Home>Furniture & Design>Outdoor Furniture>How To Build Outdoor Concrete Countertop

Outdoor Furniture
How To Build Outdoor Concrete Countertop
Published: January 13, 2024
Learn how to build a durable and stylish outdoor concrete countertop for your outdoor furniture. Get expert tips on design and construction. Outdoor-furniture-furniture-and-design.
(Many of the links in this article redirect to a specific reviewed product. Your purchase of these products through affiliate links helps to generate commission for Storables.com, at no extra cost. Learn more)
Introduction
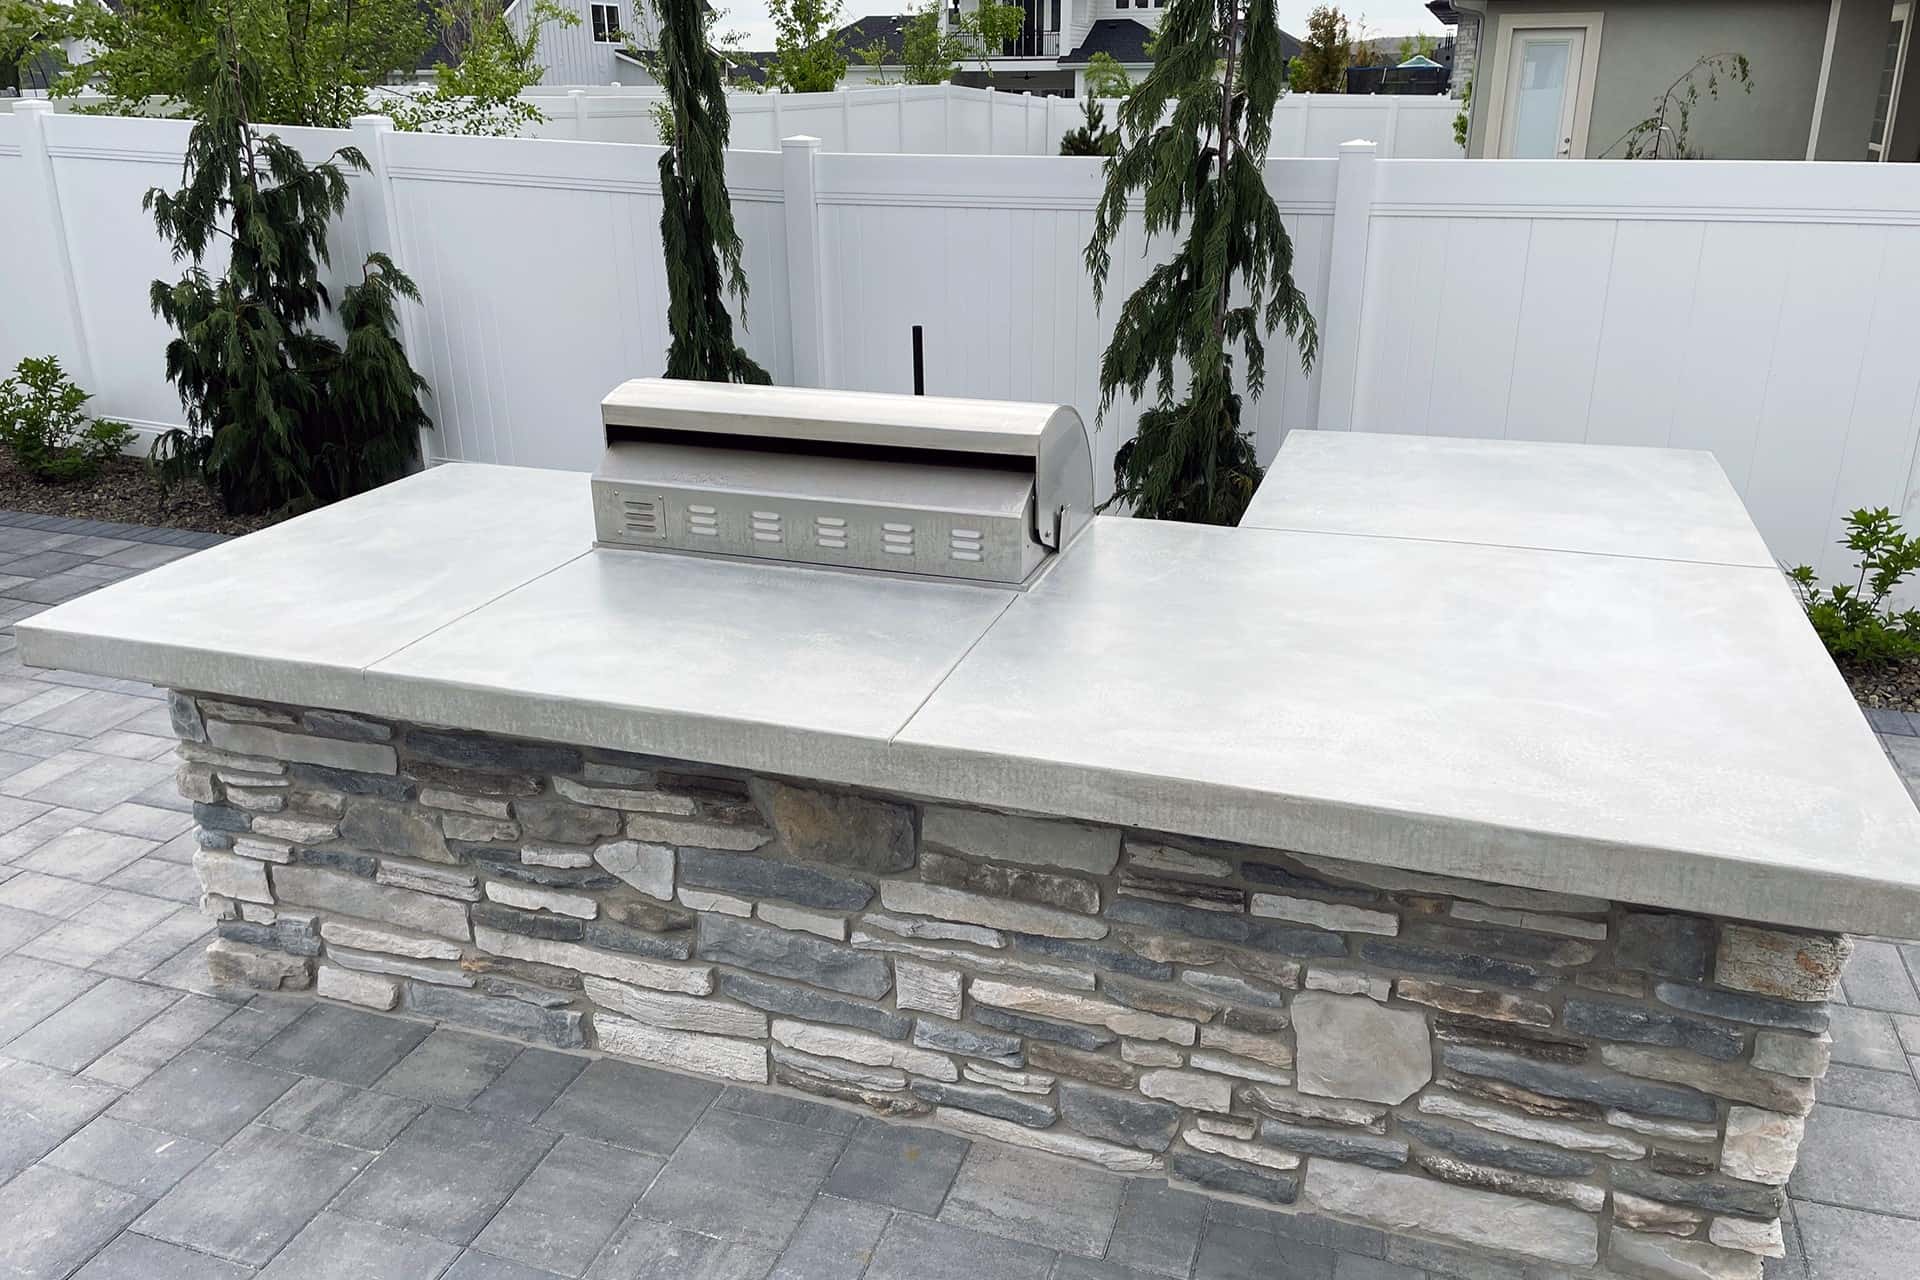
Creating an outdoor concrete countertop can elevate the functionality and aesthetic appeal of your outdoor space. Whether you're aiming to enhance a barbecue area, outdoor kitchen, or patio bar, a well-crafted concrete countertop adds a touch of modern elegance and durability. This versatile material allows for custom designs, seamless integration of sinks and other features, and the ability to withstand the elements. Before embarking on this DIY project, it's essential to understand the necessary materials, tools, and steps involved in constructing a durable and visually appealing outdoor concrete countertop. By following a systematic approach and incorporating your creative vision, you can achieve a stunning and long-lasting addition to your outdoor living area. Let's delve into the process of bringing your outdoor concrete countertop vision to life.
Key Takeaways:
- Elevate your outdoor space with a durable and stylish concrete countertop, customized to your vision and seamlessly integrated into your outdoor living area.
- From preparing the area to installing the countertop, follow a systematic process to create a stunning and enduring centerpiece for your outdoor oasis.
Read more: How To Build Outdoor Concrete Countertops
Materials and Tools Needed
Before diving into the construction of an outdoor concrete countertop, it’s crucial to gather the essential materials and tools. The following items are fundamental for this project:
Materials:
- Concrete mix: Opt for a high-quality concrete mix suitable for countertops, ensuring strength and durability.
- Reinforcement materials: Steel mesh or fiberglass reinforcement to enhance the countertop's structural integrity.
- Mold release agent: A non-stick spray or liquid to facilitate the release of the countertop from the mold.
- Sealer: A concrete sealer to protect the finished countertop from moisture and stains.
- Coloring agents (optional): Pigments or dyes to add a personalized touch to the concrete.
Tools:
- Melamine sheets: Used to construct the form for the countertop.
- Screws and drill: For assembling the formwork.
- Concrete mixer or mixing tools: Depending on the size of the project, a concrete mixer or mixing tools such as a mixing drill attachment and a mixing tub.
- Trowels: Both finishing and margin trowels are essential for achieving a smooth surface and precise edges.
- Level: To ensure the formwork and concrete surface are level during construction.
- Protective gear: Safety glasses, gloves, and a dust mask for personal protection during concrete mixing and pouring.
By securing these materials and tools, you’ll be well-prepared to proceed with the construction of your outdoor concrete countertop.
Preparing the Area
Before commencing the construction of your outdoor concrete countertop, it’s essential to prepare the designated area to ensure a smooth and efficient process. Here are the key steps to prepare the area:
Clearing and Cleaning:
Begin by clearing the designated space of any debris, plants, or obstacles. Thoroughly clean the area to remove dirt, dust, and any other contaminants that could affect the quality of the concrete surface.
Setting Up a Work Surface:
Create a sturdy and level work surface where the concrete countertop will be constructed. This may involve setting up sawhorses and placing a large, flat board or sheet of plywood on top to serve as a workbench.
Assembling the Formwork:
The next crucial step is to assemble the formwork, which will define the shape and dimensions of the countertop. Using melamine sheets and screws, construct a sturdy form that matches the desired dimensions of the countertop. Ensure that the form is level and properly secured in place.
Applying Mold Release Agent:
To facilitate the easy removal of the countertop from the formwork once the concrete has cured, apply a mold release agent to the interior surfaces of the form. This will prevent the concrete from sticking to the form, allowing for a smooth release and minimizing the risk of damage to the countertop.
By meticulously preparing the area and setting up the formwork, you’ll establish a solid foundation for the subsequent stages of building your outdoor concrete countertop.
Read more: How To Refinish Concrete Countertops
Building the Form
Constructing the form for your outdoor concrete countertop is a critical step that directly influences the final appearance and functionality of the countertop. Here’s a detailed guide to building the form:
Design Considerations:
Before assembling the form, carefully consider the shape, dimensions, and features of your countertop. Whether you prefer a straight, L-shaped, or curved design, ensure that the form accurately reflects your vision. If incorporating a sink or other fixtures, account for these elements in the form’s design.
Cutting and Assembling:
Using melamine sheets, begin by cutting the material to the required sizes for the sides, front, and back of the form. Assemble the pieces using screws, ensuring that the corners are tightly joined and sealed to prevent concrete leakage. Take precise measurements and use a level to confirm that the form is perfectly aligned and even.
Reinforcement Placement:
If reinforcement materials such as steel mesh or fiberglass are being incorporated into the countertop, position them within the form at the appropriate height. This reinforcement enhances the structural integrity of the concrete, reducing the risk of cracks and improving overall strength.
Read more: How To DIY Concrete Countertops
Sealing Joints:
To prevent concrete seepage and ensure a smooth surface finish, seal the interior joints of the form with silicone caulk. This step is crucial for preventing the concrete mix from leaking out and maintaining the desired shape and edges of the countertop.
Double-Checking Dimensions:
Before proceeding to the next phase, double-check the dimensions and alignment of the form to confirm that it accurately represents your intended countertop design. Any necessary adjustments should be made at this stage to avoid complications during the concrete pouring process.
By meticulously constructing the form and paying attention to design details and structural integrity, you’ll lay the groundwork for a successful and visually appealing outdoor concrete countertop.
Mixing and Pouring Concrete
Once the form for your outdoor concrete countertop is meticulously constructed, the next crucial phase involves mixing and pouring the concrete. This stage demands precision and attention to detail to ensure a flawless final product. Here’s a comprehensive guide to mixing and pouring concrete for your countertop:
Preparing the Concrete Mix:
Begin by carefully following the manufacturer’s instructions to prepare the concrete mix. It’s essential to use a high-quality concrete mix designed specifically for countertops, as it offers the necessary strength and workability for this application. If desired, add coloring agents to the mix to achieve a personalized hue for your countertop.
Read more: How To Smooth Concrete Countertops
Calculating the Volume:
Calculate the volume of concrete required based on the dimensions and thickness of the countertop. Ensure that you have an adequate amount of concrete mix to complete the entire surface without interruptions, which can lead to visible seams or inconsistencies.
Mixing Consistency:
Achieving the correct consistency is crucial for the success of the project. The concrete should be thoroughly mixed to a uniform texture, free of lumps and with a workable, semi-fluid consistency. Use a concrete mixer or mixing tools to achieve the desired texture, following the manufacturer’s recommendations for water-to-concrete ratio.
Pouring Technique:
With the concrete mix prepared, carefully pour it into the form, starting from one end and working methodically to ensure even distribution. Use a trowel to gently spread and level the concrete, paying close attention to achieving a uniform thickness and a smooth surface. Vibrating the form with a concrete vibrator can help eliminate air pockets and ensure a dense, professional finish.
Curing and Drying:
After the concrete is poured, cover the countertop with plastic sheeting to facilitate a slow and even curing process. Allow the concrete to cure for the recommended duration, typically several days, before proceeding to the finishing and sealing stages.
By meticulously following these steps for mixing and pouring concrete, you’ll lay the foundation for a beautifully crafted outdoor concrete countertop that seamlessly integrates with your outdoor living space.
Read more: How To Seal Concrete Countertops
Finishing and Sealing
As your outdoor concrete countertop nears completion, the finishing and sealing stages play a pivotal role in enhancing its durability, visual appeal, and resistance to environmental elements. Here’s a detailed guide to achieving a professional finish and ensuring long-term protection for your concrete countertop:
Surface Smoothing:
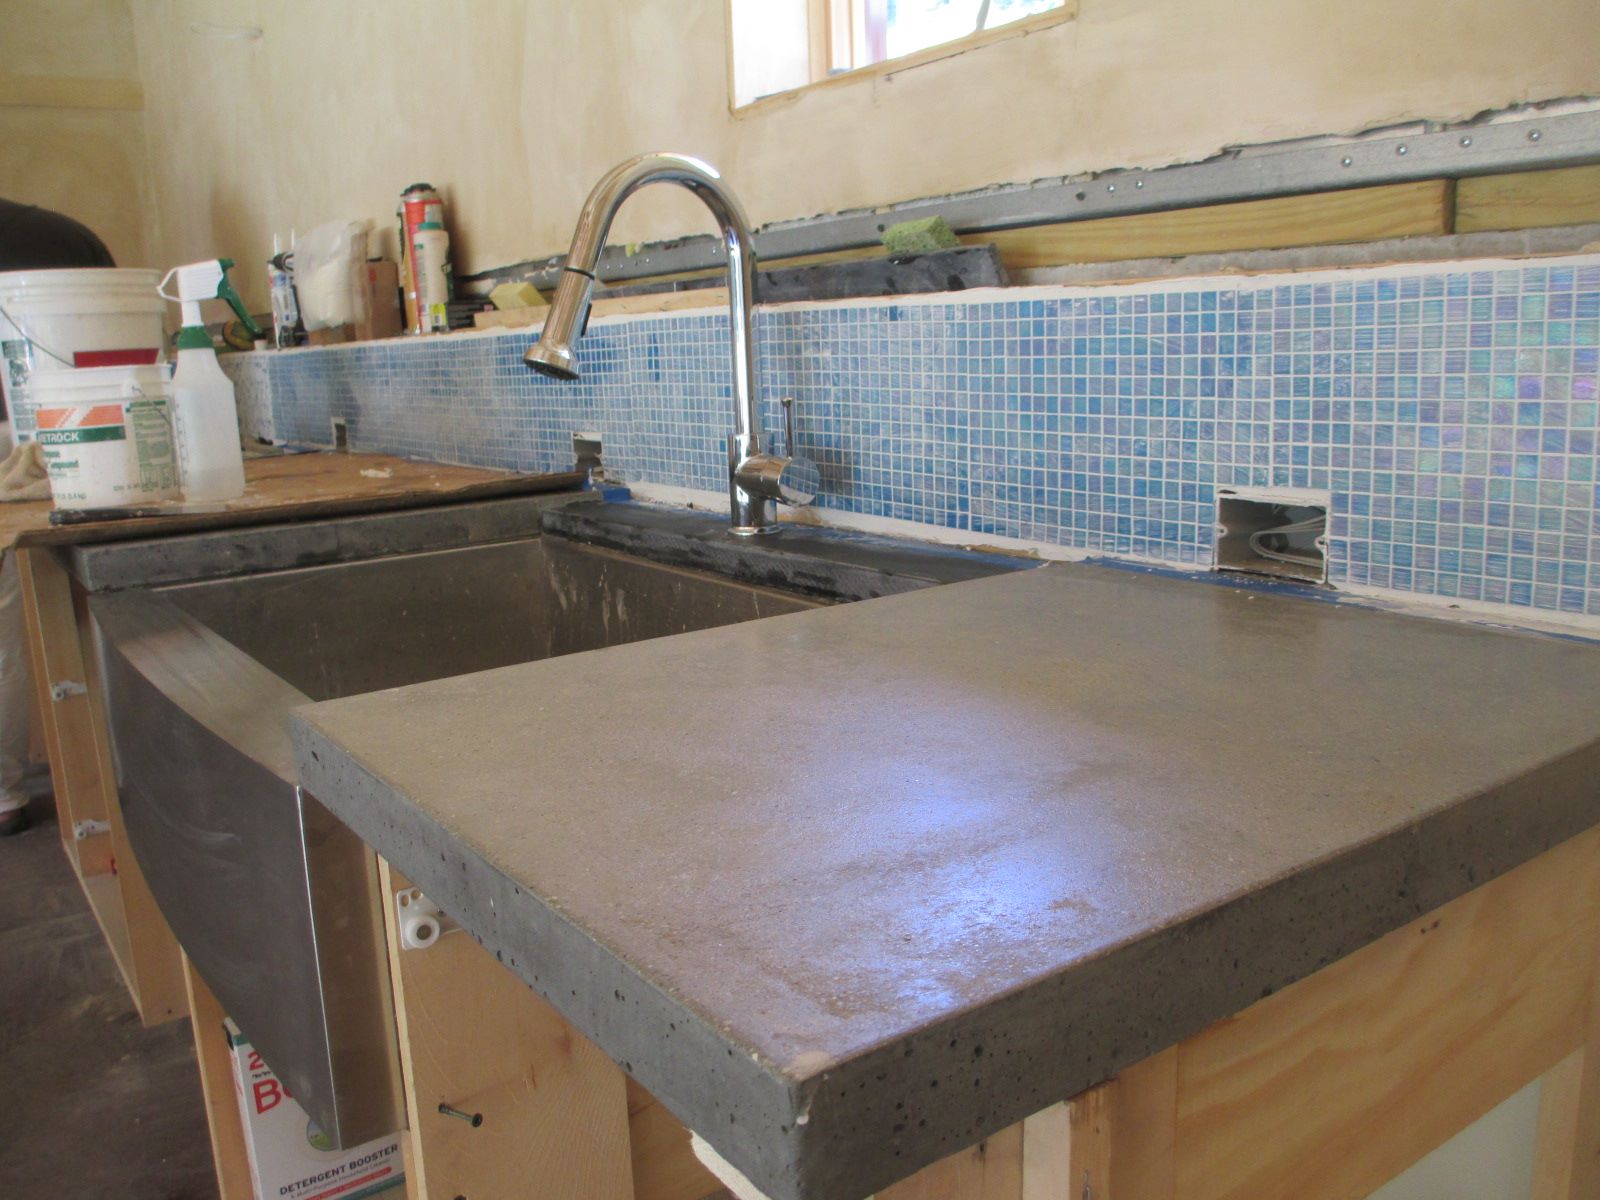
Once the concrete has cured, use a combination of finishing trowels and polishing pads to smooth the surface of the countertop. This process involves gradually refining the concrete’s texture to achieve the desired level of smoothness and sheen, ensuring a visually appealing and touch-friendly surface.
Edge Detailing:
Pay special attention to the edges of the countertop, as they contribute to the overall aesthetic and safety of the installation. Use a margin trowel and abrasive pads to shape and refine the edges, creating a smooth and rounded profile that complements the countertop’s design.
Sealing the Surface:
Applying a high-quality concrete sealer is crucial for protecting the countertop from moisture, stains, and UV damage. Select a sealer specifically formulated for outdoor use and countertops, and carefully follow the manufacturer’s instructions for application. The sealer will enhance the concrete’s color, provide a protective barrier, and facilitate easier cleaning and maintenance.
Read more: What Type Of Concrete For Countertops
Optional Enhancements:
Depending on your aesthetic preferences, consider additional enhancements such as decorative aggregates, embedded objects, or artistic elements. These personalized touches can add character and uniqueness to your outdoor concrete countertop, further reflecting your style and creativity.
Final Inspection:
Before installing the countertop, thoroughly inspect the surface for any imperfections, blemishes, or areas that may require additional touch-ups. Address any minor flaws to ensure that the finished countertop meets your expectations in terms of appearance and quality.
By meticulously executing the finishing and sealing processes, you’ll transform your outdoor concrete countertop into a resilient, visually captivating, and functional centerpiece of your outdoor living space.
Installing the Countertop
As the culmination of your outdoor concrete countertop project, the installation phase requires precision and attention to detail to ensure a seamless integration into your outdoor living area. Here’s a comprehensive guide to installing the countertop:
Preparing the Base:
Ensure that the base where the countertop will be installed is level, stable, and capable of supporting the weight of the concrete. If necessary, make any adjustments to the base to guarantee a secure and even surface for the countertop.
Read more: How To Build A Pergola On Concrete
Lifting and Placing:
Enlist the assistance of others to safely lift and position the concrete countertop onto the prepared base. Exercise caution and use proper lifting techniques to avoid damaging the countertop or causing injury during the installation process.
Securing the Countertop:
Once the countertop is in place, secure it to the base using an appropriate adhesive or mounting hardware. Ensure that the countertop is firmly anchored and level, making any necessary adjustments to achieve a perfect fit.
Connecting Fixtures:
If your outdoor concrete countertop incorporates a sink, grill, or other fixtures, proceed to connect these elements according to the manufacturer’s instructions. Pay careful attention to plumbing and electrical connections, ensuring that everything is properly aligned and functioning.
Final Inspection and Cleanup:
Thoroughly inspect the installed countertop for any signs of damage, misalignment, or imperfections. Make any necessary touch-ups or adjustments to guarantee a flawless and professional installation. Once the countertop is secured and aligned, clean the surface and surrounding area to remove any debris or construction residues.
Read more: How To Take Care Of Concrete Countertops
Maintaining the Countertop:
Educate yourself about the recommended maintenance practices for your outdoor concrete countertop. This may include regular cleaning, resealing, and avoiding harsh chemicals or abrasive materials that could compromise the countertop’s integrity and appearance.
By meticulously following these installation steps and prioritizing the proper care and maintenance of your outdoor concrete countertop, you’ll ensure that it remains a stunning and enduring feature of your outdoor living space for years to come.
Conclusion
Embarking on the journey of constructing an outdoor concrete countertop is a rewarding endeavor that allows you to infuse your outdoor living space with personalized style, durability, and functionality. By following the systematic process of preparing the area, building the form, mixing and pouring concrete, finishing and sealing, and ultimately installing the countertop, you have created a captivating and enduring focal point for your outdoor environment.
Throughout this project, attention to detail, precision, and creative expression have been instrumental in shaping a countertop that seamlessly integrates with your outdoor lifestyle. The durability and versatility of concrete have empowered you to customize the design, incorporate unique features, and craft a surface that withstands the rigors of outdoor use while exuding modern elegance.
As you admire the finished product, take pride in the craftsmanship and dedication that have culminated in a stunning outdoor concrete countertop. Whether it’s a functional addition to your outdoor kitchen, a stylish accompaniment to your patio bar, or a versatile surface for entertaining, your concrete countertop stands as a testament to your vision and commitment to enhancing your outdoor living space.
Moving forward, embrace the joy of utilizing and showcasing your outdoor concrete countertop, knowing that it not only elevates the aesthetics of your outdoor area but also serves as a durable and resilient platform for your activities and gatherings. By adhering to recommended maintenance practices and caring for your countertop, you’ll ensure that it remains a cherished and enduring feature of your outdoor oasis for years to come.
Congratulations on successfully bringing your outdoor concrete countertop vision to life, and may it continue to enrich your outdoor experiences and gatherings with its timeless appeal and functional utility.
Frequently Asked Questions about How To Build Outdoor Concrete Countertop
Was this page helpful?
At Storables.com, we guarantee accurate and reliable information. Our content, validated by Expert Board Contributors, is crafted following stringent Editorial Policies. We're committed to providing you with well-researched, expert-backed insights for all your informational needs.



0 thoughts on “How To Build Outdoor Concrete Countertop”