Articles
How To Build Storage Shed
Modified: February 23, 2024
Learn how to build your own outdoor storage shed with our step-by-step guide. Get organized and create extra space for your belongings.
(Many of the links in this article redirect to a specific reviewed product. Your purchase of these products through affiliate links helps to generate commission for Storables.com, at no extra cost. Learn more)
Introduction
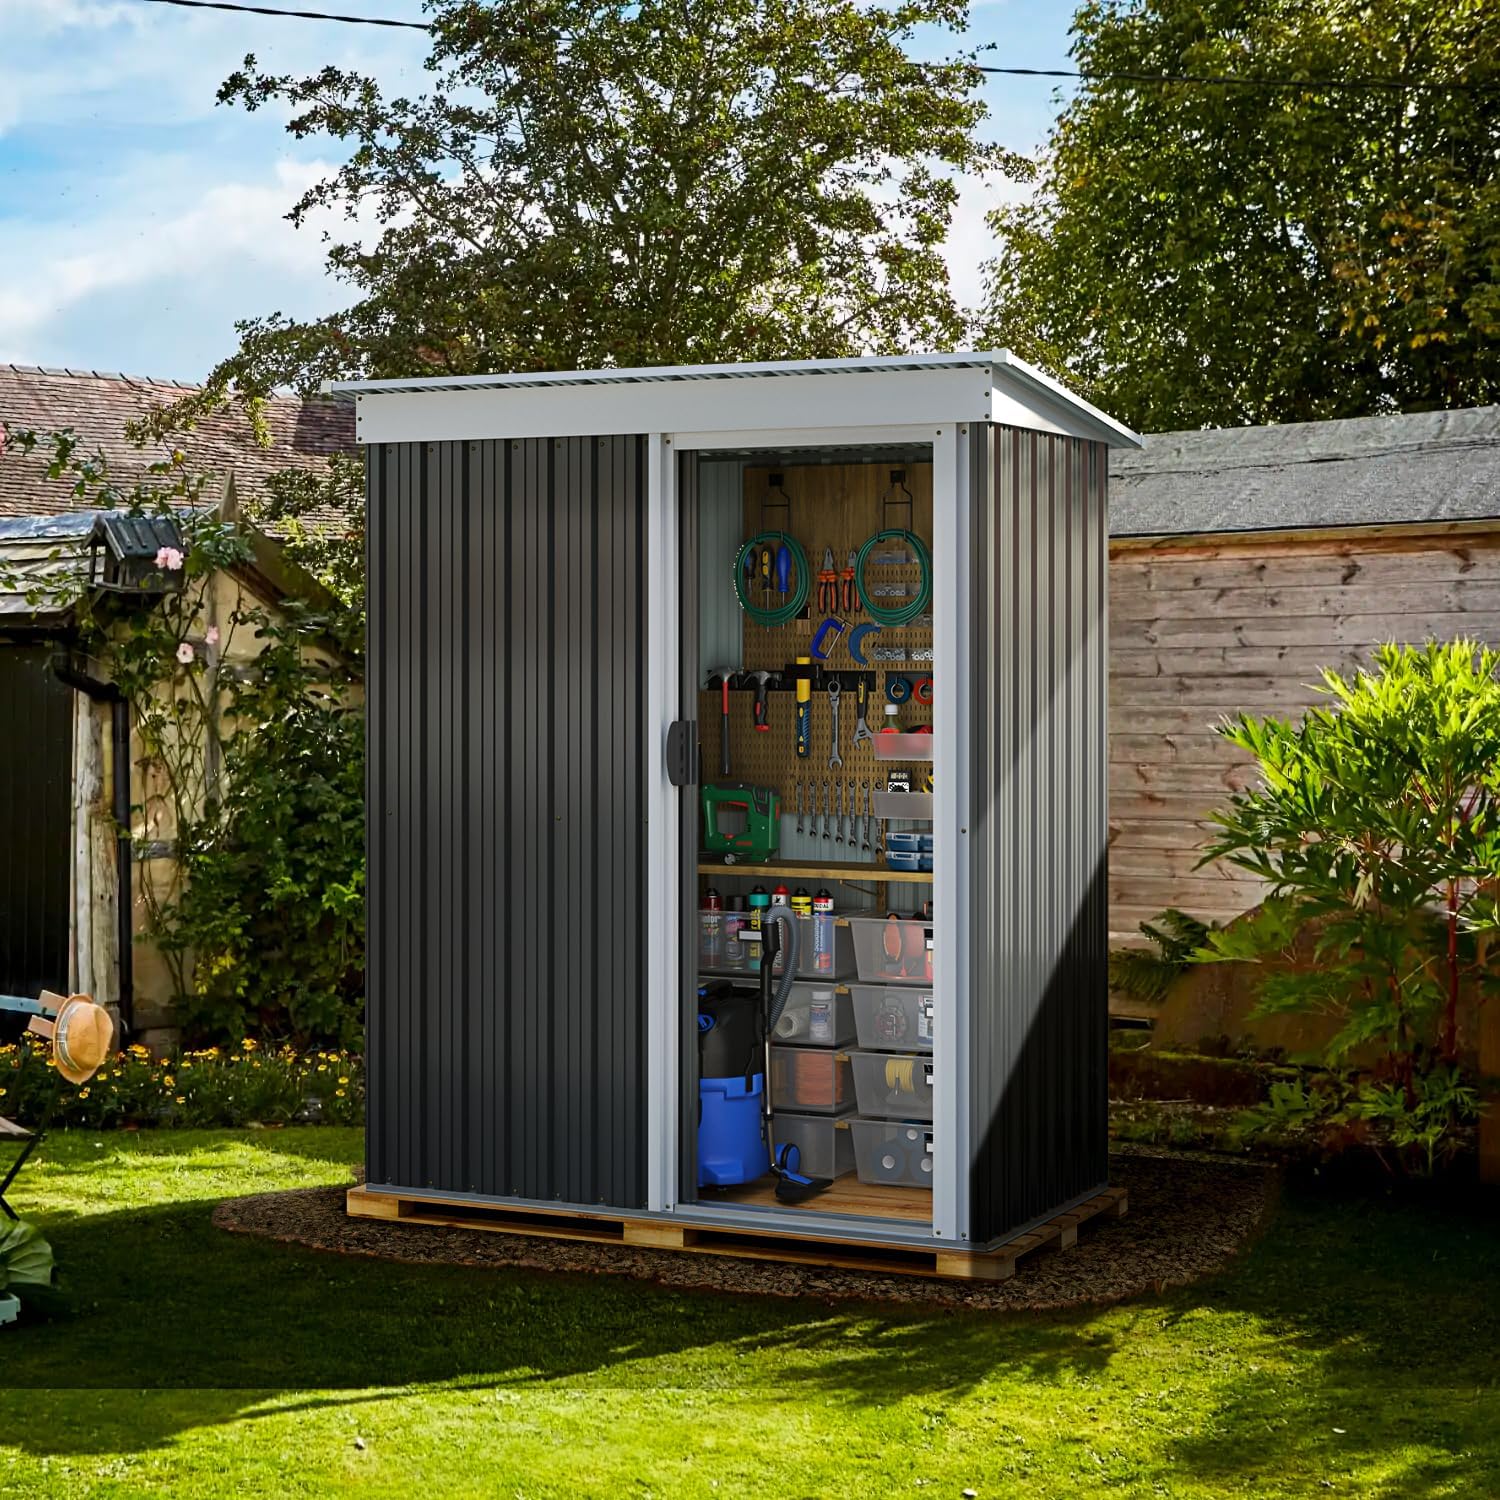
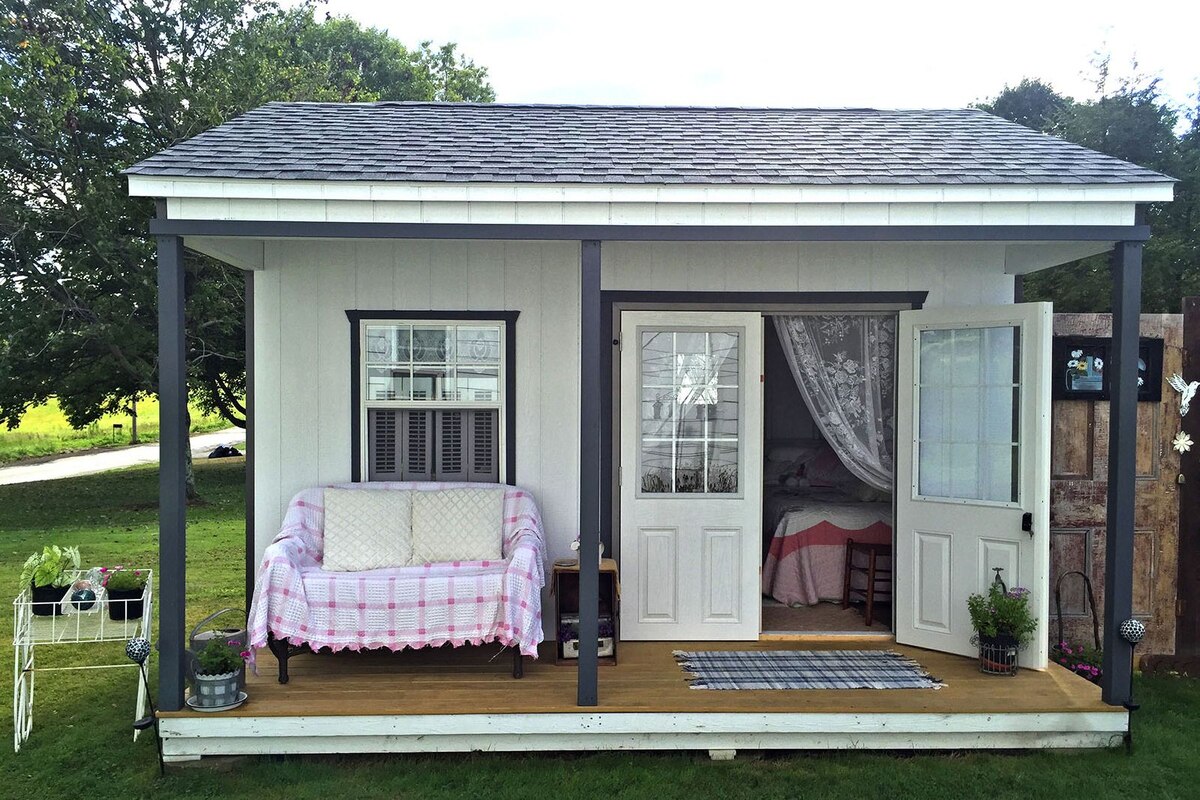
Are you in need of some extra storage space on your property? Building a storage shed can be a great solution. Whether you need a place to store your gardening tools, outdoor furniture, or other belongings, a storage shed can provide you with the perfect space to keep things organized and protected.
In this guide, we will walk you through the step-by-step process of building a storage shed. From choosing the right location to adding the finishing touches, we’ll cover all the essential aspects to ensure a successful project.
A storage shed not only provides practical storage solutions but also adds value to your property. It offers a dedicated space for your belongings, freeing up space in your garage or home. Additionally, it gives you the flexibility to customize the shed according to your specific needs and preferences.
Before we dive into the construction process, it’s important to note that building a storage shed requires careful planning, adherence to local building codes, and the right tools and materials. While this project is doable for most DIY enthusiasts, if you are unsure of your abilities, it may be wise to consult a professional contractor.
Now, let’s get started with step one: choosing the right location for your storage shed.
Key Takeaways:
- Building a storage shed involves careful planning, from choosing the right location to obtaining permits and designing the shed. Proper maintenance and organization ensure a functional and long-lasting storage solution.
- By following the step-by-step guide, you can create a well-organized and efficient storage shed that meets your specific needs. Regular maintenance and care will preserve the shed’s integrity and functionality for years to come.
Read more: How To Build Garden Shed
Step 1: Choosing the Right Location
Choosing the right location for your storage shed is crucial for its functionality and longevity. Here are a few factors to consider:
- Accessibility: Select a location that is easily accessible from your house or driveway. You wouldn’t want to trek through muddy terrain or maneuver around obstacles every time you need to retrieve something from the shed.
- Foundation: Ensure that the chosen location offers a solid and level foundation for your shed. A flat surface will make the construction process easier and provide stability for the structure.
- Sunlight: Consider the amount of sunlight the location receives throughout the day. If you plan to use the shed for gardening purposes or as a workshop, having ample natural light can be beneficial.
- Drainage: Avoid areas prone to water accumulation or poor drainage. Placing the shed in a spot with good natural drainage will help prevent potential water damage and ensure the longevity of your structure.
- Proximity to Utilities: If you plan to install electrical outlets or plumbing fixtures in your shed, ensure that the location is within reach of the main electrical and plumbing lines of your property.
- Aesthetics: Consider how the shed will blend with the overall aesthetics of your property. Choose a location that looks visually pleasing and doesn’t obstruct any scenic views or landscaping features.
Once you have identified the ideal location for your storage shed, mark it out using stakes and string. This will help you visualize the shed’s footprint and make any necessary adjustments before moving forward with the construction process.
Remember to check with your local zoning regulations and homeowner’s association guidelines to ensure compliance with any restrictions on shed placement. Some areas may have specific setbacks, size limitations, or requirements for obtaining permits.
With step one complete, you’re now ready to move on to step two: obtaining permits and zoning requirements.
Step 2: Obtaining Permits and Zoning Requirements
Before you start building your storage shed, it’s important to research and understand the necessary permits and zoning requirements in your area. Compliance with local regulations will ensure that your shed is safe, legal, and meets all necessary standards.
Here are the key steps to follow:
- Check with your local government or building department: Contact your local government or building department to inquire about the specific permits and regulations for constructing a storage shed. This will vary depending on your location, so it’s important to gather accurate information.
- Review zoning ordinances and restrictions: Zoning ordinances dictate where and how structures can be built in a particular area. Check the zoning regulations for your property to ensure that building a storage shed is allowed. Pay attention to setbacks, size restrictions, maximum height limits, and any other guidelines that may apply.
- Submit permit applications: Once you have a clear understanding of the requirements, complete the necessary permit applications. This typically includes providing information such as shed dimensions, location plans, and construction details. Make sure to fill out the forms accurately and include any requested documentation.
- Pay permit fees: Most permits require payment of a fee, which can vary depending on the size and complexity of the project. Calculate the fees based on the information provided by the building department and submit the payment along with your permit application.
- Wait for approval: After submitting your permit application, it will undergo a review process. This can take anywhere from a few days to several weeks, so be patient. The building department may request additional information or modifications to ensure compliance with local regulations.
- Receive the permit: Once your permit application is approved, you will be issued a permit to proceed with your storage shed construction. Keep the permit in a safe place and make sure to display it prominently on the construction site, as required by your local regulations.
Remember, obtaining permits and adhering to zoning requirements is a crucial step to ensure that your storage shed is legal and up to code. Failure to do so may result in fines and the need to dismantle or modify your structure in the future.
With step two complete, you can now move on to step three: designing and planning your storage shed.
Step 3: Designing and Planning the Shed
Designing and planning your storage shed is an exciting step in the construction process. It involves considering your storage needs, desired functionality, and aesthetics. Here are the key aspects to focus on:
1. Size and Layout: Determine the size of your shed based on the items you plan to store and the available space. Consider the height, width, and depth to accommodate your belongings comfortably. The layout should include spaces for shelves, workbenches, or any specific storage requirements you may have.
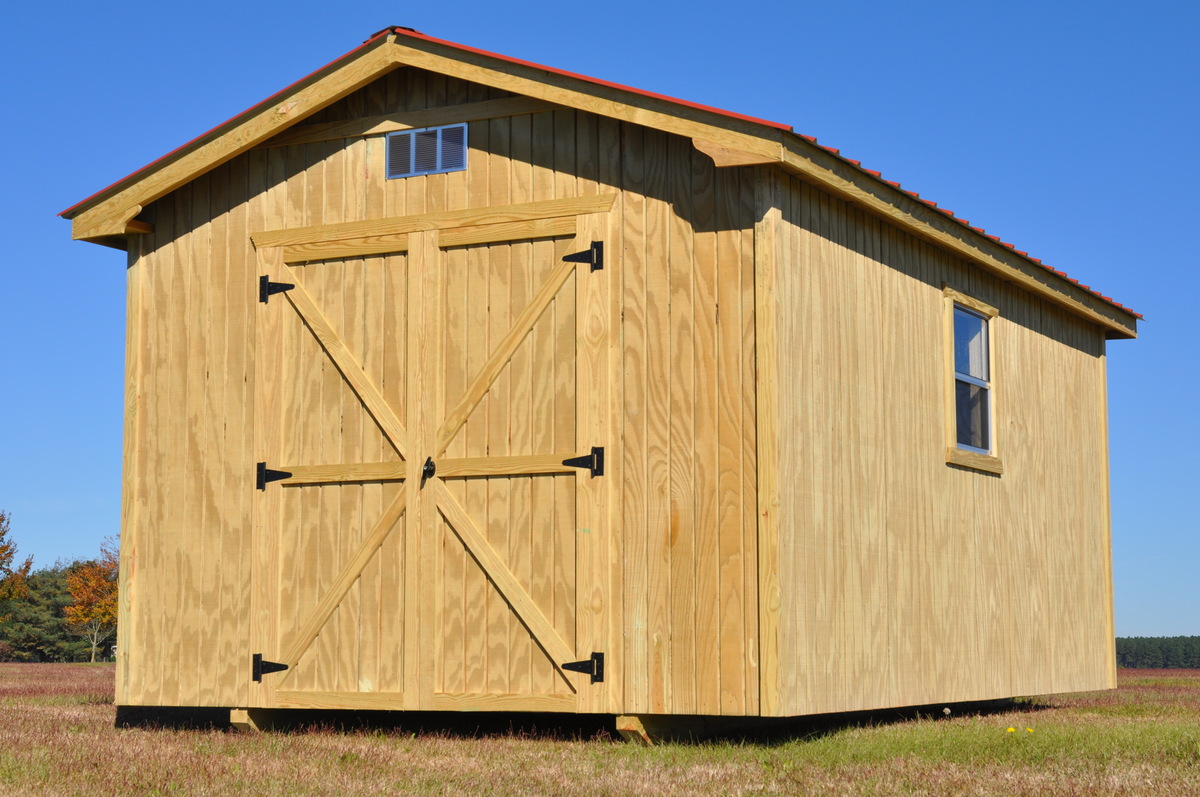
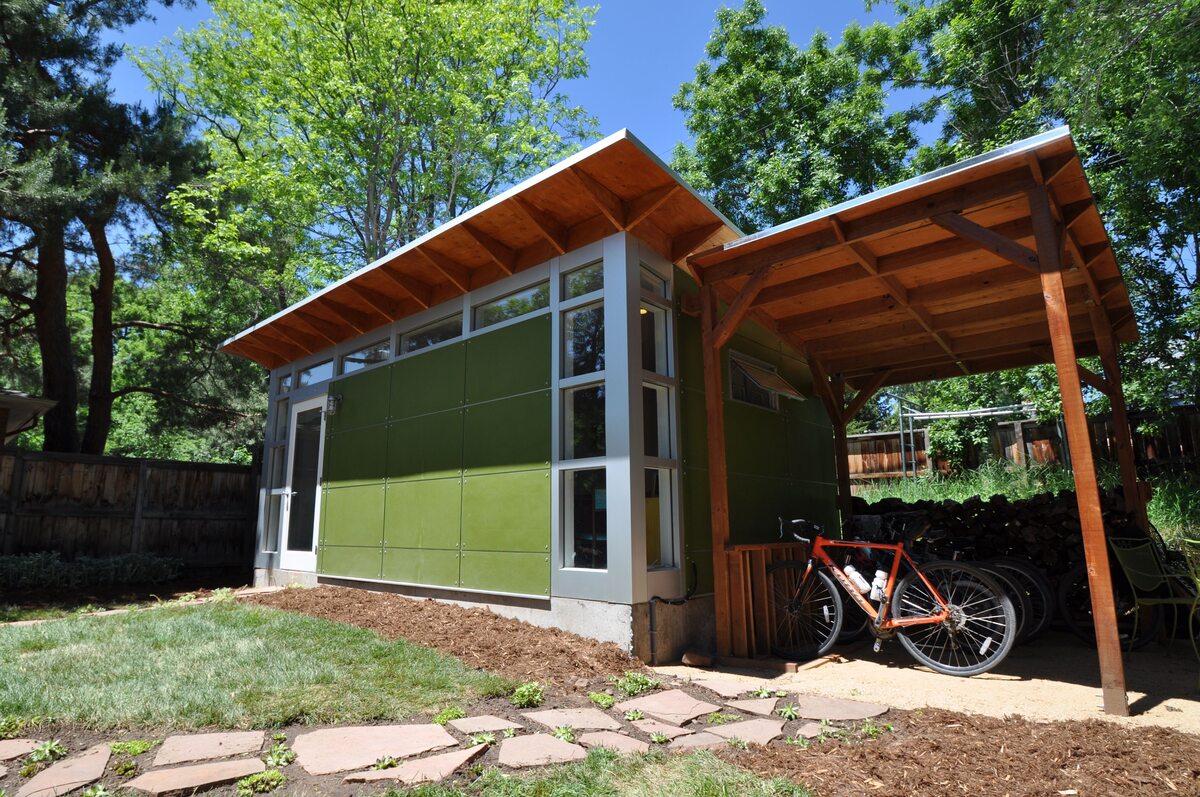
2. Shed Style: Choose a shed style that complements your property and meets your functional needs. Popular options include gable roof, gambrel roof, or lean-to. Each style has its benefits, so select one that suits your preferences and blends well with your existing structures.
3. Materials: Select the appropriate materials for your shed construction. Common options include wood, metal, vinyl, or plastic. Consider the durability, maintenance requirements, and weather resistance of the materials. You may also need to choose roofing materials, siding options, and paint or stain colors.
4. Ventilation and Lighting: Ensure adequate ventilation in your shed to prevent mold, mildew, and condensation. Windows, vents, or skylights can provide natural ventilation and improve lighting. You may also want to include electrical outlets or battery-powered lighting for convenience.
5. Door and Window Placement: Determine the ideal placement of doors and windows based on accessibility and aesthetics. Consider how you will enter and exit the shed, as well as how natural light will enter the space. Take into account any landscaping features that may affect door and window placement.
6. Building Codes and Restrictions: Verify if there are any specific building codes or restrictions that apply to your shed design. Factors like setbacks, maximum height, and distance from property lines may be regulated by local building departments.
7. Accessibility and Storage Solutions: Plan for easy access to your stored items by incorporating shelves, racks, or hooks. Consider the types of storage systems that will work best for your needs and maximize the use of space.
8. Budget Considerations: Determine your budget for the shed construction and plan accordingly. Research the costs of materials, labor (if applicable), and any additional features you want to include. Keep in mind that it’s better to invest in quality materials and construction for a durable and long-lasting shed.
Once you have a clear design and plan for your storage shed, you can proceed to the next step: gathering materials and tools.
Step 4: Gathering Materials and Tools
Gathering the necessary materials and tools is an essential step before you begin constructing your storage shed. Having everything you need at hand will save you time and make the construction process more efficient. Here is a list of materials and tools you may require:
Materials:
- Building materials: This includes lumber, plywood, roofing materials, siding, insulation, and any other materials needed for the construction of the shed walls, roof, and floor.
- Fasteners: Nails, screws, bolts, and other fasteners required for assembling the shed structure.
- Foundation materials: Depending on your chosen foundation type, you may need concrete blocks, gravel, or pressure-treated lumber.
- Door and window materials: If your shed design includes doors and windows, make sure you have the required materials, such as hinges, locks, and window frames.
- Finishing materials: Paint, stain, or sealant to protect and enhance the appearance of your shed.
- Hardware and accessories: Shelving brackets, hooks, handles, and any other hardware or accessories you plan to install inside the shed.
Tools:
- Measuring tools: Tape measure, level, and square for accurately measuring and aligning components.
- Saw: Circular saw or miter saw for cutting lumber and plywood.
- Hammer: Essential for driving nails and securing fasteners.
- Screwdriver: Phillips and flathead screwdrivers for installing screws.
- Drill: A power drill for drilling holes and driving screws more efficiently.
- Nail gun: If you prefer using a nail gun instead of a hammer for faster and more precise nailing.
- Safety equipment: Safety goggles, gloves, ear protection, and a dust mask to protect yourself during construction.
- Ladder: Depending on the height of your shed, a ladder may be necessary for reaching higher areas during construction.
Make sure to double-check your shed design and materials list to ensure you have everything you need. Having the right tools and materials readily available will streamline the construction process and prevent unnecessary delays.
With step four completed, you can now move on to step five: preparing the foundation for your storage shed.
Read more: How To Build A Cheap Storage Shed
Step 5: Preparing the Foundation
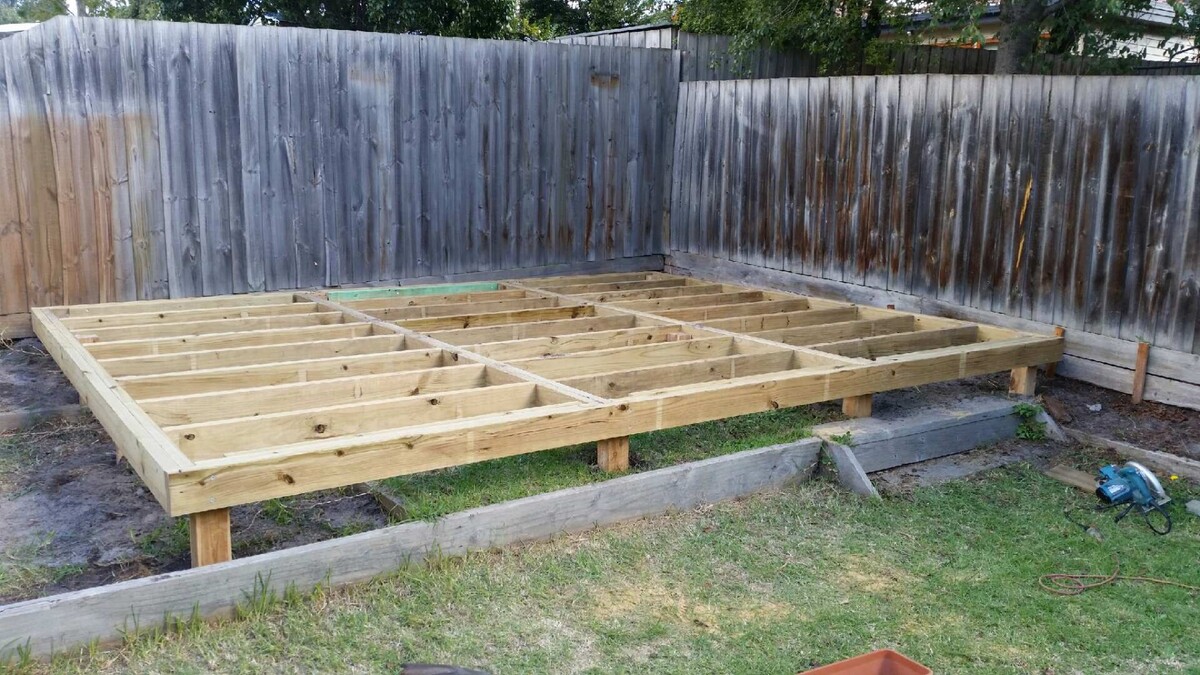
Before you can begin constructing the walls and framing of your storage shed, it is crucial to properly prepare a solid foundation. The foundation provides stability and ensures that your shed remains level and durable over time. Here are the key steps to prepare the foundation:
- Select the foundation type: Choose the type of foundation that best suits your needs and the conditions of your location. The most common options include concrete slab, concrete piers, post and beam, or skids. Consider factors such as the shed size, local building codes, soil conditions, and your budget.
- Clear and level the area: Start by clearing the area where the shed will be located. Remove any vegetation, rocks, or debris that may interfere with the foundation construction. Use a shovel, rake, or a compacting machine to level the ground as much as possible.
- Mark the foundation measurements: Using stakes and string, mark the dimensions of your shed’s foundation on the cleared and leveled area. This will serve as your guide for excavating or constructing the foundation according to the desired size.
- Excavate if necessary: If your chosen foundation requires excavation, such as for a concrete slab or piers, start digging according to the marked dimensions. Dig to the recommended depth, taking into account any necessary drainage or insulation requirements.
- Install leveling and drainage materials: If you’re using a concrete slab or piers foundation, place a layer of compacted gravel or crushed stone at the bottom of the excavation area. This provides a stable base and aids in drainage. If required, install leveling materials like sand or crushed stone to even out the surface.
- Construct the foundation: Depending on the chosen foundation type, follow the specific instructions for construction. This may involve pouring concrete for a slab, setting up concrete piers, or assembling posts and beams. Ensure that all components are properly aligned, level, and securely fastened.
- Allow for curing or settling: If you’ve poured concrete, allow sufficient time for it to cure and gain strength before placing any weight on it. Follow the recommended curing timeline and protect the foundation from excessive moisture or temperature fluctuations during this time.
Remember to consult with local building codes and regulations for any specific requirements regarding foundation construction. Following these guidelines will help ensure that your shed foundation is structurally sound and meets all necessary standards.
With step five complete, you are now ready to move on to step six: framing the structure of your storage shed.
Step 6: Framing the Structure
Once the foundation is in place, it’s time to move on to framing the structure of your storage shed. This step involves constructing the framework that will support the walls, roof, and any additional features of your shed. Here’s how to frame the structure:
- Gather your materials and tools: Ensure that you have all the necessary lumber, fasteners, and tools required for framing the shed. Double-check your shed design plans to determine the lengths and quantities of lumber needed.
- Start with the base plates: Place pressure-treated lumber boards known as base plates along the perimeter of the shed foundation. These will serve as the bottom support for the shed walls.
- Mark and cut the wall studs: Measure and mark the locations of the wall studs on the base plates. Cut the lumber to the appropriate lengths for the wall studs, taking into account the thickness of the top plate that will connect them.
- Assemble the wall frame: Attach the vertical wall studs to the base plates, aligning them with the marked locations. Secure the studs to the plates using nails or screws. Install additional studs as necessary, depending on your shed design and spacing requirements.
- Add the top plates: Once the wall studs are in place, attach the top plates horizontally across the top of the wall studs. This adds stability to the structure and connects the wall framing.
- Raise the wall frames: With the wall frames assembled, carefully lift them into an upright position and position them on the base plates. Ensure that they are plumb (vertically straight) and level before securing them in place.
- Secure the walls: Use nails or screws to fasten the wall frames to the base plates and secure them together at the corners. Add temporary braces to keep the walls in position while you work on the remaining construction.
- Incorporate door and window frames: If your shed design includes doors and windows, install the frames within the wall openings according to your design plans. Ensure that they are level and securely fastened.
- Frame the roof structure: Depending on your chosen roof design, frame the roof structure using the appropriate lumber and framing techniques. This may include installing rafters, ridge boards, and support beams.
Throughout the framing process, continuously check the alignment, plumbness, and levelness of the structure. This ensures that your shed will have a straight and solid framework, providing the foundation for the rest of the construction.
Once the framing is complete, you can proceed to step seven: constructing the walls of your storage shed.
Step 7: Constructing the Walls
With the framework in place, it’s time to move on to constructing the walls of your storage shed. Building sturdy and well-insulated walls will provide structural integrity, security, and protection for the contents inside. Follow these steps to construct the walls:
- Measure and cut the wall sheathing: Start by measuring and cutting the wall sheathing material, such as plywood or oriented strand board (OSB), to fit the dimensions of each wall section. Use a circular saw or a table saw for accurate cuts.
- Attach the wall sheathing: Begin attaching the sheathing material to the exterior side of the wall frames. Place the sheathing panels vertically, with the long edges aligned with the wall studs. Use nails or screws to secure the sheathing to the studs, spacing them according to building code requirements.
- Install insulation (optional): If you plan to insulate your storage shed, now is the time to install insulation between the wall studs. Choose an insulation material suitable for your climate and follow the manufacturer’s instructions for installation. Ensure that the insulation is placed snugly and covers the entire wall cavity.
- Apply weather-resistant barrier (optional): For added protection against moisture, consider applying a weather-resistant barrier, such as house wrap or building paper, over the sheathing. This helps prevent water infiltration while allowing vapor to escape from the shed.
- Install windows and doors: If your shed design includes windows and doors, carefully cut the openings in the wall sheathing using the appropriate measurements. Install the window and door frames according to the manufacturer’s instructions, ensuring they are level and securely attached.
- Add interior wall covering (optional): If desired, you can add interior wall covering, such as drywall or paneling, to enhance the appearance and functionality of the shed’s interior. Follow the specific guidelines for installing the chosen wall covering material.
- Apply exterior siding: Once the sheathing and insulation (if applicable) are in place, it’s time to install the exterior siding. Choose the desired siding material, such as wood, vinyl, or fiber cement, and install it according to the manufacturer’s instructions. Ensure that the siding is properly aligned and securely fastened.
- Seal and caulk: To prevent infiltration of water and drafts, carefully seal all gaps and seams in the exterior siding using weather-resistant caulk. Pay special attention to areas around windows, doors, and corners.
- Trim and finishing touches: Complete the construction of the walls by adding trim boards around windows, doors, and corners. This adds a clean, finished look to the shed. Consider painting or staining the exterior of the shed to protect the siding and enhance its aesthetics.
Throughout the construction of the walls, ensure that everything is plumb, level, and properly aligned. Take the time to double-check your measurements and make adjustments as needed. Building strong and well-built walls will provide a solid foundation for the remaining steps in constructing your storage shed.
Once the walls are constructed, you can proceed to step eight: installing the roof of your storage shed.
When building a storage shed, make sure to choose a level and well-drained location for the foundation. This will help prevent water damage and ensure the stability of the structure.
Step 8: Installing the Roof
Installing the roof is a crucial step in building your storage shed as it provides protection against the elements and adds structural integrity to the overall structure. Follow these steps to properly install the roof:
- Choose the roofing material: Select the appropriate roofing material based on your preference, budget, and climate conditions. Options include asphalt shingles, metal roofing, or roof tiles. Ensure that the chosen material is suitable for the slope of your shed’s roof.
- Prepare the roof deck: Before installing the roofing material, ensure that the roof deck is clean, free from any debris or protruding nails. Repair any damaged areas and replace any rotted or warped plywood or sheathing.
- Install drip edge: Begin by installing a drip edge along the eaves of the roof. This metal strip helps to direct water away from the shed and prevent damage from water infiltration. Nail or screw the drip edge to the roof deck, ensuring that it overhangs the edges of the roof by the specified amount.
- Add underlayment: Apply a layer of roofing underlayment over the roof deck. This provides an additional barrier against water penetration. Start at the bottom of the roof and work your way up, overlapping successive rows of underlayment by the specified amount.
- Trim vents and protrusions: If your shed design includes vents or other protrusions on the roof, carefully cut openings in the underlayment and sheathing to accommodate them. Install vents and other accessories, following the manufacturer’s instructions.
- Install the roofing material: Begin installing the roofing material according to the manufacturer’s instructions. Whether you are using shingles, metal panels, or tiles, start at the bottom edge of the roof and work your way up, overlapping each row. Fasten the roofing material securely to the roof deck using nails, screws, or the recommended fasteners.
- Ensure proper ventilation: Install ridge vents or other ventilation systems to promote airflow within the shed. Adequate ventilation helps prevent excess heat and moisture buildup, which can lead to damage and deterioration.
- Seal and flash: Apply roofing sealant or flashing around roof penetrations, such as chimneys or vent pipes, to ensure a watertight seal. Make sure all seams and edges are properly sealed to prevent water leakage.
- Inspect and clean: Once the roofing is installed, inspect for any loose or damaged shingles, metal panels, or tiles. Clean off any debris or excess materials from the roof to maintain its appearance and prevent clogging of gutters or drainage systems.
While installing the roof, prioritize safety by working on a stable and secure surface. Use proper safety equipment, such as fall protection devices and non-slip footwear.
With the roof installed, your storage shed is now protected from the elements. You can move on to step nine: adding doors and windows to your shed.
Read also: 11 Best Storage Buildings And Sheds For 2024
Step 9: Adding Doors and Windows
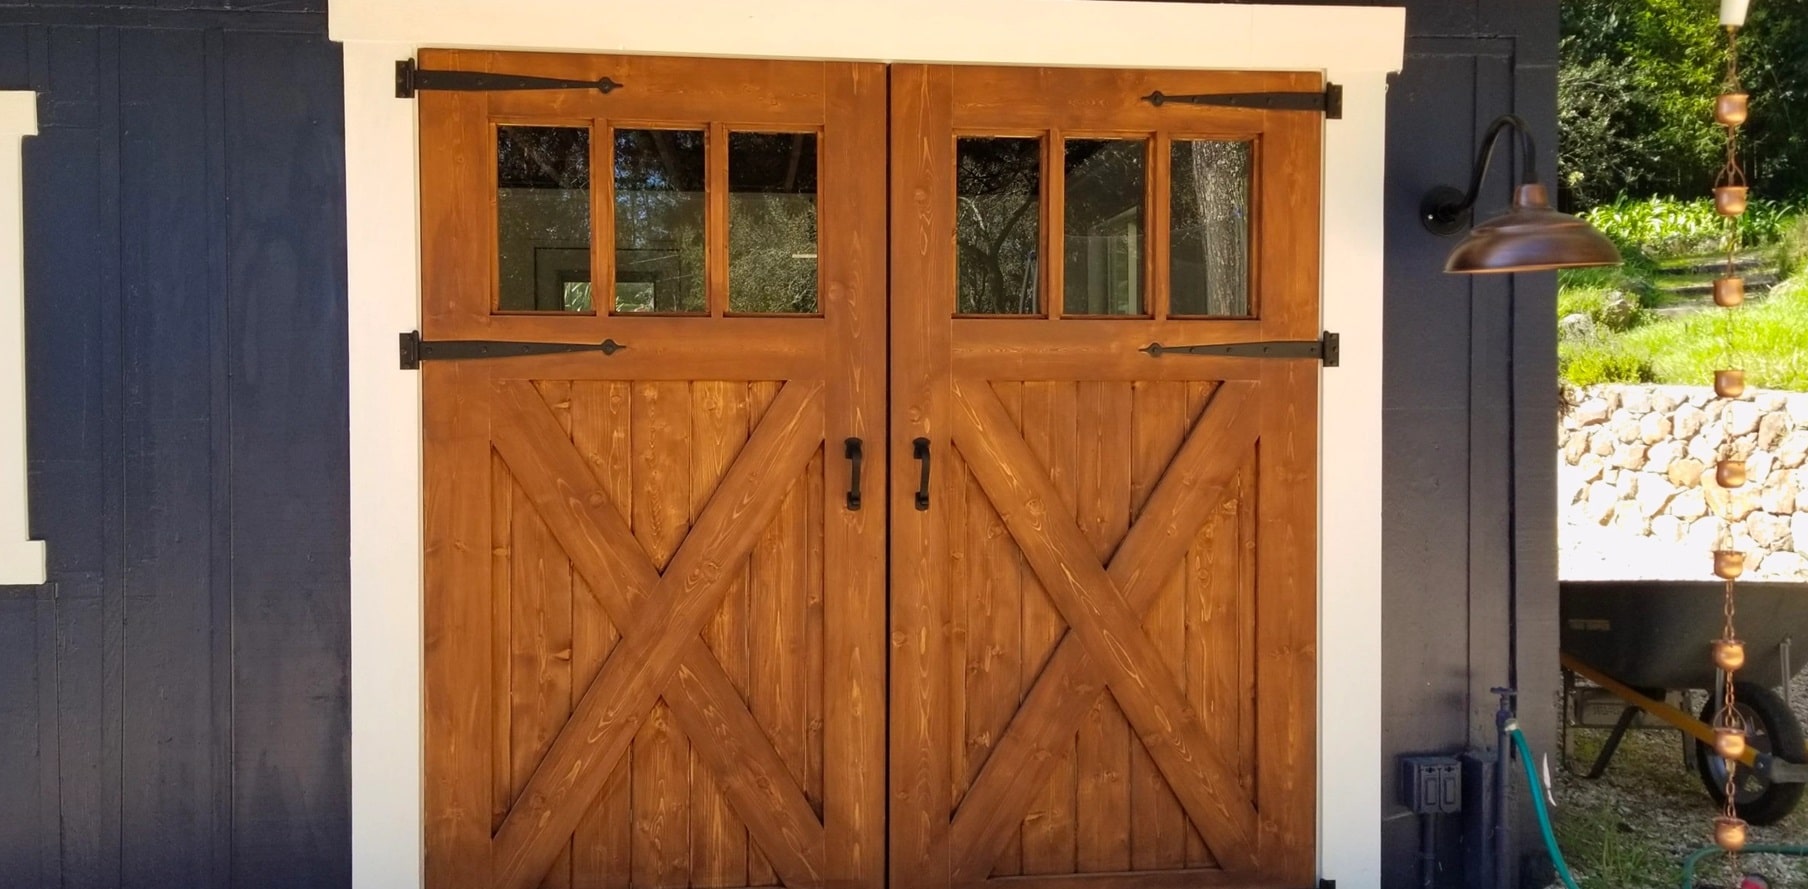
Adding doors and windows to your storage shed not only enhances its functionality and accessibility but also improves its overall aesthetics. Here’s how you can add doors and windows to your shed:
- Choose the right doors: Determine the type of door that best suits your needs and shed design. Common options include single or double doors, sliding doors, or roll-up doors. Consider factors such as size, durability, security, and ease of use.
- Measure and mark door openings: Measure and mark the desired locations for the door openings based on your shed design. Ensure that the openings are appropriately sized to accommodate the doors.
- Cut the door openings: Using a circular saw or a jigsaw, carefully cut the door openings according to the marked measurements. Take caution to make clean and straight cuts to ensure a proper fit for the doors.
- Install the door frame: Start by installing the door frame, ensuring that it is square and level. Attach the frame to the shed walls using screws or nails, following the manufacturer’s instructions.
- Hang the doors: Hang the doors on the installed door frame, making sure they fit properly and open and close smoothly. Adjust the hinges and hardware as needed to ensure proper alignment and functionality.
- Install door locks and handles: Depending on your security needs, install appropriate locks and handles on the doors. This provides added security and ease of use.
- Choose the right windows: Determine the size and style of windows that complement your shed design. Consider factors such as natural light, ventilation, and energy efficiency. Common window styles include single-hung, double-hung, or casement windows.
- Measure and mark window openings: Measure and mark the desired locations for the window openings. Ensure that the openings are appropriately sized to accommodate the windows.
- Cut the window openings: Carefully cut the window openings using a circular saw or a jigsaw, following the marked measurements. Take your time to make clean and accurate cuts.
- Install the window frames: Insert the window frames into the cut openings, making sure they fit snugly and are level. Secure the frames to the shed walls using screws or nails according to the manufacturer’s instructions.
- Install window glass and hardware: Once the frames are in place, install the window glass and any necessary hardware, such as latches or locks. Ensure that the windows open, close, and seal properly.
- Weatherproof doors and windows: Apply weatherstripping or caulk around the doors and windows to ensure a tight seal and protect against air and water infiltration. This will help maintain the insulation and energy efficiency of your shed.
When adding doors and windows, consider their placement to maximize natural light and airflow while maintaining the functionality and security of your storage shed. Take the time to test the doors and windows to ensure they open, close, and latch properly.
With doors and windows installed, you’re now one step closer to completing your storage shed. Move on to step ten: insulating and waterproofing the shed.
Step 10: Insulating and Waterproofing the Shed
Insulating and waterproofing your storage shed is essential to protect its contents from moisture and temperature fluctuations. Proper insulation improves energy efficiency, while waterproofing safeguards against leaks and water damage. Follow these steps to insulate and waterproof your shed:
- Choose the insulation material: Select the appropriate insulation material based on your shed’s construction and climate. Common options include fiberglass batts, foam boards, or spray foam insulation. Ensure that the chosen insulation meets building code requirements.
- Start with the walls: If your shed has wall insulation, position the insulation material between the wall studs. Ensure a snug fit, cutting the insulation as needed to fill the entire cavity. Use a staple gun or insulation adhesive to secure the insulation in place.
- Insulate the ceiling: If your shed has a ceiling or roof insulation, install the insulation material between the roof rafters or on the ceiling. Follow the manufacturer’s instructions for proper installation, ensuring a continuous insulation barrier.
- Seal air gaps: Use caulk or expanding foam to seal any gaps or cracks in the walls, roof, and around windows and doors. This helps prevent air leakage and improves the overall energy efficiency of the shed.
- Apply a vapor barrier: Install a vapor barrier on the warm side of the insulation, typically facing the interior of the shed. This prevents moisture from passing through the insulation and causing condensation or mold growth. Secure the vapor barrier using tape or staples, ensuring it covers all insulated areas.
- Waterproof the exterior: Apply a waterproofing membrane or sealant to the exterior of the shed walls and roof. This creates a protective barrier against water penetration and helps prevent rot and deterioration. Follow the manufacturer’s instructions for proper application.
- Check for and repair leaks: Inspect the shed for any existing leaks or areas prone to water infiltration. Seal any cracks or gaps using caulk or waterproofing sealant. Ensure that windows, doors, and roof penetrations are properly sealed to prevent water from entering the shed.
- Install gutters and downspouts: Consider installing gutters and downspouts to redirect rainwater away from the shed’s foundation. This helps prevent water pooling and potential damage to the structure. Regularly clean and maintain the gutters to ensure proper water flow.
- Provide proper ventilation: Ensure that your shed has adequate ventilation to prevent moisture buildup and condensation. Consider installing vents or exhaust fans to promote airflow and reduce humidity levels.
- Regularly inspect and maintain: Periodically check the insulation and waterproofing of your shed to identify any signs of damage or wear. Repair or replace any compromised insulation or waterproofing materials to maintain the shed’s protection and energy efficiency.
Effective insulation and waterproofing are crucial for preserving the integrity and longevity of your storage shed. They not only protect the shed itself but also help keep your stored items safe from moisture-related issues.
With insulation and waterproofing complete, your shed is now ready for the finishing touches. Move on to step eleven: adding exterior features and finishing touches.
Step 11: Finishing Touches and Exterior Features
Adding finishing touches and exterior features to your storage shed not only enhances its appearance but also improves functionality and convenience. These final touches will help transform your shed into a fully functional space that meets your specific needs. Follow these steps to add finishing touches and exterior features to your shed:
- Paint or stain: Apply a coat of paint or stain to the exterior of your shed. Choose a color that complements your property and personal taste. Make sure to use a high-quality outdoor paint or stain that is durable and weather-resistant.
- Add trim: Install trim boards around the edges of the shed walls, windows, and doors. This helps create a clean, finished look and provides additional protection against moisture and pests.
- Install gutters: If you haven’t already done so, consider installing gutters and downspouts to divert rainwater away from the shed’s foundation. This helps prevent water damage and erosion.
- Construct a ramp: If you plan to store heavy equipment or tools in your shed, adding a ramp can make it easier to move items in and out. Build a ramp using treated lumber or prefabricated ramp kits for convenience and accessibility.
- Add exterior lighting: Install exterior lighting around your shed to enhance visibility and safety, especially during nighttime. Consider options such as wall-mounted lights, solar-powered lights, or motion-sensor lights.
- Include shelving and storage racks: Maximize the storage capability of your shed by installing shelves, storage racks, or hooks. This allows for efficient organization and easy access to your belongings.
- Consider a workbench: If your shed doubles as a workspace, consider adding a workbench. This provides a flat surface for various projects and increases the versatility of your shed.
- Design and install landscaping: Enhance the overall aesthetic appeal of your storage shed by designing and installing landscaping around it. Choose plants, shrubs, or flowers that complement the shed’s design and blend well with your property.
- Install security features: Consider adding security features to protect your shed and its contents. This may include installing a lock on the doors, security cameras, or an alarm system. Choose options that align with your security needs and budget.
- Personalize the interior: Make the shed your own by personalizing the interior. Consider adding a work of art, a pegboard for organizing tools, or a whiteboard for notes and reminders.
- Maintain and care for your shed: Regularly inspect and maintain your shed to ensure its longevity. This includes checking for and repairing any damages, cleaning the exterior, and performing routine maintenance tasks.
By adding these finishing touches and exterior features, your storage shed will not only be a practical storage solution but also a visually appealing addition to your property. Take the time to customize your shed to suit your unique needs, and enjoy the benefits it brings.
With the finishing touches in place, your storage shed is almost complete. Move on to step twelve: organizing the interior and implementing storage solutions.
Step 12: Interior Organization and Storage Solutions
Organizing the interior of your storage shed is crucial in maximizing its storage capacity and efficiency. With the right storage solutions in place, you can easily access and maintain your belongings. Follow these steps to organize the interior of your shed:
- Assess your storage needs: Determine what items you will be storing in your shed and create a plan for organizing them. Categorize your belongings and prioritize frequently used items for easy accessibility.
- Install shelves: Adding shelves is an effective way to create vertical storage space. Install sturdy and adjustable shelves along the walls to accommodate items of various sizes. Consider using materials such as wood, metal, or plastic that suit your needs and budget.
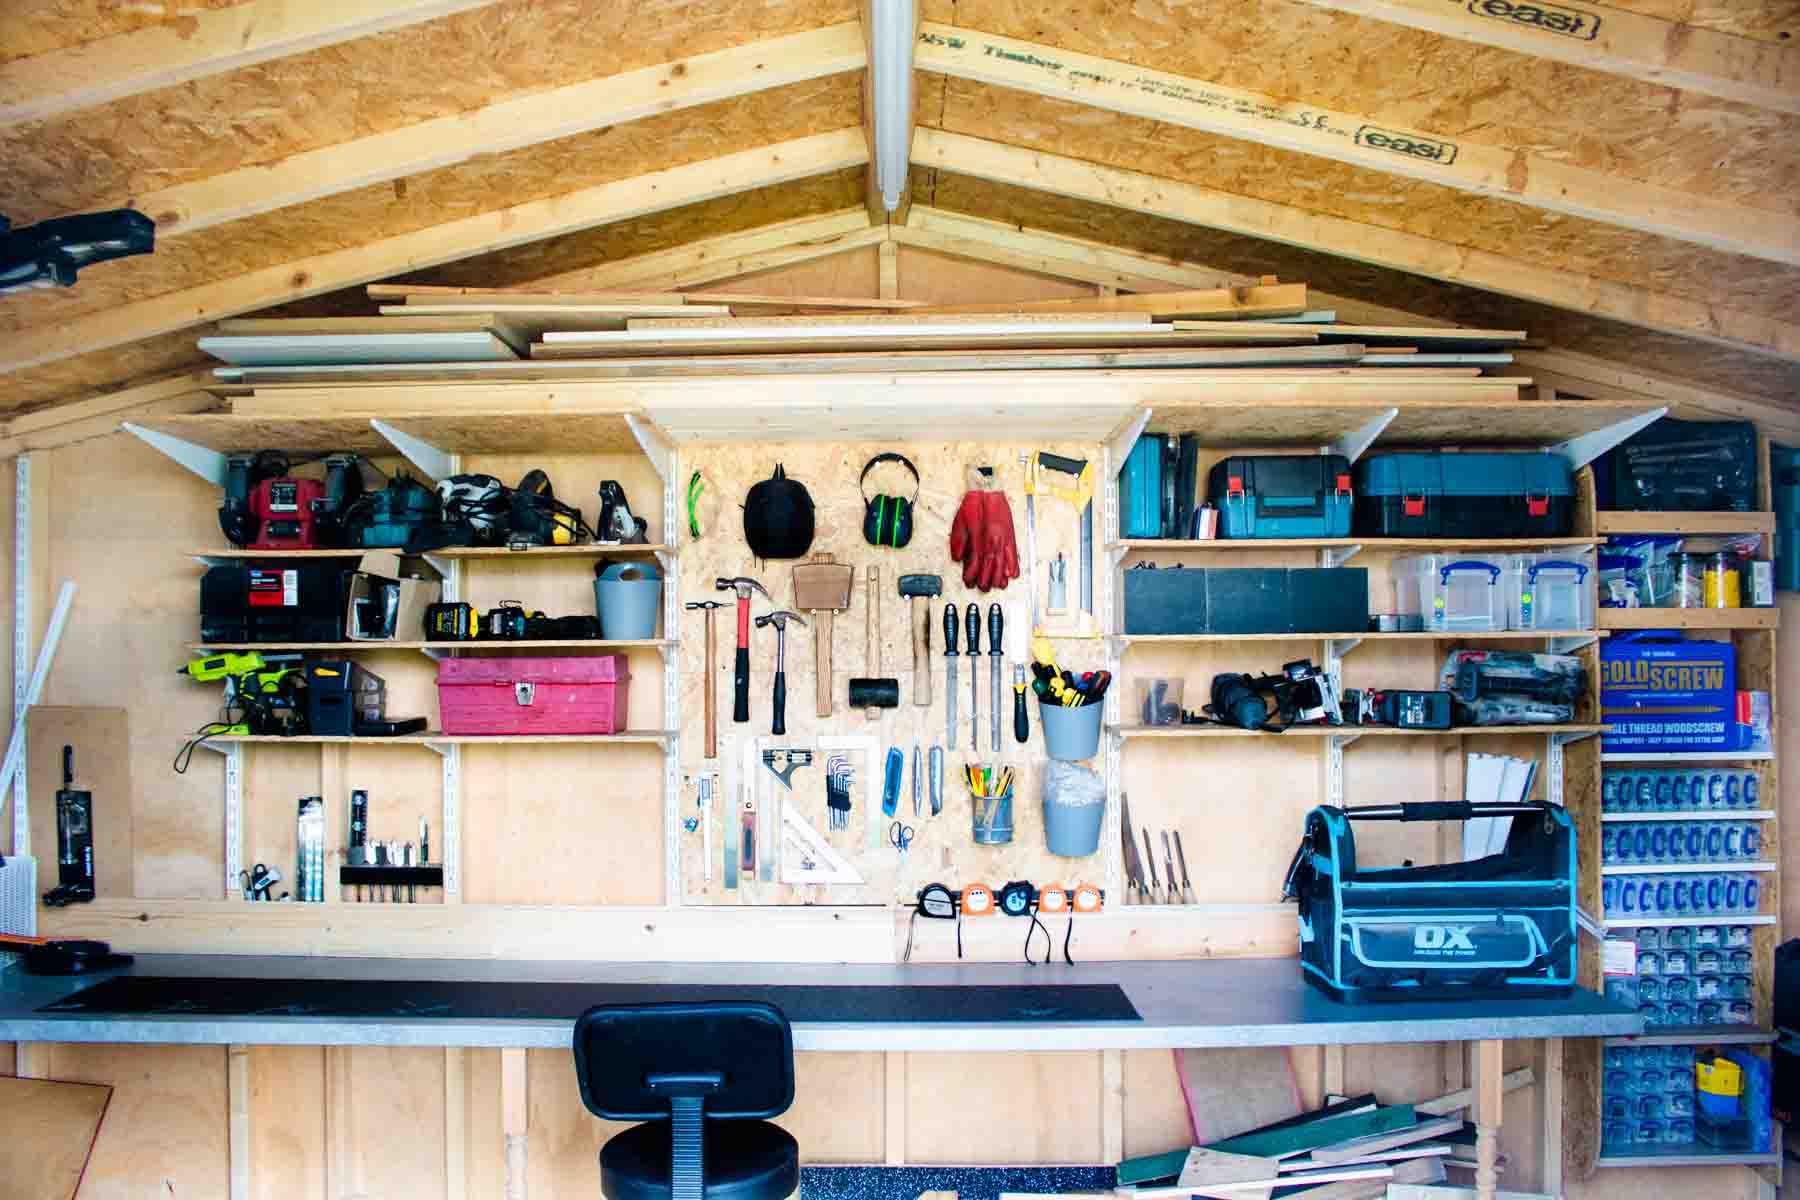
- Utilize pegboards and hooks: Install pegboards on the walls to hang tools, gardening equipment, or other items with handles. Utilize hooks and hangers to maximize vertical space and create a clutter-free environment.
- Consider storage bins and containers: Use storage bins and containers to keep smaller items organized and protected. Label them for easy identification and stack them efficiently to optimize space utilization.
- Add a workbench or table: If your shed doubles as a workspace, incorporate a workbench or table where you can carry out projects or repairs. Ensure it is stable, provides ample workspace, and has storage drawers or shelves underneath.
- Implement a tool storage system: Use tool racks, cabinets, or pegboard attachments to neatly store your tools. This will keep them easily accessible and prevent them from cluttering your workspace.
- Organize with wall-mounted racks and holders: Install wall-mounted racks and holders specifically designed to accommodate items such as rakes, shovels, brooms, or ladders. These will keep long-handled tools off the floor and organized.
- Allocate space for seasonal items: Designate a separate area or storage unit for seasonal items such as holiday decorations or summer/winter equipment. This will minimize clutter and ensure easy retrieval when needed.
- Create a labeling system: Label storage bins, shelves, and drawers to make it easier to locate and retrieve items. This simple but effective step can save time and eliminate frustration when searching for specific items in the future.
- Keep a clear pathway: Ensure there is a clear pathway or walkway in your shed to access items without obstruction. This will enhance safety and allow efficient movement within the space.
- Regularly declutter and reorganize: As your storage needs change, regularly assess and reorganize the shed’s interior. Remove any unused or unnecessary items, rearrange storage solutions as needed, and maintain a clutter-free environment.
By implementing these interior organization and storage solutions, you can make the most of your shed’s storage capacity and create a functional and tidy space. Remember to regularly maintain and update the organization system to ensure it continues to meet your needs over time.
With the interior organized, your storage shed is now a well-structured and efficient storage space. Move on to step thirteen: maintaining and caring for your shed.
Read more: How To Build A Shed
Step 13: Maintenance and Care of the Shed
Maintaining and caring for your storage shed is essential in preserving its structural integrity and prolonging its lifespan. Regular maintenance tasks will help prevent damages and keep your shed in optimal condition. Follow these steps to properly maintain and care for your shed:
- Inspect the shed regularly: Conduct regular visual inspections of your shed, checking for any signs of damage, wear, or potential issues. Look for cracks, leaks, pests, or any structural issues that may require attention.
- Repair damages promptly: If you notice any damages during your inspection, address them promptly to prevent further deterioration. Replace or repair damaged roofing, siding, windows, doors, or any other components as needed.
- Clean the interior and exterior: Regularly clean the interior and exterior of your shed to remove dirt, dust, spider webs, and other debris. Use a broom, brush, or pressure washer (if appropriate) to keep the shed clean and prevent buildup that may lead to discoloration or damage.
- Inspect and maintain the roof: Regularly check the roof for loose or damaged shingles, metal panels, or tiles. Clear off any debris, such as leaves or branches, that may accumulate on the roof. Ensure that gutters and downspouts are clear to allow proper drainage.
- Maintain the foundation: Monitor the condition of the shed’s foundation, checking for any signs of shifting or settling. Address any drainage issues promptly to prevent excessive moisture around the foundation.
- Prevent water damage: Regularly inspect doors, windows, and other openings for signs of water infiltration. Ensure that weatherstripping, caulk, and seals are in good condition and replace as needed to maintain a watertight seal.
- Treat and prevent pest infestations: Regularly inspect the shed for signs of pests such as insects, rodents, or termites. Take appropriate measures to treat and prevent infestations, such as sealing holes, using pest repellents, and removing potential food sources.
- Check and maintain locks and security features: Inspect and maintain the locks, hinges, and other security features on your shed’s doors and windows. Lubricate as necessary to ensure smooth operation and secure access.
- Keep the shed ventilated: Proper ventilation is crucial in preventing moisture buildup and controlling temperature. Ensure that vents are clear of obstructions and open or close them as needed to regulate airflow.
- Refinish or repaint as necessary: Over time, the exterior of your shed may require refinishing or repainting. Monitor the condition of the paint or stain and apply a fresh coat as needed to protect and rejuvenate the appearance of your shed.
- Follow manufacturer’s instructions: If your shed has specific care and maintenance recommendations provided by the manufacturer, be sure to follow them. This includes any instructions for the materials used, such as wood treatments or roof coatings.
By regularly maintaining and caring for your storage shed, you can ensure its longevity, keep it in good condition, and protect your stored belongings. A well-maintained shed will continue to provide reliable storage and functionality for years to come.
Congratulations! With step thirteen complete, you have successfully learned how to build, organize, and maintain your storage shed. Enjoy the benefits of your shed and the convenience of having a dedicated space for your storage needs.
Conclusion
Building a storage shed is a rewarding and practical project that provides valuable storage space on your property. By following the step-by-step guide outlined in this article, you have learned how to choose the right location, obtain permits, design and plan your shed, gather materials and tools, prepare the foundation, frame the structure, construct the walls, install the roof, add doors and windows, insulate and waterproof, add finishing touches, organize the interior, and maintain and care for your shed.
With each step, you have gained valuable knowledge and insights into the construction process and the necessary considerations to ensure a successful outcome. Your shed is now a functional and well-organized space that meets your storage needs while enhancing the aesthetics of your property.
Remember to continuously monitor and maintain your shed, addressing any issues promptly to prevent further damage. Regular cleaning, inspections, and repairs will help preserve the longevity and integrity of your shed for years to come.
Utilize the storage solutions and organizational tips provided to keep your belongings neat and easily accessible. By creating an efficient and well-organized interior, you maximize the utility and functionality of your shed.
Whether you use your shed for storing gardening tools, outdoor furniture, or other items, it serves as a valuable asset that enhances the organization and cleanliness of your property. With proper care and maintenance, your storage shed will remain a reliable and durable storage solution for years to come, providing convenience and peace of mind.
Thank you for embarking on this journey to build a storage shed. Enjoy the benefits of your newly constructed shed and the satisfaction of a successful DIY project!
Frequently Asked Questions about How To Build Storage Shed
Was this page helpful?
At Storables.com, we guarantee accurate and reliable information. Our content, validated by Expert Board Contributors, is crafted following stringent Editorial Policies. We're committed to providing you with well-researched, expert-backed insights for all your informational needs.


0 thoughts on “How To Build Storage Shed”