Articles
How To Build A Cheap Storage Shed
Modified: October 20, 2024
Looking for an affordable solution to outdoor storage? Discover how to build a cheap storage shed and declutter your space without breaking the bank. Perfect for all your outdoor storage needs.
(Many of the links in this article redirect to a specific reviewed product. Your purchase of these products through affiliate links helps to generate commission for Storables.com, at no extra cost. Learn more)
Introduction
Welcome to our comprehensive guide on how to build a cheap storage shed! If you’re in need of extra storage space for your outdoor belongings but don’t want to break the bank, then building your own shed is a great option. Not only will it save you money, but it will also provide you with a sense of accomplishment and the satisfaction of having a customized storage solution.
In this article, we’ll walk you through the step-by-step process of building a cheap storage shed. We’ll provide you with tips and tricks along the way, as well as highlight important considerations to ensure your shed is durable and functional.
Before diving into the construction process, it’s essential to choose the right location for your shed. This will depend on the available space in your yard and accessibility. You’ll also need to gather the necessary materials and tools. By planning the design and preparing a solid foundation, you’ll set a strong base for your shed’s construction.
Building the shed frame is a crucial step, as it forms the skeleton of your structure. Once the frame is complete, you can proceed with installing the walls and roof. Adding doors and windows will provide access and natural light to your shed’s interior.
While our focus is on building a cheap storage shed, there are also finishing touches and optional upgrades that you can consider to enhance its functionality and aesthetics. These include insulation, shelving, and exterior treatments.
Now, let’s dive into the details of each step, starting with choosing the right location for your shed!
Key Takeaways:
- Building a cheap storage shed involves crucial steps such as choosing the right location, gathering materials and tools, and planning the design. It’s a rewarding project that provides a customized storage solution while saving money.
- Adding doors, windows, and optional upgrades like insulation and shelving enhances the functionality and aesthetics of a cheap storage shed. Prioritizing safety and proper construction practices ensures a durable and practical outdoor storage space.
Read more: How To Build A Shed For Cheap
Choosing the Right Location
When it comes to building a cheap storage shed, selecting the right location is key to ensuring its longevity and functionality. Here are some factors to consider:
- Sunlight: Choose a spot that receives ample sunlight throughout the day. Sunlight helps to keep the interior of the shed dry and prevents moisture buildup, which can lead to mold and decay.
- Drainage: Avoid areas prone to flooding or standing water. It’s important to have proper drainage to prevent water damage to your shed and its contents. A slightly elevated spot with good natural drainage is ideal.
- Access and convenience: Consider how easily you can access the shed. It should be located in a convenient spot that allows you to retrieve and store items without any hassle. If you plan on using the shed for specific purposes like gardening tools or outdoor equipment, placing it near the related area of your yard can also be beneficial.
- Utilities: If you’ll be using electricity or water in your shed, make sure the location is close enough to connect to the existing supply. This will save you time and money on extending utilities to the shed.
- Landscaping: Take into account the impact of the shed on your yard’s overall aesthetics. Consider how it will blend in with your landscaping and any surrounding structures. You may choose to incorporate it into the landscape design by adding plants, a pathway, or a small patio area.
Once you’ve identified a suitable location, mark out the dimensions of the shed using stakes and string. This will help you visualize the space and ensure that it fits well within your yard.
Remember to check with your local building codes and regulations before finalizing the location. In some areas, there may be restrictions on where and how you can construct a shed. By following these guidelines, you’ll ensure that your shed is compliant and meets any necessary permits or requirements.
Now that you have chosen the right location for your shed, let’s move on to gathering the materials and tools needed for the construction process.
Gathering Materials and Tools
Before you can begin constructing your cheap storage shed, you’ll need to gather the necessary materials and tools. Here’s a comprehensive list to help you get started:
Materials:
- Pressure-treated lumber: This will form the base of your shed and provide durability and resistance against rot and decay.
- Plywood or oriented strand board (OSB): These materials will be used for the walls, roof, and flooring of the shed.
- Roofing material: Choose from a variety of options such as corrugated metal, asphalt shingles, or plastic roofing. Consider your budget and aesthetic preferences.
- Siding material: Opt for materials like vinyl, wood, or composite siding to enclose the shed’s walls. Choose an option that is affordable and low-maintenance.
- Hardware: This includes nails, screws, and other fasteners required for assembly.
- Window and door frames: If you plan to have windows and doors, make sure to purchase the appropriate frames and hardware.
- Insulation (optional): If you’ll be using your storage shed for temperature-sensitive items or as a workshop, consider insulating the walls and ceiling.
- Paint or sealant: Enhance the appearance and prolong the lifespan of your shed by painting or sealing the exterior surfaces.
Tools:
- Tape measure: Accurate measurements are crucial during the construction process.
- Hammer: A basic tool for hammering nails into the lumber.
- Saw: Choose a circular saw or hand saw for cutting the lumber, plywood, or siding to the desired dimensions.
- Drill: Necessary for drilling holes and driving screws.
- Level: Ensure that your shed is level and plumb during construction.
- Safety equipment: Don’t forget safety goggles, gloves, and a dust mask to protect yourself while working.
- Ladder: Depending on the height of your shed, you may need a ladder to reach certain areas during construction.
While this list provides a general idea of the materials and tools you’ll need, it’s important to customize it based on your shed’s design and specific requirements. Take inventory of what you already have and purchase the remaining items from your local home improvement store.
Now that you have all the necessary materials and tools, it’s time to move on to planning the design of your cheap storage shed.
Planning the Design
Planning the design of your cheap storage shed is a crucial step that will define the functionality and aesthetics of your structure. Here are some key considerations to keep in mind:
Size and Layout:
Determine the size of your shed based on the available space in your yard and your storage needs. Consider what you’ll be storing in the shed and plan accordingly. Sketch out a rough layout that includes the dimensions of the walls, doors, and windows. This will give you a clear picture of how everything will fit together.
Door and Window Placement:
Decide on the number and placement of doors and windows based on accessibility and natural light requirements. Consider the size and height of the items you’ll be storing to ensure that the doors are wide enough for easy entry.
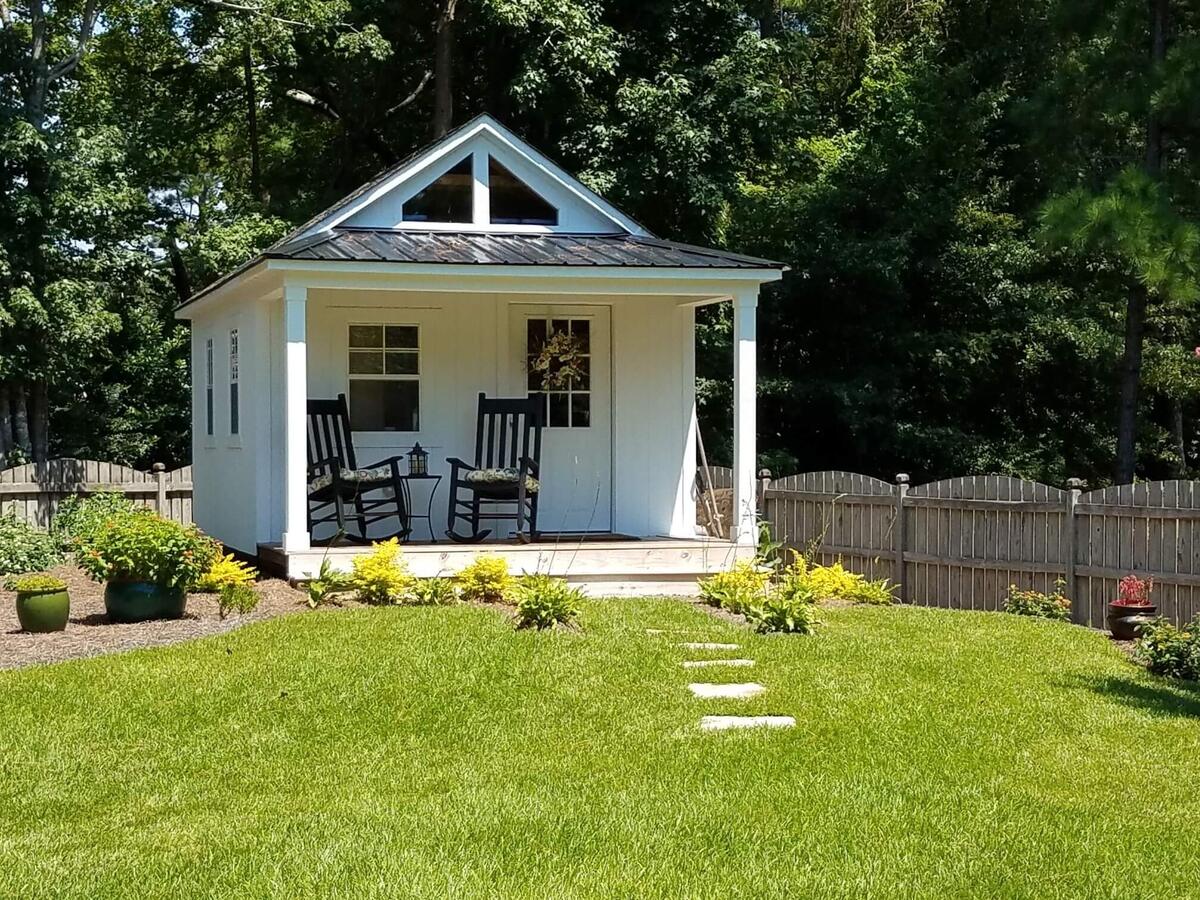
Roof Style:
Choose a roof style that suits your preferences and complements your home’s architecture. Popular options include gable, gambrel, and lean-to roofs. Consider factors such as drainage, snow load, and aesthetics when making your decision.
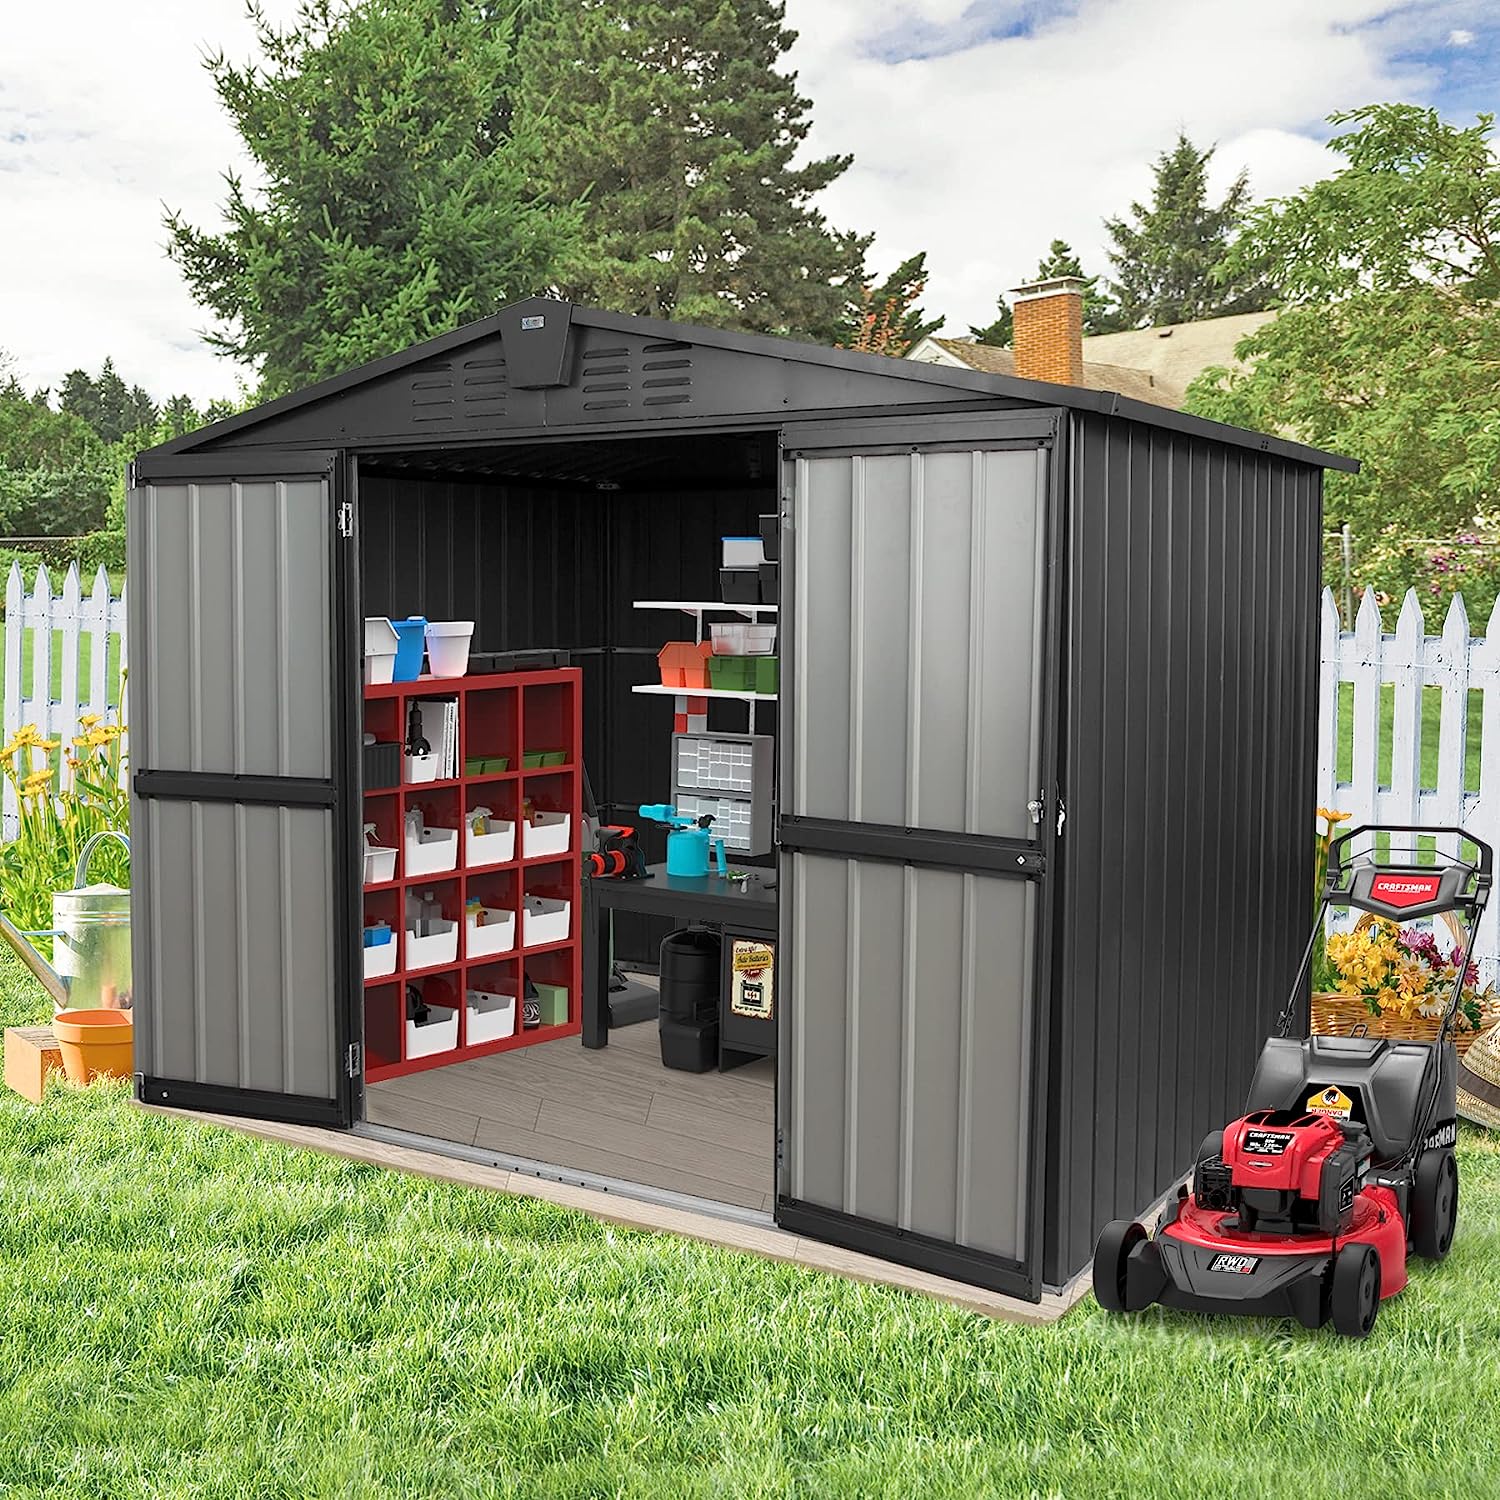
Storage Organization:
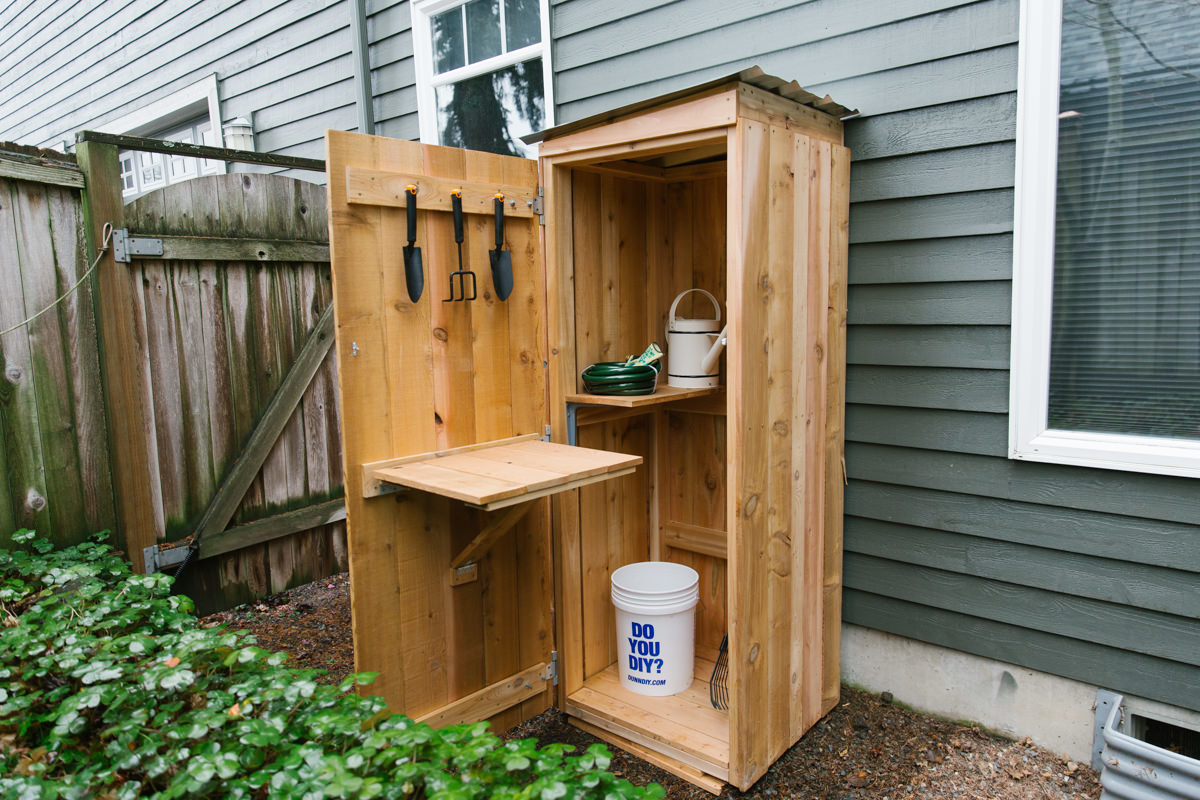
Think about how you will organize and utilize the interior space of your shed. Consider adding shelves, hooks, or pegboards to maximize storage efficiency. You may also want to allocate specific areas for different types of items, such as gardening tools or sporting equipment.
Materials and Colors:
Select the materials and colors for your shed’s exterior that align with your budget and personal taste. Keep in mind that low-maintenance materials like vinyl siding or metal roofing can save you time and effort in the long run.
Permits and Regulations:
Check with your local building department to determine if you need any permits or need to adhere to specific regulations for constructing a shed. Some areas have restrictions on size, setbacks, and height, so it’s important to be informed to avoid any legal issues.
Take your time during the planning phase to ensure that you have a well-thought-out design that meets your storage needs and budget. Once you have a clear plan in place, you can move on to preparing the foundation for your cheap storage shed.
Preparing the Foundation
The foundation of your cheap storage shed is a critical component for ensuring its stability and longevity. Here are the steps to prepare a solid foundation:
1. Clear the area:
Start by clearing the chosen location of any debris, rocks, or vegetation. This will provide a clean and level surface for your foundation.
2. Mark the boundaries:
Using stakes and string, mark the boundaries of your shed’s foundation. Ensure that it is square and aligned with the desired dimensions of your shed. This will act as a guide during the construction process.
3. Excavation:
For a permanent foundation, you’ll need to excavate the area to a level depth of about 4-6 inches. This will allow for proper drainage and stability. Remove the topsoil and ensure that the ground is level. Alternatively, you can use pre-made concrete pavers or blocks as a base.
4. Create a level base:
To create a level base, you can use crushed stone or concrete. Spread and compact the material evenly across the excavated area. Use a tamper or roller to ensure a compact and solid base.
5. Install a vapor barrier:
To reduce moisture absorption from the ground, install a vapor barrier over the leveled base. This can be in the form of plastic sheeting or a moisture-resistant membrane.
6. Build a frame:
Construct a wooden or concrete frame to further support the shed’s foundation. This frame should match the dimensions of your shed’s base and will help prevent the shed from shifting or settling over time.
7. Anchor the frame:
Using metal or concrete anchors, secure the frame to the ground. This will provide additional stability, particularly in areas with high winds or seismic activity.
8. Verify levelness:
Double-check the levelness of your foundation using a spirit level. Make any necessary adjustments to ensure that the foundation is perfectly level in all directions.
By following these steps, you’ll have a solid and level foundation for your cheap storage shed. This foundation will provide the necessary support for the shed’s structure and ensure its durability over time.
Now that your foundation is ready, you can move on to building the shed frame.
Consider using salvaged or repurposed materials such as old pallets, shipping containers, or reclaimed lumber to build a cheap storage shed. These materials can often be found for free or at a low cost, helping to keep your overall expenses down.
Read more: How To Build Garden Shed
Building the Shed Frame
Building the frame of your cheap storage shed is an exciting step as it forms the skeleton of your structure. Here’s a step-by-step guide to help you construct the shed frame:
1. Cut the lumber:
Using the measurements from your shed design, cut the pressure-treated lumber into appropriate lengths. You’ll need pieces for the floor joists, wall studs, top plates, and roof rafters.
2. Construct the floor:
Begin by assembling the floor frame according to your shed’s dimensions. Place the floor joists at equal intervals and secure them to the frame using nails or screws. Double-check for squareness and make adjustments if needed.
3. Build the walls:
Next, construct the walls of your shed by attaching the wall studs vertically to the bottom plate. Use a level to ensure they are straight and square. Add additional studs or bracing as needed for structural stability.
4. Connect the walls:
Once the wall frames are complete, connect them by attaching the top plates horizontally, aligning them with the studs. Secure them firmly to create a rigid structure.
5. Install the roof rafters:
Measure, cut, and install the roof rafters according to your chosen roof design. Make sure they are evenly spaced and securely attached to the top plates. This will provide support for the roof structure.
6. Reinforce the frame:
To reinforce the shed frame, add additional bracing where needed, such as angle brackets or plywood gussets. This will provide stability and prevent any movement or shifting.
7. Verify measurements:
Double-check all measurements and alignments to ensure the shed frame is level, square, and structurally sound. Make any necessary adjustments before proceeding with the next steps.
Remember to wear appropriate safety gear and follow proper construction practices throughout the process. It’s also helpful to have an extra set of hands for lifting and securing larger pieces of lumber.
With your shed frame complete, you’re ready to move on to the next phase—installing the walls and roof.
Stay tuned for the next section to learn how to assemble your shed’s walls and roof components.
Installing the Walls and Roof
Now that you’ve constructed the frame of your cheap storage shed, it’s time to install the walls and roof. Here’s a step-by-step guide to help you complete this phase of the construction:
1. Attach the walls:
Position the wall frames in their designated locations and secure them to the floor frame using nails or screws. Ensure that the walls are plumb and square before fastening them to the frame. Use a level to double-check the alignment.
2. Add sheathing:
Attach plywood or oriented strand board (OSB) to the exterior of the shed walls. This sheathing will provide stability and act as a base for the siding. Fasten the sheathing with nails or screws, ensuring that they penetrate the wall studs.
3. Install the roof components:
Begin by installing the roof trusses or rafters according to your shed design. Attach them at equal intervals along the top plates of the walls using strong fasteners such as screws or metal brackets. Make sure they are aligned and securely in place.
4. Add roof sheathing:
Cover the roof trusses or rafters with plywood or OSB to create a solid base for the roofing material. Secure the sheathing with nails or screws, ensuring that they are evenly spaced and properly fastened.
5. Install the roofing material:
Choose your preferred roofing material, such as corrugated metal, asphalt shingles, or plastic roofing. Follow the manufacturer’s guidelines and installation instructions for your chosen material. Ensure that the roofing is securely fastened and provides proper waterproofing for your shed.
6. Weatherproofing:
Once the walls and roof are in place, it’s essential to weatherproof your shed. Apply caulking or weatherstripping to seal any gaps or joints, preventing water and pests from entering the shed. This will help keep your belongings safe and dry.
Throughout the installation process, continually check for accuracy, alignment, and stability. It’s crucial to maintain the structural integrity of the shed by ensuring that all components are properly secured.
With the walls and roof successfully installed, you’re one step closer to completing your cheap storage shed. The next phase will involve adding doors and windows, so stay tuned!
Adding Doors and Windows
Now that the walls and roof of your cheap storage shed are in place, it’s time to add doors and windows. Here’s a step-by-step guide to help you complete this important phase:
1. Choose the location:
Determine the ideal placement of doors and windows based on your shed’s design and your accessibility needs. Consider factors such as natural light, ventilation, and ease of entry.
2. Install the doors:
Measure and cut an opening in one of the walls, ensuring it is large enough to accommodate your chosen door size. Install the door frame according to the manufacturer’s instructions, making sure it fits snugly within the opening. Attach hinges to the door and the frame, allowing it to open and close smoothly. Install any necessary door hardware, such as locks or handles.
3. Add windows:
Measure and cut openings in the desired walls for your windows. Install window frames, ensuring they fit securely within the openings. Attach the windows to the frames using screws or nails, and seal any gaps with weatherstripping or caulking for proper insulation and weatherproofing.
4. Enhance security:
Consider adding additional security measures to your doors and windows. Install locks, deadbolts, or window bars to provide extra protection and prevent unauthorized access to your storage shed.
5. Ensure proper sealing:
Check that all doors and windows are properly sealed to prevent water infiltration and drafts. Apply weatherstripping or caulking as needed around the frames to ensure a tight seal.
6. Consider additional features:
Depending on your needs, you may want to add additional features to your doors and windows. For example, installing a window screen can help keep insects out while allowing fresh air to circulate inside the shed. Adding blinds or curtains to windows adds privacy and helps control light levels.
Remember to follow the manufacturer’s instructions when installing doors and windows and use appropriate safety precautions. Take measurements accurately to ensure a proper fit and functionality.
With the doors and windows now installed, your cheap storage shed is almost complete. The next step is to add the finishing touches and optional upgrades, which we’ll cover in the next section.
Finishing Touches and Optional Upgrades
Now that the main construction of your cheap storage shed is complete, it’s time to focus on the finishing touches and optional upgrades. These elements will enhance the functionality and aesthetic appeal of your shed. Here are some ideas to consider:
1. Insulation:
If you plan to use your shed for temperature-sensitive items or as a workshop, adding insulation can help regulate the indoor temperature. Install insulation in the walls and ceiling, and consider insulating the floor as well. This will help keep your shed comfortable throughout the year.
2. Shelving and Storage:
Add shelves, hooks, or pegboards to maximize storage efficiency. This will help you keep your belongings organized and easily accessible. Consider installing a workbench or tool rack if you’ll be using the shed for DIY projects or hobbies.
3. Exterior Treatment:
You can enhance the appearance of your shed and protect it from the elements by applying paint or stain to the exterior. Choose a color that complements your outdoor space and use a weather-resistant coating to prolong the shed’s lifespan.
4. Ventilation:
Ensure proper airflow by installing vents or windows that can be opened. This will help prevent condensation and keep the interior fresh and dry. Consider adding a small fan or vent to improve air circulation.
5. Lighting:
If you’ll be using your shed in the evenings or need additional lighting, install LED lights or a small solar-powered lighting system. This will make it easier to navigate and find items inside the shed, even in dim lighting conditions.
6. Landscaping:
Integrate your shed into your landscaping by adding plants, flower beds, or a small pathway leading up to the entrance. This will help blend the shed with the surrounding environment and create a cohesive outdoor space.
7. Security Measures:
Consider adding security features to your shed, such as motion sensor lights, a surveillance camera, or an alarm system. These measures can help deter theft and protect your valuable items.
Remember to prioritize your budget and needs when considering optional upgrades. Choose the ones that will provide the most value and functionality for your specific requirements.
Congratulations! By completing the finishing touches and implementing optional upgrades, your cheap storage shed is now ready to use. It is a testament to your hard work and craftsmanship. Enjoy the additional storage space and the satisfaction of having built a customized shed that fits your needs and budget.
Now, step back and admire your finished creation, knowing that you have a durable and practical storage solution in your outdoor space.
Read more: How To Build A Cheap Carport
Conclusion
Building a cheap storage shed is not only a cost-effective solution for your outdoor storage needs but also a rewarding project that allows you to customize a space that suits your requirements. By following the steps outlined in this comprehensive guide, you can construct a durable and functional shed that will serve you for years to come.
We started by discussing the importance of choosing the right location for your shed, considering factors such as sunlight, drainage, access, and utilities. Next, we covered gathering the necessary materials and tools, ensuring you have everything you need to begin construction.
Planning the design was a crucial step, as it allowed you to determine the size, layout, and desired features of your shed. Preparing a solid foundation provided the stability and level base necessary for the shed’s construction.
Building the shed frame formed the structure of your shed and set the stage for the wall and roof installation. Adding doors and windows enhanced the accessibility and functionality of the shed.
Finally, we discussed the finishing touches and optional upgrades that you can consider to make your cheap storage shed even more practical and aesthetically pleasing.
Throughout the construction process, it’s important to prioritize safety and follow proper building practices. Ensure that all components are securely fastened, and double-check measurements and alignments to guarantee the structural integrity of your shed.
By embracing your creativity and taking the time to plan and execute each step with care, you’ve now completed your cheap storage shed. It provides you with a dedicated space to store outdoor belongings, tools, equipment, and more, while also adding value and functionality to your property.
Congratulations on your hard work and accomplishment! Step back and admire your finished shed, knowing that you’ve created a customized storage solution that meets your needs and budget. Enjoy the convenience and satisfaction that comes with having built your own outdoor storage space.
Frequently Asked Questions about How To Build A Cheap Storage Shed
Was this page helpful?
At Storables.com, we guarantee accurate and reliable information. Our content, validated by Expert Board Contributors, is crafted following stringent Editorial Policies. We're committed to providing you with well-researched, expert-backed insights for all your informational needs.


0 thoughts on “How To Build A Cheap Storage Shed”