Home>Gardening & Outdoor>Outdoor Structures>How To Build Shed Walls
Outdoor Structures
How To Build Shed Walls
Modified: August 27, 2024
Learn how to build sturdy shed walls for your outdoor structures with our step-by-step guide. Get expert tips and techniques for a durable and long-lasting construction.
(Many of the links in this article redirect to a specific reviewed product. Your purchase of these products through affiliate links helps to generate commission for Storables.com, at no extra cost. Learn more)
Introduction
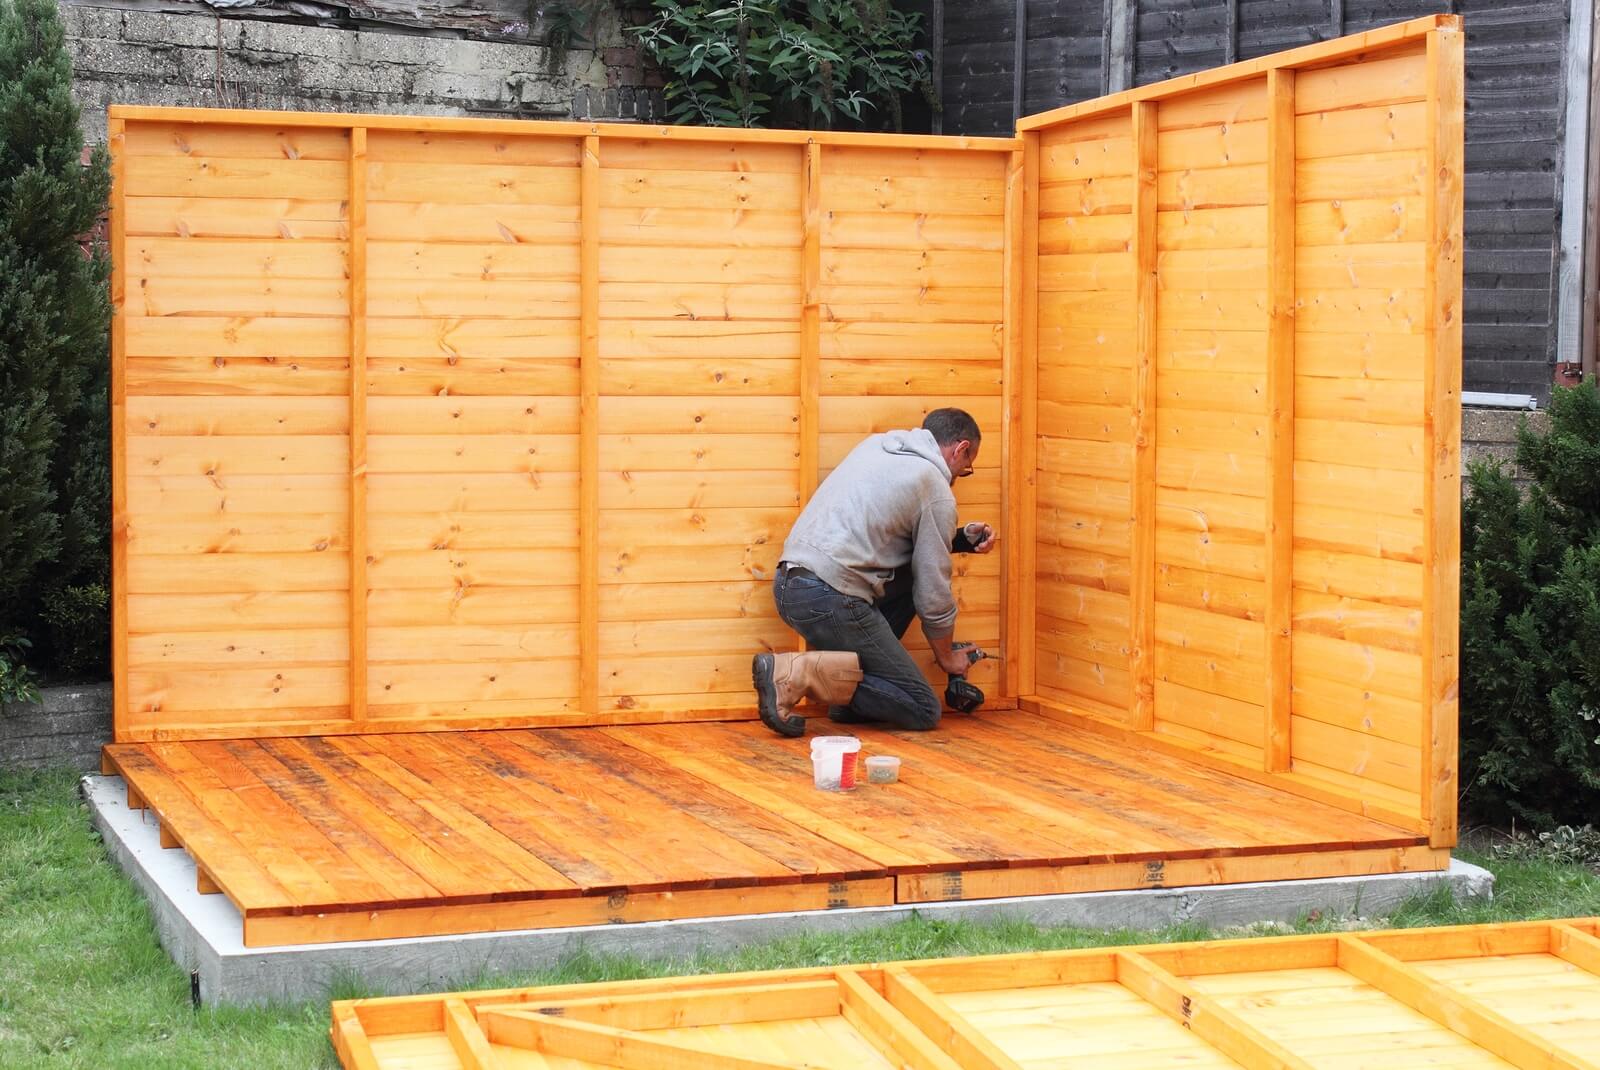
Building a shed is a gratifying endeavor that not only enhances your outdoor space but also provides valuable storage and workspace. One of the fundamental steps in constructing a sturdy and durable shed is assembling its walls. Whether you are a seasoned DIY enthusiast or a novice builder, crafting shed walls requires careful planning, precise measurements, and the right tools. In this comprehensive guide, we will walk you through the step-by-step process of building shed walls, from gathering materials and tools to standing and securing the walls in place.
Constructing shed walls involves several key stages, each of which contributes to the overall strength and stability of the structure. By following these detailed instructions, you can ensure that your shed walls are expertly crafted and built to last. So, roll up your sleeves, gather your tools, and let's delve into the rewarding journey of constructing robust shed walls that will stand the test of time.
Key Takeaways:
- Building shed walls requires careful planning, precise measurements, and the right tools. Each step, from gathering materials to standing and securing the walls, contributes to a sturdy and enduring outdoor structure.
- Integrating windows and doors enhances the shed’s functionality and introduces natural light and ventilation. Standing and securing the walls in place marks a significant milestone, bringing the structure one step closer to completion.
Read more: How To Build A Stud Wall For A Shed
Step 1: Gather Materials and Tools
Before embarking on the construction of shed walls, it is essential to gather all the necessary materials and tools. This step sets the foundation for a smooth and efficient building process. Here’s a comprehensive list of the items you will need:
Materials:
- Lumber for wall framing
- Exterior-grade plywood for sheathing
- Nails or screws
- Wood preservative or primer and paint
- House wrap or building paper
- Window and door units (if applicable)
Tools:
- Tape measure
- Circular saw or miter saw
- Hammer or nail gun
- Level
- Safety goggles and gloves
- Workbench or sawhorses
- Paintbrushes or paint sprayer
Once you have gathered these materials and tools, you are ready to move on to the next step, which involves measuring and cutting the wall framing. Proper preparation and organization at this stage will streamline the construction process and contribute to the overall quality of your shed walls.
Step 2: Measure and Cut Wall Framing
Accurate measurements and precise cuts are crucial for ensuring that your shed walls fit together seamlessly and form a sturdy framework for the structure. Here’s a detailed guide on how to measure and cut the wall framing:
Begin by measuring the dimensions of the shed walls according to your construction plans. Use a tape measure to determine the length and height of each wall. It’s essential to account for the thickness of the lumber when measuring the dimensions.
Next, transfer the measurements to the lumber that will serve as the wall framing. Mark the cut lines clearly using a pencil and a straight edge. A carpenter’s square can help ensure that the lines are perpendicular, resulting in accurately cut pieces of lumber.
Once the cut lines are marked, it’s time to use a circular saw or miter saw to make the cuts. Ensure that the saw blade is set to the appropriate depth to achieve clean and precise cuts. Take your time and exercise caution when operating the saw to prevent any splintering or uneven edges on the lumber.
After cutting the individual pieces for the wall framing, organize and label them according to their respective walls. This labeling process will simplify the assembly stage, preventing any confusion regarding which piece belongs to each wall. Additionally, it’s beneficial to conduct a dry fit by positioning the cut lumber together to confirm that the framing components align accurately and form the intended wall dimensions.
By meticulously measuring and cutting the wall framing, you lay the groundwork for constructing robust shed walls that fit together flawlessly. With the framing components prepared, you are now ready to proceed to the next step: assembling the wall framing.
Read more: How Build A Shed
Step 3: Assemble Wall Framing
Assembling the wall framing is a pivotal stage in the construction of shed walls. This process involves joining the cut lumber pieces to create the framework that will form the structure’s walls. Follow these detailed steps to effectively assemble the wall framing:
Begin by laying out the bottom plate of the wall on a flat and level surface, such as a concrete slab or a workbench. Position the vertical studs at the designated intervals along the bottom plate, aligning them accurately according to the construction plans. Ensure that the studs are plumb (perfectly vertical) and securely attach them to the bottom plate using nails or screws.
Once the vertical studs are in place, add the top plate to the assembly, creating a sturdy frame that encloses the wall’s perimeter. The top plate should align precisely with the bottom plate, forming a cohesive and square framework. Secure the top plate to the vertical studs, ensuring that the entire assembly is rigid and stable.
At this stage, it’s beneficial to check the squareness of the wall framing using a carpenter’s square. This step ensures that the corners of the frame form right angles, indicating that the walls will fit together accurately during the construction process. Making any necessary adjustments at this point will prevent complications when it’s time to erect the walls.
Additionally, consider incorporating openings for windows and doors as per your design. Carefully frame these openings within the wall framing, ensuring that they are structurally sound and properly supported. This is a critical step in preparing the walls to accommodate windows and doors, enhancing the functionality and aesthetics of the shed.
By meticulously assembling the wall framing, you establish the structural framework that will form the basis of your shed walls. This precise and methodical approach sets the stage for the next step: installing wall sheathing to enclose the frame and provide structural rigidity.
Step 4: Install Wall Sheathing
Installing wall sheathing is a crucial phase in the construction of shed walls, as it provides structural support, stability, and protection from the elements. Wall sheathing also serves as a base for exterior finishes such as siding. Follow these detailed steps to effectively install wall sheathing:
Begin by positioning the first sheet of exterior-grade plywood or oriented strand board (OSB) at the corner of the wall framing, ensuring that the bottom edge aligns with the bottom plate. Secure the sheathing to the framing using nails or screws, taking care to space the fasteners at the specified intervals along the edges and intermediate studs.
Continue installing additional sheets of sheathing, ensuring that the long edges of each sheet are properly supported by the vertical studs in the wall framing. Stagger the seams of the sheathing panels to enhance structural integrity, alternating the placement of vertical joints between successive rows of sheathing. This staggered pattern minimizes weak points and reinforces the overall strength of the walls.
As you progress with the installation, periodically check the sheathing for plumb and alignment to maintain a straight and uniform surface. Use a level to ensure that the sheathing is installed vertically, correcting any deviations to prevent misaligned walls. Additionally, inspect the sheathing for any warping or irregularities, replacing any damaged panels to maintain the structural integrity of the walls.
Once the walls are entirely sheathed, trim any excess sheathing material along the edges to achieve a clean and uniform appearance. This step prepares the walls for the application of exterior finishes such as siding or paint, enhancing the aesthetic appeal of the shed while providing weather-resistant protection.
By installing wall sheathing with precision and attention to detail, you fortify the shed walls, creating a solid and resilient enclosure. This meticulous approach sets the stage for the next step: adding windows and doors to the walls to enhance functionality and visual appeal.
When building shed walls, make sure to use pressure-treated lumber for the bottom plates to prevent rot. Also, use a level to ensure the walls are straight and plumb.
Step 5: Add Windows and Doors
Integrating windows and doors into the shed walls not only enhances the functionality of the structure but also introduces natural light and ventilation. Follow these comprehensive steps to effectively add windows and doors to the shed walls:
Windows:
Begin by determining the optimal locations for windows within the shed walls, considering factors such as natural light, ventilation, and aesthetic appeal. Mark the precise openings for the windows on the wall sheathing, ensuring that they align with the framing and provide adequate support for the window units.
Next, carefully cut out the marked openings using a circular saw, following the designated dimensions for each window. Exercise caution and precision during the cutting process to achieve clean and accurate openings that accommodate the window units seamlessly.
Install the window units within the prepared openings, ensuring that they are level, plumb, and securely anchored to the surrounding framing. Use shims and fasteners to align and secure the windows, creating a weather-tight seal that prevents drafts and moisture infiltration.
Doors:
Similarly, determine the ideal placement for doors within the shed walls, considering accessibility and functional requirements. Mark the outlines of the door openings on the wall sheathing, ensuring that they align with the framing and provide sufficient structural support for the door unit.
Carefully cut out the marked door openings using a circular saw, allowing for the dimensions of the door unit and ensuring a precise and clean opening. Take care to maintain the integrity of the surrounding sheathing and framing during the cutting process.
Install the door unit within the designated opening, ensuring that it is plumb, level, and securely affixed to the surrounding framing. Utilize shims and fasteners to align and secure the door, creating a sturdy and functional entryway that complements the shed walls.
By seamlessly integrating windows and doors into the shed walls, you enhance the structure’s utility and aesthetic appeal, creating a welcoming and functional space. This meticulous approach sets the stage for the next step: standing and securing the walls in place, bringing the shed one step closer to completion.
Step 6: Stand and Secure Walls in Place
As the construction of the shed walls nears completion, the pivotal step of standing and securing the walls in place brings the structure to life. Follow these detailed steps to effectively stand and secure the shed walls, marking a significant milestone in the construction process:
Enlist the assistance of at least one or two individuals to aid in lifting and positioning the walls into place. With careful coordination, maneuver each wall section into its designated location, ensuring that they align precisely with the foundation and with each other according to the construction plans.
Use temporary bracing to support the walls in an upright position while adjustments are made to ensure proper alignment and plumbness. This temporary bracing prevents the walls from shifting or tilting as they are secured in place, maintaining stability during the final stages of construction.
Secure the walls to the foundation using anchor bolts or other appropriate fastening methods, ensuring that the walls are firmly anchored and resistant to external forces such as wind and seismic activity. This crucial step establishes a strong connection between the walls and the foundation, contributing to the overall stability and durability of the shed structure.
Once the walls are securely fastened to the foundation, reinforce the connections between individual wall sections, ensuring that they are aligned and properly joined to form a cohesive and structurally sound enclosure. This meticulous attention to detail enhances the overall integrity of the shed walls, preparing them for subsequent construction phases.
Inspect the standing walls for plumb, level, and alignment, making any necessary adjustments to ensure that they conform to the intended dimensions and specifications. This careful scrutiny guarantees that the walls are positioned accurately and ready to receive the remaining components of the shed structure.
By effectively standing and securing the shed walls in place, you achieve a significant milestone in the construction process, bringing the structure one step closer to completion. This meticulous and methodical approach sets the stage for subsequent phases of construction, paving the way for the successful realization of a robust and functional shed.
Read more: How To Build A Shed
Conclusion
Congratulations! You have successfully navigated the comprehensive process of constructing shed walls, laying the foundation for a sturdy, functional, and visually appealing outdoor structure. Each step in this journey, from gathering materials and tools to standing and securing the walls in place, has contributed to the creation of a robust and enduring shed.
By meticulously measuring and cutting the wall framing, you ensured that the walls fit together seamlessly, forming a strong framework for the structure. The precise assembly of the wall framing established the structural integrity of the walls, setting the stage for the installation of wall sheathing, which provided essential support and protection.
Integrating windows and doors into the shed walls not only enhanced the functionality of the structure but also introduced natural light and ventilation, creating a welcoming and versatile space. Finally, standing and securing the walls in place marked a significant milestone, bringing the shed one step closer to completion.
Throughout this journey, your attention to detail, precision, and dedication to quality craftsmanship have been instrumental in shaping the shed walls into a resilient and reliable enclosure. As you continue your construction endeavors, remember that each phase of the process, no matter how intricate, contributes to the overall strength and durability of the structure.
Whether you are building a storage shed, a workshop, or a garden retreat, the construction of robust shed walls is a testament to your commitment to creating a functional and enduring outdoor space. As you embark on future projects, may the knowledge and skills gained from this endeavor continue to inspire and guide your construction endeavors, leading to the successful realization of your vision.
With the shed walls standing tall and secure, the stage is set for the next phases of construction, bringing you one step closer to the completion of your outdoor sanctuary. Embrace the journey, savor the process, and take pride in the craftsmanship that shapes the spaces where memories are made and passions are pursued.
Frequently Asked Questions about How To Build Shed Walls
Was this page helpful?
At Storables.com, we guarantee accurate and reliable information. Our content, validated by Expert Board Contributors, is crafted following stringent Editorial Policies. We're committed to providing you with well-researched, expert-backed insights for all your informational needs.


0 thoughts on “How To Build Shed Walls”