Articles
How To Change Beer Lines In Kegerator
Modified: October 18, 2024
Learn how to change beer lines in your kegerator with our informative articles. Find step-by-step instructions and expert tips to ensure a smooth process.
(Many of the links in this article redirect to a specific reviewed product. Your purchase of these products through affiliate links helps to generate commission for Storables.com, at no extra cost. Learn more)
Introduction
Welcome to the world of home beer dispensing! If you’re a beer enthusiast who loves the convenience of having a kegerator at home, then you know the importance of keeping your beer lines clean and in good condition. Over time, beer lines can become clogged, develop off-flavors, or even become a breeding ground for bacteria. That’s why it’s crucial to regularly change your beer lines.
In this article, I will guide you through the process of changing the beer lines in your kegerator. By following these steps, you’ll not only maintain the quality of your beer but also ensure a smooth and enjoyable pouring experience.
Before we dive into the details, it’s essential to have a basic understanding of beer lines and their role in the dispensing system. So, let’s get started!
Key Takeaways:
- Regularly changing beer lines in a kegerator is essential for maintaining the quality and taste of your beer, ensuring a smooth and refreshing pouring experience.
- Prioritize safety, gather the necessary tools and materials, and follow the step-by-step process to confidently change beer lines and maintain optimal beer quality.
Read also: 15 Superior Kegerator Beer Line For 2025
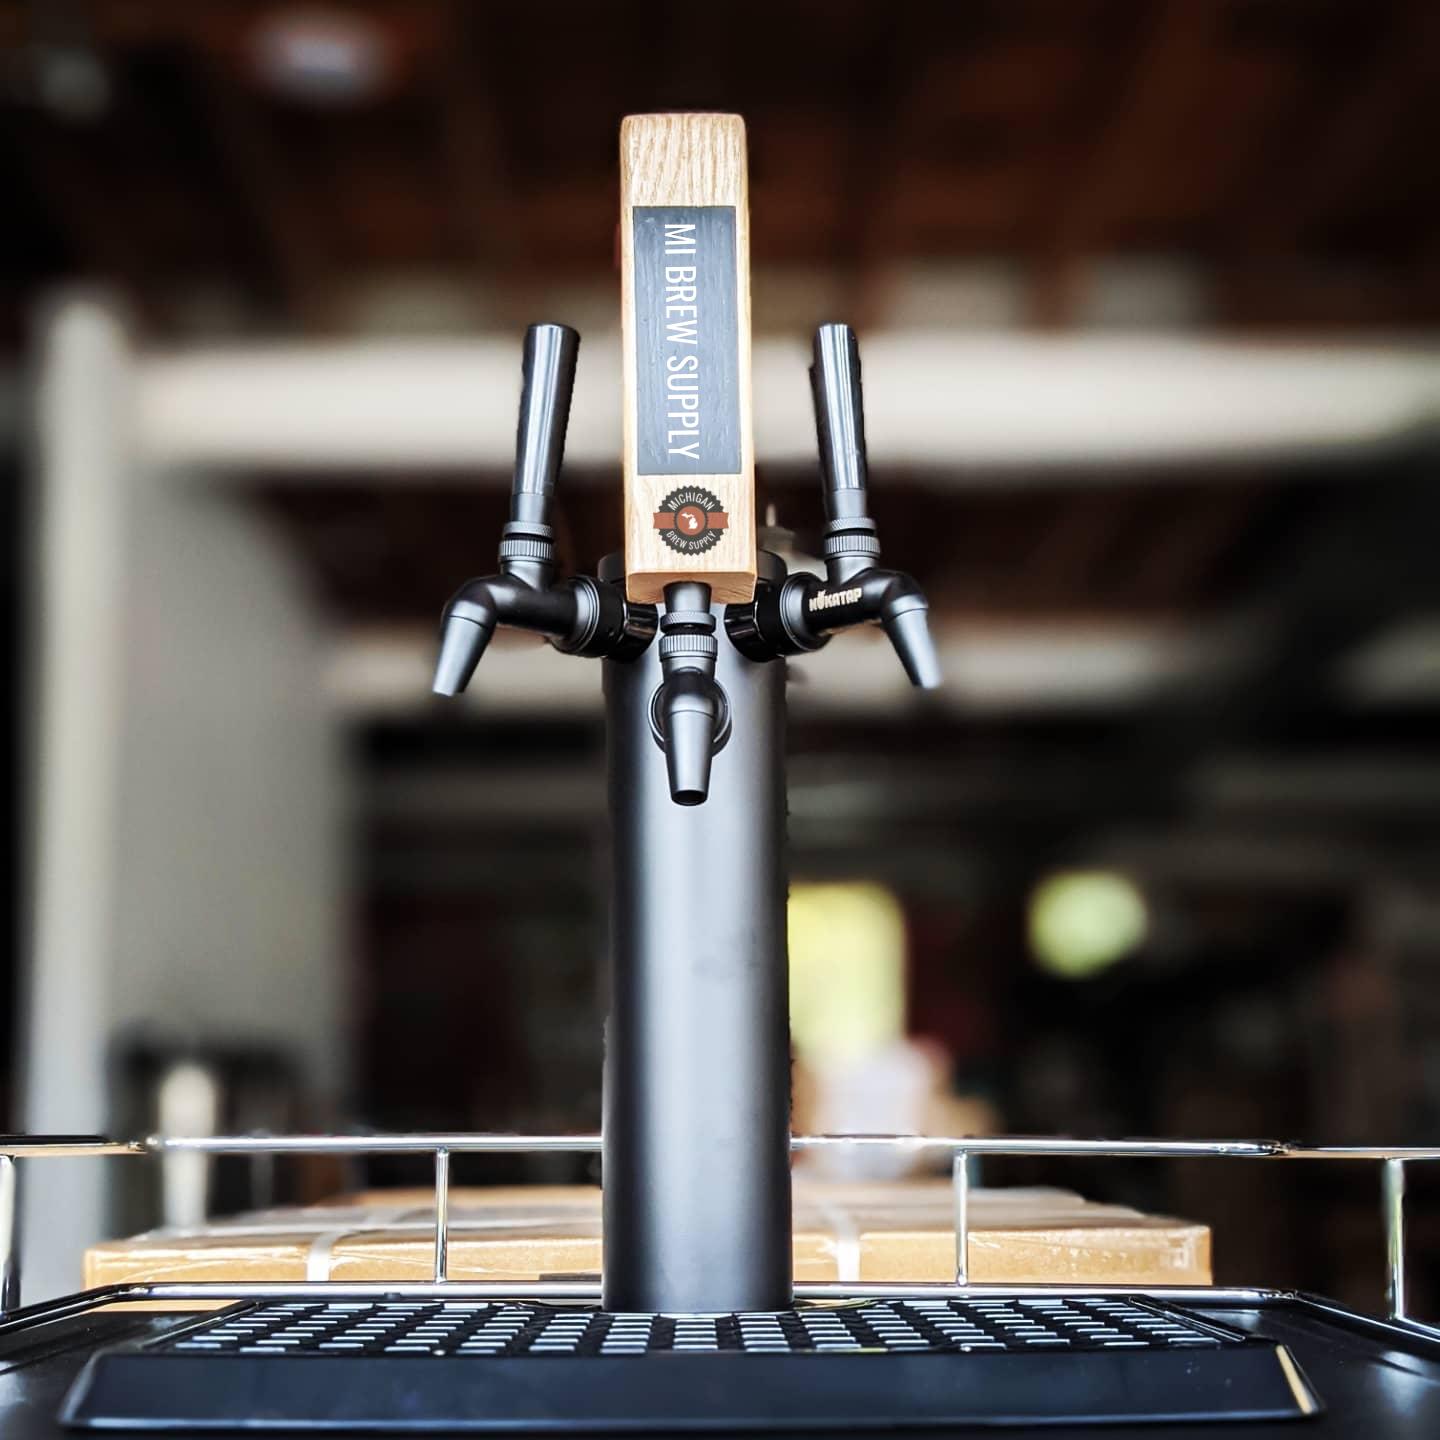
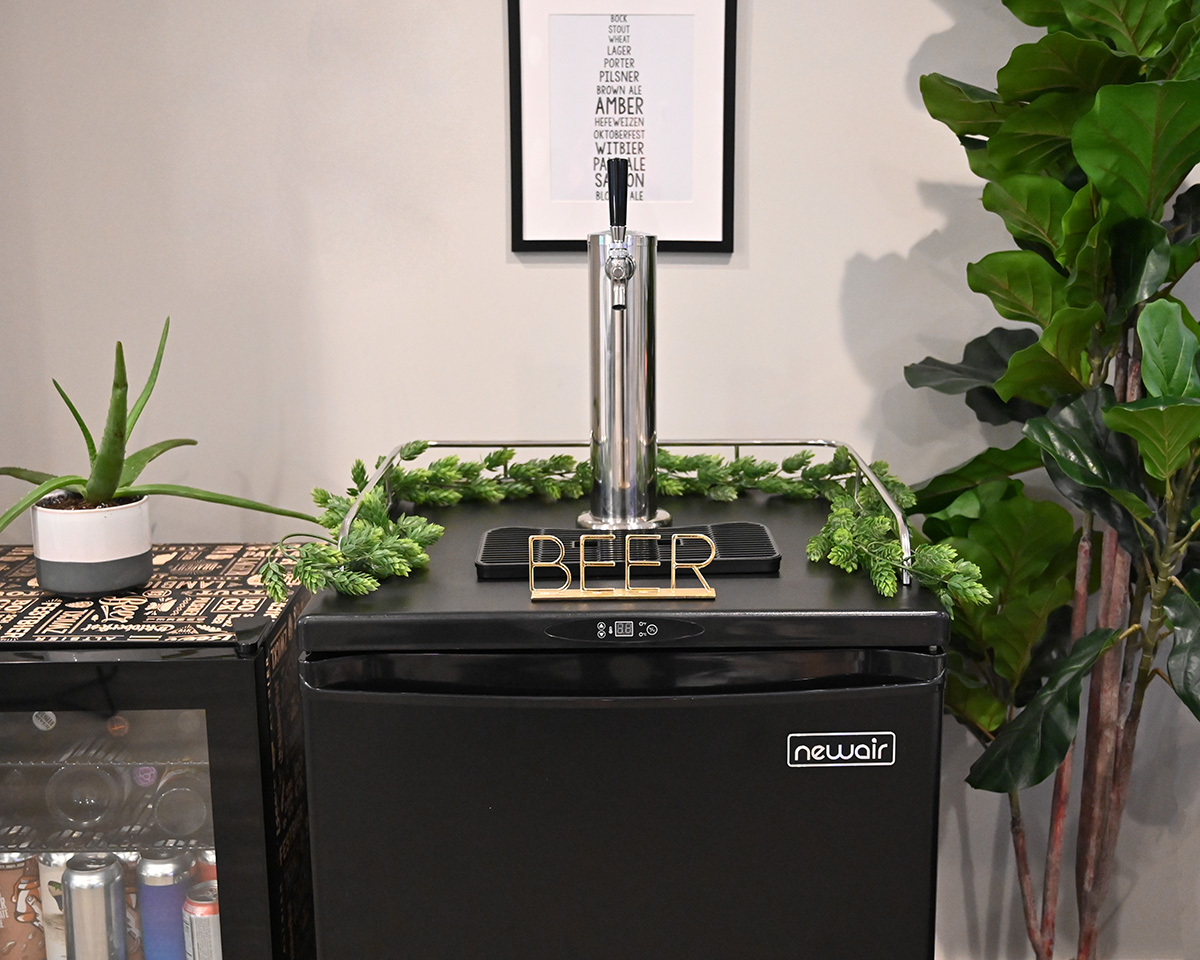
Understanding Beer Lines
Beer lines are the crucial connection between your keg and the tap. They transport the beer from the keg, through the CO2 system, and into the tap, allowing you to pour a refreshing glass of beer. The quality and cleanliness of the beer lines directly affect the taste, aroma, and overall experience of your beer.
Beer lines are typically made of either vinyl or polyethylene tubing, both of which are flexible and easy to work with. These materials are food-grade and resistant to bacteria and chemicals. However, over time, beer lines can accumulate beer stone, yeast, bacteria, and other impurities. This buildup can not only affect the taste of your beer but also lead to clogs and other dispensing issues.
Regularly changing your beer lines is essential to maintain the quality and flavor of your beer. This process involves removing the old lines, cleaning and sanitizing them, and replacing them with fresh ones. By doing so, you ensure that your beer flows smoothly and retains its optimal taste.
Additionally, it’s important to note that different types of beer may require different types of beer lines. For example, dispensing beers with higher carbonation levels, such as Belgian ales or lagers, may require longer and wider diameter lines to prevent excessive foaming and maintain optimal carbonation levels. It’s crucial to consider the specific needs of the beer you’ll be dispensing when selecting your beer lines.
Now that we understand the importance of beer lines and why they need to be changed regularly, let’s move on to the safety precautions you should take before starting the process.
Safety Precautions
When working with kegerators and beer lines, it’s important to prioritize safety. Here are some essential safety precautions to keep in mind before you start changing your beer lines:
- Ensure the kegerator is unplugged: Before you begin any work on your kegerator, make sure that it is unplugged from the power source. This will prevent any mishaps or electric shocks.
- Wear protective gloves: It’s always a good idea to wear protective gloves when handling beer lines. This will protect your hands from any potential cuts or injuries.
- Use protective eyewear: Safety goggles or glasses are recommended to protect your eyes from any spraying liquids or debris that may occur during the process.
- Work in a well-ventilated area: Ensure that you are working in a well-ventilated area to avoid inhaling any fumes from cleaning agents or other chemicals.
- Follow manufacturer instructions: It’s essential to read and follow the instructions provided by the manufacturer of your kegerator and any cleaning/sanitizing products you use. This will ensure that you are using the appropriate methods and products for your specific equipment.
- Be cautious with sharp objects: When detaching and attaching beer lines, be mindful of any sharp objects, such as scissors or knives, that you may need to use. Handle them with care and keep them out of reach when not in use.
- Work with a partner if needed: If your kegerator is heavy or difficult to maneuver, it’s a good idea to have a second person assist you during the process to prevent any accidents or injuries.
By following these safety precautions, you can ensure a safe and smooth experience while changing your beer lines. Now that we’ve covered the essential safety measures, let’s move on to the tools and materials you’ll need for this task.
Tools and Materials Needed
Before you start changing your beer lines, gather the necessary tools and materials to ensure a smooth and efficient process. Here’s a list of what you’ll need:
- Hex wrench or screwdriver: Depending on the type of kegerator you have, you may need a hex wrench or screwdriver to remove any clamps or screws holding the beer lines in place.
- Scissors or tubing cutter: You’ll need a pair of scissors or a tubing cutter to trim the new beer lines to the appropriate length.
- Bucket or container: You’ll need a bucket or container that is large enough to hold the old beer lines and cleaning solution while you clean them.
- Cleaning and sanitizing solution: Use a food-grade cleaning solution or a mixture of warm water and a mild detergent to clean the beer lines. Additionally, a sanitizing solution, such as a diluted bleach solution or a commercial beer line cleaner, will be needed to sanitize the new lines.
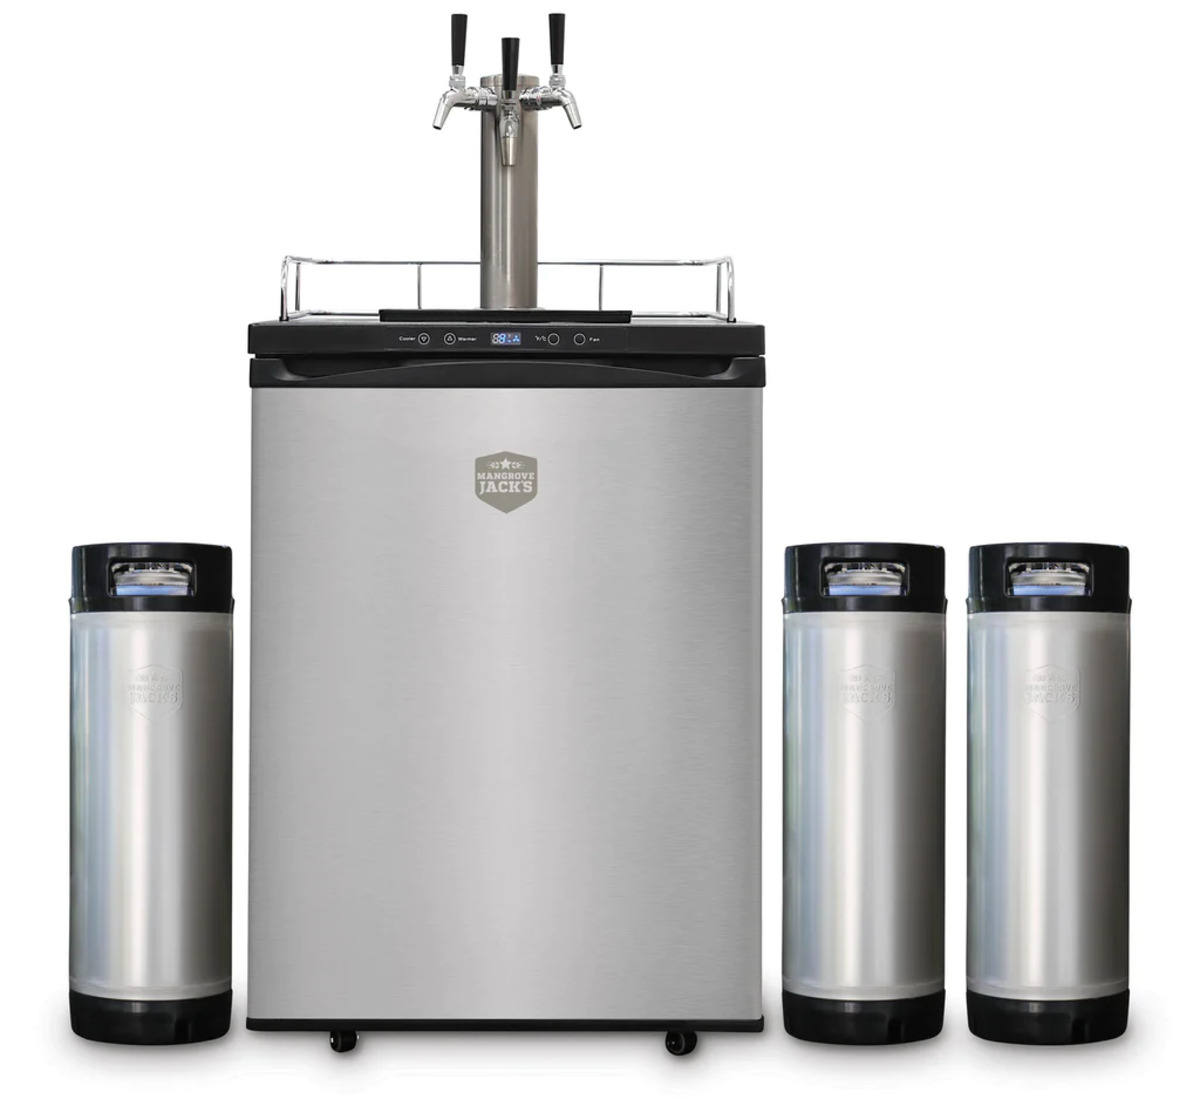
- New beer lines: Purchase new beer lines that are the appropriate length and diameter for your kegerator and the type of beer you’ll be dispensing.
- Clamps or connectors: Depending on your kegerator and the type of beer lines you have, you may need clamps or connectors to securely attach the new lines.
- Clean cloth or paper towels: Keep a clean cloth or paper towels nearby to wipe up any spills or excess cleaning solution.
- Bucket of clean water: Have a bucket or container filled with clean water to rinse the beer lines after cleaning and before attaching the new lines.
By having all the necessary tools and materials ready before you begin, you can streamline the process and avoid any unnecessary interruptions. Now that you have everything you need, let’s move on to the step-by-step process of changing your beer lines.
Step 1: Shutting Off the Kegerator
Before you start working on changing your beer lines, it’s essential to shut off your kegerator and disconnect the power source. Here’s how to do it:
- Unplug the kegerator: Locate the power cord of your kegerator and unplug it from the power outlet. This will ensure that no electricity is running through the system during the line replacement process.
- Turn off the CO2 tank: Locate the CO2 tank connected to your kegerator. Depending on the type of kegerator you have, you may need to turn the valve clockwise or counterclockwise to shut off the gas flow. Refer to your kegerator’s manual for specific instructions on how to shut off the CO2 tank.
- Release the pressure: After shutting off the CO2 tank, there may still be pressure inside the kegerator’s lines. To release the pressure, lift the tap handle and allow any remaining carbon dioxide to escape. You may hear a hissing sound as the gas is released. Once the hissing stops, you can proceed to the next step.
By shutting off the kegerator and releasing the pressure, you ensure your safety during the line replacement process. Once you’ve completed this step, you’re ready to move on to detaching the beer lines in the next step.
Read also: 10 Incredible Kegerator Lines For 2025
Step 2: Detaching the Beer Lines
Now that you’ve shut off the kegerator and released the pressure, it’s time to detach the old beer lines. Follow these steps to do it properly:
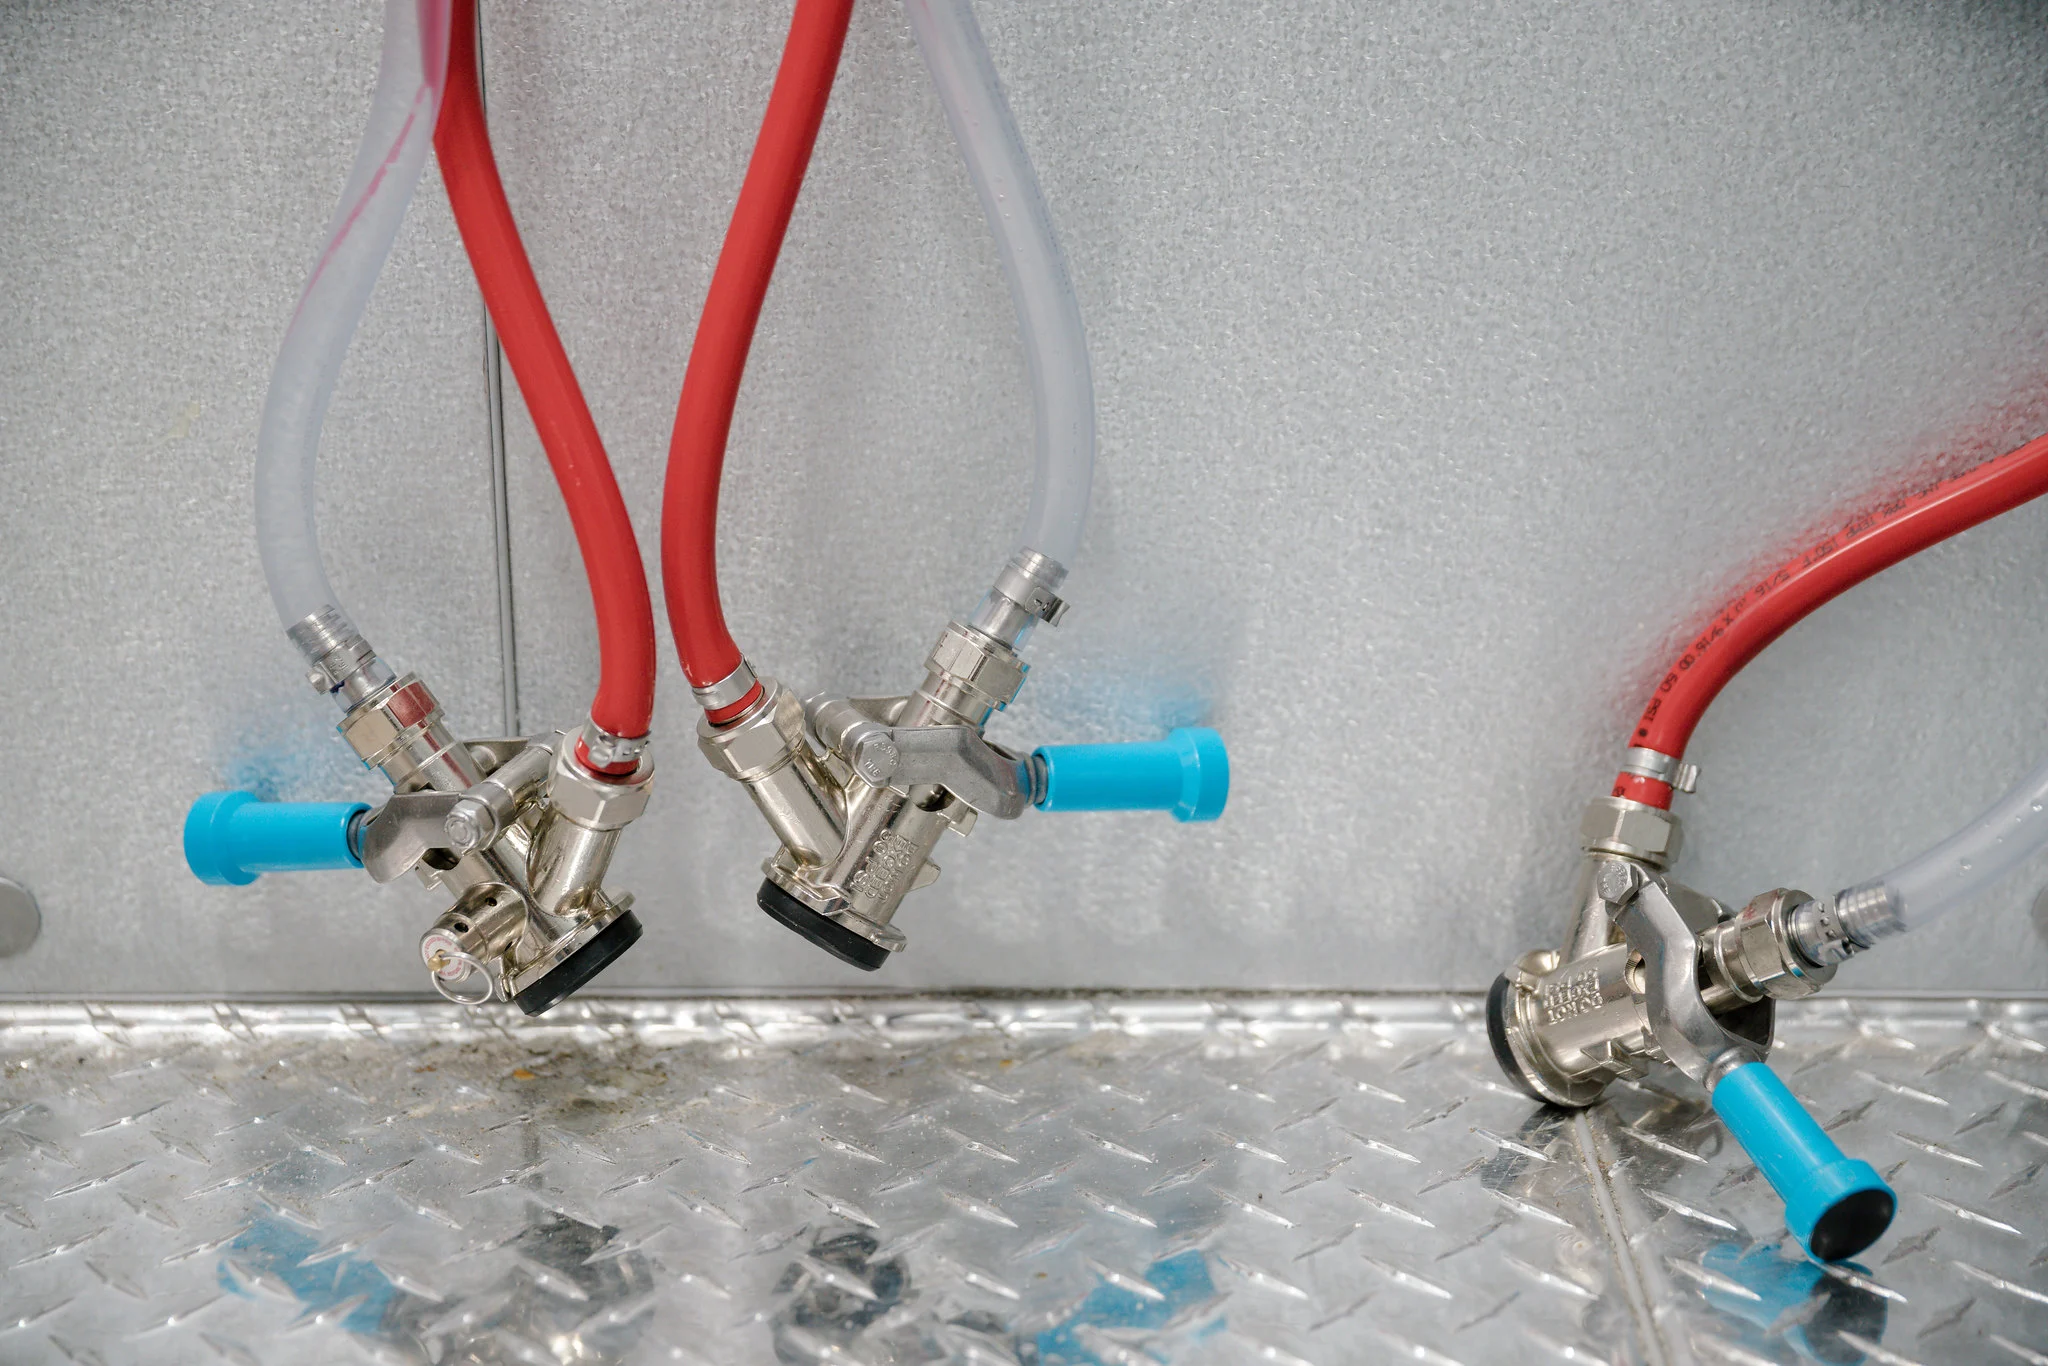
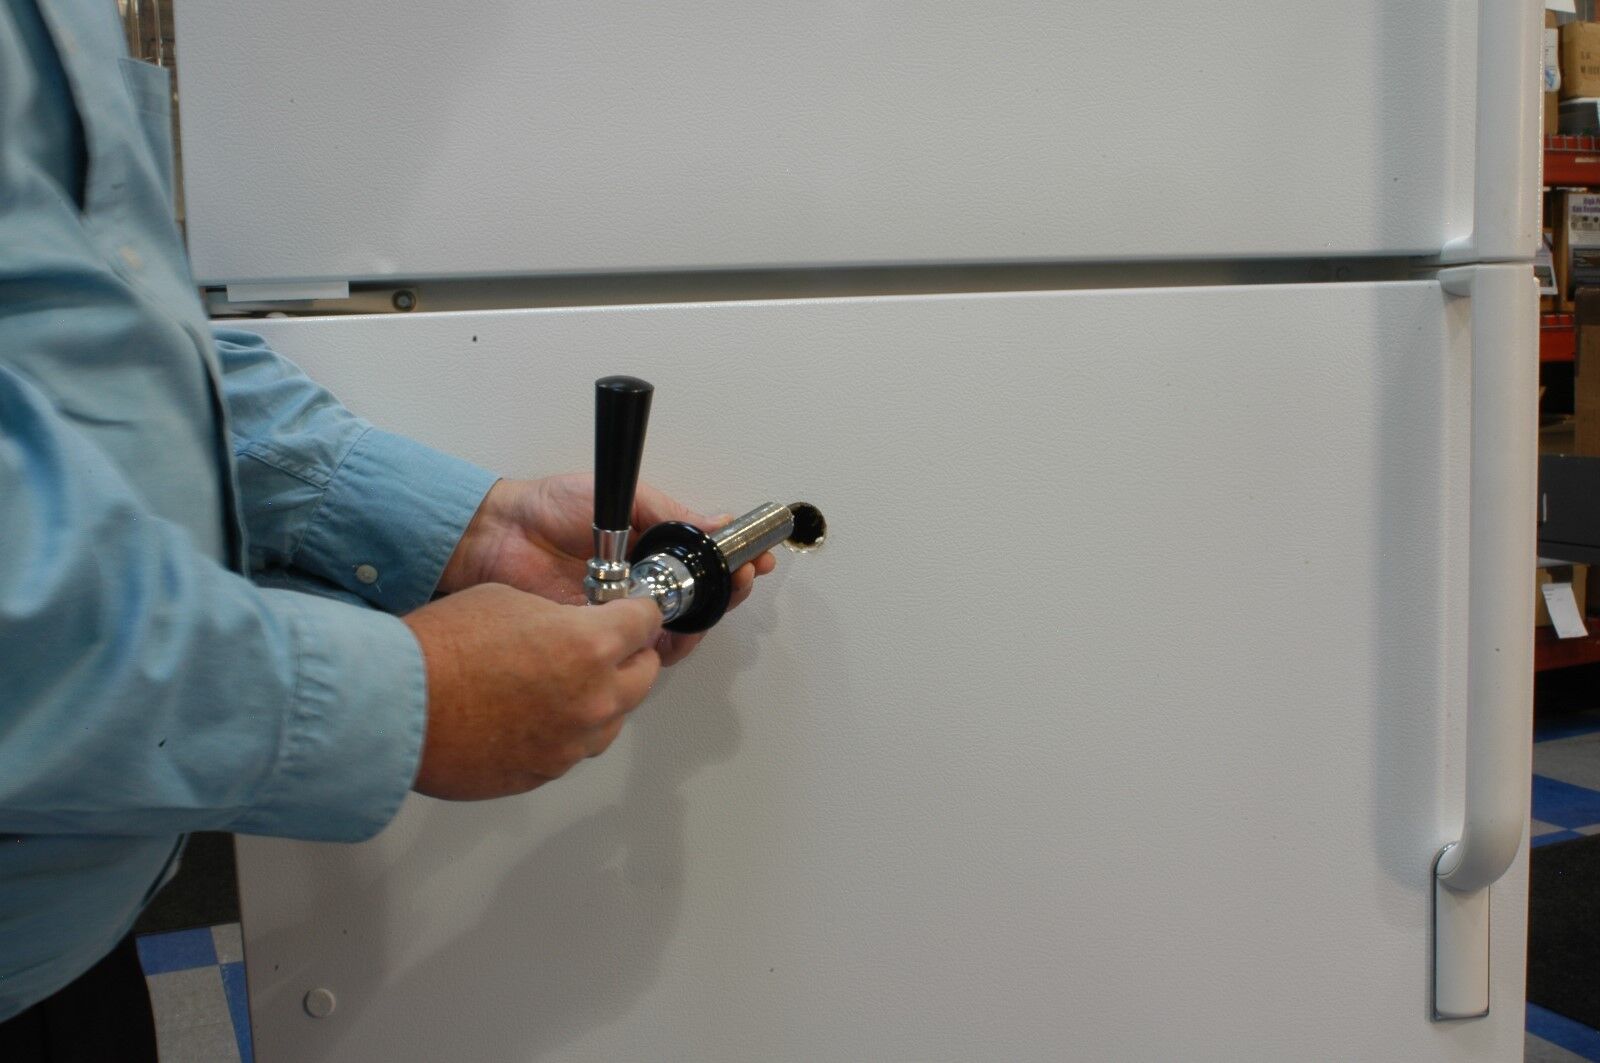
- Locate the connections: Identify where the beer lines are connected to the kegerator system. Depending on your setup, this could be at the keg coupler, the shank inside the kegerator, or the faucet.
- Remove any clamps or screws: If there are clamps or screws securing the beer lines, use a hex wrench or a screwdriver to loosen and remove them. Set the clamps or screws aside, as you may need them when attaching the new beer lines.
- Detach the beer lines: Gently pull the beer lines away from the connections. Be careful not to yank or bend them excessively, as this can damage the lines or the connectors.
- Drain the beer lines: To avoid any spills or dripping, carefully drain any remaining beer from the lines into a bucket or container. This will prevent any mess and make it easier to clean the lines later.
- Inspect the lines and connectors: Take a moment to inspect the old beer lines for any signs of buildup, damage, or wear. Check the connectors as well to ensure they are clean and in good condition. If you notice any issues, it’s a good idea to replace the connectors along with the lines.
By following these steps, you can safely and effectively detach the old beer lines from your kegerator. Next, in step three, we’ll focus on cleaning and sanitizing the new beer lines before attaching them.
When changing beer lines in a kegerator, be sure to thoroughly clean and sanitize the new lines before installation to prevent any off-flavors or contamination in your beer.
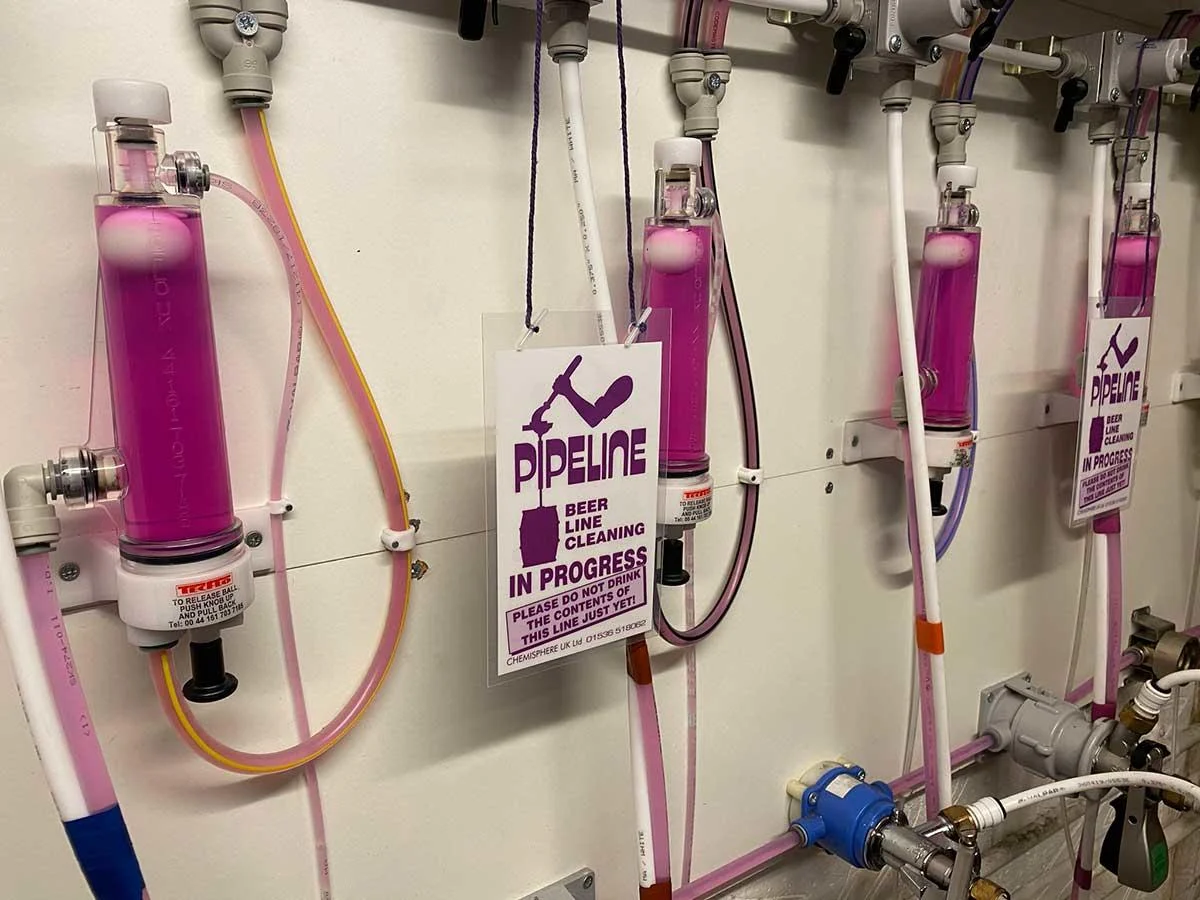
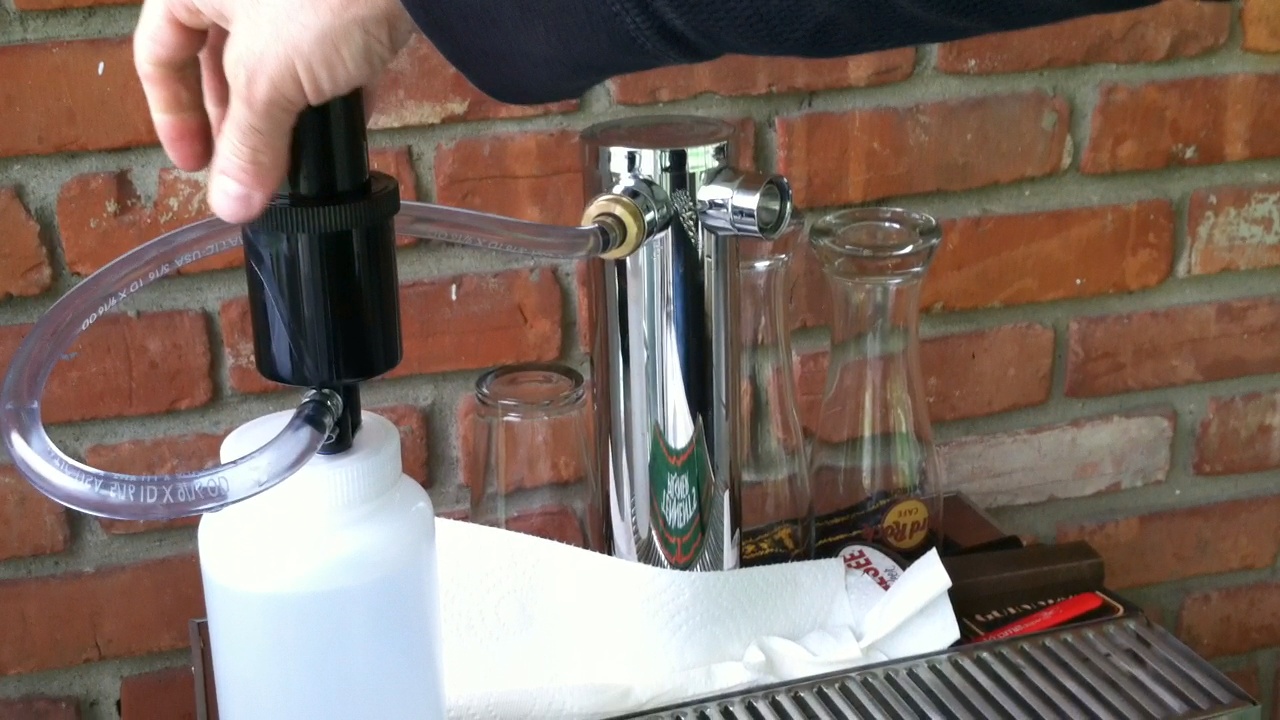
Step 3: Cleaning and Sanitizing the New Beer Lines
Now that you have successfully detached the old beer lines, it’s time to clean and sanitize the new ones. This step is crucial to remove any impurities and ensure that your beer will flow smoothly and taste its best. Follow these steps to clean and sanitize the new beer lines:
- Prepare the cleaning solution: Dilute a food-grade cleaning solution or mix warm water with a mild detergent according to the manufacturer’s instructions. Fill a bucket or container with the cleaning solution.
- Soak the new beer lines: Immerse the new beer lines in the cleaning solution. Ensure that the lines are fully submerged and let them soak for the recommended amount of time. This will loosen and remove any residues or particles from the manufacturing process.
- Rinse the beer lines: After soaking, remove the beer lines from the cleaning solution and rinse them thoroughly with clean water. This will remove any traces of the cleaning solution and prevent any off-flavors. Inspect the lines to ensure they are clean and free from any debris.
- Prepare the sanitizing solution: After rinsing, mix a sanitizing solution, such as a diluted bleach solution or a commercial beer line cleaner, according to the manufacturer’s instructions. Fill a separate container with the sanitizing solution.
- Sanitize the beer lines: Immerse the newly cleaned beer lines in the sanitizing solution. Ensure that they are fully submerged and allow them to soak for the recommended amount of time. This will kill any remaining bacteria or microorganisms that could affect the taste and quality of your beer.
- Rinse the beer lines again: After sanitizing, remove the beer lines from the sanitizing solution and rinse them thoroughly with clean water. This will remove any traces of the sanitizing solution and ensure that your beer remains uncontaminated.
- Dry the beer lines: Use a clean cloth or paper towels to dry the beer lines completely. Ensure that there is no moisture left as it can promote the growth of bacteria.
By following these steps, you can ensure that your new beer lines are clean, sanitized, and ready for use. Now that the lines are prepared, let’s move on to step four, where we will attach the new beer lines to your kegerator system.
Step 4: Attaching the New Beer Lines
With the new beer lines cleaned and sanitized, it’s time to attach them to your kegerator system. Follow these steps to ensure a secure and proper connection:
- Identify the connection points: Locate the connection points on your kegerator where the beer lines need to be attached. This could be the keg coupler, shank inside the kegerator, or the faucet. Refer to your kegerator’s manual if you’re unsure.
- Trim the beer lines: Measure the appropriate length for your beer lines, considering the distance between the connection points. Use scissors or a tubing cutter to trim the lines to the desired length. Be sure to make clean, straight cuts to ensure a proper fit.
- Attach clamps or connectors: If necessary, attach clamps or connectors to the ends of the beer lines. Slide them onto the line and position them near the ends so that they will secure the lines to the connection points.
- Connect the beer lines: Insert one end of the beer line onto the appropriate connection point. Push the line firmly until it is securely in place. If using clamps, tighten them to ensure a tight seal. Repeat this step for each beer line, making sure each one is connected properly.
- Tighten clamps or screws: If your kegerator requires clamps or screws to secure the beer lines, use a hex wrench or screwdriver to tighten them. This will prevent any leaks or disconnections.
By following these steps, you can ensure a secure and proper attachment of the new beer lines to your kegerator system. Now, in step five, it’s time to test for leaks and make sure everything is properly connected.
Step 5: Testing for Leaks
Once you have attached the new beer lines to your kegerator system, it’s essential to test for any potential leaks. This step will ensure that everything is properly connected and that your beer will flow smoothly. Follow these steps to test for leaks:
- Pressurize the system: Turn on the CO2 tank by slowly turning the valve counterclockwise. This will pressurize the kegerator system and allow gas to flow through the beer lines.
- Inspect for leaks: Carefully examine all the connection points, including where the beer lines are attached to the keg coupler, shank, and faucet. Look for any signs of bubbles or moisture around the connections. If you spot any leaks, you’ll need to tighten the clamps or connectors to create a better seal.
- Check for proper functionality: Lift the tap handle and attempt to pour a small amount of beer. Observe the flow of beer from the tap. Ensure that the beer is flowing smoothly without any interruptions or excessive foaming. If you encounter any issues, such as slow flow or excessive foaming, it may indicate that there is a blockage or improper pressure in the lines.
- Monitor for a period of time: After noting the initial status, let the kegerator run for a while and monitor it for any leaks or dispensing issues. Keep an eye out for any dripping, continuous foam, or other anomalies that may indicate a problem with the beer lines or connections.
By testing for leaks and ensuring that the system is functioning properly, you can have peace of mind knowing that your new beer lines are properly attached and ready to serve your favorite beer. Once you’ve completed this step, let’s move on to the final step: turning on the kegerator.
Read also: 14 Incredible Kegerator Line For 2025
Step 6: Turning On the Kegerator
Now that you have successfully attached the new beer lines and tested for leaks, it’s time to turn on your kegerator and enjoy your freshly changed lines. Follow these steps to complete the process:
- Ensure the tap is closed: Before turning on the kegerator, make sure that the tap handle is in the closed position. This will prevent any beer from flowing while the system is being pressurized.
- Plug in the kegerator: Locate the power cord and plug it into a power outlet. Ensure that the kegerator is properly grounded for safety purposes.
- Turn on the kegerator: Look for the power switch or control knob on your kegerator and turn it on. The unit should start cooling down to the desired temperature.
- Set the appropriate temperature: Depending on the type of beer you’re dispensing, adjust the temperature control to the recommended setting. Refer to your kegerator’s manual or consult the brewery’s guidelines for the optimal temperature for the specific beer style.
- Allow time for cooling: Give the kegerator some time to cool down and stabilize at the desired temperature. This will ensure that your beer is served at its best.
- Open the tap and enjoy: Once the kegerator has reached the desired temperature, you’re ready to open the tap and pour yourself a glass of delicious beer. Remember to hold the glass at an appropriate angle and open the tap slowly to control the flow and minimize foam.
By following these steps, you have successfully turned on your kegerator and can now enjoy the fruits of your labor – a perfectly poured beer from the freshly changed beer lines. Cheers!
Now that you’re familiar with the process of changing beer lines in a kegerator, you can confidently maintain the quality and taste of your beer. Remember to adhere to regular cleaning and line-changing schedules to ensure the best possible beer drinking experience.
Thank you for reading, and happy beer dispensing!
Conclusion
Congratulations! You have successfully learned how to change beer lines in a kegerator. By following the step-by-step process outlined in this article, you can ensure that your beer lines remain clean, sanitary, and in optimal condition for serving delicious beer.
Regularly changing your beer lines is crucial for maintaining the quality and taste of your beer. With time, beer lines can accumulate impurities, leading to off-flavors, clogs, and potentially harmful bacteria. By following the proper cleaning and sanitizing procedures, you’ll keep your beer flowing smoothly and ensure every pour is as refreshing as it should be.
Remember to prioritize safety when working with kegerators and beer lines. Always unplug the kegerator and wear protective gloves and eyewear to avoid any accidents or injuries. Additionally, follow the manufacturer’s instructions and be cautious when using sharp objects.
By understanding the importance of beer lines, taking necessary safety precautions, and being equipped with the right tools and materials, you can confidently change your beer lines and maintain the optimal quality of your beer. This process will ensure that your kegerator continues to provide you and your guests with a delightful beer-drinking experience.
Now, grab yourself a glass, raise it to your success, and enjoy the fruits of your efforts. Cheers to flavorful, clean, and perfectly poured beer!
Frequently Asked Questions about How To Change Beer Lines In Kegerator
Was this page helpful?
At Storables.com, we guarantee accurate and reliable information. Our content, validated by Expert Board Contributors, is crafted following stringent Editorial Policies. We're committed to providing you with well-researched, expert-backed insights for all your informational needs.


0 thoughts on “How To Change Beer Lines In Kegerator”