Articles
What Is A Kegerator Conversion Kit
Modified: October 19, 2024
Learn all about kegerator conversion kits in this comprehensive guide. Discover the best articles, tips, and recommendations for articles on kegerators.
(Many of the links in this article redirect to a specific reviewed product. Your purchase of these products through affiliate links helps to generate commission for Storables.com, at no extra cost. Learn more)
Introduction
Welcome to the world of beer enthusiasts, where enjoying a fresh, cold draft beer in the comfort of your own home is a dream come true. If you’re tired of buying expensive individual bottles or cans of your favorite craft beer, it’s time to consider investing in a kegerator conversion kit.
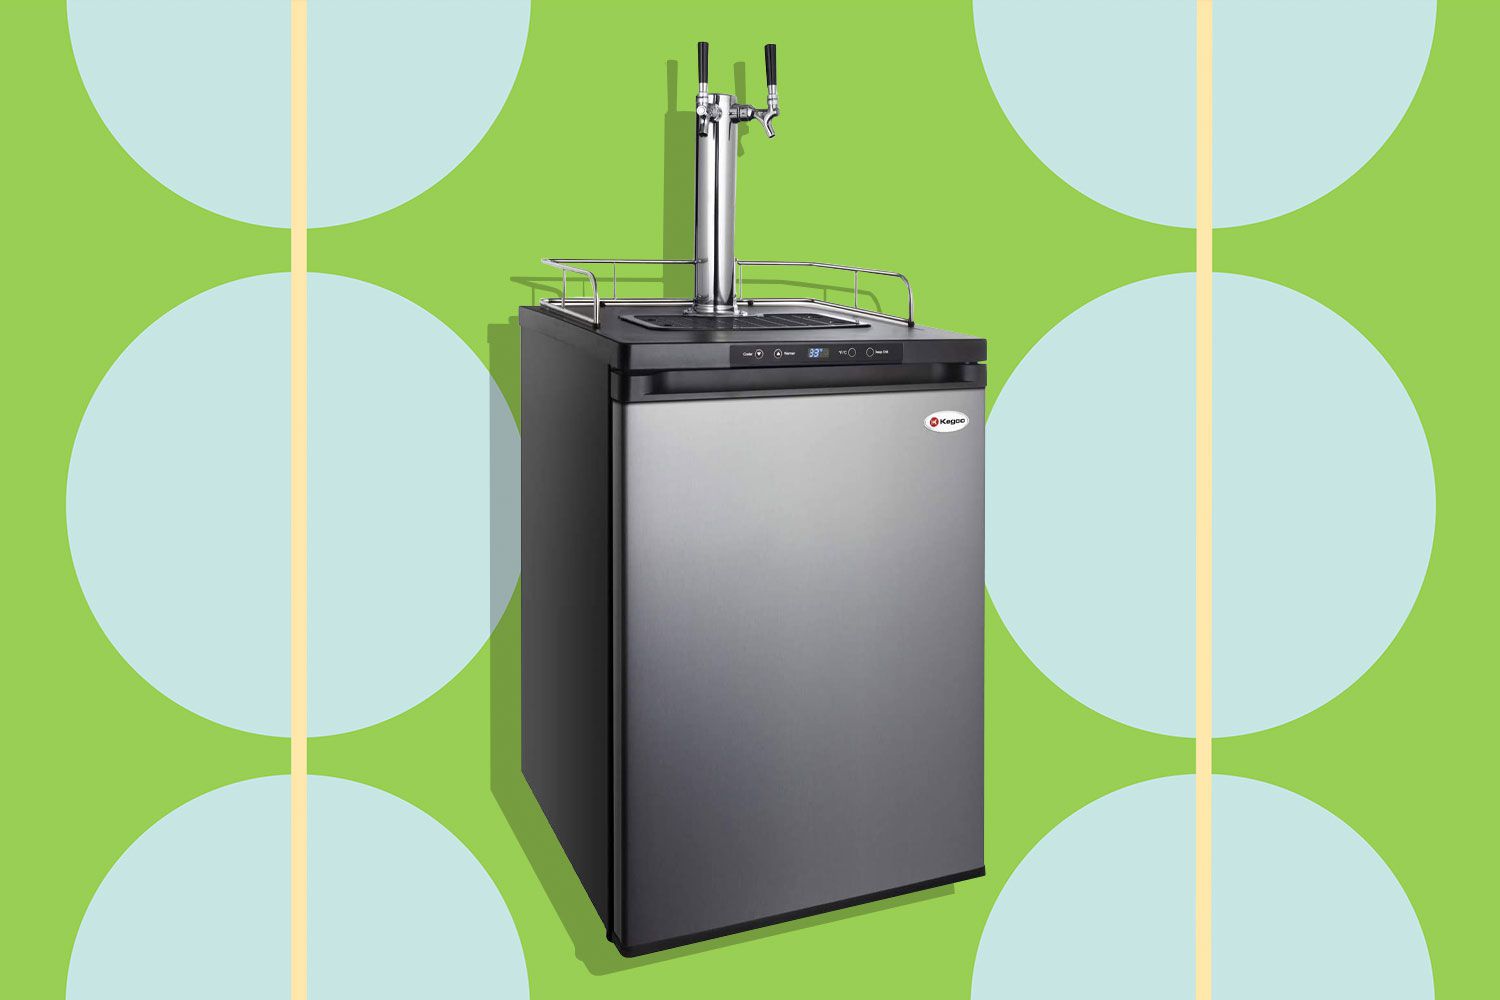
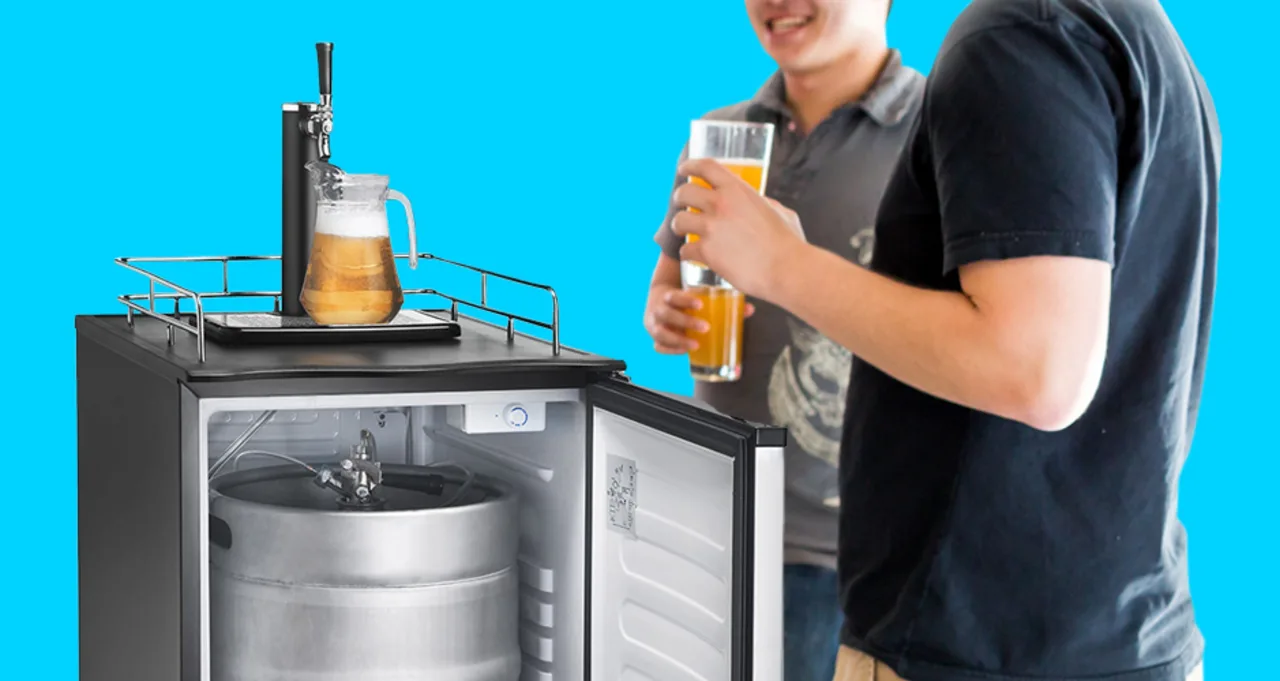
A kegerator conversion kit is the perfect solution for turning a standard refrigerator into a kegerator, a specialized beer dispensing system. With a kegerator conversion kit, you can enjoy the luxury of having a draft beer on tap, just like your favorite local bar or pub.
But what exactly is a kegerator conversion kit, and what are the benefits of using one? In this article, we will explore everything you need to know about kegerator conversion kits, from their components and advantages to how to choose the right kit for your needs.
So, grab a pint, sit back, and let’s dive into the world of kegerator conversion kits!
Key Takeaways:
- Transform your standard refrigerator into a kegerator with a conversion kit, and enjoy cost savings, fresher beer, variety, convenience, and eco-friendliness while impressing friends with your own draft beer dispenser at home.
- When choosing a kegerator conversion kit, consider compatibility, number of faucets, quality, brand reputation, customization options, and budget to ensure a successful conversion and long-term satisfaction.
Read more: What Psi Should A Kegerator Be Set At
What is a Kegerator Conversion Kit?
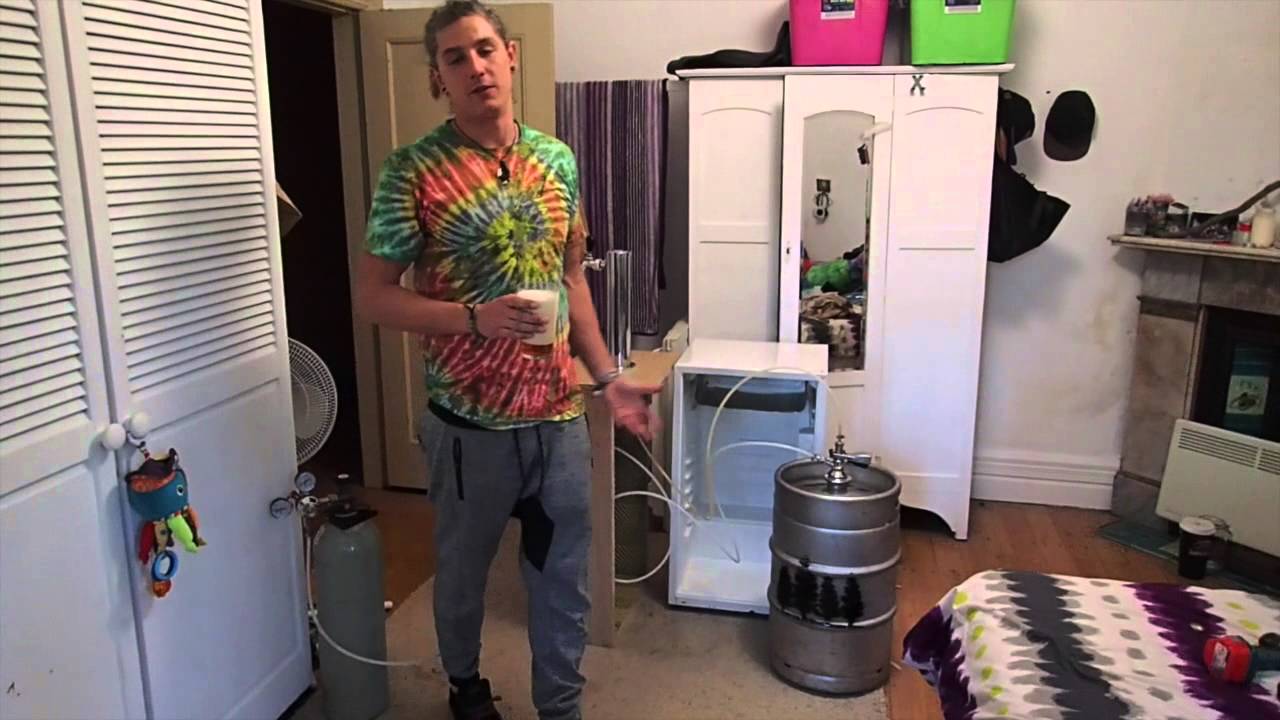
A kegerator conversion kit is a set of components that allows you to transform a regular refrigerator into a kegerator, a device used to store and dispense draft beer. It’s essentially a DIY project that brings the joy of having a draft beer dispenser right in your home.
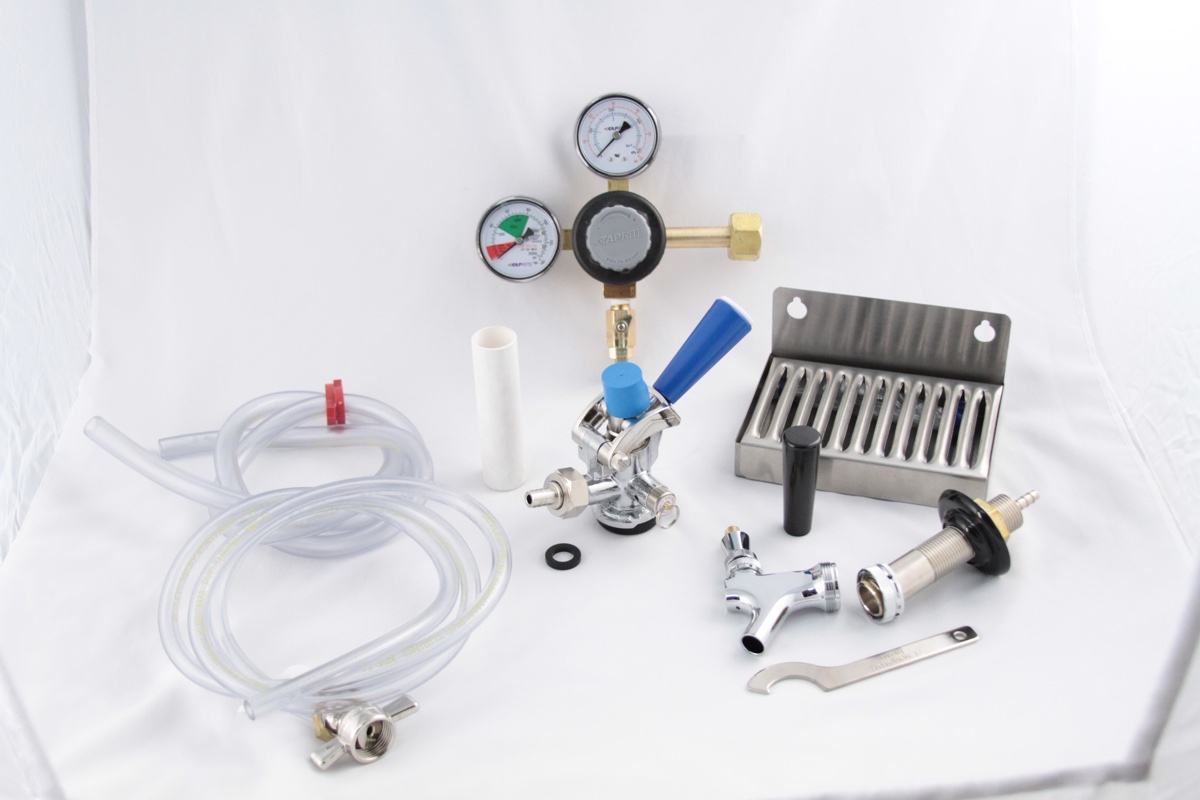
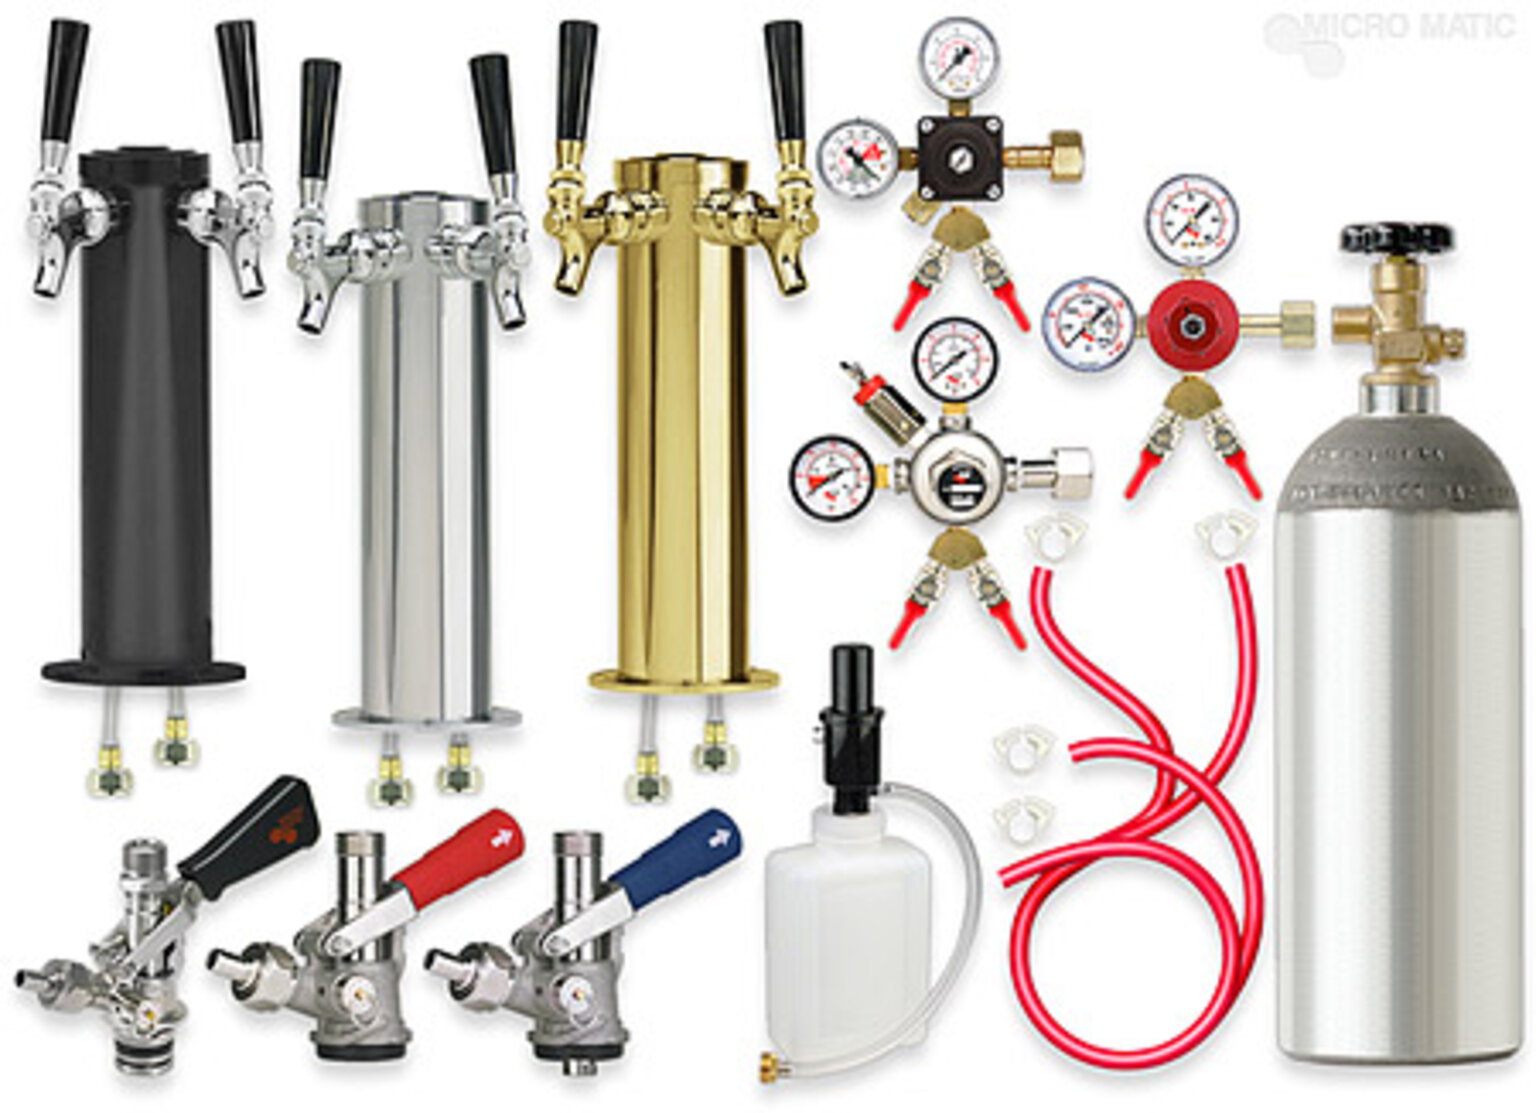
A kegerator conversion kit typically includes the necessary hardware and accessories to convert your refrigerator into a kegerator, including a CO2 tank, a CO2 regulator, beer lines, faucets, and taps. These components work together to create a pressurized system that delivers draft beer directly from a keg, just like you’d find in a bar.
With a kegerator conversion kit, you can say goodbye to buying expensive individual bottles or cans of beer and enjoy the freshness and convenience of having your favorite brew on tap. It also allows you to experiment with different types of beer, as you can easily switch between kegs to suit your taste.
Not only does a kegerator conversion kit enhance your beer-drinking experience, but it also adds a touch of sophistication to your home entertainment setup. Imagine inviting friends over for a game night or a backyard barbecue and impressing them with your very own kegerator, serving up perfectly poured pints of their favorite beer.
Whether you’re a beer connoisseur, a party host, or simply someone who enjoys a good draft beer, a kegerator conversion kit is an investment that will enhance your beer-drinking experience and make you the envy of your friends.
Benefits of Using a Kegerator Conversion Kit
Using a kegerator conversion kit offers a range of benefits that go beyond just having a draft beer dispenser in your home. Here are some of the advantages of investing in a kegerator conversion kit:
1. Cost Savings: Purchasing beer in kegs is more cost-effective compared to buying individual bottles or cans. With a kegerator conversion kit, you can buy beer in bulk and save money in the long run. Additionally, you can eliminate the need for bottle deposits and reduce waste from packaging.
2. Fresher Beer: Draft beer offers a fresher and more flavorful experience compared to packaged beer. The kegerator keeps beer at the optimal temperature and carbonation levels, ensuring that every pint you pour is crisp and delicious.
3. Variety and Flexibility: A kegerator conversion kit allows you to explore a wide variety of beer styles and flavors. You can easily switch between different kegs, offering your guests a diverse selection of beers to choose from. This flexibility also allows you to support local breweries and try limited-edition or seasonal brews that may not be available in bottles or cans.
4. Convenience: Having a kegerator at home means you can enjoy a cold draft beer on demand, without the need to run to the store every time you want to stock up. It’s perfect for gatherings and parties, as you can quickly and easily serve multiple guests without the hassle of opening individual bottles or cans.
5. Customization: With a kegerator conversion kit, you have the freedom to customize your beer setup to suit your preferences. You can choose different beer taps, add additional accessories like drip trays or keg coolers, and even install a kegerator tower or a mini-fridge for convenient storage of glasses or snacks.
6. Eco-Friendly: By using a kegerator conversion kit, you’re reducing your carbon footprint. Instead of consuming beer from single-use bottles or cans, you can opt for reusable kegs, reducing waste and promoting sustainability.
Overall, a kegerator conversion kit offers a cost-effective, convenient, and enjoyable way to savor your favorite draft beer at home. It’s a worthwhile investment for any beer lover who wants to elevate their drinking experience and entertain guests with a touch of sophistication.
Components of a Kegerator Conversion Kit
A kegerator conversion kit typically consists of several essential components that work together to transform your refrigerator into a functional kegerator. Here are the key components you can expect to find in a standard kegerator conversion kit:
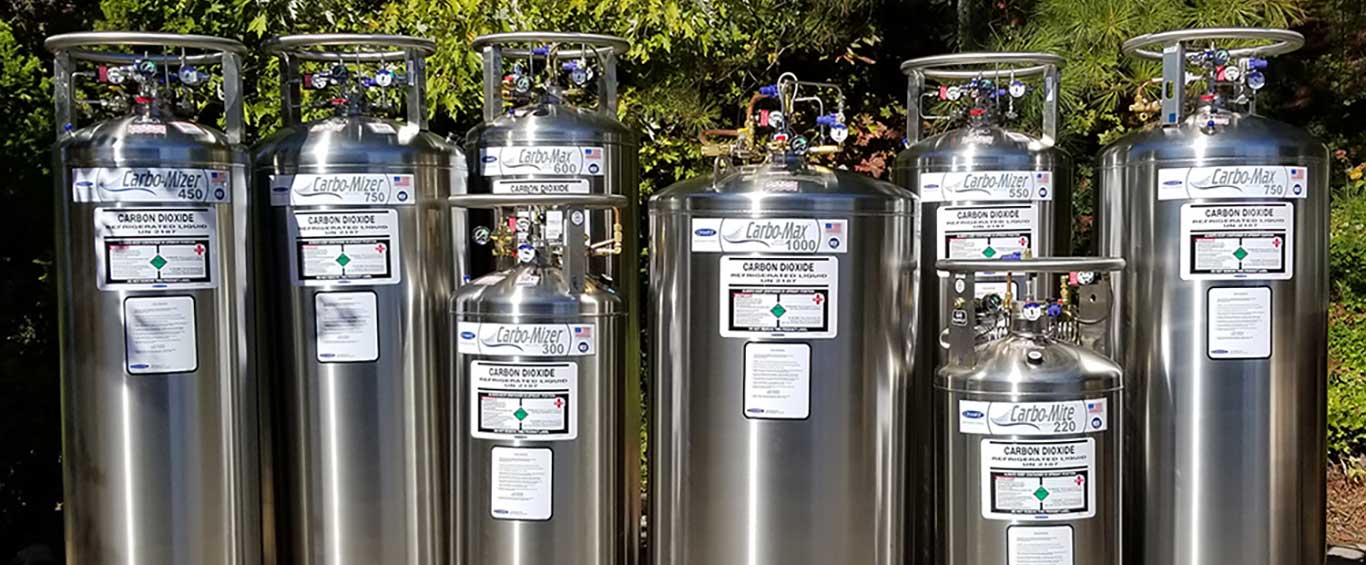
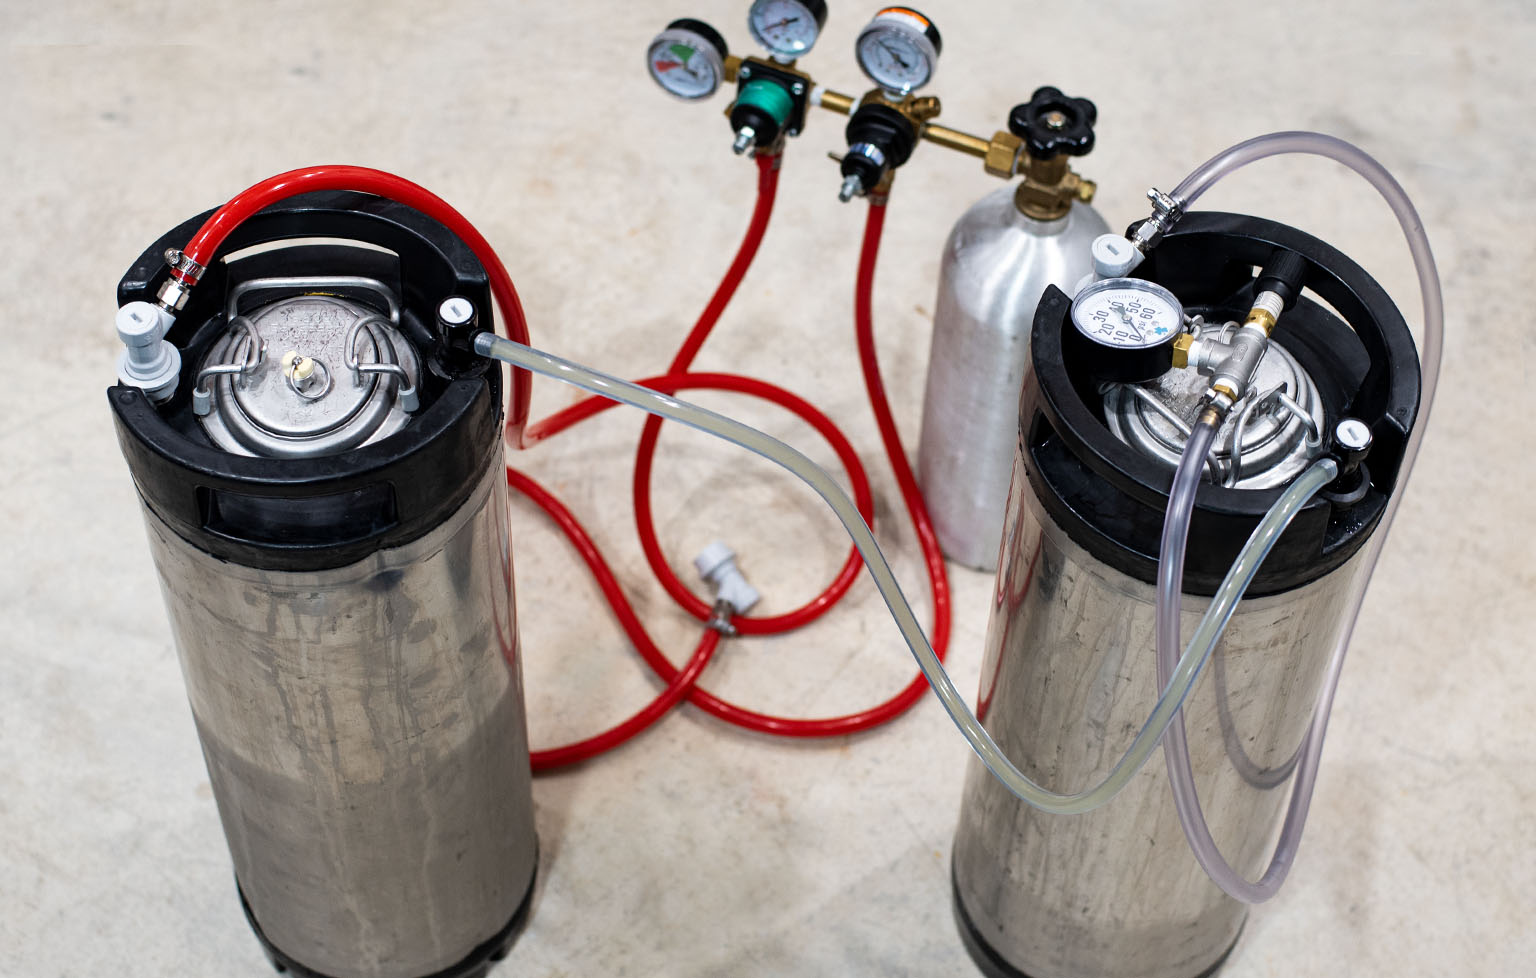
1. CO2 Tank: The CO2 tank is a crucial part of the kegerator setup. It provides the pressure needed to push beer from the keg to the faucet. The size of the CO2 tank may vary, but a typical kegerator conversion kit includes a CO2 tank in the range of 2.5 to 5 pounds. Make sure to choose a tank that fits your kegerator and consider the frequency of use to determine the appropriate size.
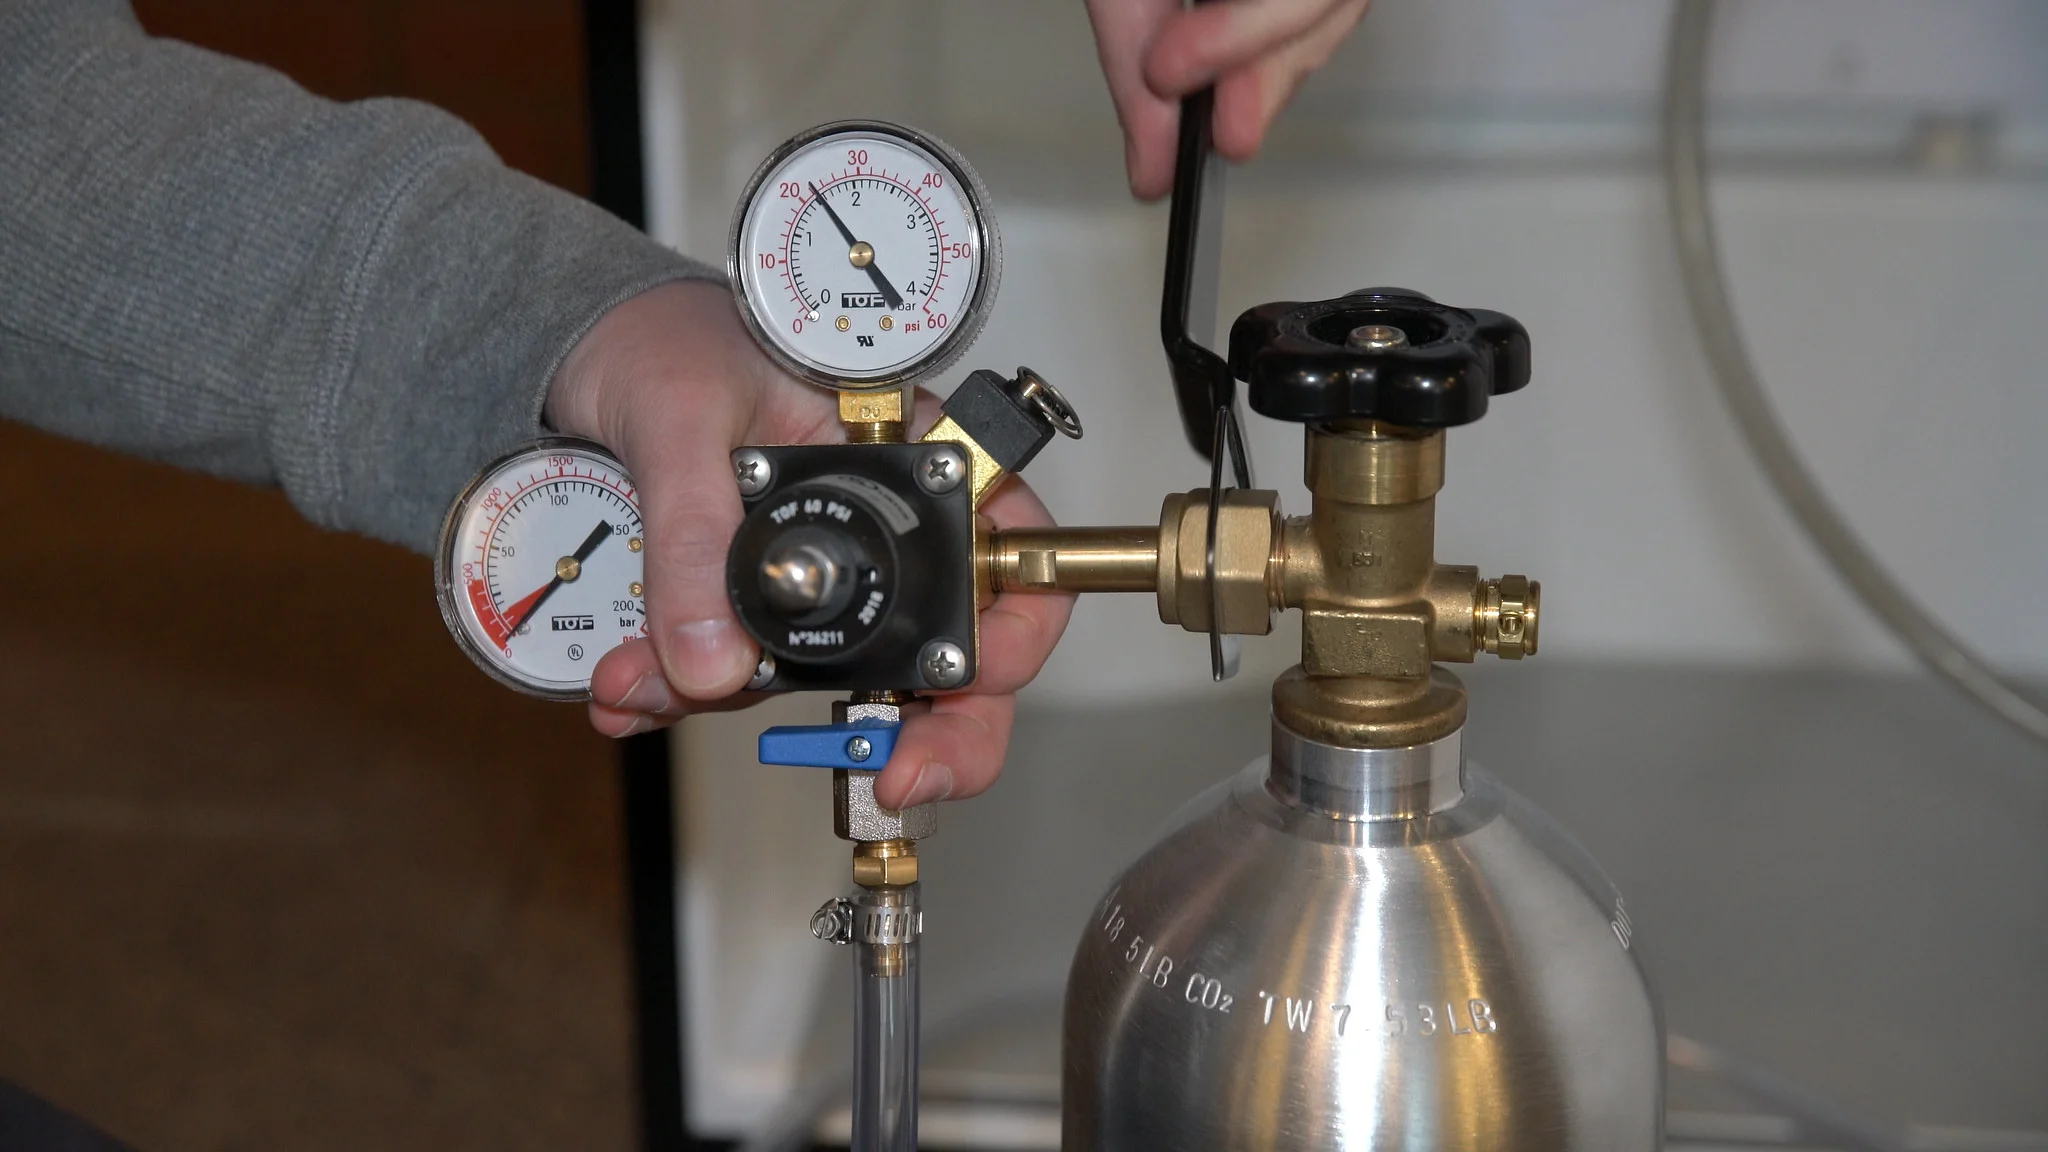
2. CO2 Regulator: The CO2 regulator is responsible for controlling the pressure from the CO2 tank to ensure an optimal flow of beer from the keg. It allows you to adjust and maintain the desired level of carbonation in your beer. Look for a high-quality, adjustable regulator that is easy to read and provides precise pressure control.
3. Beer Lines: The beer lines are tubes that connect the keg to the faucet, allowing the beer to flow from the keg to the tap. These lines are usually made of food-grade vinyl or beverage tubing. The length of the beer lines may vary depending on the distance between the keg and the faucet, but a standard kegerator conversion kit includes beer lines around 5 to 6 feet in length.
4. Faucets and Taps: The faucet and tap are the final connection points between the beer lines and the glass. The faucet is where the beer is dispensed, while the tap is the handle that controls the flow. There are various styles and designs of faucets and taps available, ranging from basic models to more advanced ones with flow control and temperature control features. Choose the ones that best suit your preferences and budget.
5. Connectors and Fittings: The kegerator conversion kit also includes a variety of connectors and fittings to establish the proper connections between the CO2 tank, regulator, beer lines, and faucets. These components ensure a secure and leak-free system. Some common fittings include ball-lock or pin-lock connectors for attaching the beer lines to the keg, as well as shank and nipple fittings for connecting the faucet to the beer lines.
6. Cleaning Kit: Proper cleaning and maintenance of your kegerator are crucial for keeping the beer lines and system free from bacteria and mold. Many kegerator conversion kits include a cleaning kit with cleaning solution, brushes, and instructions on how to effectively clean and sanitize your kegerator. Regular cleaning will help ensure the quality and taste of your beer.
These are the key components you can expect to find in a kegerator conversion kit. However, it’s important to note that kits may vary slightly depending on the manufacturer and the specific model you choose. Always check the product details and specifications of the kit you’re considering to ensure it includes all the necessary components for a successful conversion.
How to Choose the Right Kegerator Conversion Kit
Choosing the right kegerator conversion kit is essential to ensure a successful and enjoyable beer-drinking experience. Here are some factors to consider when selecting the right kit for your needs:
1. Compatibility: Before purchasing a kegerator conversion kit, make sure it is compatible with your refrigerator. Determine the available space in your fridge, the dimensions of the keg you plan to use, and any specific requirements of the kit. Check if the kit includes the necessary hardware for installation, such as shanks or tower adapters.
2. Number of Faucets: Consider how many beers you want to have on tap at once. Some kegerator conversion kits come with single faucets, while others offer multiple faucets that allow you to dispense different beers simultaneously. Decide whether you want to start with a single faucet setup or if you prefer the versatility of multiple faucets for a wider selection of beers.
3. Quality and Durability: Look for a kegerator conversion kit made with high-quality materials for durability and reliability. Components like the beer lines, faucets, and connectors should be made from food-grade materials to ensure the integrity of the beer and the longevity of the system.
4. Brand Reputation: Research different brands and their reputation in the kegerator market. Read reviews and testimonials from other customers who have used their kegerator conversion kits. Choose a brand that is known for producing reliable, high-quality products and providing excellent customer support.
5. Customization Options: Consider the customization options available with the kit. Some kits may offer different faucet designs, tap handles, or additional accessories like keg coolers or drip trays. Choose a kit that allows you to personalize your kegerator to suit your style and preferences.
6. Budget: Set a budget for your kegerator conversion kit and consider the value for the price. While it’s important to invest in a quality kit, there are options available at different price points. Compare the features and components offered by different kits within your budget and find the one that offers the best balance of quality and affordability.
7. Customer Support: Check if the manufacturer or seller provides reliable customer support. Look for a kit that comes with clear installation instructions and troubleshooting guides. It’s helpful to have access to knowledgeable support staff who can assist you with any issues or questions that may arise during the installation or operation of your kegerator conversion kit.
By considering these factors, you can choose the right kegerator conversion kit that meets your requirements, fits your budget, and allows you to enjoy the pleasure of having a draft beer dispenser right in your home.
When converting a refrigerator into a kegerator, make sure to properly measure and drill holes for the beer lines and CO2 tank. Use a conversion kit with all necessary components for a seamless installation.
Read more: How To Insulate Kegerator Tower
Steps to Convert a Refrigerator into a Kegerator
Converting a refrigerator into a kegerator may sound daunting, but with the right tools and instructions, it can be a straightforward process. Here are the general steps to follow when converting a refrigerator into a kegerator:
1. Choose the Right Refrigerator: Select a refrigerator that is large enough to accommodate the kegs you plan to use. Ensure that it has enough internal space to fit the necessary components of the kegerator conversion kit, including the CO2 tank and beer lines.
2. Gather the Conversion Kit: Purchase a kegerator conversion kit that suits your needs and is compatible with your chosen refrigerator. The kit should include essentials such as a CO2 tank, CO2 regulator, beer lines, faucets, and taps, as well as connectors and fittings. Additionally, ensure that you have a cleaning kit for maintenance purposes.
3. Clear and Clean the Refrigerator: Empty the refrigerator and clean it thoroughly, removing any debris or lingering odors. This step is important to ensure a clean environment for your kegerator setup and to maintain the quality of your beer.
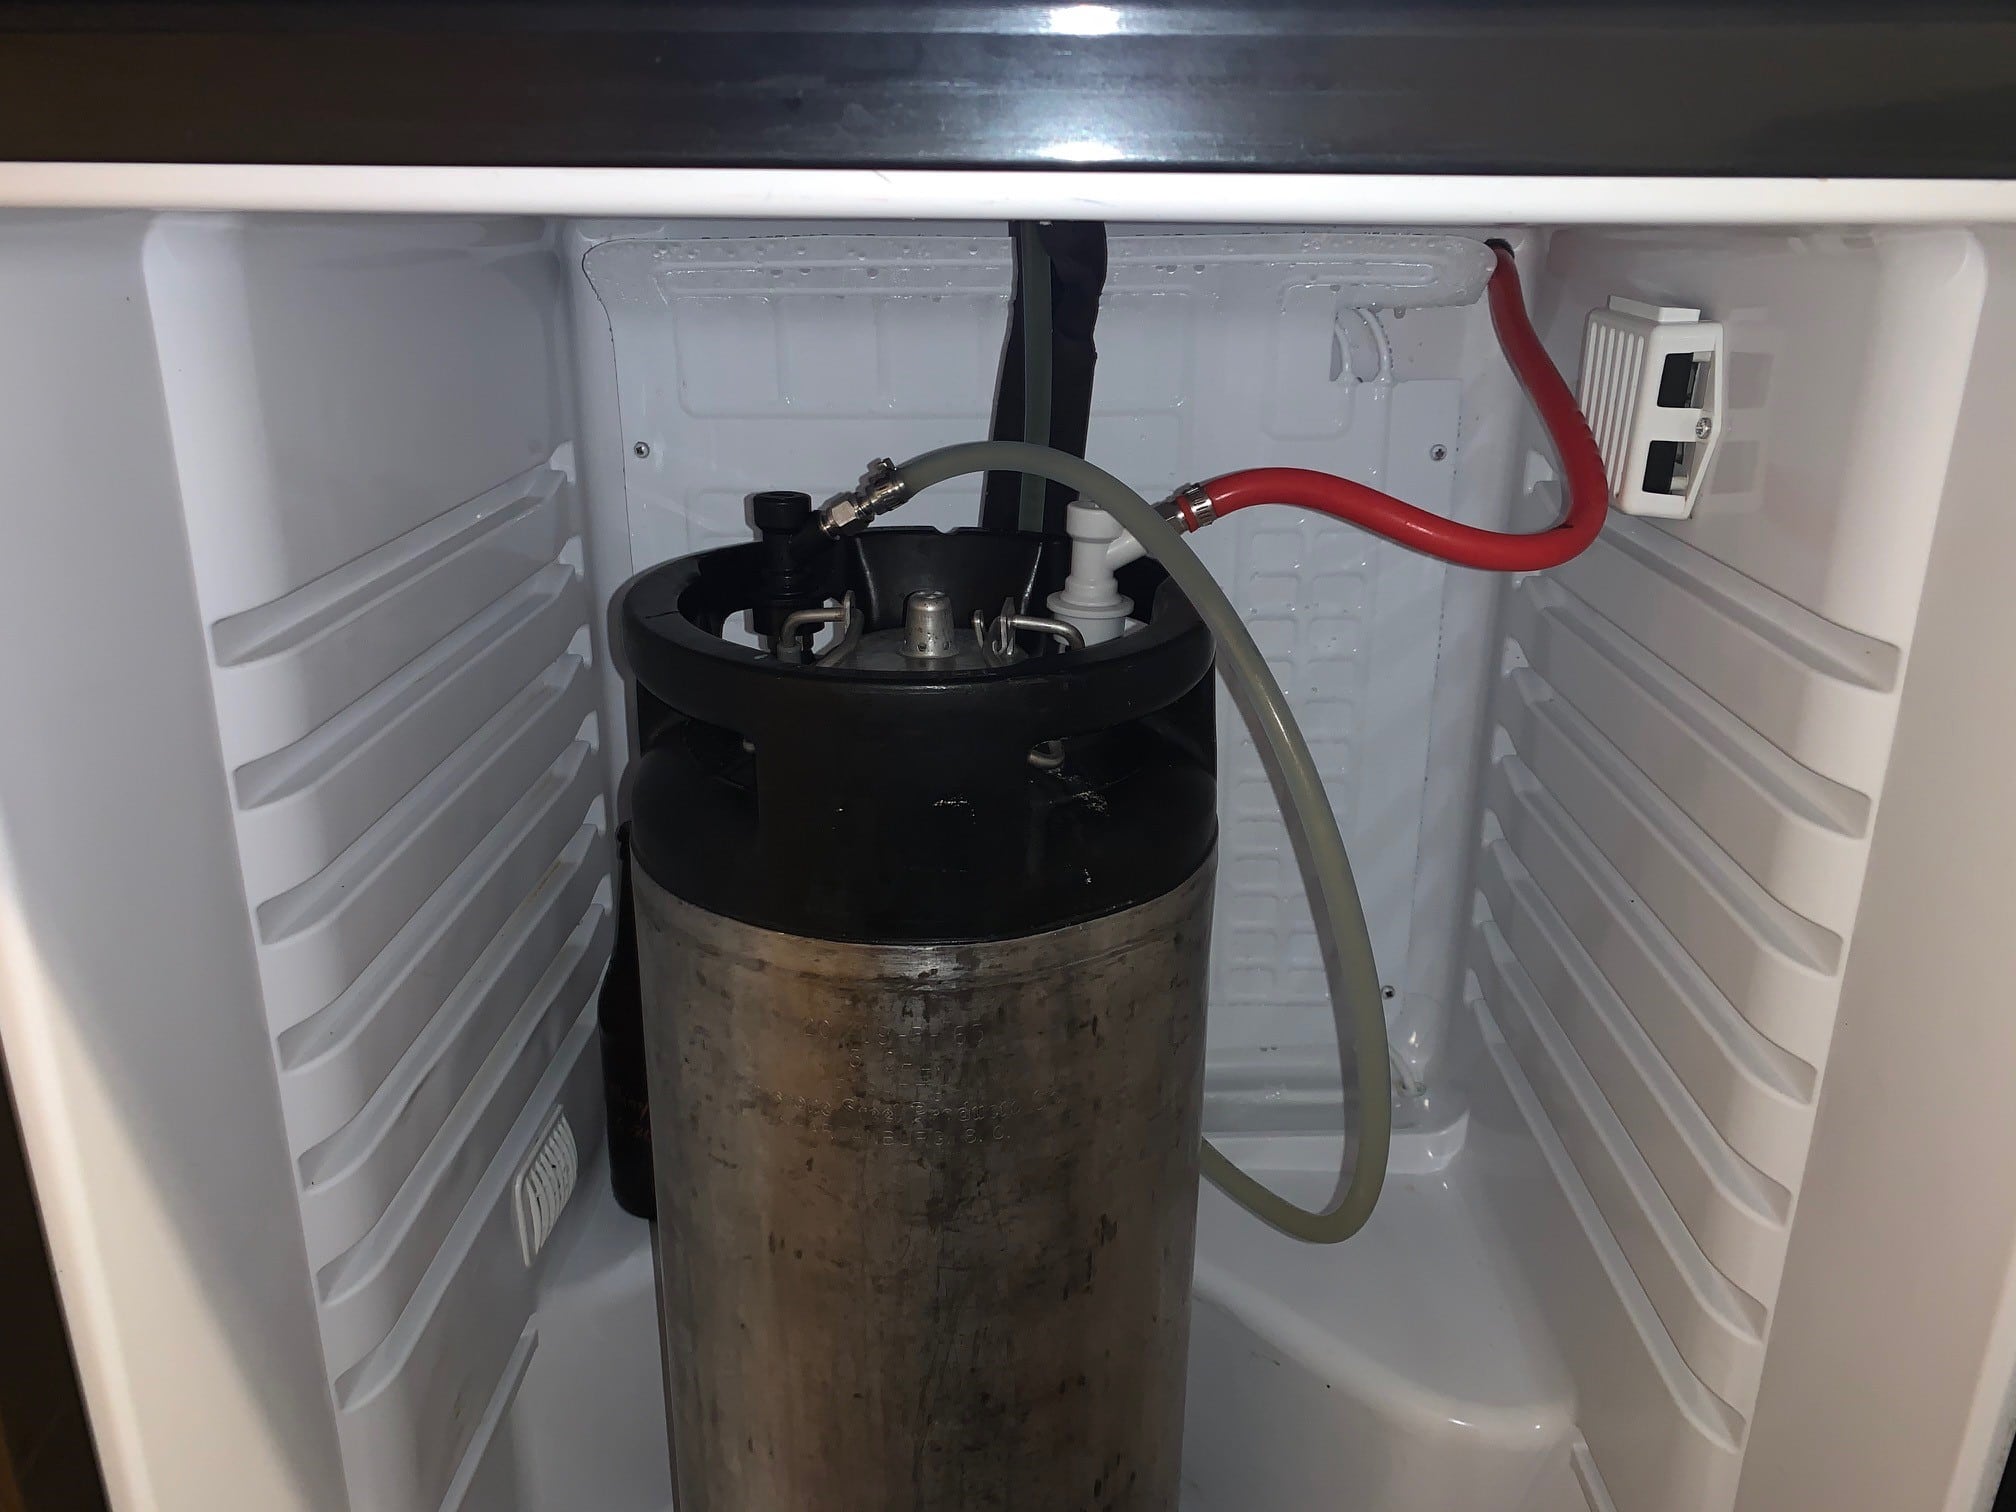
4. Plan the Layout: Decide where the CO2 tank and regulator will be located inside the refrigerator. Consider factors such as space availability and accessibility for maintenance. Also, plan the placement of the beer lines, ensuring that they are properly routed and easily connected to the kegs and the faucets.
5. Install the Components: Follow the manufacturer’s instructions provided with the kegerator conversion kit to install all the components. This will involve connecting the CO2 tank to the regulator, attaching the regulator to the CO2 manifold or splitter, and securing the beer lines to the kegs and the faucet connections.
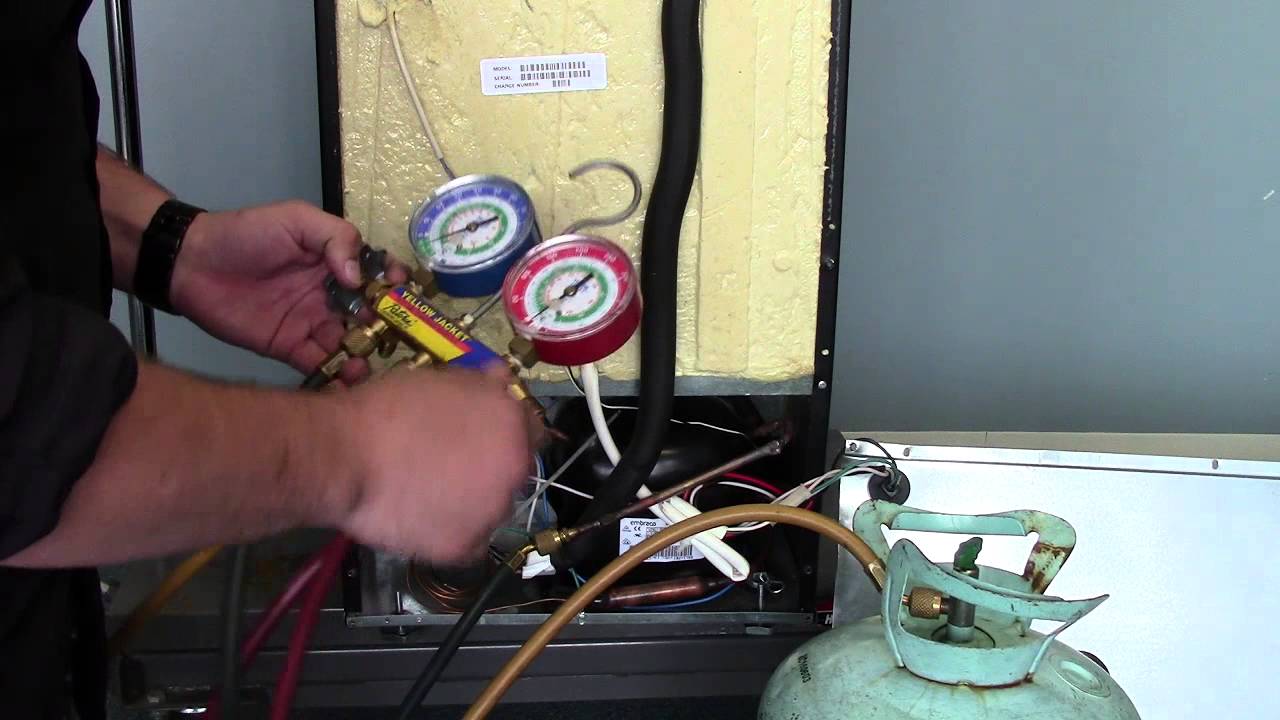
6. Test for Leaks: Once the components are installed, conduct a thorough leak test. Pressurize the system by opening the CO2 tank and checking for any signs of air or gas leakage around the connections. This step is crucial to ensure a properly functioning kegerator and to prevent any beer wastage or damage to the equipment.
7. Adjust the Settings: Use the CO2 regulator to adjust the pressure settings based on the carbonation level you desire for your beer. Refer to the specific instructions provided with your kegerator conversion kit for guidance on setting and maintaining the appropriate pressure for optimal beer dispensing.
8. Clean and Maintain: Regularly clean the beer lines, faucets, and other components of your kegerator to ensure the longevity and quality of your beer. Follow the instructions provided in the cleaning kit and perform routine maintenance to prevent any build-up of mold, bacteria, or off-flavors in the system.
By following these steps carefully and taking your time to properly install and maintain your kegerator conversion kit, you can enjoy a homemade draft beer experience that’s sure to impress your friends and elevate your enjoyment of your favorite brews.
Maintenance and Cleaning Tips for Your Kegerator Conversion Kit
Maintaining and cleaning your kegerator conversion kit is crucial for ensuring the longevity and quality of your beer, as well as the optimal performance of the system. Here are some essential tips to keep your kegerator in top shape:
1. Regular Cleaning: Clean your kegerator on a regular basis to remove any build-up of yeast, bacteria, or mold. Follow the instructions provided with your kegerator conversion kit or cleaning kit for proper cleaning procedures. Typically, this involves disassembling the faucets and taps, soaking them in a cleaning solution, and using a brush to remove any residue. Rinse thoroughly and allow the components to dry completely before reassembling.
2. Clean Beer Lines: The beer lines are prone to developing mold or bacteria over time if not properly cleaned. Every few weeks, flush the beer lines with a cleaning solution specifically designed for beer line cleaning. Use a cleaning pump or a keg filled with cleaning solution to circulate the cleaner through the lines. Rinse thoroughly with fresh water to remove any traces of the cleaning solution.
3. Keep Everything Sanitized: Prioritize hygiene by sanitizing all components of your kegerator conversion kit. Use a food-grade sanitizer, following the recommended concentration and contact time specified by the manufacturer. Sanitize the beer lines, faucets, taps, keg coupler, and all other parts that come into contact with the beer regularly.
4. Check for Leaks: Regularly inspect the connections throughout your kegerator system to ensure there are no leaks. Check for any signs of beer or gas leakage around the CO2 lines, beer lines, and faucet connections. Tighten any loose fittings and replace any parts that are damaged or worn.
5. Temperature Control: Maintain the proper temperature in your kegerator to keep the beer fresh and carbonated. Most kegerators have temperature control options to adjust the cooling level. Aim for a temperature range between 36°F and 40°F (2°C and 4°C) for optimal beer storage and serving conditions.
6. Protect from Sunlight: Position your kegerator away from direct sunlight or any sources of heat. UV rays and heat can affect the quality and taste of the beer. If necessary, use a kegerator cover or a simple towel to protect the kegerator from sunlight.
7. Monitor CO2 Levels: Keep an eye on the level of CO2 in your tank to ensure a consistent flow and carbonation. Monitor the pressure gauge on the regulator and refill or exchange the CO2 tank as needed. It’s a good idea to have a spare CO2 tank on hand for uninterrupted beer enjoyment.
8. Clean the Drip Tray and Floor: Don’t forget to clean and sanitize the drip tray regularly to prevent any buildup of spilled beer or other liquids. Also, ensure that the area around the kegerator is clean and free from any spills or drips. This will prevent any potential contamination and maintain a clean and presentable setup.
By following these maintenance and cleaning tips, you’ll ensure that your kegerator conversion kit functions optimally, the beer stays fresh and delicious, and you can enjoy an excellent draft beer experience in the comfort of your own home.
Troubleshooting Common Issues with Kegerator Conversion Kit
While kegerator conversion kits are designed to provide an enjoyable and hassle-free beer-drinking experience, occasional issues may arise. Here are some common problems you may encounter with your kegerator conversion kit and some troubleshooting tips to help you resolve them:
1. Foamy Beer: If your beer pours excessively foamy, it may be due to high carbonation levels or incorrect temperature settings. Check the pressure on your CO2 regulator and ensure it’s set to the appropriate level for the style of beer you’re dispensing. Additionally, ensure that your kegerator is set to the recommended temperature range for optimal carbonation and serving conditions.
2. Slow Dispensing: If your beer flows slowly or with low pressure, it could be caused by a clogged or improperly cleaned faucet, beer line, or keg coupler. Disassemble the affected parts and clean them thoroughly with a cleaning solution. Attention should also be paid to the length and diameter of the beer lines, as improper sizing can result in flow issues. Adjust or replace any parts as necessary.
3. Beer Tastes Off: If your beer has an off-flavor or unusual taste, it may be due to dirty or contaminated lines. Regularly clean and sanitize your beer lines and faucets to prevent any buildup of mold, yeast, or bacteria. Also, ensure that your keg is properly sealed and not exposed to excessive heat or sunlight, which can affect the beer’s taste and quality.
4. Leakages: If you notice any leaks around the connections or fittings of your kegerator conversion kit, it’s important to address them promptly. Tighten any loose connections and replace any damaged or worn parts to ensure a secure and leak-free system. Use a mixture of dish soap and water to check for bubbles, indicating the source of the leak.
5. No Carbonation: If your beer lacks carbonation or appears flat, the issue may be related to the CO2 system. Check if the CO2 tank is properly connected and has enough pressure. Also, ensure that the CO2 regulator is set to the appropriate pressure for the desired level of carbonation. If the issue persists, there may be a leak in the system that is causing the CO2 to escape.
6. Freezing Beer: If your beer becomes frozen or overly chilled, it may be due to a temperature setting that is too low. Adjust the temperature of your kegerator to the recommended range, usually between 36°F and 40°F (2°C and 4°C), to ensure proper chilling without freezing the beer. You may also need to check the calibration of your temperature control mechanism.
7. Strange Noises: Unusual noises, such as buzzing or rattling, may indicate an issue with the compressor or other mechanical components of your kegerator. Check for any loose or moving parts and ensure that the unit is leveled properly. If the noise persists, it’s advisable to seek professional assistance or contact the manufacturer for support.
If you encounter any other issues not mentioned here or if the troubleshooting tips provided do not resolve the problem, consult the instruction manual for your specific kegerator conversion kit or reach out to the manufacturer’s customer support for further assistance. With proper troubleshooting, you can quickly get your kegerator back to delivering perfect pints of draft beer.
Conclusion
Investing in a kegerator conversion kit can bring the joy of having a draft beer dispenser right into your home. It offers a range of benefits, including cost savings, fresher beer, variety and flexibility, convenience, customization options, and eco-friendliness. With a kegerator conversion kit, you can enjoy the luxury of having your favorite brew on tap, impressing your friends, and elevating your beer-drinking experience.
When choosing a kegerator conversion kit, consider factors such as compatibility, the number of faucets, quality and durability, brand reputation, customization options, and your budget. By selecting the right kit for your needs, you can ensure a successful conversion and long-term satisfaction.
Converting a refrigerator into a kegerator involves steps such as choosing the right refrigerator, gathering the conversion kit, clearing and cleaning the refrigerator, planning the layout, installing the components, conducting leak tests, adjusting settings, and performing regular maintenance and cleaning. By following these steps carefully, you can transform your refrigerator into a kegerator and enjoy the luxury of having draft beer right at your fingertips.
To keep your kegerator conversion kit in optimal condition, it’s important to maintain and clean your kegerator regularly. This includes regular cleaning, cleaning the beer lines, sanitizing all components, checking for leaks, controlling the temperature, protecting from sunlight, and keeping the drip tray and surrounding area clean. These maintenance and cleaning practices ensure the longevity and quality of your kegerator and guarantee a pleasurable beer-drinking experience every time.
If you encounter any issues with your kegerator conversion kit, such as foamy beer, slow dispensing, off-flavors, leakages, lack of carbonation, freezing beer, or strange noises, follow the troubleshooting tips provided or consult the instruction manual. If needed, seek support from the manufacturer’s customer service to resolve any problems and continue enjoying your draft beer with ease.
In conclusion, a kegerator conversion kit brings the bar experience to your home, allowing you to savor fresh, cold draft beer at any time. With the right kit, proper installation and maintenance, you can create an impressive and reliable kegerator that will enhance your beer-drinking enjoyment for years to come.
Frequently Asked Questions about What Is A Kegerator Conversion Kit
Was this page helpful?
At Storables.com, we guarantee accurate and reliable information. Our content, validated by Expert Board Contributors, is crafted following stringent Editorial Policies. We're committed to providing you with well-researched, expert-backed insights for all your informational needs.


0 thoughts on “What Is A Kegerator Conversion Kit”