Articles
How To Measure Temperature In Kegerator
Modified: October 20, 2024
Learn how to measure temperature in your kegerator with these helpful articles. Ensure your beer is chilled to perfection.
(Many of the links in this article redirect to a specific reviewed product. Your purchase of these products through affiliate links helps to generate commission for Storables.com, at no extra cost. Learn more)
Introduction
Keeping your kegerator at the optimal temperature is crucial to serving refreshing and perfectly chilled beer. Temperature control is essential to preserving the taste, aroma, and quality of your brew, ensuring a pleasurable drinking experience for you and your guests. But how do you accurately measure the temperature inside your kegerator? In this article, we will guide you through the steps to effectively measure the temperature in your kegerator and maintain it at the desired level.
Whether you have a commercial-grade kegerator or a DIY home setup, the process of measuring temperature remains the same. By following a few simple steps, you can ensure that your beer is always served at the ideal temperature, enhancing its flavor and presentation.
Before we dive into the details, it is important to note that different types of beer have varying serving temperature recommendations. While most kegerators have a standard temperature range of 36 to 42 degrees Fahrenheit (2 to 6 degrees Celsius), certain beer styles might require deviations from this range. For example, light lagers and pilsners are typically served at colder temperatures, while stouts and porters are best enjoyed slightly warmer. Always refer to the specific beer’s recommended serving temperature to achieve the optimal drinking experience.
Now that we have established the importance of temperature control, let’s explore the step-by-step process of measuring the temperature in your kegerator.
Key Takeaways:
- Ensure accurate temperature readings by selecting the right measuring device, placing the probe correctly, and calibrating it for precise monitoring, leading to optimal beer serving conditions.
- Regularly monitor and troubleshoot temperature issues in your kegerator to maintain consistent and ideal temperature, ensuring a delightful and refreshing beer-drinking experience for you and your guests.
Read more: What Temperature Should A Kegerator Be
Step 1: Selecting the Temperature Measuring Device
Choosing the right temperature measuring device for your kegerator is crucial to ensure accurate readings. There are various options available, each with its own pros and cons. Here are a few common types of temperature measuring devices to consider:
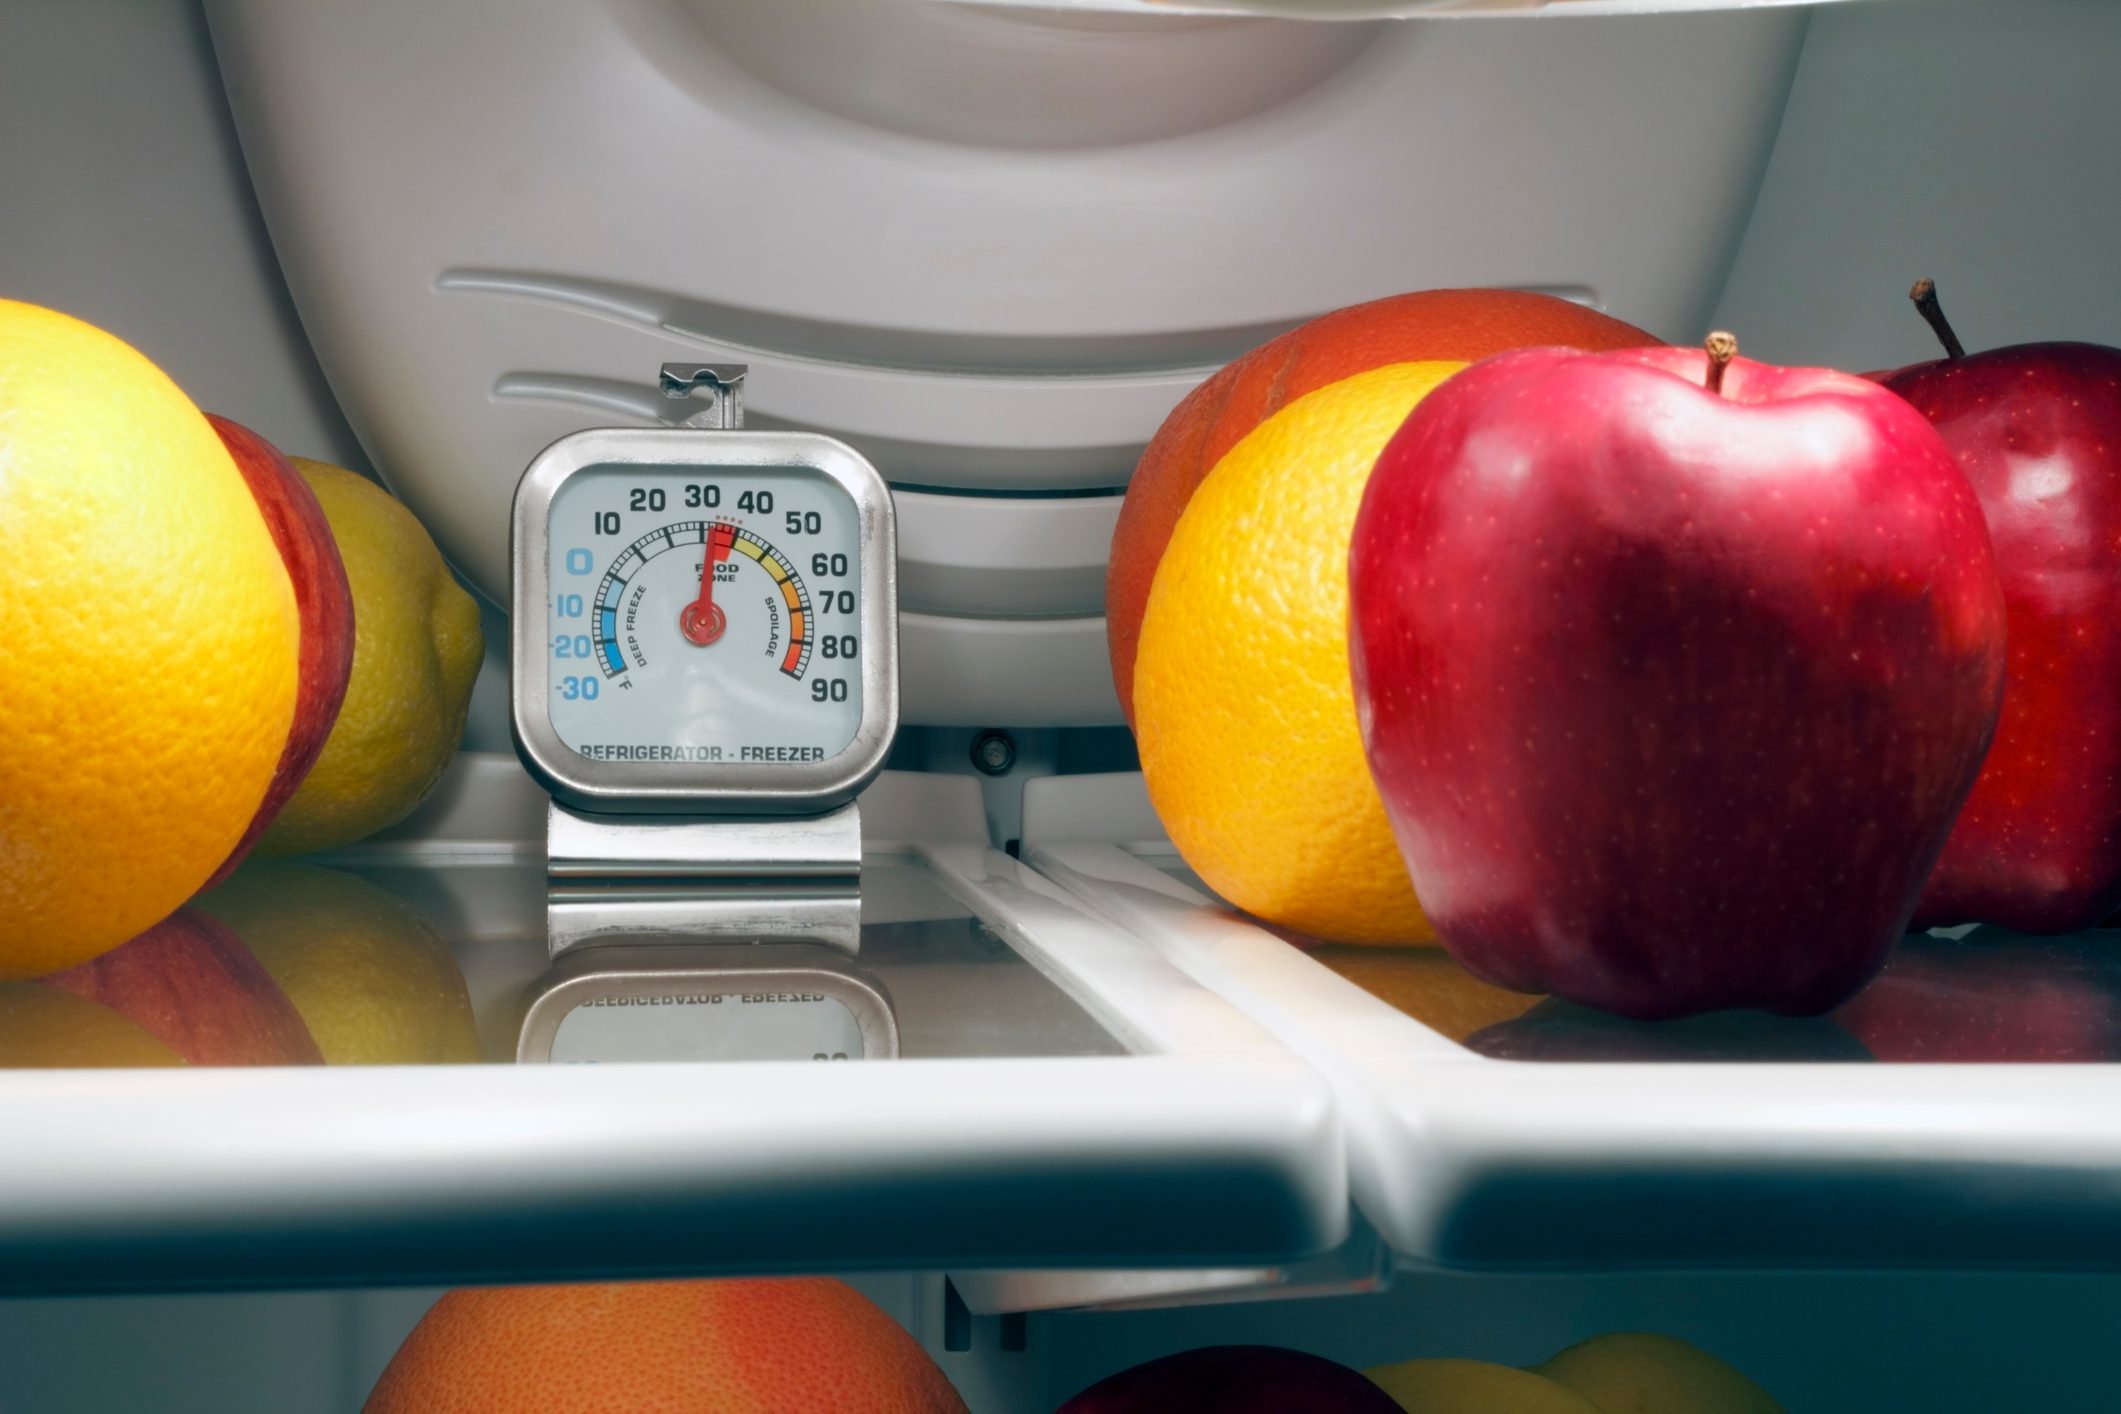
- Thermometer: A traditional glass or digital thermometer is a simple and cost-effective option. It can be placed inside the kegerator to measure the temperature directly. Make sure to select a thermometer that is specifically designed for refrigeration applications and provides accurate readings within the desired temperature range.
- Digital Temperature Controller: A digital temperature controller offers precise temperature control and monitoring. It consists of a sensor probe that is placed inside the kegerator and a display unit that shows real-time temperature readings. Some advanced models even allow you to set specific temperature ranges and provide audible alarms if the temperature goes outside the desired range.
- Wireless Temperature Sensor: This innovative device allows you to monitor the temperature of your kegerator remotely. It consists of a sensor probe that is placed inside the kegerator and a wireless receiver that displays the temperature readings. With a wireless temperature sensor, you can conveniently monitor the temperature from anywhere in your home or even receive alerts on your smartphone.
When selecting a temperature measuring device, consider factors such as ease of use, accuracy, and your specific monitoring preferences. It is also a good idea to read reviews and seek recommendations from other kegerator owners to determine which device will work best for you.
Once you have selected the appropriate temperature measuring device, it’s time to move on to the next step: placing the temperature probe in the kegerator.
Step 2: Placement of the Temperature Probe
The correct placement of the temperature probe is essential to ensure accurate temperature readings. Improper placement can lead to misleading measurements and may result in serving beer at the wrong temperature. Here are some guidelines for placing the temperature probe in your kegerator:
- Position the Probe Away from the Cooling Source: To get an accurate reading of the overall temperature inside the kegerator, it is important to place the temperature probe away from the cooling source. This means avoiding direct contact with the cooling unit or the walls of the kegerator, as they can give inaccurate readings.
- Avoid Contact with Draft Lines or Kegs: Placing the temperature probe in direct contact with draft lines or kegs can affect the accuracy of the measurements. The heat transfer from the draft lines or kegs may give false readings. Instead, position the probe in the open space of the kegerator, away from any obstruction.
- Consider Multiple Probe Placement: If you have a larger kegerator with multiple kegs or compartments, it is advisable to use multiple temperature probes. This will allow you to monitor the temperature in different areas of the kegerator and adjust accordingly. Each probe should be placed in a representative location to provide an accurate overall temperature reading.
- Secure the Probe in Place: Once you have chosen the ideal location for the temperature probe, you need to ensure that it stays in place. You can use adhesive strips, zip ties, or other securing methods to prevent the probe from moving or falling out of position. Make sure the probe is securely attached but does not interfere with the proper functioning of the kegerator or cause any damage to the equipment.
Remember, the accuracy of your temperature readings depends on the proper placement and securing of the temperature probe. Take your time to find the best spot that provides an accurate representation of the kegerator’s overall temperature.
Now that you have successfully placed the temperature probe, it’s time to move on to the next step: calibrating the temperature measuring device.
Step 3: Calibrating the Temperature Measuring Device
Calibrating your temperature measuring device is an important step to ensure accurate readings. Over time, temperature measuring devices may become slightly off, affecting the precision of your temperature measurements. Here’s how you can calibrate your device:
- Verify the Accuracy: Before calibrating, it’s important to determine if your temperature measuring device is already accurate. You can do this by comparing it to a known accurate reference thermometer. Place both thermometers in the same location within the kegerator and check if they display the same temperature. If your device is already accurate, there is no need for calibration.
- Adjust the Calibration: If your temperature measuring device is not accurate, you can usually adjust the calibration. Refer to the manufacturer’s instructions for your specific device to know how to calibrate it. Most digital thermometers and temperature controllers provide an option to adjust the calibration by a few degrees up or down. Follow the instructions provided to make the necessary adjustments.
- Test and Recheck: After making the calibration adjustments, test the device again by comparing it to the known accurate reference thermometer. Place both thermometers in the same location within the kegerator and verify if they display the same temperature. Repeat this process until your temperature measuring device shows temperature readings that align with the known accurate reference thermometer.
- Periodic Re-Calibration: It is recommended to periodically re-check and re-calibrate your temperature measuring device to ensure ongoing accuracy. Factors such as temperature fluctuations and normal wear and tear can affect the accuracy of the device over time. Routine calibration will help maintain precise temperature measurements and ensure your kegerator is operating at the desired temperature.
By calibrating your temperature measuring device, you can have confidence in the accuracy of your temperature readings. This will enable you to make necessary adjustments when needed and maintain your kegerator at the optimal temperature for serving delicious beer.
Now that your temperature measuring device is calibrated, it’s time to move on to the next step: monitoring the temperature in your kegerator.
To measure the temperature in a kegerator, use a digital thermometer with a probe that can be placed inside the kegerator to accurately monitor the temperature. This will ensure that your beer is stored at the optimal temperature for serving.
Step 4: Monitoring the Temperature
Once you have selected the temperature measuring device, placed the temperature probe correctly, and calibrated the device, it’s time to start monitoring the temperature in your kegerator. Regular monitoring will help you ensure that your beer is being stored and served at the desired temperature. Here are some tips for effectively monitoring the temperature:
- Regular Temperature Checks: Make it a habit to check the temperature in your kegerator regularly. This can be done manually by looking at the display of your temperature measuring device or using a remote monitoring system if you have a wireless temperature sensor. Aim to check the temperature at least once a day, especially if you’re hosting an event or have recently restocked your kegs.
- Record Temperature Readings: Keep a log or record of your temperature readings for future reference. This will help you identify any patterns or fluctuations in the temperature over time. It can also be useful if you need to troubleshoot any potential issues or discuss your temperature settings with other kegerator owners or experts.
- Take Action When Needed: If you notice that the temperature in your kegerator is consistently outside the desired range, it’s important to take appropriate action. This could involve adjusting the temperature control settings, relocating the temperature probe, or even consulting a professional if there are underlying issues with the kegerator’s cooling system. Regular monitoring will allow you to address any temperature-related concerns promptly.
- Consider Temperature Trends: Temperature fluctuations are normal in any refrigeration system. However, if you notice consistent trends of temperature spikes or drops, it may indicate an underlying issue that needs to be addressed. Monitoring the temperature over a period of time will help you identify such trends and pinpoint potential problems that require attention.
Remember, maintaining a consistent and optimal temperature in your kegerator is key to enjoying perfectly chilled beer. By regularly monitoring the temperature and taking appropriate action when needed, you can ensure that your beer stays fresh, flavorful, and satisfying.
Now that you understand the importance of monitoring the temperature, let’s move on to the final step: troubleshooting temperature measurement issues.
Step 5: Troubleshooting Temperature Measurement Issues
While measuring the temperature in your kegerator can be a straightforward process, there may be instances where you encounter issues with temperature measurements. Here are some common troubleshooting steps to help you resolve temperature measurement issues:
- Check Probe Placement: Ensure that the temperature probe is placed in the correct location within the kegerator. Verify that it is not in direct contact with the cooling source, draft lines, or kegs, as these can affect the accuracy of readings. Additionally, make sure the probe is securely attached and not obstructing the airflow inside the kegerator.
- Verify Calibration: Double-check the calibration of your temperature measuring device. If you are experiencing consistently inaccurate temperature readings, it is possible that the device needs to be recalibrated. Follow the manufacturer’s instructions to recalibrate the device and test it against a known accurate reference thermometer.
- Monitor External Factors: External factors such as ambient temperature, humidity, and the proximity to other heat-emitting appliances can impact temperature measurements. Ensure that your kegerator is placed in an environment with stable ambient conditions and minimal exposure to external heat sources.
- Inspect Cooling System: If you are still experiencing temperature measurement issues, it may be worth checking the cooling system of your kegerator. Ensure that the temperature control unit is functioning correctly and that there are no blockages or obstructions within the cooling system. If necessary, consult a professional technician to inspect and service the cooling system.
- Consider Equipment Upgrades: In some cases, temperature measurement issues may be due to outdated or malfunctioning equipment. If you consistently encounter problems or inaccurate readings, consider upgrading to a more reliable and high-quality temperature measuring device. This can help eliminate measurement discrepancies and provide more precise temperature readings for your kegerator.
By following these troubleshooting steps, you can overcome temperature measurement issues and ensure accurate readings in your kegerator. Remember, maintaining the proper temperature is crucial for serving beer at its best, so do not hesitate to address any problems that may arise.
Congratulations! With the completion of this final step, you now have a comprehensive understanding of how to measure the temperature in your kegerator. By selecting the right temperature measuring device, placing the temperature probe correctly, calibrating the device, monitoring the temperature, and troubleshooting any issues, you can perfectly maintain the temperature of your kegerator and enjoy refreshing, perfectly chilled beer.
Prost to a delightful beer-drinking experience!
Conclusion
Measuring and maintaining the temperature in your kegerator is fundamental to ensuring that your beer is served at its absolute best. By following the steps outlined in this article, you can achieve precise temperature control and create an exceptional drinking experience for yourself and your guests.
Firstly, by selecting the right temperature measuring device, such as a thermometer, digital temperature controller, or wireless temperature sensor, you can accurately monitor the temperature inside your kegerator. Remember to choose a device that meets your specific needs and preferences.
Next, proper placement of the temperature probe within the kegerator is crucial. Avoiding contact with the cooling source, draft lines, or kegs will provide more accurate readings. Securing the probe in place ensures consistent monitoring without interference.
Calibrating your temperature measuring device is a vital step to maintain accuracy in readings. By comparing your device to a known accurate reference thermometer and adjusting the calibration if necessary, you can rely on precise temperature measurements.
Frequent monitoring of the temperature is essential to spot any fluctuations and take appropriate action. Regularly checking the temperature, recording readings, and considering temperature trends will help you identify any issues and maintain optimal conditions for your kegerator.
If you experience any temperature measurement issues, troubleshoot by checking probe placement, verifying calibration, monitoring external factors, inspecting the cooling system, or considering equipment upgrades. Addressing these issues ensures consistent and accurate temperature readings.
In conclusion, by diligently following the steps outlined in this article, you can successfully measure and control the temperature in your kegerator. Whether you’re a beer enthusiast or entertaining guests, maintaining the ideal temperature will enhance the flavor, aroma, and overall enjoyment of your beer.
Now raise a glass, savor your perfectly chilled beer, and appreciate the wonderful world of kegerator temperature control. Cheers!
Frequently Asked Questions about How To Measure Temperature In Kegerator
Was this page helpful?
At Storables.com, we guarantee accurate and reliable information. Our content, validated by Expert Board Contributors, is crafted following stringent Editorial Policies. We're committed to providing you with well-researched, expert-backed insights for all your informational needs.


0 thoughts on “How To Measure Temperature In Kegerator”