
Articles
How To Clean A Chicken Coop With A Dirt Floor
Modified: February 28, 2024
Learn how to clean a chicken coop with a dirt floor with these helpful articles. Find tips, tricks, and essential steps for maintaining a healthy coop environment.
(Many of the links in this article redirect to a specific reviewed product. Your purchase of these products through affiliate links helps to generate commission for Storables.com, at no extra cost. Learn more)
Introduction
Welcome to our comprehensive guide on how to clean a chicken coop with a dirt floor. Keeping a clean and sanitary coop is essential for the health and well-being of your flock. A dirt floor can provide a natural environment for chickens, but it also requires regular maintenance to prevent the buildup of dirt, debris, and harmful bacteria.
In this article, we will walk you through the step-by-step process of cleaning a chicken coop with a dirt floor. We will cover everything from gathering supplies to bringing your chickens back into their fresh and clean home. By following these guidelines, you can ensure your chickens have a clean and safe environment to thrive in.
Before we dive into the specifics, it’s important to note that cleaning a chicken coop with a dirt floor should be done regularly, ideally every few weeks or as needed. Regular cleaning not only helps to control odors but also reduces the risk of diseases and parasites that can affect your flock.
Now, let’s get started with the preparation phase.
Key Takeaways:
- Regularly cleaning a chicken coop with a dirt floor is crucial for maintaining a healthy environment, controlling odors, and preventing diseases and parasites that can affect your flock.
- Providing a clean and safe living space for your chickens involves thorough cleaning, disinfecting, and maintaining fresh bedding, ensuring optimal flock health and well-being.
Read more: What To Put On Floor Of Chicken Coop
Preparation
Before you begin cleaning your chicken coop, it’s important to gather all the necessary supplies. This will ensure that you have everything you need within reach, making the cleaning process more efficient.
Here’s a list of supplies you’ll need:
- Protective gear: Gloves, goggles, and a dust mask to protect yourself from dust, dirt, and potential pathogens.
- Broom and dustpan: For sweeping away loose dirt and debris.
- Rake or shovel: To remove larger debris and clumps of dirt from the floor.
- Bucket with soapy water: To clean walls and roosts.
- Scrub brush: For scrubbing surfaces and removing stubborn stains.
- Hose or pressure washer: To rinse and disinfect the coop floor.
- Disinfectant spray: Choose a poultry-friendly disinfectant to kill bacteria and parasites.
- Fresh bedding material: Such as straw, wood shavings, or hay to replace the old bedding.
Once you have gathered all the necessary supplies, find a time when your chickens are outside or in a separate area. This will make it easier to clean without disturbing or stressing the birds. It’s best to choose a dry and sunny day for cleaning, as it will help the coop dry faster after cleaning.
Now that you are prepared, let’s move on to the next step: removing the chickens from the coop.
Gathering Supplies
Properly preparing for cleaning your chicken coop with a dirt floor involves gathering all the necessary supplies to ensure a smooth and efficient cleaning process. Here’s a detailed list of supplies you’ll need:
- Protective gear: Wear gloves, goggles, and a dust mask to protect yourself from dust, debris, and potential pathogens. This is especially important if you have respiratory issues or are sensitive to dust.
- Broom and dustpan: Use a broom to sweep away loose dirt, feathers, and debris from the coop floor. A dustpan makes collecting the swept debris much easier.
- Rake or shovel: Use a rake or shovel to remove larger debris, such as accumulated droppings or clumps of dirt. This will help prepare the coop for a more thorough cleaning.
- Bucket and scrub brush: Fill a bucket with warm soapy water and use a scrub brush to clean the coop walls, roosts, and other surfaces. Choose a mild detergent or poultry-specific cleaner to avoid any harmful chemicals.
- Hose or pressure washer: Connect a hose to a water source or use a pressure washer to rinse off dirt and debris from the coop floor and surfaces. This will help remove stubborn stains and disinfect the area.
- Disinfectant spray: Select a poultry-friendly disinfectant spray to kill bacteria, viruses, and parasites that may be present in the coop. Follow the manufacturer’s instructions carefully when using the spray.
- Fresh bedding material: Prepare a sufficient amount of fresh bedding material, such as straw, wood shavings, or hay, to replace the old bedding. Quality bedding helps control odors and provides a comfortable environment for your chickens.
- Trash bags: Keep some sturdy trash bags on hand to dispose of any waste or soiled bedding. Properly disposing of waste helps maintain cleanliness and prevent the spread of diseases.
Once you have gathered all the necessary supplies, double-check that you have everything within easy reach. Having everything on hand will make the cleaning process more efficient and prevent delays or interruptions.
Now that you are well-equipped, you can move on to the next step: removing the chickens from the coop.
Removing Chickens from the Coop
Before you start cleaning your chicken coop with a dirt floor, it’s important to ensure the safety and well-being of your feathered friends. Removing the chickens from the coop will help minimize stress and make the cleaning process easier. Here’s how to safely remove the chickens:
- Lure them with treats: Chickens are naturally curious and love treats. Use their favorite treats, such as mealworms or grain, to entice them out of the coop. Scatter the treats outside the coop or use a feeder near the entrance to encourage them to come out.
- Create a temporary enclosure: If your chickens are hesitant to leave the coop, you can create a temporary enclosed area adjacent to the coop. Use chicken wire or portable fencing to create a narrow section where the chickens can move into from the coop.
- Gently guide them out: If luring them with treats doesn’t work, gently guide the chickens out of the coop. You can use a broom or your hands to gently nudge them towards the coop entrance. Be patient and avoid causing any distress or harm to the chickens.
- Close the coop entrance: Once all the chickens are out of the coop, securely close the entrance to prevent them from re-entering while you clean. You can use a latch, clip, or any secure mechanism to ensure the coop remains off-limits to the chickens during the cleaning process.
- Provide a safe temporary space: While you clean the coop, make sure your chickens have a safe, sheltered area to stay. This can be a chicken run, a separate fenced area, or even a temporary coop setup. Ensure they have access to food, water, and shelter to keep them comfortable.
Always prioritize the safety and well-being of your chickens when removing them from the coop. Handle them gently and avoid causing unnecessary stress or harm. Creating a positive and calm environment will make the cleaning process smoother for both you and your feathered friends.
With the chickens safely relocated, you are now ready to move on to the next step: clearing out loose dirt and debris from the coop floor.
Clearing Out Loose Dirt and Debris
Now that the chickens are safely out of the coop, it’s time to roll up your sleeves and start clearing out the loose dirt and debris from the coop floor. This step is crucial in creating a clean and hygienic environment for your flock. Here’s how to effectively clear out the dirt and debris:
- Remove any movable objects: Start by removing any movable objects from the coop, such as feeders, waterers, or nesting boxes. Set them aside to be cleaned separately. This will give you better access to the entire coop floor.
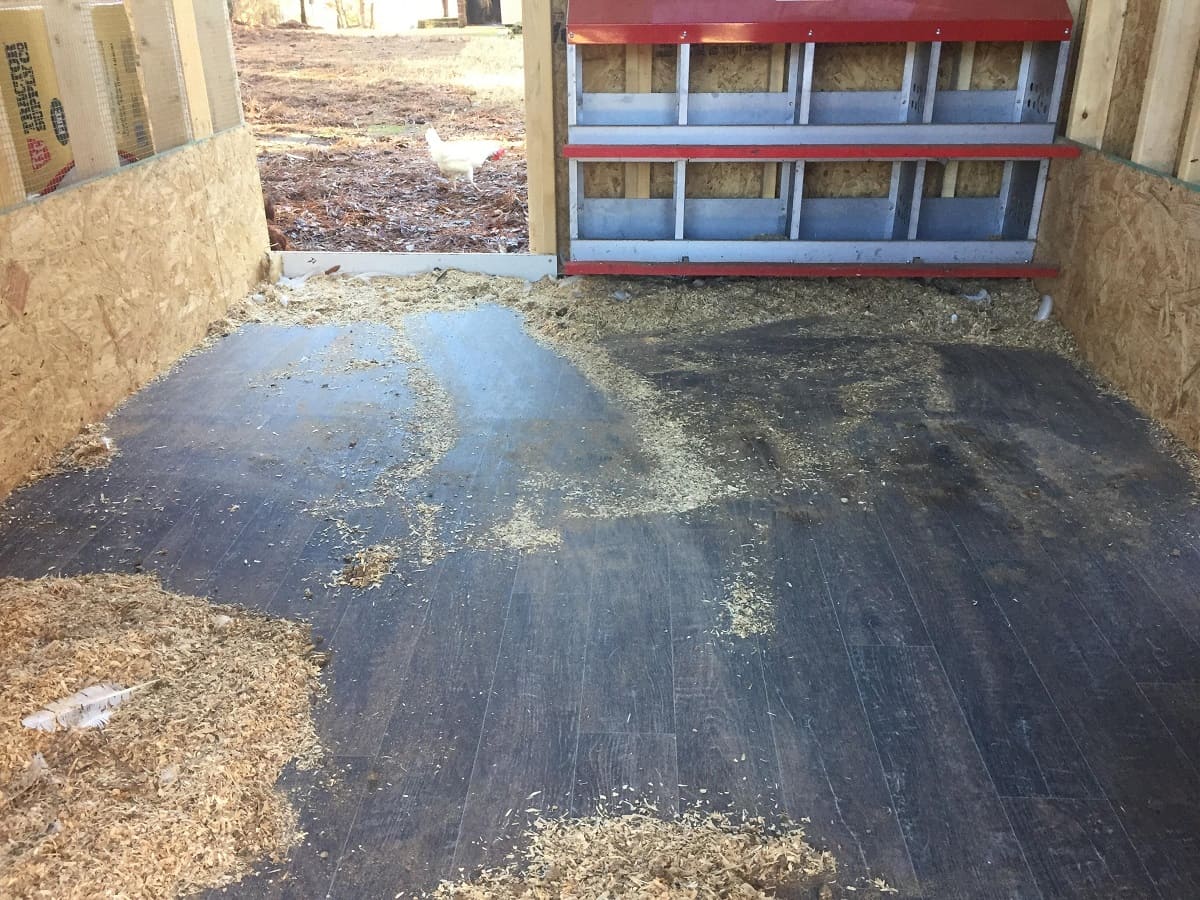
- Sweep away loose dirt and feathers: Use a broom to sweep away loose dirt, feathers, and other debris from the coop floor. Start from the farthest corner and work your way towards the coop entrance. Collect the swept dirt and debris with a dustpan or shovel for easy disposal.
- Scrape off dried manure: If there are dried manure or stubborn stains on the coop floor, use a rake or shovel to gently scrape them off. Avoid applying excessive force as it can damage the dirt floor. Take care not to scratch or gouge the surface.
- Remove large clumps of dirt: As you clean, you may come across larger clumps of dirt or debris. Use a rake or shovel to carefully remove these clumps from the coop floor. Dispose of them in a designated waste bag or compost pile, depending on your preferences and local regulations.
- Sweep out cobwebs and dust: Inspect the corners, walls, and ceilings of the coop for any cobwebs or accumulated dust. Use a broom or a long-handled brush to sweep them away. Pay close attention to areas where spiders or other pests may have built their nests.
Be thorough as you clear out the loose dirt and debris, ensuring that the entire coop floor is clean and free of any large clumps or obstructions. This step sets the foundation for a clean and healthy coop environment.
With the loose dirt and debris removed, it’s time to move on to the next step: spraying and disinfecting the coop floor.
Spraying and Disinfecting the Coop Floor
After clearing out the loose dirt and debris from the coop floor, it’s important to properly sanitize and disinfect the area to eliminate any harmful bacteria or parasites. This step is crucial in maintaining a clean and healthy environment for your chickens. Here’s how to effectively spray and disinfect the coop floor:
- Fill a bucket with soapy water: Start by filling a bucket with warm water and add a mild detergent or poultry-specific cleaner. Mix the solution well to create a soapy mixture that will help cut through grease and grime.
- Use a sprayer or watering can: Transfer the soapy water solution into a sprayer or watering can for easier application. This will allow you to evenly distribute the solution across the entire coop floor.
- Thoroughly spray the coop floor: Begin by spraying the soapy water solution onto the entire coop floor, ensuring that you cover all areas, including the corners and hard-to-reach spots. The soapy water will help loosen any remaining dirt and prepare the surface for disinfection.
- Prepare a poultry-friendly disinfectant spray: After thoroughly spraying the coop floor with the soapy water solution, prepare a poultry-friendly disinfectant spray according to the manufacturer’s instructions. Choose a disinfectant that is safe for chickens and effective in killing bacteria and parasites.
- Apply the disinfectant spray: Spray the entire coop floor with the disinfectant spray, making sure to cover all areas evenly. Pay special attention to high-traffic areas and areas that were previously soiled by droppings. Allow the disinfectant to sit for the recommended amount of time stated on the product label.
- Rinse the coop floor: After the recommended contact time has passed, use a hose or pressure washer to thoroughly rinse the coop floor. Start from the farthest end and work your way towards the exit, ensuring that all traces of the disinfectant are rinsed away.
Properly spraying and disinfecting the coop floor helps remove harmful bacteria and parasites, creating a clean and safe environment for your chickens. It’s crucial to choose a poultry-friendly disinfectant and follow the manufacturer’s instructions for safe and effective use.
Now that the coop floor is clean and disinfected, it’s time to move on to the next step: scrubbing the coop walls and roosts.
Use a rake to remove soiled bedding and droppings from the dirt floor of the chicken coop. Then, sprinkle diatomaceous earth to help control odors and pests.
Scrubbing the Coop Walls and Roosts
Now that the coop floor has been sprayed and disinfected, it’s time to move on to scrubbing the coop walls and roosts. This step is crucial in maintaining a clean and sanitary environment for your chickens. Here’s how to effectively scrub the coop walls and roosts:
- Prepare a bucket with soapy water: Fill a bucket with warm water and add a mild detergent or poultry-specific cleaner. Mix the solution well to create a soapy mixture that will help remove dirt, grime, and any remaining bacteria.
- Dip a scrub brush into the soapy water: Submerge a scrub brush into the bucket of soapy water, ensuring that the bristles are saturated with the cleaning solution. The scrub brush should be appropriate for the surfaces you are cleaning, such as nylon bristles for plastic or metal surfaces.
- Scrub the coop walls: Starting from the top, scrub the coop walls using the soaked scrub brush. Work your way downwards, applying gentle pressure to remove any dirt, stains, or dried droppings. Pay extra attention to areas that are visibly soiled or have caked-on debris.
- Scrub the roosts: Once the coop walls are cleaned, focus on scrubbing the roosts. Remove the roost bars and scrub them thoroughly with the soapy water solution. Pay attention to any cracks or crevices where bacteria or parasites may hide.
- Rinse the walls and roosts: After scrubbing, rinse the walls and roosts with clean water to remove any residual soap or dirt. Use a hose or pressure washer to ensure thorough rinsing. It’s important to remove all soap residue, as chickens can be sensitive to harsh chemicals.
- Allow the walls and roosts to dry: Once rinsed, allow the coop walls and roosts to air dry completely before returning them to the coop. This will help prevent the growth of mold and mildew.
Scrubbing the coop walls and roosts helps remove any remaining dirt, bacteria, and parasites, ensuring a clean and safe living environment for your chickens. Regularly cleaning these surfaces reduces the risk of disease transmission and helps maintain optimal flock health.
With the coop walls and roosts thoroughly scrubbed and dried, it’s time to move on to the next step: applying fresh bedding.
Applying Fresh Bedding
After scrubbing the coop walls and roosts, it’s time to create a comfortable and clean resting area for your chickens by applying fresh bedding. Proper bedding not only provides a soft surface for your chickens to rest on but also helps control odors and absorbs droppings. Follow these steps to apply fresh bedding in your chicken coop:
- Select the right bedding material: Choose a suitable bedding material for your chickens, such as straw, wood shavings, or hay. Avoid cedar shavings or other aromatic woods, as they can irritate your chickens’ respiratory system.
- Spread a generous layer of bedding: Begin by spreading a generous layer of bedding material evenly across the entire coop floor. Aim for a thickness of around 2-3 inches, ensuring that all areas are covered.
- Pay attention to nesting boxes and roosts: For nesting boxes, provide a thick layer of clean straw or other bedding material. This will create a cozy and inviting space for your hens to lay their eggs. On the roosts, sprinkle a thin layer of bedding to provide a comfortable and clean perching surface.
- Refresh bedding regularly: Keep in mind that bedding needs to be refreshed regularly to maintain cleanliness and hygiene. Depending on the condition of the bedding and the number of chickens, you may need to replace it every few weeks or as needed.
By applying fresh bedding, you not only provide a comfortable space for your chickens to relax and sleep but also help maintain a clean and odor-free coop environment. Remember to periodically monitor the bedding and replace it when necessary to ensure optimal flock health.
With fresh bedding applied, the coop is nearly ready for your chickens to return. However, before that, it’s important to allow adequate time for the coop to dry. Let’s move on to the next step: allowing the coop to dry.
Allowing the Coop to Dry
After cleaning, disinfecting, scrubbing, and applying fresh bedding, it’s crucial to allow the chicken coop to dry thoroughly before letting your feathered friends back in. Drying the coop effectively helps prevent the growth of mold, mildew, and bacteria, ensuring a clean and healthy environment for your chickens. Follow these steps to properly dry the coop:
- Open windows and doors: If your coop has windows and doors, open them to allow air circulation. This will help promote faster drying and fresh air exchange, reducing moisture levels inside the coop.
- Utilize fans or natural ventilation: If you have access to fans, position them strategically to enhance airflow and speed up the drying process. Alternatively, rely on natural ventilation by adjusting vents or creating openings to promote air movement.
- Choose a warm and dry day: Optimize the drying process by choosing a warm and dry day to clean the coop. This will naturally aid in evaporating excess moisture and accelerate the drying time.
- Avoid overcrowding the coop: During the drying period, refrain from introducing chickens back into the coop. Crowding the space can hinder airflow and hinder the drying process. It’s crucial to prioritize the health and comfort of your flock by providing them with a completely dry environment.
- Regularly check for moisture: Monitor the coop’s moisture levels by visually inspecting the floor and walls. Look out for any signs of dampness or moisture buildup. If you notice any, extend the drying time before allowing the chickens back in.
Remember, a properly dried coop reduces the risk of respiratory diseases, mold growth, and bacterial contamination. While it may be tempting to return the chickens to their clean home immediately, ensuring the coop is completely dry is essential for the overall well-being of your flock.
Once you are confident that the coop is thoroughly dry, it’s time to move on to the final step: bringing the chickens back to their freshly cleaned coop.
Bringing the Chickens Back to the Coop
After properly cleaning, disinfecting, scrubbing, applying fresh bedding, and allowing the coop to dry, it’s time to bring your chickens back to their clean and cozy home. Here are some important steps to follow when reintroducing your chickens:
- Double-check the cleanliness: Before bringing the chickens back, take a final look around the coop to ensure everything is clean and in order. Check for any leftover debris, wet spots, or areas that may need further attention.
- Make the coop inviting: Create a welcoming environment for your chickens by scattering treats or their favorite feed around the coop. This will encourage them to explore their fresh surroundings and make them feel at ease.
- Open the coop entrance: Unlatch or remove any mechanisms blocking the coop entrance. Give your chickens free access to enter the coop at their own pace. Avoid forcing or rushing them, as it may cause unnecessary stress.
- Observe their behavior: Once the entrance is open, carefully observe your chickens’ behavior as they enter the coop. Watch for signs of hesitation, stress, or any issues with their new surroundings. Provide support, reassurance, and additional treats as needed.
- Monitor their adjustment: Keep an eye on the chickens for the first few hours after reintroduction to ensure they are adapting well to the clean coop. Watch for any signs of distress, bullying, or health issues. Address any concerns promptly to maintain the well-being of your flock.
- Maintain regular cleaning routine: To keep a clean and healthy coop, establish a regular cleaning routine. Regularly remove soiled bedding, perform spot cleaning as needed, and schedule thorough cleanings periodically, ensuring a comfortable and sanitary living environment for your chickens.
Bringing your chickens back to a clean coop provides them with a safe and inviting space to thrive. By following these steps and maintaining a consistent cleaning routine, you’ll create an environment that promotes optimal health, well-being, and egg production for your flock.
Congratulations on successfully cleaning your chicken coop with a dirt floor! By following these guidelines, you have taken an important step towards ensuring the health and happiness of your chickens.
Remember, a clean coop is not only beneficial for your chickens, but it also has a positive impact on the quality of their eggs, overall flock health, and your own peace of mind. Regular maintenance and cleanliness are key to maintaining a thriving and sustainable chicken-raising experience.
Happy chicken keeping!
Conclusion
Cleaning a chicken coop with a dirt floor is essential for maintaining a healthy and comfortable environment for your feathered friends. Regular cleaning and maintenance not only control odors but also prevent the spread of diseases and parasites. By following the steps outlined in this comprehensive guide, you can ensure that your chickens have a clean and safe living space.
From gathering supplies and removing the chickens from the coop to clearing out loose dirt and debris, spraying and disinfecting, scrubbing the walls and roosts, and applying fresh bedding, each step plays a crucial role in maintaining cleanliness and optimal flock health. Allowing the coop to dry thoroughly before reintroducing the chickens is vital to prevent mold and bacteria growth.
Remember, a clean coop not only keeps your chickens healthy but also contributes to the quality of their eggs and your overall chicken-raising experience. Regular cleaning routines and periodic deep cleanings ensure a thriving and sustainable flock.
Be sure to prioritize the well-being of your chickens throughout the cleaning process, handling them gently and providing a safe temporary space while the coop is being cleaned. Watch for any signs of stress or discomfort during the reintroduction process and address any concerns promptly.
Cleaning a chicken coop is an ongoing task, but the rewards are worth it. Your chickens will be happier and healthier, and you’ll have the satisfaction of providing them with a clean and cozy home. So roll up your sleeves, gather your supplies, and give your chicken coop the thorough cleaning it deserves!
Wishing you many years of joy and success in your chicken-raising journey.
Frequently Asked Questions about How To Clean A Chicken Coop With A Dirt Floor
Was this page helpful?
At Storables.com, we guarantee accurate and reliable information. Our content, validated by Expert Board Contributors, is crafted following stringent Editorial Policies. We're committed to providing you with well-researched, expert-backed insights for all your informational needs.


0 thoughts on “How To Clean A Chicken Coop With A Dirt Floor”