Articles
How To Clean A Scotsman Ice Maker
Modified: October 19, 2024
Learn effective techniques and tips on how to clean a Scotsman Ice Maker with our informative articles. Ensure your ice maker stays in top condition for maximum performance and hygiene.
(Many of the links in this article redirect to a specific reviewed product. Your purchase of these products through affiliate links helps to generate commission for Storables.com, at no extra cost. Learn more)
Introduction
Welcome to this comprehensive guide on how to clean a Scotsman ice maker. Whether you have a Scotsman residential ice maker or a commercial one, regular cleaning is essential to ensure optimal performance and maintain the quality of your ice. Over time, mineral deposits, mold, and bacteria can accumulate inside the machine, affecting the taste and clarity of the ice it produces. By following the steps outlined in this article, you will be able to effectively clean your Scotsman ice maker and keep it running smoothly.
Before we dive into the cleaning process, it’s important to note that safety should always be the top priority. Make sure to read and understand the manufacturer’s instructions and precautions specific to your Scotsman ice maker. Additionally, ensure you have the necessary tools and materials ready before starting the cleaning process.
Now, let’s take a look at the safety precautions you should follow before proceeding with cleaning your Scotsman ice maker.
Key Takeaways:
- Safety First!
Before cleaning your Scotsman ice maker, prioritize safety by following the manufacturer’s guidelines, wearing protective gear, and disconnecting the power supply to prevent electrical accidents. Keep children and pets away for a safe cleaning process. - Optimal Performance Guaranteed
By diligently cleaning the exterior, water system, ice making components, and condenser coil of your Scotsman ice maker, you ensure optimal performance, high-quality ice production, and a prolonged appliance lifespan. Regular maintenance is key!
Read more: How To Clean A Igloo Ice Maker
Safety Precautions
Before you begin cleaning your Scotsman ice maker, it’s crucial to take the necessary safety precautions to protect yourself and avoid any accidents. Here are some guidelines to follow:
- Read the instruction manual: Familiarize yourself with the manufacturer’s guidelines and safety instructions specific to your Scotsman ice maker. This will ensure that you understand the proper procedure for cleaning and avoid any potential hazards.
- Disconnect power supply: Before starting the cleaning process, unplug the ice maker from the power source to prevent any electrical accidents. This will also ensure that the machine is not running during the cleaning process.
- Wear protective gear: When handling cleaning agents or chemicals, it’s important to protect your skin and eyes. Wear rubber gloves and safety goggles to minimize the risk of any contact with harmful substances.
- Ventilate the area: If you’re using cleaning agents that emit fumes, make sure to work in a well-ventilated area. Open windows and doors or use a fan to circulate air and avoid any inhalation of toxic fumes.
- Use the right tools: Ensure you have the appropriate tools and cleaning supplies for the job. This may include a soft cloth, a brush with nylon bristles, a mild cleaning solution, and a water source for rinsing.
- Handle with care: When removing and cleaning ice maker components, such as the ice bin or drain line, be gentle to avoid any damage. Follow the manufacturer’s instructions for proper handling to ensure that you don’t cause any harm to the machine.
- Keep children and pets away: During the cleaning process, it’s important to have a clear workspace and keep children and pets away from the area. This will prevent any accidents or injuries while you’re working on the ice maker.
By adhering to these safety precautions, you can minimize the risks associated with cleaning your Scotsman ice maker and ensure a safe and effective cleaning process. Now that you’re aware of the safety guidelines, let’s move on to the tools and materials you’ll need for the task.
Tools and Materials Needed
Before you start cleaning your Scotsman ice maker, gather the following tools and materials to ensure a successful cleaning process:
- Soft cloth or sponge: Use a non-abrasive cloth or sponge to wipe down the exterior surfaces of the ice maker. This will help remove any dirt or grime.
- Nylon bristle brush: A gentle brush with nylon bristles will come in handy for scrubbing the interior components of the ice maker. This will help remove any mineral deposits or buildup.
- Mild cleaning solution: Prepare a mixture of warm water and a mild cleaning solution, such as a dish soap or vinegar solution. This will be used to clean various parts of the ice maker.
- Water source: You’ll need access to water for rinsing and cleaning purposes. Ensure you have a nearby water source, such as a sink or hose, that you can use throughout the cleaning process.
- Towels or paper towels: Have some towels or paper towels handy for drying off the ice maker components after cleaning. This will help prevent any moisture or water spots from forming.
- Protective gloves and goggles: For your safety, wear rubber gloves and safety goggles to protect your skin and eyes from any cleaning agents or chemicals you may be using.
- Manufacturer’s cleaning solution (optional): Some Scotsman ice makers may recommend using a specific cleaning solution provided by the manufacturer. If applicable, make sure you have this solution ready to use.
Having these tools and materials readily available will make the cleaning process more efficient and ensure that you have everything you need to properly clean your Scotsman ice maker. Now that you’re well-prepared, let’s move on to the step-by-step cleaning process.
Step 1: Disconnect Power Supply
The first step in cleaning your Scotsman ice maker is to disconnect the power supply. This is crucial to ensure your safety and prevent any electrical accidents during the cleaning process. Here’s how to do it:
- Locate the power cord: Find the power cord of your Scotsman ice maker. It is usually located at the back or side of the machine, near the bottom.
- Unplug the power cord: Gently unplug the power cord from the electrical outlet. Make sure to firmly grasp the plug and avoid pulling on the cord itself, as this can cause damage.
- Confirm power is disconnected: Double-check that the ice maker is completely disconnected from the power supply. You can do this by attempting to turn it on or by checking for any lights or indicators that may be on.
- Secure the power cord: To prevent any accidental reconnection, secure the power cord by either taping it to the back of the ice maker or tying it with a twist tie. This will minimize the risk of someone unknowingly plugging it back in while you’re cleaning.
By disconnecting the power supply, you eliminate the risk of electrical shock or damage to the ice maker. Keep in mind that many Scotsman ice makers have a built-in battery backup system to preserve settings and data, so you don’t need to worry about losing any information during the cleaning process.
Now that you’ve safely disconnected the power supply, you can proceed to the next step, which involves removing the ice bin and unplugging the drain line. Let’s move on to Step 2.
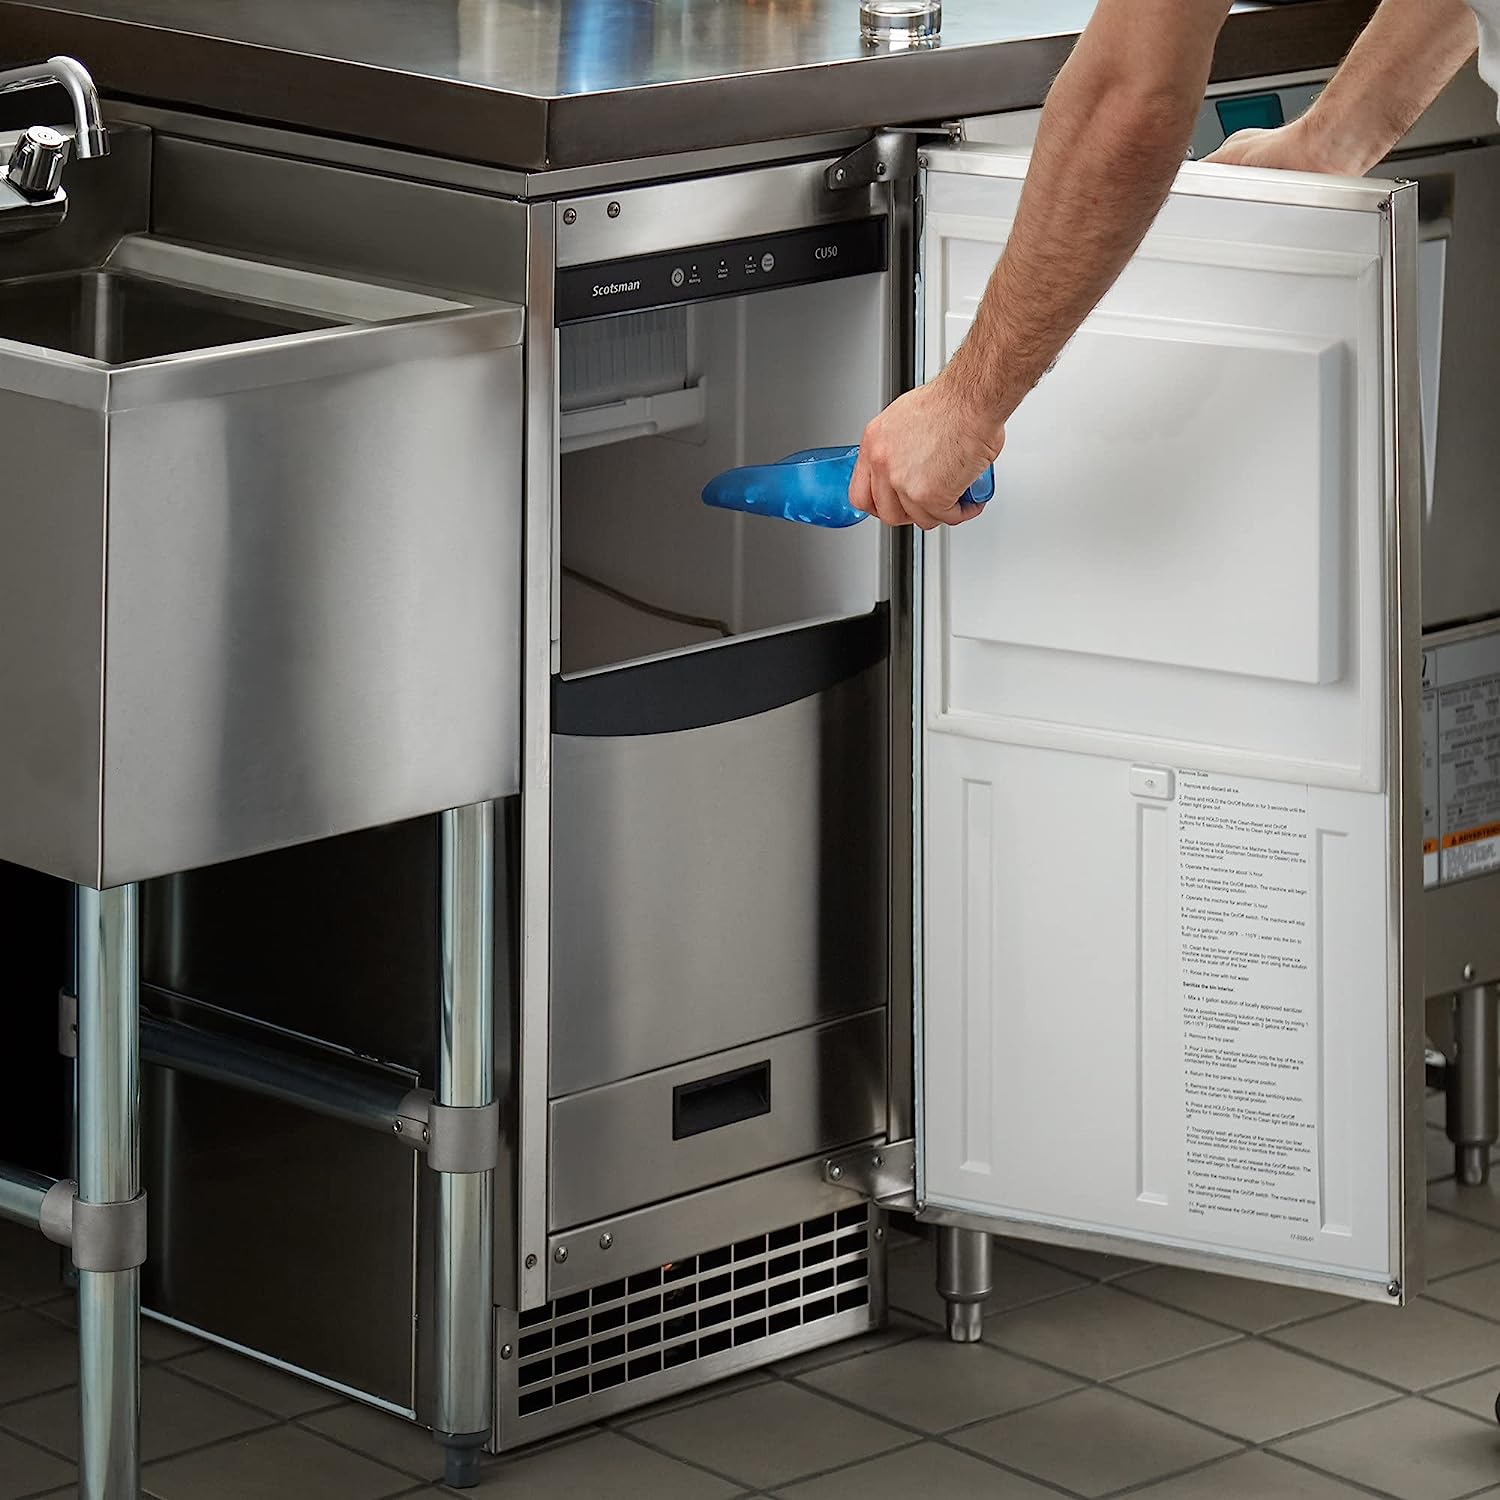
Step 2: Remove Ice Bin and Unplug the Drain Line
Once you have successfully disconnected the power supply, it’s time to remove the ice bin and unplug the drain line of your Scotsman ice maker. This will allow you to access the interior components for thorough cleaning. Follow these steps:
- Locate the ice bin: The ice bin is usually located at the front of the ice maker, beneath the ice chute. It is where the ice collects and is stored before being dispensed.
- Remove the ice bin: Gently lift the ice bin upwards and pull it towards you. Depending on the model of your Scotsman ice maker, there may be a release lever or button that needs to be pressed to detach the ice bin from the machine. Follow the manufacturer’s instructions for proper removal.
- Empty the ice bin: Once you have removed the ice bin, empty any remaining ice into a sink or a separate container. Dispose of the ice or save it for later use, depending on your preference.
- Unplug the drain line: Locate the drain line at the bottom of the ice maker. It is usually a flexible tube that connects to a drain or a drain pump.
- Disconnect the drain line: Gently detach the drain line from the ice maker. Depending on the model, you may need to twist, unscrew, or release a latch to remove it.
- Clean the ice bin and drain line: Take the time to clean both the ice bin and the drain line thoroughly. You can use warm soapy water and a cloth to wipe down the surfaces and remove any residue or buildup. Rinse them well with clean water to ensure they are free from any cleaning agents or debris.
Removing the ice bin and unplugging the drain line allows you to access the interior parts of your Scotsman ice maker, which are essential to clean for optimal performance. Next, we’ll move on to the next step: cleaning the exterior surfaces of the ice maker.
Read more: How To Clean Out An Ice Maker
Step 3: Clean the Exterior Surfaces
Now that you’ve removed the ice bin and unplugged the drain line, it’s time to clean the exterior surfaces of your Scotsman ice maker. This step is important to remove any dirt, grime, or stains that may have accumulated over time. Follow these steps:
- Prepare a cleaning solution: Mix a mild cleaning solution using warm water and a small amount of dish soap or vinegar. This mixture will effectively clean the exterior surfaces of the ice maker.
- Dampen a soft cloth or sponge: Dip a soft cloth or sponge into the cleaning solution. Wring out any excess liquid so that it is damp, but not soaking wet.
- Wipe down the surfaces: Gently wipe down the exterior surfaces of the ice maker, including the front, sides, and top. Pay special attention to areas that may be dirty or sticky, such as the control panel or dispenser area.
- Scrub stubborn stains: For stubborn stains or residue, use a gentle nylon bristle brush to scrub the affected area. Be careful not to use excessive force or scrub too vigorously, as this may damage the surface of the ice maker.
- Rinse with clean water: After cleaning, rinse the cloth or sponge with clean water and go over the surfaces again to remove any soap or vinegar residue.
- Dry the exterior: Use a soft, dry cloth or paper towel to dry the exterior surfaces of the ice maker. This will help prevent water spots and maintain the appearance of your appliance.
Cleaning the exterior surfaces of your Scotsman ice maker not only improves its appearance but also helps maintain a hygienic environment for your ice. With the exterior surfaces clean, you can now move on to the next step, which involves cleaning the water system of the ice maker.
Regularly clean the water system and evaporator of your Scotsman ice maker with a solution of water and ice machine cleaner to prevent mineral buildup and ensure optimal ice production.
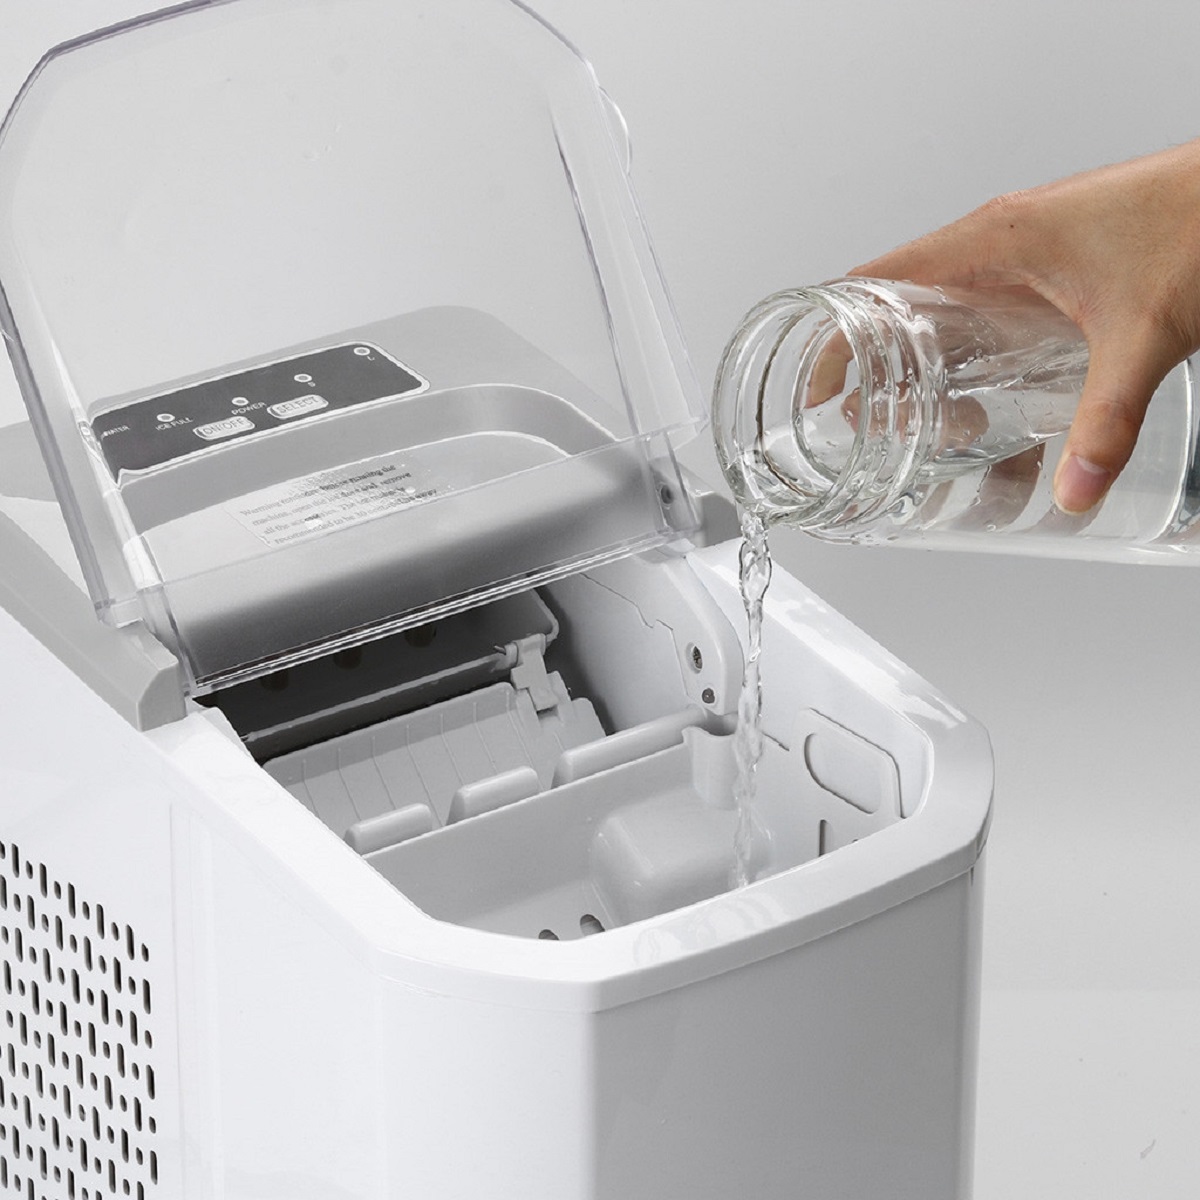
Step 4: Clean the Water System
Now that you’ve cleaned the exterior surfaces of your Scotsman ice maker, it’s time to focus on the water system. The water system is responsible for supplying clean water to the ice maker to produce quality ice. Over time, mineral deposits and bacteria can build up in the system, affecting the taste and quality of the ice. Follow these steps to clean the water system:
- Prepare a cleaning solution: In a bucket or container, mix a solution of warm water and a Scotsman-approved cleaning agent. Follow the manufacturer’s instructions and recommended dilution ratio for the specific cleaning agent you are using.
- Locate the water inlet valve: The water inlet valve is usually located at the back or bottom of the ice maker. It is connected to the water supply line.
- Disconnect the water supply line: Carefully disconnect the water supply line from the water inlet valve. This will allow you to flush the system with the cleaning solution.
- Flush the water system: Place the disconnected end of the water supply line into the bucket or container containing the cleaning solution. Turn on the water supply for a few seconds to let the solution flow through the water system and flush out any impurities or build-up.
- Drain and rinse: Once the water system has been flushed, discard the used cleaning solution and thoroughly rinse the water supply line with clean water. Make sure there is no residual cleaning solution left in the line.
- Reconnect the water supply line: Reconnect the water supply line to the water inlet valve securely. Double-check for any leaks.
- Run clean water cycle: Turn on the ice maker and initiate a clean water cycle. This will flush out any remaining cleaning solution from the water system. Follow the manufacturer’s instructions on how to initiate a clean water cycle for your specific model.
- Check for proper water flow: Ensure that water is flowing freely into the ice maker and there are no clogs or blockages in the water system.
Cleaning the water system of your Scotsman ice maker will help maintain the quality of your ice, ensuring it is free from impurities and tastes fresh. With the water system clean, it’s time to move on to the next step: cleaning the ice making components of the machine.
Step 5: Clean the Ice Making Components
Now that you’ve cleaned the water system of your Scotsman ice maker, it’s time to focus on cleaning the ice making components. These components are responsible for producing the ice, and it’s important to keep them clean to ensure the quality and efficiency of the ice maker. Follow these steps to clean the ice making components:
- Remove any removable parts: Depending on your Scotsman ice maker model, there may be removable parts such as the ice scoop, ice deflector, or other components. Remove these parts and set them aside for cleaning.
- Prepare a cleaning solution: In a basin or sink, mix a solution of warm water and a mild cleaning agent, such as dish soap. This will be used to clean the removable parts and the interior of the ice maker.
- Soak and scrub the removable parts: Place the removable parts in the cleaning solution and let them soak for a few minutes. Then, use a soft brush or sponge to scrub away any dirt, residue, or mineral deposits. Rinse the parts thoroughly with clean water and set them aside to dry.
- Clean the interior components: Use a soft brush or nylon bristle brush to gently scrub the interior walls, evaporator plate, and any other accessible parts inside the ice maker. Pay attention to any areas with visible build-up or debris.
- Rinse with clean water: After scrubbing, rinse the interior components with clean water to remove any cleaning solution or residue. This will help ensure that there are no lingering residues that could affect the taste or clarity of the ice.
- Dry the components: After rinsing, use a clean cloth or paper towel to dry the components before reassembling them. Make sure they are completely dry to prevent any moisture-related issues.
- Reassemble the ice maker: Once the components are dry, reassemble the ice maker by placing the removable parts back in their respective positions. Ensure that each part is securely in place.
By regularly cleaning the ice making components of your Scotsman ice maker, you’ll help maintain the efficiency and quality of the ice production. With the components clean and reassembled, we can now move on to the next step: cleaning the condenser coil.
Step 6: Clean the Condenser Coil
Cleaning the condenser coil of your Scotsman ice maker is an important step to ensure optimal cooling performance and energy efficiency. The condenser coil is responsible for dissipating heat from the refrigeration system, and over time, it can become dirty or clogged with dust, debris, and grease. Here’s how to clean the condenser coil:
- Locate the condenser coil: The condenser coil is typically located at the back or bottom of the ice maker. It may be covered by a protective grille or panel.
- Remove the grille or panel: If there is a protective grille or panel covering the condenser coil, carefully remove it. Refer to the manufacturer’s instructions for specific guidance on removing the cover.
- Inspect the condenser coil: Take a close look at the condenser coil to assess its condition. Look for any visible dirt, dust, or debris that may have accumulated on the coil surface.
- Clean the condenser coil: Use a soft brush, a vacuum cleaner with a brush attachment, or compressed air to gently remove the dirt, dust, and debris from the condenser coil. Be careful not to use excessive force to avoid damaging the delicate fins.
- Precision cleaning (optional): If the condenser coil is heavily soiled or clogged, you may consider using a coil cleaning solution specifically designed for HVAC or refrigeration systems. Follow the manufacturer’s instructions and apply the cleaning solution as recommended.
- Rinse the condenser coil (if applicable): If you used a coil cleaning solution, rinse the condenser coil with water to remove any residue. Make sure to check the manufacturer’s instructions to determine if rinsing is necessary.
- Dry and reassemble: Once the condenser coil is clean, ensure that it is completely dry before reassembling the protective grille or panel. This will help prevent the accumulation of moisture and dust in the future.
Regularly cleaning the condenser coil of your Scotsman ice maker ensures that it operates efficiently, extends the lifespan of the appliance, and helps maintain optimal ice production. With the condenser coil clean and the grille or panel reassembled, we can now proceed to the next step: reconnecting the drain line and ice bin.
Read more: How To Clean A Silonn Ice Maker
Step 7: Reconnect the Drain Line and Ice Bin
After cleaning the condenser coil of your Scotsman ice maker, it’s time to reconnect the drain line and ice bin. These components play essential roles in the proper functioning of the ice maker. Follow these steps to reconnect them:
- Locate the drain line connection: Locate the opening or connection point where the drain line will be attached. This is generally located near the bottom or back of the ice maker.
- Inspect the drain line: Before reconnecting the drain line, inspect it for any damage or clogs. Ensure that the drain line is clean and free from debris.
- Reconnect the drain line: Align the drain line with the opening and gently push it in until it is securely connected. If applicable, twist, screw, or latch the drain line to ensure a tight connection.
- Place the ice bin back in position: Carefully place the ice bin back into its designated spot inside the ice maker. Ensure that it is aligned properly and securely locked in place according to the manufacturer’s instructions.
- Test the ice bin: Give the ice bin a gentle shake or wiggle to make sure it is firmly in place and will not dislodge during operation.
- Double-check connections: Double-check that both the drain line and ice bin are securely connected. This will prevent any leaks or spills during the ice making process.
Reconnecting the drain line and ice bin ensures that the Scotsman ice maker functions properly and prevents any water or ice from leaking out. With these components reconnected, we can move on to the final step: reconnecting the power supply and testing the ice maker.
Step 8: Reconnect Power Supply and Test the Ice Maker
After completing the cleaning and reassembly process of your Scotsman ice maker, it’s time to reconnect the power supply and test the machine to ensure proper functionality. Follow these final steps:
- Locate the power cord: Find the power cord of your Scotsman ice maker, which should be near the back or side of the machine.
- Plug in the power cord: Carefully plug the power cord back into the electrical outlet. Make sure the plug is securely inserted into the outlet to establish a proper connection.
- Turn on the ice maker: Once the power supply is reconnected, turn on the ice maker using the control panel or power switch. Refer to the manufacturer’s instructions for your specific model if you’re unsure how to do this.
- Wait for ice production: Allow the ice maker some time to begin the ice production cycle. It may take a couple of hours for the ice maker to start producing ice and reach its optimal performance.
- Monitor ice production: As the ice maker operates, monitor the ice production to ensure that ice cubes are being formed properly and dispensed without any issues. Check for any unusual noises, leaks, or other irregularities.
- Verify ice quality: Once the ice maker has produced a sufficient amount of ice, check the quality of the ice. The ice cubes should be clear, solid, and free from any off-flavors or odors. If you notice any abnormalities, refer to the troubleshooting section of your Scotsman ice maker’s manual or consult a professional technician.
By reconnecting the power supply and testing the ice maker, you can ensure that the cleaning process was successful and that the machine is operating as intended. Enjoy your freshly cleaned Scotsman ice maker and the high-quality ice it produces!
Remember, regular maintenance and cleaning are essential to keep your Scotsman ice maker in optimal condition and prolong its lifespan. Be sure to follow the manufacturer’s guidelines regarding cleaning frequency and procedures to ensure the best results.
Conclusion
Congratulations! You have successfully completed the comprehensive cleaning process for your Scotsman ice maker. By following the steps outlined in this guide, you have ensured that your ice maker is clean, hygienic, and operating at its best. Regular maintenance and cleaning are essential for optimal ice production and maintaining the quality of the ice your machine produces.
Throughout the cleaning process, you have learned important safety precautions to follow, gathered the necessary tools and materials, and diligently cleaned each component of your ice maker. From disconnecting the power supply to reassembling the ice maker, each step plays a crucial role in maintaining the performance and longevity of your Scotsman ice maker.
Remember, safety is paramount when handling electrical appliances. Always follow the manufacturer’s instructions and take the necessary precautions to protect yourself and prevent any accidents.
Now that your Scotsman ice maker is clean, make sure to continue regular maintenance, such as wiping down the exterior surfaces and checking for any signs of build-up or issues. Regular cleaning and maintenance will help keep your ice maker running smoothly and ensure the production of high-quality ice for your enjoyment.
Thank you for taking the time to clean your Scotsman ice maker using this comprehensive guide. We hope that your ice maker continues to provide you with refreshing ice for years to come. Cheers!
Frequently Asked Questions about How To Clean A Scotsman Ice Maker
Was this page helpful?
At Storables.com, we guarantee accurate and reliable information. Our content, validated by Expert Board Contributors, is crafted following stringent Editorial Policies. We're committed to providing you with well-researched, expert-backed insights for all your informational needs.


0 thoughts on “How To Clean A Scotsman Ice Maker”