Articles
How To Clean A Gevi Ice Maker
Modified: September 2, 2024
Learn how to clean your Gevi ice maker with these helpful articles. Keep your ice maker in top shape for refreshing drinks all year round.
(Many of the links in this article redirect to a specific reviewed product. Your purchase of these products through affiliate links helps to generate commission for Storables.com, at no extra cost. Learn more)
How To Clean A Gevi Ice Maker
Keeping your Gevi Ice Maker clean is essential in maintaining its optimal performance and longevity. Regular cleaning prevents the accumulation of dirt, mold, and bacteria, ensuring that you have clean and refreshing ice at all times. In this guide, we will walk you through the steps to effectively clean your Gevi Ice Maker.
Key Takeaways:
- Regular cleaning and maintenance of your Gevi Ice Maker is crucial to ensure clean, refreshing ice and optimal performance. Follow the provided instructions and manufacturer’s guidelines for effective and safe cleaning.
- Incorporating maintenance tips into your routine will prolong the lifespan of your Gevi Ice Maker and ensure consistent ice production. Enjoy the convenience of clean and refreshing ice cubes with proper care.
Read more: How To Clean A Igloo Ice Maker
Safety Precautions
Before you begin the cleaning process, it is important to take some safety precautions to protect yourself and your appliance. Make sure to unplug the ice maker from the power source and wear protective gloves to avoid any potential injuries from sharp edges or cleaning agents. Keep in mind that some cleaning solutions may be harsh, so read the label carefully and follow the manufacturer’s safety recommendations.
Gathering Supplies
To clean your Gevi Ice Maker, you will need a few supplies:
- Warm water
- Mild cleaning solution or vinegar
- Soft cloth or sponge
- Small brush or toothbrush
These supplies will help you effectively clean the interior, exterior, and components of the Gevi Ice Maker.
Preparation
Before you start cleaning, make sure to turn off the ice maker and unplug it from the power source. With the machine powered down, empty the ice bin and remove any remaining ice. This will give you access to the interior and allow for a thorough cleaning.
Cleaning the Interior
To clean the interior of your Gevi Ice Maker, dampen a soft cloth or sponge with warm water and mild cleaning solution. Using a gentle motion, wipe down all the interior surfaces, including the walls and the ice chute. Pay attention to any stubborn stains or residue and use the brush or toothbrush to remove them. Ensure that you do not spray any cleaning solution directly into the ice maker to avoid damaging the electrical components.
Read more: How To Clean Out An Ice Maker
Cleaning the Ice Basket and Scoop
The ice basket and scoop also require regular cleaning. Remove them from the ice maker and soak them in warm water with mild cleaning solution or vinegar for about 10-15 minutes. Use the small brush or toothbrush to scrub away any buildup or debris. Rinse them thoroughly with clean water and allow them to air dry before reassembling.
Cleaning the Exterior
To clean the exterior surfaces of your Gevi Ice Maker, mix warm water with a mild cleaning solution or vinegar in a spray bottle. Spray the solution onto a soft cloth and gently wipe down the external surfaces, including the control panel and buttons. Be cautious not to use excessive moisture that can seep into the appliance. Pay close attention to any specific areas that may require extra cleaning, such as corners or crevices.
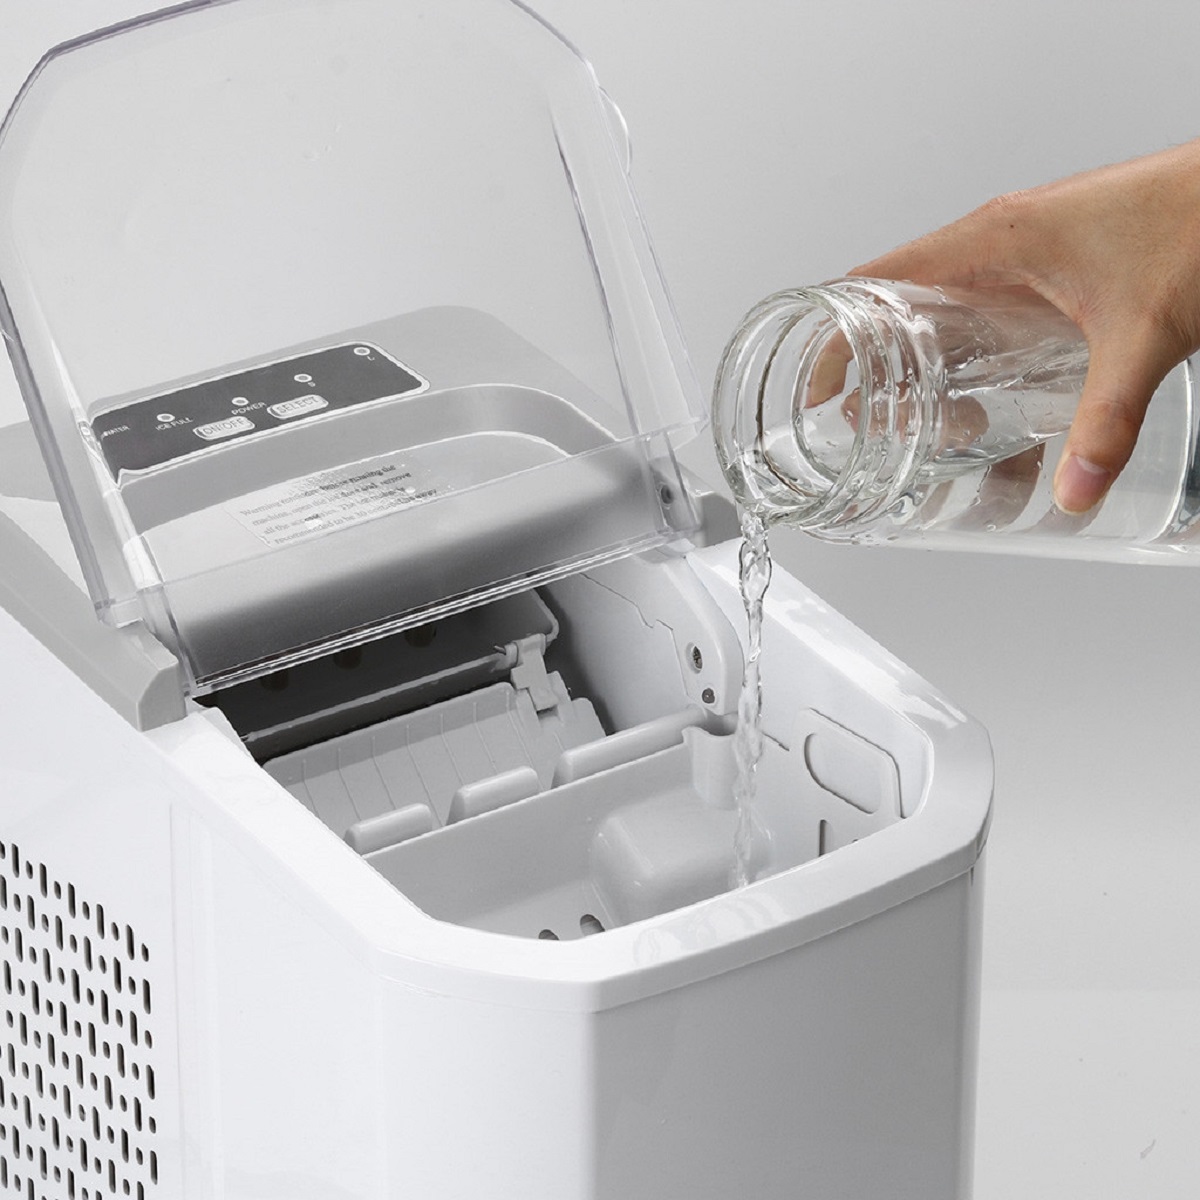
Cleaning the Water Reservoir
The water reservoir of your Gevi Ice Maker should also be cleaned regularly. Empty the reservoir and rinse it with warm water to remove any sediment or mineral buildup. Ensure that you do not submerge or soak the ice maker in water, as this can damage the internal components. Wipe the reservoir dry with a clean cloth before reassembling.
Final Steps
Allow all the cleaned components of your Gevi Ice Maker to air dry completely. Once dry, reassemble the ice basket, scoop, and other removable parts. Plug the ice maker back in and turn it on. It is now ready to make clean and refreshing ice once again.
Read more: How To Clean A Silonn Ice Maker
Maintenance Tips
To keep your Gevi Ice Maker in excellent condition, it is recommended to clean it every 2-3 months or as needed. Additionally, regularly check the water supply line for any leaks or blockages. Keeping the ice maker in a well-ventilated area and maintaining proper hygiene will prolong its lifespan and ensure the quality of the ice it produces.
Following these cleaning and maintenance guidelines will help you enjoy uninterrupted ice production and ensure the longevity of your Gevi Ice Maker. Cheers to clean and refreshing ice!
Introduction
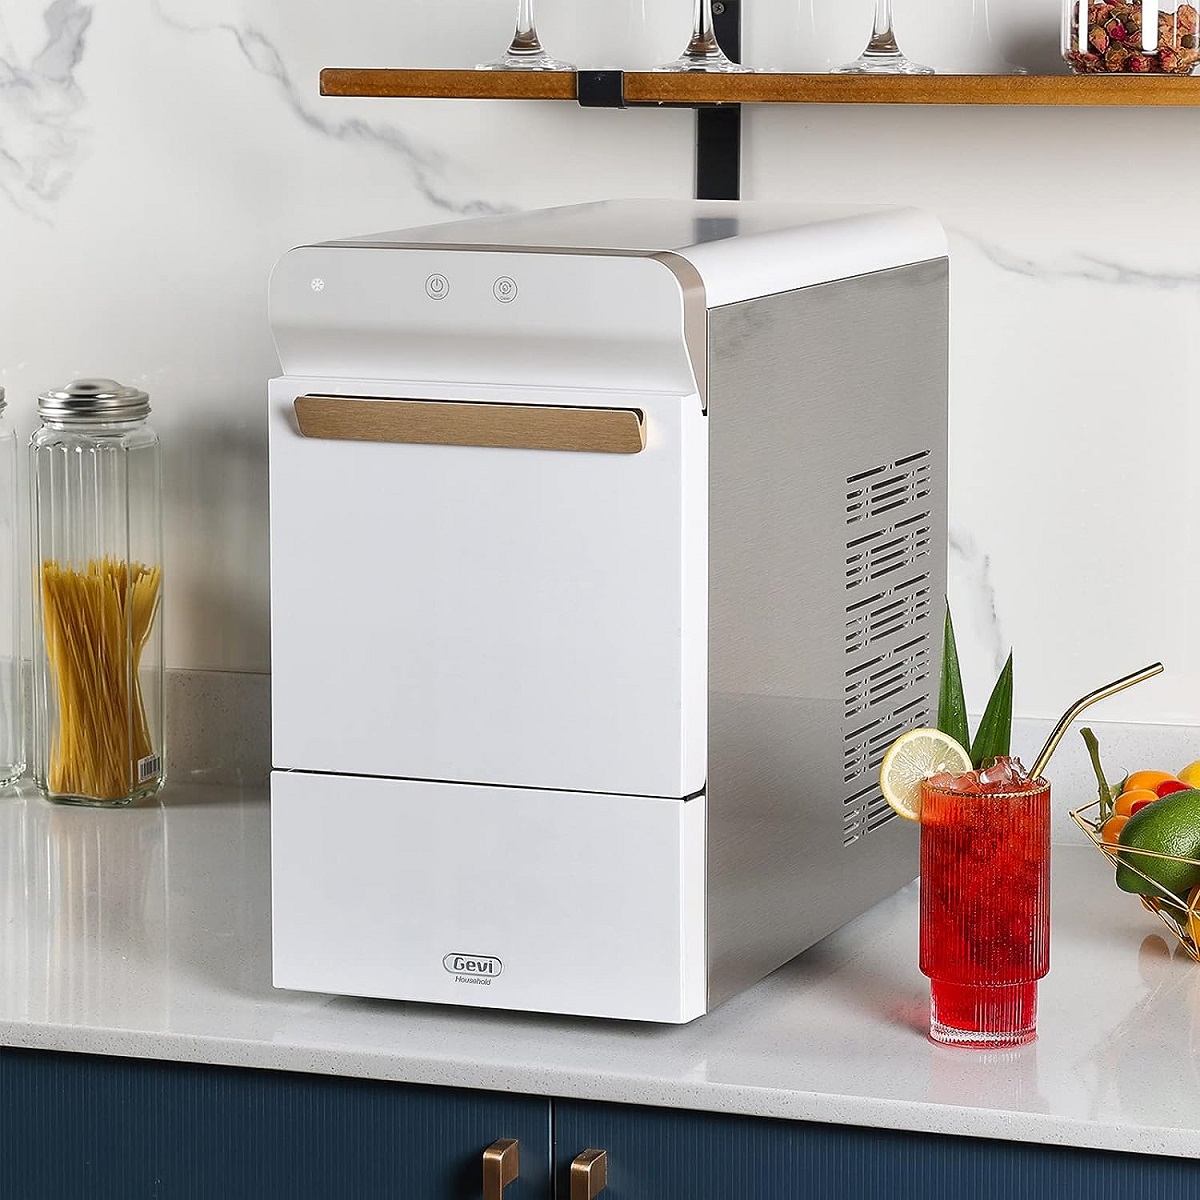
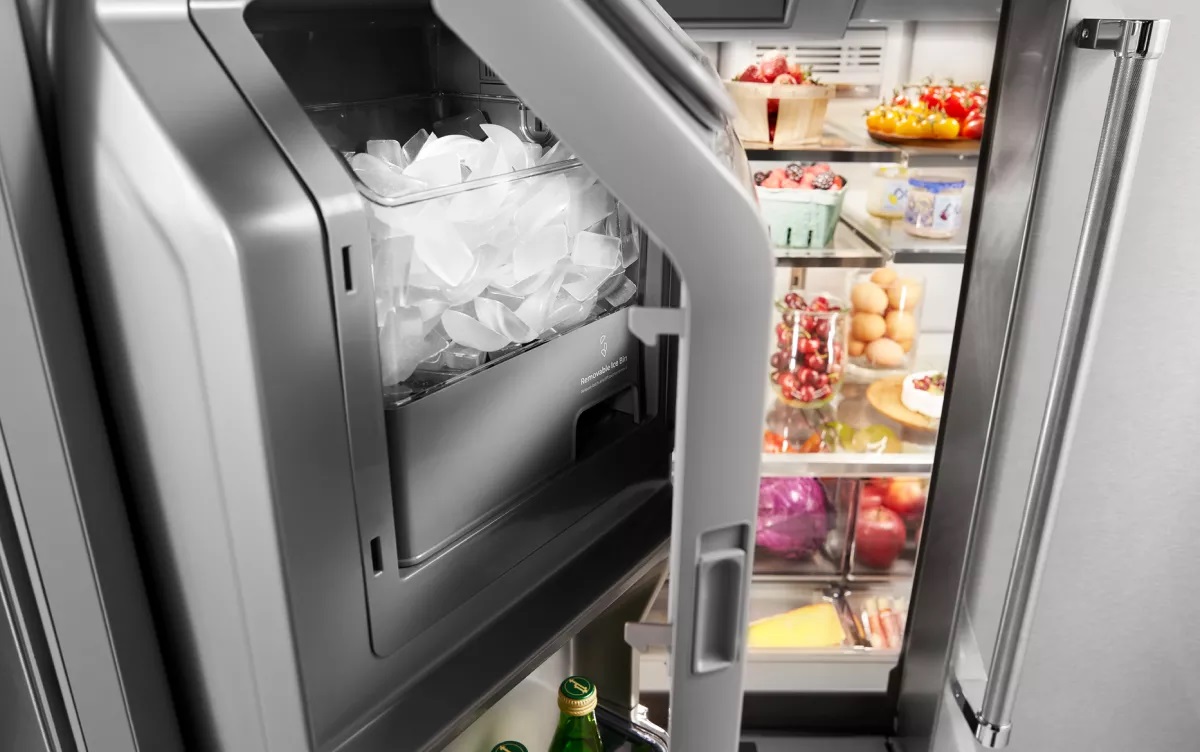
The Gevi Ice Maker is a versatile and efficient appliance that allows you to enjoy a constant supply of ice cubes, whether for your refreshing beverages or for hosting gatherings. This compact and stylish ice maker is designed to produce ice cubes quickly, making it a convenient addition to any kitchen or home bar setup.
While the Gevi Ice Maker provides convenience and versatility, it is important to understand the significance of regular cleaning for its optimal performance and longevity. By keeping your Gevi Ice Maker clean, you can ensure the production of clean and hygienic ice cubes, free from any impurities or unpleasant odors.
Regular cleaning of your Gevi Ice Maker prevents the buildup of dirt, mold, and bacteria that can affect the quality of the ice cubes and the overall performance of the machine. Over time, minerals and other particles can accumulate in the ice maker’s components, causing clogged filters and reduced efficiency. This can lead to slower ice production and even potential damage to the appliance.
By incorporating a cleaning routine into your maintenance regimen, you can enjoy the full benefits of your Gevi Ice Maker. Regular cleaning not only ensures the production of clean and fresh-tasting ice but also helps maintain the appliance’s efficiency and extends its lifespan.
Additionally, keeping your Gevi Ice Maker clean promotes better hygiene and reduces the risk of contamination. This is especially important if you use the ice cubes for consumption purposes. By eliminating any potential bacteria or mold buildup, you can have peace of mind knowing that the ice you serve is safe and healthy for you and your family.
Regularly cleaning your Gevi Ice Maker is a simple yet essential task to maintain its optimal performance and ensure the production of high-quality ice cubes. By following the cleaning instructions provided by the manufacturer, you can keep your appliance in excellent condition, prolong its lifespan, and enjoy clean and refreshing ice cubes whenever you need them.
Now that you understand the importance of regular cleaning for your Gevi Ice Maker, let’s explore the necessary steps and guidelines to effectively clean and maintain this indispensable appliance.
To clean a Gevi ice maker, mix equal parts of water and white vinegar and run the solution through the machine. Then, run a few cycles of plain water to rinse it thoroughly. Wipe down the exterior with a damp cloth.
Safety Precautions
Prior to starting the cleaning process for your Gevi Ice Maker, it is essential to take certain safety precautions to ensure your well-being and protect the appliance from any potential damage. By following these measures, you can carry out the cleaning task safely and effectively.
Before you begin cleaning, make sure to turn off and unplug the Gevi Ice Maker from the power source. This step is crucial in preventing any electrical accidents or injury during the cleaning process. By unplugging the appliance, you eliminate the risk of electric shocks or damage to the internal components.
When handling cleaning agents and tools, it is important to prioritize safety. Wear a pair of protective gloves to shield your hands from any potential cuts, chemical exposure, or irritation. These gloves will also provide a better grip while handling wet surfaces and cleaning solutions.
Whether you are using a specialized cleaning solution recommended by the manufacturer or opting for a mild solution, always read and follow the instructions on the label carefully. Some cleaning agents may contain strong chemicals, and it is crucial to use them in well-ventilated areas and avoid direct contact with your skin or eyes. If you are using vinegar as a natural cleaning agent, dilute it properly before application.
When using cleaning tools such as brushes or sponges, choose ones that are appropriate for the task and will not scratch or damage the surfaces of the Gevi Ice Maker. Soft cloths or sponges are excellent for wiping down the interior and exterior surfaces without causing any harm.
While cleaning, be cautious not to apply excessive force or pressure on delicate parts of the ice maker. Gentle wiping or brushing is usually sufficient to remove any residue or stains without causing any damage.
It is crucial to keep cleaning agents or solutions away from food items or surfaces that come into direct contact with food. Make sure to thoroughly rinse any cleaning solution from the Gevi Ice Maker before using it again to ensure that there is no residue or chemical taste transferred to the ice cubes.
By following these safety precautions, you can maintain a safe environment during the cleaning process and protect both yourself and your Gevi Ice Maker from any potential harm. Now that you are aware of the safety measures, let’s move on to gathering the supplies needed for cleaning your Gevi Ice Maker.
Gathering Supplies
Before you begin cleaning your Gevi Ice Maker, it is important to gather the necessary supplies to ensure a thorough and effective cleaning process. These supplies will help you remove dirt, stains, and any buildup from the various components of the ice maker. Here is a list of supplies you will need:
- Warm water: Water at a moderate temperature is effective in loosening dirt and impurities from the ice maker.
- Mild cleaning solution: Opt for a mild cleaning solution recommended by the manufacturer or a mixture of mild dish soap and warm water. This will help remove any residue without causing damage to the appliance.
- Soft cloth: Use a soft cloth or sponge to wipe down the interior and exterior surfaces of the ice maker. This will prevent scratching or damaging the appliance while effectively cleaning it.
- Brush: A small brush or toothbrush will come in handy for removing stubborn dirt or residue from hard-to-reach areas of the ice maker, such as the ice chute or corners.
- Microfiber cloth: Consider using a microfiber cloth for a streak-free cleaning of the exterior surfaces, such as the control panel or buttons. Microfiber cloths are highly absorbent and lint-free, ensuring a polished finish.
- Vinegar (optional): If you prefer a natural cleaning solution, vinegar can be an effective alternative. Dilute vinegar with water for cleaning purposes to remove stains or mineral buildup.
Having these supplies readily available will facilitate the cleaning process and allow you to efficiently clean all parts of your Gevi Ice Maker. Remember to read the manufacturer’s instructions for cleaning and maintenance recommendations specific to your ice maker model.
Now that you have gathered the necessary supplies, let’s move on to the preparation steps before cleaning the Gevi Ice Maker.
Read more: How To Clean A Scotsman Ice Maker
Preparation
Before you embark on the cleaning process for your Gevi Ice Maker, there are a few important preparatory steps you should follow to ensure a successful and efficient cleaning session. These steps will help maintain safety and enable you to access all the areas that require cleaning. Here is a guide to the necessary preparation steps:
- Turn off and unplug the ice maker: Begin by turning off the Gevi Ice Maker and unplugging it from the power source. This step is crucial to prevent any electrical accidents or damage to the appliance during the cleaning process. It ensures your safety and allows you to work on the ice maker without the risk of electric shocks.
- Empty the ice bin: Next, empty the ice bin by removing any remaining ice cubes. This step is important as it allows you to access the interior of the ice maker without obstruction. Carefully scoop out the ice cubes and transfer them to a separate container or discard them.
- Remove any removable parts: Check if your Gevi Ice Maker has any removable parts, such as the ice basket or the water reservoir. If applicable, remove these parts from the ice maker before starting the cleaning process. This will allow for a more thorough cleaning by giving you access to all the components of the ice maker.
By following these preparation steps, you ensure that your Gevi Ice Maker is ready for a deep and effective cleaning. The next step will be to clean the interior of the ice maker, which we will guide you through in the following section.
Cleaning the Interior
Now that you have prepared your Gevi Ice Maker for cleaning, it’s time to focus on the interior of the appliance. The interior of your ice maker can accumulate dirt, mineral deposits, and residue over time, which can affect the quality of the ice produced. Follow these guidelines to effectively clean the inside of your Gevi Ice Maker:
- Prepare a cleaning solution: Mix a mild cleaning solution according to the manufacturer’s recommendations or dilute a small amount of mild dish soap in warm water. Avoid using abrasive cleaners that could damage the interior surfaces of the ice maker.
- Dampen a soft cloth: Dip a soft cloth or sponge into the cleaning solution and wring it out to remove excess moisture. The cloth should be damp, not overly wet, to avoid damaging the electrical components of the ice maker.
- Wipe down all interior surfaces: Gently wipe down all the interior surfaces of the Gevi Ice Maker with the damp cloth. Pay close attention to areas where dirt or residue may accumulate, such as the walls, cooling elements, and the ice chute. Ensure that you cover the entire interior surface for a thorough cleaning.
- Remove stubborn stains or residue: If you encounter stubborn stains or residue that is not easily wiped away, use a small brush or toothbrush dipped in the cleaning solution to gently scrub the affected areas. Be careful not to apply excessive force or use abrasive materials that could scratch or damage the surfaces.
- Rinse with clean water: After cleaning, rinse the interior surfaces of the ice maker with clean water to remove any leftover cleaning solution. This step ensures that no traces of cleaning agents remain that could affect the taste or quality of the ice cubes.
- Dry the interior: Use a clean, dry cloth to wipe down the interior surfaces of the Gevi Ice Maker, removing any excess moisture. It is essential to thoroughly dry the interior to prevent the growth of mold or mildew.
By following these guidelines, you can effectively clean the interior of your Gevi Ice Maker and remove any dirt, stains, or residue that may have accumulated. Once the interior is clean, you can move on to cleaning the ice basket and scoop, which we will discuss in the next section.
Cleaning the Ice Basket and Scoop
In addition to cleaning the interior surfaces of your Gevi Ice Maker, it is important to pay attention to the ice basket and scoop. These components come into direct contact with the ice cubes and can accumulate dirt and residue over time. Follow these instructions to effectively clean the ice basket and scoop:
- Remove the ice basket and scoop: Take out the ice basket and scoop from the Gevi Ice Maker, ensuring that they are empty. This will allow you to clean them thoroughly without any obstructions.
- Prepare a cleaning solution: Fill a basin or sink with warm water and add a small amount of mild cleaning solution. Alternatively, you can use a mixture of warm water and vinegar for a natural cleaning solution.
- Soak the ice basket and scoop: Place the ice basket and scoop into the cleaning solution, ensuring that they are fully submerged. Let them soak for about 10-15 minutes to loosen any dirt or residue.
- Brush away buildup or debris: After soaking, use a brush or toothbrush to gently scrub the ice basket and scoop, focusing on areas where dirt or buildup may be present. Pay extra attention to the corners, bottom, and other hard-to-reach spots. The brush will help remove any stubborn residue or debris from the surfaces.
- Rinse with clean water: Once you have thoroughly brushed the ice basket and scoop, rinse them under clean running water to remove any remaining cleaning solution or debris. Ensure that there are no particles or residue left on the surfaces.
- Air dry before reassembling: Allow the ice basket and scoop to air dry completely before placing them back into the Gevi Ice Maker. Make sure there is no moisture left on the components to prevent the growth of mold or mildew.
By following these instructions, you can ensure that the ice basket and scoop of your Gevi Ice Maker are clean and free from any dirt or residue. Once the components are dry, you can proceed to clean the exterior surfaces of the appliance, which will be covered in the next section.
Cleaning the Exterior
As part of the cleaning process for your Gevi Ice Maker, it is important to pay attention to the exterior surfaces of the appliance. These areas can accumulate dust, fingerprints, and other stains that can affect the overall appearance of your ice maker. Follow these steps to effectively clean the exterior of your Gevi Ice Maker:
- Prepare a cleaning solution: Mix a mild cleaning solution by diluting a small amount of mild dish soap or a recommended cleaner in warm water. Alternatively, you can also use a mixture of equal parts water and vinegar for a natural cleaning solution.
- Dampen a soft cloth: Dip a soft cloth or sponge into the cleaning solution and wring out any excess moisture. The cloth should be damp, not wet, to avoid any water seeping into the internals of the ice maker.
- Wipe down the exterior surfaces: Gently wipe down the external surfaces of the Gevi Ice Maker with the damp cloth. Pay special attention to areas that may accumulate dust or fingerprints, such as the control panel, buttons, and edges of the appliance. Ensure that you cover the entire exterior surface for a comprehensive cleaning.
- Pay attention to specific areas: Take note of any specific areas that may require extra cleaning. For example, corners, crevices, or textured surfaces tend to collect more dirt and may need additional attention. Use a soft brush or toothbrush dipped in the cleaning solution to gently scrub these areas.
- Rinse with clean water: After wiping down the surfaces with the cleaning solution, rinse the cloth or sponge with clean water and wring out any excess moisture. Go over the external surfaces once again to remove any residue from the cleaning solution.
- Dry the exterior: Use a dry, clean cloth to dry the exterior surfaces of the Gevi Ice Maker. Make sure to remove any lingering moisture to prevent water spots or streaks. Pay extra attention to the control panel and buttons, ensuring they are completely dry.
By following these steps, you can effectively clean the exterior of your Gevi Ice Maker and restore its shine. Regularly cleaning the external surfaces of the appliance will not only enhance its appearance, but it will also contribute to a hygienic and inviting environment in your kitchen.
Now that you have successfully cleaned the exterior of your Gevi Ice Maker, we will move on to cleaning the water reservoir, an important component of the appliance, in the next section.
Read more: How To Clean Uline Ice Maker
Cleaning the Water Reservoir
The water reservoir of your Gevi Ice Maker requires regular cleaning to ensure the quality and cleanliness of the ice it produces. Over time, mineral deposits, impurities, and bacteria can accumulate in the reservoir, affecting the taste and safety of the ice. Follow these instructions to effectively clean the water reservoir of your ice maker:
- Turn off and unplug the ice maker: Before cleaning the water reservoir, make sure to turn off and unplug the Gevi Ice Maker from the power source. This step is essential to prevent any electrical accidents or damage during the cleaning process.
- Empty the water reservoir: Carefully empty the water reservoir of any remaining water. If there is a drain plug, remove it to ensure complete drainage. Dispose of the water as needed.
- Rinse the reservoir: Rinse the water reservoir with warm water to remove any sediment, mineral buildup, or impurities. You can use a gentle stream of water or fill the reservoir and agitate it to loosen any particles. Empty the water and repeat the rinsing process until the water runs clear.
- Avoid submerging or soaking the ice maker: It is important to note that the ice maker itself should not be submerged or soaked in water. Only the removable water reservoir should be cleaned separately. Submerging the ice maker can potentially damage the internal components and electrical connections.
- Dry the water reservoir: Thoroughly dry the water reservoir with a clean and dry cloth. Make sure there is no moisture left inside the reservoir to prevent the growth of mold or mildew. Pay attention to any hard-to-reach areas or corners where moisture might accumulate.
- Reassemble and plug in the ice maker: Once the water reservoir is completely dry, reassemble and insert it back into the Gevi Ice Maker. Plug in the ice maker and turn it on, ensuring that it is functioning properly.
By following these instructions, you can effectively clean the water reservoir of your Gevi Ice Maker and maintain the quality and cleanliness of the ice it produces. Regular cleaning of the water reservoir is essential to ensure the safety and taste of the ice cubes. Remember to always refer to the manufacturer’s guidelines for specific cleaning instructions for your ice maker model.
Now that you have cleaned the water reservoir, we will move on to the final steps to complete the cleaning process and provide maintenance tips to prolong the lifespan of your Gevi Ice Maker.
Final Steps
You’re nearing the completion of the cleaning process for your Gevi Ice Maker. These final steps will ensure that everything is properly cleaned and ready for use. Follow these instructions to wrap up the cleaning process:
- Allow the ice maker to air dry: After cleaning the various components of the Gevi Ice Maker, it is essential to allow them to air dry completely. Set them in a well-ventilated area and let any moisture evaporate naturally. Make sure there is no residual moisture left on any of the surfaces to prevent the growth of mold or mildew.
- Reassemble the ice basket, scoop, and other removable parts: Once all the components are dry, reassemble the ice basket, scoop, and any other removable parts back into the Gevi Ice Maker. Ensure that they are securely in place before proceeding.
- Plug in and turn on the ice maker: With everything properly reassembled, plug in the Gevi Ice Maker and turn it on. Check that all the buttons and settings are functioning as they should. Allow the ice maker to start the ice-making process and ensure that it is working efficiently.
By following these final steps, you can complete the cleaning process for your Gevi Ice Maker and be confident that everything is properly cleaned and assembled. Now, your ice maker is ready to produce clean and refreshing ice cubes for your enjoyment.
Before we conclude, let’s go over a few maintenance tips to keep your Gevi Ice Maker in excellent condition for the long term.
Maintenance Tips
Regular maintenance is key to prolonging the lifespan of your Gevi Ice Maker and ensuring its optimal performance. By following these maintenance tips, you can keep your ice maker running smoothly and enjoy clean and refreshing ice cubes consistently:
- Frequent cleaning: Clean your Gevi Ice Maker every 2-3 months or as needed, depending on usage. Regular cleaning helps prevent buildup of dirt, minerals, and bacteria that can affect ice quality and the performance of the appliance.
- Check the water supply line: Regularly inspect the water supply line for any leaks, kinks, or blockages. A properly functioning water supply line is crucial for the efficient operation of the ice maker.
- Keep the ice maker in a well-ventilated area: Ensure that your Gevi Ice Maker is placed in a well-ventilated space with good air circulation. Adequate airflow around the appliance helps prevent overheating and ensures optimal performance.
- Monitor the ice production: Keep an eye on the ice production of your Gevi Ice Maker. If you notice a significant decrease in ice production or any other performance issues, it may be a sign of a clogged filter or other internal problem. Address these issues promptly to avoid further damage.
- Use filtered water: Using filtered water can help reduce mineral buildup in the ice maker and improve the quality of the ice cubes. If your tap water is high in minerals or impurities, consider using a water filtration system or purchasing filtered water for your ice maker.
- Regularly clean the exterior: It’s important to clean the exterior surfaces of your Gevi Ice Maker regularly to maintain its appearance and hygiene. Wipe down the exterior with a damp cloth and mild cleaner to remove dust, fingerprints, and other stains.
- Follow the manufacturer’s instructions: Always refer to the manufacturer’s instructions for specific guidelines on cleaning, maintenance, and troubleshooting. Each Gevi Ice Maker model may have unique features or requirements that require specific attention.
By incorporating these maintenance tips into your routine, you can ensure that your Gevi Ice Maker remains in optimal condition, providing you with clean and refreshing ice cubes whenever needed.
Remember, regular cleaning and maintenance are essential to maintain the performance and longevity of your Gevi Ice Maker. Enjoy the convenience of having an ice maker at home while taking the necessary steps to keep it running smoothly.
With these maintenance tips in mind, you’re now equipped to properly care for your Gevi Ice Maker and enjoy its benefits for years to come!
Conclusion
Regular cleaning is a vital aspect of maintaining the optimal performance and longevity of your Gevi Ice Maker. Through proper cleaning and maintenance, you can ensure that your ice maker produces clean and refreshing ice cubes consistently. Let’s recap the importance of regular cleaning and maintenance, and the encouragement to follow the provided instructions:
Regular cleaning keeps your Gevi Ice Maker free from dirt, mold, bacteria, and mineral buildup. By removing these contaminants, you can enjoy ice that not only tastes great but is also safe for consumption. The accumulation of impurities can affect the quality of the ice cubes and even impact the functioning of your ice maker.
Proper maintenance, including regular cleaning, helps prevent issues such as clogged filters, decreased ice production, and potential damage to internal components. Cleaning the interior, ice basket, scoop, exterior, and water reservoir ensures that all parts of the ice maker are in optimal condition and ready to produce high-quality ice cubes.
By following the instructions provided in this guide, you can effectively clean and maintain your Gevi Ice Maker. Always refer to the manufacturer’s guidelines for specific cleaning instructions and recommendations for your model. Each ice maker may have unique features or requirements that are important to follow to maintain its optimal performance.
We encourage you to incorporate regular cleaning and maintenance into your routine to ensure that your Gevi Ice Maker remains in excellent condition. By doing so, you can enjoy the convenience and efficiency of your ice maker for a long time.
Now it’s time to put the knowledge and instructions into practice. Clean your Gevi Ice Maker regularly, maintain it properly, and relish the pleasure of having clean and refreshing ice cubes whenever you need them.
Cheers to sparkling clean ice and the reliable performance of your Gevi Ice Maker!
Frequently Asked Questions about How To Clean A Gevi Ice Maker
Was this page helpful?
At Storables.com, we guarantee accurate and reliable information. Our content, validated by Expert Board Contributors, is crafted following stringent Editorial Policies. We're committed to providing you with well-researched, expert-backed insights for all your informational needs.
0 thoughts on “How To Clean A Gevi Ice Maker”