Articles
How To Stain Your Fence
Modified: December 7, 2023
Discover the best articles on how to stain your fence and achieve professional results. Get step-by-step guides, expert tips, and product recommendations for a flawless finish.
(Many of the links in this article redirect to a specific reviewed product. Your purchase of these products through affiliate links helps to generate commission for Storables.com, at no extra cost. Learn more)
Introduction
Welcome to the ultimate guide on how to stain your fence! If you’re looking to revitalize the appearance of your outdoor space and protect your fence from the elements, staining is a great option. Not only does it enhance the aesthetic appeal of your fence, but it also adds a layer of protection against moisture, UV rays, and other environmental factors.
Staining your fence is a simple and effective way to prolong its lifespan and maintain its structural integrity. Whether you have a brand-new fence or an older one that needs some TLC, this article will provide you with all the information you need to achieve professional-looking results.
Before we dive into the step-by-step process of staining your fence, let’s discuss why staining is important. Wood fences, in particular, are vulnerable to damage caused by various factors such as sunlight, rain, and insects. If left untreated, these factors can lead to rotting, warping, and discoloration, which can diminish the overall beauty and functionality of your fence.
By applying a stain to your fence, you create a protective barrier that helps prevent moisture from seeping into the wood. This, in turn, reduces the likelihood of rot and mold growth. Additionally, stain contains UV inhibitors that shield the wood from the sun’s harmful rays, preventing fading and discoloration.
Staining not only protects your fence but also enhances its natural beauty. With a wide range of stain colors available, you can choose a shade that complements your outdoor space and adds a touch of personal style. Whether you prefer a subtle and natural look or a bold and vibrant statement, staining allows you to customize the appearance of your fence to suit your taste.
Now that you understand the importance and benefits of staining your fence, let’s move on to the next section – choosing the right stain.
Key Takeaways:
- Staining your fence not only enhances its appearance but also protects it from the elements, preventing rot, mold, and discoloration. Choose the right stain, prepare the surface, and apply it carefully for professional-looking results.
- Proper maintenance is crucial for a stained fence’s longevity. Regular cleaning, inspections, repairs, and protective sealant application will ensure your fence remains vibrant and well-protected for years to come.
Read more: How To Spray Stain A Fence
Choosing the Right Stain
When it comes to choosing the right stain for your fence, there are a few key factors to consider. The right stain can enhance the natural beauty of the wood while providing the necessary protection against the elements. Here are some important considerations:
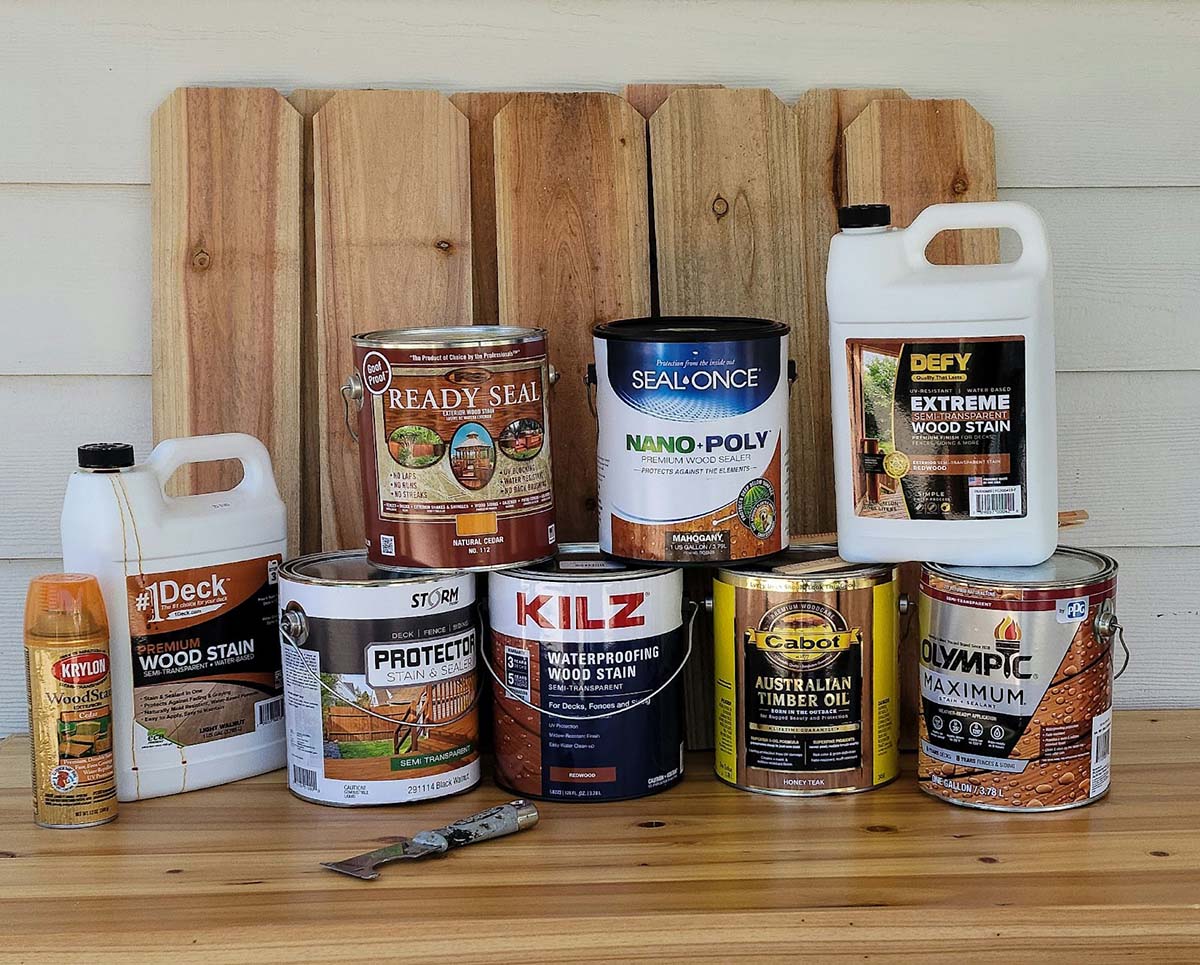
- Type of Stain: There are two main types of fence stains – transparent and semi-transparent. Transparent stains allow the natural grain of the wood to show through, while semi-transparent stains provide a slightly more opaque finish. Consider the level of coverage you desire and the appearance you want to achieve when choosing between the two.
- Color: Stains come in a wide range of colors, from light natural tones to darker hues. Consider the overall aesthetic of your outdoor space and the surrounding environment when selecting a color. Lighter stains tend to blend well with a more rustic or coastal setting, while darker stains can provide a dramatic contrast in a modern or contemporary landscape.
- Protection: Look for a stain that offers protection against UV rays, water damage, and mildew. These features will ensure that your fence remains vibrant and durable over time. Read product labels and choose a stain specifically formulated for exterior wood surfaces.
- Application Method: Consider the ease of application when choosing a stain. Some stains are applied with a brush, while others can be sprayed or rolled onto the fence. Choose a method that is convenient for you and suits the size and design of your fence.
- Drying Time: Check the drying time specified by the manufacturer. Faster-drying stains may be more convenient if you have limited time or want to complete the staining process quickly.
- Maintenance: Consider the level of maintenance required for the stain you choose. Some stains may require reapplication every couple of years, while others may provide longer-lasting protection. Take into account your willingness and ability to maintain the fence’s appearance.
It’s also worth mentioning that sample testing the stain on a small, inconspicuous area of your fence is highly recommended. This allows you to see how the stain will look on your specific type of wood and ensures you are satisfied with the color and finish before proceeding with the entire fence.
Now that you have a better understanding of the factors to consider when choosing a stain, let’s move on to the next section – gathering the required materials.
Gathering the Required Materials
Before you begin staining your fence, it’s important to gather all the necessary materials to ensure a smooth and efficient process. Having everything prepared beforehand will save you time and hassle during the staining process. Here’s a list of the materials you will need:
- Stain: Choose the type and color of stain that best suits your preferences and needs, as discussed in the previous section. Make sure to purchase enough stain to cover the entire surface area of your fence.
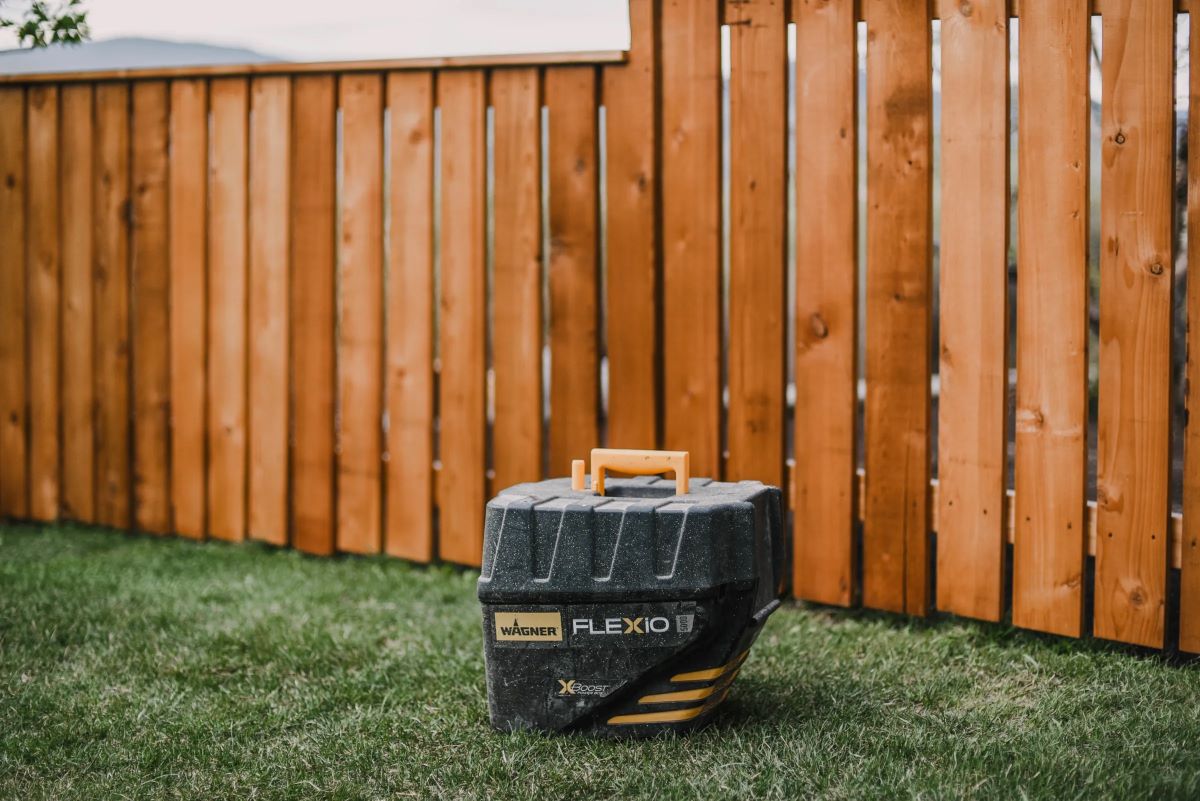
- Brush, Roller, or Sprayer: Depending on the type of stain you have chosen, you will need the appropriate application tool. A brush is ideal for smaller fences or intricate designs, while a roller or sprayer can be more efficient for larger areas.
- Drop Cloths or Tarps: Protect the surrounding area by laying down drop cloths or tarps to catch any drips or spills during the staining process. This will help prevent staining on other surfaces or vegetation.
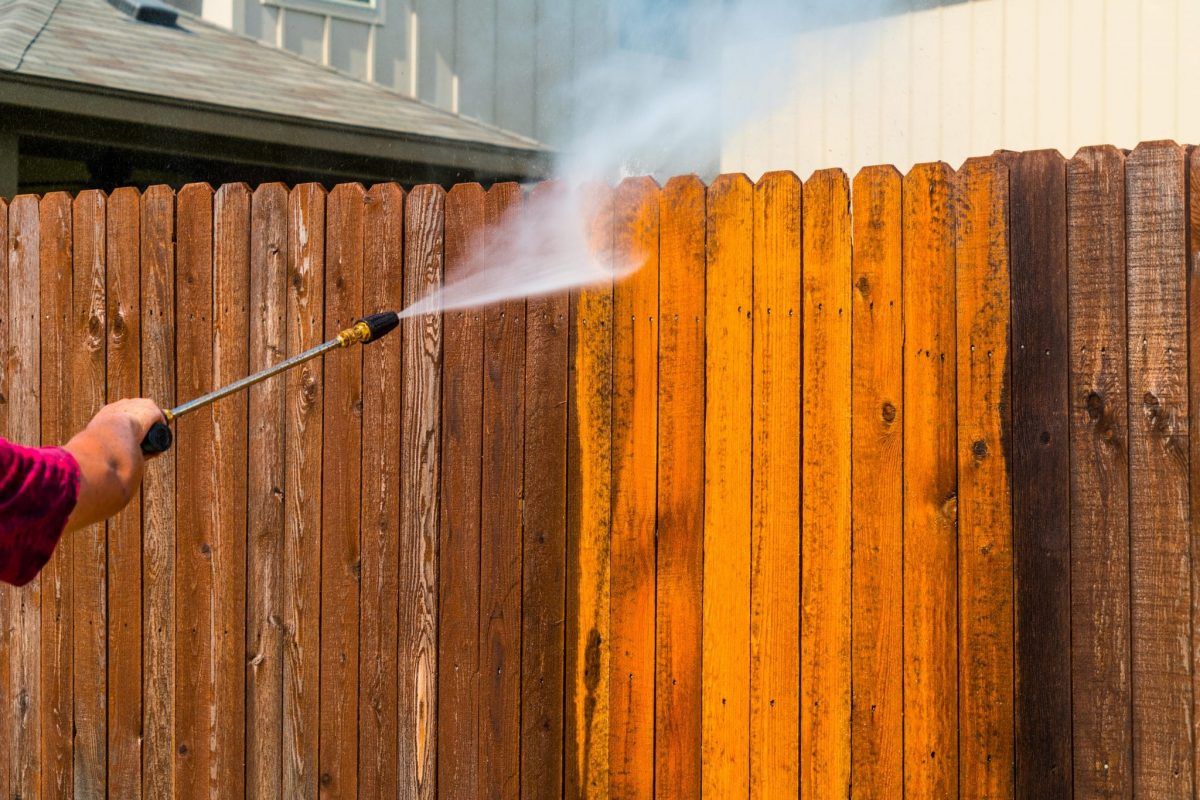
- Cleaning Supplies: Before staining, it’s important to clean the fence thoroughly. Gather cleaning supplies such as a pressure washer or hose, a mild detergent or bleach solution, and a scrub brush for removing dirt, grime, and mold.
- Sandpaper or Power Sander: If your fence has rough or uneven areas, sanding it before staining can help create a smoother surface. Have sandpaper or a power sander on hand to prepare the wood for staining.
- Protective Gear: To protect yourself during the staining process, gather safety equipment such as gloves, safety glasses, and a mask. This will help prevent any potential skin or respiratory irritations from the stain fumes or contact with your skin.
- Tape and Plastic Sheets: If there are any areas, such as metal hardware or nearby structures, that you want to protect from the stain, gather tape and plastic sheets to create barriers and ensure precise application.
- Ladder or Step Stool: Depending on the height and design of your fence, you may need a ladder or step stool to reach higher areas during the staining process. Ensure that the ladder or step stool is stable and secure before use.
- Pre-stain Conditioner (optional): If you’re working with a softwood fence or a porous wood surface, a pre-stain conditioner can help the wood absorb the stain more evenly. Consider this optional step if you want to achieve a more uniform and professional finish.
- Appropriate Clothing: Wear old clothes or attire that you don’t mind getting stained. Staining can be messy, so it’s important to wear clothing that provides good coverage and is suitable for working outdoors.
By gathering all the necessary materials in advance, you’ll be well-prepared to begin the fence staining process. In the next section, we’ll explore how to properly prepare your fence before applying the stain.
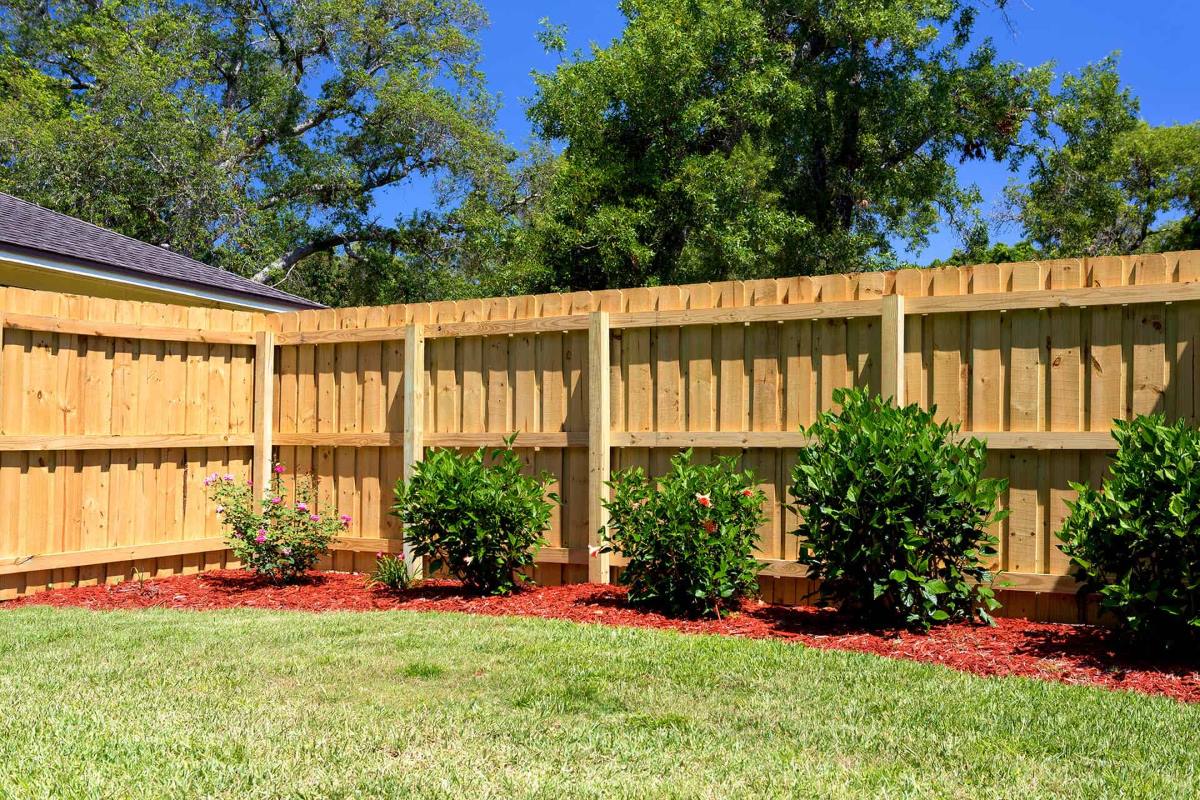
Preparing the Fence for Staining
Before you start applying the stain to your fence, it’s essential to properly prepare the surface. Preparing the fence ensures that the stain adheres effectively and provides long-lasting results. Here are the steps to follow for preparing your fence:
- Clean the Surface: Begin by cleaning the fence to remove any dirt, dust, mold, or mildew. Use a pressure washer or garden hose to spray the entire surface of the fence. For stubborn stains or areas with mold or mildew, scrub the surface with a mild detergent or bleach solution and a scrub brush. Rinse off the cleaning solution thoroughly and allow the fence to dry completely before proceeding.
- Repair Damaged Areas: Inspect your fence for any damaged or rotten parts. Replace any broken boards, loose nails, or damaged sections before staining. Repairing these areas will ensure the structural integrity of your fence and provide a smoother surface for the stain application.
- Sand the Surface (if needed): If your fence has rough or uneven areas, use sandpaper or a power sander to smooth them out. Sanding helps create a more even surface and allows the stain to penetrate the wood more effectively. Sand in the direction of the wood grain for the best results. Once you’ve finished sanding, remove any sawdust or debris from the surface.
- Protect Surrounding Areas: Use tape and plastic sheets to protect any adjacent structures, plants, or surfaces that you want to avoid staining. Cover nearby plants with drop cloths or plastic to prevent them from coming into contact with the stain.
- Apply a Pre-Stain Conditioner (if applicable): Depending on the type of wood you’re working with, applying a pre-stain conditioner can help the wood absorb the stain more evenly. Follow the manufacturer’s instructions for the pre-stain conditioner and allow it to dry completely before proceeding.
By thoroughly cleaning and preparing the fence, you create a smooth and clean surface for the stain to adhere to. This ensures that the stain will penetrate the wood effectively and provide a more even and long-lasting finish. Once you’ve completed the preparation steps, you’re ready to move on to the next section – applying the stain to the fence.
When staining your fence, make sure to clean and dry the surface thoroughly before applying the stain. This will ensure better adhesion and a more even finish.
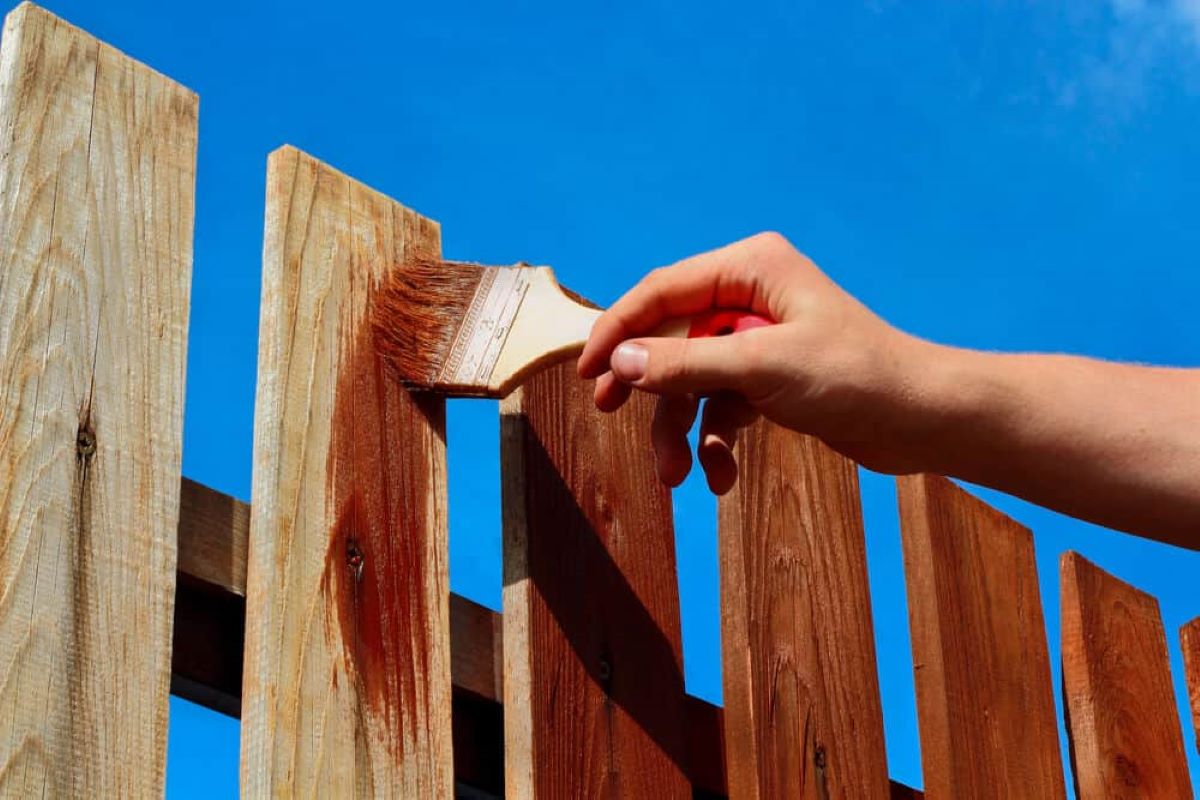
Applying the Stain to the Fence
Now that you have prepared your fence, it’s time to apply the stain. Follow these steps to achieve a professional-looking finish:
- Read the Instructions: Before you begin, carefully read the manufacturer’s instructions on the stain can. Different stains may have specific application instructions or recommended weather conditions for optimal results.
- Stir the Stain: Open the stain can and use a stir stick to thoroughly mix the stain. This ensures an even distribution of color pigments and ensures consistent results.
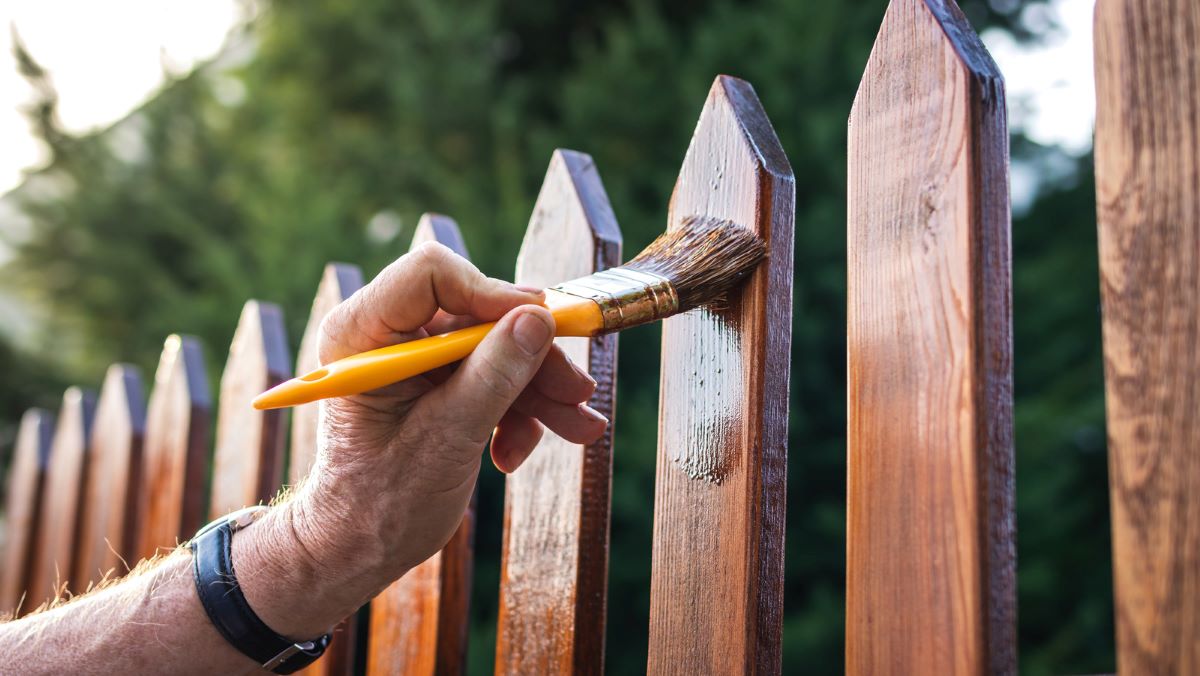
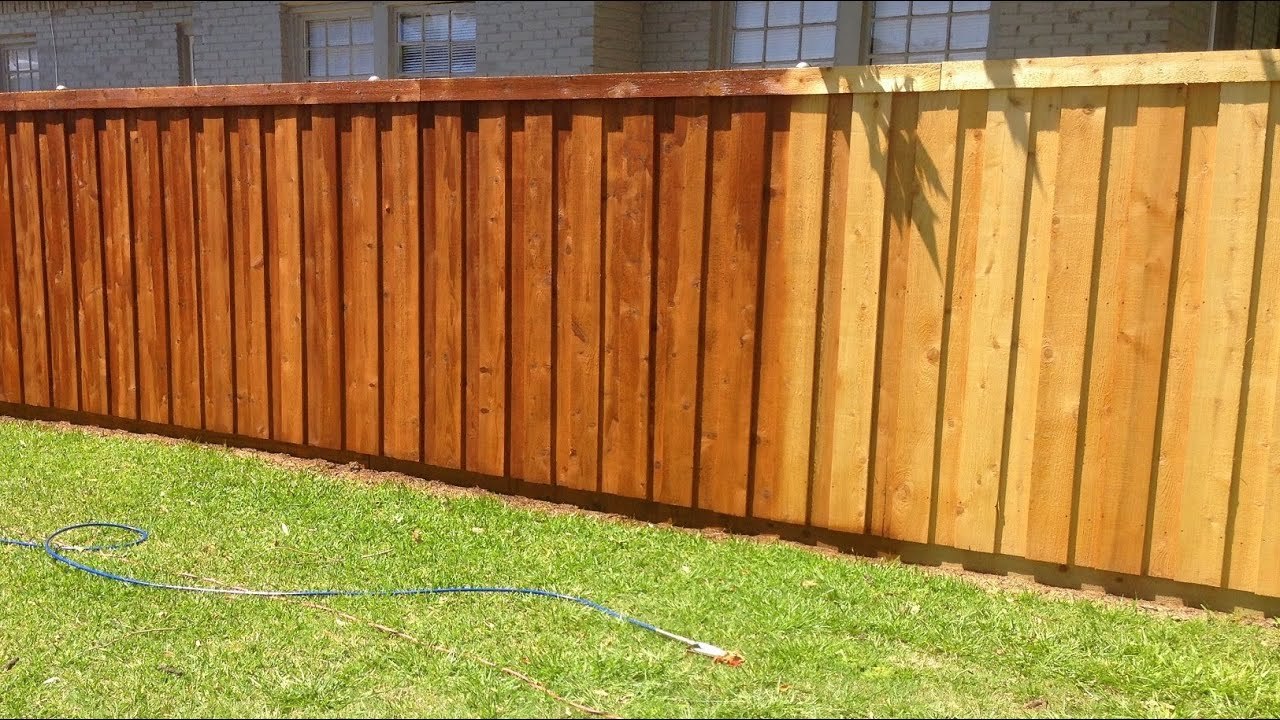
- Start from the Top: Begin staining from the top of the fence and work your way down. This prevents any drips or stains from landing on previously stained areas, ensuring a smooth and even application.
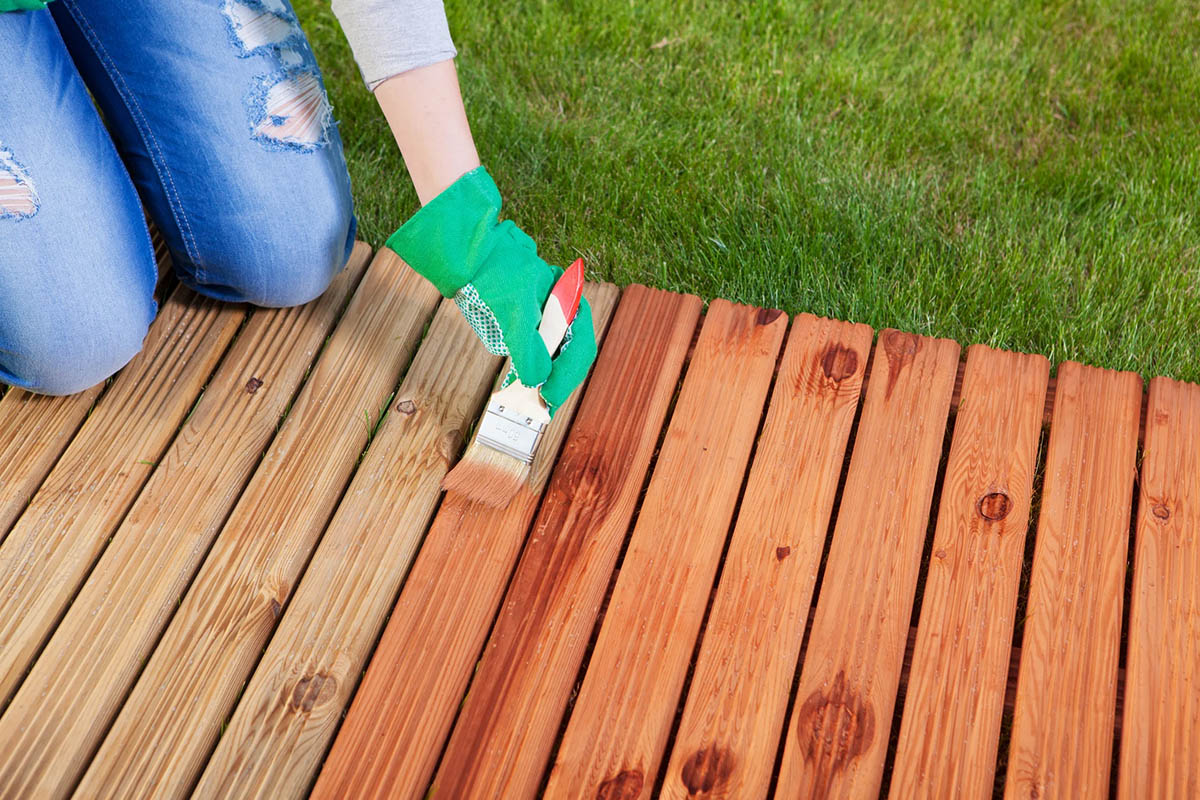
- Apply a Thin Coat: Dip your brush, roller, or sprayer into the stain and apply a thin, even layer to the surface of the fence. Work in small sections, applying the stain in the direction of the wood grain. Avoid over-applying the stain, as it may result in an uneven or blotchy finish.
- Work in Manageable Sections: Divide your fence into manageable sections and complete one section at a time. This allows you to maintain a consistent application and prevents the stain from drying before you have a chance to spread it evenly.
- Blend Overlapping Areas: As you move from one section to the next, blend the edges of the stain to create a seamless transition. This helps avoid visible lines or streaks on the fence. It’s important to work quickly but carefully to ensure a uniform appearance.
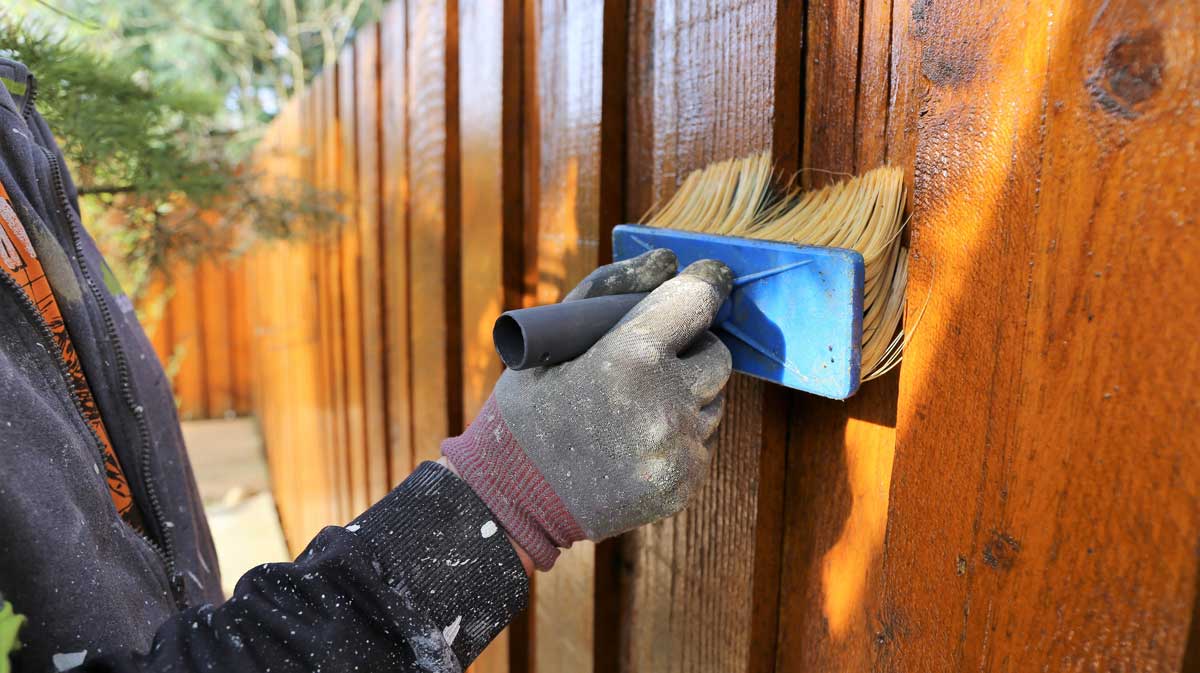
- Pay Attention to Hard-to-Reach Areas: Use a brush or smaller applicator to reach corners, edges, and tight spaces that may be difficult to cover with a roller or sprayer. These areas are prone to uneven application, so take your time to ensure proper coverage.
- Allow Proper Drying Time: After applying the first coat of stain, follow the manufacturer’s instructions for the recommended drying time. This typically ranges from a few hours to a full day, depending on the type and brand of stain used.
- Apply Additional Coats (if desired): If you prefer a darker or more saturated color, you can apply additional coats of stain after the initial coat has dried. Follow the same application process, making sure to blend the edges of each coat for a seamless finish.
- Clean up and Dispose of Materials: Once you have finished staining, clean your brushes, rollers, and any other staining tools according to the manufacturer’s instructions. Properly dispose of any leftover stain or materials used in the staining process.
Remember to always follow safety precautions, especially when working with stain. Work in a well-ventilated area, wear protective gear, and avoid staining on windy or rainy days.
By following these steps and taking the time to apply the stain properly, you’ll achieve a beautiful, long-lasting finish on your fence. In the final section, we’ll discuss how to properly care for your stained fence to maintain its appearance and durability.
Read more: How Much To Stain Fence
Properly Caring for Your Stained Fence
After investing time and effort into staining your fence, it’s important to properly care for it to ensure its longevity and maintain its appearance. Here are some essential tips for maintaining and caring for your stained fence:
- Regular Cleaning: Keep your fence clean by regularly removing dirt, debris, and mildew. Use a gentle cleaner or a mixture of mild soap and water to scrub the surface with a soft-bristle brush. Rinse thoroughly with water and allow the fence to dry completely.
- Inspect for Damage: Periodically inspect your stained fence for any signs of damage, such as rotting wood, loose boards, or insect infestation. Address any issues promptly to prevent further damage and maintain the structural integrity of your fence.
- Repair and Replace: If you notice any damaged or deteriorating areas, repair or replace them as necessary. Replace broken or rotted boards, tighten loose screws or nails, and address any other issues that may compromise the integrity of your fence.
- Apply a Protective Sealant: To further protect your stained fence, consider applying a protective sealant. This additional layer of protection helps guard against moisture, UV rays, and other environmental factors that can cause damage over time. Follow the manufacturer’s instructions for application and drying time.
- Trim Vegetation: Trim any vegetation, such as vines or trees, growing near your fence. Overhanging branches or plants can cause excess moisture and shade, leading to mold growth or damage to the stain. Regularly trim and maintain the area around your fence to minimize potential issues.
- Avoid Pressure Washing: While regular cleaning is important, avoid using a pressure washer on your stained fence. The high-pressure water can strip away the stain and damage the wood. Stick to gentle cleaning methods to preserve the integrity of the stain.
- Touch Up and Reapply Stain: Over time, the stain on your fence may fade or wear off in high-traffic areas. To maintain a consistent appearance, touch up these areas with a small brush and reapply stain as needed. This will help keep your fence looking vibrant and protected.
- Protect from Harsh Weather: Extreme weather conditions, such as heavy rain, snow, or prolonged exposure to direct sunlight, can accelerate wear and damage to your stained fence. Consider installing a shade sail or applying a protective cover during harsh weather to minimize the impact on the stain.
- Maintain a Safe Distance: If using outdoor fire pits or barbecues near your fence, take precautions to maintain a safe distance and prevent accidental damage. Sparks or heat from these sources can potentially cause discoloration or even ignite the wood, so exercise caution.
- Regular Inspections: Make it a habit to regularly inspect your stained fence for any signs of wear, damage, or needed maintenance. By addressing issues in their early stages, you can prevent more extensive damage and ensure the longevity of your fence.
By following these care and maintenance tips, you’ll be able to enjoy the beauty and protection of your stained fence for years to come. Proper maintenance and proactive attention will help retain the appearance and durability of the stain.
As a closing reminder, always refer to the manufacturer’s instructions and guidelines for specific maintenance recommendations for the stain product you have used on your fence.
Now that you’re equipped with the knowledge and steps to care for a stained fence, you can confidently enjoy the benefits of your newly stained and protected outdoor space.
Conclusion
Congratulations! You have now learned how to properly stain and care for your fence, allowing you to enhance the beauty of your outdoor space while ensuring its longevity and protection. Staining your fence not only adds aesthetic appeal but also safeguards it from the damaging effects of the elements.
Throughout this guide, we’ve covered important aspects of fence staining, such as choosing the right stain, gathering the necessary materials, preparing the fence, applying the stain, and proper maintenance. By following the step-by-step instructions and utilizing the tips provided, you’ll achieve professional-looking results and enjoy a beautiful and well-preserved fence.
Remember to select a stain that suits your preferences, taking into consideration factors such as opacity, color, and protection. Properly clean and prepare the fence surface, making any necessary repairs or sanding to ensure a smooth canvas for the stain application. Apply the stain carefully and evenly, following the manufacturer’s instructions, and allow ample drying time between coats if desired.
After staining your fence, it’s essential to maintain it properly. Regular cleaning, inspections for damage, and timely repairs will help prolong the life of your fence and keep it looking its best. Applying a protective sealant and touching up any faded or worn areas will ensure continued protection and beauty.
By caring for your stained fence and implementing proper maintenance practices, you’ll enjoy a stunning outdoor space for years to come. So, go ahead and showcase your newfound knowledge by staining your fence and transforming your outdoor area into a welcoming and stylish haven.
Now it’s time to put your skills into action and enjoy the results of your hard work. Happy staining!
Frequently Asked Questions about How To Stain Your Fence
Was this page helpful?
At Storables.com, we guarantee accurate and reliable information. Our content, validated by Expert Board Contributors, is crafted following stringent Editorial Policies. We're committed to providing you with well-researched, expert-backed insights for all your informational needs.


0 thoughts on “How To Stain Your Fence”