Articles
How To Compress Calipers
Modified: December 7, 2023
Learn how to compress calipers with our informative articles. Find step-by-step instructions and expert tips for efficient caliper compression.
(Many of the links in this article redirect to a specific reviewed product. Your purchase of these products through affiliate links helps to generate commission for Storables.com, at no extra cost. Learn more)
Introduction
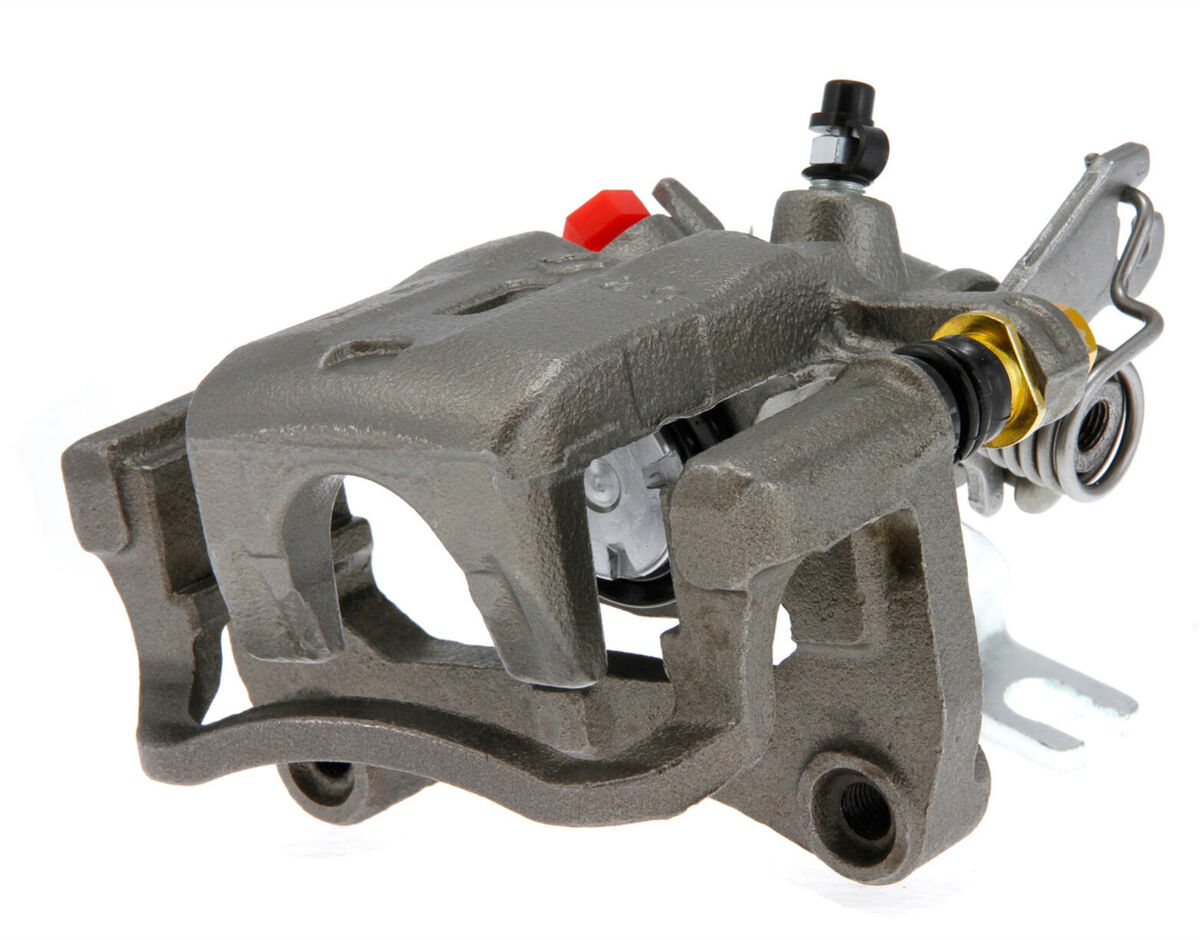
When it comes to maintaining the performance and safety of your vehicle, proper maintenance of your braking system is crucial. The braking system consists of several components, including the calipers. The calipers play a vital role in the braking process by squeezing the brake pads against the rotors, causing friction and ultimately bringing your vehicle to a stop.
Over time, calipers can become worn or damaged, leading to decreased braking efficiency and potential safety issues. One common maintenance task associated with calipers is compression. Caliper compression is the process of retracting the pistons within the caliper to make room for new brake pads or to remove the caliper for further repairs or replacements.
While caliper compression may seem like a complex task, it can be easily accomplished with the right tools and knowledge. In this article, we will guide you through the steps to compress calipers effectively, ensuring the longevity and functionality of your braking system.
Key Takeaways:
- Properly compressing calipers is crucial for maintaining a safe and efficient braking system. Follow the step-by-step guide and use the right tools to ensure even compression and optimal brake performance.
- Prioritize safety and adhere to precautions when compressing calipers. Wear safety gear, follow manufacturer’s instructions, and seek professional help if unsure. Proper maintenance ensures reliable and responsive brakes for safe driving.
Read more: How To Compress Pillows For Shipping
Understanding Calipers Compression
Before diving into the process of compressing calipers, it’s important to understand how they work and why compression is necessary. Calipers are responsible for housing the pistons and brake pads that apply pressure to the rotors, thus causing the vehicle to slow down or come to a halt. When you apply the brakes, hydraulic pressure is transmitted through the brake fluid, forcing the pistons within the calipers to move outward and press against the brake pads.
Over time, as the brake pads wear down, the pistons extend further out of the calipers. This extension is necessary to compensate for the decreased thickness of the brake pads. When it’s time to replace the brake pads or perform other repairs on the braking system, the pistons need to be retracted or compressed back into the calipers to make room for the new pads or facilitate removal.
Compressing the calipers prevents unnecessary strain on the brake system and ensures that the new brake pads fit properly. It is also essential to achieve an even compression of the calipers to maintain balance and avoid potential brake issues, such as uneven pad wear or reduced braking effectiveness on certain wheels.
It’s important to note that the compression process may vary slightly depending on the type of calipers your vehicle has. Let’s explore the steps involved in caliper compression and the tools you will need to complete the task effectively.
Steps to Compress Calipers
Compressing calipers requires a systematic approach to ensure a safe and effective process. Here is a step-by-step guide to help you through the caliper compression process:
- Step 1: Preparing the Vehicle
- Step 2: Removing Wheel and Brake Components
- Step 3: Compressing the Calipers
- Step 4: Reassembling the Brake Components
Start by parking your vehicle on a level surface and engaging the parking brake. If necessary, loosen the lug nuts on the wheel where you will be working, but do not remove them completely at this stage.
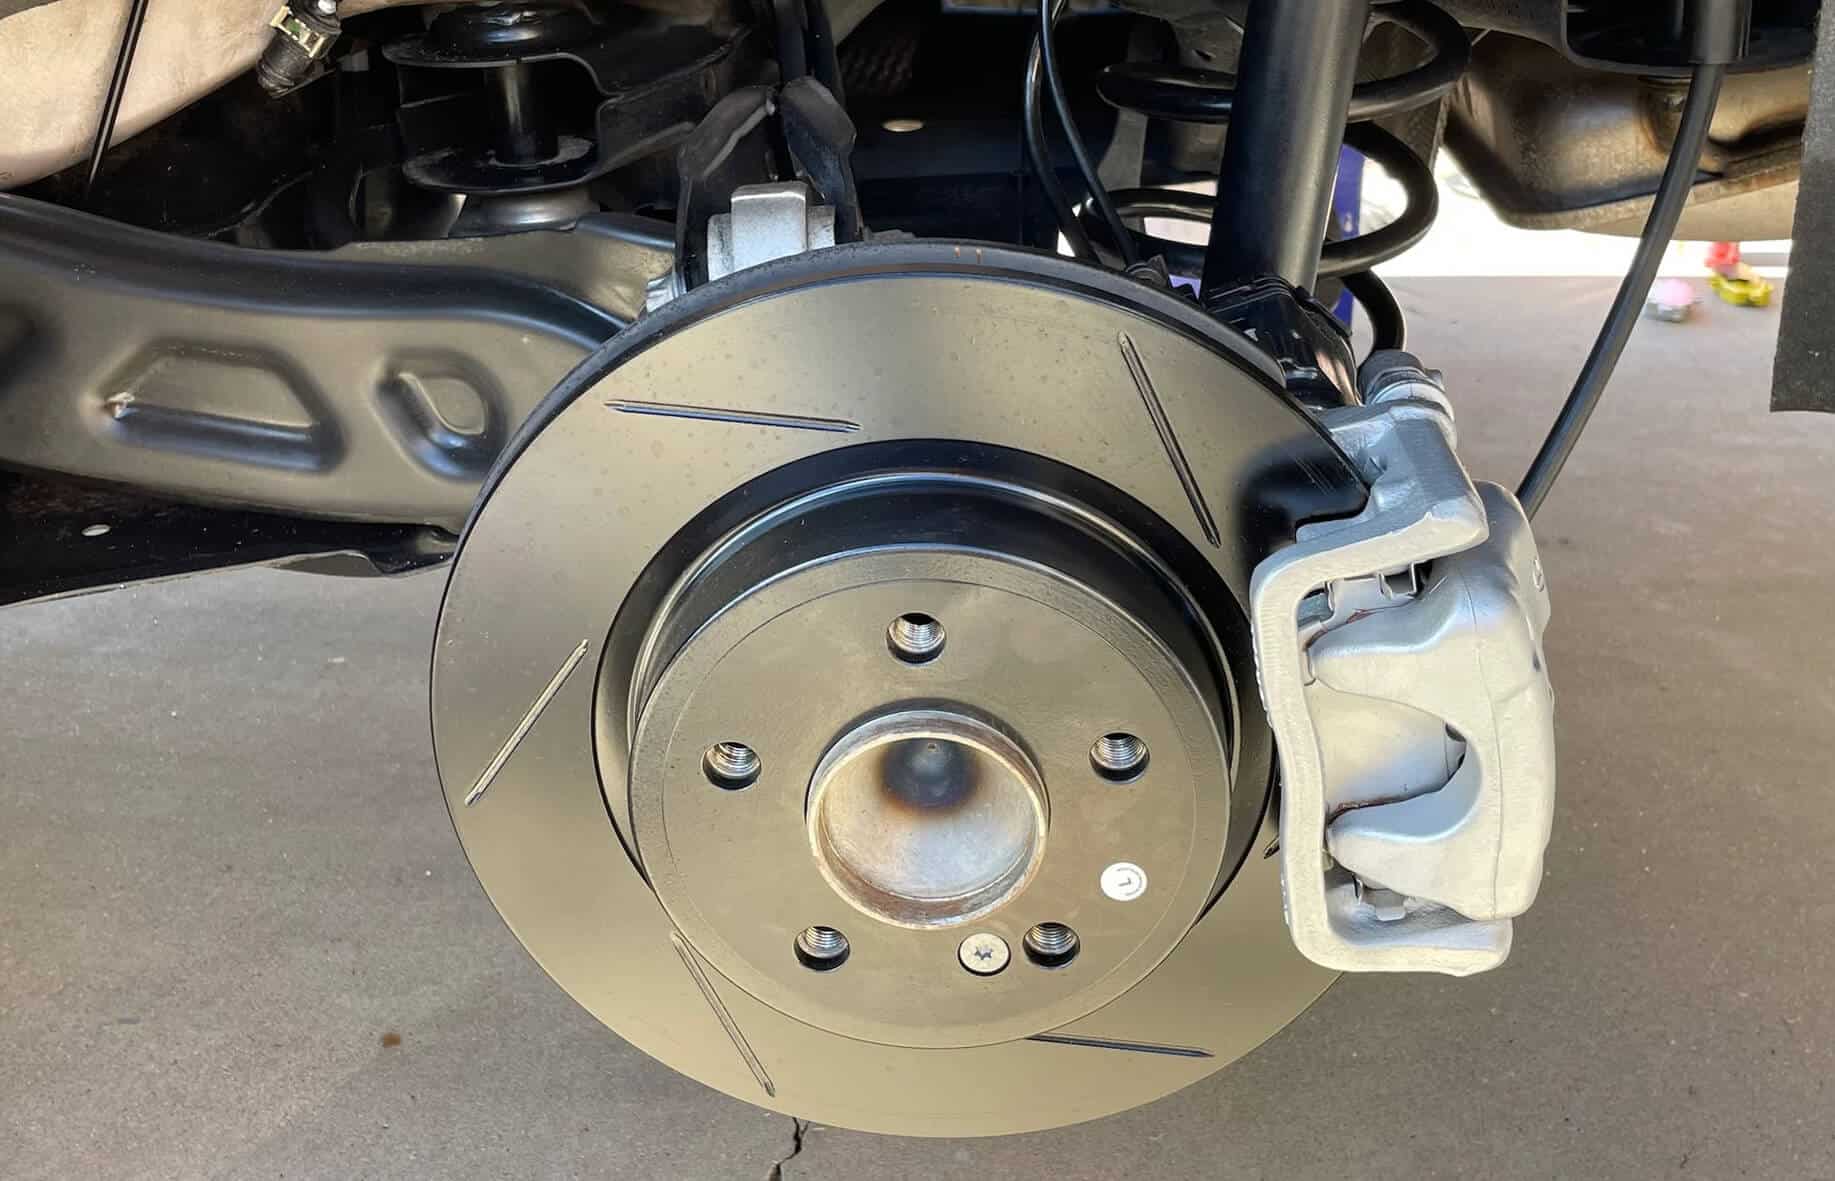
Use a lug wrench or an impact wrench to loosen and remove the lug nuts. Carefully lift the wheel off the vehicle and set it aside. Next, remove the brake caliper bolts or pins using the appropriate tools, such as a socket wrench or Allen key. Gently wiggle the caliper off the rotor and suspend it securely using a suitable bracket or bungee cord to prevent damage to the brake hose.
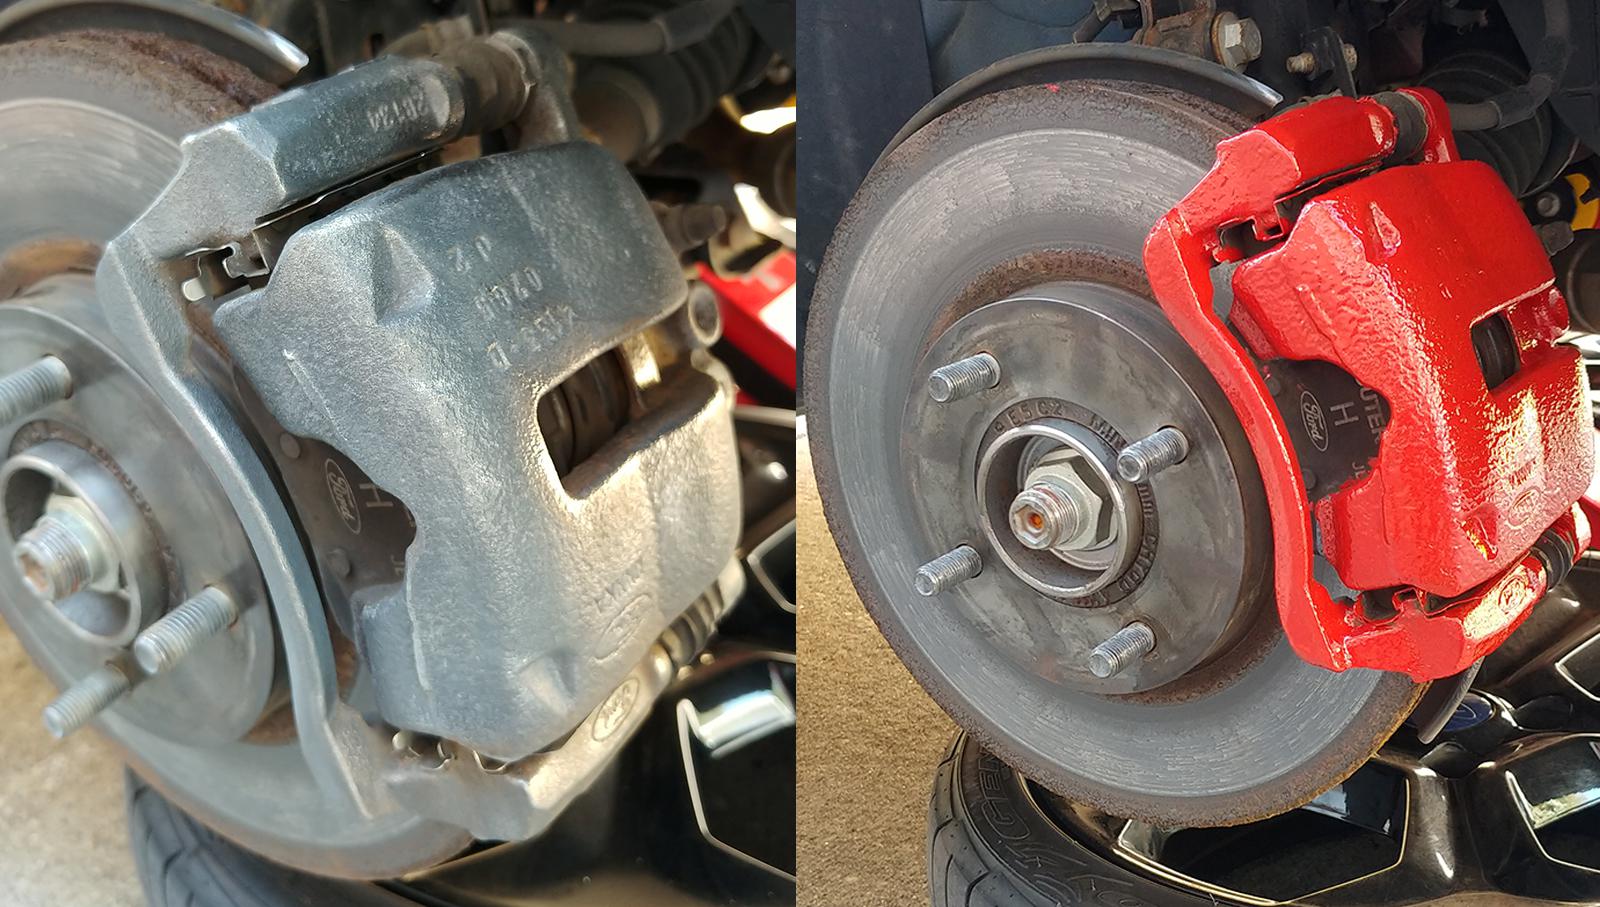
Before compressing the calipers, inspect and clean them for any debris or dirt buildup. This will prevent any contaminants from getting into the pistons or the braking system. Use a caliper compression tool, such as a C-clamp or caliper piston compression tool, to carefully and evenly compress the pistons back into the caliper. Be cautious not to press too aggressively and cause damage to the pistons or the caliper housing. Ensure that the pistons are fully retracted and flush with the caliper housing.
Once the calipers are compressed, it’s time to reassemble the brake components. Begin by applying a thin layer of brake grease or lubricant to the caliper bolts or pins. Slide the caliper back onto the rotor, aligning the bolt holes. Tighten the caliper bolts or pins to the specified torque using a torque wrench. Finally, put the wheel back on the vehicle and hand tighten the lug nuts, followed by using a torque wrench to tighten them to the manufacturer’s recommended torque specifications.
Repeat the above steps for each caliper that needs compression. Once all calipers have been compressed and reassembled, double-check the tightness of the lug nuts and ensure that all brake components are securely in place. Lower the vehicle, and test the brakes by applying gentle pressure to the brake pedal a few times before driving.
Keep in mind that if you’re not confident in performing the caliper compression process yourself, it’s always recommended to seek professional assistance to ensure a safe and accurate execution.
Tools and Materials Needed
Before you begin compressing the calipers, gather the necessary tools and materials to ensure a smooth and efficient task. Here are the tools and materials you will need:
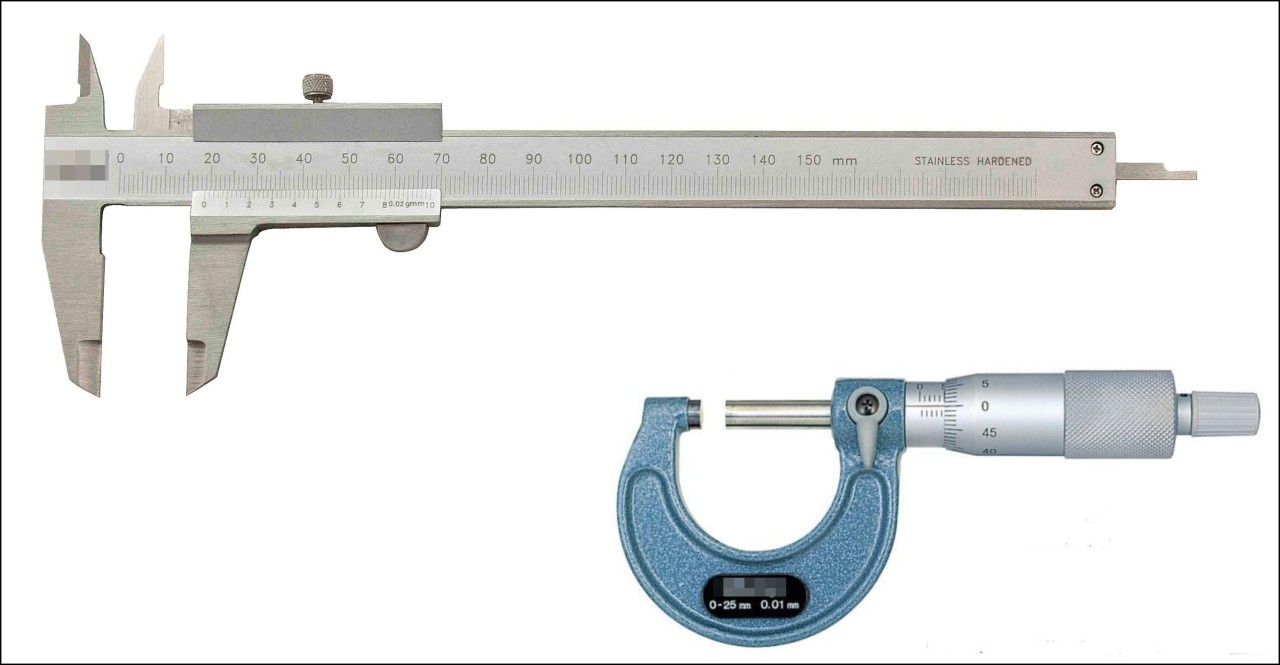
- Caliper Compression Tool: A caliper compression tool is essential for retracting the caliper pistons. There are various types of compression tools available, including C-clamps, caliper piston compression tools, and ratchet-style compression tools. Choose the tool that is compatible with your vehicle’s caliper design.
- Socket Wrench or Allen Key: You will need a socket wrench or an Allen key to remove the brake caliper bolts or pins. Make sure to use the appropriate size and type of wrench or key.
- Lug Wrench or Impact Wrench: A lug wrench or an impact wrench is necessary to loosen and tighten the lug nuts on the wheel. The type of wrench you use will depend on your preference and the availability of tools.
- Brake Grease or Lubricant: Applying a thin layer of brake grease or lubricant to the caliper bolts or pins helps prevent corrosion and ensures smooth movement when reassembling the brake components.
- Torque Wrench: A torque wrench is crucial for tightening the caliper bolts, lug nuts, and other components to the manufacturer’s recommended torque specifications. This helps prevent overtightening or undertightening, which can lead to brake system malfunctions.
- Bungee Cord or Bracket: To prevent damage to the brake hose, it is recommended to suspend the caliper securely using a bungee cord or bracket while working on the brake components.
Make sure you have all the necessary tools and materials before starting the caliper compression process. This will save you time and ensure that the task is completed correctly without any complications. Always prioritize safety and follow the manufacturer’s instructions and guidelines when using tools and working on your vehicle.
Precautions and Safety Measures
Working on the braking system, including compressing calipers, involves certain risks and requires adherence to safety precautions. Here are some important precautions and safety measures to keep in mind:
- Safety Glasses and Gloves: Wear safety glasses and gloves to protect your eyes and hands from any debris, brake particles, or hazardous substances that may be encountered during the process.
- Proper Lifting Techniques: When removing the wheel, use proper lifting techniques to prevent strain or injury to your back. Lift with your legs and avoid twisting your body while carrying heavy components.
- Securely Support the Vehicle: Ensure that the vehicle is securely supported using jack stands, especially when working underneath the vehicle. This will prevent the vehicle from accidentally falling and causing serious injury or damage.
- Brake System Inspection: Before compressing the calipers, perform a visual inspection of the brake system components, including the brake lines, hoses, and rotors. Look for any signs of damage, leaks, or excessive wear. If you notice any issues, it is recommended to address them before proceeding with the caliper compression.
- Follow Manufacturer’s Instructions: Always refer to the vehicle manufacturer’s instructions and guidelines regarding the specific caliper compression process for your vehicle make and model. This ensures that you follow the correct procedures and use the appropriate tools and torque specifications.
- Brake Fluid Contamination: Take precautions to avoid any contamination of the brake fluid. If the brake fluid becomes contaminated, it may adversely affect the braking performance. Cover the brake fluid reservoir and use clean tools and materials when working on the brake system.
- Double-Check Everything: Before reassembly, double-check that all brake components are correctly aligned and securely fastened. Ensure that the lug nuts, caliper bolts or pins, and other connections are tightened to the specified torque settings.
It’s important to prioritize safety throughout the caliper compression process. If you are not confident in performing the task or encounter any difficulties, seek professional assistance to avoid potential hazards or improper brake system functioning.
By following these precautions and safety measures, you can ensure a secure and successful caliper compression, maintaining the integrity and functionality of your vehicle’s braking system.
When compressing calipers, always open the brake fluid reservoir cap to prevent pressure buildup. Use a C-clamp or caliper tool to slowly compress the piston, being careful not to damage the rubber seal.
Read more: How To Change Calipers
Step 1: Preparing the Vehicle
The first step in compressing calipers is to prepare the vehicle for the task. Follow these instructions to properly prepare your vehicle:
- Park your vehicle on a level surface and engage the parking brake to prevent any movement during the process.
- If necessary, use a lug wrench or an impact wrench to loosen the lug nuts on the wheel where you will be working. Loosen them slightly, but do not remove them completely at this stage. This will make it easier to remove the wheel later.
Preparing the vehicle is essential to ensure stability and accessibility throughout the caliper compression process. Parking on a level surface and engaging the parking brake prevents any involuntary movement of the vehicle, reducing the risk of accidents. Loosening the lug nuts beforehand will help facilitate the removal of the wheel in the subsequent steps.
Once you have prepared the vehicle, you can move on to the next step of removing the wheel and brake components.
Step 2: Removing Wheel and Brake Components
After preparing the vehicle, you can now proceed to remove the wheel and brake components. Follow these steps carefully:
- Using a lug wrench or an impact wrench, fully loosen and remove the lug nuts that were loosened in the previous step. Place the lug nuts in a secure location to avoid misplacing them.
- Carefully lift the wheel off the vehicle and set it aside. Make sure to place it in a safe location where it will not roll or cause any obstructions.
- Inspect the brake caliper to identify the bolts or pins that secure it. Use the appropriate tools, such as a socket wrench or Allen key, to remove the caliper bolts or pins. Remember to keep track of the bolts or pins for reassembly later.
- Gently wiggle the caliper off the brake rotor. Be cautious not to put any strain on the brake hose, as this could lead to damage or brake fluid leakage. If necessary, you can use a rubber mallet or a block of wood to tap the caliper loose.
- Once removed, securely suspend the caliper using a suitable bracket or a bungee cord. This helps prevent any strain on the brake hose and ensures the caliper is out of the way while you work on the brake components.
Removing the wheel and brake components is a crucial step in gaining access to the calipers for compression. Take your time and be careful when handling the caliper to avoid any damage or injury. By securely suspending the caliper, you create a safer working environment and protect the brake hose from unnecessary stress.
With the wheel and brake components removed, you are now ready to move on to compressing the calipers in the next step.
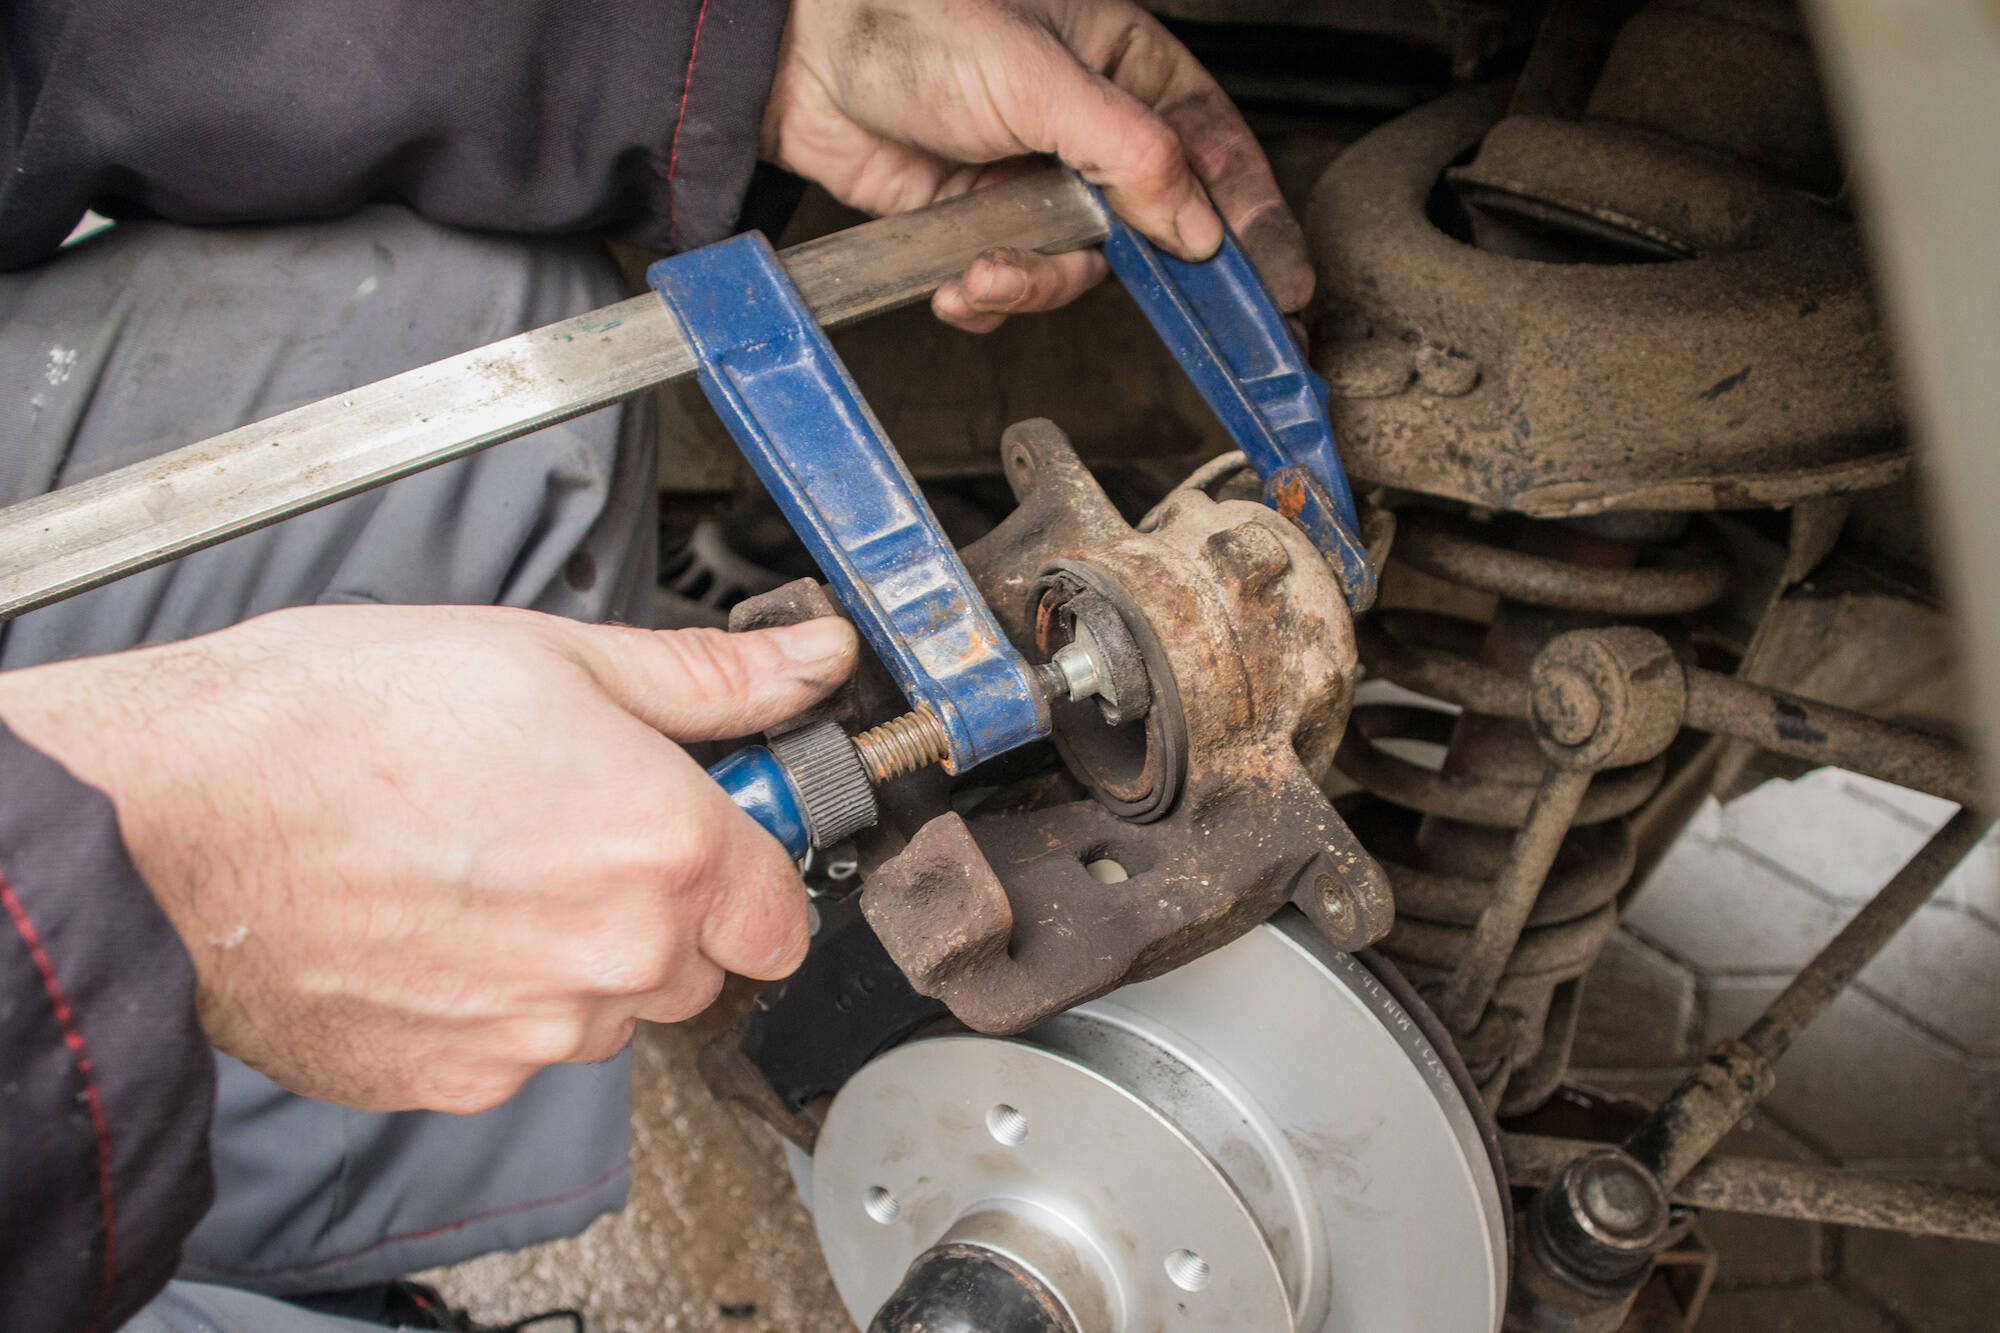
Step 3: Compressing the Calipers
Now that you have removed the wheel and brake components, it’s time to proceed with compressing the calipers. Follow these steps to safely and effectively compress the calipers:
- Before compressing the calipers, visually inspect them for any debris or dirt buildup. Use a clean cloth or a brush to remove any dirt or contamination, ensuring a clean working surface.
- Position the caliper compression tool of your choice over the caliper pistons. The tool should be centered and evenly distributed on both pistons.
- Start tightening the compression tool gradually, applying even pressure. Slowly and carefully compress the pistons back into the caliper housing.
- Monitor the compression process closely to ensure that the pistons retract smoothly and evenly. Take your time and avoid applying excessive force, as this may cause damage to the pistons or caliper housing.
- Continue compressing the pistons until they are fully retracted and flush with the caliper housing. This ensures there is enough space for the new brake pads or facilitates easy removal of the caliper, depending on the purpose of compression.
It’s essential to compress the calipers evenly and smoothly to maintain balance and prevent any future brake issues. By taking the time to carefully compress the calipers, you ensure proper functionality and longevity of the braking system.
Once you have successfully compressed the calipers, you can proceed to the next step of reassembling the brake components.
Step 4: Reassembling the Brake Components
After compressing the calipers, it’s time to reassemble the brake components. Follow these steps to complete the caliper compression process:
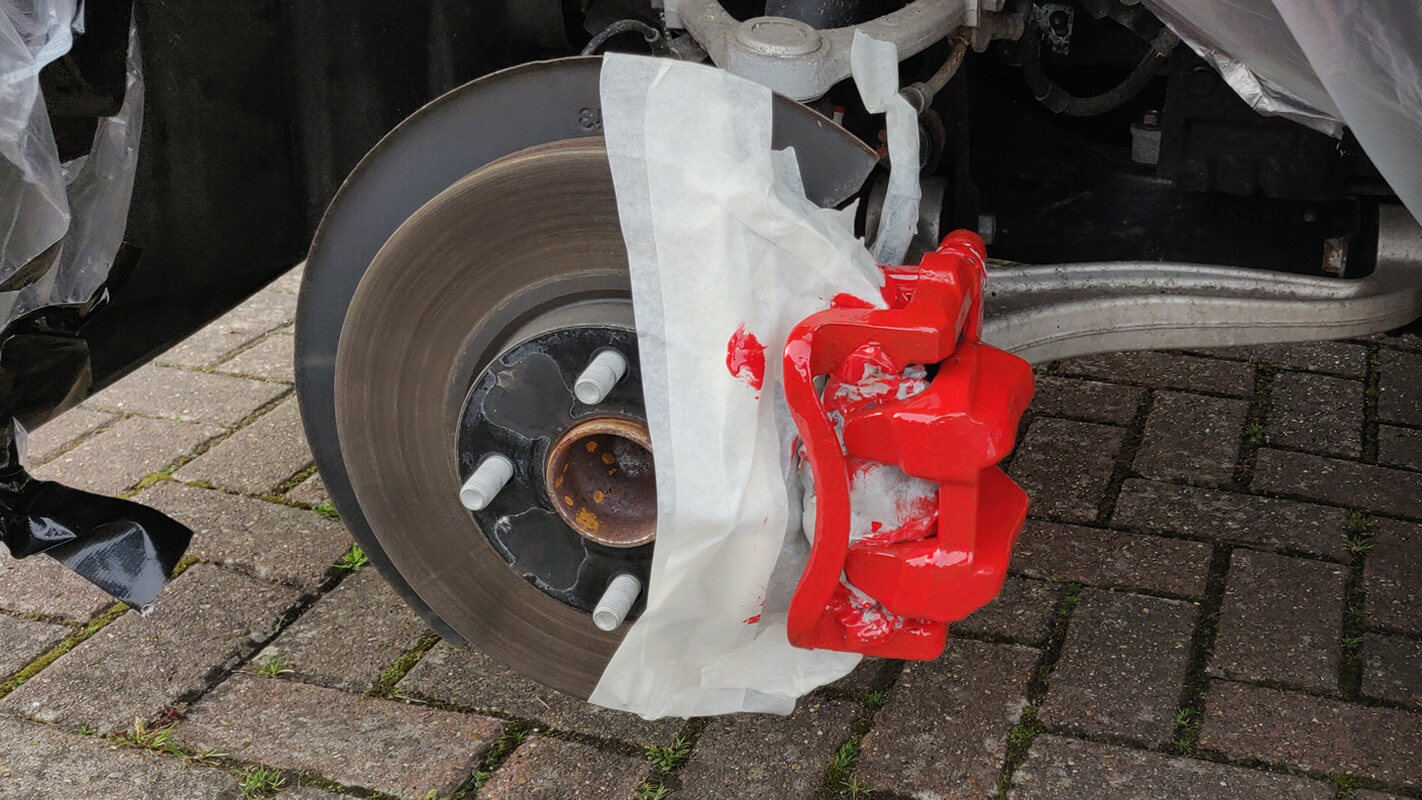
- Apply a thin layer of brake grease or lubricant to the caliper bolts or pins. This helps to prevent corrosion and ensure smooth movement during reassembly.
- Align the caliper with the brake rotor and slide it back into position, making sure the bolt holes of the caliper align with those on the brake caliper bracket.
- Insert and tighten the caliper bolts or pins using the appropriate tool, such as a socket wrench or Allen key. Follow the manufacturer’s specifications for the correct torque settings. Be careful not to overtighten the bolts, as this can cause damage to the caliper housing or affect the brake system’s performance.
- Replace the wheel onto the wheel hub, aligning the lug nut holes with the wheel studs.
- Tighten the lug nuts by hand first to ensure they are properly aligned. Then, use a torque wrench to tighten the lug nuts to the manufacturer’s recommended torque specifications. This helps to ensure the wheel is securely attached and prevents any risk of it coming loose while driving.
When reassembling the brake components, it’s important to follow the proper procedures and torque specifications. This ensures that everything is correctly aligned and securely fastened, reducing the risk of malfunction or potential accidents due to loose parts during braking.
Once you have reassembled the brake components and tightened the lug nuts, the caliper compression process is complete. Before driving, remember to test the brakes by applying gentle pressure to the brake pedal a few times to ensure proper engagement.
By following these steps, you can successfully compress the calipers and maintain the optimal performance of your vehicle’s braking system.
Read more: How To Grease Calipers
Conclusion
Compressing calipers is an essential maintenance task in ensuring the proper functioning and safety of your vehicle’s braking system. By following the step-by-step process outlined in this article, you can effectively compress the calipers and maintain the integrity of your brakes.
Remember to take precautions and adhere to safety measures during the caliper compression process. Wear safety glasses and gloves to protect yourself from debris and use proper lifting techniques when removing the wheel. Additionally, always refer to the manufacturer’s instructions and guidelines specific to your vehicle’s make and model.
By preparing the vehicle, removing the wheel and brake components, compressing the calipers evenly, and reassembling the brake components correctly, you can ensure that your braking system operates at its optimal performance. This regular maintenance task helps prevent uneven brake pad wear, ensures proper brake balance, and prolongs the lifespan of your braking components.
If you are uncertain or uncomfortable performing the caliper compression yourself, it’s highly recommended to seek professional assistance. A qualified mechanic can efficiently conduct the compression process, ensuring your brakes are in top condition.
Remember, proper maintenance of your braking system is crucial for your safety and the safety of others on the road. By taking the time to compress calipers as needed, you can maintain the performance, responsiveness, and reliability of your vehicle’s brakes, providing you with peace of mind on every drive.
Frequently Asked Questions about How To Compress Calipers
Was this page helpful?
At Storables.com, we guarantee accurate and reliable information. Our content, validated by Expert Board Contributors, is crafted following stringent Editorial Policies. We're committed to providing you with well-researched, expert-backed insights for all your informational needs.

0 thoughts on “How To Compress Calipers”