Articles
How To Crochet A Blanket Square
Modified: February 24, 2024
Learn how to crochet a beautiful blanket square with our step-by-step articles. Discover tips, tricks, and techniques to create stunning crochet designs.
(Many of the links in this article redirect to a specific reviewed product. Your purchase of these products through affiliate links helps to generate commission for Storables.com, at no extra cost. Learn more)
Introduction
Welcome to the world of crochet! If you’re looking to create a cozy and beautiful blanket, crocheting individual squares can be a great way to start. Crochet blanket squares are versatile, allowing you to mix and match colors and patterns to create a unique and personalized blanket.
In this tutorial, we’ll guide you through the process of crocheting a blanket square. Whether you’re a beginner or have some experience with crochet, this step-by-step guide will help you create a square that is both functional and aesthetically pleasing.
Crocheting a blanket square is not only a practical skill, but it’s also a therapeutic and rewarding hobby. Not only will you have a handmade item with sentimental value, but you’ll also gain a sense of accomplishment and relaxation as you work on each stitch.
Before we dive into the crochet techniques, let’s go over the materials you’ll need to get started.
Key Takeaways:
- Crocheting a blanket square is a therapeutic and rewarding hobby that allows you to create a unique and personalized piece. Enjoy the process and relish in the warmth and comfort of your handmade creation.
- With patience and creativity, you can confidently embark on your crochet journey to create stunning blankets. Embrace the joy of creating something special and share your handmade creations with others.
Materials Needed
Before you can start crocheting your blanket square, gather the following materials:
- Yarn: Choose a yarn that is suitable for a blanket project. The weight of the yarn will depend on the desired thickness of your blanket. Make sure to select colors that complement each other or follow a specific color scheme.
- Crochet Hook: The size of the crochet hook will depend on the yarn weight you’ve chosen. Refer to the yarn label or find a hook size that works best with the yarn you have.
- Scissors: A good pair of scissors is essential for cutting the yarn as you complete each section of the square.
- Tapestry Needle: This needle will be used for weaving in loose ends and adding any decorative elements to your square.
- Measuring Tape or Ruler: Having a measuring tool on hand will help ensure that your square is the correct size and maintains even proportions.
- Stitch Markers (optional): Stitch markers can be helpful in marking specific stitches or sections of your square, especially for more intricate patterns.
- Pattern or Instructions: Depending on your skill level, you may choose to follow a specific pattern or create a simple square with basic stitches. If you’re a beginner, there are plenty of free patterns available online or in crochet books.
Once you have gathered these materials, you’re well-prepared to begin crocheting your blanket square. Now let’s move on to the first step of the process: beginning the square.
Step 1: Begin the Blanket Square
To start crocheting your blanket square, follow these steps:
- Make a slipknot: Take the loose end of your yarn and form a loop. Insert the hook through the loop and pull the yarn to create a slipknot. Place the slipknot on your crochet hook, adjusting the tightness as needed.
- Create a foundation chain: Hold the crochet hook in your dominant hand and the yarn in your other hand. With your dominant hand, wrap the yarn over the hook from back to front. Pull the wrapped yarn through the slipknot loop on the hook. This is called a chain stitch. Repeat this process until you reach the desired number of chain stitches for your square. The number of chains will determine the width of your square.
Remember to keep the tension of the yarn consistent throughout the chain. If your chain is too tight, it may be difficult to work into later, and if it’s too loose, the stitches may not hold their shape.
Now that you have created the foundation chain, you are ready to move on to the next step: crocheting the first row.
Step 2: Create the Foundation Chain
Now that you have begun your blanket square, it’s time to create the foundation chain. This chain will serve as the base for the rest of your crochet work.
- Hold the crochet hook in your dominant hand and the yarn in your other hand.
- With your dominant hand, wrap the yarn over the hook from back to front, forming a loop around the hook.
- Insert the hook through the first chain stitch (the one closest to the hook) of the foundation chain.
- With the yarn still wrapped around the hook, pull it through the chain stitch, creating a loop on your hook.
- Repeat steps 2 to 4 for each chain stitch, working your way down the foundation chain.
- Count the number of stitches you have made in this row. This will be important for maintaining the correct stitch count throughout your square.
It’s important to keep the tension of the yarn consistent as you work your way down the foundation chain. If the stitches are too tight, it will be difficult to work into them in the next row. If they are too loose, your square may become misshapen.
Congratulations! You have successfully created the foundation chain for your blanket square. Now, let’s move on to the next step: crocheting the first row.
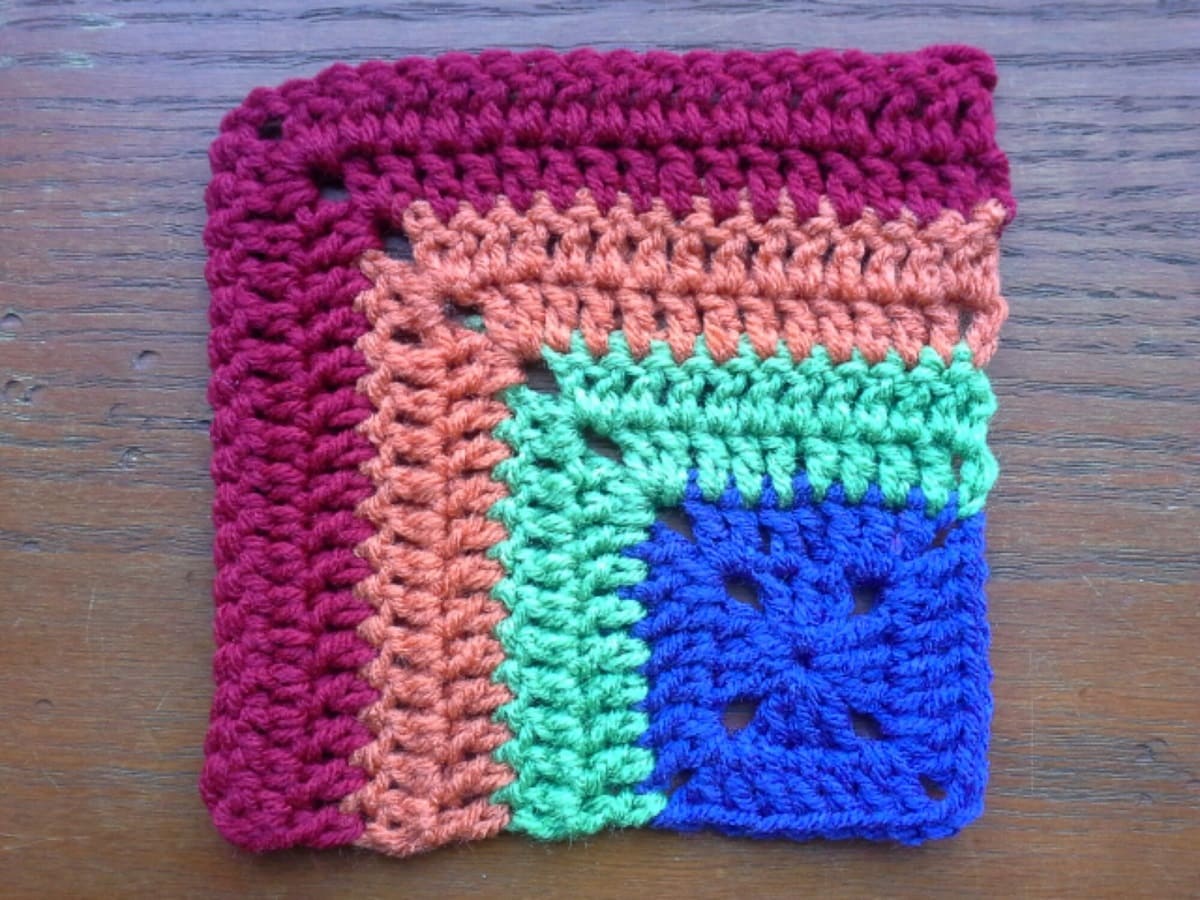
When crocheting a blanket square, be sure to use the same type of yarn and hook size for each square to ensure they are all the same size and will fit together neatly.
Step 3: Crochet the First Row
Now that you have your foundation chain ready, it’s time to start crocheting the first row of your blanket square. This row will serve as the starting point for the rest of the square.
- Hold the crochet hook in your dominant hand, and position it to the right of the last chain stitch.
- With your dominant hand, wrap the yarn over the hook from back to front, forming a loop around the hook.
- Insert the hook through the next chain stitch, moving from right to left.
- With the yarn still wrapped around the hook, pull it through the chain stitch, creating two loops on your hook.
- Wrap the yarn over the hook once again, and pull it through both loops on the hook. This completes your first single crochet stitch.
- Repeat steps 2 to 5 for each remaining chain stitch in the foundation row.
- Count the number of stitches you have made in this row, ensuring they match the stitch count of the foundation chain.
As you crochet the first row, pay attention to the tension of the yarn. Make sure the stitches are not too tight or too loose, as this can affect the overall appearance and shape of your square.
Great job! You have completed the first row of your blanket square. Now, let’s move on to the next step: continuing to crochet additional rows.
Read more: How To Crochet A Granny Square Blanket
Step 4: Continue Crocheting Additional Rows
Now that you have completed the first row of your blanket square, it’s time to continue crocheting additional rows. This will build the height and shape of your square.
- Flip your work: Turn your square clockwise, so the completed row is now facing downward.
- Create a turning chain: To start the next row, you’ll need to create a turning chain. This chain will act as the first stitch of the new row. The number of turning chains needed will depend on the type of stitch you are using. For a single crochet, you typically need one turning chain.
- Insert the hook under the top two loops of the first stitch in the previous row.
- Wrap the yarn over the hook from back to front.
- Pull the yarn through the stitch, creating two loops on the hook.
- Wrap the yarn over the hook once again, and pull it through both loops on the hook. This completes the first stitch of the new row.
- Repeat steps 3 to 6 for each stitch in the row, working your way across.
- At the end of the row, turn your work again and create a turning chain for the next row.
- Repeat steps 3 to 8 for each additional row until your square reaches the desired height.
As you crochet each row, take care to maintain an even tension and consistent stitch size. This will help ensure that your square stays square and that the stitches are evenly spaced.
Great job! You are now on your way to completing your blanket square. Let’s move on to the final step: finishing off the square.
Step 5: Finish off the Square
After you have crocheted all the necessary rows and your square has reached the desired size, it’s time to finish off your blanket square. This final step will give your square a neat and polished appearance.
- Cut the yarn: Using a pair of scissors, cut the yarn, leaving a tail that is long enough to weave in later.
- Pull the yarn through the last stitch: Insert your hook into the loop of the last stitch, from back to front. Pull the tail of the yarn through the loop, securing it in place.
- Weave in the loose ends: Thread the tail of the yarn onto a tapestry needle. Insert the needle under the top loops of several stitches on the back of the square. Slide the needle back and forth, weaving the yarn in and out of the stitches. Trim any excess yarn once the tail is secure.
- Block your square (optional): If desired, you can block your square to give it a more polished and professional look. To block, dampen your square with water, gently stretch it to the desired shape, and lay it flat to dry.
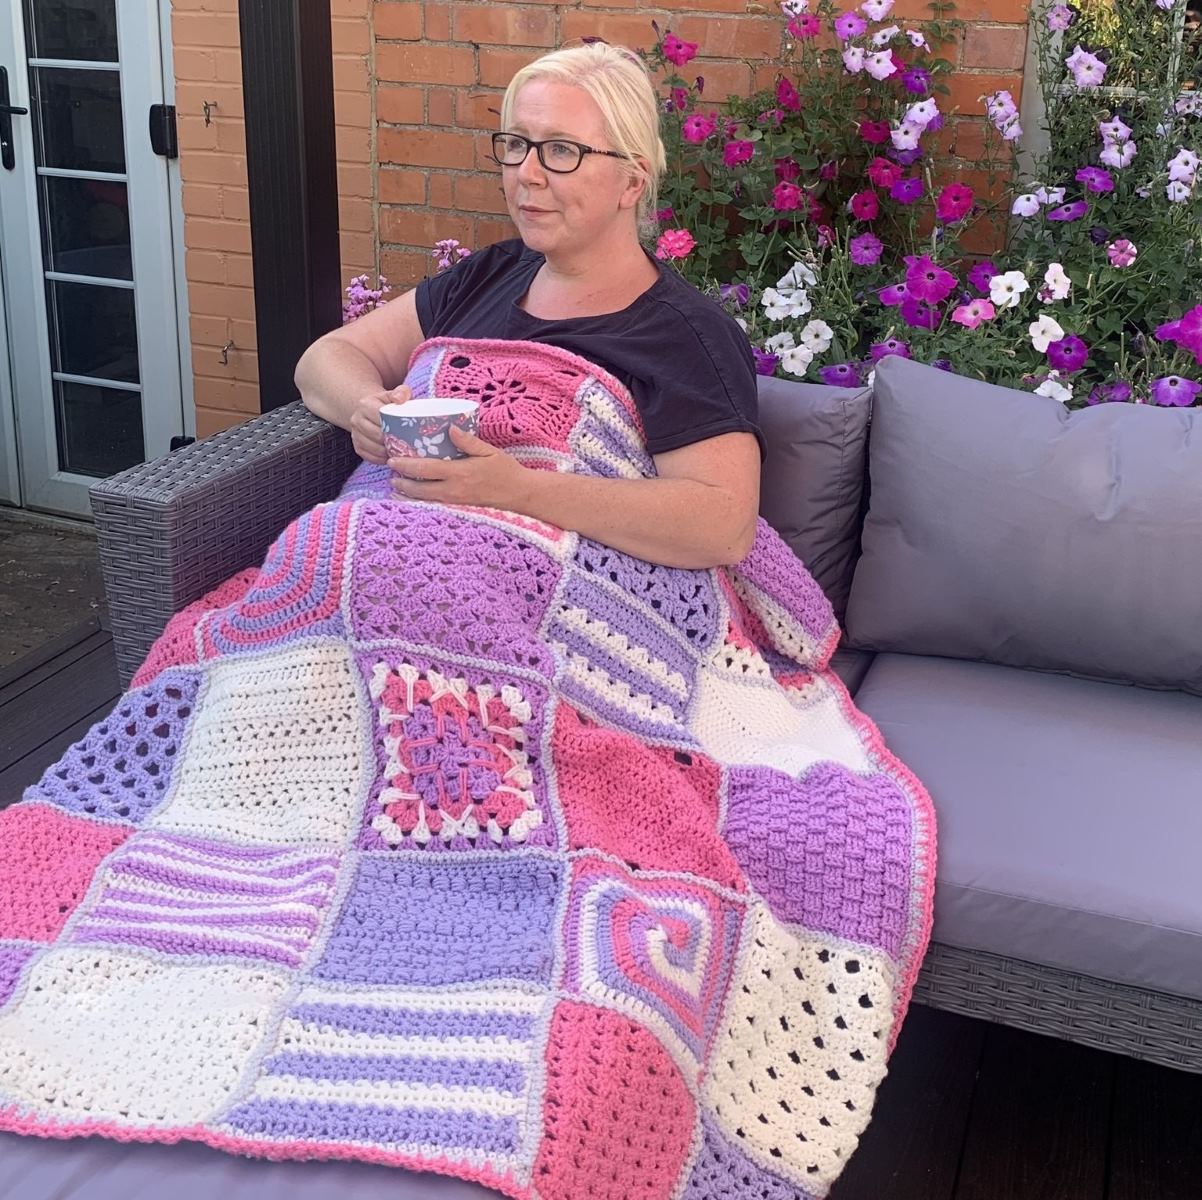
With these final steps, you have successfully completed your blanket square! You can now use it as a standalone piece or combine it with other squares to create a larger blanket. Get creative with color combinations, stitch patterns, and arrangements to make your blanket truly unique.
Congratulations on completing your crochet journey to make a beautiful blanket square! Crocheting is a wonderful craft that allows you to create functional and artistic pieces with your own two hands. Enjoy the process and relish in the warmth and comfort that your handmade blanket will bring.
Happy crocheting!
Conclusion
Crocheting a blanket square is not only a practical skill, but it’s also an opportunity to express your creativity and create something beautiful. Through the steps outlined in this tutorial, you have learned how to begin a square, create a foundation chain, crochet the first row, continue with additional rows, and finish off your square. With these skills, you can now confidently embark on your crochet journey to create stunning blankets and other projects.
Remember, crocheting is a craft that combines patience, skill, and creativity. It may take some time and practice to perfect your techniques, but with each stitch, you will gain confidence and create something unique. Don’t be afraid to experiment with different yarns, colors, and stitch patterns to make your blanket square truly one-of-a-kind.
Crocheting is also a wonderful way to relax and unwind. As you work on your blanket square, take time to enjoy the process and let your mind wander. The repetitive motion of crocheting can be meditative and soothing, providing a sense of calm and mindfulness.
Lastly, don’t forget to share your creations with others. Handmade blankets are cherished gifts that hold sentimental value. Whether you decide to keep the square for yourself or give it to a loved one, your handmade creation is sure to bring warmth and comfort.
So, gather your materials, pick up your crochet hook, and start crocheting your very own blanket square. Let your imagination run wild as you create beautiful patterns and color combinations. Enjoy the journey and embrace the joy of creating something truly special.
Happy crocheting!
Frequently Asked Questions about How To Crochet A Blanket Square
Was this page helpful?
At Storables.com, we guarantee accurate and reliable information. Our content, validated by Expert Board Contributors, is crafted following stringent Editorial Policies. We're committed to providing you with well-researched, expert-backed insights for all your informational needs.