Articles
How To Cut Hardie Board Siding
Modified: January 8, 2024
Learn the step-by-step process of cutting Hardie Board siding in our expert articles. Gain valuable insights and tips for a successful siding installation.
(Many of the links in this article redirect to a specific reviewed product. Your purchase of these products through affiliate links helps to generate commission for Storables.com, at no extra cost. Learn more)
Introduction
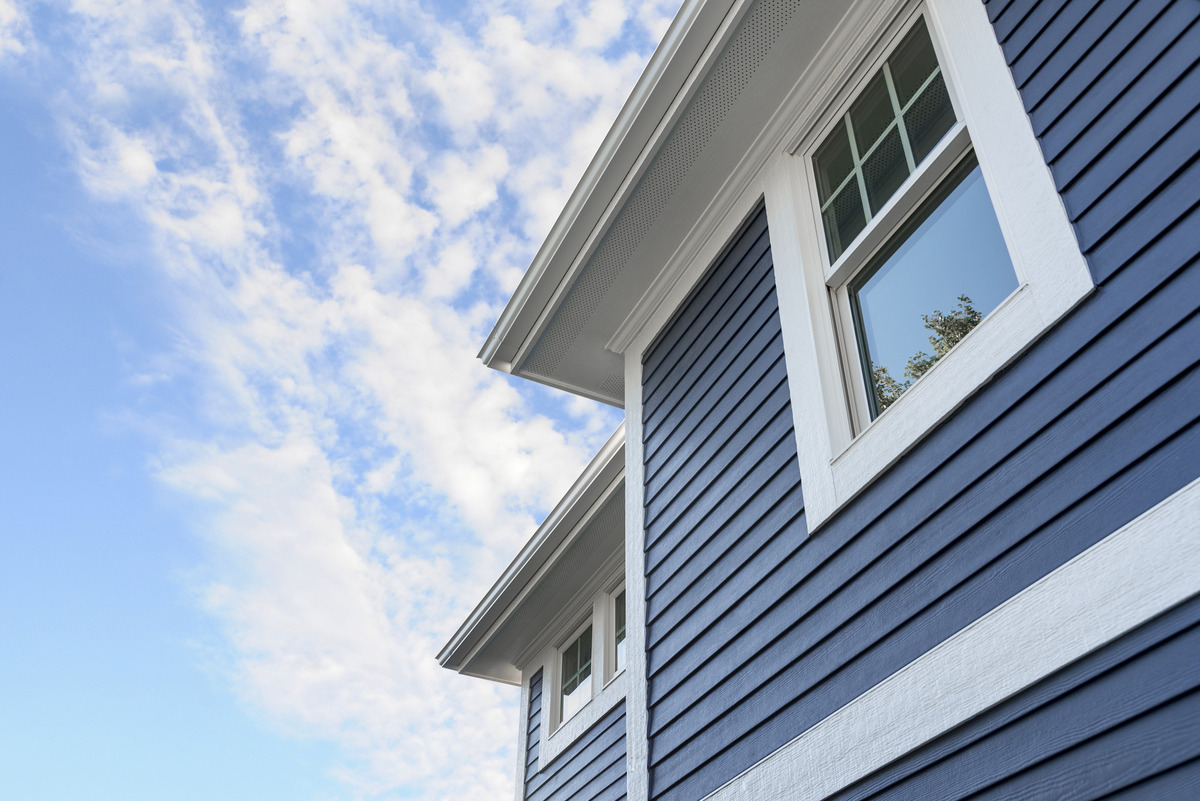
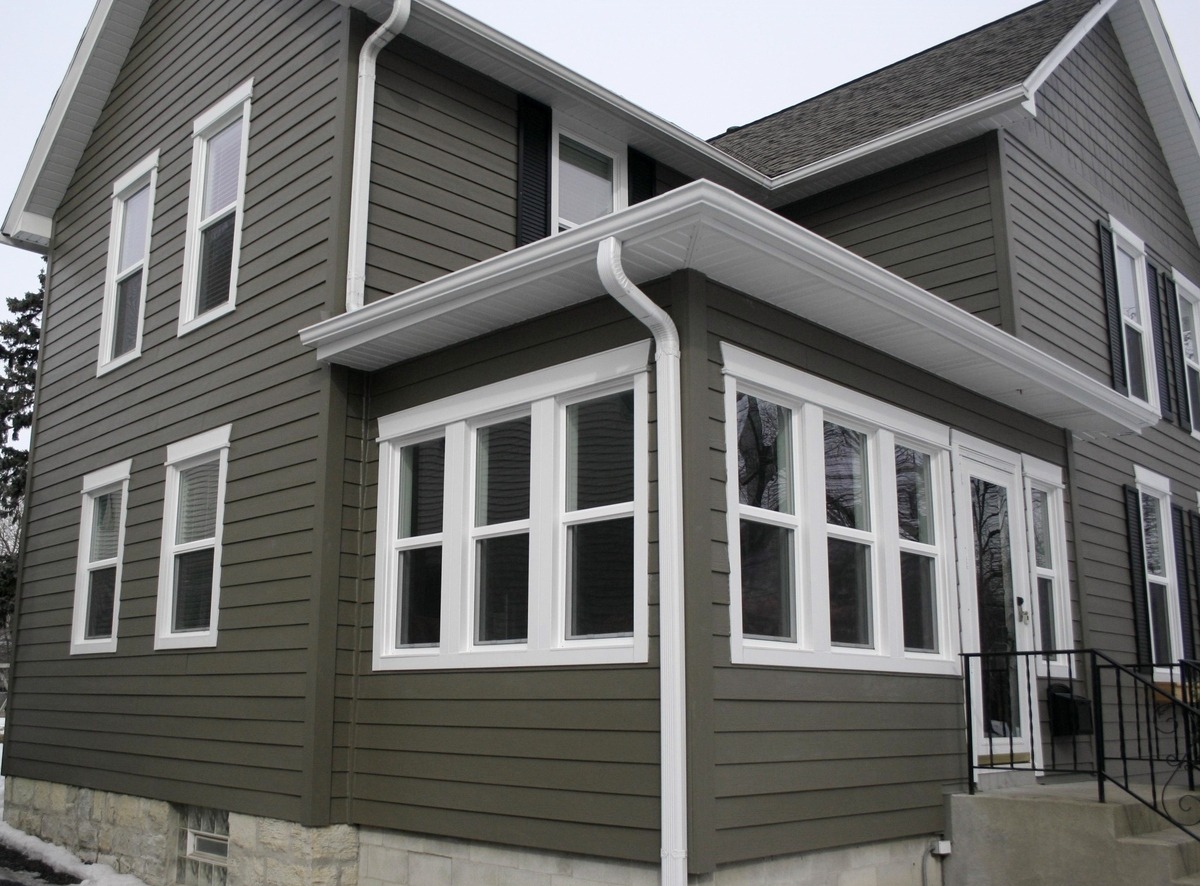
Welcome to our comprehensive guide on how to cut Hardie board siding. Hardie board, also known as fiber cement siding, is a popular choice for its durability and resistance to the elements. However, cutting Hardie board can be a challenging task if you don’t have the right tools and techniques. In this article, we will take you through the step-by-step process of cutting Hardie board siding safely and efficiently.
Whether you are a professional contractor or a DIY enthusiast, understanding how to properly cut Hardie board is essential to achieve a clean and precise finish. By following our instructions and tips, you will be able to make accurate cuts with ease and avoid costly mistakes.
Before we dive into the cutting process, it’s important to note that Hardie board is made of a combination of cement, sand, and cellulose fibers, which gives it great strength. However, this composition also makes it heavier and more brittle than other siding materials. Therefore, it is crucial to take proper safety precautions and use the right tools to prevent accidents and damage to the material.
In the following sections, we will discuss the tools and materials you will need, the safety precautions to take, and the step-by-step process of cutting Hardie board siding. So let’s get started!
Key Takeaways:
- Safety First!
When cutting Hardie board siding, prioritize safety by wearing protective gear, securing the workpiece, and working in a well-ventilated area. Following safety precautions is crucial for a successful and accident-free cutting process. - Precision is Key
Achieve accurate and clean cuts by measuring and marking the board meticulously, scoring the cutting line, and using steady, controlled movements during the cutting process. Precision ensures a professional finish for your siding project.
Read more: How To Remove Hardie Board Siding
Tools and Materials Needed
Before you begin cutting Hardie board siding, it’s essential to gather all the necessary tools and materials. Having the right equipment will not only make the job easier but also ensure that you achieve accurate and clean cuts. Here are the tools and materials you’ll need:
- Safety glasses: Protect your eyes from flying debris by wearing safety glasses throughout the cutting process.
- Dust mask: A dust mask will help you breathe easily and prevent inhalation of harmful particles.
- Gloves: Wear gloves to protect your hands from sharp edges and to provide a better grip on the tools.
- Measuring tape: Use a measuring tape to measure and mark the dimensions on the Hardie board before cutting.
- Straightedge: A straightedge, such as a ruler or a carpenter’s square, is essential for drawing straight cutting lines on the Hardie board.
- Pencil or marker: Use a pencil or a marker to mark your measurements and cutting lines on the Hardie board. Choose a color that is easily visible on the material.
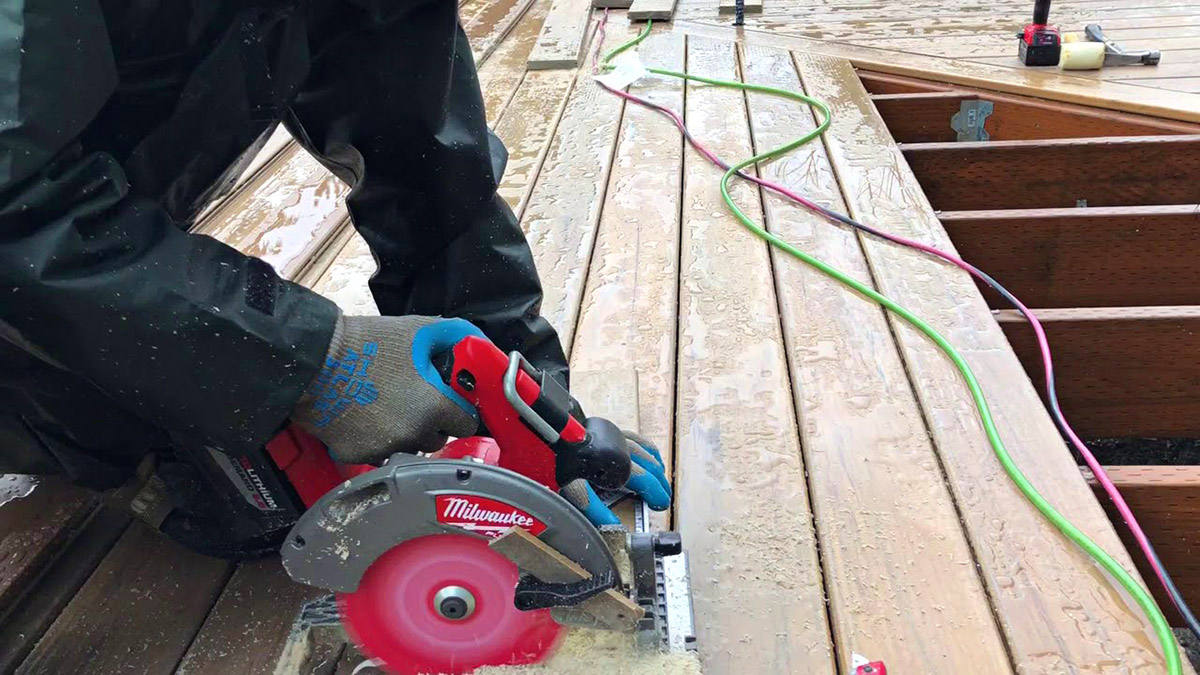
- Circular saw with a fiber cement blade: A circular saw fitted with a specialized fiber cement blade is the most efficient tool for cutting Hardie board siding. Make sure the blade has carbide-tipped teeth for durability.
- Jigsaw: A jigsaw can be used for making more intricate cuts or cutting holes for vents and outlets. Ensure you use a jigsaw blade designed for cutting fiber cement.
- Clamps: Clamps are useful for securing the Hardie board in place and preventing it from moving during the cutting process.
- Caulk gun and exterior-grade caulk: Use a caulk gun and exterior-grade caulk to seal any gaps or joints after cutting and installing the Hardie board siding.
Having these tools and materials ready before you start cutting will save you time and ensure a smoother workflow. Take a moment to double-check that you have everything you need to complete the project successfully.
Safety Precautions
When working with Hardie board siding, it’s important to prioritize safety to avoid accidents and injuries. Here are some essential safety precautions to follow while cutting Hardie board:
- Wear protective gear: Always wear safety glasses to protect your eyes from flying debris. Additionally, wear a dust mask to prevent inhalation of particles and gloves to protect your hands.
- Work in a well-ventilated area: Cutting Hardie board generates silica dust, which can be hazardous to your health. Ensure you are working in a well-ventilated area or use a fan to blow away the dust.
- Secure the workpiece: Use clamps to secure the Hardie board in place before making any cuts. This will prevent it from moving or vibrating, reducing the risk of accidents.
- Follow the manufacturer’s guidelines: Read and adhere to the guidelines provided by the manufacturer of the Hardie board and cutting tools. These guidelines will provide you with specific instructions and safety precautions for your particular products.
- Use proper cutting techniques: Always cut with the blade facing away from you and maintain a firm grip on the saw or jigsaw while cutting. Avoid leaning over or reaching across the cutting path.
- Be aware of potential hazards: Take note of any electrical wires, plumbing pipes, or other obstacles behind the area you’ll be cutting. Ensure you are clear of any hazards before starting the cutting process.
- Keep the work area clean: Remove any debris, scraps, or loose materials from the work area before you start cutting. This will minimize tripping hazards and ensure a clean and organized workspace.
- Dispose of waste properly: Clean up the debris and waste material promptly after cutting Hardie board. Dispose of it in a designated area or container to prevent injuries and maintain a tidy workspace.
By following these safety precautions, you can minimize the risk of accidents and injuries while cutting Hardie board siding. Remember, safety should always be your top priority, so take your time and proceed cautiously throughout the cutting process.
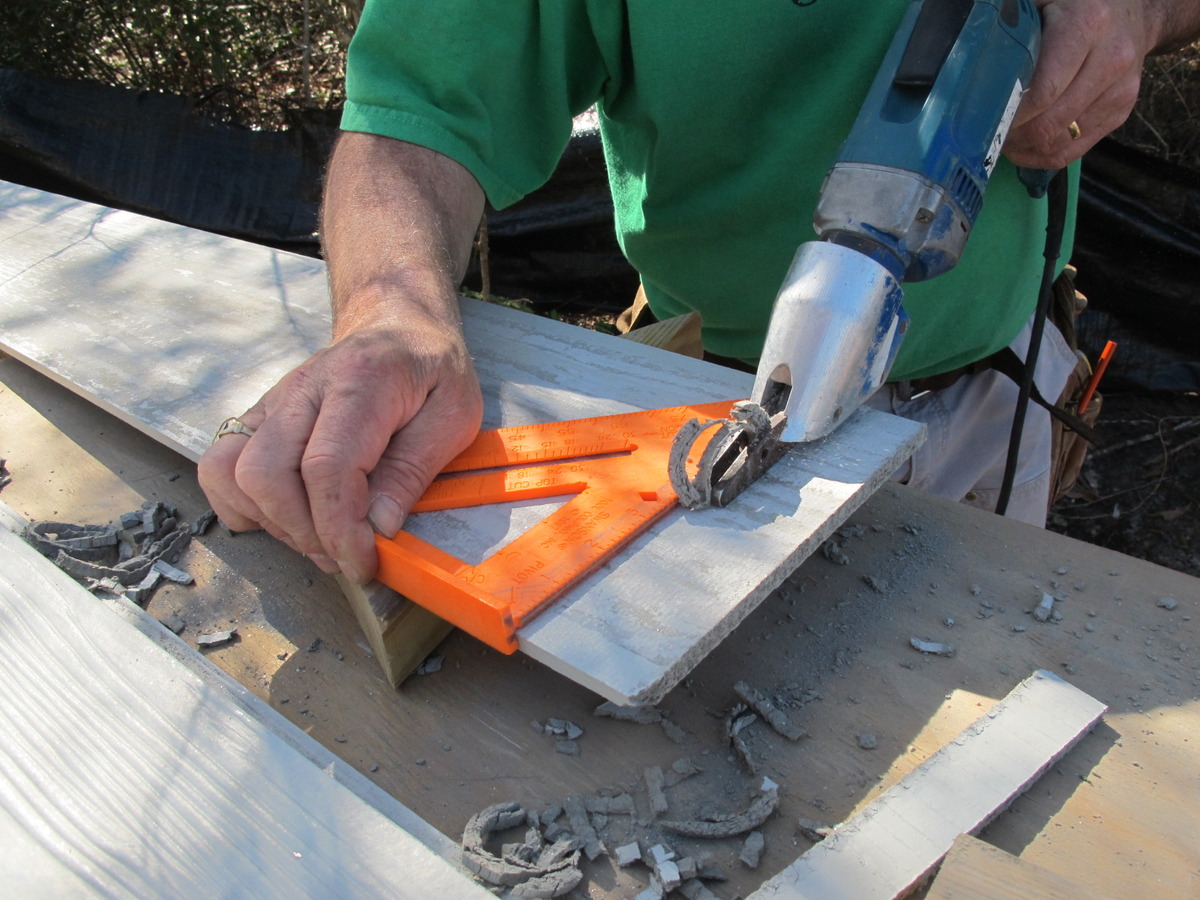
Step 1: Measure and Mark the Board
Before making any cuts on the Hardie board siding, it’s essential to measure and mark the dimensions accurately. Taking precise measurements will ensure that you achieve the desired size and shape for your siding pieces. Follow these steps to measure and mark the board:
- Measure the area: Use a measuring tape to determine the dimensions of the area where the Hardie board siding will be installed. Take into account any corners, windows, or other features that will require specific measurements.
- Transfer measurements to the board: With the measurements in hand, use a pencil or marker to mark the dimensions on the Hardie board. Make sure the marks are clear and visible.
- Mark cutting lines: Based on your measurements, use a straightedge and the pencil or marker to draw the cutting lines on the board. Ensure the lines are straight and aligned with your measurements.
- Double-check the measurements: Before proceeding to cut the board, double-check your measurements to ensure accuracy. Remember, it’s always better to double-check than to make a mistake that could ruin the board.
It’s important to work slowly and precisely during this step to ensure accurate measurements and markings. Taking the time to measure and mark the board correctly will save you from potential issues and mistakes later in the cutting process. Remember, accuracy is key when working with Hardie board siding.
Step 2: Score the Cutting Line
Once you have measured and marked the dimensions on the Hardie board siding, the next step is to score the cutting line. Scoring the line will create a groove that will help guide the saw blade during the cutting process, resulting in cleaner and more precise cuts. Follow these steps to score the cutting line:
- Place the board on a stable surface: Ensure that the Hardie board is secure and stable on a workbench or sawhorses. This will provide a solid foundation for scoring the cutting line.
- Set the blade depth: Adjust the blade on your circular saw to a depth of about 1/8-inch. This will allow the blade to score the surface of the Hardie board without cutting through it completely.
- Position the straightedge: Align the straightedge along the marked cutting line on the Hardie board. Make sure it is firmly held in place, either by clamps or by applying pressure with your free hand.
- Score the line: Keeping the saw’s base plate against the straightedge, slowly and carefully run the circular saw along the cutting line. Apply light pressure to create a shallow groove on the surface of the Hardie board. Be sure to maintain a steady hand and follow the entire length of the cut line.
- Double-check the scoring: Inspect the scored line to ensure it is deep enough to guide the blade but not too deep that it cuts through the board. Make any necessary adjustments to the depth of the cut as needed.
Scoring the cutting line is an important step to prevent any potential chipping or splintering that may occur during the cutting process. Taking the time to score the line accurately will help you achieve cleaner and more precise cuts when you move on to the next step.
When cutting Hardie board siding, use a carbide-tipped scoring knife to score the board along the cut line, then snap it along the scored line for a clean cut. Wear a dust mask and eye protection.
Read more: How To Install Vertical Hardie Board Siding
Step 3: Make the Initial Cut
After scoring the cutting line on the Hardie board siding, it’s time to make the initial cut. This step will involve creating a partial cut along the scored line, which will allow you to guide the saw blade smoothly and accurately during the rest of the cutting process. Follow these steps to make the initial cut:
- Position the board: Ensure that the Hardie board is securely positioned and supported on a stable surface. This will help prevent any movement or vibrations while cutting.
- Prepare the saw: If using a circular saw, make sure you have a carbide-tipped fiber cement blade installed securely. Set the blade depth to match the thickness of the Hardie board.
- Align the saw: Position the saw blade at the starting point of the scored line, making sure the blade is aligned with the groove created during the scoring process.
- Engage the saw: Start the saw and slowly guide it along the scored line, applying gentle pressure to create the initial cut. Take your time and maintain a steady hand to ensure a smooth and accurate cut.
- Stop before reaching the end: When approaching the end of the cut, stop the saw just before reaching the mark. This will help prevent any potential damage or splintering that may occur as the blade exits the board.
Making the initial cut creates a path for the saw blade to follow, allowing for greater control and precision during the remaining cutting process. Take your time and make sure the initial cut is clean and accurate before proceeding to the next step.
Step 4: Complete the Cut
With the initial cut made, it’s time to complete the cut along the scored line on the Hardie board siding. This step will involve guiding the saw blade through the board to achieve a clean and precise cut. Follow these steps to complete the cut:
- Reposition the saw blade: If using a circular saw, reposition the blade at the starting point of the scored line, ensuring it aligns with the groove created during the initial cut.
- Engage the saw: Start the saw and slowly guide it along the scored line, following the path created by the initial cut. Apply gentle and consistent pressure to maintain control over the saw and ensure a smooth and accurate cut.
- Allow the saw to do the work: Don’t force the saw through the Hardie board. Instead, let the weight of the saw and the sharpness of the blade do the cutting. Pushing too hard can result in a rough cut or may cause the blade to bind.
- Use the jigsaw for intricate cuts: If you need to make more intricate cuts or cut holes for vents or outlets, switch to a jigsaw with a fiber cement blade. This will give you greater control and maneuverability for precise and detailed cuts.
- Double-check the cut: After completing the cut, inspect it to ensure it is clean, smooth, and matches the desired dimensions. Make any necessary adjustments or refinements as needed.
Take your time and work carefully to complete the cut accurately. Using steady and controlled movements will help you achieve a professional-looking finish on your Hardie board siding.
Step 5: Smooth Edges and Clean Up
After completing the cuts on the Hardie board siding, it’s important to smooth out any rough edges and perform a thorough clean-up. This final step will ensure that your cut pieces are safe to handle and ready for installation. Follow these steps to smooth edges and clean up:
- Inspect the edges: Examine the cut edges of the Hardie board siding for any roughness or sharp corners. Using a sanding block or sandpaper, smooth out rough edges and chamfer sharp corners as necessary. This will make the pieces safer to handle and reduce the risk of injuries.
- Remove dust and debris: Use a brush or a vacuum cleaner to remove any dust and debris that may have accumulated during the cutting process. Ensure that the work area is clean and tidy before proceeding.
- Dispose of waste: Properly dispose of all waste material, including the offcuts and dust generated from cutting the Hardie board siding. Follow local guidelines for disposing of building materials and ensure that the waste is contained and disposed of responsibly.
- Protect your cut pieces: Once the edges are smoothed and the area is clean, consider covering the cut pieces with a protective cloth or plastic sheet to prevent any damage or scratches before installation.
Taking the time to smooth out edges and perform a thorough clean-up ensures that your cut Hardie board siding is in optimal condition for installation. By following these steps, you’ll have clean and safe pieces ready to be used for your siding project.
Conclusion
Cutting Hardie board siding can seem like a daunting task, but with the right tools, techniques, and safety precautions, it can be done smoothly and effectively. By following the step-by-step guide outlined in this article, you now have the knowledge and understanding to make accurate and precise cuts in Hardie board siding.
Remember, before starting any cutting process, always ensure you have the proper safety equipment, including safety glasses, a dust mask, and gloves. Take the time to measure and mark the board accurately, score the cutting line, and make the initial cut. Then, use careful precision to complete the cut and smooth out any rough edges.
Throughout the process, keep in mind that safety should always be a priority. Follow the manufacturer’s guidelines for your Hardie board and cutting tools and be aware of potential hazards in your work area. Take your time, work with steady hands, and never rush the cutting process.
Once you have completed the cuts, don’t forget to perform a thorough clean-up to remove any dust and debris. Smooth out the edges of the cut pieces for safety and protect them before installation.
With this comprehensive guide, you are now equipped with the knowledge and skills to confidently cut Hardie board siding. Remember to practice caution and precision to achieve clean and accurate cuts, ensuring a professional finish for your siding project.
Frequently Asked Questions about How To Cut Hardie Board Siding
Was this page helpful?
At Storables.com, we guarantee accurate and reliable information. Our content, validated by Expert Board Contributors, is crafted following stringent Editorial Policies. We're committed to providing you with well-researched, expert-backed insights for all your informational needs.


0 thoughts on “How To Cut Hardie Board Siding”