Articles
How To Attach Hardie Siding
Modified: January 19, 2024
Learn how to attach Hardie siding with our informative articles. Get step-by-step instructions and expert tips for a professional installation.
(Many of the links in this article redirect to a specific reviewed product. Your purchase of these products through affiliate links helps to generate commission for Storables.com, at no extra cost. Learn more)
Introduction
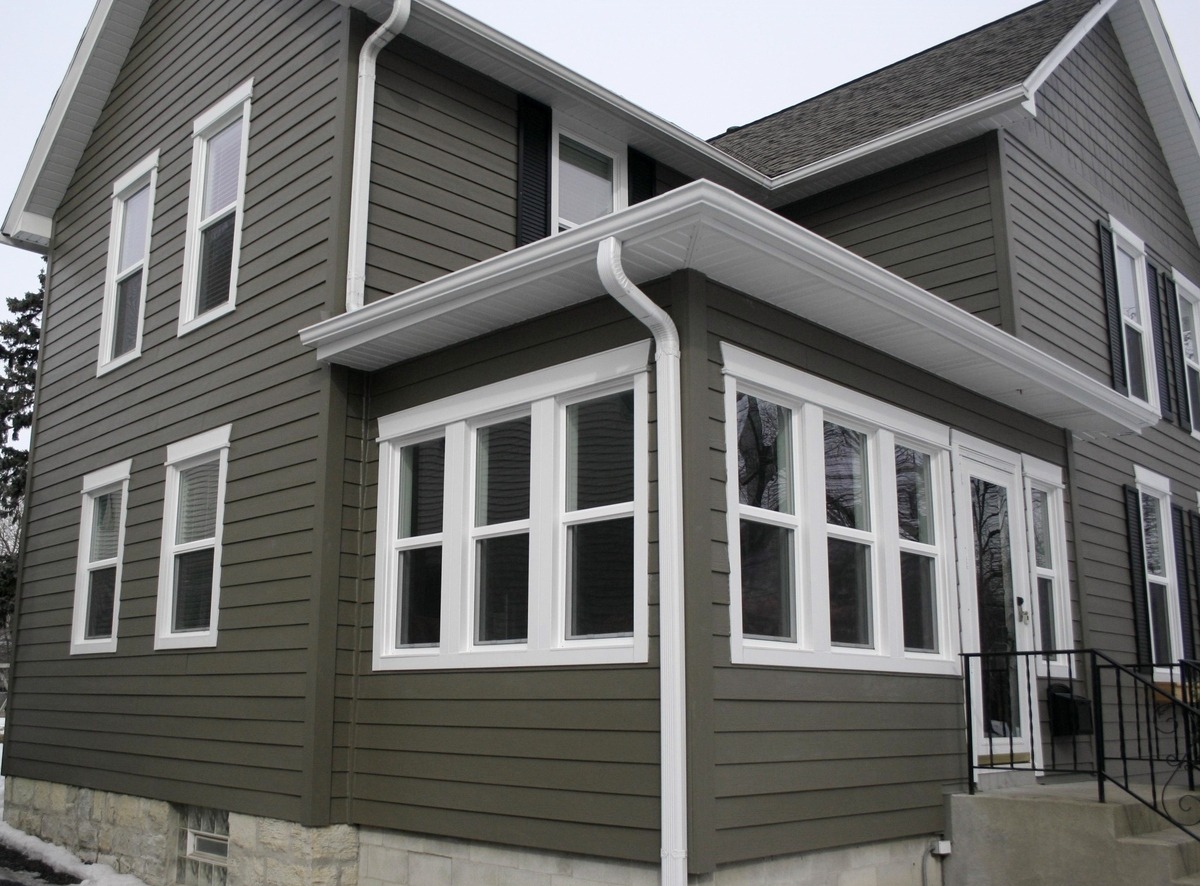
When it comes to enhancing the exterior of your home, one popular choice is Hardie siding. Hardie siding, also known as Hardie board or fiber cement siding, is a durable and low-maintenance material that offers both aesthetic appeal and protection against the elements.
However, attaching Hardie siding is not a task to be taken lightly. It requires careful planning, preparation, and installation to ensure a successful and long-lasting result. In this article, we will guide you through the step-by-step process of attaching Hardie siding, from gathering the necessary materials to applying the finishing touches.
Whether you’re a DIY enthusiast looking to tackle a home improvement project or a homeowner seeking insights before hiring a professional, this comprehensive guide will provide you with the knowledge and confidence to effectively install Hardie siding on your home.
It’s important to note that while this guide will provide a general overview of the installation process, it is always recommended to consult the specific installation instructions provided by the manufacturer of your Hardie siding. These instructions may vary based on the specific type and style of Hardie siding you are using, as well as the unique characteristics of your home’s exterior.
Now, let’s dive into the step-by-step process of attaching Hardie siding and transform the look of your home!
Key Takeaways:
- Proper preparation is essential for successful Hardie siding installation. From gathering materials to applying finishing touches, attention to detail and adherence to manufacturer’s instructions ensure a durable and visually appealing result.
- Attaching Hardie siding requires precision and care at every step, from installing starter strips to applying caulk and sealants. Following safety guidelines and consulting professionals when needed ensures a successful home improvement project.
Read more: How To Paint Hardie Siding
Step 1: Gather Materials
Before you begin the installation process, it is important to ensure that you have all the necessary materials on hand. This will help you work efficiently and prevent any unnecessary delays or interruptions during the installation. Here is a list of the materials you will need:
- Hardie siding panels
- Starter strip
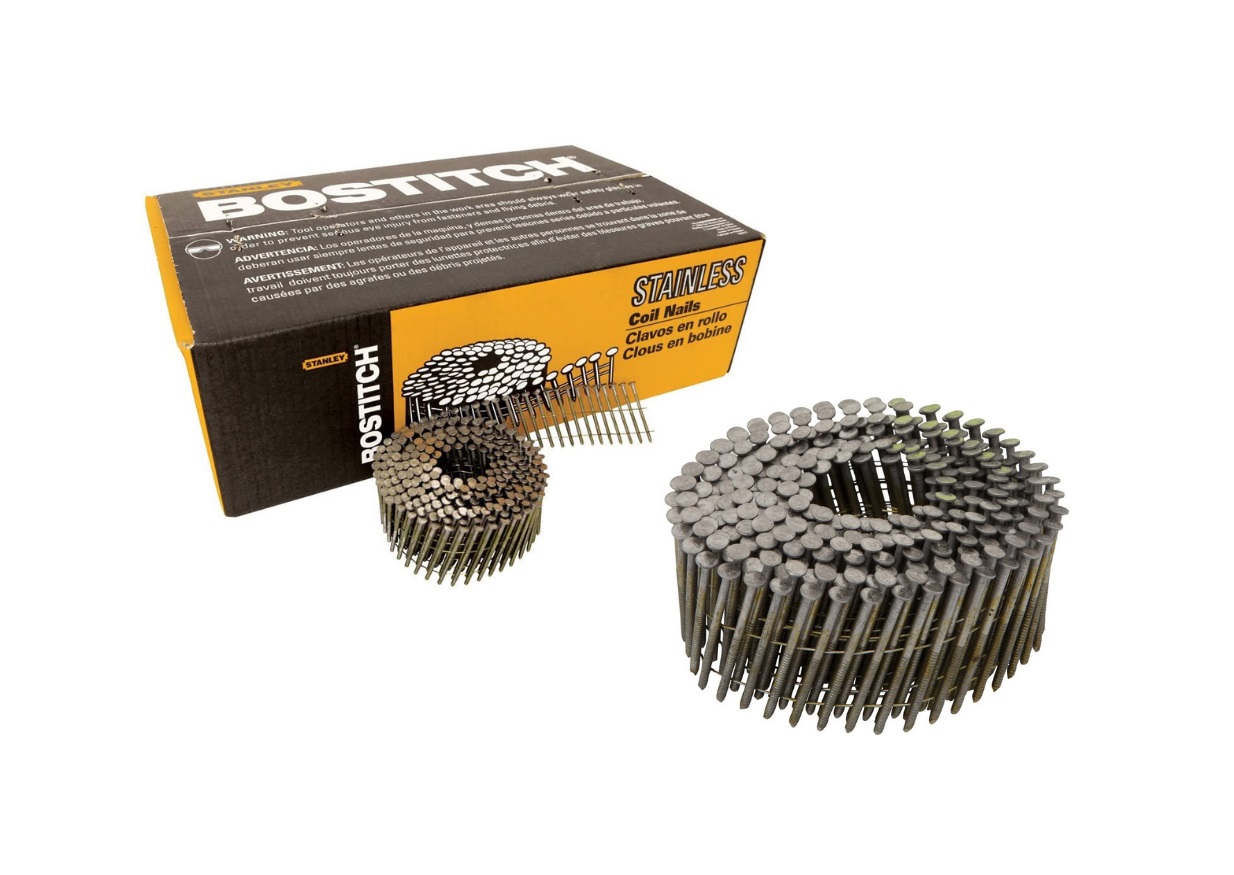
- Nails or screws (specifically designed for use with fiber cement siding)
- Hammer or nail gun
- Circular saw or cutting shears
- Tape measure
- Straightedge
- Caulk gun
- Caulk (specifically designed for use with fiber cement siding)
- Sealant
- Safety glasses
- Gloves
- Ladder or scaffolding (if needed)
- Level
While this list covers the basic materials needed for the installation, it’s important to note that there may be additional materials or tools required based on the specific requirements of your project. Consult the manufacturer’s installation instructions to ensure you have all the necessary materials and tools.
Once you have gathered all the materials, it’s important to inspect them for any defects or damage. Ensure that the Hardie siding panels are intact and free from any cracks or chips. Similarly, check the starter strip for any imperfections that could affect its performance. If you notice any issues, contact your supplier or the manufacturer to resolve them before proceeding with the installation.
By gathering all the required materials and conducting a thorough inspection, you are setting yourself up for a smooth and successful installation process. Now that you have everything you need, it’s time to move on to the next step: preparing the surface.
Step 2: Prepare the Surface
Properly preparing the surface is crucial for the long-term durability and performance of your Hardie siding. Follow these steps to ensure a solid foundation for installation:
- Clean the surface: Remove any dirt, debris, or loose paint from the exterior surface where the Hardie siding will be installed. Use a pressure washer or a scrub brush and water to thoroughly clean the area. Allow it to dry completely before moving on to the next step.
- Repair any damage: Inspect the surface for any signs of damage, such as rotted wood or loose boards. Replace or repair any damaged areas to ensure a stable substrate for the siding. This may involve replacing damaged wood, adding new sheathing, or reinforcing the structure as necessary.
- Apply a weather-resistant barrier: Install a weather-resistant barrier, such as a house wrap or building paper, to create a protective barrier between the surface and the siding. This helps prevent water infiltration and improves the overall energy efficiency of your home. Follow the manufacturer’s instructions for properly installing the weather-resistant barrier.
- Flash the windows and doors: Install flashing around windows, doors, and other openings to prevent water intrusion. Use a compatible flashing material and follow the recommended installation techniques to ensure a watertight seal. This step is crucial to protect the underlying structure from moisture damage.
- Check for level and plumb: Use a level and plumb line to check the vertical and horizontal alignment of the surface. Adjust as necessary to ensure a level and straight installation of the siding. This step is essential for achieving a professional-looking result.
By thoroughly preparing the surface, you are creating a solid and stable foundation for the Hardie siding installation. This step not only improves the overall performance of the siding but also extends its lifespan. With the surface properly prepared, we can now move on to the next step: attaching the starter strip.
Step 3: Attach Starter Strip
The starter strip is an essential component of the Hardie siding installation process. It provides a secure base for the first row of siding panels and ensures proper alignment. Follow these steps to attach the starter strip:
- Measure and mark: Begin by measuring the width of the starter strip and marking the desired placement along the bottom edge of the surface. Use a level or straightedge to ensure a straight line.
- Cut the starter strip: Using a circular saw or cutting shears, cut the starter strip to the desired length. Make sure to wear safety glasses and gloves for protection.
- Position the starter strip: Align the starter strip with the marked line and secure it in place using nails or screws. Make sure to follow the manufacturer’s recommendations for fastening methods and spacing.
- Ensure level and straight: Use a level or straightedge to ensure that the starter strip is level and straight. Make any necessary adjustments by shifting the starter strip before fully securing it in place.
- Continue attaching starter strips: Repeat the process of measuring, cutting, and positioning the starter strips along the entire length of the surface. Make sure to maintain a consistent spacing between the strips for proper alignment of the siding panels.
Attaching the starter strip properly is crucial for the overall alignment and stability of the Hardie siding. It serves as a guide for the subsequent rows of siding panels, ensuring a uniform and professional-looking installation. With the starter strip securely in place, we can now move on to the next step: installing the vertical boards.
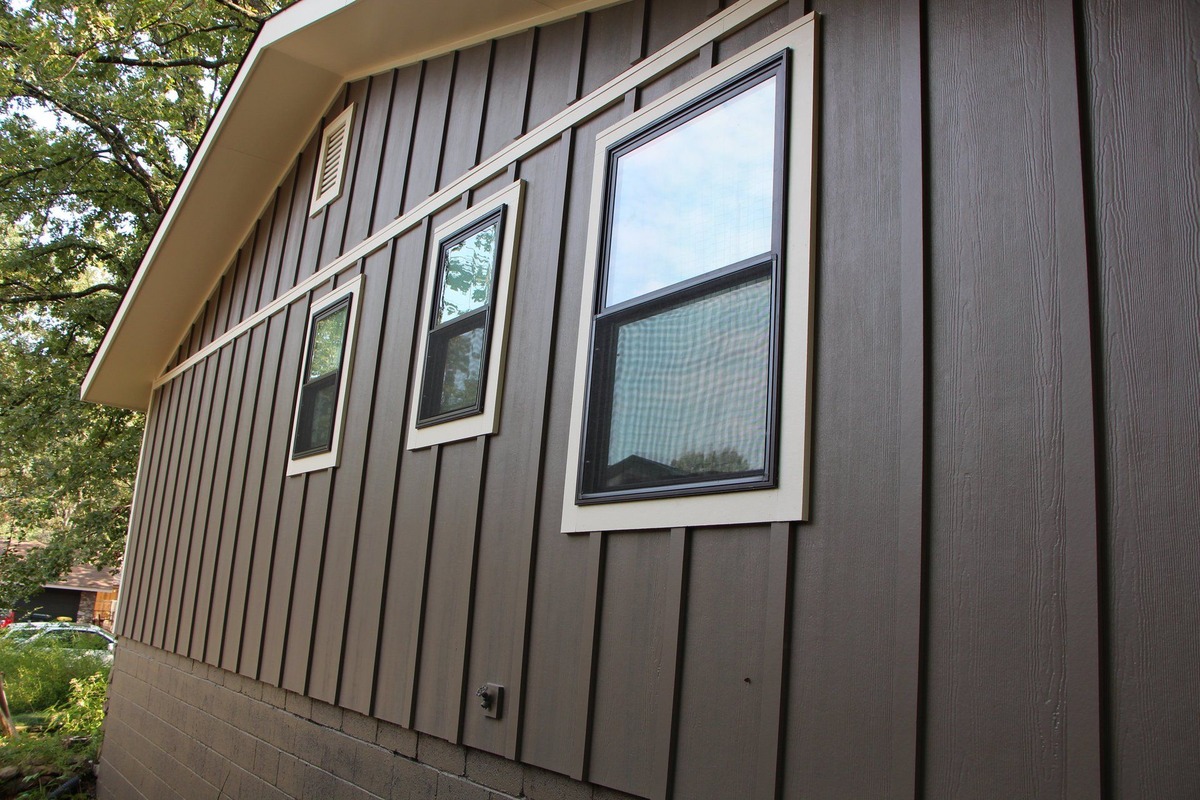
Step 4: Install Vertical Boards
With the starter strip in place, it’s time to start installing the vertical boards of the Hardie siding. These boards will be attached vertically, creating the main structure of the siding. Follow these steps to install the vertical boards:
- Measure and mark: Measure the height of the surface and mark the desired placement of the first vertical board. Use a level or straightedge to ensure a straight line.
- Cut the vertical boards: Using a circular saw or cutting shears, cut the first vertical board to the desired length. Maintain proper safety precautions while cutting.
- Position the vertical board: Align the first vertical board with the marked line and the bottom edge of the starter strip. Secure it in place using nails or screws, following the manufacturer’s recommendations.
- Check for level: Use a level or straightedge to ensure that the vertical board is level vertically. Make adjustments if necessary by shifting the board before fully securing it.
- Continue installing vertical boards: Repeat the process of measuring, cutting, positioning, and leveling the vertical boards along the length of the surface. Ensure a consistent spacing between the boards for a uniform appearance.
- Overlap where necessary: When installing the vertical boards, there may be areas where two boards need to overlap. Use a circular saw or cutting shears to create a lap joint, ensuring a proper connection between the boards.
Installing the vertical boards is a significant step in the Hardie siding installation process. It helps create the structure and visual appeal of the siding, enhancing the overall aesthetics of your home. By following these steps and paying attention to detail, you can achieve a professional and seamless vertical board installation.
Now that the vertical boards are in place, we can move on to the next step: attaching the horizontal boards.
When attaching Hardie siding, make sure to use the recommended nails or screws and follow the manufacturer’s installation guidelines to ensure a secure and long-lasting application.
Read more: How Thick Is Hardie Siding
Step 5: Attach Horizontal Boards
With the vertical boards securely installed, it’s time to move on to attaching the horizontal boards of the Hardie siding. These boards will be installed horizontally, overlapping the vertical boards to create a visually pleasing and weather-resistant finish. Follow these steps to attach the horizontal boards:
- Measure and mark: Measure the width of the surface and mark the desired placement of the first horizontal board. Use a level or straightedge to ensure a straight line.
- Cut the horizontal boards: Using a circular saw or cutting shears, cut the first horizontal board to the desired length. Take proper safety precautions while cutting.
- Position the horizontal board: Align the first horizontal board with the marked line and the bottom edge of the previously installed vertical board. Secure it in place using nails or screws, following the manufacturer’s recommendations.
- Check for level: Use a level or straightedge to ensure that the horizontal board is level horizontally. Adjust if necessary by shifting the board before fully securing it.
- Continue attaching horizontal boards: Repeat the process of measuring, cutting, positioning, and leveling the horizontal boards along the length of the surface. Maintain a consistent spacing between the boards for a uniform appearance.
- Overlap where necessary: When installing the horizontal boards, there may be areas where two boards need to overlap. Use a circular saw or cutting shears to create a lap joint, ensuring a secure connection between the boards.
Attaching the horizontal boards is a critical step in completing the installation of the Hardie siding. These boards not only contribute to the overall aesthetics of your home but also serve as a protective barrier against the elements. Properly installed horizontal boards will enhance the durability and longevity of your siding.
Once all the horizontal boards are securely in place, we can proceed to the next step: cutting and installing trim.
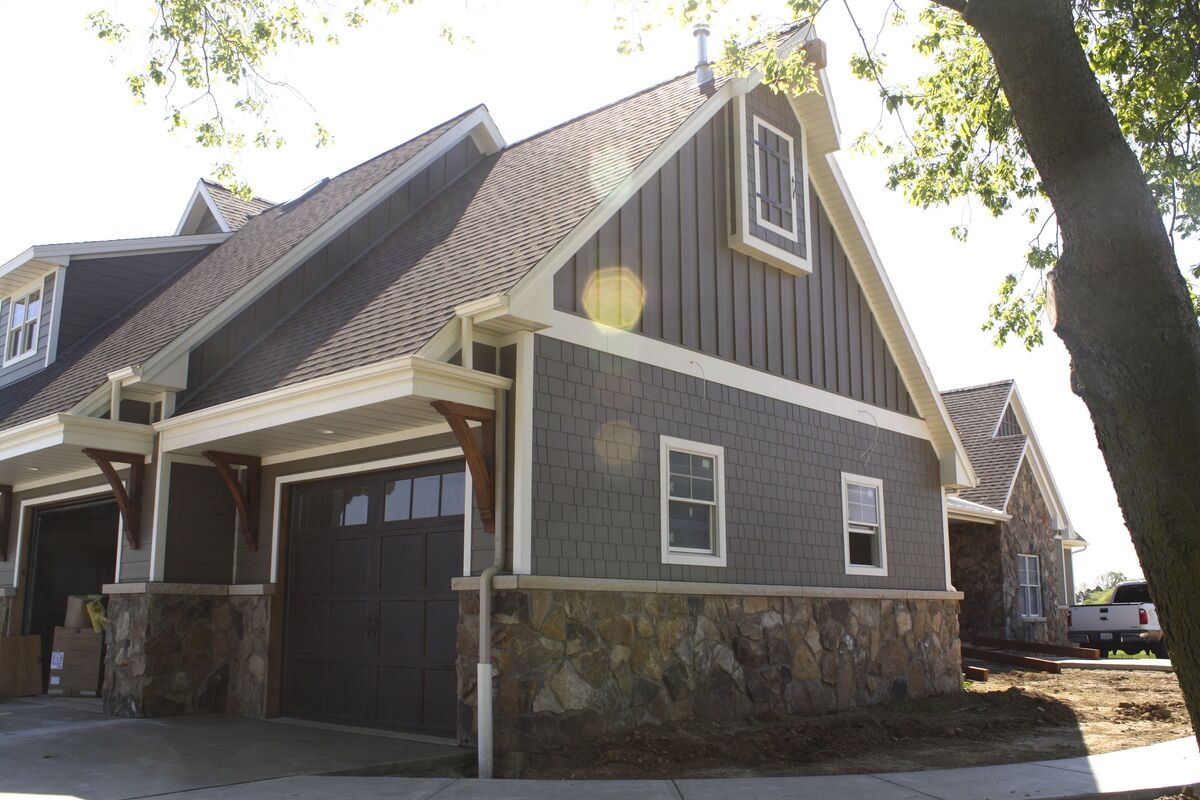
Step 6: Cut and Install Trim
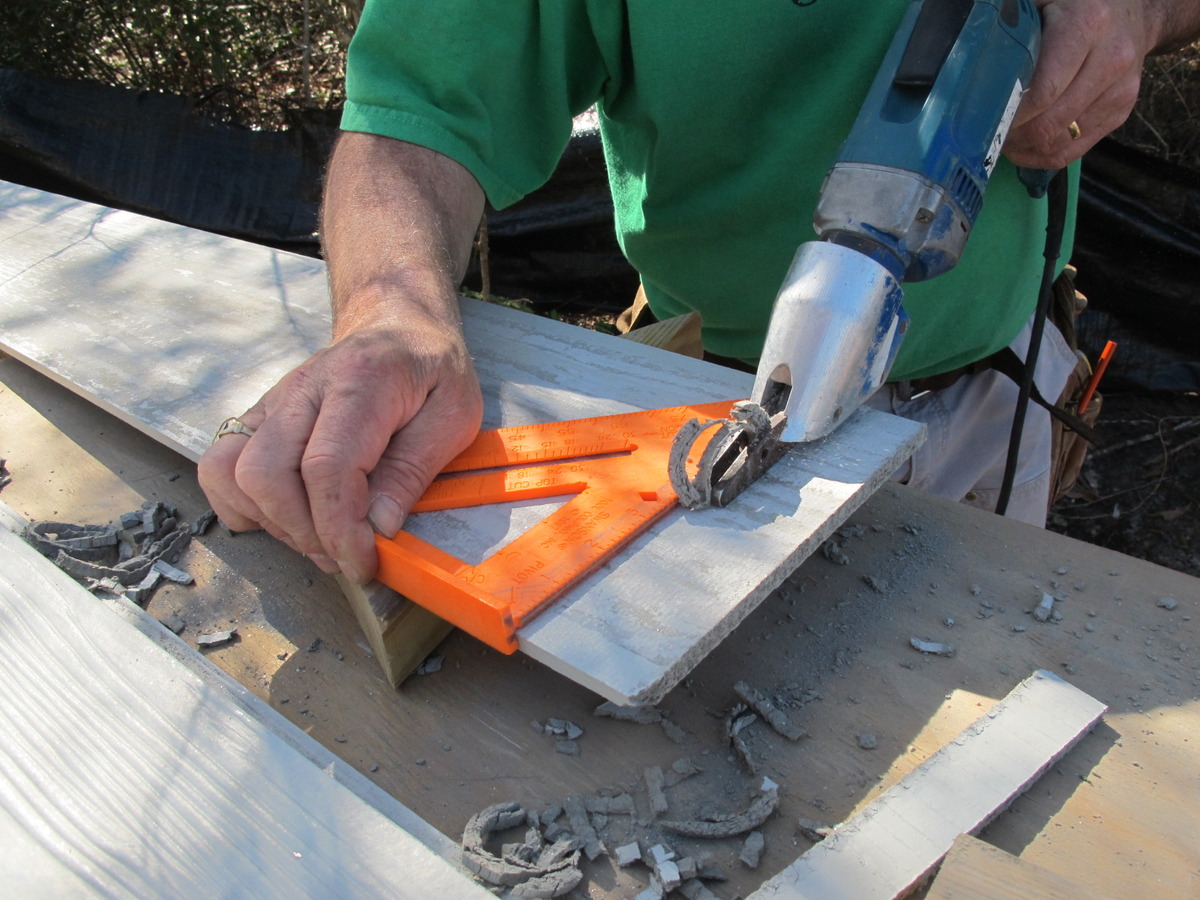
Adding trim to your Hardie siding installation can give it a polished and finished appearance. Trim is typically installed around windows, doors, corners, and other areas to provide a clean transition and enhance the architectural details of your home. Follow these steps to cut and install trim:
- Measure and mark: Measure the areas where trim will be installed, such as around windows and doors. Mark the measurements on the trim pieces using a pencil or marker.
- Cut the trim: Using a saw or cutting tool suitable for the trim material, carefully cut the trim pieces according to the marked measurements. Take proper safety precautions while cutting, and ensure the cuts are straight and accurate.
- Position the trim: Align the trim pieces with the desired location and check for proper fit. Make any necessary adjustments by trimming or sanding the edges until the trim fits snugly against the surface.
- Secure the trim: Once the trim is properly positioned, secure it in place using nails or screws. Make sure to follow the manufacturer’s recommendations for fastening methods and spacing. For longer trim pieces, additional support may be needed to prevent sagging or warping.
- Fill nail or screw holes: After securing the trim, use a suitable filler or putty to fill any nail or screw holes. Smooth out the filler using a putty knife or a similar tool and let it dry completely.
- Seal the trim: Apply a bead of caulk or sealant along the edges of the trim to create a watertight seal and protect against moisture infiltration. Smooth out the caulk using a caulking tool or your finger for a neat and professional finish.
The trim adds the final touches to your Hardie siding installation, giving it a refined look and ensuring a seamless transition between different elements of your home’s exterior. Take your time during this step to ensure accurate measurements, precise cuts, and proper installation of the trim.
With the trim securely in place, we are now ready to move on to the next step: applying caulk and sealants.
Step 7: Apply Caulk and Sealants
Applying caulk and sealants is a crucial step in the Hardie siding installation process. It helps create a watertight seal and prevents moisture from seeping behind the siding, ensuring the longevity and durability of your siding. Follow these steps to apply caulk and sealants:
- Clean the surface: Before applying caulk, make sure the surface is clean and free from any dirt, dust, or debris. Use a mild detergent and water solution to remove any contaminants. Allow the surface to dry completely.
- Select the appropriate caulk: Choose a caulk specifically designed for use with fiber cement siding. It should be weather-resistant, durable, and compatible with the materials being sealed. Consult the manufacturer’s instructions or seek professional advice if necessary.
- Load the caulk gun: Load the caulk gun with the chosen caulk. Cut the tip of the caulk tube at a 45-degree angle to create a small opening. Insert the caulk tube into the caulk gun and secure it in place.
- Apply caulk: Start at one end of the siding and carefully apply a bead of caulk along the seams, joints, and edges where the siding meets other materials such as trim or windows. Hold the caulk gun at a 45-degree angle and apply consistent pressure while moving along the surface. Use a smooth and steady motion for even application.
- Smooth the caulk: After applying the caulk, use a caulk smoothing tool, a wet finger, or a damp cloth to smooth out the caulk and create a clean, even finish. This helps ensure a proper seal and improves the overall appearance.
- Allow the caulk to dry: Follow the manufacturer’s instructions for drying time. Avoid touching or disturbing the caulk until it is fully cured. This will ensure its effectiveness and longevity.
Applying caulk and sealants is an essential step in protecting your Hardie siding from the elements and maintaining its integrity. Take your time during this step to ensure proper application and a consistent seal along all seams and joints.
Now that the caulk and sealants have been applied, we can move on to the final step: adding the finishing touches.
Step 8: Finishing Touches
As you near the completion of your Hardie siding installation, it’s time to focus on the finishing touches. These final steps will ensure that your siding looks polished and professional. Follow these guidelines to add the finishing touches to your Hardie siding:
- Clean the siding: Give the entire siding a thorough clean to remove any dirt, dust, or debris that may have accumulated during the installation process. You can use a soft brush, mild detergent, and water to gently scrub the surface. Rinse well and let it dry.
- Inspect for any touch-ups: Take a close look at your installed Hardie siding. Check for any areas that may require touch-ups such as painting or caulking. Address any noticeable imperfections or areas that may need additional attention.
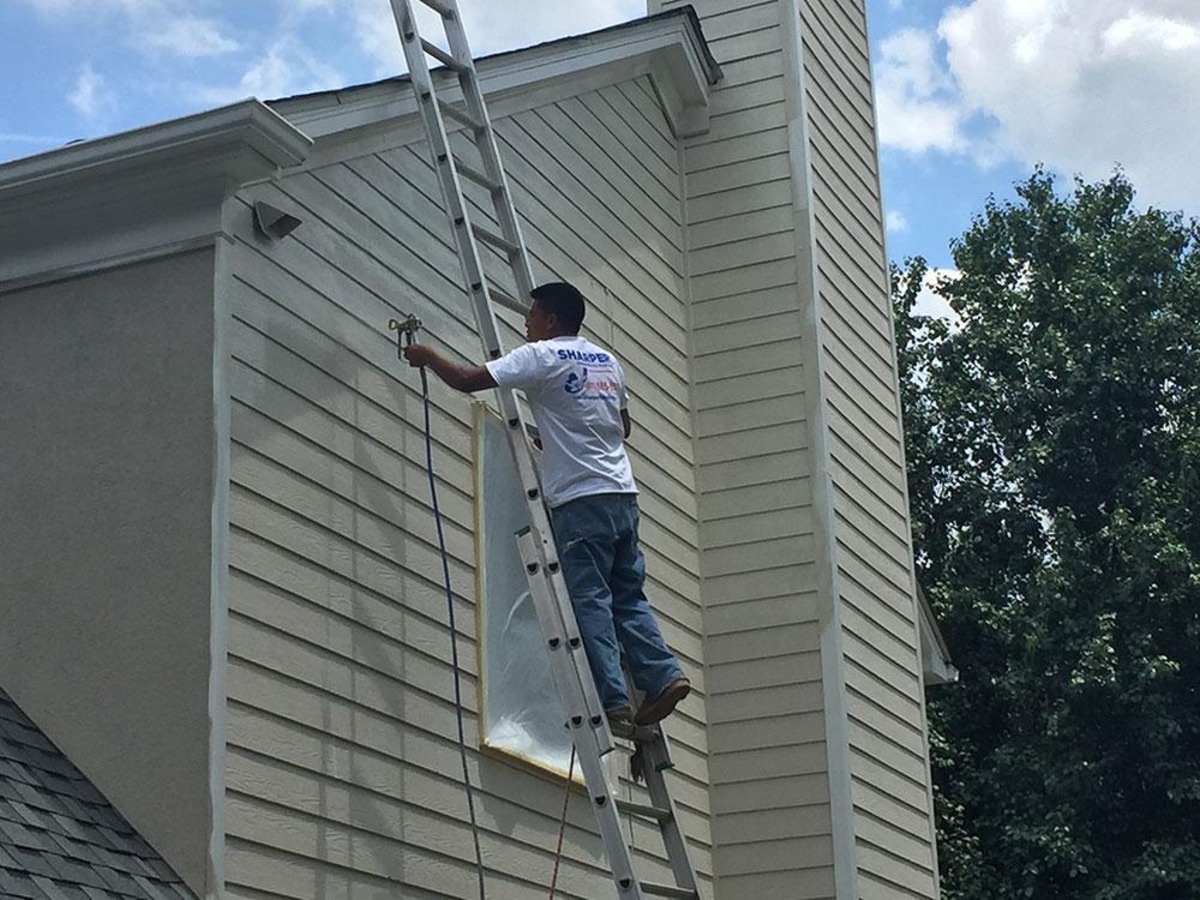
- Paint or stain: If you have opted for pre-primed Hardie siding, you may need to paint or stain it according to your desired color scheme. Ensure that you use paint or stain recommended for use with fiber cement siding and follow the manufacturer’s instructions for application and drying times.
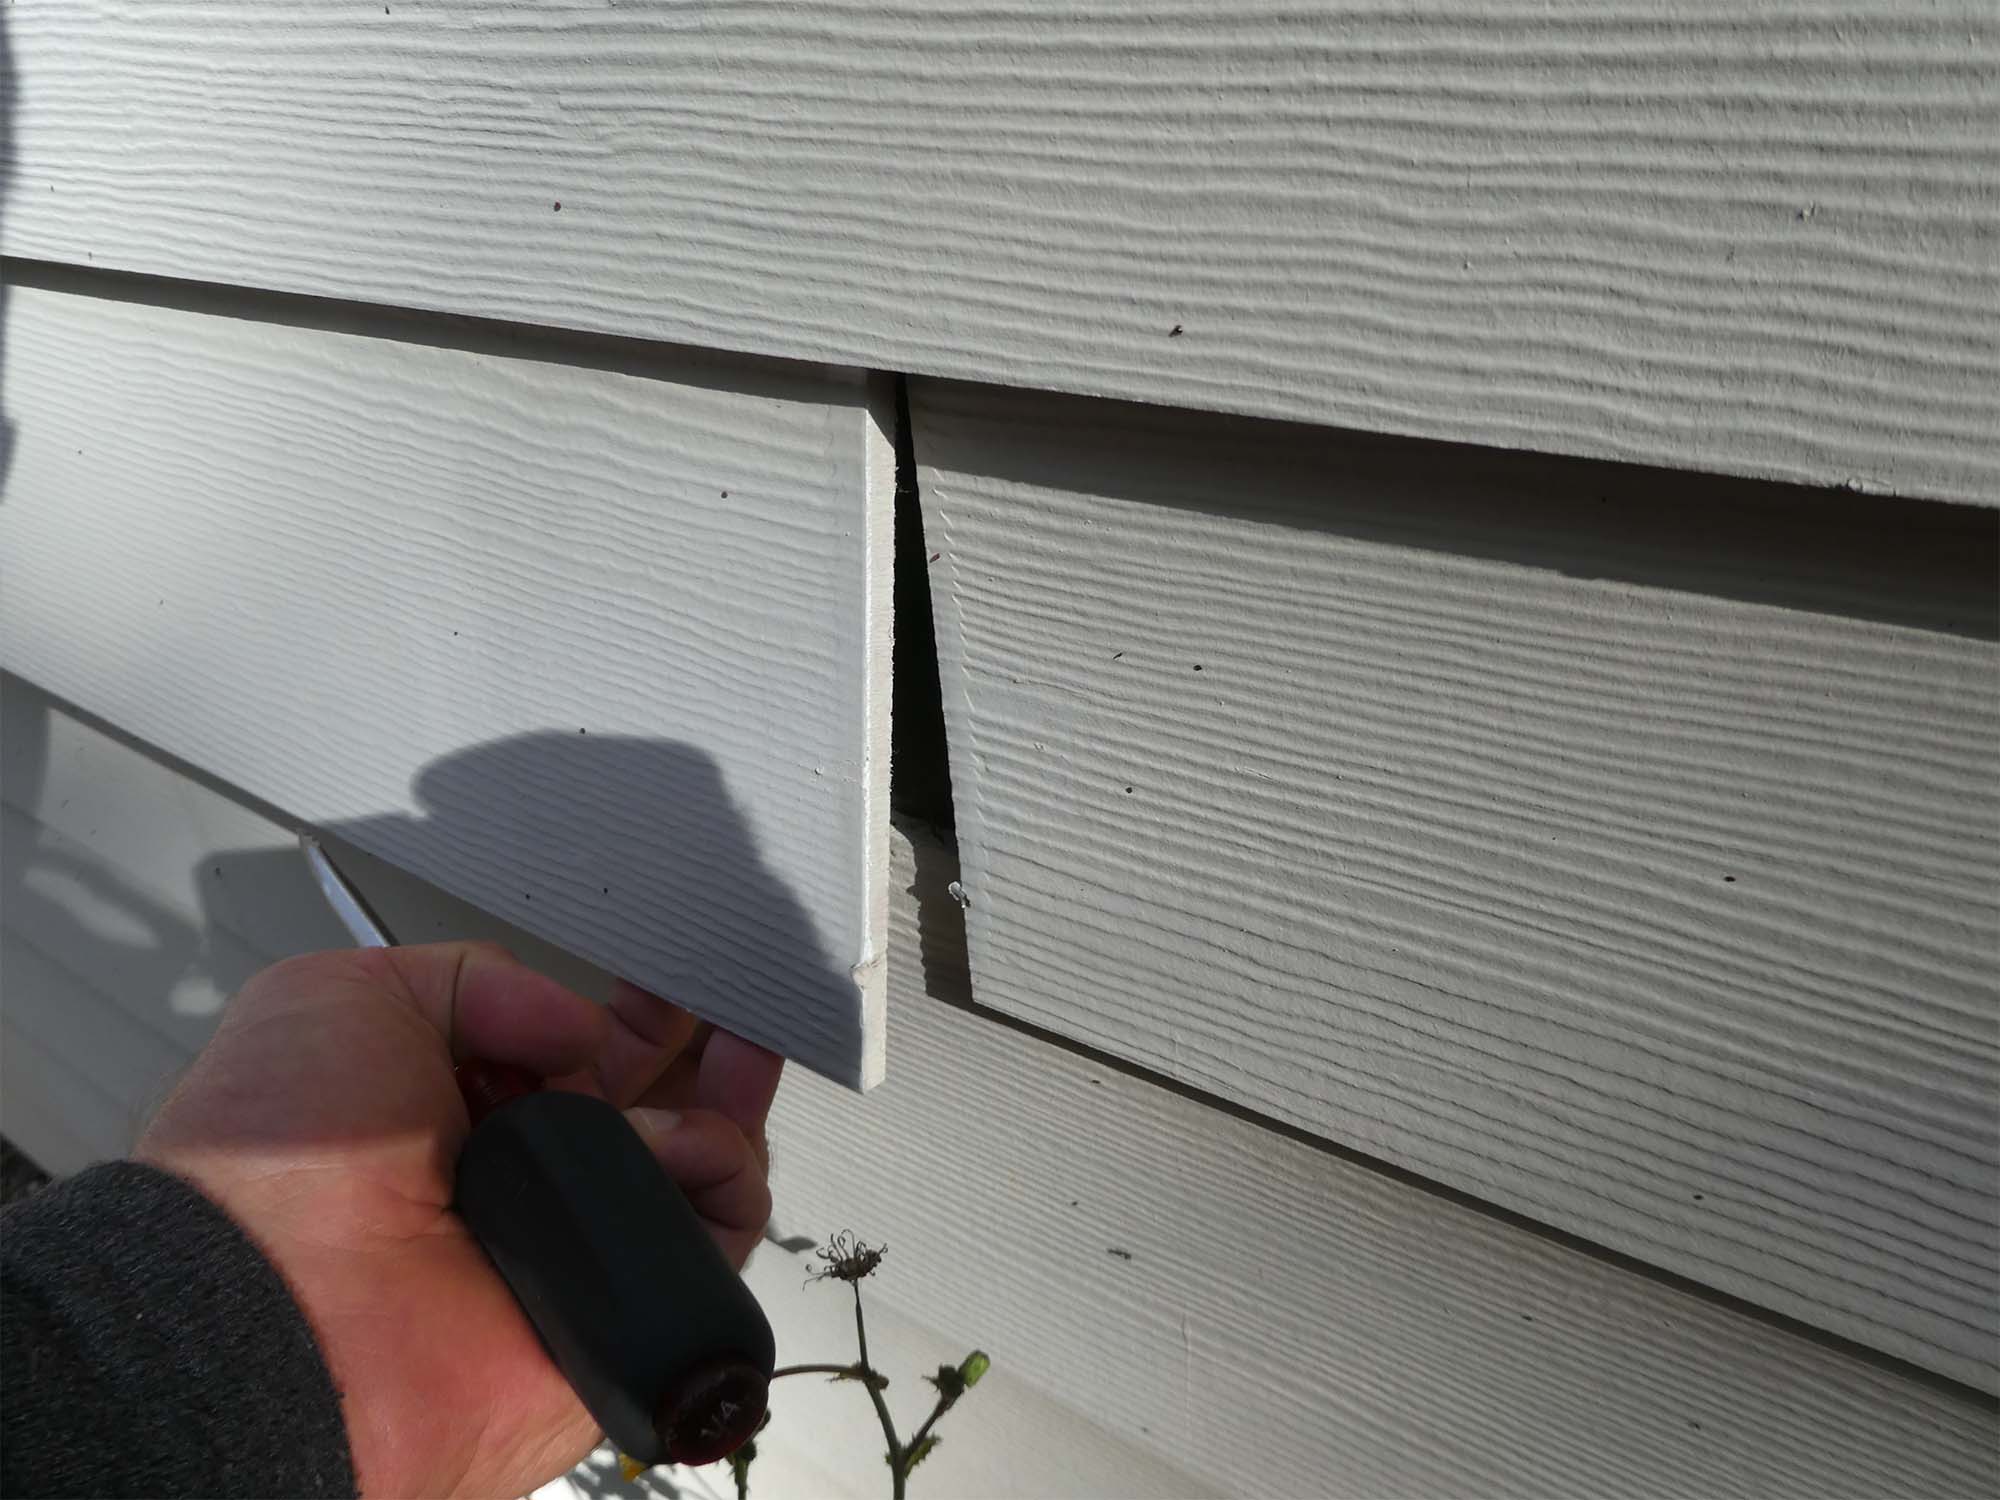
- Replace and secure loose nails: Inspect the siding and identify any loose or protruding nails. Carefully remove them and replace with new nails or screws, driving them in securely to ensure the siding is properly fastened.
- Install vents and accessories: Depending on your home’s ventilation needs and design choices, now is the time to install any required vents or accessories. This includes items like soffit vents, trim pieces, corner caps, or decorative accents.
- Final inspection: Before concluding the installation, conduct a final inspection of your Hardie siding. Check for any missed spots, loose boards, or areas that may need additional caulking or sealing. Make sure everything is structurally secure and aesthetically pleasing.
By attending to these finishing touches, you will ensure that your Hardie siding installation is not only visually appealing but also durable and long-lasting. Taking the time to complete these final steps will contribute to the overall success and satisfaction of your project.
Congratulations! With the finishing touches complete, you have successfully attached Hardie siding to your home. Enjoy the improved aesthetics, protection, and value that your newly installed Hardie siding provides.
Remember, these instructions are meant to provide a general overview of the installation process. Always consult the specific installation instructions provided by the manufacturer for your particular siding type and follow all safety guidelines throughout the installation.
Read more: How To Remove Hardie Board Siding
Conclusion
Attaching Hardie siding to your home can transform its appearance while providing a durable and low-maintenance exterior. Throughout this comprehensive guide, we have covered the step-by-step process of installing Hardie siding, from gathering the necessary materials to adding the finishing touches.
By following these guidelines and consulting the manufacturer’s installation instructions, you can confidently tackle this home improvement project. Properly preparing the surface, attaching the starter strip, installing vertical and horizontal boards, cutting and installing trim, applying caulk and sealants, and adding the finishing touches will result in a professional and visually pleasing Hardie siding installation.
Remember to prioritize safety throughout the process by wearing appropriate protective gear, using tools correctly, and following all safety guidelines. If you have any doubts or concerns, consider consulting a professional contractor experienced in Hardie siding installation.
By attaching Hardie siding to your home, you are not only enhancing its curb appeal but also investing in a long-lasting and weather-resistant solution. Hardie siding offers durability, resistance to rot and pests, and a variety of style options to suit your aesthetic preferences.
Now that you have the knowledge and confidence to tackle the installation, it’s time to transform the look of your home with Hardie siding. Enjoy the benefits of a beautiful and protected exterior that will stand the test of time.
Frequently Asked Questions about How To Attach Hardie Siding
Was this page helpful?
At Storables.com, we guarantee accurate and reliable information. Our content, validated by Expert Board Contributors, is crafted following stringent Editorial Policies. We're committed to providing you with well-researched, expert-backed insights for all your informational needs.


0 thoughts on “How To Attach Hardie Siding”