
Articles
How To Discharge AC CapACitor
Modified: November 2, 2024
Learn how to safely discharge an AC capacitor in this informative article. Follow our step-by-step guide to ensure safety while working with capacitors.
(Many of the links in this article redirect to a specific reviewed product. Your purchase of these products through affiliate links helps to generate commission for Storables.com, at no extra cost. Learn more)
Introduction
Welcome to this comprehensive guide on how to discharge your AC capacitor. If you’ve ever worked on air conditioners or HVAC systems, you know that safety should always be a top priority. One crucial safety step when dealing with AC units is discharging the capacitor. Failure to do so can result in serious injury or even death due to the high voltage stored in the capacitor.
Understanding how the AC capacitor works and knowing the proper procedure for discharging it is essential for anyone working on these systems. In this article, we will break down the process step by step, ensuring that you have the knowledge and tools necessary to discharge your AC capacitor safely and efficiently.
Before we dive into the steps, let’s take a moment to understand what an AC capacitor is and why it needs to be discharged. The capacitor is an electrical component within the air conditioning system that stores electrical energy. It plays a critical role in providing the electrical boost needed to start the compressor and keep it running.
When the power is disconnected from the AC unit, the capacitor retains a charge. This charge can be dangerous, capable of delivering a severe electric shock if it is not discharged properly before any work or maintenance on the system. Hence, it is of utmost importance to discharge the AC capacitor before attempting any repairs or adjustments.
In the next section, we will discuss the significant importance of discharging the AC capacitor and why you should never skip this crucial safety step. So let’s get started!
Key Takeaways:
- Discharging the AC capacitor is a critical safety step when working on air conditioning systems. It prevents electric shock, potential damage, and ensures efficient troubleshooting, making it essential for anyone handling HVAC maintenance.
- Prioritizing safety and following the proper procedure to discharge the AC capacitor is crucial for a secure working environment. By understanding the process and taking necessary precautions, technicians can protect themselves from potential electrical hazards.
Read more: How To Test AC CapACitor With Multimeter
Understanding the AC Capacitor
Before we delve into the process of discharging the AC capacitor, it’s essential to have a clear understanding of what the capacitor is and how it functions within an air conditioning system.
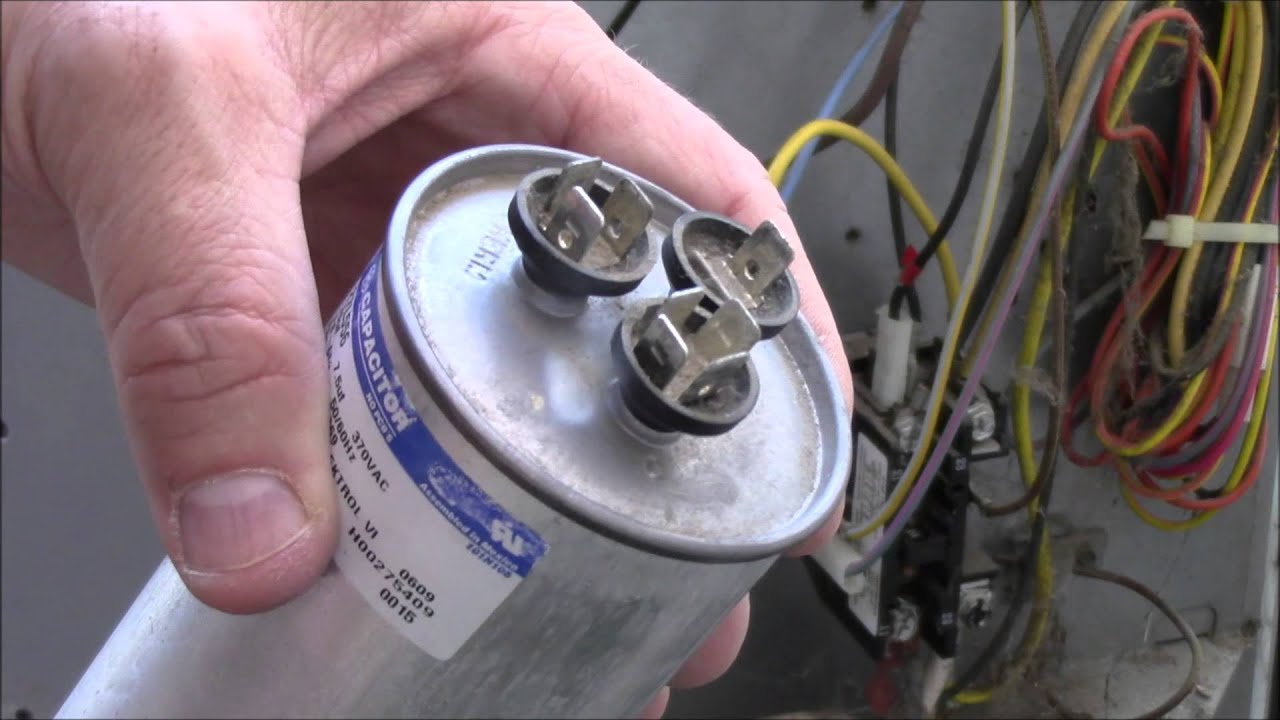
An AC capacitor is an electrical component that stores and releases electrical energy when needed. It consists of two conductive plates separated by an insulating material known as a dielectric. The capacitor’s capacity to store energy is measured in microfarads (µF) and is indicated on its label or housing.
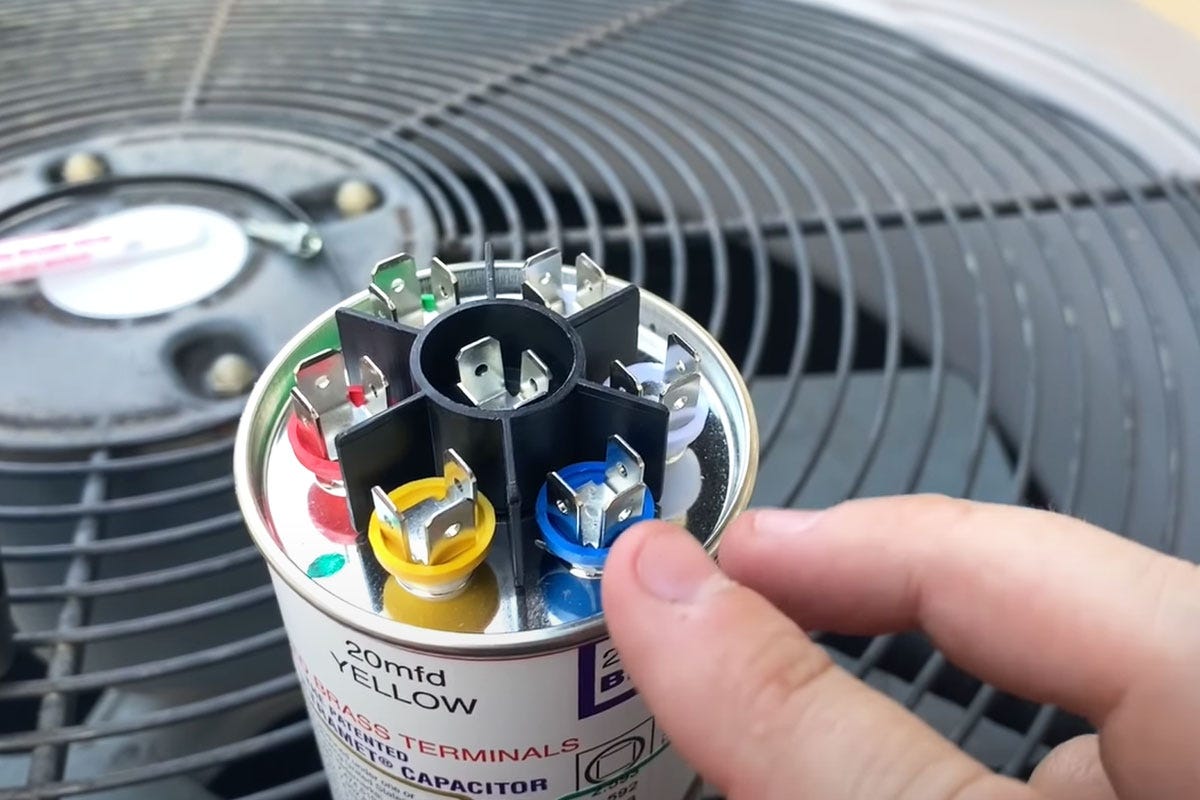
In an air conditioner, the capacitor is connected to both the compressor and the fan motor. The two main types of capacitors found in AC units are the start capacitor and the run capacitor.
The start capacitor provides a high voltage boost to the compressor during startup, enabling it to overcome the initial resistance and start running smoothly. Once the compressor is up and running, the start capacitor is no longer required and is taken out of the circuit. This is where the run capacitor comes into play.
The run capacitor ensures a consistent and efficient operation of the compressor and fan motor. It helps maintain the desired temperature by providing the necessary electrical energy to keep the components running smoothly.
Capacitors can hold an electrical charge even when the power to the AC unit is turned off. This is why it is essential to discharge the capacitor before performing any maintenance or repair work. Neglecting to do so can result in a dangerous electric shock.
Now that we have a fundamental understanding of how the AC capacitor operates, let’s move on to the next section, where we will discuss the critical importance of discharging the capacitor before working on an air conditioning system.
Importance of Discharging the AC Capacitor
Discharging the AC capacitor is a crucial step that should never be overlooked when working on an air conditioning system. The capacitor stores a charge even when the power to the unit is switched off, and failing to discharge it properly can lead to serious injury or even prove fatal.
Here are some key reasons why discharging the AC capacitor is of paramount importance:
1. Safety:
The most significant reason to discharge the capacitor is to ensure the safety of the technician or anyone working on the air conditioner. Capacitors can hold a significant charge, often ranging from hundreds to thousands of volts. Direct contact with an energized capacitor can cause severe electric shocks or burns.
2. Preventing Damage:
Discharging the capacitor prevents accidental damage to the air conditioning system. When a charged capacitor is left unattended, it can discharge through other delicate components, such as control boards or wiring, causing irreversible damage. By discharging the capacitor, you protect the system from potential electrical surges that might occur when working on it.
Read more: How Do I Know If My AC CapACitor Is Bad?
3. Efficient Troubleshooting:
Discharging the capacitor allows for safer and more efficient troubleshooting of the air conditioning system. By removing the electrical charge, you eliminate the potential interference from high voltage that could affect your diagnostic process. This improves the accuracy of your troubleshooting and saves time in identifying the root cause of the problem.
4. Code Compliance:
Following proper safety procedures, including discharging the AC capacitor, is essential for code compliance when working on air conditioning systems. Failure to adhere to safety regulations can result in legal consequences, fines, or even the revocation of professional licenses. Discharging the capacitor ensures that you are complying with safety standards and regulations.
5. Peace of Mind:
Discharging the AC capacitor provides peace of mind for both technicians and homeowners. Knowing that the capacitor has been discharged removes the risk of accidental shocks or electrical hazards. It allows you to focus on the task at hand, knowing that you have mitigated any potential dangers associated with the electrical charge stored in the capacitor.
By now, you understand the critical importance of discharging the AC capacitor before working on an air conditioning system. In the next section, we will discuss the safety precautions and the tools and materials necessary for this procedure.
Safety Precautions
When it comes to working with electricity, safety should always be the number one priority. Discharging the AC capacitor requires careful attention and adherence to safety precautions to prevent accidents and injuries. Here are some essential safety measures to follow:
Read more: Where Can I Buy An AC CapACitor
1. Power Disconnect:
Before attempting to discharge the capacitor, make sure to turn off the power supply to the air conditioning unit. This can be done by switching off the circuit breaker or shutting off the power at the main electrical panel. Ensure that the power is completely off, and test with a voltage tester to verify there is no electricity flowing to the system.
2. Personal Protective Equipment (PPE):
Wear appropriate personal protective equipment, including safety glasses, insulated gloves, and non-conductive footwear. PPE provides an extra layer of protection against electric shock and other potential hazards.
3. Grounding:
Ensure that you are working on a grounded surface and that you are properly grounded yourself. Stand on a rubber mat or wear insulating footwear to minimize the risk of electric shock.
4. Capacitor Discharge Tool:
Use a proper capacitor discharge tool or a high voltage probe specifically designed for discharging capacitors. This tool allows for safe and controlled discharge of the electrical charge stored in the capacitor.
5. One Hand Rule:
Use the “One Hand Rule” when working near the capacitor. Keep one hand behind your back or in your pocket to avoid accidental contact with live wires or exposed terminals. This helps prevent the possibility of a complete circuit passing through your body.
6. Double Check for Discharge:
After discharging the capacitor, double-check with a reliable voltage tester to ensure that there is no remaining electrical charge. This additional step provides an extra layer of safety and assurance.
7. Professional Assistance:
If you are unsure or uncomfortable discharging the capacitor yourself, it is highly recommended to seek professional assistance. A certified technician will have the knowledge and experience to discharge the capacitor safely and efficiently.
Remember, neglecting safety precautions can have severe consequences. Always prioritize your well-being and the safety of those around you when working with electrical components like the AC capacitor.
With the necessary safety measures in mind, let’s move on to the tools and materials you will need to discharge the AC capacitor properly.
Tools and Materials Required
Discharging the AC capacitor requires a few essential tools and materials. Before you begin the process, gather the following items to ensure a smooth and safe procedure:
Read more: What Does AC CapACitor Do
1. Screwdriver with Insulated Handle:
Choose a screwdriver with an insulated handle to avoid the risk of electric shock. The insulated handle acts as a protective barrier between you and the live electrical components.
2. Voltmeter or Multimeter:
A voltmeter or multimeter is a crucial tool for measuring voltage. It helps you confirm that the capacitor has been discharged completely and ensures there is no residual charge left. Make sure the meter has a suitable voltage range for AC systems.
3. Personal Protective Equipment (PPE):
Wear the appropriate personal protective equipment, including safety glasses, insulated gloves, and non-conductive footwear. PPE provides an additional layer of protection against potential hazards and electrical shocks.
4. Voltage Tester:
A voltage tester is a handy tool used to verify if power is present or absent in a circuit. It helps ensure that the power has been properly disconnected before discharging the capacitor.
Read more: How To Test HVAC Capacitor
5. Insulated Container or Discharge Resistor:
Prepare an insulated container or a discharge resistor to safely store or dissipate the electrical charge from the capacitor. This prevents accidental recharging or discharging while you are working on other components of the air conditioning system.
6. Insulated Wire:
In some cases, you may need an insulated wire to connect the terminals of the capacitor together for discharge. Ensure the wire is suitable for carrying high voltage and is insulated to prevent any accidental contact with live electrical components.
Once you have gathered all the necessary tools and materials, you are ready to proceed with discharging the AC capacitor. Remember to follow the safety precautions we discussed earlier, and if you are unsure about any step, consult a professional technician for guidance.
In the next section, we will provide a step-by-step guide on how to discharge the AC capacitor safely and effectively.
Step 1: Switch Off the Power
Before you begin discharging the AC capacitor, it is crucial to ensure that the power to the air conditioning unit is completely switched off. This step will eliminate any risk of electric shock during the procedure. Follow these steps to switch off the power:
1. Locate the Circuit Breaker Panel:
Find the circuit breaker panel or the main electrical panel in your home. It is typically located in the basement, utility room, garage, or on an exterior wall.
Read more: How To Test A Fan Capacitor
2. Identify the Correct Breaker:
Locate the breaker that controls power to the air conditioner or HVAC system. Look for labels or markings that indicate the specific breaker for the AC unit. If it is not labeled, you may need to refer to the user manual or consult a professional to identify the correct breaker.
3. Switch Off the Breaker:
Switch off the breaker for the air conditioner by flipping it to the “off” position. Ensure that the switch is completely in the “off” position and not in the middle or partially flipped. This guarantees that there is no power flowing to the AC unit.
4. Test for Power:
Use a reliable voltage tester or a multimeter to test for any remaining power. Confirm that the power to the air conditioning unit is indeed turned off by checking the voltage on the exposed wires or terminals. If there is no voltage detected, you can proceed to the next steps with confidence.
Switching off the power is an essential first step before discharging the AC capacitor. It eliminates the risk of electric shock and ensures your safety during the procedure. In the next step, we will discuss how to identify the location of the capacitor within the air conditioner.
Step 2: Identify the Capacitor Location
After ensuring the power is switched off, the next step in discharging the AC capacitor is to locate its position within the air conditioning unit. The capacitor is generally found near the condenser unit or the outdoor compressor. Follow these steps to identify the capacitor’s location:
Read more: How To Change HVAC Capacitor
1. Locate the Condenser Unit:
The condenser unit is typically located outside the home. It consists of a metal box containing the compressor, fans, and other components. Take a moment to visually inspect the condenser unit and familiarize yourself with its appearance.
2. Look for the Capacitor Housing:
The capacitor is usually housed inside or attached to the condenser unit. It is a cylindrical or rectangular-shaped component with wires leading to it. Look for a metal or plastic housing with wires coming out of it. The housing may have labels indicating its capacitance rating or other specifications.
3. Observe the Wires:
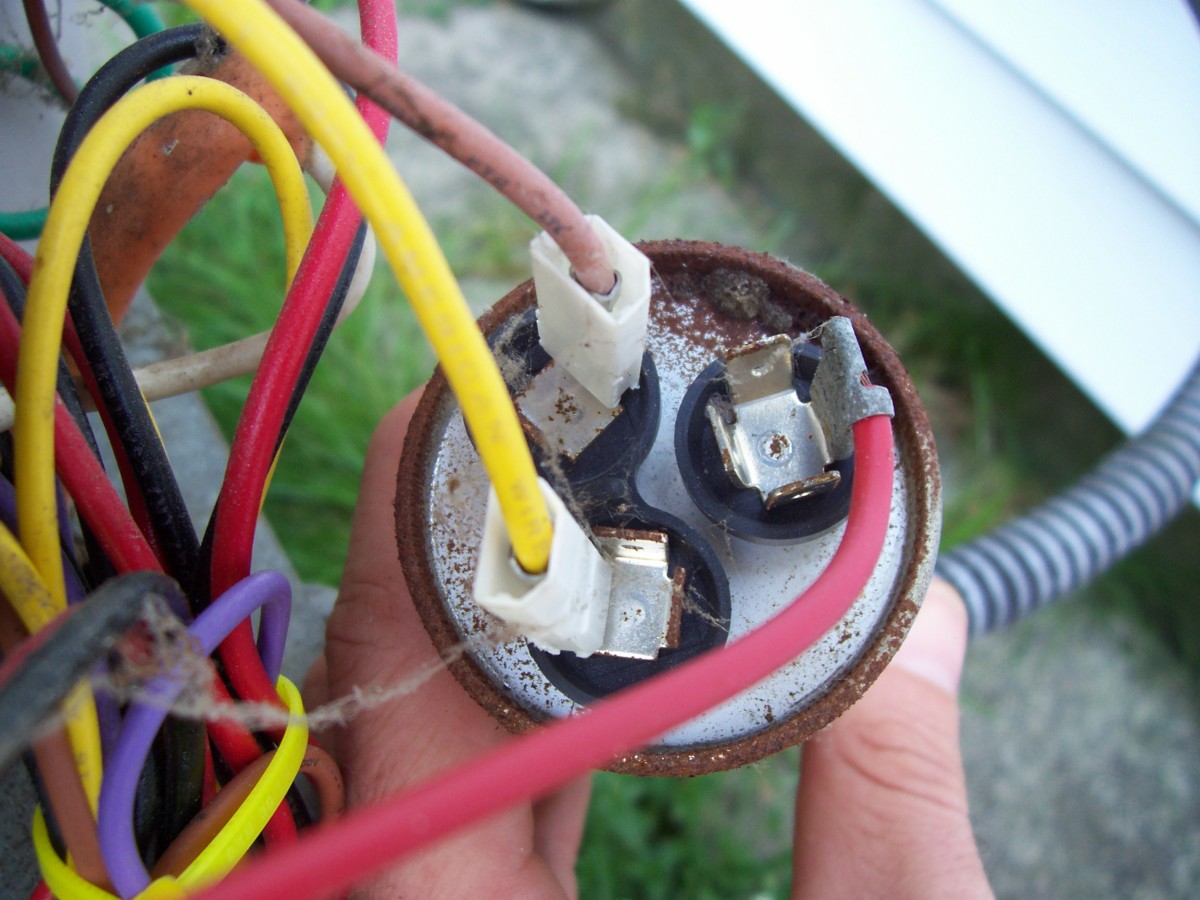
Examine the wires that are connected to the capacitor. There are typically two sets of wires – one connected to the compressor and the other to the fan motor. Carefully trace the wires leading to the capacitor to ensure you have identified the correct component.
4. Take Note of the Capacitor’s Orientation:
Pay attention to the orientation of the capacitor within the housing. Note the position of the terminals, as discharging the capacitor requires you to connect them together. Take a mental or written note of the capacitor’s orientation for the next steps in the process.
Identifying the location of the AC capacitor is crucial to the discharging procedure. Once you have successfully located the capacitor, you can proceed to the next step, which involves discharging the capacitor using a screwdriver.
Step 3: Discharge the Capacitor Using a Screwdriver
Now that you have identified the capacitor’s location, it’s time to discharge it using a screwdriver. The goal is to safely remove any residual electrical charge from the capacitor to ensure your safety during maintenance or repair work. Follow these steps to discharge the capacitor:
1. Confirm Safety Precautions:
Before proceeding, ensure that you have followed all the necessary safety precautions, such as wearing personal protective equipment (PPE) and switching off the power supply to the air conditioning unit.
2. Select a Screwdriver:
Choose a screwdriver with an insulated handle to avoid the risk of electric shock. The insulated handle acts as a protective barrier between you and the live electrical components.
3. Short the Capacitor Terminals:
With the insulated screwdriver, carefully touch both terminals of the capacitor simultaneously. This will create a short circuit, allowing the electrical charge stored in the capacitor to flow out gradually. Hold the screwdriver in place for a few seconds to ensure a complete discharge.
Read also: 13 Amazing Washer Discharge Hose For 2025
4. Prevent Screwdriver Slip:
As you discharge the capacitor, be cautious of any potential screwdriver slip. Make sure to firmly hold the screwdriver by the handle and keep your hand away from the metal part to avoid accidental contact with live wires or terminals.
5. Repeat the Process if Necessary:
In some cases, the capacitor may still retain a residual charge even after the initial discharge. If you suspect that the capacitor still has some electrical charge, repeat the shorting process multiple times until it is fully discharged.
Discharging the capacitor using a screwdriver is a critical step in ensuring your safety when working on the air conditioning system. However, it is essential to verify that the capacitor is completely discharged. We will discuss this in the next step.
Step 4: Verify Capacitor Discharge
After discharging the AC capacitor using a screwdriver, it is crucial to verify that the capacitor is fully discharged before proceeding with any maintenance or repair work. This step ensures your safety and prevents any potential risk of electrical shock. Follow these steps to verify the capacitor discharge:
1. Safety Precautions:
Before proceeding, ensure that you are following all necessary safety precautions, such as wearing personal protective equipment (PPE) and avoiding direct contact with the capacitor terminals.
Read also: 14 Best Dishwasher Discharge Hose for 2025
2. Use a Voltmeter or Multimeter:
Set your voltmeter or multimeter to the appropriate voltage range for AC systems. Carefully place the probes on the capacitor terminals, ensuring that they are making good contact with the metal terminals. Take note of the readings displayed on the meter.
3. Check for Zero Voltage:
If the voltmeter or multimeter reads zero voltage or close to zero, it indicates that the capacitor is discharged. This means that all electrical energy has been safely released, and it is safe to proceed with the maintenance or repair work.
4. Repeat the Test:
Repeat the voltage measurement a few times to ensure consistency in the readings. If the meter consistently indicates zero voltage, it provides confirmation that the capacitor is indeed fully discharged.
5. Seek Professional Assistance if Uncertain:
If you are uncertain about the voltage readings or uncomfortable performing the verification process yourself, it is recommended to seek professional assistance. A certified technician will have the expertise and proper equipment to confirm the capacitor discharge accurately.
Verifying the capacitor discharge is a critical step in ensuring your safety when working on the air conditioning system. By confirming the absence of voltage, you can proceed with confidence to the next steps in the maintenance or repair process.
Read more: How To Check A Electric Motor Capacitor
Step 5: Recheck for Any Remaining Charge
Even after verifying the discharge of the AC capacitor, it is essential to recheck for any remaining electrical charge before proceeding with further work. This additional step ensures that no residual energy is present, minimizing the risk of electric shock. Follow these steps to recheck for any remaining charge:
1. Continue Following Safety Precautions:
Prioritize your safety by wearing personal protective equipment (PPE) and avoiding direct contact with the capacitor terminals.
Read also: 14 Best Dishwasher Discharge Hose for 2025
2. Use a Voltmeter or Multimeter:
Set your voltmeter or multimeter to the appropriate voltage range for AC systems. Carefully place the probes on the capacitor terminals, making sure they are making good contact with the metal terminals.
3. Monitor the Voltage Reading:
Observe the voltage reading on the voltmeter or multimeter. If the reading remains at zero or close to zero, it confirms that the capacitor is fully discharged, and there is no remaining electrical charge.
Read more: How To Replace A Ceiling Fan Capacitor
4. Take Multiple Readings:
Repeat the voltage measurement a few times, taking multiple readings, to ensure consistency. If the voltmeter consistently shows zero voltage, it provides further confirmation that the capacitor is safely discharged.
5. Be Cautious:
Even if the voltage readings indicate no remaining charge, it is essential to handle the capacitor with caution. Avoid touching the terminals directly to prevent any accidental contact with live wires or terminals.
6. Proceed with Maintenance or Repair:
Once you have rechecked and confirmed the absence of any remaining electrical charge, you can proceed with the necessary maintenance or repair work on the air conditioning system safely.
Rechecking for any remaining charge is an important final step to ensure your safety and avoid any potential risks when working with the AC capacitor. By taking these precautions, you can confidently continue with the required tasks, knowing that the capacitor is completely discharged.
Conclusion
In conclusion, discharging the AC capacitor is an important safety step that should never be overlooked when working on an air conditioning system. The capacitor stores electrical energy and can pose a significant risk of electric shock if not properly discharged. By following the step-by-step process outlined in this guide, you can ensure your safety and minimize the potential for accidents or injuries.
We started by understanding the AC capacitor and its role within the air conditioning system. We learned that the capacitor stores electrical energy and helps in starting the compressor and keeping it running smoothly. We then explored the importance of discharging the capacitor, which includes preventing injuries, avoiding potential damage to components, and ensuring efficient troubleshooting.
Next, we discussed the essential safety precautions to follow when discharging the AC capacitor. These precautions include switching off the power supply, wearing appropriate personal protective equipment (PPE), and using insulated tools. We also emphasized the one-hand rule, grounding, and checking for proper discharge before proceeding further.
Furthermore, we outlined the tools and materials required for the discharging process, such as an insulated screwdriver, voltmeter or multimeter, discharge resistor or insulated container, and insulated wire.
The step-by-step process included switching off the power, identifying the capacitor location, discharging the capacitor using a screwdriver, verifying the discharge with a voltmeter, and finally rechecking for any remaining charge. Each step played a crucial role in ensuring a safe and effective discharge of the capacitor.
Remember, if you are uncertain or uncomfortable with the discharging process, it is always recommended to seek professional assistance. A certified technician will have the expertise and experience to safely discharge the AC capacitor and carry out any necessary maintenance or repairs.
By prioritizing safety and following the proper procedure to discharge the AC capacitor, you can ensure a secure working environment and protect yourself from potential electrical hazards. With this knowledge and understanding, you are now equipped to undertake the necessary tasks on your air conditioning system with confidence.
Now that you've mastered discharging an AC capacitor, you might wonder what role this component plays in your home's electrical system. Our next guide, "What Does AC Capacitor Do," dives deep into its functions, utility, and significance in maintaining the efficiency of electrical appliances. Understanding this crucial component can help you troubleshoot issues and handle maintenance more effectively.
Frequently Asked Questions about How To Discharge AC CapACitor
Was this page helpful?
At Storables.com, we guarantee accurate and reliable information. Our content, validated by Expert Board Contributors, is crafted following stringent Editorial Policies. We're committed to providing you with well-researched, expert-backed insights for all your informational needs.


0 thoughts on “How To Discharge AC CapACitor”