Home>Home Maintenance>How To Test A Capacitor On An Air Conditioner
Home Maintenance
How To Test A Capacitor On An Air Conditioner
Modified: March 7, 2024
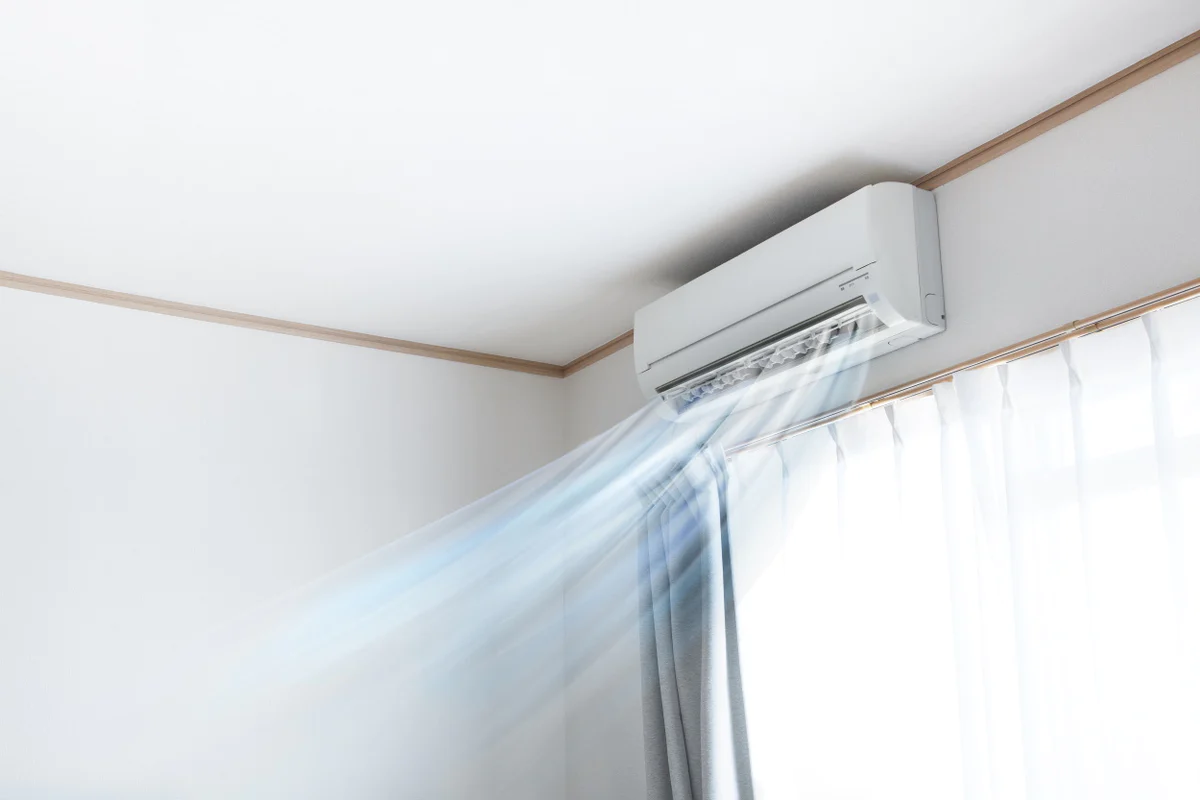
Learn how to test a capacitor on your air conditioner with this essential home maintenance guide. Ensure optimal performance and prevent costly repairs.
(Many of the links in this article redirect to a specific reviewed product. Your purchase of these products through affiliate links helps to generate commission for Storables.com, at no extra cost. Learn more)
Introduction
Welcome to our comprehensive guide on how to test a capacitor on an air conditioner. Capacitors are essential components in the operation of an air conditioner, helping to start the motor and keep it running smoothly. Over time, capacitors can wear out or fail, causing issues with the performance of your air conditioning unit. By learning how to test a capacitor, you can diagnose any capacitor-related problems and determine if a replacement is necessary.
Before we dive into the testing process, it is important to note that working with electrical components can be dangerous if proper precautions are not taken. Always prioritize safety and follow the necessary steps to ensure your well-being. If you are not comfortable working with electrical systems, it is recommended to hire a professional technician to handle the testing and replacement of capacitors.
In this guide, we will walk you through each step of the process, from gathering the tools and equipment to interpreting multimeter readings. We will also discuss how to determine if your capacitor needs replacement and guide you through the replacement process, if necessary. By following these steps, you can identify and address capacitor issues, helping to keep your air conditioner running smoothly and efficiently.
Key Takeaways:
- Regularly testing and replacing your air conditioner’s capacitor ensures smooth and efficient operation, preventing unexpected breakdowns and costly repairs. Safety should always be a priority when working with electrical components.
- If you’re unsure or uncomfortable with the testing and replacement process, it’s best to consult a professional technician. Prioritize regular maintenance to enjoy a cool and comfortable home while extending the lifespan of your air conditioner.
Read more: How To Test HVAC Capacitor
Step 1: Safety Precautions
Before you begin testing a capacitor on your air conditioner, it is crucial to prioritize your safety. Dealing with electrical systems can be hazardous if proper precautions are not taken. Follow these safety measures to protect yourself from potential harm:
- Turn Off Power: Make sure to turn off the power to your air conditioning unit before starting any work. Locate the main electrical circuit panel in your home and switch off the circuit breaker that controls the air conditioner.
- Double-Check Power: Even after turning off the power from the circuit breaker, it is important to confirm that there is no power flowing to the unit. Use a non-contact voltage tester to ensure that the power is completely shut off.
- Wear Protective Gear: Always wear protective gear, such as safety goggles and gloves, when working on your air conditioner. This will help protect you from any potential electrical hazards and prevent injuries.
- Work in a Well-Ventilated Area: Ensure that you are working in a well-ventilated area to prevent the accumulation of harmful fumes and gases.
- Avoid Touching Exposed Wires: Do not touch any exposed wires or terminals during the testing process. Capacitors can retain electrical charge, even when the power is turned off, so it is essential to discharge them before proceeding.
- Keep Children and Pets Away: Make sure to keep children and pets away from the area while you are working on your air conditioner. This will prevent any accidents or injuries.
By following these safety precautions, you can minimize the risk of accidents or injuries while testing the capacitor on your air conditioner. Remember to prioritize safety at all times and seek professional assistance if you are uncertain about any step of the process.
Step 2: Gathering the Necessary Tools and Equipment
Before you can start testing the capacitor on your air conditioner, you will need to gather a few essential tools and equipment. Having the right tools on hand will help you perform the test accurately and safely. Here is a list of the tools and equipment you will need:
- Multimeter: A digital multimeter is an indispensable tool for testing capacitors. Make sure you have a multimeter capable of measuring capacitance.
- Screwdriver: A small flathead screwdriver will be needed to open the air conditioner unit and access the capacitor.
- Insulated Gloves: Insulated gloves will provide an extra layer of protection while handling electrical components.
- Insulated Screwdriver: An insulated screwdriver will help prevent accidental electric shocks while working inside the air conditioner.
- Non-Contact Voltage Tester: A non-contact voltage tester is used to ensure that the power to the air conditioner unit is switched off before starting any work. This will help prevent potential accidents.
Once you have gathered all the necessary tools and equipment, double-check to ensure that they are in good working condition. If any tool is damaged or malfunctioning, replace it before proceeding with the testing process. It is important to have reliable tools to ensure accurate results and your safety.
Keep these tools and equipment handy throughout the testing process to easily access them when needed. Having everything organized and readily available will save you time and frustration during the capacitor testing.
By gathering the necessary tools and equipment, you are now prepared to move on to the next step: locating the capacitor in your air conditioner.
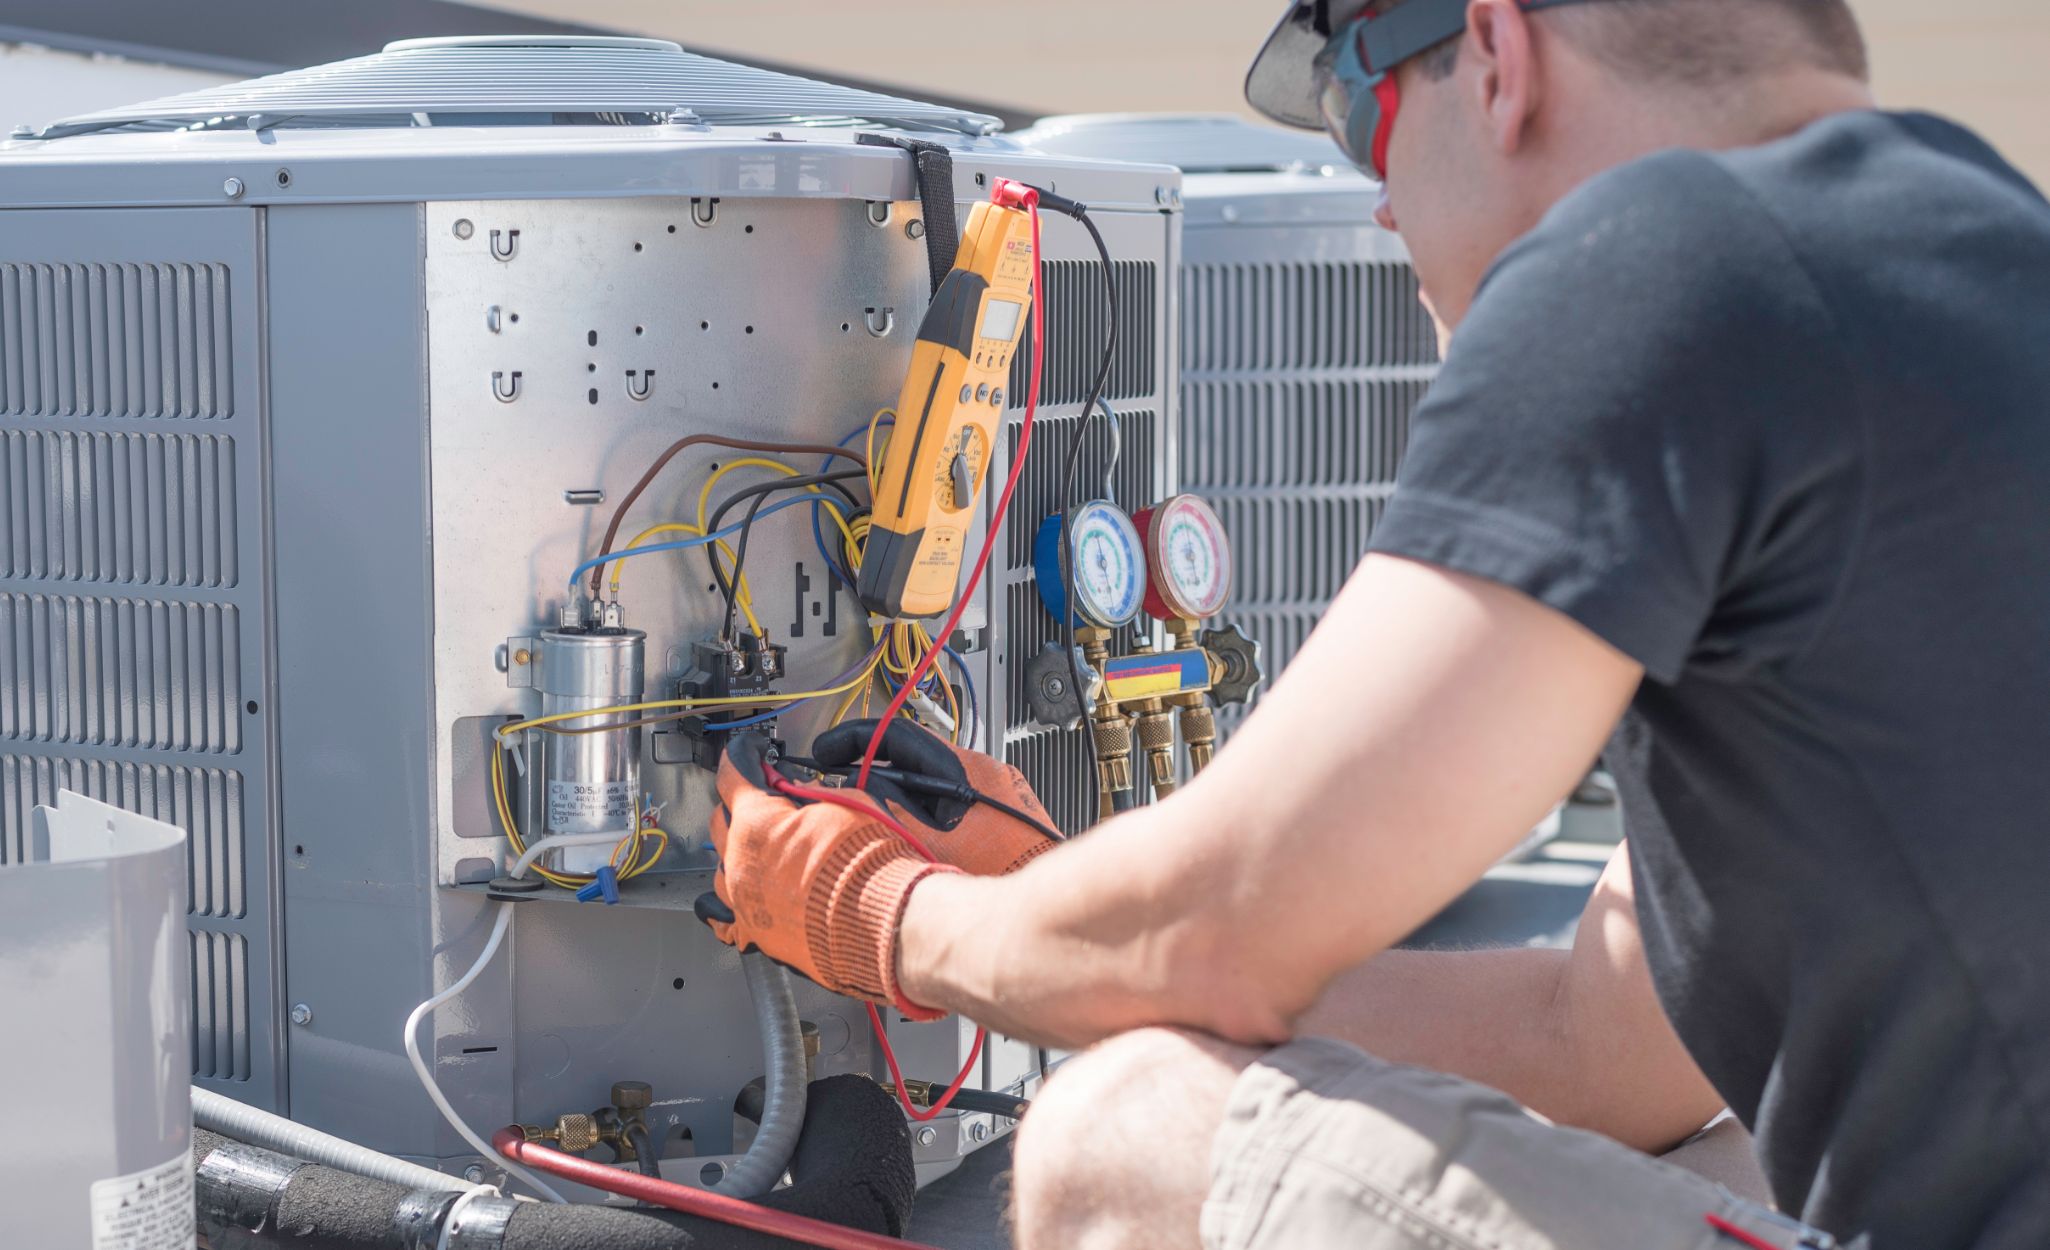
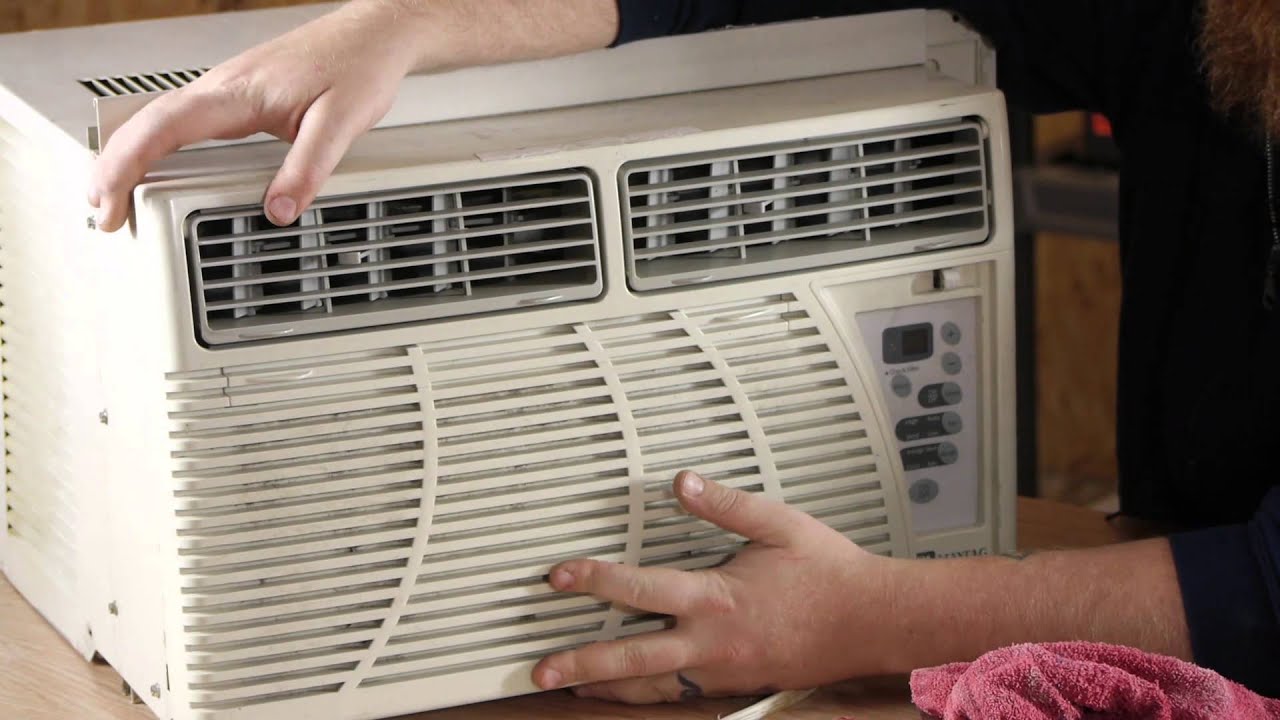
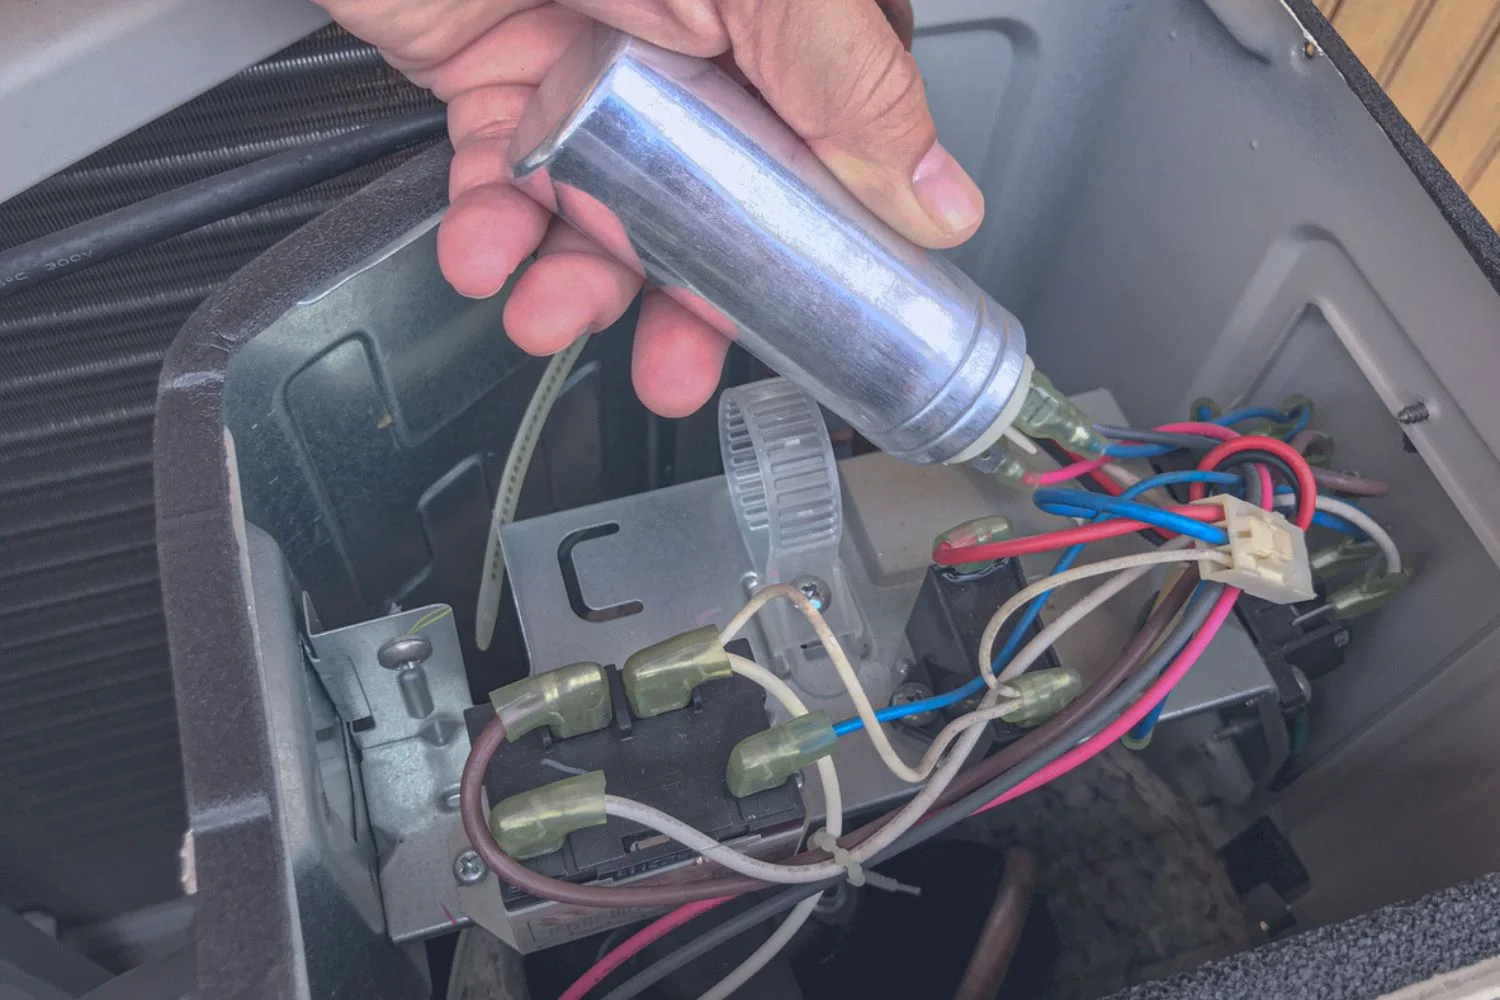
Step 3: Locating the Capacitor in the Air Conditioner
Now that you have gathered the necessary tools and equipment, the next step is to locate the capacitor in your air conditioner. The capacitor is typically located in the outdoor condenser unit or the indoor air handler unit. Follow these steps to find the capacitor:
- Turn Off Power: Make sure that the power to your air conditioner is switched off. Refer to Step 1 for instructions on how to turn off the power.
- Access the Air Conditioner: Depending on your air conditioner model, you may need to remove a panel or access cover to reach the capacitor. Use a screwdriver to remove screws securing the panel or cover.
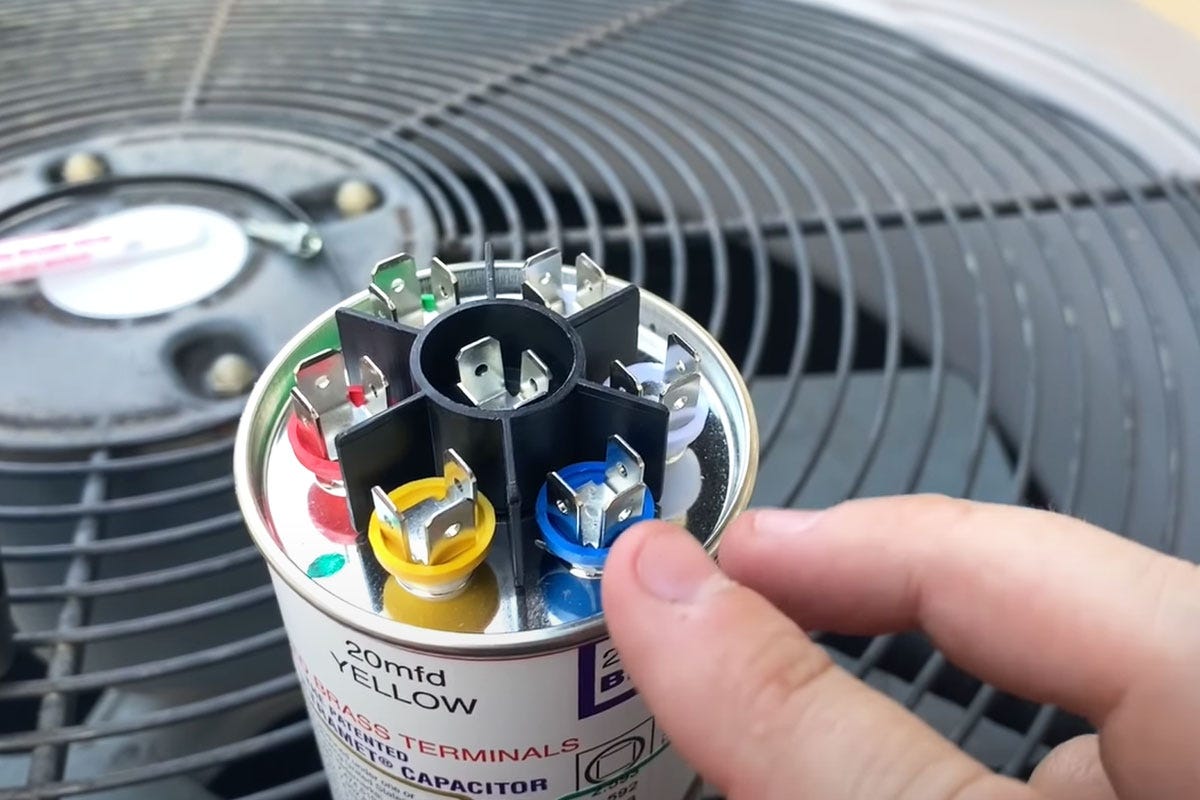
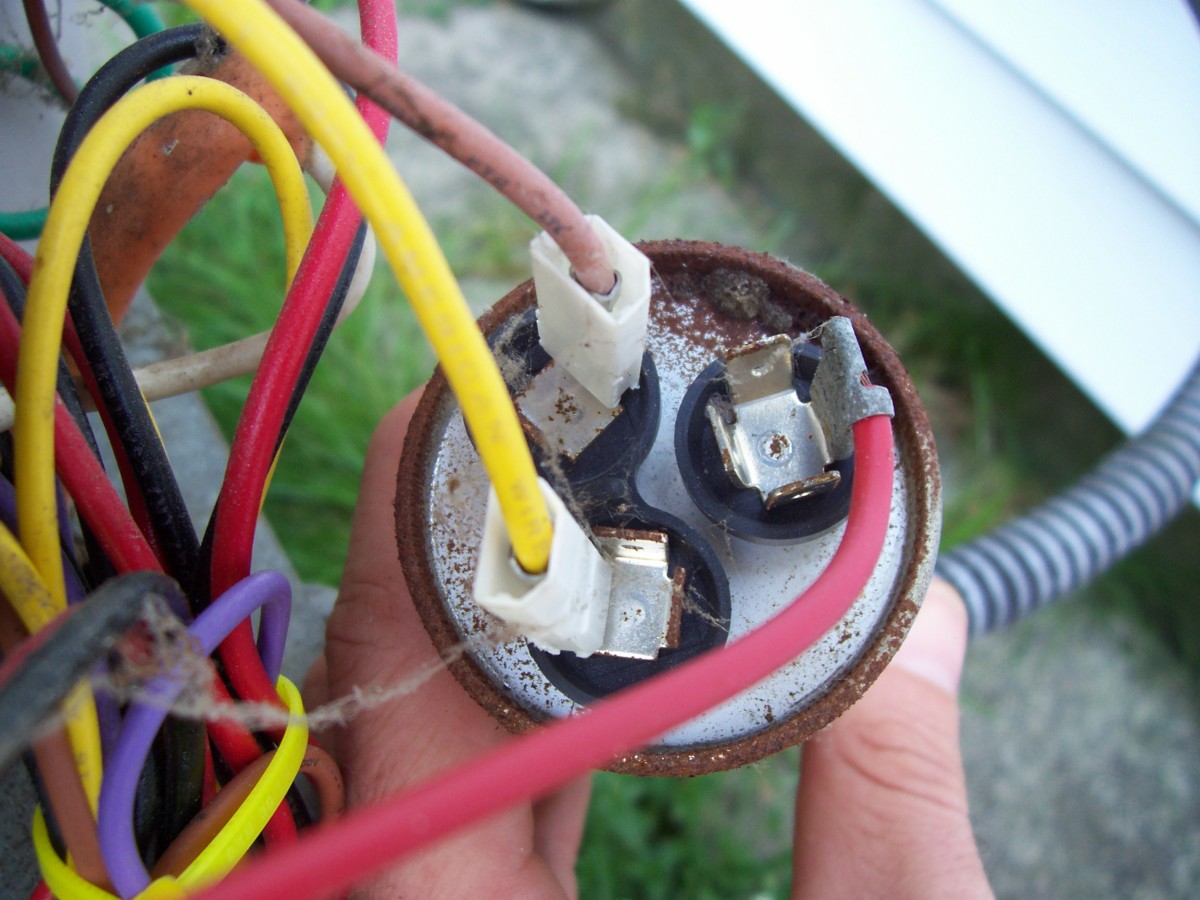
- Identify the Capacitor: Look for a small cylindrical or oval-shaped component with wires connected to it. The capacitor is usually made of metal and may be marked with a label indicating its capacitance rating.
- Take Note of the Capacitor Wiring: Before disconnecting any wires, carefully observe and take note of the capacitor’s wiring configuration. Each wire should be connected to a designated terminal on the capacitor.
It is essential to exercise caution when working around the capacitor and its wiring. Ensure that you do not touch any exposed wires or terminals and avoid coming into contact with the capacitor’s metal body, as it may still hold an electrical charge even after the power is turned off.
If you are uncertain about the location or identification of the capacitor in your air conditioner, refer to the manufacturer’s manual or consult a professional technician for assistance. Properly identifying the capacitor will allow you to proceed with discharging and testing it accurately.
Once you have located the capacitor, you are ready to move on to the next step: discharging the capacitor to ensure your safety during the testing process.
Step 4: Discharging the Capacitor
Discharging the capacitor is an important step to ensure your safety during the testing process. Capacitors store electrical charges, and even after the power is turned off, they can still retain a potentially dangerous charge. Follow these steps to discharge the capacitor safely:
- Turn Off Power: Ensure that the power to your air conditioner is switched off. Refer to Step 1 for instructions on how to turn off the power.
- Confirm Power is Off: Use a non-contact voltage tester to verify that there is no electrical charge present. Place the voltage tester near the wires and terminals of the capacitor. If the voltage tester does not detect any voltage, it is safe to proceed with discharging.
- Use Insulated Screwdriver: Using an insulated screwdriver with a long handle, carefully short the terminals of the capacitor to discharge any remaining charge. To do this, touch the metal portion of the screwdriver to both terminals of the capacitor simultaneously.
- Wait and Verify Discharge: After shorting the terminals, wait for a few seconds to ensure that the charge is completely discharged. You can use the non-contact voltage tester again to confirm that there is no voltage present.
It is essential to take these precautionary measures to prevent electric shock or injury. Discharging the capacitor will ensure that it is safe to proceed with the testing process. Remember, capacitors can still store a charge even after the power is turned off, so never skip this step.
Once you have discharged the capacitor and confirmed that it is safe, you are ready to move on to the next step: testing the capacitor with a multimeter.
Use a multimeter to test the capacitor for proper functioning. Set the multimeter to the capacitance setting and touch the probes to the capacitor’s terminals. If the reading is within 10% of the labeled capacitance, the capacitor is good.
Read more: How To Test A Fan Capacitor
Step 5: Testing the Capacitor with a Multimeter
After discharging the capacitor, it’s time to test it using a multimeter. A multimeter is a versatile tool that can measure various electrical parameters, including capacitance. Follow these steps to test the capacitor with a multimeter:
- Select the Capacitance Setting: Set your multimeter to the capacitance measurement mode. Look for the symbol that represents capacitance, usually denoted by “F” for farads.
- Attach the Test Leads: Connect the test leads of the multimeter to the appropriate terminals on the capacitor. The positive lead of the multimeter should be connected to the positive terminal of the capacitor, while the negative lead should be connected to the negative terminal.
- Begin the Measurement: Press the measurement button on the multimeter to start the measurement process. The multimeter will send a small current to the capacitor and measure the time it takes to charge and discharge the capacitor.
- Record the Reading: Once the measurement is complete, the multimeter will display the capacitance value of the capacitor. Take note of this reading for further analysis.
It is important to note that capacitors degrade over time, and their capacitance value may deviate from the original rating. If the measured capacitance value is significantly lower or higher than the capacitor’s rated capacitance, it may indicate a faulty or worn-out capacitor. Additionally, if the measured capacitance value is close to zero, it suggests that the capacitor is shorted and needs replacement.
Remember to handle the capacitor and test leads carefully during the measurement process to avoid any accidental contact with live wires or terminals. Always follow safety precautions and refer to the multimeter’s manual for specific instructions and guidelines regarding capacitance measurement.
Once you have obtained the multimeter reading, you can move on to the next step: interpreting the multimeter readings to determine the condition of the capacitor.
Step 6: Interpreting the Multimeter Readings
Interpreting the multimeter readings is a crucial step in determining the condition of the capacitor. The measured capacitance value will provide insight into whether the capacitor is within the acceptable range or if it requires replacement. Here are some factors to consider when interpreting the multimeter readings:
- Comparing to the Rated Capacitance: Check the manufacturer’s specifications or markings on the capacitor to determine its rated capacitance. Compare this value to the measured capacitance reading from the multimeter. If the measured capacitance is close to the rated capacitance, the capacitor is likely in good condition.
- Significantly Lower Reading: If the measured capacitance is significantly lower than the rated capacitance, it indicates that the capacitor has lost its capacitance and may be faulty or worn-out. This can affect the performance of the air conditioner and necessitate replacement.
- Significantly Higher Reading: Conversely, if the measured capacitance is significantly higher than the rated capacitance, it suggests that the capacitor is experiencing failure due to aging or internal damage. In this case, it is advisable to replace the capacitor to maintain optimal air conditioner performance.
- Zero or Near-Zero Reading: If the multimeter reading shows a value close to zero or very low, it indicates that the capacitor may be shorted or completely failed. A shorted capacitor will not function properly and should be replaced to restore the normal operation of the air conditioner.
It is important to note that multimeter readings provide an initial evaluation of the capacitor’s condition, but they may not always be foolproof. If you are unsure about the interpretation or suspect capacitor issues despite a normal reading, it is recommended to consult with a professional technician for further evaluation.
Now that you have interpreted the multimeter readings, you can proceed to the next step: determining if the capacitor needs replacement.
Step 7: Determining if the Capacitor Needs Replacement
Based on the multimeter readings and the interpretation in the previous step, you can now determine if the capacitor needs to be replaced. Consider the following factors when making this determination:
- Deviation from Rated Capacitance: If the measured capacitance is significantly lower or higher than the rated capacitance, it indicates that the capacitor is not functioning within its intended range. In such cases, replacing the capacitor is recommended to ensure proper operation of the air conditioner.
- Age of the Capacitor: Capacitors naturally degrade over time due to usage and environmental factors. If the capacitor is several years old or nearing the end of its typical lifespan (usually around 5-10 years), it is wise to consider replacing it, even if the multimeter reading appears normal. This proactive approach can prevent potential failures and disruption in the future.
- Visible Damage or Leaks: Inspect the capacitor visually for any signs of physical damage, such as bulging, leaking fluid, or burnt marks. These are clear indications that the capacitor is faulty and requires immediate replacement.
- Frequent System Issues: If your air conditioner frequently experiences problems, such as difficulty starting, intermittent operation, or unusual noises, a faulty capacitor may be to blame. Replacing the capacitor can help resolve these issues and restore the proper functioning of your air conditioner.
It is important to remember that capacitors play a critical role in the operation of the air conditioner’s motor. Ignoring capacitor issues can lead to decreased efficiency, increased energy consumption, or even motor damage. Therefore, it is generally recommended to replace capacitors that show any signs of failure or deviation from the specified capacitance.
If you are uncertain about the condition of the capacitor or unsure how to proceed, consulting with a professional technician is always a wise decision. They can provide expert advice and assistance in determining if the capacitor needs replacement or if further troubleshooting is required.
Now that you have determined if the capacitor needs to be replaced, you can move on to the final step: replacing the capacitor (if necessary).
Step 8: Replacing the Capacitor (if necessary)
If the testing and evaluation indicate that the capacitor needs to be replaced, it is important to follow the proper steps to ensure a successful replacement. Here’s a guide on how to replace the capacitor:
- Turn Off Power: Before starting any work, make sure to turn off the power to your air conditioner at the circuit breaker to ensure your safety.
- Take Note of Wiring: Take a picture or make a note of the wiring configuration of the existing capacitor. This will help you reconnect the wires correctly to the new capacitor.
- Disconnect Wires: Carefully disconnect the wires from the terminals of the old capacitor. Use a screwdriver, if necessary, to loosen the screws holding the wires in place.
- Remove Old Capacitor: Unscrew or unclip the old capacitor from its mounting bracket or housing. Keep in mind that capacitors can hold a charge, so handle the old capacitor with caution.
- Install New Capacitor: Position the new capacitor in the same location and secure it using screws or clips. Ensure that it is securely fastened to prevent any movement during operation.
- Connect Wires to New Capacitor: Attach the wires to the corresponding terminals of the new capacitor, following the wiring configuration you noted earlier. Tighten the screws to secure the wires in place.
- Double-Check Connections: Take a moment to verify that all connections are secure and that there are no loose wires or terminal screws.
- Re-energize Power: Once you are confident in the installation, go back to the circuit breaker and switch on the power to your air conditioner.
- Test the System: Turn on your air conditioner and check if it starts and operates properly. Listen for any unusual noises and ensure that the system is running smoothly.
It is important to follow the manufacturer’s instructions and guidelines when replacing the capacitor. If you are not comfortable performing the replacement yourself, it is recommended to seek assistance from a professional technician to ensure proper installation and to avoid any potential damage to the air conditioner.
By following these steps, you can safely and effectively replace the capacitor in your air conditioner, restoring the optimal performance of your cooling system.
Congratulations! You have successfully completed the process of testing and, if necessary, replacing the capacitor on your air conditioner. Regular maintenance and testing of capacitors can help prevent unexpected breakdowns and ensure the efficient operation of your air conditioning unit for years to come.
Remember, if you are unsure or uncomfortable performing any of these steps, it is always recommended to consult a professional technician to handle the testing and replacement of capacitors or any other electrical components of your air conditioner.
Read more: How To Test An Air Conditioning Capacitor
Conclusion
Testing and maintaining the capacitor on your air conditioner is a crucial aspect of home maintenance that ensures your cooling system operates efficiently and reliably. By following the steps outlined in this comprehensive guide, you can effectively test the capacitor and determine if a replacement is necessary. Remember, safety should always be a priority when working with electrical components, so take the necessary precautions and consider seeking professional assistance if you are uncertain or uncomfortable with the process.
Regularly testing the capacitor allows you to identify and address potential issues before they escalate, preventing unexpected breakdowns and costly repairs. A properly functioning capacitor helps to start and run the motor smoothly, ensuring optimal performance and energy efficiency in your air conditioner.
If you find that the capacitor needs replacement, ensure that you choose a new capacitor with the correct capacitance rating and follow the proper installation steps. Replacing the capacitor when needed will help maintain the longevity and performance of your air conditioner, ultimately contributing to a comfortable living environment.
Remember to prioritize regular maintenance and check your air conditioner’s capacitor periodically, especially if you notice any signs of reduced cooling capacity, intermittent operation, or unusual noises. By providing proper care and attention to your air conditioning system, you can enjoy a cool and comfortable home while extending the lifespan of your unit.
We hope that this guide has equipped you with the knowledge and confidence to test and replace the capacitor on your air conditioner. Stay proactive and keep your cooling system in top shape to beat the summer heat!
Frequently Asked Questions about How To Test A Capacitor On An Air Conditioner
Was this page helpful?
At Storables.com, we guarantee accurate and reliable information. Our content, validated by Expert Board Contributors, is crafted following stringent Editorial Policies. We're committed to providing you with well-researched, expert-backed insights for all your informational needs.