Home>Home Maintenance>How To Check Air Conditioner Capacitor
Home Maintenance
How To Check Air Conditioner Capacitor
Modified: October 20, 2024
Learn how to check the air conditioner capacitor at home. Ensure optimal performance and prevent breakdowns with this helpful home maintenance guide.
(Many of the links in this article redirect to a specific reviewed product. Your purchase of these products through affiliate links helps to generate commission for Storables.com, at no extra cost. Learn more)
Introduction
Welcome to our comprehensive guide on how to check an air conditioner capacitor. The air conditioner capacitor is an essential component that helps start and run the compressor and fan motors in your AC unit. Over time, the capacitor can wear out or become faulty, causing issues with your air conditioning system. By learning how to check and test the capacitor, you can diagnose any problems and avoid costly repairs or replacements.
In this article, we will walk you through the process of checking and diagnosing a faulty air conditioner capacitor. We will cover the signs of a faulty capacitor, the tools and equipment you need, and the step-by-step process of checking and replacing the capacitor. Whether you are a seasoned DIY enthusiast or a homeowner looking to troubleshoot your AC unit, this guide will provide you with the necessary knowledge and steps to ensure your air conditioner is running smoothly and efficiently.
Understanding how your air conditioner functions and the role of the capacitor is crucial in troubleshooting any issues. The capacitor stores electrical energy and provides an extra boost of power to start the compressor and fan motors. It acts as a temporary power source, supplying a jolt of electricity whenever needed. Without a functioning capacitor, the motors may struggle to start or function correctly. By inspecting and testing the capacitor, you can determine if it needs replacement or repair.
Before we dive into the testing procedure, it’s vital to familiarize yourself with the common signs of a faulty air conditioner capacitor. These signs can manifest in various ways and may indicate a problem with the capacitor or other components of the air conditioning system. Identifying these signs will help you determine if the capacitor is the culprit and guide you in troubleshooting the issue effectively.
Now, let’s move on to understanding the indicators of a faulty capacitor and the tools you will need to perform the tests.
Key Takeaways:
- Regularly checking and testing your air conditioner capacitor can help prevent costly repairs. Look out for signs of a faulty capacitor, gather the right tools, and follow the step-by-step process to ensure your AC runs smoothly.
- Safety is crucial when working with electrical components. Always turn off the power, wear protective gear, and consider seeking professional help if you’re unsure. By following these steps, you can maintain a cool and comfortable home environment.
Understanding the Air Conditioner Capacitor
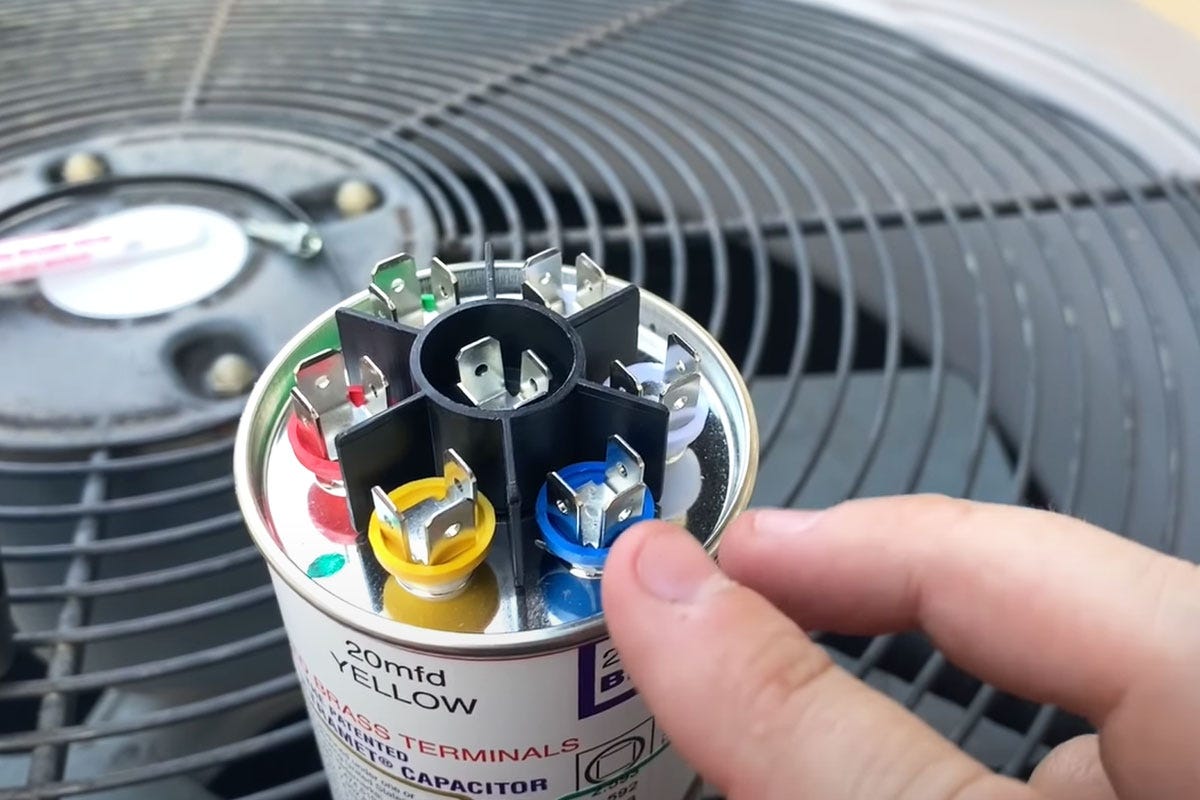
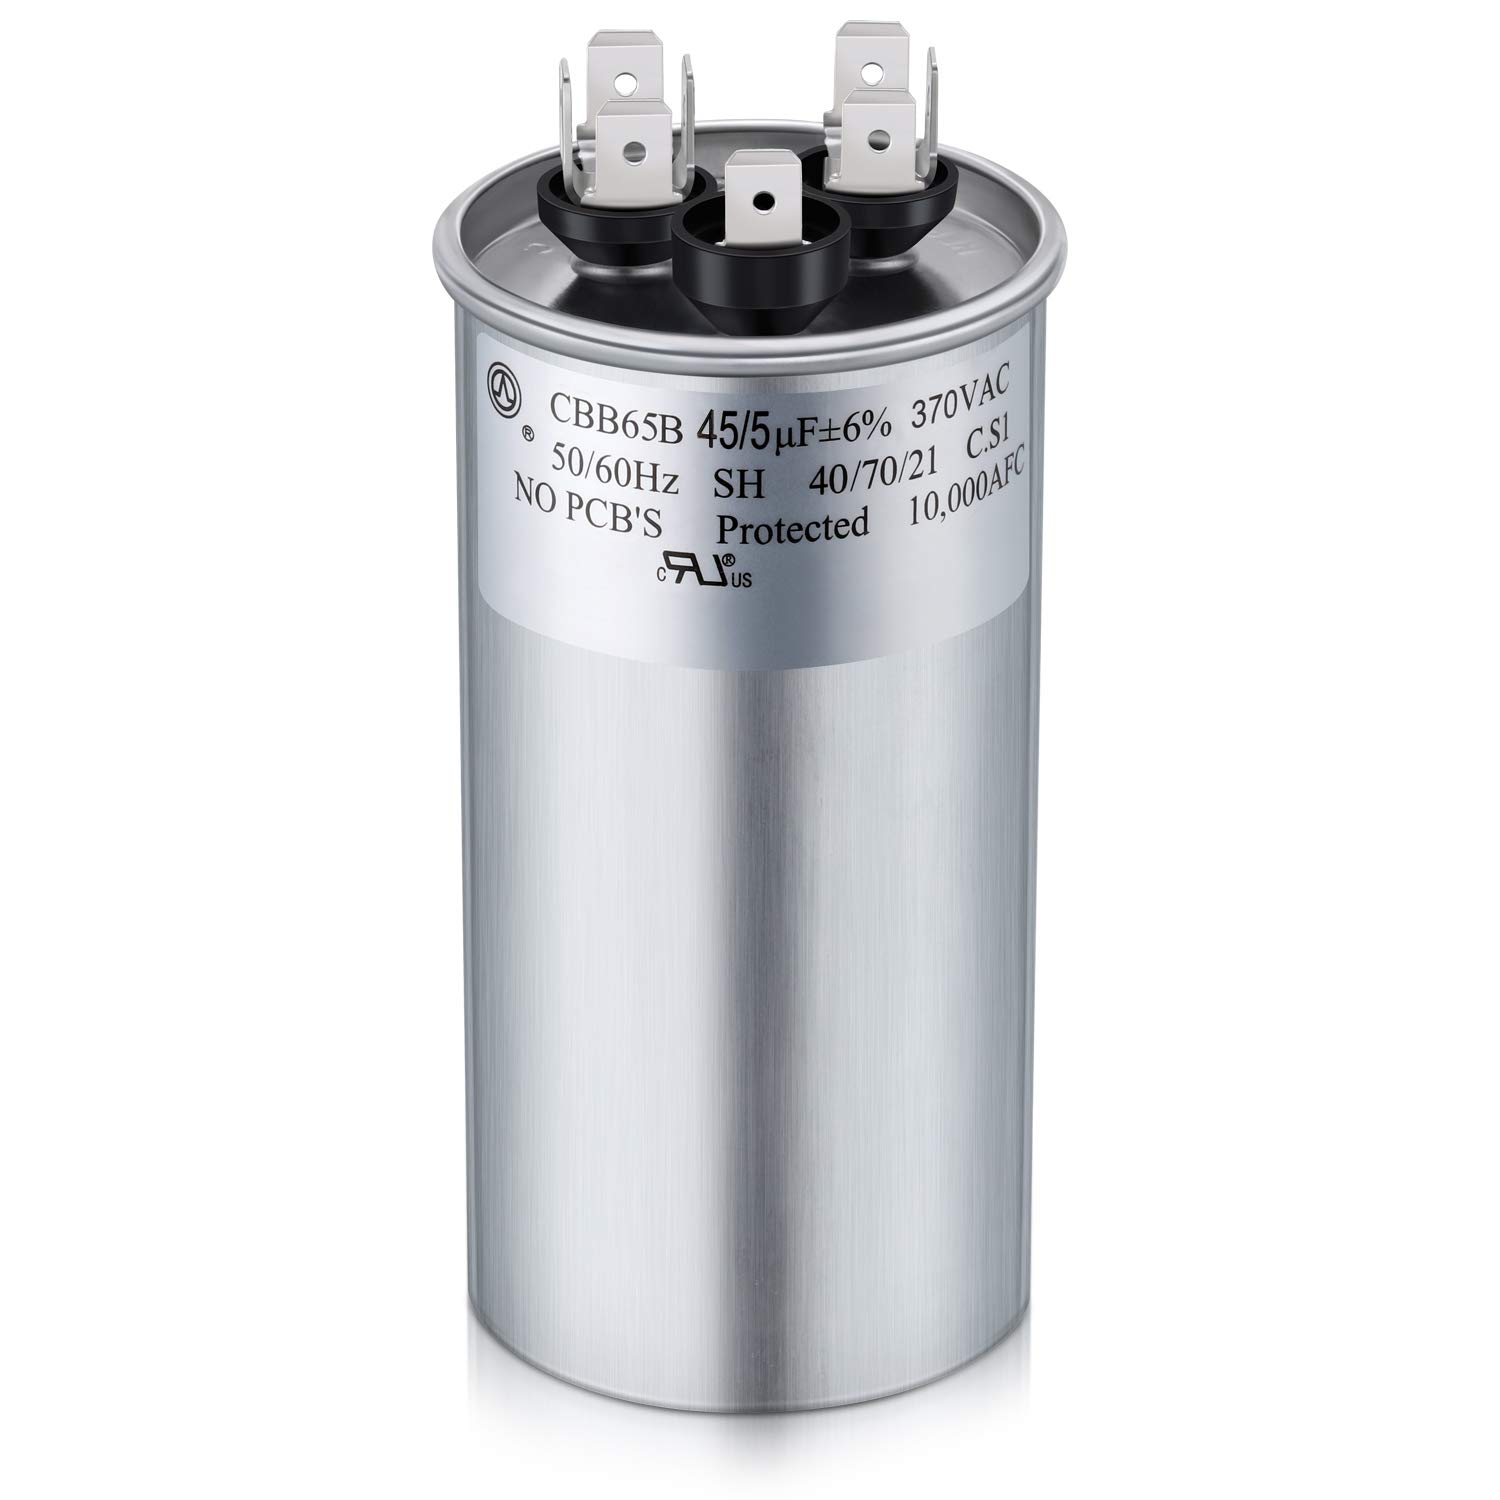
The air conditioner capacitor is a small, cylindrical device that stores electrical energy in the form of charge. It plays a crucial role in the functioning of your air conditioning system, particularly in starting the compressor and fan motors. The capacitor acts as a temporary power source, providing an extra boost of electricity to initiate the motors’ operation.
There are two main types of capacitors used in air conditioning systems: start capacitors and run capacitors. Start capacitors provide the initial jolt of electricity to start the motors, while run capacitors continue to provide power to keep the motors running smoothly. Both types are essential for the proper functioning of your air conditioner.
The capacitor consists of two metal plates, separated by an insulating material known as a dielectric. The dielectric material determines the capacitance value, which determines how much charge the capacitor can store. This value is typically measured in microfarads (µF).
It’s important to note that capacitors can become faulty over time due to various factors such as age, extreme temperature fluctuations, voltage spikes, or electrical surges. A faulty capacitor can result in several issues, including difficulties in starting the unit, reduced cooling capacity, or even complete failure of the air conditioner.
Now that you have a basic understanding of the air conditioner capacitor and its role in the system, let’s move on to the next section, where we will learn about the signs that indicate a faulty capacitor. Recognizing these signs will help you determine if the capacitor needs testing and replacement.
Signs of a Faulty Air Conditioner Capacitor
Air conditioner capacitors can develop faults over time due to various factors like age, wear and tear, or electrical issues. It’s important to be aware of the signs that indicate a faulty capacitor so that you can address the problem promptly and avoid further damage to your air conditioning system. Here are some common signs to look out for:
- Difficulty in starting: If your air conditioner takes a long time to start or struggles to turn on, it could be a sign of a faulty capacitor. The capacitor provides the initial boost of electricity needed to start the compressor and fan motors. If it is unable to perform this function, the motors may have difficulty starting, resulting in a delay or failure to start altogether.
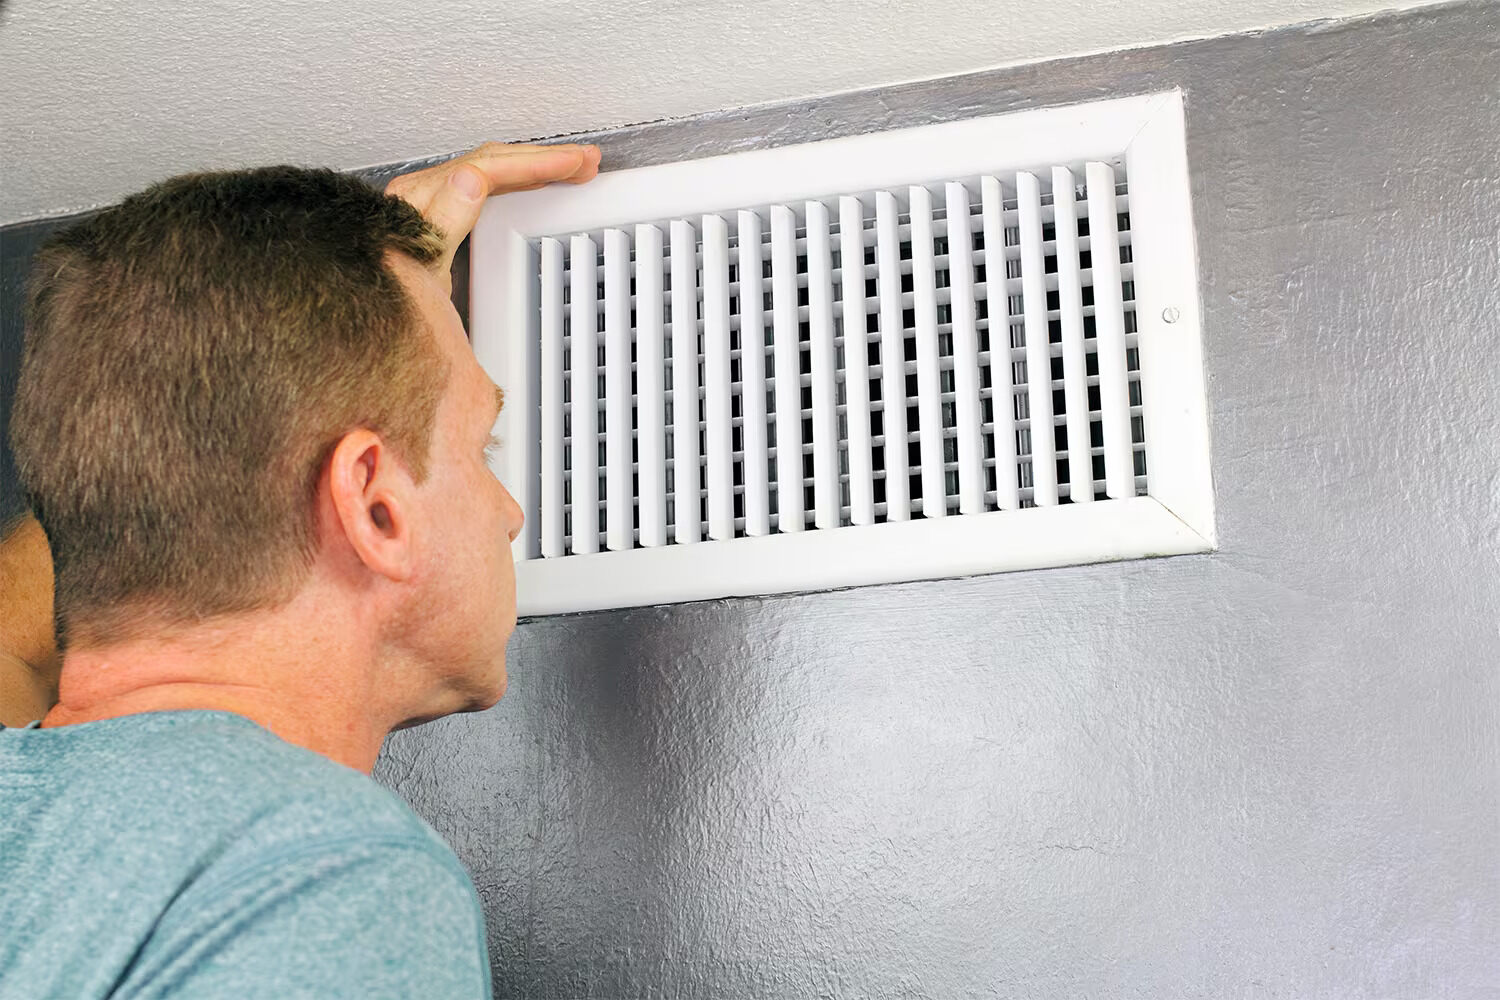
- Reduced cooling capacity: A failing capacitor can result in reduced cooling capacity from your air conditioner. You may notice that the air coming from the vents is not as cold as it should be, or the cooling is uneven throughout your home. This can be a result of the capacitor not providing enough power to the motors, causing them to operate at a lower capacity.
- Frequent tripping of circuit breaker: If your air conditioner is repeatedly tripping the circuit breaker, it could be due to a faulty capacitor. When the capacitor is unable to supply the necessary power to the motors, it can cause an overload on the electrical system, leading to the circuit breaker tripping as a safety measure.
- Strange noises: Faulty capacitors can cause the motors in your air conditioner to make unusual noises. You may hear buzzing, humming, or clicking sounds coming from the unit when it is running. These noises can indicate that the motors are not receiving the proper voltage and are struggling to operate.
- Excessive heat: If you notice that the capacitor is excessively hot to the touch, it could be a sign of a malfunction. Capacitors can overheat due to prolonged use or internal issues, leading to their failure. An overheating capacitor may need to be replaced to prevent further damage to the air conditioning system.
If you observe any of these signs with your air conditioner, it is recommended to inspect and test the capacitor to confirm whether it is indeed the cause of the problem. In the next section, we will discuss the tools and equipment you need to perform the capacitor testing process.
Tools and Equipment Needed
Before starting the process of checking and testing an air conditioner capacitor, it’s essential to gather the necessary tools and equipment. Having the right tools ensures that you can perform the tests accurately and safely. Here is a list of tools and equipment you will need:
- Safety gloves and goggles: It’s crucial to prioritize safety when working with electrical components. Wear protective gloves and goggles to protect yourself from any potential hazards.
- Insulated screwdriver: An insulated screwdriver is necessary for removing the air conditioner capacitor cover and accessing the capacitor safely. Make sure the screwdriver is appropriately insulated to prevent electrical shocks.
- Digital multimeter: A digital multimeter is a versatile tool that measures voltage, current, and resistance. It is essential for testing the capacitor and ensuring its functionality. Make sure the multimeter is capable of measuring capacitance.
- Capacitor tester (optional): While not mandatory, a capacitor tester can provide a more accurate assessment of the capacitor’s condition. It allows you to test the capacitance, leakage, and overall performance of the capacitor.
- Discharge resistor or insulated pliers: Before working on the capacitor, it must be discharged to prevent any electrical shock. You can use a discharge resistor specifically designed for this purpose or insulated pliers to safely discharge the capacitor.
- Notebook and pen: Keeping a notebook and pen handy will allow you to jot down any readings, observations, or notes during the testing process.
- Replacement capacitor (if needed): If you find that the capacitor is faulty, you may need to replace it. Make sure to purchase a compatible replacement capacitor based on the specifications of your air conditioning system.
By gathering these tools and equipment, you will be well-prepared to check and test the air conditioner capacitor effectively. In the next section, we will dive into the step-by-step process of checking the capacitor and identifying any issues.
Step 1: Turning off the Power
Before you begin working on the air conditioner capacitor, it is crucial to turn off the power to ensure your safety. Working with electrical components can be dangerous, and taking proper precautions is essential. Follow the steps below to turn off the power to your air conditioner:
- Locate the main electrical disconnect: Depending on your air conditioning system, the main electrical disconnect can be found near the outdoor condenser unit or in your home’s electrical panel. Look for a switch or breaker labeled for your air conditioner.
- Switch off the main electrical disconnect: Once you have located the main electrical disconnect, switch it off. For a switch, simply flip it to the “off” position. If you have a breaker, flip it to the “off” position or remove the corresponding fuse.
- Verify power is turned off: To ensure the power is completely disconnected, test that your air conditioner is not operational. Adjust the thermostat to call for cooling and verify that your air conditioner does not start. Additionally, use a non-contact voltage tester to confirm that there is no current running to the unit.
By ensuring the power is turned off, you mitigate the risk of electrical shock while working on the air conditioner capacitor. Remember to proceed with caution and prioritize your safety throughout the testing and checking process. In the next step, we will cover how to remove the air conditioner capacitor cover to access the component.
Read more: How To Check Air Conditioner In Car
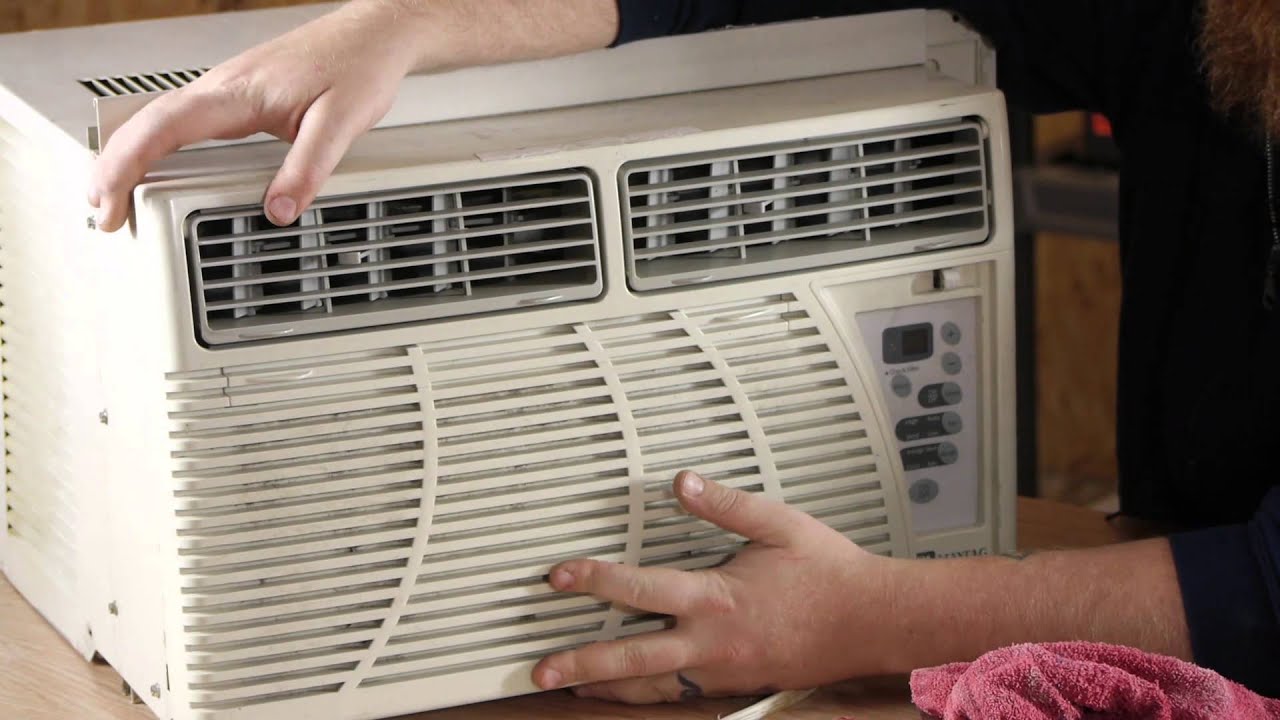
Step 2: Removing the Air Conditioner Capacitor Cover
Now that you have turned off the power to your air conditioner, you can safely proceed to remove the capacitor cover. The capacitor cover is typically located on the outdoor condenser unit of your air conditioning system. Follow these steps to remove the cover:
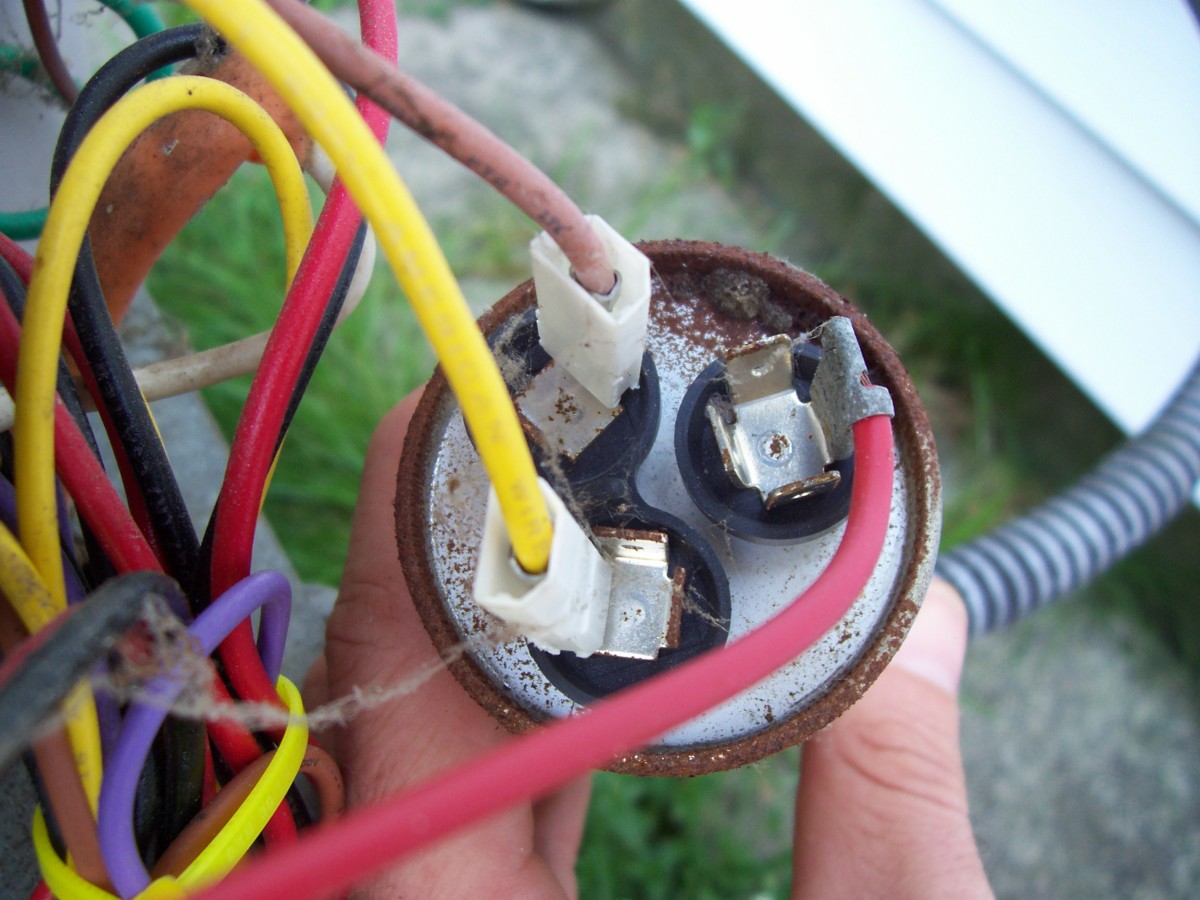
- Locate the capacitor: Look for a small, cylindrical component inside the condenser unit. It should have wires connected to it, indicating that it is the capacitor.
- Inspect the capacitor cover: Before removing the cover, inspect it for any signs of damage or deterioration. If the cover is damaged, it is recommended to replace it for safety and to protect the capacitor from environmental elements.
- Using appropriate tools, remove the screws or fasteners: Depending on the make and model of your air conditioner, the capacitor cover may be secured with screws or fasteners. Use an insulated screwdriver or the necessary tool to remove these screws or fasteners and set them aside in a safe place.
- Take precautions for live capacitors: Capacitors can still retain a charge even after the power is turned off. To be safe, use a discharge resistor or insulated pliers to short the terminals of the capacitor. This will discharge any residual charge and prevent electrical shocks during the testing process.
- Remove the capacitor cover: Once you have discharged the capacitor, carefully lift off the capacitor cover from the condenser unit. Set it aside in a clean and safe location, ensuring that it doesn’t come into contact with any water or moisture.
With the capacitor cover removed, you now have access to the capacitor itself. In the next step, we will learn how to discharge the capacitor to ensure your safety during testing.
When checking an air conditioner capacitor, always discharge it before touching any terminals to avoid electric shock. Use a multimeter to test for continuity and proper capacitance. If the readings are outside the specified range, the capacitor may need to be replaced.
Step 3: Discharging the Capacitor
Discharging the capacitor is an important step to ensure your safety before proceeding with any testing or handling of the component. Capacitors store electrical energy, even after the power is turned off, and can potentially discharge a dangerous amount of current. Follow these steps to discharge the capacitor safely:
- Ensure power is turned off: Before discharging the capacitor, double-check that the power to your air conditioner is turned off. This is to prevent any accidental electrical shocks during the process.
- Wear safety gloves and goggles: Put on your safety gloves and goggles to protect yourself from any potential electrical hazards.
- Using a discharge resistor: If you have a discharge resistor, it is the safest and most efficient way to discharge the capacitor. Connect the discharge resistor across the terminals of the capacitor. This will create a path for the stored electrical charge to safely dissipate.
- Using insulated pliers: If you don’t have a discharge resistor, you can use insulated pliers to discharge the capacitor. Make sure the pliers have insulated handles and are rated for electrical applications. Carefully touch the metal ends of the pliers to both terminals of the capacitor simultaneously. Hold them in place for a few seconds to allow the charge to discharge.
- Verify the discharge: After discharging the capacitor, use a non-contact voltage tester to confirm that there is no voltage present at the terminals. This step ensures that the capacitor is fully discharged, reducing the risk of electrical shock.
Once you have successfully discharged the capacitor and confirmed the absence of electrical charge, you can proceed with testing the capacitor. In the next step, we will cover the process of checking the capacitor using a multimeter.
Step 4: Checking the Capacitor with a Multimeter
Now that the capacitor is safely discharged, you can use a multimeter to test its capacitance and determine if it is functioning properly. A multimeter is a versatile tool that measures various electrical properties, including capacitance. Follow these steps to check the capacitor with a multimeter:
- Select the appropriate setting on your multimeter: Turn on your multimeter and set it to the capacitor testing mode (usually denoted by the symbol “C” or “µF”). Make sure the range is suitable for the capacitance value of your capacitor. If you’re unsure, start with the highest range and adjust if necessary.
- Identify the terminals of the capacitor: Take note of which terminal is connected to the “C” or “COM” (common) terminal on your multimeter, and which terminal is connected to the “µF” terminal. This information may vary depending on your multimeter model.
- Connect the multimeter to the capacitor terminals: Start by connecting the black (negative) lead of the multimeter to the common terminal of the capacitor. Then, connect the red (positive) lead to the terminal marked with the µF symbol.
- Read the capacitance value: With the multimeter leads connected to the capacitor terminals, the display on the multimeter will show the capacitance value of the capacitor. Compare this reading to the labeled capacitance value of the capacitor. The readings should be within a reasonable range, typically with a small tolerance, such as ±10%.
- Interpret the results: If the measured capacitance value is within the acceptable range, it indicates that the capacitor is functioning correctly. However, if the measured value is significantly lower or higher than the labeled value, it may indicate a faulty capacitor that needs to be replaced.
By using a multimeter to check the capacitance of the capacitor, you can get a good indication of its functionality. However, it’s essential to note that a capacitor may still be faulty even if the measured capacitance falls within the acceptable range. In the next step, we will discuss an additional method to test the capacitor using a capacitor tester.
Step 5: Testing the Capacitor with a Capacitor Tester
In addition to using a multimeter, you can also test the capacitor using a dedicated capacitor tester. While not necessary, a capacitor tester can provide a more accurate assessment of the capacitor’s condition and performance. Follow these steps to test the capacitor with a capacitor tester:
- Ensure the power is turned off: Before testing the capacitor, ensure that the power to your air conditioner is turned off to avoid any electrical hazards.
- Prepare the capacitor tester: Set up your capacitor tester according to the manufacturer’s instructions. This may include connecting test leads or adjusting the settings on the tester.
- Identify the terminals of the capacitor: Take note of which terminal is connected to the positive (+) lead of the capacitor tester and which terminal is connected to the negative (-) lead.
- Connect the capacitor to the tester: With the power off, connect the positive (+) lead of the capacitor tester to the corresponding terminal on the capacitor. Then, connect the negative (-) lead to the respective terminal.
- Follow the instructions on the capacitor tester: Once the capacitor is connected to the tester, follow the instructions provided by the manufacturer to initiate the testing process. This may involve pressing a button or activating a specific feature on the tester.
- Interpret the results: The capacitor tester will provide a comprehensive analysis of the capacitor’s condition, including information such as capacitance, leakage current, and other performance indicators. Refer to the manufacturer’s instructions or rating charts to interpret the results accurately.
By using a capacitor tester, you can obtain a more detailed assessment of the capacitor’s condition and determine if it is functioning within the acceptable parameters. This additional testing method can provide valuable insights and help you make an informed decision on whether the capacitor needs to be replaced.
Once you have completed the testing process and have identified a faulty capacitor, you can proceed to the next step: replacing the faulty capacitor. We will cover this step in detail in the following section.
Read more: How To Check An Air Conditioner Compressor
Step 6: Replacing a Faulty Capacitor
If you have determined that the capacitor is faulty and needs to be replaced, follow these steps to safely and effectively replace the faulty capacitor:
- Ensure the power is turned off: Before replacing the capacitor, make sure the power to your air conditioner is turned off to avoid any electrical hazards.
- Take note of the capacitor’s specifications: Before purchasing a replacement capacitor, take note of the specifications of the faulty capacitor, including the capacitance value and the voltage rating. These specifications can usually be found on the label of the capacitor.
- Remove the faulty capacitor: Disconnect the wires connected to the terminals of the faulty capacitor. Take note of their positions or label them for easy reconnection later. Inspect the capacitor mounting bracket or strap and remove any screws or fasteners that secure the capacitor in place. Carefully remove the faulty capacitor from its location.
- Install the new capacitor: Take the new capacitor and ensure that it matches the specifications of the faulty capacitor. Position the new capacitor in the mounting bracket or strap and secure it in place using the appropriate screws or fasteners. Connect the wires to the correct terminals, ensuring a secure and tight connection.
- Double-check the connections: Before proceeding further, double-check the connections to ensure they are correct and secure. Verify that the wires are properly connected to the respective terminals of the capacitor.
- Reinstall the capacitor cover: Place the capacitor cover back over the capacitor, aligning it with the condenser unit. Secure the cover in place using the screws or fasteners that were previously removed during the removal process.
- Turn on the power: After the new capacitor is securely installed, turn on the power to your air conditioner. Switch on the main electrical disconnect or flip the circuit breaker to restore power to the unit.
- Test the air conditioner: Once the power is restored, test the air conditioner to ensure that it is operating correctly. Listen for any unusual sounds and check that the system is cooling effectively.
By following these steps, you can successfully replace a faulty capacitor and restore the proper functioning of your air conditioning system. If you are unsure or uncomfortable performing the replacement yourself, it is always recommended to seek the assistance of a professional HVAC technician.
Finally, in the next step, we will discuss how to close and test the air conditioner after replacing the capacitor.
Step 7: Closing and Testing the Air Conditioner
After replacing the faulty capacitor, it is important to properly close the air conditioner and test its functionality. Follow these steps to complete the process:
- Ensure all connections are secure: Double-check that all connections, including the wires to the capacitor and any other components you may have disconnected, are securely attached. Verify that all screws or fasteners are tightened.
- Replace the condenser unit cover: If you had removed the cover of the condenser unit during the capacitor replacement process, make sure to put it back in place. Line up the cover correctly and secure it with the screws or fasteners.
- Turn on the power: Turn on the main electrical disconnect switch or flip the circuit breaker to restore power to the air conditioner. Ensure that the unit is receiving power and the control panel is functioning.
- Set the thermostat: Adjust the thermostat settings to the desired temperature and cooling mode. Listen for the air conditioner to start and check that cool air is being produced. Take note of any unusual sounds or issues during the startup process.
- Monitor the air conditioner operation: Let the air conditioner run for a while to ensure it is cooling effectively. Pay attention to any abnormal noises, vibrations, or fluctuations in cooling performance.
- Check for any air leaks: Inspect the area around the condenser unit and the air ducts for any air leaks or gaps that could impact the cooling efficiency. Seal any gaps or cracks to optimize the air conditioner’s performance.
- Schedule regular maintenance: It is recommended to schedule regular maintenance for your air conditioning system to prevent future issues. A professional HVAC technician can inspect and service the system to keep it running smoothly.
By following these steps, you can complete the process of closing and testing your air conditioner after replacing the capacitor. It is important to ensure that the system is operating correctly and efficiently to maintain a comfortable indoor environment.
Remember, if you encounter any difficulties or are not comfortable performing these steps on your own, it is always advisable to seek the assistance of a professional HVAC technician to ensure the proper functioning and safety of your air conditioning system.
With the completion of these steps, you have successfully checked, tested, and replaced a faulty air conditioner capacitor. By diagnosing and addressing capacitor issues promptly, you can enjoy a cool and comfortable home environment during hot summer months. Regular maintenance and attention to your air conditioning system will help extend its lifespan and ensure optimal performance in the long run.
Thank you for following this comprehensive guide. We hope it has been informative and helpful to you. Stay cool!
Conclusion
Taking the time to check and test your air conditioner capacitor is an essential maintenance task that can save you from costly repairs or replacements down the line. By understanding the signs of a faulty capacitor, gathering the necessary tools and equipment, and following the step-by-step process outlined in this guide, you can effectively diagnose and address capacitor issues in your air conditioning system.
Throughout this guide, we discussed the importance of understanding the air conditioner capacitor and its role in the system. We explored the common signs of a faulty capacitor, enabling you to identify potential problems. We also provided a comprehensive list of tools and equipment needed for the testing process, emphasizing the importance of safety precautions.
We then walked you through each step of the testing process, including turning off the power, removing the capacitor cover, discharging the capacitor, and testing it using a multimeter or a dedicated capacitor tester. By following these steps, you can accurately determine if your capacitor is functioning properly or if it needs to be replaced.
Speaking of replacement, we covered the process of replacing a faulty capacitor, ensuring that you have the knowledge and confidence to safely replace the component. Additionally, we discussed the importance of properly closing and testing your air conditioner, as well as scheduling regular maintenance to prevent future issues.
Remember, safety should always be your top priority when working with electrical components. If you are unsure or uncomfortable with any of the steps outlined in this guide, seek the assistance of a professional HVAC technician to ensure the proper functioning and safety of your air conditioning system.
By following this comprehensive guide, you can maintain the efficiency and longevity of your air conditioner, keeping your home cool and comfortable during the warm summer months. Regular maintenance and attention to your air conditioning system will help provide you with reliable cooling for years to come.
Thank you for taking the time to read this article. We hope it has been a valuable resource for you. Stay cool and enjoy the comfort of your air-conditioned home!
While mastering DIY capacitor checks can prevent many air conditioner issues, some situations call for professional attention. If you suspect deeper problems or feel unsure after testing the capacitor, reaching out for expert help is wise. Knowing who to summon for specialized air conditioner repair ensures your unit receives prompt, accurate care, restoring comfort to your space swiftly.
Frequently Asked Questions about How To Check Air Conditioner Capacitor
Was this page helpful?
At Storables.com, we guarantee accurate and reliable information. Our content, validated by Expert Board Contributors, is crafted following stringent Editorial Policies. We're committed to providing you with well-researched, expert-backed insights for all your informational needs.