Articles
How To Test A Fan Capacitor
Modified: October 28, 2024
Learn how to test a fan capacitor through this informative article. Discover the steps and tools required for accurate testing.
(Many of the links in this article redirect to a specific reviewed product. Your purchase of these products through affiliate links helps to generate commission for Storables.com, at no extra cost. Learn more)
Introduction
When it comes to keeping your home cool and comfortable, a fan plays an essential role. Whether it’s a ceiling fan, a standing fan, or even a small desk fan, these devices help circulate air and create a refreshing breeze. But have you ever wondered how a fan operates? Well, one crucial component that ensures a fan runs smoothly is a fan capacitor.
A fan capacitor is a small electrical component that stores and releases energy to help the fan motor start and keep running. It acts as a temporary power source, providing the necessary electrical boost during start-up. Without a functioning fan capacitor, your fan may struggle to start, run at a slower speed, or not work at all.
In this article, we will explore the importance of fan capacitors and guide you on how to test them. By learning how to test a fan capacitor, you can diagnose and troubleshoot any issues your fan might be experiencing. So, let’s dive in and learn more about fan capacitors and how to test them effectively.
Key Takeaways:
- Fan capacitors are essential for smooth fan operation, and signs of a faulty capacitor include failure to start, slow speed, erratic operation, unusual noises, and overheating. Testing with a multimeter or capacitance meter is crucial for diagnosing issues.
- When testing a fan capacitor, prioritize safety by disconnecting power, waiting for capacitor discharge, and wearing protective gear. Troubleshooting common issues such as inaccurate readings, faulty wiring, and motor problems ensures effective diagnosis and resolution.
Read more: How To Test HVAC Capacitor
Understanding Fan Capacitors
Before we delve into testing a fan capacitor, it’s important to have a clear understanding of what it is and how it works. A fan capacitor is an integral part of the motor system in many fans. It is responsible for providing the necessary electrical boost to start the fan and keep it running smoothly.
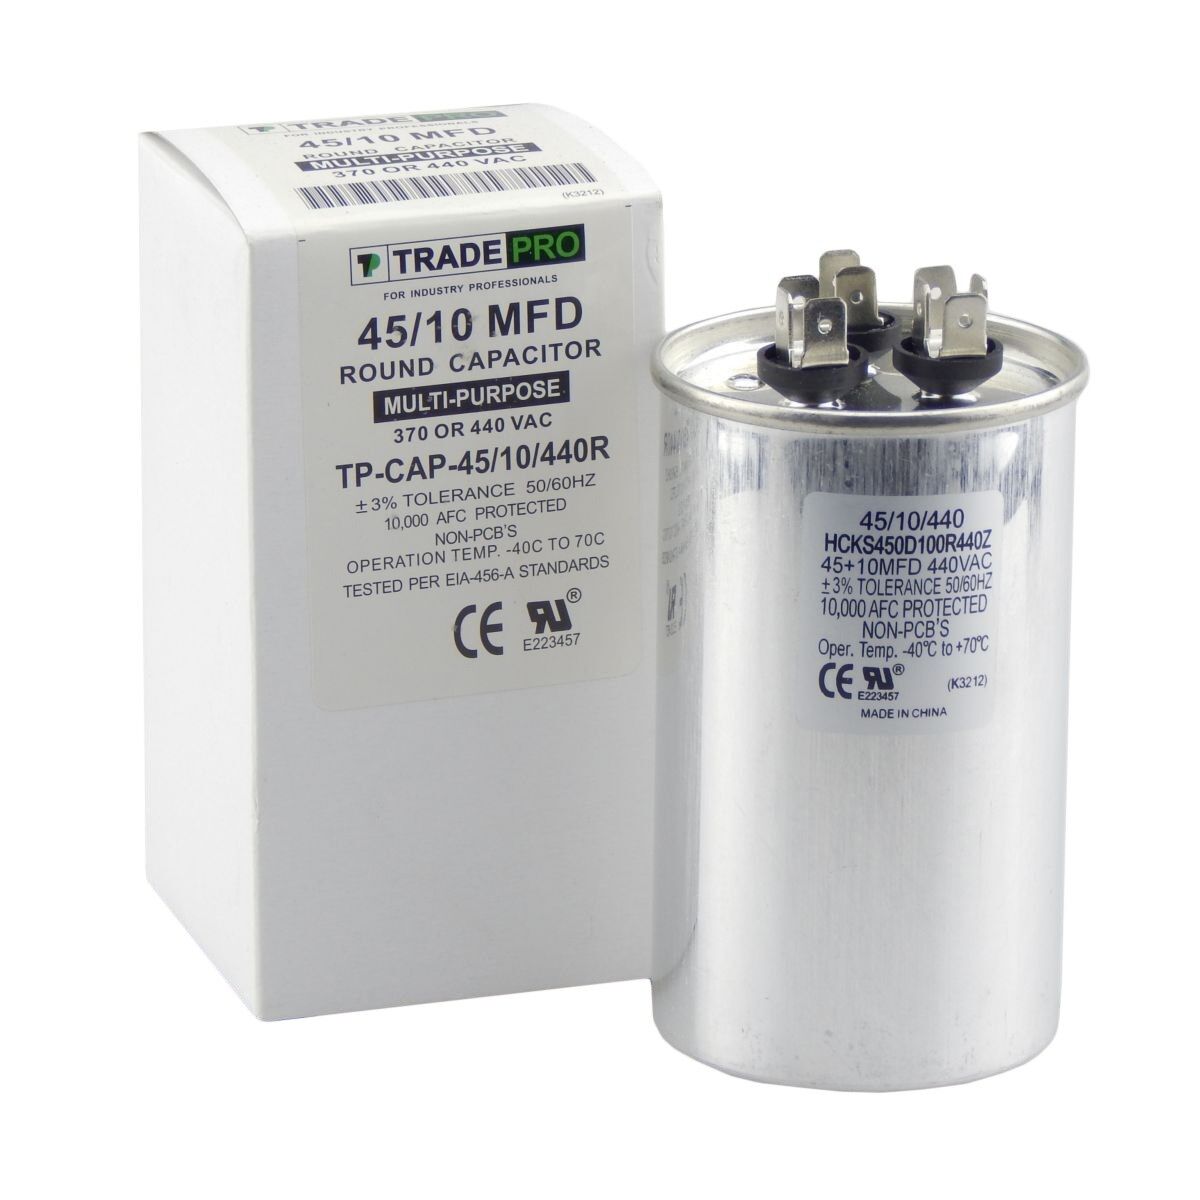
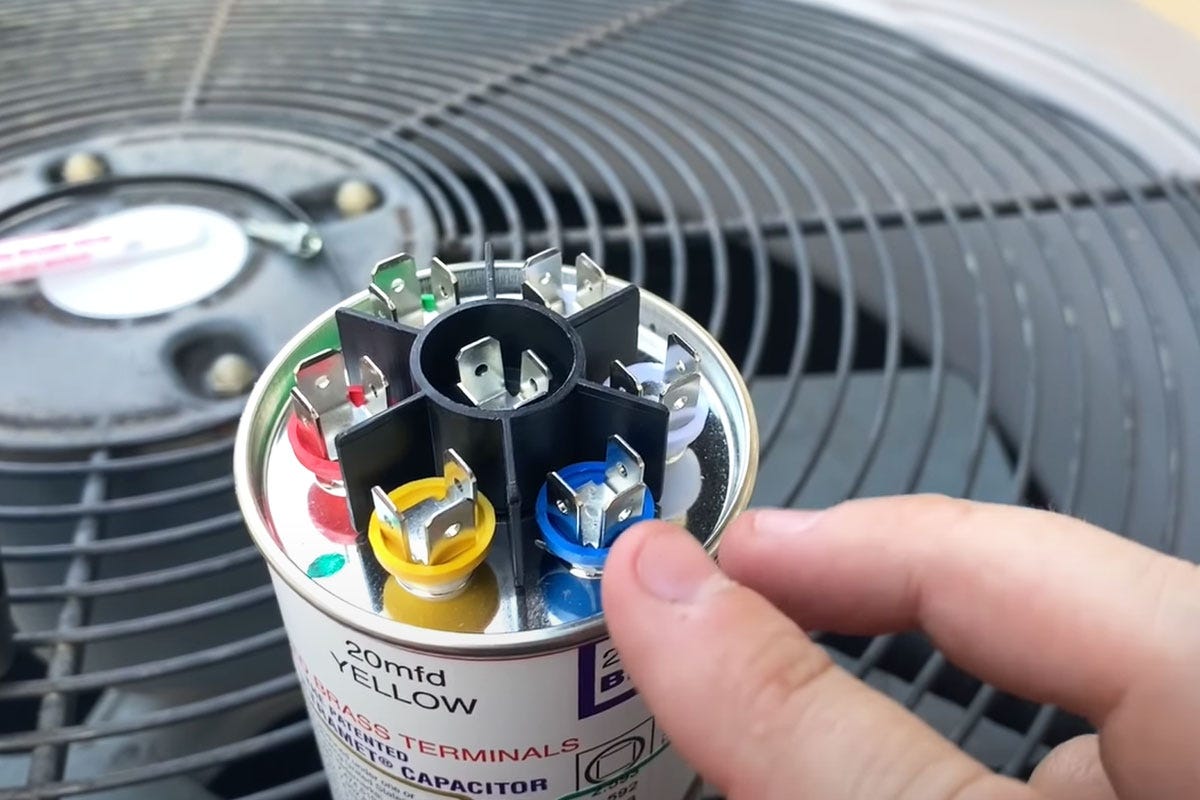
Fan capacitors are typically small, cylindrical devices that store electrical energy. They consist of two conductive plates separated by an insulating material known as the dielectric. The capacitance value of a fan capacitor determines its ability to store and release electrical energy.
There are two main types of fan capacitors – the start capacitor and the run capacitor. The start capacitor is temporarily connected to the motor during start-up to provide the extra voltage needed to initiate rotation. Once the fan reaches its operating speed, the run capacitor takes over and maintains a steady flow of energy to sustain motor operation.
The capacitance value of a fan capacitor is measured in microfarads (μF). Common values for fan capacitors range from 1 μF to 15 μF, although it can vary depending on the specific fan model and motor requirements. It’s crucial to have a capacitor with the correct capacitance rating to ensure optimal fan performance.
Now that we have a basic understanding of fan capacitors, let’s move on to exploring the signs that indicate a faulty capacitor.
Signs of a Faulty Fan Capacitor
A faulty fan capacitor can lead to various issues with your fan’s performance. Here are some common signs that indicate a faulty fan capacitor:
- Failure to Start: If you turn on your fan and it fails to start or struggles to get going, it could be due to a faulty capacitor. The capacitor provides the initial electrical boost needed for the motor to start spinning. If it’s not functioning correctly, the fan may exhibit difficulty starting up.
- Slow Speed: Another sign of a faulty fan capacitor is when your fan runs at a slower speed than usual. The capacitor plays a crucial role in regulating the motor’s speed. If it’s defective, the fan may operate at a reduced speed, resulting in inadequate airflow.
- Inconsistent Operation: A faulty capacitor can cause erratic operation in your fan. It may randomly stop and start, or the speed may fluctuate unexpectedly. If you notice irregular patterns in your fan’s operation, it’s worth checking the capacitor.
- Unusual Noises: Faulty capacitors can also produce strange noises when in operation. You may hear buzzing, humming, or clicking sounds coming from the fan. These noises indicate that the capacitor is not functioning properly, and it may need to be tested and replaced.
- Overheating: When a fan capacitor is faulty, it may heat up more than usual during operation. Overheating can cause further damage to the capacitor and other components of the fan system. If you notice excessive heat coming from your fan, it’s essential to investigate and address the issue promptly.
If you observe any of these signs in your fan’s performance, it’s highly likely that the fan capacitor is faulty. Testing the capacitor will help confirm the issue and determine if it needs to be repaired or replaced. Let’s now move on to discussing the tools and equipment you’ll need for testing a fan capacitor.
Tools and Equipment Needed
Testing a fan capacitor requires a few specific tools and equipment to ensure accurate results. Here are the essential items you’ll need:
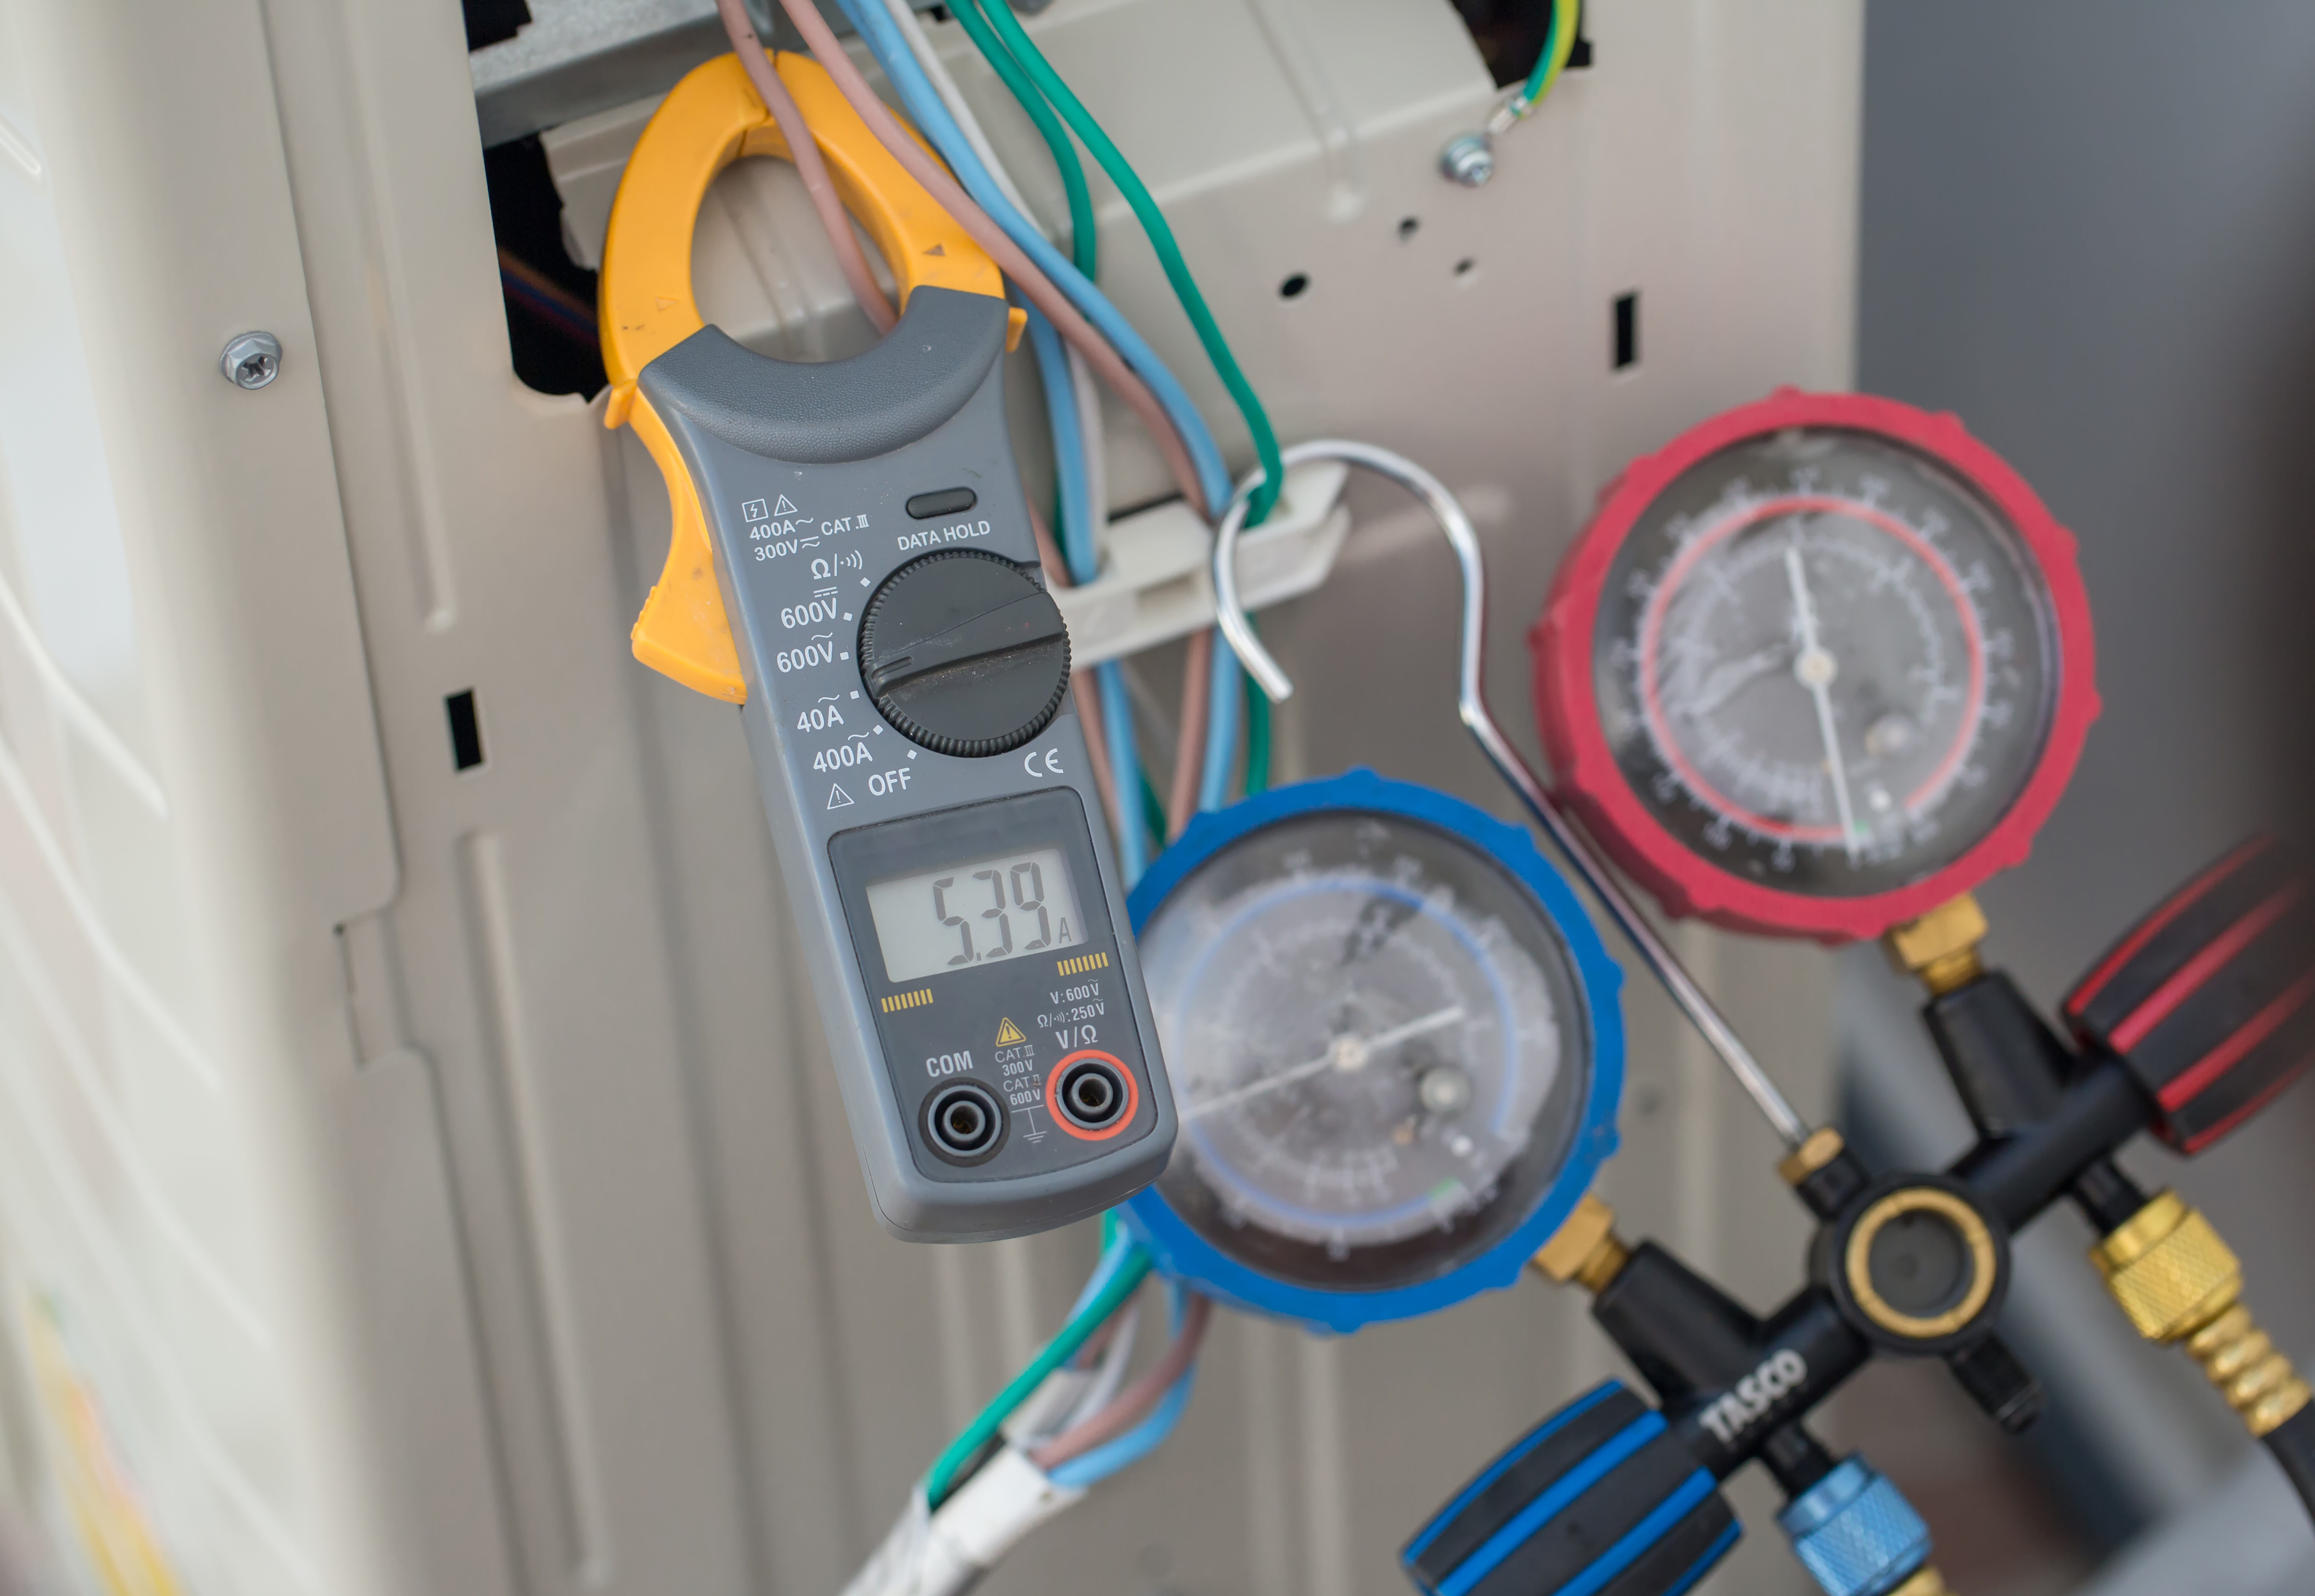
- Multimeter: A multimeter is a versatile tool used for measuring various electrical parameters. It can measure voltage, resistance, and capacitance, which makes it ideal for testing a fan capacitor. Make sure your multimeter has a capacitance measurement function.
- Capacitance Meter: If you don’t have a multimeter with a capacitance measurement function, you can opt for a dedicated capacitance meter. This device is specifically designed to measure capacitance and provides accurate readings for fan capacitors.
- Safety Gloves and Goggles: Safety should always be a priority when working with electrical components. Wear protective gloves and goggles to prevent any potential injuries or accidents.
- Screwdriver Set: Depending on your specific fan model, you may need a screwdriver to access the fan’s capacitor compartment. A set of screwdrivers with various sizes and types will ensure you have the right tool for the job.
- Replacement Capacitor (Optional): If you determine that your fan capacitor is faulty, you may need a replacement capacitor. Make sure to identify the correct capacitance rating and type of capacitor required for your fan.
Having these tools and equipment readily available will make the process of testing a fan capacitor much more convenient and efficient. Additionally, ensure that you’re working in a well-lit area with proper ventilation to ensure a safe testing environment.
Now that you’re aware of the necessary tools and equipment, let’s move on to the safety precautions you should take before testing a fan capacitor.
Safety Precautions
Working with electrical components can be potentially hazardous if proper safety precautions are not followed. Before testing a fan capacitor, it’s important to take the following safety precautions:
- Disconnect Power: Before attempting any work on your fan, ensure that the power is completely turned off. This can be done by unplugging the fan from the power source or switching off the relevant circuit breaker. The last thing you want is to accidentally come into contact with live electrical wires.
- Wait for Capacitor Discharge: Capacitors store electrical energy, even when the power is turned off. To avoid any electric shocks, it’s crucial to wait a sufficient amount of time for the capacitor to discharge. This ensures that there is no residual charge present when you begin testing.
- Protective Gear: Always wear safety gloves and goggles when working with electrical components. The gloves will protect your hands from any potential shocks or burns, while the goggles will shield your eyes from any debris or particles that may be released during the testing process.
- Inspect for Damage: Before testing the fan capacitor, inspect it visually for any signs of physical damage, such as bulging or leaking. If you notice any damage, do not proceed with the testing and consult a professional for assistance.
- Follow Manufacturer’s Instructions: Different fan models may have specific instructions for accessing the capacitor compartment. Make sure to consult the manufacturer’s manual or guidelines to ensure you’re following the correct procedures for your particular fan.
By following these safety precautions, you can minimize the risk of accidents or injuries while testing a fan capacitor. Your safety should always be a top priority when working with electricity.
Now that you’re aware of the safety precautions, let’s move on to the step-by-step guide on how to test a fan capacitor using different methods.
Read more: How To Test An Air Conditioning Capacitor
Step-by-Step Guide to Testing a Fan Capacitor
Testing a fan capacitor requires careful attention to detail and following a systematic process. Below is a step-by-step guide on how to test a fan capacitor using two different methods:
Method 1: Using a Multimeter
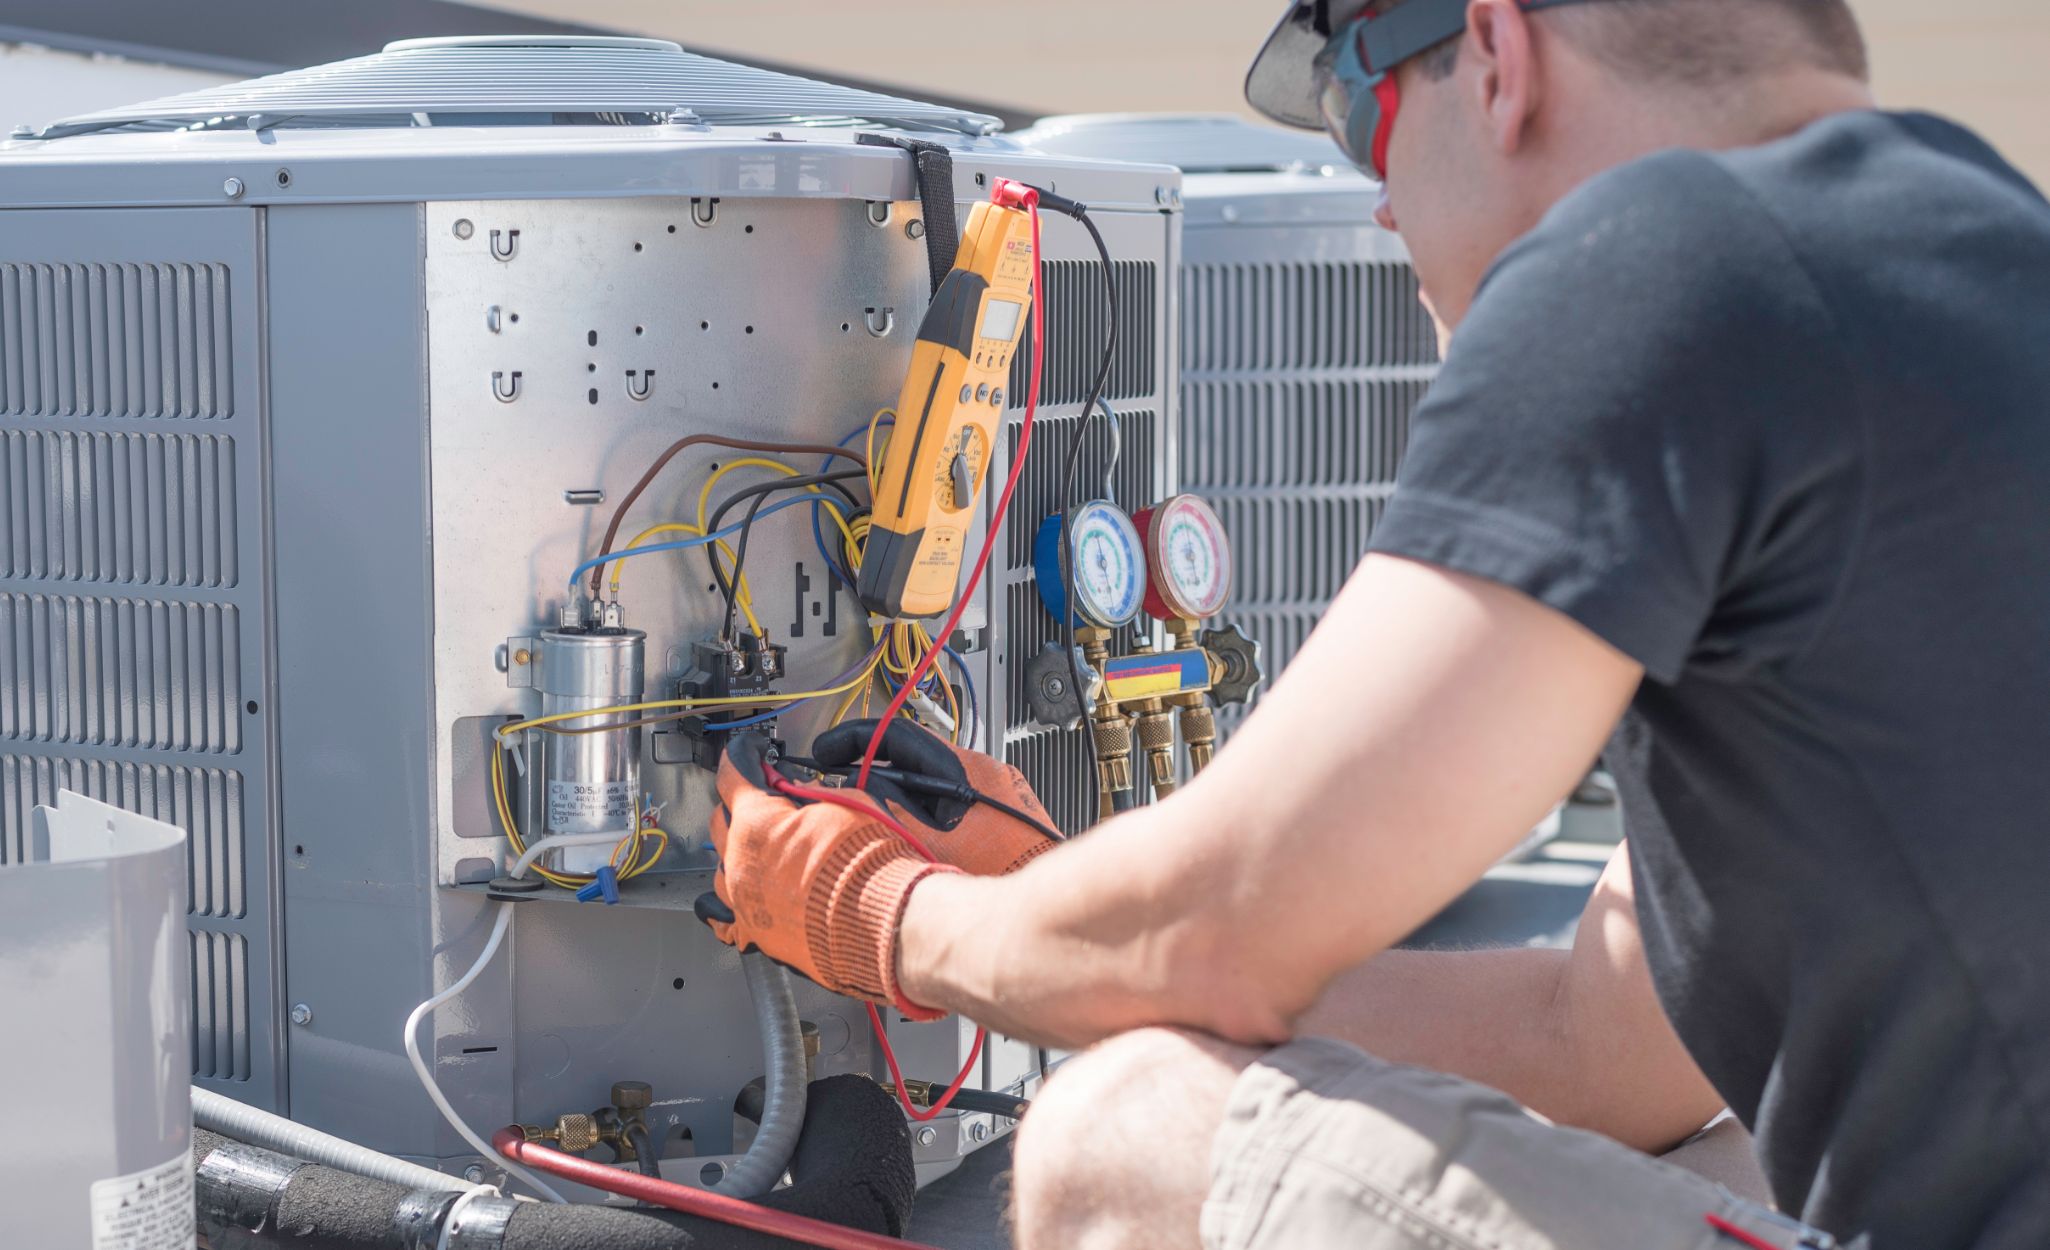
- Step 1: Ensure that the power to the fan is turned off. Unplug the fan from the power source or switch off the relevant circuit breaker.
- Step 2: Access the fan’s capacitor compartment. Depending on the fan model, you may need to unscrew the cover or remove any necessary panels to expose the capacitor.
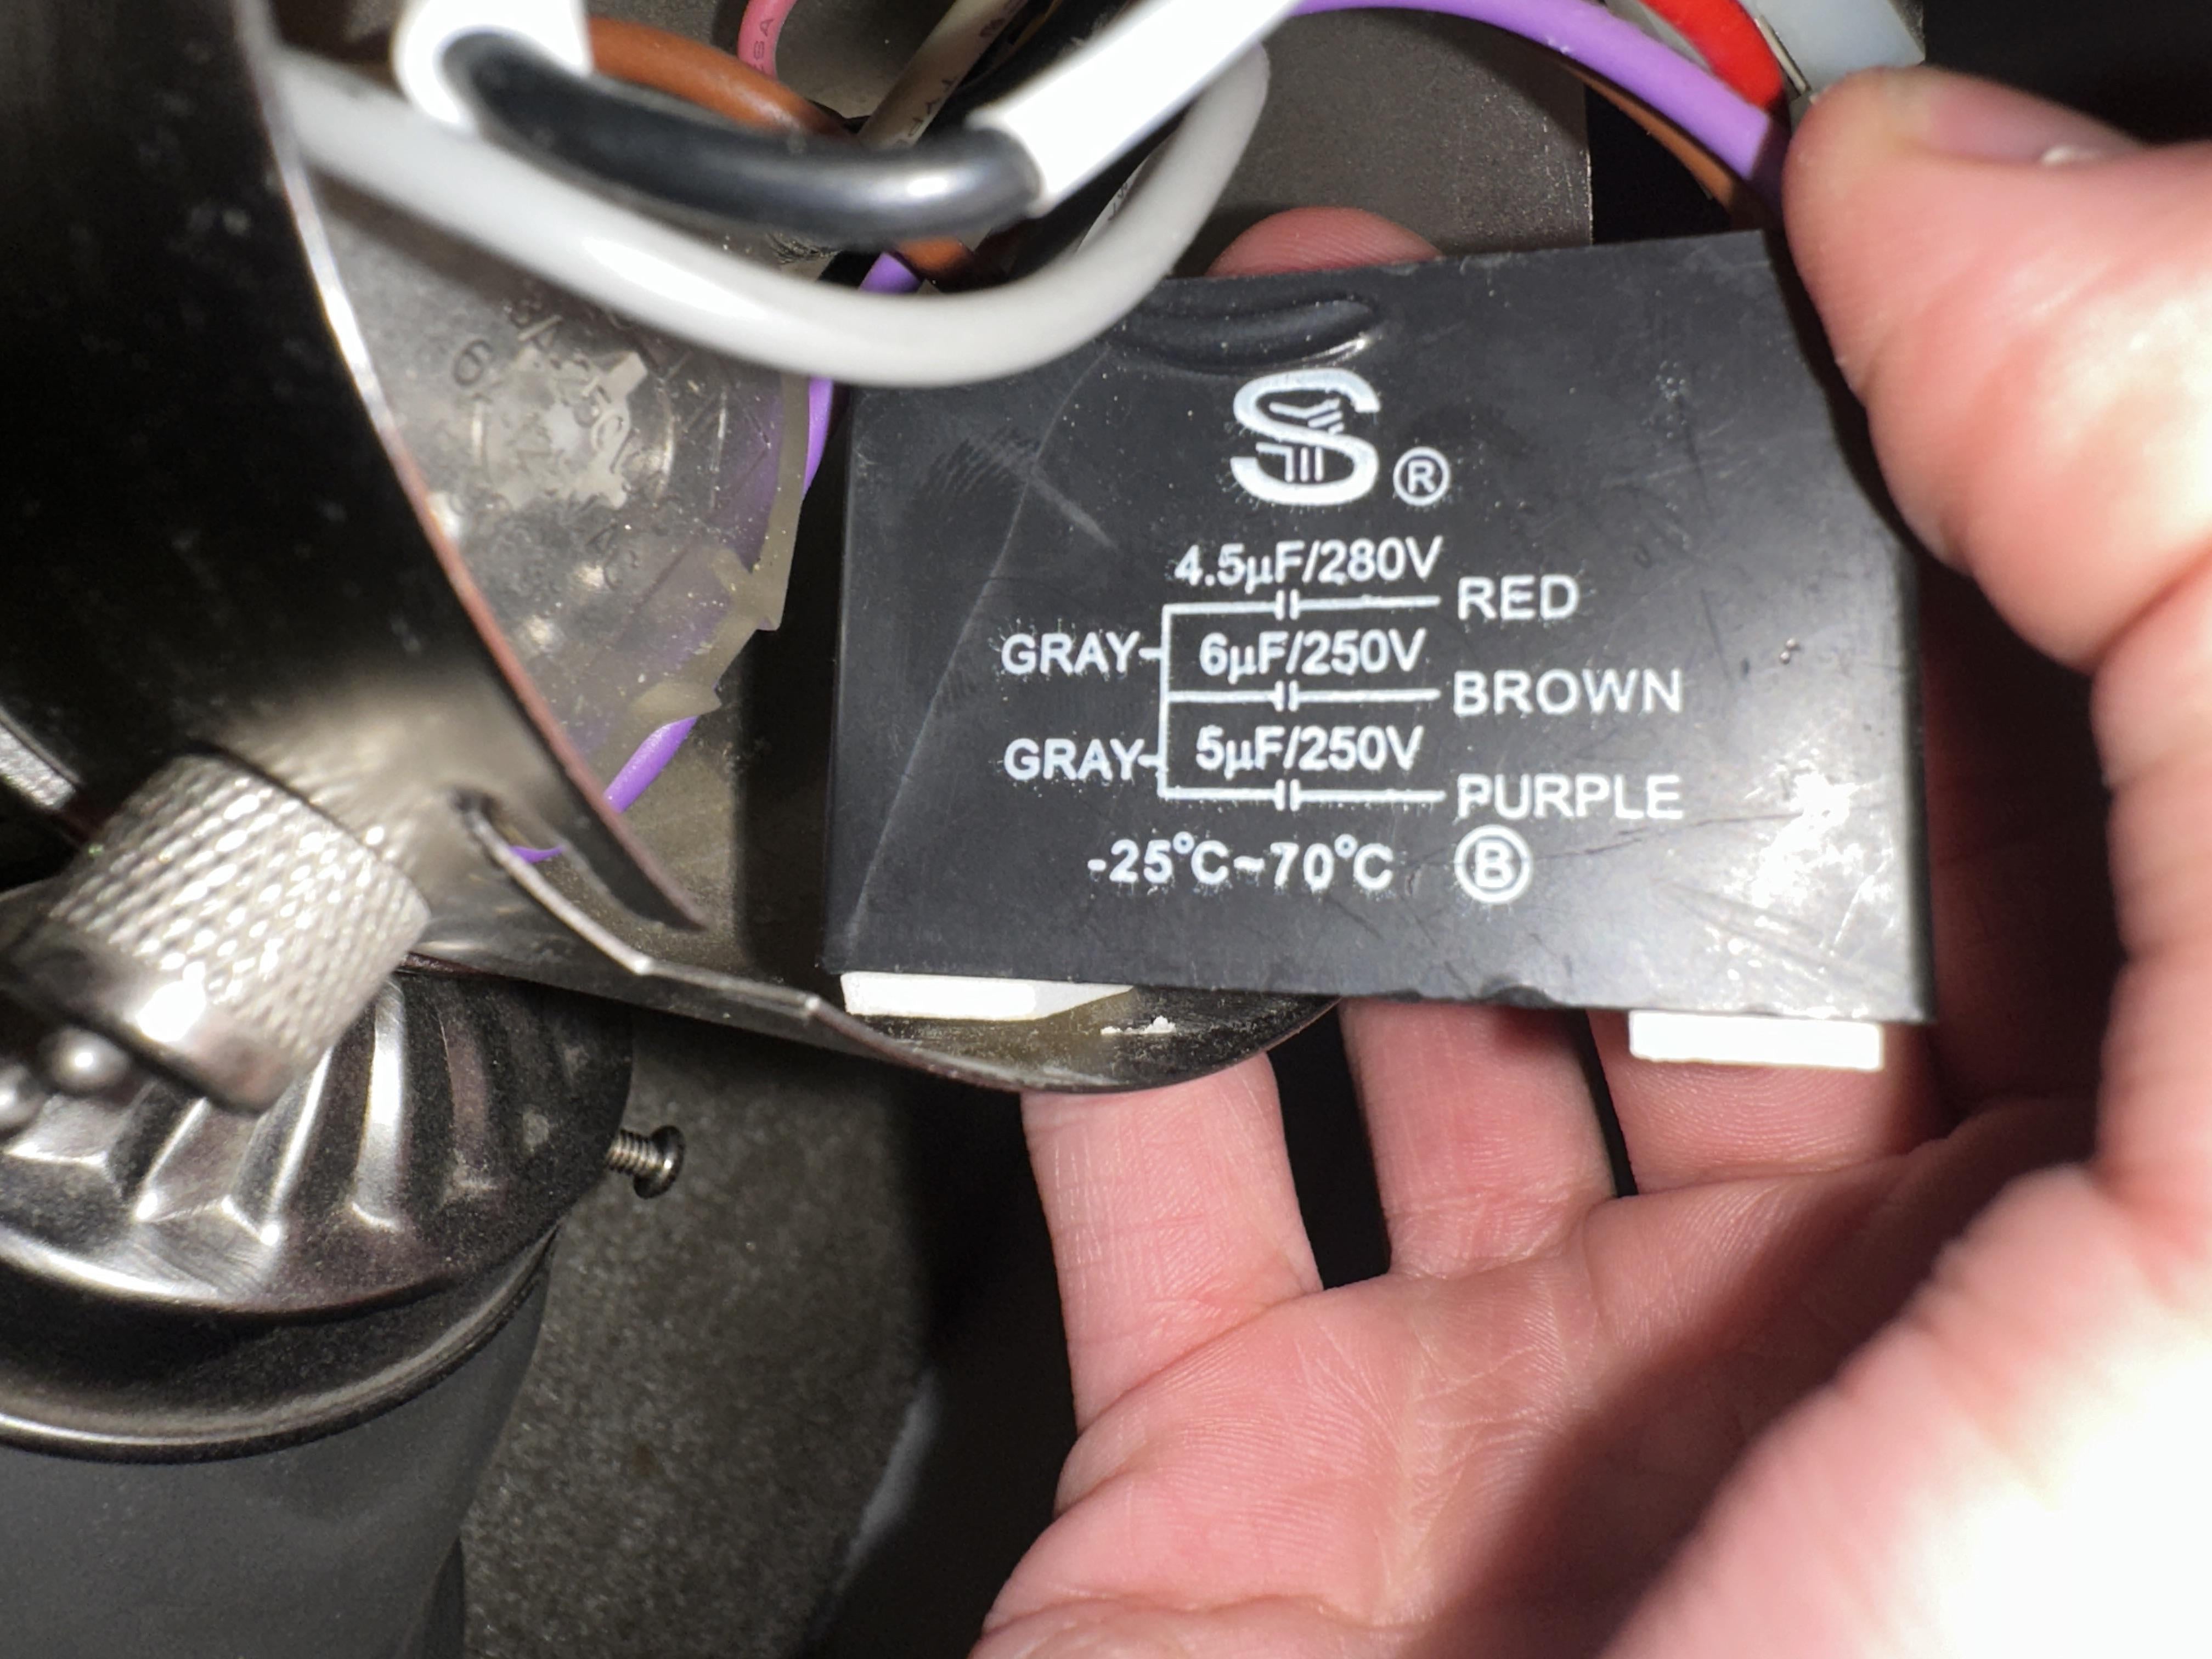
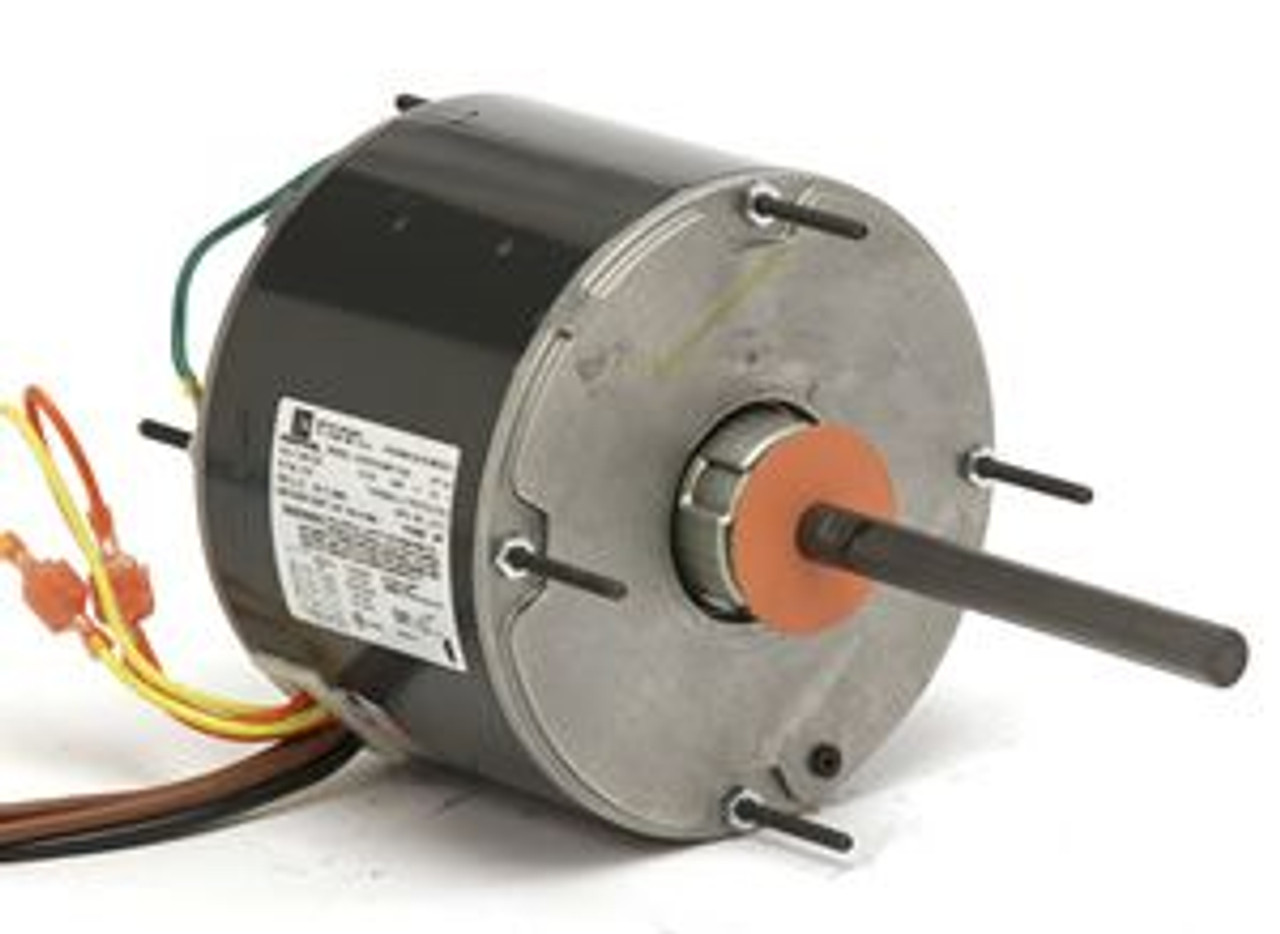
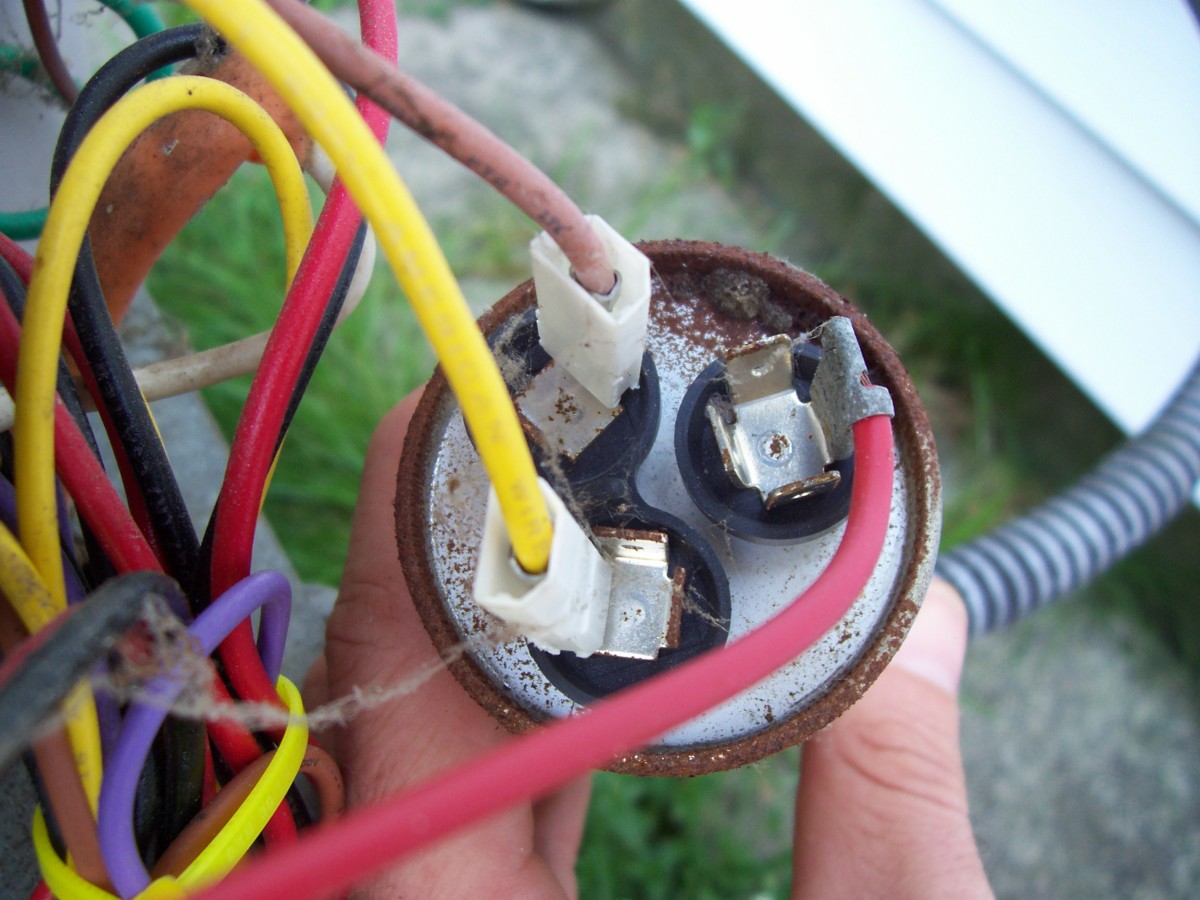
- Step 3: Identify the fan capacitor. It is a small cylindrical component typically connected to the motor with two or three wires.
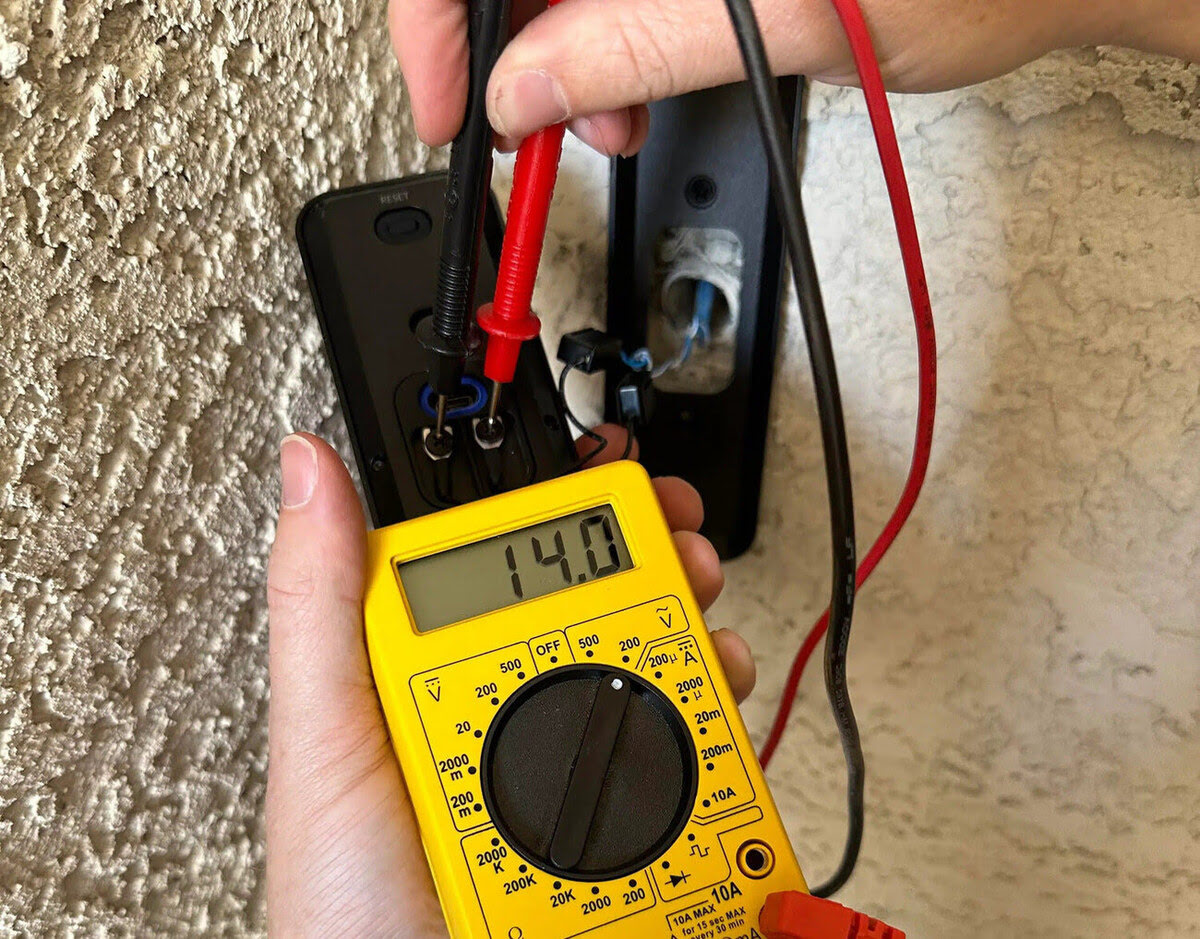
- Step 4: Set your multimeter to the capacitance measurement mode. Refer to the multimeter’s manual for specific instructions on how to select the capacitance measurement function.
- Step 5: Touch the multimeter’s leads to the capacitor terminals. Ensure that the positive lead is connected to the capacitor’s positive terminal (marked with a plus sign) and the negative lead is connected to the negative terminal (marked with a minus sign).
- Step 6: Read the capacitance value displayed on the multimeter. Compare it to the expected capacitance rating specified by the manufacturer. If the reading is significantly different or close to zero, it indicates a faulty capacitor.
Method 2: Using a Capacitance Meter
- Step 1: Follow the same steps 1-3 mentioned above to ensure the power is off and access the capacitor compartment.
- Step 2: Disconnect the wires connected to the capacitor by gently pulling them off the terminals. Take note of their respective positions for reassembly.
- Step 3: Set your capacitance meter to the capacitance measurement mode. Refer to the meter’s manual for specific instructions on how to select the capacitance measurement function.
- Step 4: Connect the capacitance meter’s leads to the corresponding terminals of the capacitor. The positive lead goes to the positive terminal, and the negative lead goes to the negative terminal.
- Step 5: Read the capacitance value displayed on the capacitance meter. Again, compare it to the expected capacitance rating specified by the manufacturer. Any significant deviation or a reading close to zero indicates a faulty capacitor.
By following these step-by-step guides, you can accurately test your fan capacitor and determine if it requires replacement or repair. If the capacitor is faulty, it’s advisable to consult a professional or contact the fan manufacturer for further assistance.
Now that you know how to test a fan capacitor, let’s move on to troubleshooting common issues that may arise during the testing process.
When testing a fan capacitor, use a multimeter to check for continuity and resistance. If the readings are outside the specified range, the capacitor may need to be replaced.
Method 1: Using a Multimeter
Testing a fan capacitor using a multimeter is a reliable method that allows you to measure the capacitance value. Here is a step-by-step guide on how to test a fan capacitor using a multimeter:
- Step 1: Ensure that the power to the fan is turned off. Unplug the fan from the power source or switch off the relevant circuit breaker to prevent the risk of electrical shock.
- Step 2: Access the fan’s capacitor compartment. This typically involves removing the fan cover or any panels necessary to expose the capacitor.
- Step 3: Locate the fan capacitor, which is a small cylindrical component connected to the motor with two or three wires.
- Step 4: Set your multimeter to the capacitance measurement mode. Consult the multimeter’s manual for specific instructions on how to select the capacitance measurement function.
- Step 5: Identify the positive and negative terminals of the capacitor. The positive terminal is usually marked with a plus sign (+), while the negative terminal may be marked with a minus sign (-) or have no marking at all.
- Step 6: Touch the multimeter’s leads to the corresponding capacitor terminals. Ensure that the positive lead is connected to the positive terminal and the negative lead is connected to the negative terminal.
- Step 7: Read the capacitance value displayed on the multimeter. This reading represents the capacitance value of the fan capacitor. Refer to the manufacturer’s specifications or consult a professional to determine the expected capacitance range for your specific fan model.
- Step 8: Compare the measured capacitance value with the expected range. If the reading is significantly different or close to zero, it indicates a faulty capacitor that needs to be replaced.
By following these steps, you can effectively test a fan capacitor using a multimeter. Remember to exercise caution and ensure that the power is disconnected before proceeding with the testing process.
If the fan capacitor is found to be faulty, you can consider replacing it with a new one. Consult the manufacturer’s instructions or seek professional assistance for proper installation and compatibility.
Now that you are familiar with one testing method, let’s explore another method using a capacitance meter.
Method 2: Using a Capacitance Meter
Another effective method for testing a fan capacitor is by using a capacitance meter. This dedicated device is designed specifically for measuring capacitance values accurately. Here is a step-by-step guide on how to test a fan capacitor using a capacitance meter:
- Step 1: Begin by ensuring that the power to the fan is turned off. Unplug the fan from the power source or switch off the relevant circuit breaker to ensure a safe testing environment.
- Step 2: Access the fan’s capacitor compartment by removing the necessary panels or coverings that may be obstructing it.
- Step 3: Disconnect the wires connected to the capacitor by gently pulling them off the terminals. Take note of their respective positions or label them for reassembly.
- Step 4: Set your capacitance meter to the capacitance measurement mode. Consult the meter’s manual for specific instructions on how to select the capacitance measurement function.
- Step 5: Connect the capacitance meter’s leads to the corresponding terminals of the capacitor. Ensure that the positive lead is connected to the positive terminal and the negative lead is connected to the negative terminal.
- Step 6: Read the capacitance value displayed on the capacitance meter. This reading represents the capacitance value of the fan capacitor. Compare it to the expected range specified by the manufacturer or consult a professional for guidance.
- Step 7: If the measured capacitance value significantly deviates from the expected range or is close to zero, it indicates a faulty capacitor that needs to be replaced.
Using a capacitance meter provides an accurate measurement and removes the need for calculating values manually. Ensure that you follow the steps carefully and prioritize safety by disconnecting the power before performing the test.
If the fan capacitor is found to be faulty, consider sourcing a replacement capacitor that matches the required capacitance rating and consult the manufacturer’s instructions or seek professional help for proper installation.
Now that you have learned two different methods for testing a fan capacitor, let’s move on to troubleshooting common issues that may arise during the testing process.
Troubleshooting Common Issues
While testing a fan capacitor can help identify and diagnose potential problems, it’s essential to be aware of common issues that may arise during the testing process. Here are some troubleshooting tips for common issues:
- Inaccurate Readings: If you’re getting inconsistent or inaccurate readings while testing the fan capacitor, double-check your connections. Ensure that the leads are securely connected to the capacitor terminals and that there is no loose wiring or poor contact. Also, verify that your multimeter or capacitance meter is functioning correctly.
- Faulty Wiring: Sometimes, the issue may not lie with the capacitor itself but with faulty or damaged wiring connections. Inspect the wiring leading to and from the capacitor for any signs of damage, such as frayed or exposed wires. Repair or replace any damaged wires as necessary.
- Undersized Capacitor: If you’ve replaced a faulty capacitor but are still experiencing issues with your fan’s performance, it’s possible that the replacement capacitor has an incorrect capacitance rating. Ensure that you are using the correct size and type of capacitor specified by the fan manufacturer.
- Motor Problems: In some cases, a faulty fan capacitor may not be the sole cause of the problem. If you’ve tested the capacitor and it appears to be in good working condition, there may be underlying motor issues. Consult a professional technician or contact the fan manufacturer for further assistance.
- Multiple Capacitors: Some fans, particularly those with complex motor systems, may have multiple capacitors. If you are experiencing issues with your fan’s performance, it’s important to identify all the capacitors in the system and test each one individually. A faulty capacitor among multiple ones can still cause problems.
If you have followed the testing methods accurately and addressed any troubleshooting issues but are still unable to resolve the problem, it’s recommended to consult a professional technician. They have the expertise to diagnose and fix complex fan issues and ensure your fan operates efficiently and safely.
Now that you have a better understanding of troubleshooting common issues, let’s wrap up the article.
Conclusion
Testing a fan capacitor is a crucial step in diagnosing and troubleshooting issues with your fan’s performance. By understanding fan capacitors and having the knowledge and tools to test them, you can easily identify a faulty capacitor and take appropriate measures to address the problem.
We explored two methods for testing a fan capacitor – using a multimeter and a capacitance meter. Both methods provide accurate measurements of capacitance values, helping you determine the condition of the capacitor. Remember to follow safety precautions while testing to ensure your well-being.
Additionally, we discussed common signs of a faulty fan capacitor, such as failure to start, slow speed, inconsistent operation, unusual noises, and overheating. By recognizing these signs, you can promptly address any capacitor-related issues.
If you encounter any troubleshooting issues during the testing process, such as inaccurate readings or faulty wiring, make sure to double-check your connections and inspect the wiring for damage. Also, be aware that there may be underlying motor problems or multiple capacitors in some fan systems, requiring further attention and professional assistance if necessary.
In conclusion, testing a fan capacitor is a simple yet effective way to ensure the optimal functioning of your fan. By being equipped with the knowledge and tools to test and troubleshoot, you can maintain a cool and comfortable environment in your home. Should you encounter any difficulties or feel uncertain about the testing process, it is always recommended to consult a professional technician for assistance.
Now, armed with this information, you can confidently test your fan capacitor and take the necessary steps to keep your fan running smoothly.
Now that you've mastered testing fan capacitors, why not broaden your skills further by learning to check motor capacitors? Each type of capacitor demands specific techniques for accurate assessment. So, if you're eager to keep all your electric motors running smoothly, don't miss our detailed guide on motor capacitors.
Frequently Asked Questions about How To Test A Fan Capacitor
Was this page helpful?
At Storables.com, we guarantee accurate and reliable information. Our content, validated by Expert Board Contributors, is crafted following stringent Editorial Policies. We're committed to providing you with well-researched, expert-backed insights for all your informational needs.


0 thoughts on “How To Test A Fan Capacitor”