Articles
How To Scrape Popcorn Ceiling
Modified: October 19, 2024
Learn how to safely remove popcorn ceiling using our step-by-step articles. Our detailed guides will help you get rid of this outdated texture quickly and easily.
(Many of the links in this article redirect to a specific reviewed product. Your purchase of these products through affiliate links helps to generate commission for Storables.com, at no extra cost. Learn more)
Introduction
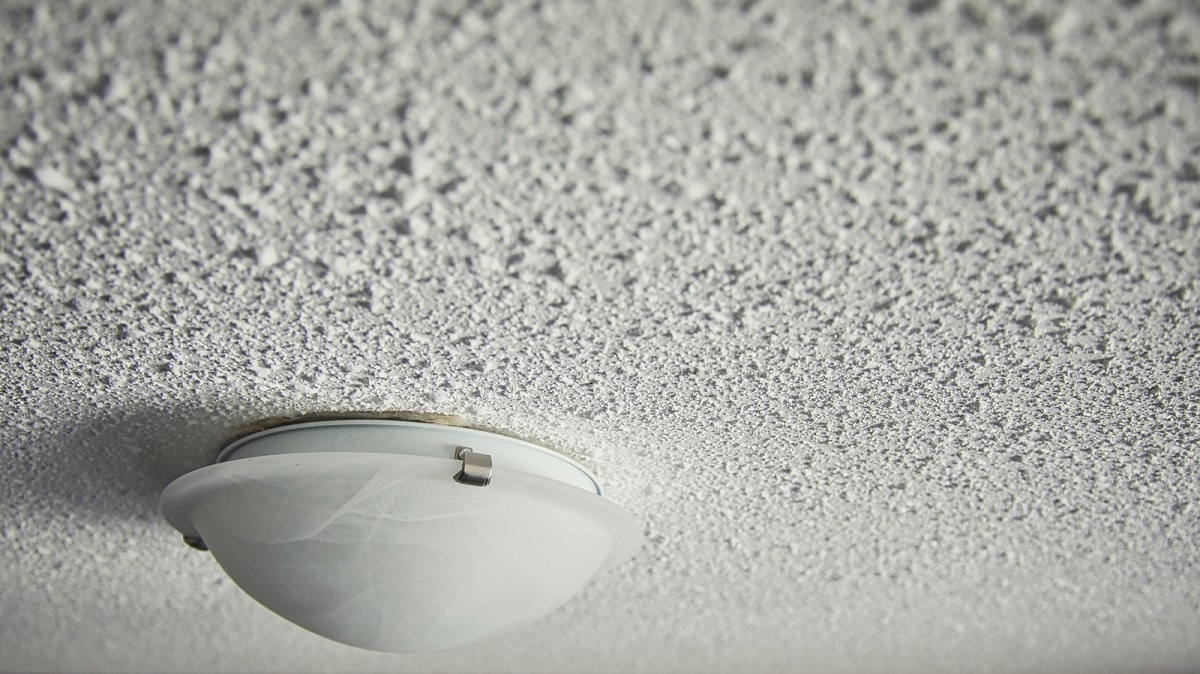
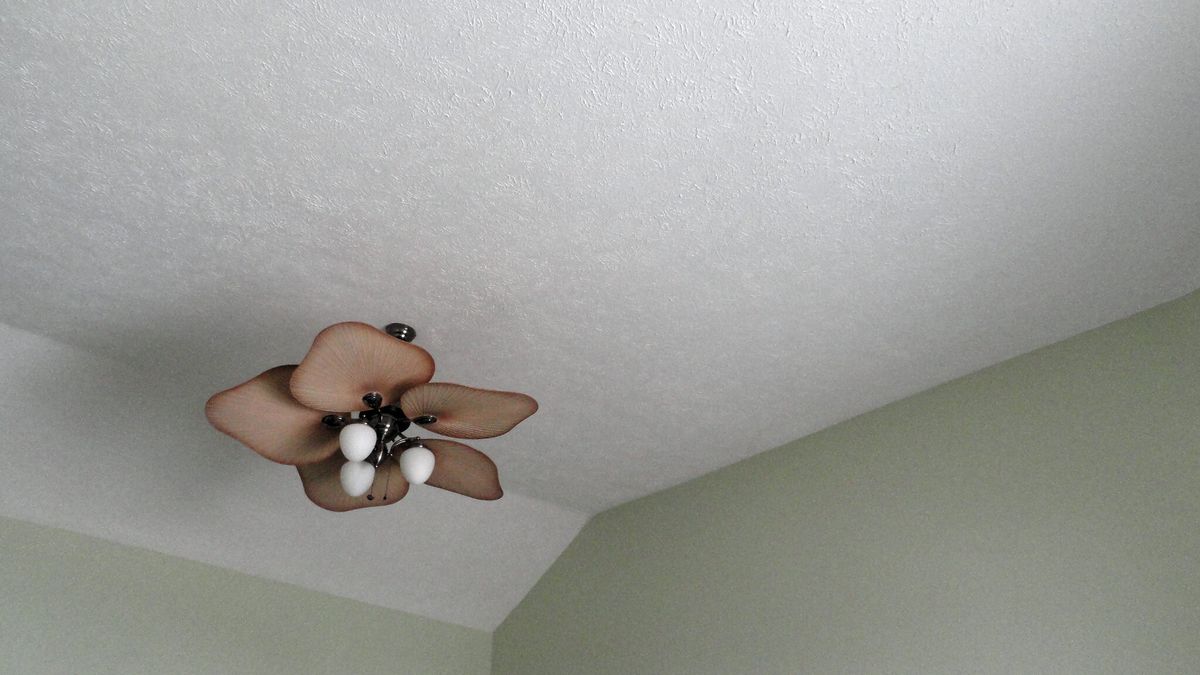
Popcorn ceilings, also known as textured or acoustic ceilings, were popular in the mid-20th century due to their ability to hide imperfections and provide some soundproofing. However, they have fallen out of favor in recent years due to their dated appearance and potential health risks. If you are tired of the popcorn texture and ready to give your ceilings a fresh, modern look, then it’s time to learn how to scrape popcorn ceilings.
Scraping popcorn ceilings is a process that involves removing the textured layer to reveal a smooth surface underneath. This can be a challenging and messy task, but with the right tools, techniques, and a little patience, you can achieve great results. In this article, we will guide you through the step-by-step process of scraping popcorn ceilings and transforming your space.
Before getting started, it’s important to note that if your home was built before the late 1970s, there is a possibility that the popcorn ceiling contains asbestos. Asbestos is a hazardous material that can cause serious health issues if inhaled. If you suspect that your ceiling contains asbestos, it is essential to consult with a professional asbestos abatement company before attempting any removal.
Assuming that your popcorn ceiling does not contain asbestos, let’s delve into the tools and materials you’ll need to gather before starting the scraping process. Having the right equipment will make the job easier and ensure a successful outcome.
Key Takeaways:
- Transform your space by scraping popcorn ceilings to achieve a fresh, modern look. Prioritize safety, gather the right tools, and follow the step-by-step process for a successful outcome.
- Embrace the challenging task of scraping popcorn ceilings to enhance your home’s aesthetic. From testing for asbestos to priming and painting, follow the guide for a polished and professional finish.
Read more: What To Do After Scraping A Popcorn Ceiling
Tools and Materials Needed
Before you begin scraping your popcorn ceiling, it’s important to gather the necessary tools and materials. Here’s a list of what you’ll need:
1. Safety Gear: As a precautionary measure, you should wear safety goggles, a dust mask, and disposable coveralls to protect yourself from dust and debris.
2. Drop Cloths: To protect your floors and furniture from dust and falling debris, lay down drop cloths or plastic sheets in the area where you’ll be working.
3. Ladder or Scaffold: Depending on the height of your ceiling, you may need a ladder or scaffold to reach the surface comfortably and safely.
4. Water: Fill a spray bottle with warm water. You’ll use this to dampen the ceiling before scraping, which helps loosen the texture.
5. Scraper: A wide putty knife or scraper with a long handle is essential for scraping off the popcorn texture. Choose one with a flexible blade for easier maneuverability.
6. Sanding Tools: Once the texture is removed, you’ll need sanding tools such as a sanding block or pole sander to smooth the surface.
7. Joint Compound: After scraping, you’ll likely have some uneven spots or small holes. Joint compound will be used for patching and repairing the surface.
8. Primer: To prepare the ceiling for painting, you’ll need a good quality primer specifically designed for ceilings.
9. Paint: Choose a high-quality paint in the color of your choice to give your ceiling a fresh, new look.
10. Painting Supplies: Brushes, rollers, paint trays, and painter’s tape will be needed for applying the primer and paint.
Having all the necessary tools and materials ready before you start will ensure a smoother and more efficient scraping process. Once you have everything prepared, you can move on to the next step: preparing the area.
Preparing the Area
Before you begin scraping your popcorn ceiling, it’s important to prepare the area to minimize mess and damage. Follow these steps to properly prepare the space:
1. Clear the Room: Remove any furniture, decorations, and fixtures from the room. If it’s not possible to remove large furniture, cover it with plastic sheets or drop cloths to protect it from dust and debris.
2. Cover the Floors: Lay down drop cloths or plastic sheets to cover the entire floor and ensure that any falling debris is collected. Secure the edges with painter’s tape to avoid shifting during the scraping process.
3. Protect Walls and Trim: Use painter’s tape to cover the walls, trim, and any other areas you want to keep clean and free from damage.
4. Turn Off Electrical Power: For safety reasons, turn off the electrical power to the room before starting the scraping process.
5. Seal Off Vents and Light Fixtures: Use plastic sheets and painter’s tape to cover vents and light fixtures in the room. This will prevent dust and debris from entering and damaging them.
6. Dampen the Ceiling: Before you start scraping, lightly spray the ceiling with warm water using a spray bottle. This will make the popcorn texture easier to remove.
By properly preparing the area, you’ll minimize the mess and protect your belongings during the scraping process. Next, it’s important to determine whether your popcorn ceiling contains asbestos, as this will affect how you proceed. We’ll cover that in the next section: testing for asbestos.
Testing for Asbestos
If your home was built before the late 1970s, there is a possibility that your popcorn ceiling contains asbestos. Asbestos is a hazardous material that can cause severe health issues if the fibers are inhaled. Therefore, it’s crucial to test for asbestos before attempting to scrape or disturb the ceiling texture.
Here are the steps to test for asbestos:
- Consult a Professional: It’s recommended to consult with a licensed asbestos inspector or abatement company. They have the expertise and necessary equipment to safely collect samples and perform accurate testing.
- Collect Samples: If you plan to test for asbestos yourself, it’s important to take proper precautions. Put on safety gloves, a mask, and goggles before collecting samples. Use a spray bottle to mist the textured area lightly. This helps prevent fibers from becoming airborne. Carefully scrape off a small piece of the texture using a putty knife or scraper. Place the sample in a sealed plastic bag.
- Send Samples to a Laboratory: Contact a certified asbestos testing laboratory and follow their instructions for sending your samples for analysis. Be sure to label the samples correctly and provide the necessary information.
- Wait for Results: Once the laboratory receives your samples, they will analyze them for the presence of asbestos. The testing process may take a few days or weeks, depending on the lab’s turnaround time.
- Consult Professionals for Removal: If your test results confirm the presence of asbestos, it’s essential to consult with a licensed asbestos abatement company. They will safely remove and dispose of the asbestos-containing material according to local regulations.
Testing for asbestos is crucial to ensure your safety and the safety of others in your home. If your test results come back negative for asbestos, you can proceed with the scraping process. However, if asbestos is detected, it’s important to leave the removal to professionals to minimize the risk of exposure.
In the next section, we’ll discuss the scraping techniques you can use to remove the popcorn texture effectively.
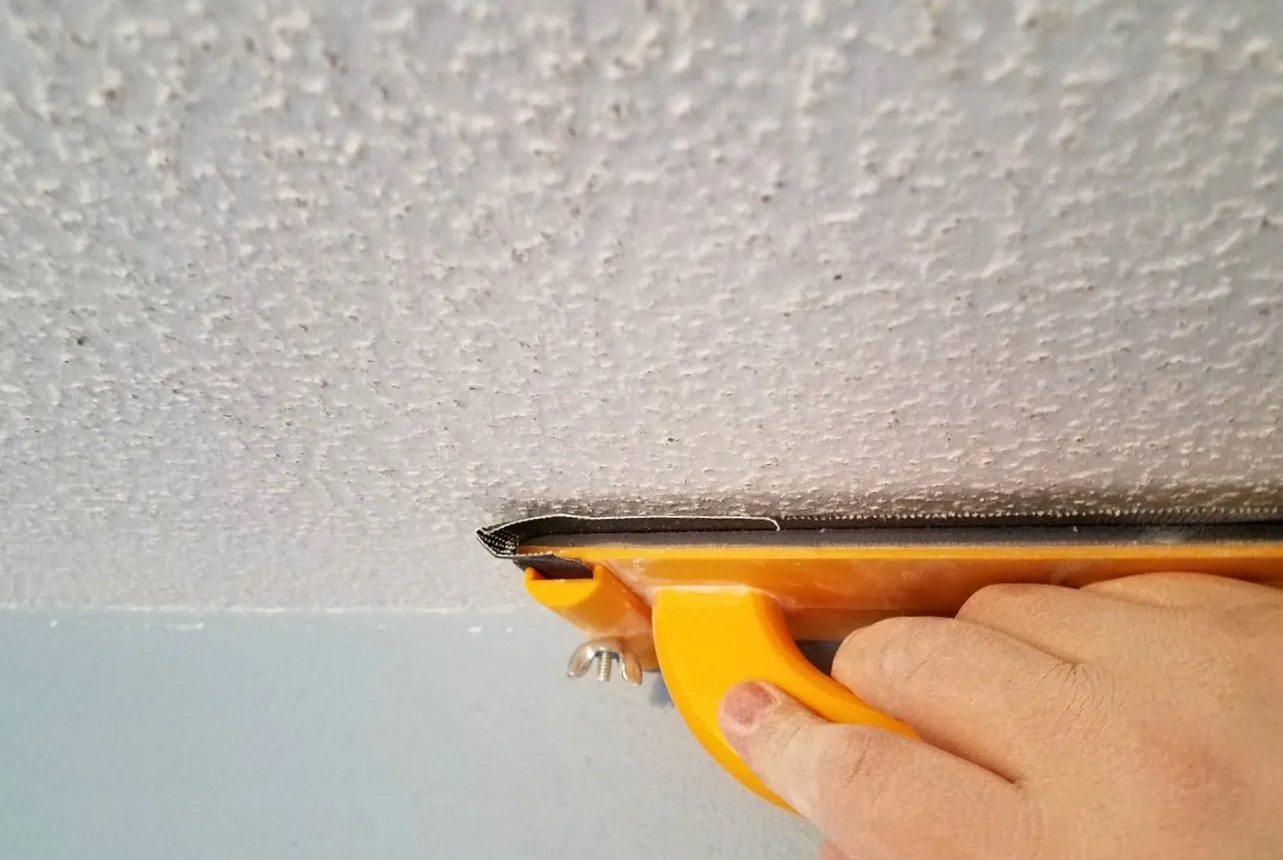
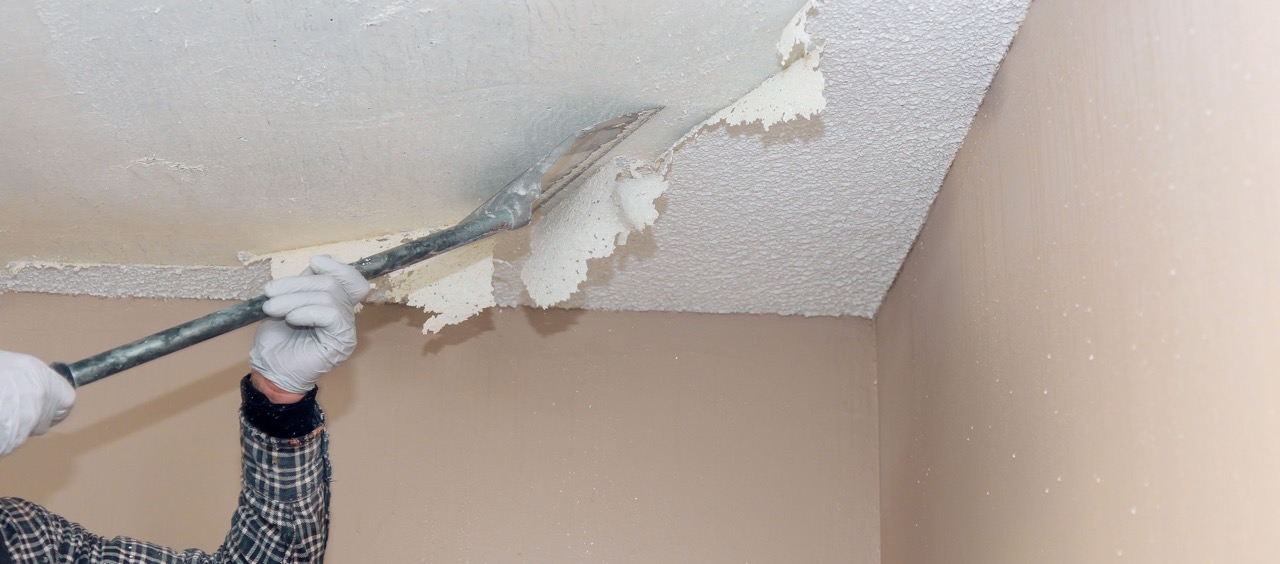
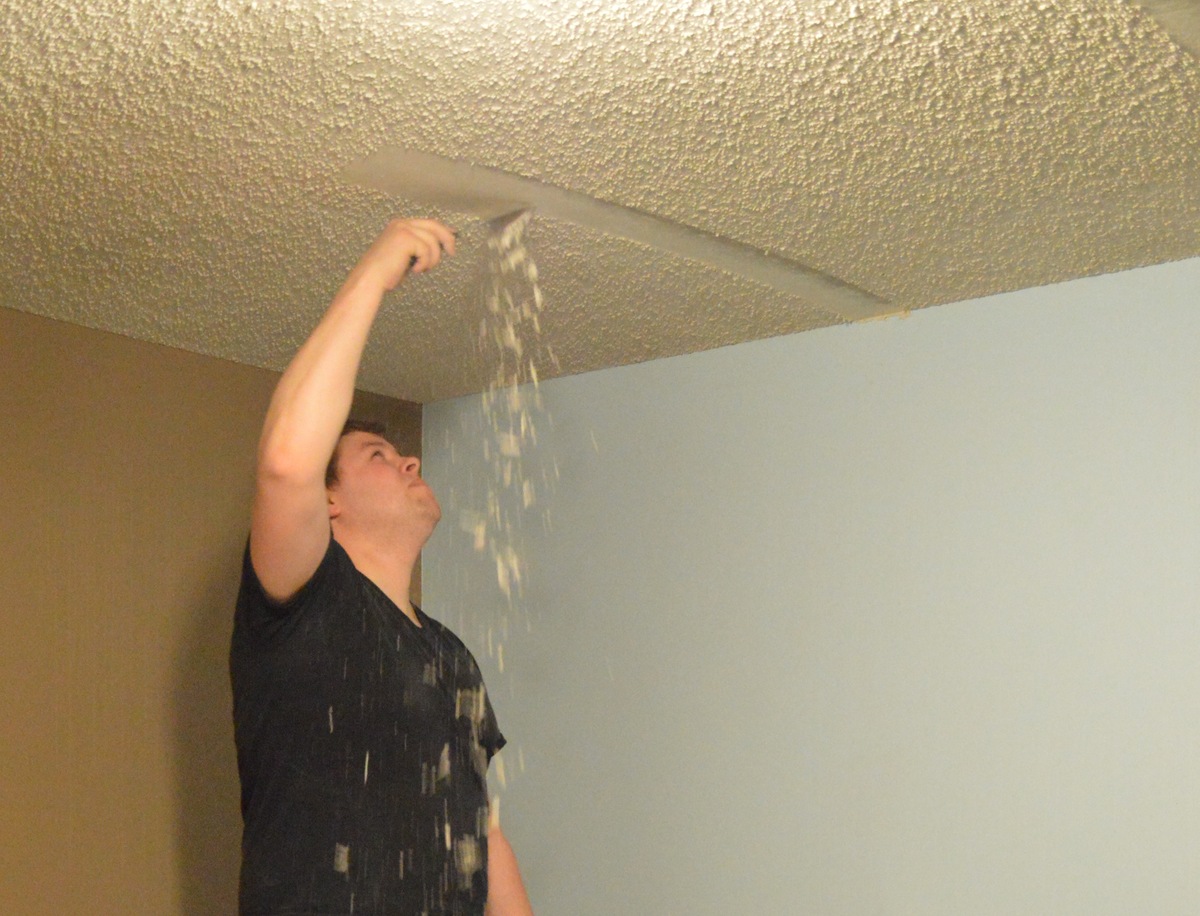
Scraping Techniques
Once you have determined that your popcorn ceiling does not contain asbestos, you can proceed with the scraping process. Here are a few techniques to effectively remove the popcorn texture:
1. Hand Scraping: This method involves manually scraping off the popcorn texture using a wide putty knife or scraper. Start in one corner of the ceiling and work your way across, gently sliding the scraper along the surface to remove the texture. Be careful not to apply too much pressure or gouge the ceiling.
2. Moisture Technique: Another approach is to use a moisture technique, which involves spraying the popcorn ceiling with warm water using a spray bottle. Let the water sit for a few minutes to allow it to penetrate the texture. This will soften the texture, making it easier to scrape off. Use a scraper to gently remove the softened texture.
3. Power Tool Assistance: If you have a larger area to scrape, you may consider using a power tool, such as a drywall sander or a power scraper. These tools can help speed up the process and make it easier to remove the texture. However, it’s important to be cautious and follow the manufacturer’s instructions to avoid damaging the ceiling.
Regardless of the technique you choose, it’s essential to work in small sections to avoid overwhelming yourself and to ensure that the texture is adequately removed. Take breaks as needed to rest your arms and shoulders.
During the scraping process, you may encounter stubborn areas where the texture is more difficult to remove. In such cases, lightly mist the area with warm water and allow it to sit for a few minutes before attempting to scrape again. This will help soften the texture and make it easier to remove.
As you scrape, be prepared for some dust and debris to fall. This is normal, but wearing safety goggles, a dust mask, and disposable coveralls will help protect you from inhaling the particles.
Once you have successfully removed the popcorn texture, the next step is to address any imperfections and prepare the surface for patching and repairing, which we’ll cover in the next section.
Read more: How To Cover A Popcorn Ceiling
Removing the Scraped Texture
Now that you have scraped off the popcorn texture from your ceiling, it’s time to remove the debris and prepare the surface for further work. Here are the steps to remove the scraped texture:
1. Clean Up Debris: Use a broom or a vacuum with a HEPA filter to clean up the debris from the floor and surrounding area. Make sure to dispose of the collected debris properly.
2. Inspect the Surface: After scraping, carefully inspect the ceiling surface for any remaining texture, loose bits, or uneven spots. Use your hands or a scraper to gently remove any stubborn areas or loose debris.
3. Apply a Skim Coat (Optional): Depending on the condition of your ceiling, you may choose to apply a thin layer of joint compound, also known as a skim coat, to achieve a smoother finish. Apply the joint compound evenly using a trowel or putty knife, feathering the edges to blend it with the surrounding surface. Allow it to dry completely according to the manufacturer’s instructions.
4. Inspect and Sand: Once the joint compound is dry, inspect the area again for any imperfections. Use a sanding block or sandpaper to gently sand any rough spots or high points to smooth the surface. Be careful not to sand too much, as this can damage the underlying drywall or create unevenness.
Removing the scraped texture is an important step in the process of achieving a smooth and pristine ceiling. By carefully inspecting the surface and addressing any remaining texture or rough areas, you’ll be one step closer to achieving the desired end result.
Next, we’ll move on to the process of patching and repairing any holes or uneven spots on the ceiling to ensure a seamless finish.
Before scraping a popcorn ceiling, make sure to wet the surface with a spray bottle to minimize dust. Use a wide putty knife for easier scraping.
Patching and Repairing
After scraping off the popcorn texture from your ceiling, it’s common to have small holes, cracks, or uneven spots that require patching and repairing. Here’s how you can address these imperfections:
1. Prepare the Surface: Ensure that the surface is clean and free from any dust or debris. Use a damp cloth or sponge to wipe down the area and let it dry completely.
2. Fill Small Holes: For small holes or cracks, you can use a spackling compound or a lightweight joint compound. Apply a small amount of the compound to a putty knife and gently fill the hole or crack, smoothing it out with the knife. Feather the edges to blend it with the surrounding surface.
3. Repair Larger Holes: For larger holes, you may need to use a patching material such as drywall compound or a drywall patch. Cut the patch to fit the size of the hole and secure it in place using joint compound. Smooth out the edges and feather the compound until it is level with the surrounding area.
4. Let the Patching Compound Dry: Allow the patched areas to dry completely according to the manufacturer’s instructions. This may take a few hours or overnight, depending on the product and the size of the patches.
5. Sand and Feather the Repaired Areas: Once the patched areas are dry, use a sanding block or sandpaper to gently sand the repaired spots until they are smooth and blend seamlessly with the rest of the ceiling. Be sure to remove any dust or loose particles afterward.
Patching and repairing is an important step in achieving a flawless finish on your newly scraped ceiling. By carefully filling holes, cracks, and leveling uneven spots, you’ll be one step closer to achieving a smooth and uniform surface.
Next, we’ll discuss the process of sanding and smoothing the ceiling to ensure a polished and professional result.
Sanding and Smoothing
After patching and repairing any imperfections on your scraped popcorn ceiling, the next step is to sand and smooth the surface. This will ensure a polished and even finish for painting or applying a new texture. Follow these steps to sand and smooth the ceiling:
1. Preparation: Ensure the patched areas are completely dry before proceeding with sanding. Cover any furniture or items in the room with plastic sheets or drop cloths to protect them from dust.
2. Select the Right Sandpaper: Choose a fine-grit sandpaper, such as 120-grit or 150-grit, for smoothing the surface of the ceiling. Avoid using a coarse-grit sandpaper as it can create scratches or damage the drywall.
3. Sand in a Circular Motion: Start sanding the patched areas and the surrounding ceiling in a circular motion. Apply gentle pressure and keep the sandpaper flat against the surface. Sand in small sections at a time, gradually working your way across the entire ceiling.
4. Test and Feather the Edges: Periodically stop and run your hands over the sanded areas to check for smoothness. If there are any noticeable differences in texture or unevenness, feather the edges by sanding them at a slight angle to blend them with the surrounding surface.
5. Remove Dust: After sanding, use a vacuum or a clean cloth to remove dust and debris from the ceiling. Make sure the surface is clean and free from any loose particles before proceeding further.
Take your time while sanding and pay attention to details. It’s important to achieve a smooth and uniform surface before moving on to the next steps of priming and painting or applying a new texture. Keep in mind that excessive sanding can damage the drywall, so be mindful of the pressure you apply.
Once you have finished sanding and the ceiling surface is smooth and ready, it’s time to prepare for priming and painting, which we’ll cover in the next section.
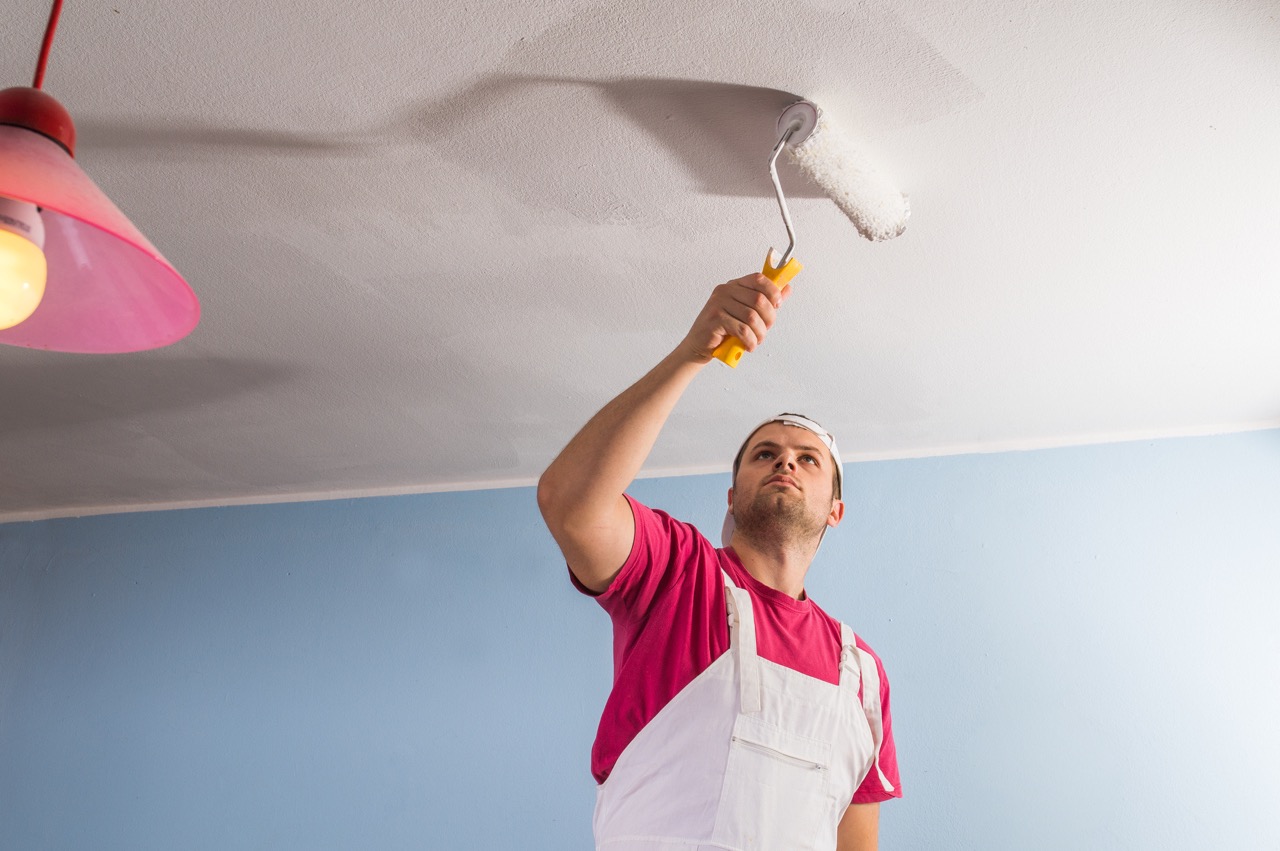
Priming and Painting
After scraping, patching, and sanding your popcorn ceiling, it’s time to prime and paint to achieve your desired finish. Here’s what you need to know about priming and painting your newly prepared ceiling:
1. Choose the Right Primer: Select a primer specifically formulated for ceilings. Look for a high-quality primer that helps to hide imperfections and provides a smooth base for the paint.
2. Prepare the Surface: Ensure the ceiling is clean and free from any dust or debris after sanding. Use a damp cloth or sponge to wipe down the surface and let it dry completely before applying the primer.
3. Apply the Primer: Use a roller or a brush to apply an even coat of primer to the entire ceiling. Start in one corner and work your way across the ceiling in manageable sections. Follow the manufacturer’s instructions for the recommended drying time.
4. Sand Lightly (Optional): After the primer has dried, you may choose to lightly sand the surface with a fine-grit sandpaper to achieve an even smoother finish. This step is optional but can help create a more polished result.
5. Choose the Right Paint: Select a paint specifically designed for ceilings. Opt for a paint with a low sheen or a flat finish to minimize the visibility of any remaining imperfections.
6. Apply the Paint: Using a roller or a brush, apply an even coat of paint to the primed ceiling. Start in one corner and work your way across, making sure to blend the edges. Allow the first coat to dry completely before applying a second coat if necessary.
7. Let the Paint Cure: After painting, allow the paint to cure according to the manufacturer’s instructions before moving furniture back into the room or touching the surface.
Priming and painting your ceiling will not only give it a fresh, clean look but also help to seal and protect the surface. Take your time during this step and ensure the application is even and smooth to achieve a professional-looking finish.
Once the paint has dried and cured, it’s time to clean up the area and dispose of any remaining materials as we’ll discuss in the next section.
Read more: How Do You Paint Popcorn Ceiling
Cleaning Up and Disposal
After completing the scraping, patching, priming, and painting of your popcorn ceiling, it’s important to properly clean up the area and dispose of any remaining materials. Follow these steps for a thorough cleanup and disposal process:
1. Remove Drop Cloths and Plastic Sheets: Start by carefully removing the drop cloths or plastic sheets that were used to protect your furniture and floors. Fold them inwards to contain any dust or debris, then dispose of them properly.
2. Vacuum: Use a vacuum cleaner with a HEPA filter to thoroughly clean the room. Pay attention to the floors, baseboards, and any surfaces where dust and debris may have collected during the scraping and sanding process.
3. Wipe Down Surfaces: Use a damp cloth or sponge to wipe down any remaining surfaces, including walls, windowsills, and furniture, to remove any dust particles.
4. Dispose of Debris: Gather any remaining debris, such as scraped texture, sanding dust, and paint cans, in a sturdy trash bag. Seal the bag tightly and dispose of it according to your local waste disposal regulations. Some areas may require you to schedule a pickup or take the bag to a designated disposal facility.
5. Clean Tools: Wash your brushes, rollers, and any other tools used during the process thoroughly with water or the appropriate cleaning solution. Allow them to dry properly before storing them for future use.
6. Inspect and Touch Up: Once the room is clean, take a final inspection of your newly scraped and painted ceiling. Look for any areas that may require touch-ups or additional paint, and address them as necessary.
Proper cleanup and disposal are essential not only for maintaining a clean living space but also for adhering to environmental regulations. By following these steps, you’ll ensure that your project is wrapped up neatly, and your room is ready for use.
With the scraping, patching, priming, and painting complete, you can now enjoy the fresh, modern look of your newly transformed popcorn ceiling. Sit back, relax, and appreciate the renewed aesthetic of your space!
Disclaimer: The information provided in this article is for educational purposes only. Please consult professionals or experts for specific advice and guidance tailored to your situation.
Conclusion
Scraping popcorn ceilings can be a labor-intensive process, but the end result is a fresh, modern look that can transform the entire atmosphere of a room. By following the steps outlined in this guide and having the right tools and materials on hand, you can successfully scrape your popcorn ceiling and achieve a smooth, clean surface.
Remember to prioritize safety throughout the process. If your home was built before the late 1970s, it’s crucial to test for asbestos before proceeding with any removal. Always consult with professionals and follow proper disposal procedures if asbestos is present.
Preparing the area, testing for asbestos, employing the right scraping techniques, and patching and repairing any imperfections are all essential steps in the scraping process. Once you have removed the popcorn texture, sand and smooth the surface to create a pristine backdrop for priming and painting.
Choosing the right primer and paint specifically designed for ceilings will help you achieve a polished and professional finish. The final step is to clean up the area and dispose of any debris properly, leaving your space clean and ready to enjoy.
While scraping popcorn ceilings can be a challenging task, the end result is well worth the effort. A freshly scraped and painted ceiling can significantly enhance the overall aesthetic of a room and bring a sense of modernity and sophistication.
Remember to be patient, take breaks as needed, and carefully follow each step to ensure a successful outcome. By embarking on this journey, you are transforming your space and adding value to your home.
Now that you have the knowledge and guidance, it’s time to roll up your sleeves and embark on the exciting journey of transforming your popcorn ceiling. The satisfaction and sense of accomplishment you’ll experience when gazing up at your beautifully scraped and painted ceiling will make all the hard work worthwhile.
Frequently Asked Questions about How To Scrape Popcorn Ceiling
Was this page helpful?
At Storables.com, we guarantee accurate and reliable information. Our content, validated by Expert Board Contributors, is crafted following stringent Editorial Policies. We're committed to providing you with well-researched, expert-backed insights for all your informational needs.


0 thoughts on “How To Scrape Popcorn Ceiling”