Articles
What To Do After Scraping A Popcorn Ceiling
Modified: October 29, 2024
Discover the best steps to take after scraping a popcorn ceiling in this informative article. Learn how to properly clean up, repair, and transform your newly scraped ceiling. Don't miss out!
(Many of the links in this article redirect to a specific reviewed product. Your purchase of these products through affiliate links helps to generate commission for Storables.com, at no extra cost. Learn more)
Introduction
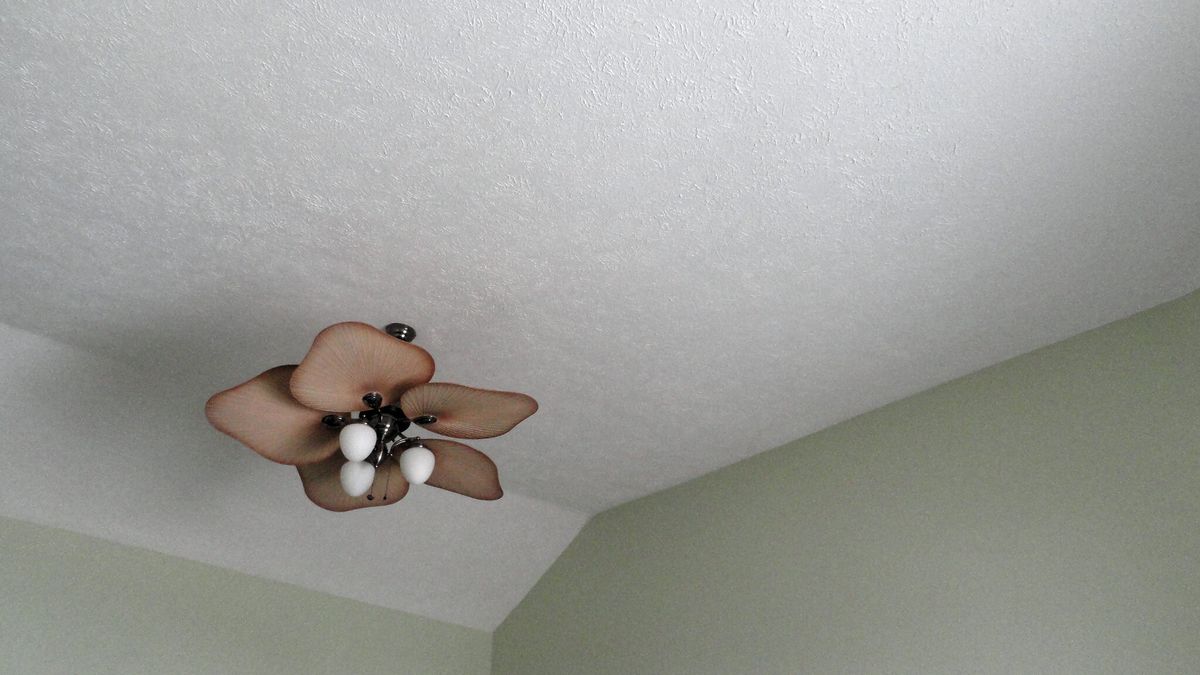
Scraping popcorn ceilings has become a popular home improvement project for those looking to update and modernize their living spaces. Popcorn ceilings, also known as textured or acoustic ceilings, were commonly used in homes from the 1950s to the 1980s to hide imperfections and reduce noise. However, their outdated appearance and potential health hazards have led many homeowners to opt for their removal.
In this article, we will explore the process of scraping popcorn ceilings and provide you with step-by-step instructions to help you tackle this project with confidence. From understanding the reasons for scraping popcorn ceilings to preparing the room and protecting your furniture, we will cover all the essential aspects of this home improvement task.
Whether you are a seasoned DIY enthusiast or a beginner looking for guidance, this article will equip you with the necessary knowledge and techniques to successfully scrape popcorn ceilings and transform your living space. So, let’s dive in and discover how you can achieve a smooth, modern ceiling by removing that outdated popcorn texture!
Key Takeaways:
- Say goodbye to outdated popcorn ceilings and hello to a modern, updated space by following the step-by-step process outlined in this article. Prioritize safety, proper ventilation, and disposal of debris for a successful and rewarding home improvement project.
- Whether you’re a seasoned DIY enthusiast or a beginner, this article equips you with the knowledge and techniques to confidently tackle the task of scraping popcorn ceilings. From understanding the reasons for removal to preparing the room and employing proper scraping, repairing, sanding, and painting techniques, you’re ready to transform your living space.
Read more: How To Scrape Popcorn Ceiling
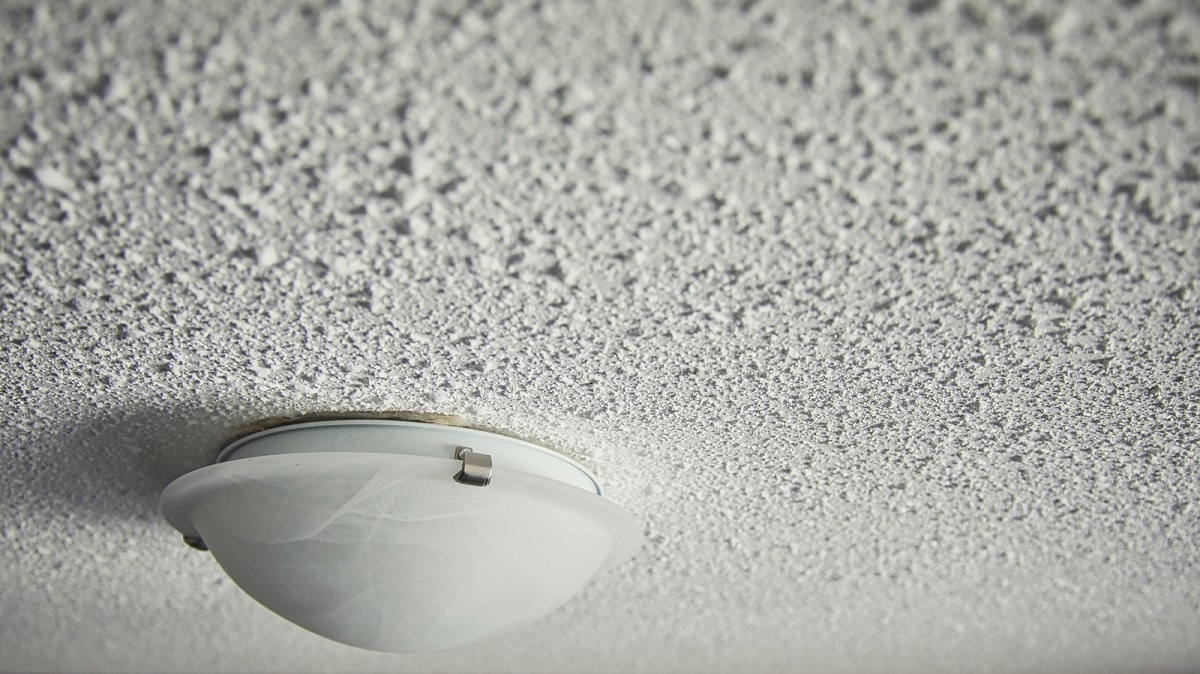
Understanding Popcorn Ceilings
Popcorn ceilings, also referred to as stucco or acoustic ceilings, were once a popular choice in residential construction due to their ability to hide imperfections and reduce noise. The textured surface, resembling the texture of popcorn or cottage cheese, was achieved by spraying a mixture of paint, Styrofoam, and sometimes asbestos fibers onto the ceiling. However, due to health and aesthetic concerns, these textured ceilings have fallen out of favor in recent years.
One of the main drawbacks of popcorn ceilings is their association with health risks. Popcorn ceilings installed before the 1980s may contain asbestos, a harmful substance known to cause respiratory issues and even cancer. If you suspect that your popcorn ceiling contains asbestos, it is crucial to consult with a professional asbestos removal company to ensure safe removal.
Another issue with popcorn ceilings is their outdated appearance. The textured surface can make a room feel dated and diminish its overall aesthetic appeal. By removing the popcorn texture, you can open up the space, create a more modern look, and increase the value of your home.
Understanding the composition and potential hazards of popcorn ceilings is essential before undertaking any removal project. If you are unsure about the presence of asbestos or lack the confidence to handle the removal yourself, it is recommended to seek professional assistance.
However, if you have determined that your popcorn ceilings are asbestos-free and you are up for the challenge, continue reading to learn the step-by-step process of scraping popcorn ceilings and transforming your living space.
Reasons for Scraping Popcorn Ceilings
There are several compelling reasons to consider scraping popcorn ceilings and opting for a smoother, more modern ceiling finish. Let’s explore the top reasons why homeowners choose to undertake this home improvement project:
- Improved Aesthetics: Popcorn ceilings are notorious for their outdated appearance. By removing the textured surface, you can instantly update the look and feel of your space. A smooth ceiling creates a cleaner and more contemporary look, allowing you to better showcase your interior design and décor.
- Increased Home Value: Scraping popcorn ceilings can significantly increase the value of your home. Potential buyers often view popcorn ceilings as a negative feature, so by removing them, you are making your home more appealing and potentially fetching a higher price if you decide to sell.
- Easier Cleaning: Popcorn ceilings tend to collect dust and cobwebs, making cleaning a challenging task. The textured surface makes it difficult to dust and can trap allergens. Removing the textured finish makes cleaning easier and contributes to a healthier indoor environment.
- Enhanced Lighting: The uneven surface of popcorn ceilings can cause light to cast shadows, creating an overall dim and gloomy ambiance. A smooth ceiling allows light to be evenly distributed, making the room appear brighter and more inviting.
- Elimination of Health Risks: As previously mentioned, popcorn ceilings installed before the 1980s may contain asbestos. Asbestos fibers, if disturbed or inhaled, can lead to serious health problems. By scraping off the popcorn texture, you can eliminate the risk of asbestos exposure and create a safer living environment for you and your family.
Considering these reasons, it is no surprise that many homeowners are eager to tackle the task of scraping popcorn ceilings. However, it is important to note that the decision to remove popcorn ceilings should be made after careful consideration of the condition, age, and potential risks associated with the ceiling in your specific home.
Now that you understand the motivations behind scraping popcorn ceilings, let’s move on to the equipment and materials you will need to successfully complete this project.
Equipment and Materials Needed
Before you begin scraping popcorn ceilings, it’s crucial to gather all the necessary equipment and materials. Having everything prepared in advance will ensure a smoother and more efficient process. Here’s a comprehensive list of what you’ll need:
- Protective Gear: Asbestos testing kit (if required), safety goggles, dust mask or respirator, gloves, and disposable coveralls.
- Drop Cloths or Plastic Sheets: Large drop cloths or plastic sheets to cover and protect furniture, floors, and other surfaces in the room.
- Joint Compound: Used for repairing and patching any damaged areas on the ceiling after scraping.
- Drywall Tape: Necessary for reinforcing the patched areas and ensuring a smooth finish.
- Paint Scrapers or Putty Knives: These tools are essential for scraping off the popcorn texture from the ceiling. Opt for various sizes to accommodate different areas.
- Spray Bottle with Water: Moistening the popcorn ceiling with water makes it easier to scrape off. A spray bottle allows you to distribute water evenly.
- Plastic Sheets and Painter’s Tape: Used to cover and protect fixtures, walls, and light fixtures from any water or debris during the scraping process.
- Drywall Sanding Block or Sandpaper: After scraping off the popcorn texture, you’ll need a sanding block or sandpaper to smooth the ceiling’s surface.
- Vacuum Cleaner with HEPA Filter: A vacuum with a HEPA filter is essential for cleaning up the debris and minimizing dust in the room.
- Clean Cloths or Sponges: These will be used for wiping down the ceiling and ensuring it is free of any dust or residue.
- Primer and Paint: Once the ceiling is scraped and smoothed, you’ll need primer and paint to give it a fresh, new look.
It’s important to note that the specific equipment and materials you’ll need may vary depending on the size and condition of the ceiling, as well as any additional repairs or modifications you plan on making. Assess your ceiling and consult with professionals if needed to ensure you have all the necessary supplies.
Now that you’re well-equipped with the necessary tools and materials, it’s time to prepare the room before getting started on the actual scraping process.
Preparing the Room
Properly preparing the room before you start scraping popcorn ceilings is essential for a smooth and efficient process. Follow these steps to ensure everything is in order:
- Remove Furniture: Clear the room of all furniture and accessories. It’s best to completely empty the space to avoid any damage or obstruction during the scraping process. If moving furniture out of the room is not possible, cover it securely with drop cloths or plastic sheets.
- Protect Flooring: Place drop cloths or plastic sheets on the floor to protect it from falling debris and dust. Secure the coverings in place with painter’s tape to prevent them from shifting or sliding during the project.
- Take Down Wall Decorations: Remove any wall decorations, such as artwork, mirrors, or light fixtures, to prevent them from getting damaged during scraping or sanding. Cover the fixtures and outlets with plastic sheets if removal is not feasible.
- Cover Windows: Use plastic sheets or blackout curtains to cover windows and protect them from dust. This will also prevent any potential damage from water splashes during the process.
- Turn Off Electricity: As a safety precaution, turn off the electricity to the room at the circuit breaker before you begin scraping the ceiling. This will minimize the risk of electrical accidents or shorts if the scraping tools come into contact with a light fixture or electrical wiring.
- Ensure Adequate Ventilation: Open windows and use fans to create proper ventilation in the room. This will help dissipate dust and fumes, making the environment more comfortable during the scraping process. You may also consider using a plastic sheet to cover doorways and create a containment area, reducing the spread of dust to other parts of the house.
- Cover HVAC Vents: Prevent dust and debris from entering your HVAC system by covering the vents in the room with plastic sheets and securing them in place with painter’s tape.
Taking these precautions will help protect your belongings, minimize the mess, and ensure a safe environment while scraping the popcorn ceiling. Now that the room is prepared, the next step is covering and protecting your furniture and flooring.
Read more: How Do You Paint Popcorn Ceiling
Covering and Protecting Furniture and Flooring
When it comes to scraping popcorn ceilings, protecting your furniture and flooring is crucial to prevent any damage or debris from affecting your belongings. Follow these steps to properly cover and protect your furniture and flooring:
- Move Furniture: If possible, remove all furniture from the room. This will provide you with ample space to work and reduce the risk of accidentally damaging or staining your belongings. If moving furniture out of the room is not an option, move it to the center of the room and cover it securely with plastic sheets or drop cloths.
- Cover with Plastic Sheets or Drop Cloths: Cover the furniture and any remaining items in the room with plastic sheets or drop cloths. Make sure they are securely placed and properly draped to provide maximum protection. Secure the covers with tape or furniture blankets to prevent them from slipping or shifting during the scraping process.
- Protect Flooring: Lay down drop cloths or plastic sheets to protect your flooring from any debris or dust. Start from the walls and cover the entire floor area, ensuring complete coverage. If you have carpeting, use adhesive carpet protection film to safeguard it. Tape the edges of the drop cloths or plastic sheets to the baseboards to keep them in place.
- Use Painter’s Tape: For an extra layer of protection, use painter’s tape to secure the covers in place. Attach the tape to the edges and corners of the furniture and flooring to prevent the covers from slipping or lifting during the scraping process.
- Seal Off Adjacent Areas: If your room is connected to other areas of the house, use plastic sheets or drop cloths to section off the adjacent spaces. This will help contain the dust and debris within the room, minimizing the impact on the rest of your home.
By following these steps, you will ensure that your furniture and flooring are well-protected during the popcorn ceiling scraping process. Once everything is covered and secured, you can proceed with the necessary safety precautions before you start scraping the ceiling.
Preparing Yourself and Ensuring Safety
Before you begin the process of scraping popcorn ceilings, it’s crucial to prioritize your safety. Taking the necessary precautions will help prevent accidents and ensure a smooth and risk-free experience. Here are some important steps to follow:
- Wear Protective Gear: Always wear the appropriate protective gear to shield yourself from potential hazards. This includes safety goggles to protect your eyes from debris, a dust mask or respirator to prevent inhalation of dust and particles, gloves to protect your hands, and disposable coveralls to keep your clothing clean and safe. If there is a possibility that your popcorn ceiling contains asbestos, it is recommended to use an asbestos testing kit and consult with professionals before proceeding further.
- Ensure Proper Ventilation: Popcorn ceiling removal can create dust and particles, so it’s important to have adequate ventilation in the room. Open windows and use fans to help circulate air and dissipate dust. This will also improve the overall air quality during the process.
- Turn Off Electricity: Before you begin scraping the ceiling, ensure that you have turned off the electricity to the room at the circuit breaker. This will minimize the risk of accidents in case the scraping tools come into contact with any electrical fixtures or wiring.
- Use a Steady Ladder: If you require a ladder to reach the ceiling, choose a sturdy and reliable ladder. Place it on a stable surface and ensure it is securely positioned before climbing. Only stand on the ladder’s designated steps or rungs, and avoid overreaching or leaning too far to maintain balance and prevent falls.
- Hold Scraping Tools Properly: When using scraping tools such as paint scrapers or putty knives, hold them firmly and securely to avoid any slipping or losing control. Use smooth and controlled motions as you scrape off the popcorn texture from the ceiling.
- Keep the Area Clear: Clear any clutter or debris from the immediate work area to prevent tripping or stumbling. This will help maintain a safe and organized workspace.
- Stay Hydrated: Popcorn ceiling removal can be physically demanding, so remember to stay hydrated throughout the process. Take regular breaks and drink plenty of water to keep yourself hydrated and maintain your energy levels.
- Take Breaks as Needed: Don’t overexert yourself during the scraping process. Take periodic breaks to rest and avoid fatigue. This will help prevent injuries and ensure that you can complete the project in a safe and efficient manner.
- Be Mindful of Asbestos Contamination: If your popcorn ceiling contains asbestos, it is crucial to hire professionals for safe removal. Asbestos fibers can pose significant health risks if mishandled, so it’s important to prioritize your safety and the safety of those around you.
By taking these safety measures and being mindful of potential hazards, you can ensure your well-being throughout the popcorn ceiling scraping process. Next, we will explore the techniques and methods involved in removing the popcorn texture from the ceiling.
Scraping Techniques and Methods
Scraping popcorn ceilings requires proper technique and method to ensure a successful and efficient removal process. Here are the key steps and techniques you should follow:
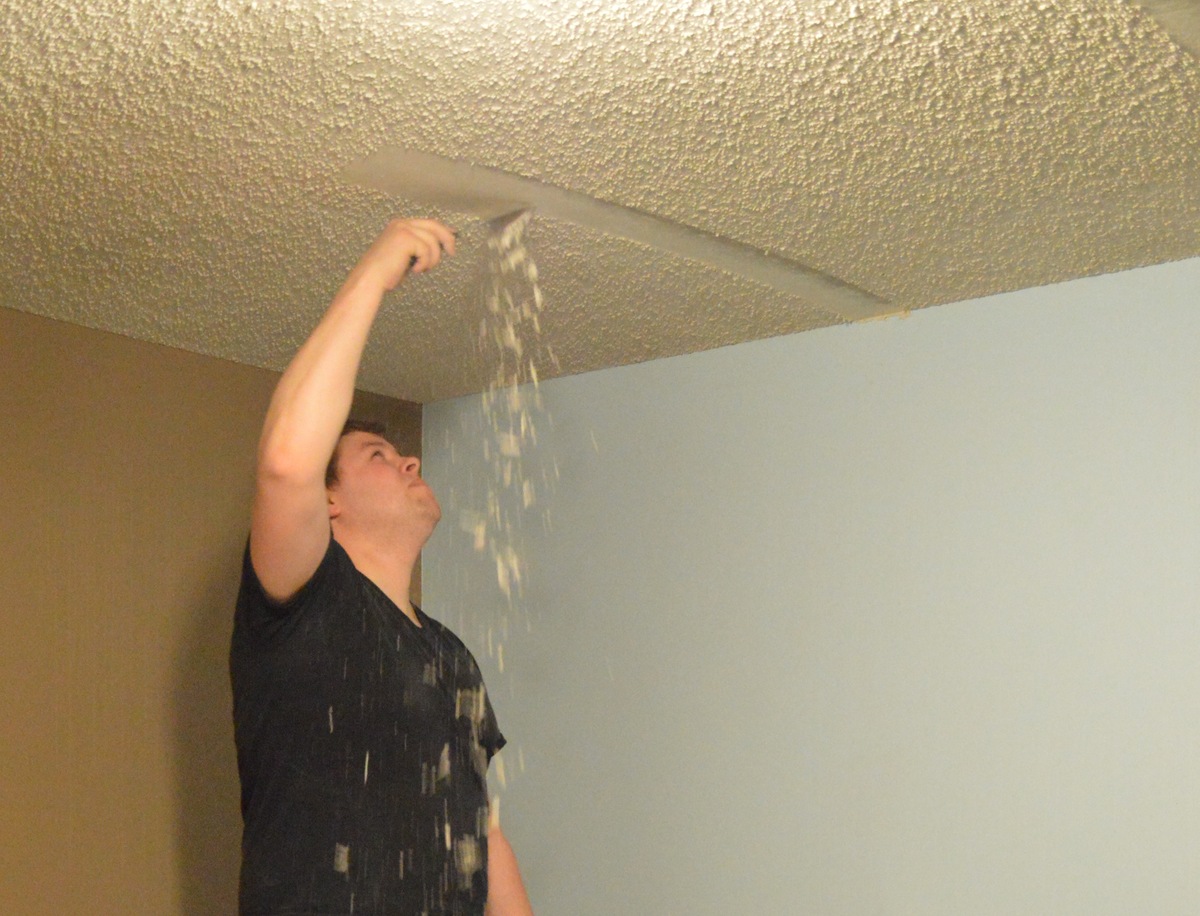
- Prepare the Surface: Before you start scraping, it’s important to dampen the popcorn texture. Fill a spray bottle with water and mist the ceiling, allowing the water to saturate the texture without causing any damage to the underlying surface.
- Scrape the Texture: Using a paint scraper or putty knife, start scraping the dampened popcorn texture from the ceiling. Be gentle but firm, using consistent strokes to remove the texture. Work in small sections at a time to avoid overwhelming yourself and to maintain control over the process.
- Work at an Angle: Hold the scraper or putty knife at a slight angle, approximately 30 to 45 degrees, to the ceiling. This will help you effectively loosen and lift the popcorn texture without damaging the ceiling surface beneath.
- Be Mindful of the Pressure: Apply enough pressure on the scraper or putty knife to remove the texture, but be cautious not to damage the ceiling or create gouges. It’s important to find the right balance between applying pressure and maintaining control over the scraping process.
- Remove Residual Texture: After scraping off the majority of the popcorn texture, you may notice some residual texture left behind. Use a damp cloth or sponge to gently wipe down the ceiling, smoothing out any remaining texture and leveling the surface.
- Inspect for Damaged Areas: As you scrape, keep an eye out for any areas of the ceiling that may have been damaged or require patching. Note these areas for later repair and make sure to remove any loose or damaged texture around them.
It’s important to approach the scraping process with patience and a systematic approach. Work section by section, ensuring that each area is thoroughly scraped and any necessary repairs are noted. Take breaks and step back periodically to assess your progress and adjust your technique if needed.
Remember, popcorn ceiling removal can be a messy and time-consuming process, so it’s essential to stay focused and maintain a steady pace. Once the popcorn texture is successfully removed, you can move on to the next phase of the project, which involves repairing and patching the ceiling.
After scraping popcorn ceiling, be sure to properly dispose of the debris to avoid creating a mess. Use a drop cloth to catch the falling popcorn and then carefully gather and dispose of it in a trash bag.
Removing Popcorn Texture
Removing popcorn texture from the ceiling requires careful attention to detail and the use of proper techniques. Follow these steps to effectively remove the popcorn texture:
- Dampen the Ceiling: Before you begin, mist the ceiling with water using a spray bottle. This will help soften the texture and make it easier to scrape off.
- Scrape the Texture: Use a scraper or putty knife at a 30-45 degree angle and gently scrape the popcorn texture off the ceiling. Work in small sections, applying moderate pressure to remove the texture without damaging the underlying surface.
- Collect the Debris: Place a plastic sheet or drop cloth on the floor to catch the falling debris. This will make clean-up easier and prevent the debris from spreading throughout the room.
- Dispose of the Debris Properly: Once you have scraped off the popcorn texture, carefully collect the debris and dispose of it in a garbage bag. Be sure to seal the bag tightly to contain the dust and prevent it from spreading.
- Inspect for Remaining Texture: After the initial scraping, inspect the ceiling for any remaining texture. Use a damp cloth or sponge to remove any stubborn areas and ensure the surface is smooth.
- Allow the Ceiling to Dry: Once the popcorn texture has been removed and the surface is smooth, allow the ceiling to dry completely before moving on to the next steps. This will ensure better adhesion of any patches or repairs that may be necessary.
Remember to take breaks as needed and stay mindful of your safety throughout the process. Properly dispose of the debris and clean up the work area to maintain a clean and organized space.
With the popcorn texture successfully removed, you can now proceed to assess the condition of the ceiling and address any repairs or patching that may be required.
Read more: How To Cover A Popcorn Ceiling
Repairing and Patching Ceilings
Once the popcorn texture has been removed, it’s time to assess the condition of the ceiling and address any repairs or patching that may be necessary. Here are the steps to effectively repair and patch your ceilings:
- Inspect for Damage: Carefully examine the ceiling for any cracks, holes, or imperfections. These may have been concealed by the popcorn texture and will need to be repaired before proceeding.
- Fill Cracks and Holes: Use a joint compound or drywall filler to fill in any cracks or holes in the ceiling. Apply the compound with a putty knife, smoothing it out to create an even surface. Allow the compound to dry completely, following the manufacturer’s instructions.
- Sand the Repaired Areas: Once the joint compound has dried, use sandpaper or a sanding block to smooth out the repaired areas. Sand gently in a circular motion to blend the repaired sections with the rest of the ceiling. Wipe away any dust generated during sanding.
- Apply a Second Coat, If Needed: For larger repairs or areas that require additional attention, apply a second coat of joint compound. Repeat the sanding process once the second coat has dried to achieve a seamless finish.
- Inspect for Uneven Surfaces: After sanding, inspect the ceiling for any remaining uneven surfaces or imperfections. If necessary, repeat the filling and sanding process until you achieve a smooth and seamless result.
- Prime the Repaired Areas: Before painting the entire ceiling, prime the repaired areas using a high-quality primer. This will ensure proper adhesion of the paint and help create a uniform finish. Follow the manufacturer’s instructions for application and drying times.
- Blend the Colors: If you are planning to paint the entire ceiling, use a primer or paint with a color close to your intended ceiling color. This will help blend the repaired areas with the rest of the ceiling and create a cohesive look.
- Final Inspections: Once the patched areas are dry and the primer has been applied, perform final inspections to ensure that the repairs and patches are seamless and blend well with the rest of the ceiling. Touch up as necessary.
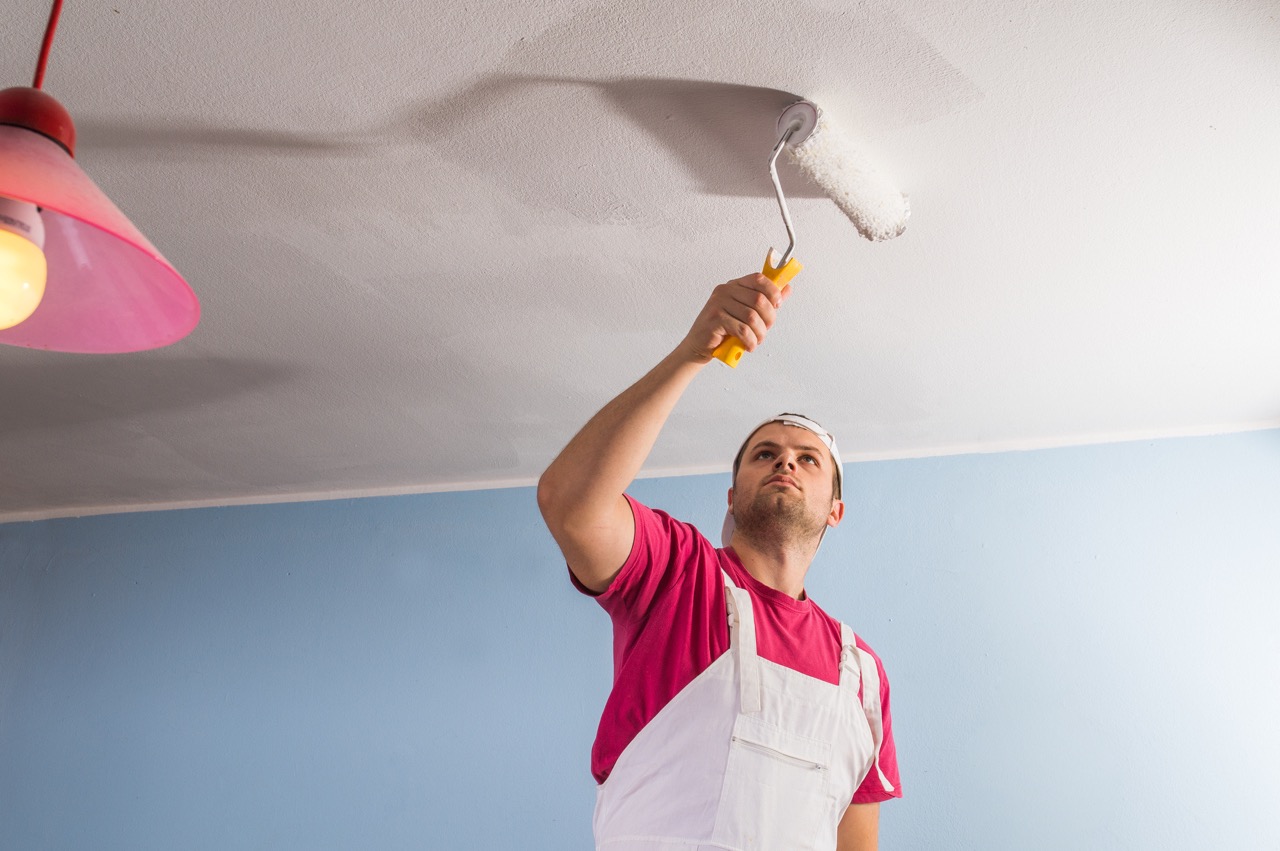
- Proceed to Painting: After completing the repairs and patches, you can proceed to paint the entire ceiling. Choose a high-quality paint that is suitable for ceilings and follow the manufacturer’s instructions for application. Apply the paint evenly to achieve a smooth and attractive finish.
By following these steps, you can effectively repair and patch your ceilings, ensuring a seamless and professional-looking result. With the repairs complete, the next step is to sand and smooth the ceiling surface before moving on to the final stages of the project.
Sanding and Smoothing the Ceiling
After the popcorn texture has been removed and any necessary repairs have been made, it’s time to sand and smooth the ceiling to prepare it for painting. This step is crucial to create a clean and polished finish. Follow these steps to effectively sand and smooth your ceiling:
- Gather the Right Tools: You will need a sanding block or sandpaper with a fine grit (around 120 to 150 grit) for this process. A sanding pole or extension handle can be helpful for reaching higher areas of the ceiling.
- Prepare the Room: Cover the furniture, flooring, and other surfaces in the room with plastic sheets or drop cloths to protect them from dust generated during sanding.
- Sand the Ceiling: Starting from one corner of the room, use the sanding block or sandpaper to gently sand the ceiling in smooth, circular motions. Apply light to moderate pressure, being careful not to damage or gouge the surface. Keep the sanding block or sandpaper flat against the ceiling to achieve an even and consistent result.
- Focus on Uneven Areas: Pay special attention to any areas that may be uneven or rough, such as patched areas or where the popcorn texture was particularly stubborn to remove. Take extra care to sand these areas until they are smooth and blend well with the rest of the ceiling.
- Clean Up the Dust: After sanding, use a vacuum cleaner with a brush attachment or a soft cloth to remove the dust from the ceiling and surrounding areas. Wipe down the walls and surfaces with a damp cloth to ensure they are free of any dust or debris.
- Inspect the Ceiling: Once the dust has been cleared, inspect the ceiling for any remaining imperfections or rough spots. If necessary, repeat the sanding process in these areas until the surface is smooth and ready for painting.
- Apply a Primer, if Desired: If you prefer to apply a primer before painting, now is the time to do so. The primer will help improve the adhesion of the paint and provide a smooth, uniform base for the final coat.
- Proceed to Painting: After the sanding and priming (if applicable), your ceiling is ready for painting. Choose a high-quality paint suitable for ceilings and follow the manufacturer’s instructions for application. Apply the paint evenly and in thin coats to achieve the desired finish.
The process of sanding and smoothing the ceiling may require some time and effort, but it is crucial to achieve a professional and polished look. Once the ceiling is smooth and ready for paint, you are one step closer to completing your popcorn ceiling removal project.
Cleaning Up the Mess
After the popcorn ceiling has been scraped, repaired, sanded, and prepared for painting, it’s important to properly clean up the mess and restore the room to its original state. Follow these steps to effectively clean up after removing the popcorn texture:
- Remove Drop Cloths and Plastic Sheets: Start by carefully removing the drop cloths or plastic sheets that were used to protect the furniture, flooring, and other surfaces. Fold them inward to contain any debris and dispose of them properly.
- Vacuum the Room: Use a vacuum cleaner with a HEPA filter to thoroughly clean the room and remove any remaining dust and debris from the floor, furniture, and other surfaces. Pay special attention to the corners, edges, and areas that might have collected more dust during the popcorn ceiling removal process.
- Dust and Wipe Down Surfaces: Using a soft cloth or microfiber duster, dust and wipe down any remaining surfaces, including walls, furniture, windowsills, and light fixtures. This will help remove any residual dust or particles that may have settled during the process.
- Clean Light Fixtures and Fans: Take the opportunity to clean any light fixtures or ceiling fans in the room. Use a soft cloth or duster to remove dust and debris from these fixtures, ensuring they are clean and in proper working order.
- Wash or Replace Vent Covers: Remove any vent covers in the room and wash them thoroughly with soap and water. If the vent covers are damaged or heavily soiled, consider replacing them for a fresh and clean appearance.
- Dispose of Debris Properly: Gather all the debris and waste materials from the popcorn ceiling removal, such as plastic sheets, drop cloths, and garbage bags containing scraped-off texture. Seal the bags tightly and dispose of them according to your local regulations for construction and renovation waste.
- Inspect for Lingering Dust: Finally, do a final inspection of the room to ensure that all dust and debris has been adequately removed. Check corners, window sills, and crevices where dust might have settled. Use a damp cloth or vacuum to address any remaining dust if necessary.
By following these steps, you will ensure a thorough and efficient cleanup after removing the popcorn ceiling. Remember to take your time and be meticulous in your cleaning efforts to restore the room to a clean, dust-free, and functional space.
Now that the room is clean and ready, it’s time to move on to the final stages of the project: priming and painting the ceiling.
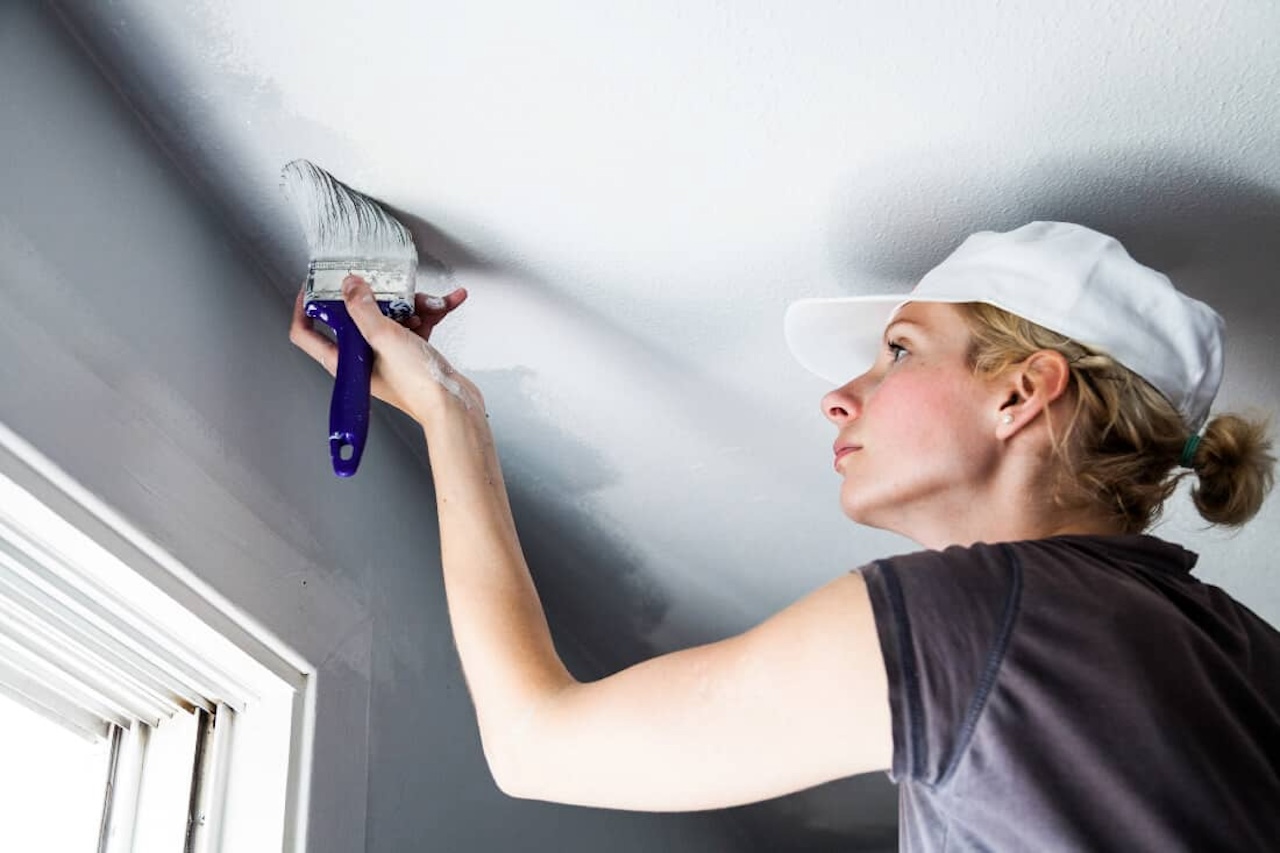
Priming and Painting the Ceiling
Once the popcorn texture has been removed, repairs have been made, the ceiling has been sanded and cleaned, it’s time to prime and paint the ceiling. This final step will give your room a fresh, updated look. Follow these steps to effectively prime and paint your ceiling:
- Prepare the Room: Cover the floor, furniture, and other surfaces with drop cloths or plastic sheets to protect them from paint splatters.
- Choose the Right Primer: Select a high-quality primer suitable for ceilings. Look for a primer specifically formulated for covering imperfections and promoting paint adhesion.
- Prime the Ceiling: Using a roller or paintbrush, apply a coat of primer to the entire ceiling. Work in small sections and apply the primer evenly, following the manufacturer’s instructions for application and drying times.
- Inspect for Imperfections: Once the primer has dried, inspect the ceiling for any remaining imperfections, such as uneven patches or areas that may require additional filling or sanding. Address these imperfections before proceeding to the painting stage.
- Choose the Ceiling Paint: Select a high-quality ceiling paint in the desired color and finish. Consider using a roller and extension pole for ease of application.
- Paint the Ceiling: Start by cutting in the edges of the ceiling with a brush, applying paint along the corners, edges, and around light fixtures. Then, use a roller to paint the rest of the ceiling in long, overlapping strokes. Work in small sections, ensuring an even application of paint. Allow the first coat to dry completely before applying a second coat if necessary.
- Inspect the Paint Job: Once the paint has dried, examine the ceiling for any areas that may require touch-ups or additional coats of paint. Use a brush or roller to address these areas, ensuring a seamless finish.
- Clean Up: Clean your brushes, rollers, and any spills or splatters immediately after painting. Dispose of any drop cloths or plastic sheets used for protection.
By following these steps, you will have successfully primed and painted your ceiling, giving it a fresh, clean look. Take your time and ensure each step is done thoroughly for a professional result.
Once the paint has dried and any necessary touch-ups have been made, your ceiling is ready to be admired. Enjoy the updated look of your room, free from the old popcorn texture.
Before concluding the project, here are some final tips and recommendations to keep in mind.
Read more: How To Know If Popcorn Ceiling Has Asbestos
Final Tips and Recommendations
As you conclude your popcorn ceiling removal project, here are some final tips and recommendations to ensure a successful outcome:
- Perform a thorough inspection: Before starting the project, thoroughly inspect the popcorn ceiling for any signs of asbestos or other potential hazards. If you suspect the presence of asbestos, consult with professionals for safe removal.
- Ensure proper ventilation: Throughout the project, maintain good ventilation by opening windows and using fans. This will help dissipate dust and fumes, providing a healthier and more comfortable working environment.
- Take breaks: Popcorn ceiling removal can be physically demanding. Take frequent breaks to rest, hydrate, and recharge. This will help prevent fatigue and potential injuries.
- Protect yourself: Always wear protective gear, including safety goggles, a dust mask or respirator, gloves, and disposable coveralls. This will help minimize the risk of dust inhalation and protect your skin and eyes from potential irritants.
- Dispose of materials responsibly: Dispose of all debris, including plastic sheets, drop cloths, and garbage bags containing scraped-off texture, in accordance with local regulations for construction and renovation waste. Proper disposal is crucial for environmental and safety reasons.
- Consider professional assistance: If you’re unsure about tackling the project yourself, or if you’re dealing with asbestos-containing popcorn ceilings, it’s recommended to seek professional assistance. Professionals can safely remove the popcorn texture and handle any associated risks.
- Select the right paint: Choose a paint specifically formulated for ceilings to ensure good coverage and durability. Consider the finish you desire, such as matte or eggshell, and select a color that complements your overall room design.
- Maintain quality ventilation after painting: After painting the ceiling, continue to keep the room well-ventilated to allow proper drying. This will help eliminate any lingering paint fumes and expedite the curing process.
- Regularly inspect and maintain the ceiling: After completing the project, regularly inspect the ceiling for any signs of damage or deterioration. Address any issues promptly to prevent further damage and ensure the longevity of your newly updated ceiling.
By following these final tips and recommendations, you can achieve a successful and satisfying outcome with your popcorn ceiling removal project. Enjoy the transformed look of your room and the improved air quality in your living space.
Remember, safety and attention to detail are key throughout the entire process. Whether you decide to tackle the project yourself or seek professional help, a smooth and modern ceiling will surely enhance the beauty and value of your home.
Good luck with your popcorn ceiling removal project!
Conclusion
Removing popcorn ceilings can be a rewarding home improvement project that updates the look and feel of your living space. By following the steps outlined in this article, you can successfully and safely scrape away the outdated popcorn texture and create a smooth, modern ceiling. From understanding the reasons for scraping popcorn ceilings to preparing the room, protecting furniture and flooring, and employing proper scraping, repairing, sanding, and painting techniques, you’ve learned the essential steps to achieve a successful outcome.
Throughout the process, it’s crucial to prioritize your safety by wearing protective gear, ensuring proper ventilation, and following all safety guidelines. If you are unsure about the presence of asbestos or lack confidence in handling the project yourself, it’s wise to consult with professionals who can safely remove the popcorn texture and manage any associated risks.
Remember to dispose of debris responsibly, comply with local regulations, and maintain a clean and organized workspace. Regularly inspect and maintain the new ceiling to address any potential issues promptly and preserve its aesthetic and structural integrity. By doing so, you can enjoy the benefits of a modern, updated space for years to come.
Whether you are a seasoned DIY enthusiast or a beginner looking to enhance your home, removing popcorn ceilings is a worthwhile project that can significantly transform the look and value of your property. With the knowledge and techniques gained from this article, you are well-equipped to embark on your journey to a smooth, modern ceiling.
So, roll up your sleeves, gather the necessary equipment, and take the first step towards saying goodbye to the outdated popcorn texture and hello to a fresh, updated ceiling. Best of luck with your popcorn ceiling removal project!
Frequently Asked Questions about What To Do After Scraping A Popcorn Ceiling
Was this page helpful?
At Storables.com, we guarantee accurate and reliable information. Our content, validated by Expert Board Contributors, is crafted following stringent Editorial Policies. We're committed to providing you with well-researched, expert-backed insights for all your informational needs.


0 thoughts on “What To Do After Scraping A Popcorn Ceiling”