Articles
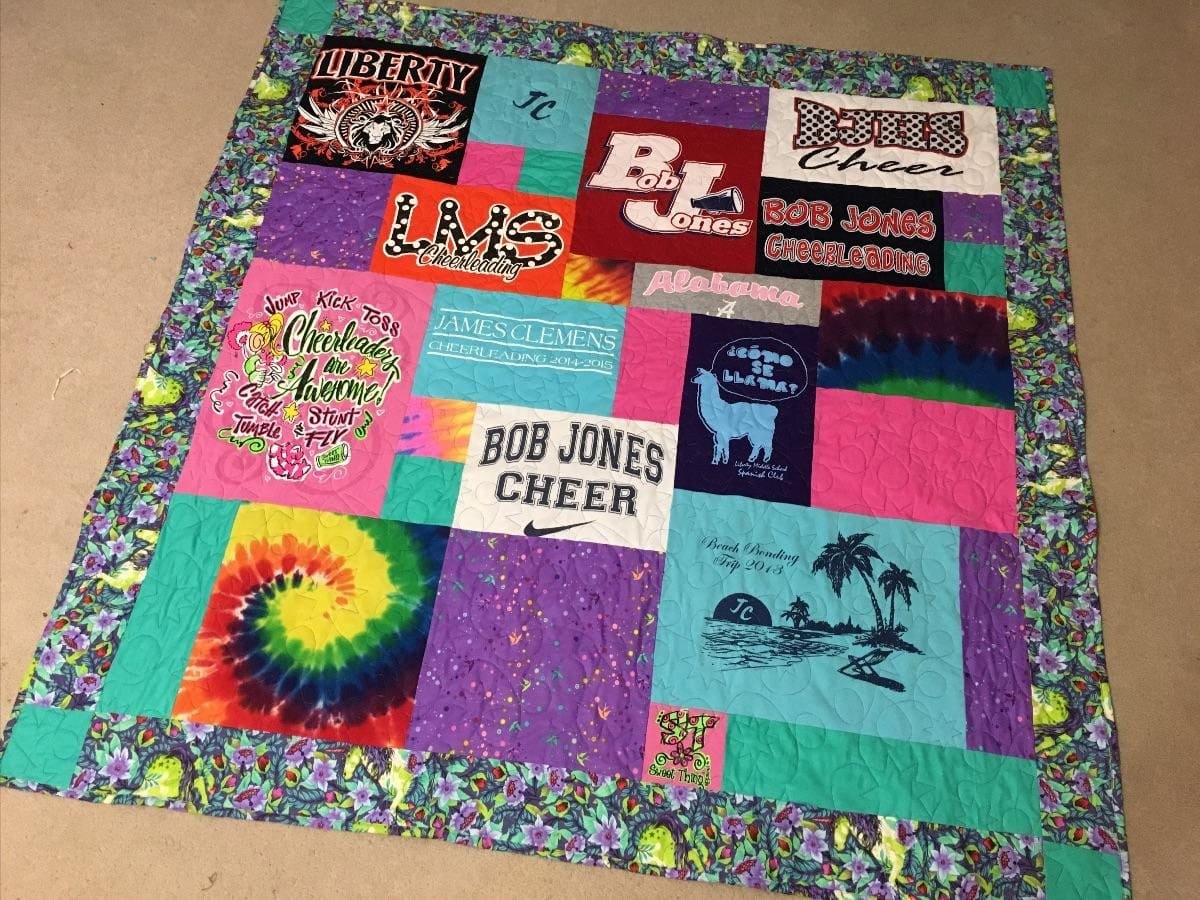
How To Do Quilt Magic Kits
Modified: August 17, 2024
Looking for articles on how to do quilt magic kits? Discover step-by-step guides, tips, and tricks to create stunning quilt designs with our informative articles.
(Many of the links in this article redirect to a specific reviewed product. Your purchase of these products through affiliate links helps to generate commission for Storables.com, at no extra cost. Learn more)
Introduction
Quilt magic kits are a fantastic way to create stunning quilts with ease. Whether you’re a seasoned quilter or a beginner looking to try your hand at this beautiful craft, quilt magic kits can provide a satisfying and rewarding experience. These kits offer a unique approach to quilting by utilizing pre-cut foam boards and fabric to create intricate designs without the need for sewing or complicated piecing.
In this article, we will explore the world of quilt magic kits, discussing the advantages they offer and how to create your own beautiful quilts using these innovative kits. We will provide step-by-step instructions, tips for choosing the right quilt magic kit, and guidance on displaying and caring for the finished quilt.
Whether you want to create a handmade masterpiece for your home or gift a stunning quilt to a loved one, quilt magic kits provide a convenient and accessible way to bring your creative vision to life. With a wide range of designs and patterns to choose from, you can easily find a kit that matches your style and interests.
One of the primary benefits of quilt magic kits is that they eliminate the need for sewing or quilting expertise. This aspect makes them especially appealing to beginners who may be intimidated by traditional quilting techniques. With quilt magic kits, you can achieve professional-looking results without the hassle of intricate stitching or complicated patterns.
Additionally, quilt magic kits offer a range of design possibilities. From floral motifs and geometric patterns to holiday-themed designs and landscapes, you can find a kit that suits your personal style and preferences. These kits often come with pre-cut foam boards, a magic template, fabric, and adhesive, allowing you to create stunning quilts with minimal effort.
Now that we have introduced the concept of quilt magic kits and their benefits, let us delve into the process of choosing the right kit for your project. By selecting the right kit and gathering the necessary materials, you will be well-equipped to embark on your quilt magic journey.
Key Takeaways:
- Quilt magic kits offer a convenient and accessible way to create stunning quilts without the need for sewing or quilting expertise. With a wide range of designs and patterns, they provide a satisfying and rewarding quilting experience for beginners and seasoned quilters alike.
- Choosing the right quilt magic kit is crucial for a successful quilting experience. Consider factors such as design, size, complexity, and included materials to ensure a seamless and enjoyable creative journey.
Read more: How To Do Quilt Sashing
Overview of Quilt Magic Kits
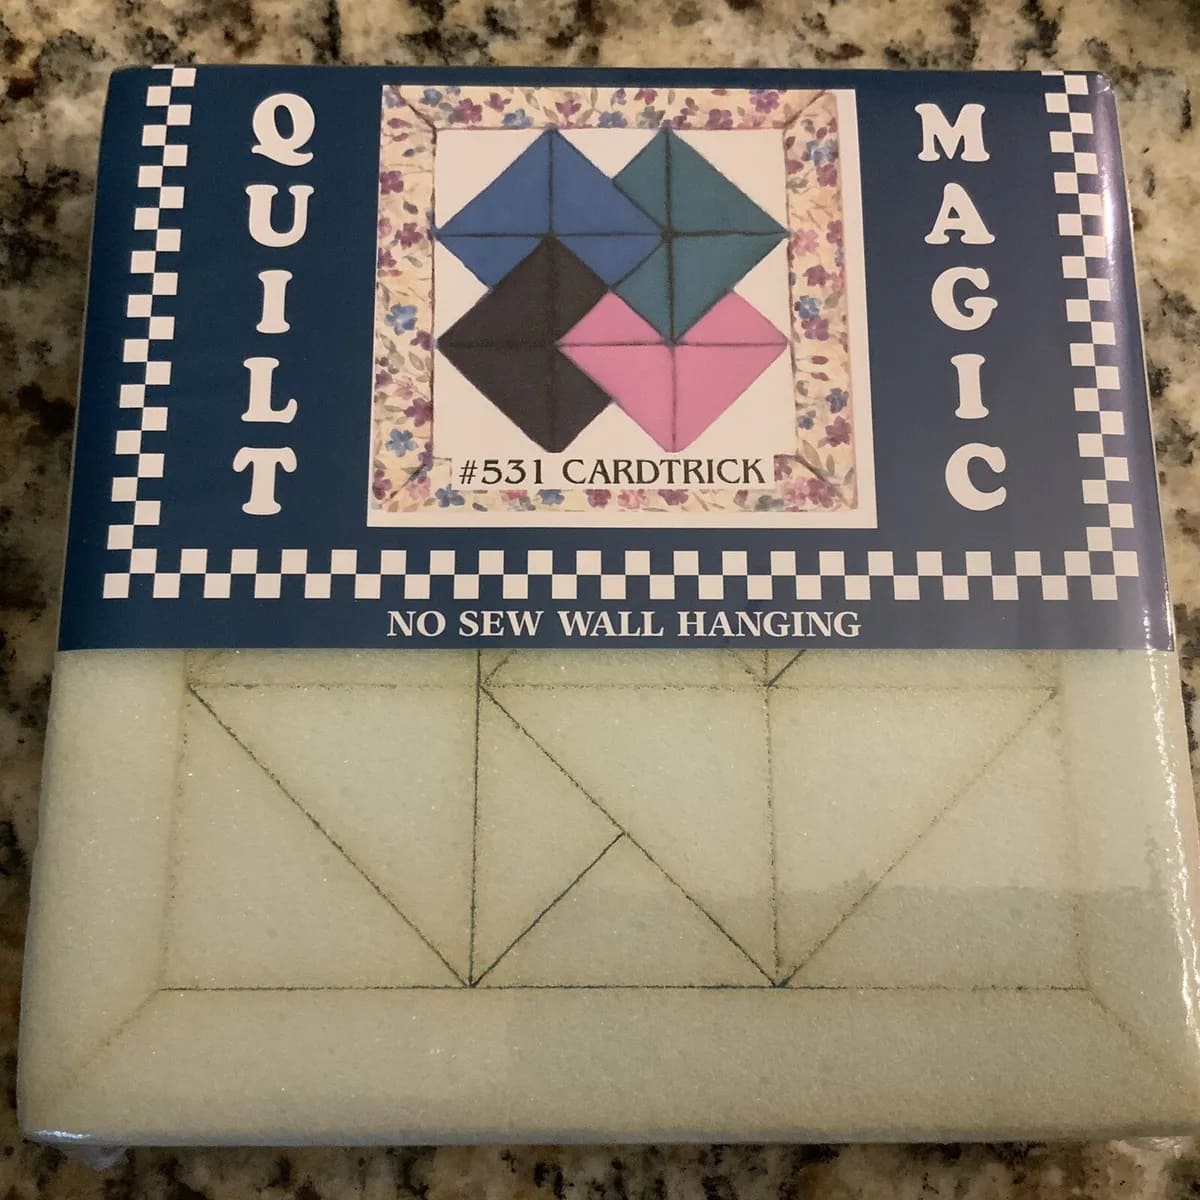
Quilt magic kits are a popular and innovative way to create beautiful quilts with ease. These kits provide a unique approach to quilting, utilizing pre-cut foam boards and fabric to create stunning designs without the need for sewing or complex piecing.
One of the key features of quilt magic kits is the use of foam boards, which act as the base for the quilt design. These foam boards are pre-cut into various shapes and sizes, depending on the specific design of the quilt kit. The foam boards are lightweight yet sturdy, providing a solid foundation for the fabric to be adhered to.
The fabric used in quilt magic kits is typically pre-cut and pre-treated with an adhesive backing. This adhesive allows the fabric to easily stick to the foam boards, ensuring that it stays in place even when displayed or hung on a wall. The fabric comes in a wide variety of colors and patterns, allowing you to choose a design that matches your aesthetic preferences.
Quilt magic kits often include a magic template, which is a pattern or guide that helps you position the fabric pieces correctly on the foam boards. These templates are usually made of clear plastic or sturdy paper, allowing you to easily see the design underneath and ensuring accurate placement of the fabric.
One of the main advantages of using quilt magic kits is the simplicity and convenience they offer. Unlike traditional quilting methods that require intricate sewing and stitching, quilt magic kits provide a quicker and more accessible way to create beautiful quilts. They are particularly suitable for beginners or those who may not have the sewing skills or equipment necessary for traditional quilting.
Another benefit of quilt magic kits is their versatility. With a wide range of designs and patterns available, you can easily find a kit that suits your personal style and preferences. Whether you prefer floral motifs, geometric shapes, or seasonal themes, there is a quilt magic kit out there for you.
Furthermore, quilt magic kits allow for creativity and customization. While the fabric pieces come pre-cut, you can still arrange them in different ways to create unique variations of the design. You can also add embellishments such as buttons, ribbons, or embroidery to further personalize your quilt.
Overall, quilt magic kits offer a fun and enjoyable way to create stunning quilts without the need for advanced quilting skills. Whether you’re a beginner looking to explore the world of quilting or an experienced quilter wanting to try something new, quilt magic kits provide a convenient and satisfying quilting experience.
Choosing the Right Quilt Magic Kit
When it comes to quilt magic kits, there is a wide variety of options available, making it important to choose the right kit for your project. Here are some factors to consider when selecting a quilt magic kit:
- Design: Consider the design or pattern of the quilt kit. Do you prefer floral designs, geometric shapes, or seasonal themes? Choose a kit that matches your personal style and aesthetic preferences.
- Size: Determine the size of the quilt you want to create. Quilt magic kits come in various sizes, so make sure to choose one that suits your desired finished dimensions.
- Complexity: Assess your skill level and the amount of time you want to invest in the project. Some quilt magic kits may have more intricate designs that require more attention to detail and time. If you’re a beginner, it’s advisable to start with a kit that offers a simpler design to get acquainted with the process.
- Materials Included: Take note of the materials included in the kit. Ensure it comes with the necessary pre-cut foam boards, fabric pieces, adhesive, and a magic template. Having all the essential materials in the kit will make the process smoother and more convenient.
- Additional Supplies: Consider any additional supplies you may need. Depending on the kit, you may require scissors, a ruler, or a craft knife to trim the fabric or foam boards. Make sure you have these tools on hand or easily accessible before starting the project.
- Reviews and Recommendations: Read reviews and seek recommendations from fellow quilters or craft enthusiasts who have used quilt magic kits. Their insights can provide valuable information about the quality of the kit, ease of use, and overall satisfaction.
By considering these factors, you can choose a quilt magic kit that aligns with your preferences, skill level, and desired outcome. Remember, the goal is to have an enjoyable and successful quilting experience, so selecting the right kit is crucial in achieving that.
Once you have chosen the perfect quilt magic kit, you’re ready to begin your quilt magic journey. In the next sections, we will provide step-by-step instructions on how to prepare the quilt magic kit, arrange and position the fabric, apply the magic template, and add the finishing touches to create a beautiful quilt.
Required Materials
Before you begin working on your quilt magic kit, it’s essential to gather all the necessary materials. Here is a list of the materials you will need:
- Quilt Magic Kit: Choose the quilt magic kit that best suits your design preference and skill level. Ensure it includes pre-cut foam boards, fabric pieces, adhesive, and a magic template.
- Scissors: You will need a pair of sharp scissors to trim the fabric and foam boards as needed. Make sure they are comfortable to work with and have a clean, precise cutting edge.
- Ruler: A ruler is handy for measuring and aligning the fabric and foam boards. Opt for a clear ruler with markings for accurate measurements.
- Craft Knife: A craft knife can be useful for intricate cutting tasks or trimming excess fabric. Use caution when handling and ensure it has a sharp, retractable blade for safety.
- Cutting Mat: Having a self-healing cutting mat is recommended. It provides a smooth and safe surface for using the craft knife and protects your working area from damage.
- Tape or Adhesive Remover: In case you need to adjust the fabric placement or remove any adhesive residue, having tape or adhesive remover can come in handy. Choose a gentle adhesive remover to avoid damaging the foam boards or fabric.
- Work Surface: Find a flat and clean work surface where you can comfortably assemble your quilt magic kit. A table or desk with sufficient space is ideal.
- Optional Embellishments: If you want to add extra elements to your quilt, consider embellishments such as buttons, ribbons, or embroidery floss. These can enhance the visual appeal and personalize your quilt.
Having all the required materials at your disposal before starting the project ensures a smooth and uninterrupted quilting experience. Make sure to double-check that you have everything on the list to avoid any unnecessary delays or interruptions in the middle of your creation.
Now that you have gathered all the necessary materials, let’s move on to the step-by-step instructions on how to prepare your quilt magic kit and start working on your quilt masterpiece.
Step-by-Step Instructions
Now that you have your quilt magic kit and all the required materials ready, let’s dive into the step-by-step process of creating your quilt masterpiece:
- Prepare the Quilt Magic Kit:
- Unbox the quilt magic kit and lay out all the contents on your work surface.
- Take a moment to familiarize yourself with the foam boards, fabric pieces, adhesive, and magic template.
- Ensure that the foam boards are clean and free from any debris.
- Read through the provided instructions and reference the magic template for guidance on assembling the quilt.
- Arrange and Position the Fabric:
- Start by selecting the fabric piece you will use as the background for your quilt.
- Place the foam board corresponding to the background fabric piece on your work surface.
- Peel off the backing of the fabric piece to reveal the adhesive side.
- Carefully position the fabric piece onto the foam board, aligning it with the edges and corners as accurately as possible.
- Smooth out any wrinkles or bubbles in the fabric, pressing it firmly onto the foam board.
- Repeat this process for the remaining fabric pieces, following the sequence outlined in the magic template.
- Applying the Magic Template:
- Place the magic template over the fabric-covered foam board, aligning it with the designated areas.
- Ensure that the template is flat and securely positioned.
- Use a fabric marker or pencil to mark the outlines or reference points indicated on the template. This will be helpful during the next steps.
- Set the magic template aside for now, but keep it nearby for reference.
- Trimming and Finishing Touches:
- Using your scissors or craft knife, carefully trim off any excess fabric along the edges of the foam board, following the marked outlines or reference points.
- Be precise and take your time to achieve clean and straight edges.
- Inspect the quilt for any loose or lifted fabric. If necessary, apply a small amount of adhesive under the fabric and press it back into place.
- Smooth out any remaining wrinkles or bubbles in the fabric, ensuring a clean and professional finish.
- At this stage, you can also add optional embellishments such as buttons, ribbons, or embroidery to accentuate the quilt design.
Once you have completed these steps, your quilt magic kit will have transformed into a stunning quilt masterpiece. Now, it’s time to display and care for your finished quilt.
In the next section, we will discuss the best ways to showcase your quilt and provide tips on how to properly care for it to ensure its longevity.
Read more: How Do I Quilt
Preparing the Quilt Magic Kit
Before you begin working on your quilt magic kit, it’s important to properly prepare the materials to ensure a smooth and successful quilting experience. Here are the steps to prepare your quilt magic kit:
- Clear Work Area: Find a flat and clean surface to assemble your quilt magic kit. Remove any clutter or debris from the workspace to ensure a clear and organized area to work in.
- Organize the Contents: Carefully unbox the quilt magic kit and gather all the materials included. Lay them out on your work area and take a moment to familiarize yourself with each component. This will help you understand the kit and its contents better.
- Read the Instructions: Take the time to carefully read the provided instructions that come with your quilt magic kit. Familiarize yourself with the steps and guidelines to follow during the quilting process. This will help you understand the specific requirements of the kit and make the process smoother.
- Inspect Foam Boards: Examine the foam boards included in the kit to ensure they are clean and free from any damage or imperfections. Any debris or residue on the foam boards can affect the adherence of the fabric, so it’s important to have them in pristine condition.
- Prepare Fabric: If the fabric pieces included in the kit require any treatment or preparation, follow the instructions provided. Some kits may require you to iron the fabric or remove any wrinkles before adhering it to the foam boards. Make sure the fabric is in the best condition possible to ensure a professional-looking quilt.
By properly preparing your quilt magic kit, you set a solid foundation for the quilting process. A clean and organized work area, along with thorough familiarization with the kit’s materials and instructions, will make the creation of your quilt much more enjoyable and efficient.
Now that you have prepared your quilt magic kit, you’re ready to move on to the exciting step of arranging and positioning the fabric onto the foam boards. This is where your quilt will start to take shape and showcase the beautiful design. Stay tuned for the next section, which will guide you through this process step by step.
When working with Quilt Magic kits, be sure to carefully follow the instructions and use a sharp craft knife for clean, precise cuts. Take your time and enjoy the process of creating a beautiful quilted design.
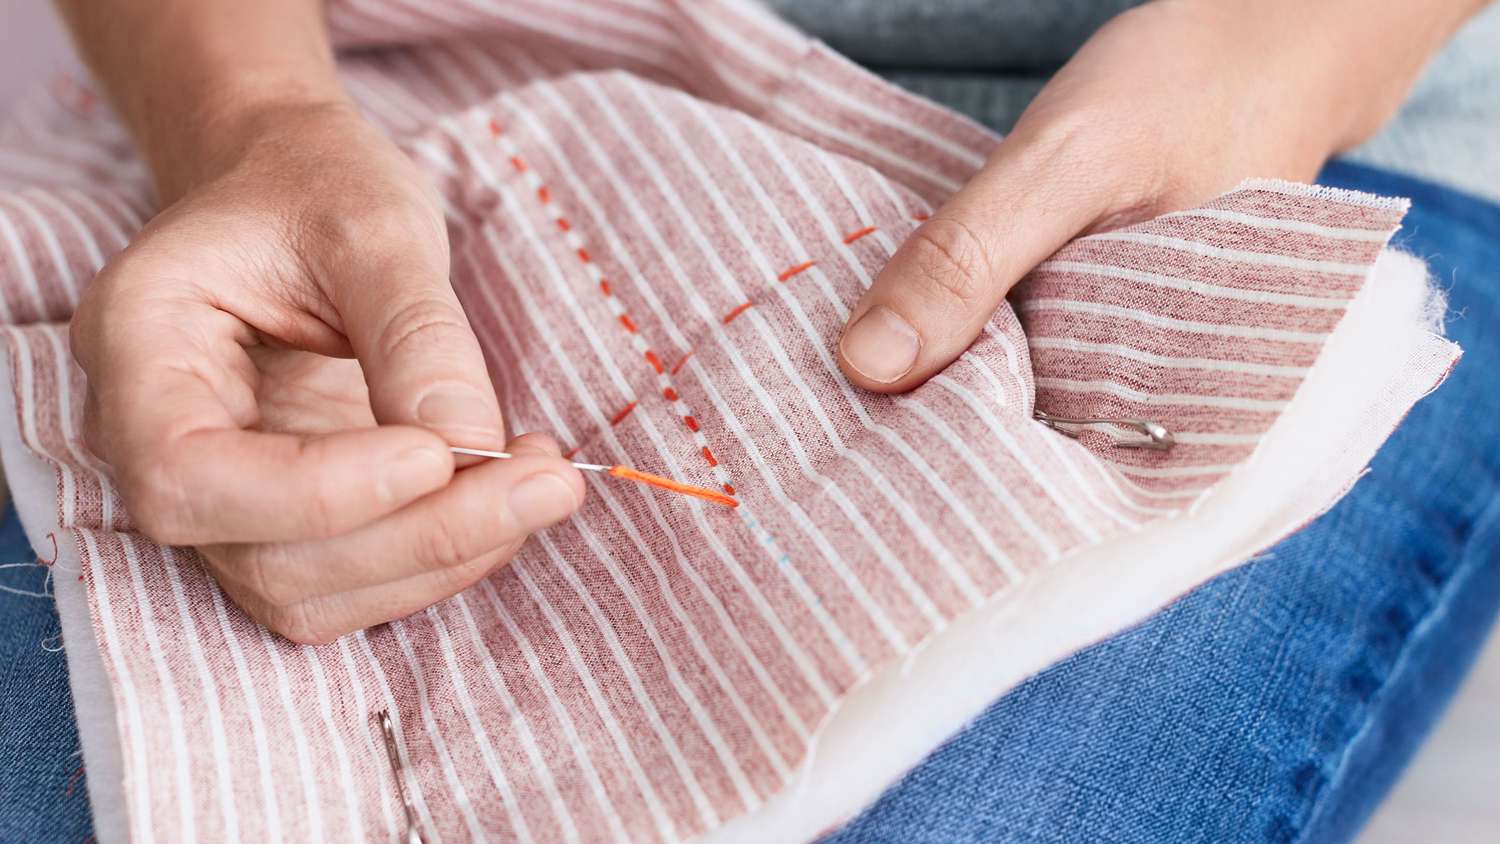
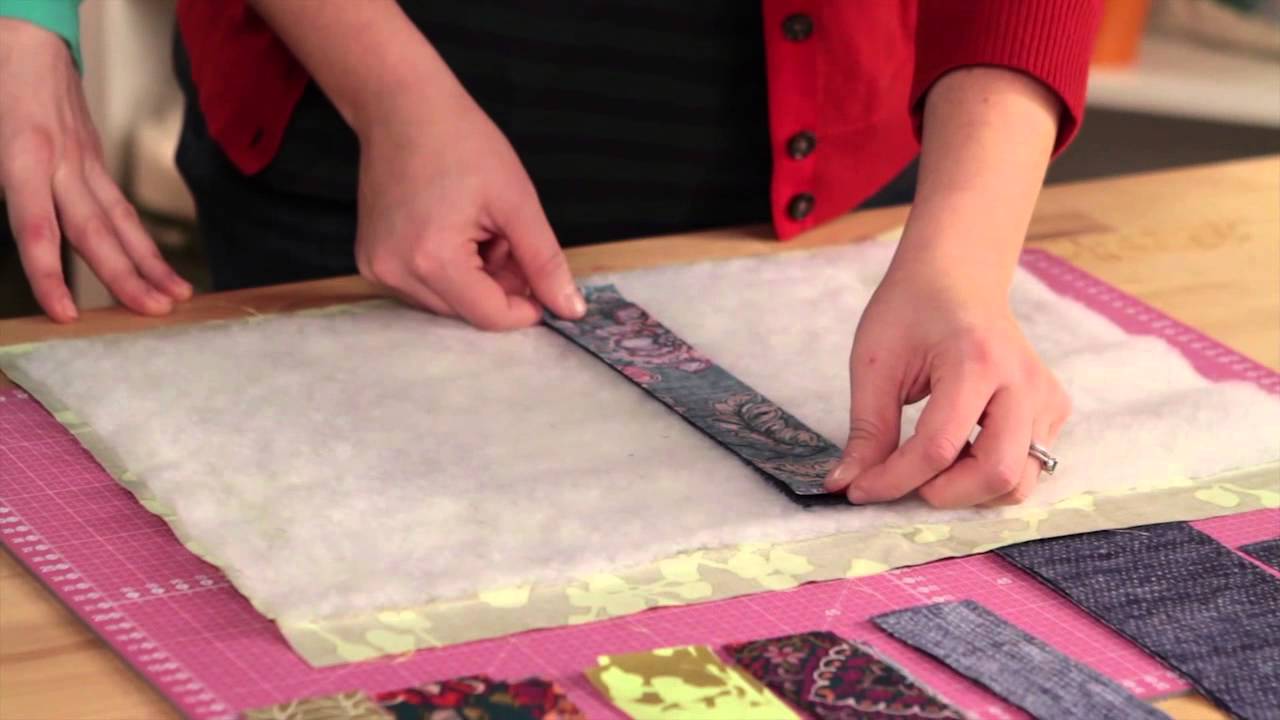
Arranging and Positioning the Fabric
Arranging and positioning the fabric is a crucial step in creating your quilt using a quilt magic kit. This is where you bring the design to life by adhering the fabric pieces to the foam boards. Follow these steps for successful fabric placement:
- Select the Background Fabric: Choose the fabric piece that will serve as the background for your quilt. This fabric will set the overall tone and backdrop for the design. Ensure that it complements the other fabric pieces in the kit.
- Prepare the Foam Board: Take the foam board corresponding to the background fabric and place it on your clean work surface. The foam boards provided in the kit are pre-cut to fit the design and serve as the base for the fabric.
- Peel Off the Adhesive Backing: Carefully remove the backing from the fabric piece you’ve chosen as the background. It will reveal the adhesive side of the fabric.
- Position the Fabric: Align the fabric piece with the foam board, making sure it covers the entire surface. Start from one edge and gradually press the fabric onto the board, smoothing it out as you go. Make sure there are no wrinkles or bubbles and that the fabric adheres securely to the board.
- Repeat for the Remaining Fabric Pieces: Follow the instructions provided in the kit to determine the sequence in which the fabric pieces should be applied. Each fabric piece will have a specific place on the foam board designated by the magic template.
- Align the Pieces: As you position each fabric piece, align it precisely with the edges and corners of the foam board. Accuracy in placement will ensure that the design elements come together seamlessly.
- Smooth Out Wrinkles and Bubbles: Pay close attention to any wrinkles or bubbles that may appear while adhering the fabric. Smooth them out gently with your hands or a clean, flat tool, such as a ruler, to achieve a smooth and professional finish.
Throughout this process, reference the magic template provided in the kit. It will help you determine the correct placement of each fabric piece and ensure that the design aligns perfectly.
Remember to take your time and be meticulous when arranging and positioning the fabric. The effort you put into this step will greatly impact the final result of your quilt. Once you have successfully positioned all the fabric pieces, your quilt will start to take shape, and you can proceed to the next stage of applying the magic template. Stay tuned for the next section, which will guide you through this process step by step.
Applying the Magic Template
Once you have arranged and positioned the fabric pieces onto the foam boards, it’s time to apply the magic template. The magic template acts as a guide, ensuring accurate placement of the fabric and helping to create a cohesive design. Follow these steps to apply the magic template:
- Place the Magic Template: Take the magic template provided in the quilt magic kit and carefully position it over the fabric-covered foam board. Align the template with the designated areas of the design. The template may have markings or guidelines to assist with placement.
- Secure the Template: Ensure that the magic template sits flat and securely on top of the fabric. If necessary, use tape or small weights to keep it in place. This will prevent any movement or shifting during the next steps.
- Mark the Outlines or Reference Points: Using a fabric marker or pencil, trace the outlines or mark the reference points indicated on the magic template. This will help you accurately position additional elements or apply finishing touches without disrupting the overall design.
- Set Aside the Template: Carefully lift and set aside the magic template for reference. Keep it nearby during the next steps, as you may need to consult it as you add final touches or embellishments.
Applying the magic template allows you to create a consistent and cohesive design for your quilt. By following the markings or guidelines, you ensure that each element of the design is accurately positioned.
Now that the magic template has served its purpose, you can proceed to the next stage of trimming and adding the finishing touches to complete your quilt. This is where you give your quilt its final shape and refine the details. Stay tuned for the next section, which will guide you through this process step by step.
Trimming and Finishing Touches
As you near the completion of your quilt using a quilt magic kit, it’s time to focus on trimming and adding the finishing touches. This step will give your quilt its final shape and refine the details. Follow these steps for trimming and adding the finishing touches:
- Trimming Excess Fabric: With scissors or a craft knife, carefully trim any excess fabric along the edges of the foam board. Follow the outlines or reference points that you marked earlier using the magic template as your guide. Take your time to achieve clean and straight edges, ensuring that the fabric aligns perfectly with the foam board.
- Checking Fabric Adherence: Inspect the fabric on each foam board to ensure it is securely adhered. Press down on the fabric to detect any looseness or lifted portions. If necessary, apply a small amount of adhesive under the fabric and press it back into place. Smooth out any remaining wrinkles or bubbles in the fabric for a polished appearance.
- Adding Optional Embellishments: If desired, this is the stage where you can add optional embellishments to your quilt. Consider buttons, ribbons, or embroidery floss to enhance the design or personalize your quilt. Place the embellishments strategically, adhering them securely to the fabric using appropriate adhesive or sewing techniques.
- Refining the Design: Take a step back and evaluate your quilt. Make any necessary adjustments to ensure the overall design looks cohesive and aesthetically pleasing. If you find any areas that need attention, such as straightening out fabric or enhancing details, take the time to refine these elements.
- Inspecting the Quilt: Before considering your quilt complete, thoroughly inspect it for any remaining imperfections. Check for loose threads, uneven edges, or areas that may require additional adhesive. Make the necessary touch-ups to ensure a professional and polished finish.
By focusing on trimming and adding the finishing touches, you give your quilt that final touch of refinement and detail. Take the time to meticulously complete this step, as it will greatly impact the overall appearance of your quilt.
Once you are satisfied with the final result, your quilt is ready to be displayed and enjoyed. In the next section, we will discuss the best ways to showcase your quilt and provide tips on how to properly care for it to ensure its longevity.
Read more: What To Do With Quilt Scraps
Displaying and Caring for the Finished Quilt
Congratulations on completing your quilt using a quilt magic kit! Now, it’s time to showcase your beautiful creation and ensure its longevity through proper care. Here are some tips for displaying and caring for your finished quilt:
- Choosing a Display Option: Decide how you want to display your quilt. You can hang it on a wall using a quilt hanger or display it on a quilt rack. Alternatively, you may prefer to use your quilt as a cozy throw on a couch or bed. Consider the size and design of your quilt when choosing a display option.
- Protect from Sunlight: Avoid placing your quilt in direct sunlight as it can cause fading and damage to the fabric over time. If you choose to hang your quilt on a wall, make sure it is in a location away from direct sunlight exposure.
- Regular Cleaning: Keep your quilt clean by gently vacuuming it or using a lint roller to remove dust and debris. Avoid using harsh chemicals or washing the quilt unless the instructions specifically recommend it. Spot clean any stains using a mild detergent and a soft cloth, if necessary.
- Storage: If you need to store your quilt for an extended period, ensure it is properly protected. Clean the quilt thoroughly and store it in a breathable fabric bag or wrap it in acid-free tissue paper. Avoid storing it in plastic, as this can lead to moisture retention and potential damage to the fabric.
- Handle with Care: When handling your quilt, make sure your hands are clean and dry. Avoid pulling or tugging on the fabric or any embellishments, as this can cause damage. Fold or roll the quilt gently when storing or moving it to prevent creases.
- Air Circulation: Allow your quilt to breathe by providing adequate air circulation. Avoid covering it with plastic or storing it in airtight containers, as this can lead to a buildup of moisture and potential fabric damage.
- Professional Cleaning: If your quilt requires a more thorough cleaning, consider seeking professional help from a quilt restoration expert or a textile conservator. They have the knowledge and expertise to handle delicate quilts and ensure proper cleaning and preservation.
By following these guidelines, you can proudly display your quilt and keep it in excellent condition for years to come. Regular cleaning and careful handling will help preserve the fabric’s beauty and extend the life of your quilt.
Quilt magic kits offer an accessible way to create stunning quilts, and your finished masterpiece is a testament to your creativity and skill. Whether you choose to showcase it in your home or gift it to a loved one, your quilt will undoubtedly be a cherished piece of art.
As you continue your quilting journey, feel free to explore different quilt magic kits, experiment with new designs, and let your creativity flourish. Happy quilting!
Conclusion
Quilt magic kits provide an innovative and accessible way to create beautiful quilts without the need for sewing or complicated piecing. These kits offer a unique approach to quilting, utilizing pre-cut foam boards and fabric to bring your design to life. Whether you’re a seasoned quilter or a beginner looking to explore the world of quilting, quilt magic kits offer a satisfying and rewarding experience.
Throughout this article, we have delved into the world of quilt magic kits, discussing the benefits they offer and providing step-by-step instructions on how to create your own quilt masterpiece. We explored how to choose the right quilt magic kit for your project, the necessary materials required, and the process of arranging and positioning the fabric using the magic template.
Furthermore, we covered trimming and adding the finishing touches to give your quilt its final shape and refined appearance. We also discussed the importance of properly displaying and caring for your finished quilt, providing valuable tips to ensure its longevity and beauty.
Quilt magic kits provide a convenient and enjoyable way to unleash your creativity and create stunning quilts. They offer versatility in design choices, making it easy to find a kit that matches your style and preferences. Whether you prefer floral motifs, geometric patterns, or seasonal themes, there is a quilt magic kit out there for you.
As you embark on your quilting journey with quilt magic kits, remember to have fun and embrace your creativity. Each quilt you create will be a unique expression of your personal style and passion. Whether you display your quilts in your home, gift them to loved ones, or even sell them, they are sure to be cherished and admired.
So, pick up a quilt magic kit, gather your materials, and let your imagination soar as you create breathtaking quilts with ease. The world of quilt magic awaits you, inviting you to explore and discover the joy of this captivating craft.
Frequently Asked Questions about How To Do Quilt Magic Kits
Was this page helpful?
At Storables.com, we guarantee accurate and reliable information. Our content, validated by Expert Board Contributors, is crafted following stringent Editorial Policies. We're committed to providing you with well-researched, expert-backed insights for all your informational needs.


0 thoughts on “How To Do Quilt Magic Kits”