Articles
How To Do Free Motion Quilt
Modified: February 24, 2024
Learn how to free motion quilt with our informative articles. Discover tips, techniques, and step-by-step instructions to enhance your quilting skills.
(Many of the links in this article redirect to a specific reviewed product. Your purchase of these products through affiliate links helps to generate commission for Storables.com, at no extra cost. Learn more)
Introduction
Welcome to the world of free motion quilting, where you can unleash your creativity and add stunning designs to your quilts. Free motion quilting is a technique that allows you to move the fabric freely under the needle of your sewing machine, giving you the ability to create intricate patterns and textures. Whether you’re a seasoned quilter or a beginner, free motion quilting offers endless possibilities to take your quilting projects to the next level.
In this article, we will guide you through the process of free motion quilting, from gathering the necessary materials to troubleshooting common issues. We’ll cover everything you need to know to get started on your free motion quilting journey.
Before we dive into the details, it’s important to note that free motion quilting requires some practice and patience. Don’t be discouraged if your first attempts don’t turn out perfect. With practice and a willingness to learn, you’ll soon become confident in your abilities and develop your own unique style.
So, let’s begin by gathering the necessary materials to get started with free motion quilting.
Key Takeaways:
- Free motion quilting offers endless creative possibilities, from stippling to feathers, allowing quilters to express their unique style and create stunning, personalized quilts.
- Mastering free motion quilting requires patience, practice, and experimentation. Overcoming common issues, such as tension and thread breakage, is part of the journey to creating beautiful, handcrafted quilts.
Gathering Necessary Materials
Before you begin your free motion quilting adventure, it’s essential to have the right materials on hand. Here’s a list of items you’ll need:
- A sewing machine – Make sure your machine allows you to drop or cover the feed dogs. This feature is necessary for free motion quilting as it allows you to move the fabric freely.
- A darning or quilting foot – This specialized foot is designed to give you better control and visibility while quilting. It hovers over the fabric, allowing you to easily maneuver in any direction.
- Quilting gloves – These gloves provide grip and allow you to smoothly move the fabric without slipping. They come in different sizes, so make sure to choose the pair that fits you comfortably.
- Quilting needles – Use sharp needles specifically designed for quilting. These needles have a sharp point to easily penetrate layers of fabric and batting.
- Thread – Choose a high-quality thread that is suitable for quilting. Cotton and polyester threads work well for most quilting projects.
- Batting – This is the layer between your quilt top and backing that gives your quilt warmth and structure. Choose a batting that suits your preferences and project requirements.
- Quilting rulers and templates – These tools are optional but can help you create precise designs and shapes on your quilt.
- Fabric and quilt sandwich – Prepare your quilt top by piecing fabrics together and layering it with batting and backing.
Make sure to gather all the necessary materials before you start free motion quilting. Having everything ready will save you time and allow you to focus on the creative process without interruptions.
Once you have your materials, it’s time to set up your machine for free motion quilting. Let’s move on to the next step.
Setting up Your Machine
Setting up your sewing machine properly is crucial for successful free motion quilting. Here are the steps to follow:
- Prepare your machine: Start by cleaning and oiling your sewing machine. A well-maintained machine will ensure smooth and uninterrupted quilting.
- Attach the darning or quilting foot: Replace the regular presser foot with a darning or quilting foot. This special foot allows for better visibility and control while free motion quilting.
- Lower or cover the feed dogs: Most machines have a lever or button to disengage or cover the feed dogs. This step is essential as it allows you to move the fabric freely under the needle. Consult your machine’s manual if you’re unsure about how to do this on your specific model.
- Thread the machine: Load your machine with the desired thread and bobbin. It’s recommended to use the same thread in both the top and bobbin for quilting.
- Adjust the tension: Set the tension to a medium setting. Test the tension by stitching on a scrap piece of fabric to ensure the stitches are balanced and not too loose or too tight.
- Select a stitch length: For free motion quilting, set your stitch length to zero or the shortest length available on your machine. This will prevent the stitches from pulling and create a freer motion.
- Practice on scrap fabric: Before starting your actual quilt, take some time to practice on scrap fabric. This will allow you to get familiar with the movement of the fabric and test different stitch lengths and tensions.
Once your machine is set up correctly, and you’ve had some practice on scrap fabric, you’re ready to prep your quilt for free motion quilting. We’ll cover that in the next section.
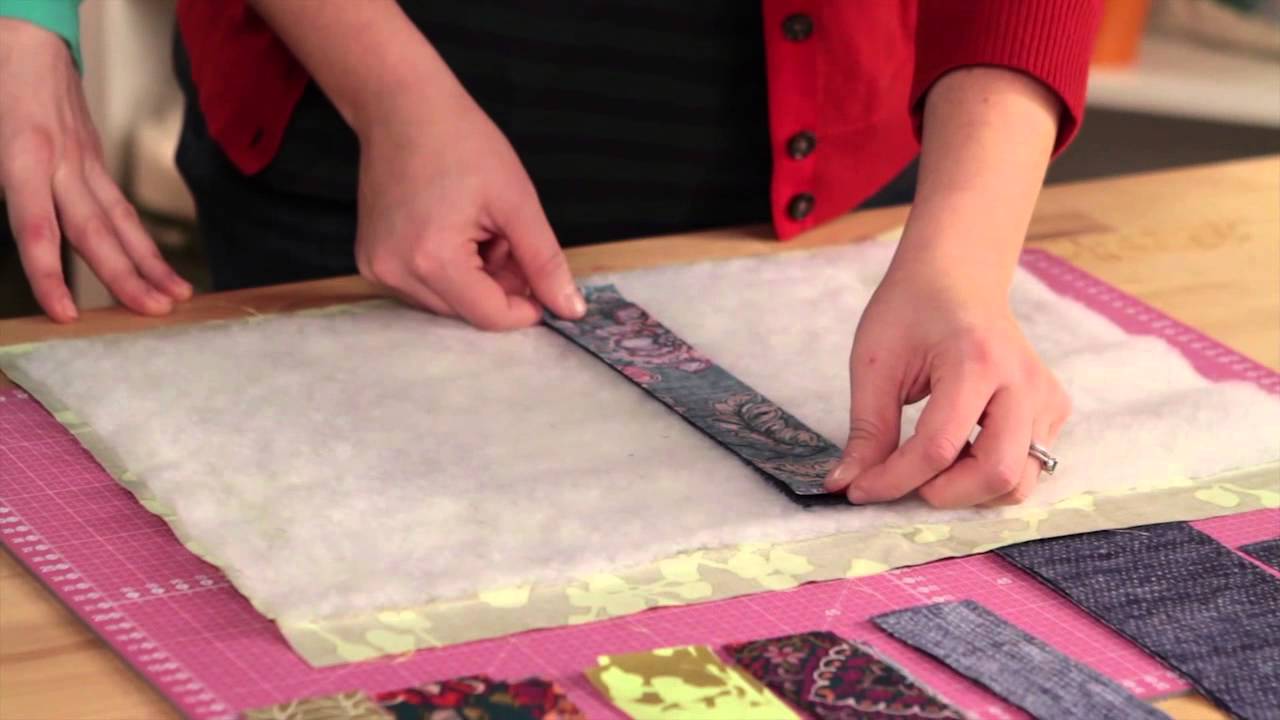
Prepping Your Quilt
Before you can begin free motion quilting, you need to prepare your quilt for the process. Here’s a step-by-step guide to help you get your quilt ready:
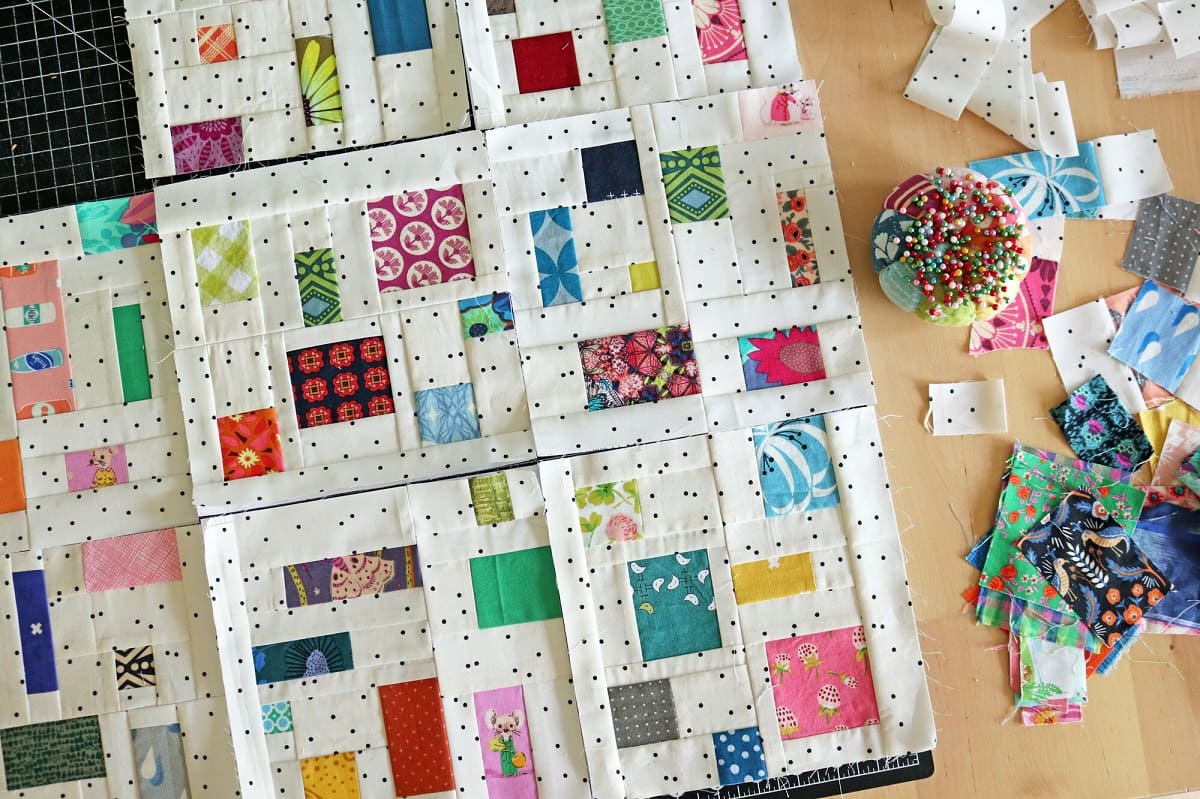
- Piece your quilt top: If you haven’t already, assemble your quilt top by piecing together the desired fabric blocks or strips. Press the seams open or to the side, depending on your preference.
- Layer your quilt sandwich: Lay out your quilt backing on a large, flat surface. Smooth out any wrinkles or creases. Place your batting on top of the backing, making sure it is evenly distributed and extends past the edges of the quilt top.
- Add the quilt top: Carefully lay your quilt top on top of the batting, aligning it with the backing and ensuring it is centered. Smooth out any wrinkles or folds. Use pins or basting spray to hold the layers together, making sure they don’t shift during the quilting process.
- Mark your quilt: If you have a specific quilting design or pattern in mind, you can use fabric pens or chalk to mark the quilting lines on your quilt top. This will serve as a guide as you quilt. Alternatively, you can opt for freehand quilting and skip this step.
Once your quilt is prepped and ready to go, it’s time to choose the right design for your free motion quilting. Let’s explore design options in the next section.
Choosing the Right Design
When it comes to free motion quilting, the design possibilities are endless. You have the freedom to choose from a wide range of patterns and motifs to add beauty and texture to your quilt. Here are a few tips to help you select the right design:
- Consider the purpose of your quilt: Think about the overall theme or purpose of your quilt. Is it a baby quilt that calls for playful and whimsical designs? Or perhaps a bed quilt that requires more intricate and detailed motifs? Tailor your design choices to match the intended use of the quilt.
- Take inspiration from your quilt top: Look closely at the patterns, colors, and textures in your quilt top. Let them guide your design choices for the quilting. You can echo the shapes or create contrast with different patterns.
- Start with simple designs: If you’re new to free motion quilting, it’s best to begin with simpler designs. This will allow you to gain confidence and control over your stitching. Basic designs like meandering, loops, or swirls are great starting points.
- Explore quilting books and online resources: There is a wealth of inspiration and tutorials available in quilting books, magazines, and online platforms. Browse through them to discover new designs and techniques that you can incorporate into your quilting.
- Consider the density of your quilting: Think about how dense or sparse you want your quilting to be. Dense quilting will create a more textured and tightly quilted look, while sparse quilting will result in a looser and more open design.
- Mix and match designs: Don’t be afraid to combine different designs within your quilt. You can create a beautiful visual effect by alternating between different patterns or by using a combination of free motion quilting and straight-line quilting.
Remember, the design you choose should reflect your style and personal touch. Free motion quilting is an opportunity to express your creativity, so don’t be afraid to experiment and have fun with it.
Now that you have an idea of the design you want to create, it’s time to build your skills through practice. We’ll explore this further in the next section.
Read more: How To Do Quilt Sashing
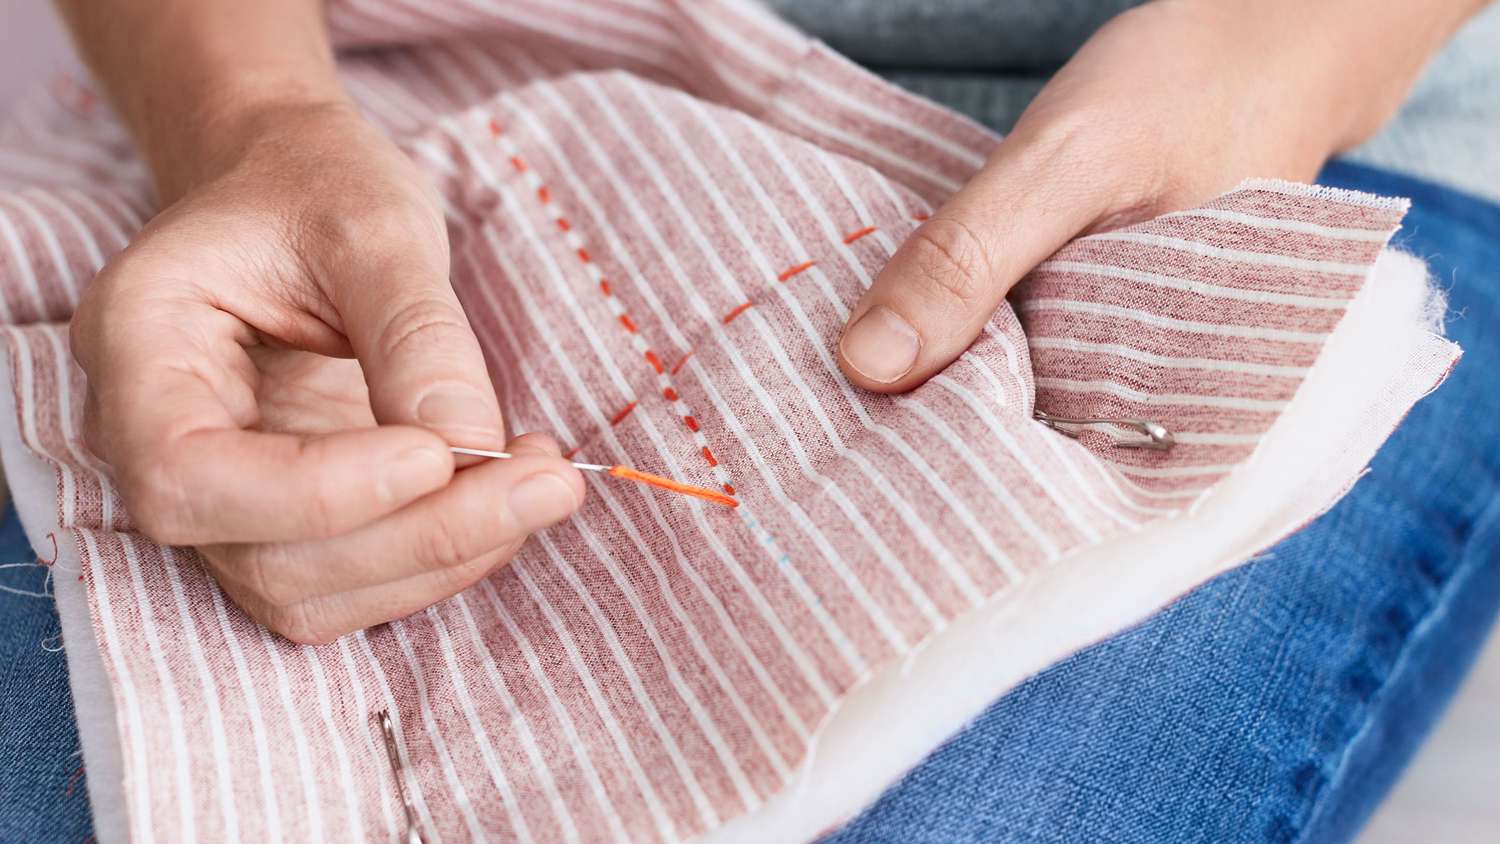
Practice on Scrap Fabric
Before diving into free motion quilting on your actual quilt, it’s essential to spend some time practicing on scrap fabric. This will help you familiarize yourself with the motion of free motion quilting and fine-tune your technique. Here’s how to make the most of your practice sessions:
- Select a scrap fabric: Choose a piece of fabric similar in weight and composition to your quilt. This will give you a more accurate feel for how your machine and thread will interact with your quilt.
- Layer your practice fabric: Place a layer of batting and a backing fabric behind your practice fabric to create a mini quilt sandwich. This will simulate the same conditions you’ll encounter when quilting your actual project.
- Set up your machine: Make sure your sewing machine is properly set up for free motion quilting, as we discussed earlier. Double-check that the feed dogs are lowered or covered, and the appropriate foot is attached.
- Warm-up with basic shapes: Start by practicing basic shapes such as straight lines, curves, circles, and squares. These shapes will help you develop control and consistency in your stitching. Focus on smooth and even stitches as you move the fabric under the needle.
- Experiment with different designs: Once you feel comfortable with the basic shapes, begin experimenting with different free motion quilting designs. Try out swirls, loops, stippling, feathers, or any other patterns that you find interesting. Don’t worry about perfection at this stage; the goal is to explore and build your skills.
- Adjust tension and machine speed: Pay attention to the tension of your stitches and the speed of your machine. Experiment with different tension settings and machine speeds to find the combination that produces the best results for your desired quilting style.
- Evaluate and learn from your practice sessions: Take a step back and evaluate your practice stitches. Assess what worked well and what areas need improvement. Learning from your mistakes and adjusting your technique will help you progress as a free motion quilter.
Remember, practice is key to mastering free motion quilting. Dedicate regular time to hone your skills, and you’ll see significant improvement over time. Once you feel confident with your practice sessions, you’ll be ready to move on to quilting your actual project.
In the next section, we’ll delve into some tips for adjusting tension and machine speed for optimal quilting results.
Adjusting Tension and Machine Speed
Properly adjusting the tension and machine speed is crucial for achieving optimal quilting results in free motion quilting. Here are some tips to help you dial in the right settings:
- Tension adjustment: The tension of your stitches plays a vital role in the overall appearance of your quilting. Most machines have a tension dial or settings that allow you to adjust the thread tension. Start with a medium tension setting and test it on a scrap piece of fabric. Ideally, the upper and lower threads should interlock in the middle of the quilt sandwich without any loops or puckering. If you see loops on the top or bottom, adjust the tension until you achieve balanced stitches.
- Machine speed: The speed at which you move your fabric beneath the needle can vary based on personal preference. Generally, it’s recommended to start at a slower speed until you gain confidence and control. Keep in mind that a consistent speed is key to maintaining even stitch length. Experiment with different speeds until you find the one that works best for you.
- Practice machine runs: Before diving into your actual quilt, take some time to practice machine runs on scrap fabric. This will help you get a feel for the speed and tension adjustments required for your specific machine.
- Make small adjustments: When fine-tuning your tension and machine speed, it’s best to make small incremental adjustments and test them on scrap fabric. This way, you can gradually dial in the perfect settings without making drastic changes that might affect the quality of your stitching.
- Take breaks: Free motion quilting can be physically demanding, especially if you’re working on a large project. Remember to take breaks to rest your hands, wrists, and shoulders. Fatigue can affect your control and accuracy, so listen to your body and pace yourself.
Remember, adjusting tension and machine speed may require some trial and error. Each machine is different, and it’s essential to find the settings that work best for you. With practice and experimentation, you’ll develop a better understanding of your machine and achieve consistent results in your free motion quilting.
In the next section, we’ll dive into the actual process of starting your free motion quilting on your quilt.
Practice on scrap fabric before quilting your actual project to get comfortable with the free motion technique and to adjust your machine’s tension.
Starting Your Free Motion Quilting
Now that you’ve practiced and adjusted your tension and machine speed, it’s time to begin your free motion quilting journey on your actual quilt. Follow these steps to get started:
- Position your quilt: Start by positioning your quilt under the needle of your sewing machine. Begin in the center of your quilt or at a convenient starting point that works best for your design.
- Lower the needle: Lower the needle into the quilt sandwich manually or by using the needle-down function on your machine. This will anchor the quilt and prevent it from slipping as you start stitching.
- Engage the foot pedal: Begin quilting by gently pressing on the foot pedal to activate the sewing machine. Gradually increase your machine speed to maintain a consistent pace as you stitch.
- Move the fabric: With your hands on either side of the needle, move the fabric in smooth and controlled motions to create your desired design. As you move, focus on maintaining even and consistent stitch length.
- Take breaks and readjust: As you progress, remember to take breaks to evaluate your work and make any necessary adjustments to the tension or machine speed. This will ensure that your quilting remains consistent throughout.
- Secure your stitches: To secure your stitches at the beginning and end of your quilting lines, make a few small backstitches or tie off the threads manually. This will prevent your stitches from unraveling over time.
As you quilt, try to relax and maintain a steady rhythm. Allow your creativity to flow and enjoy the process. Don’t be too critical of small imperfections, as they can add character and a handmade touch to your quilt.
Remember, practice makes perfect. Your skills will improve with each quilt you create, so don’t be discouraged if your first attempts aren’t flawless. Embrace the learning process and the joy of quilting.
In the next section, we’ll discuss how to effectively work on different sections of your quilt to ensure even quilting coverage.
Working on Different Sections
When free motion quilting, it’s important to work on different sections of your quilt to ensure even quilting coverage and prevent distortion. Here are some tips for effectively working on different sections:
- Divide your quilt into sections: Depending on the size of your quilt, divide it into manageable sections that you can comfortably quilt without stretching or distorting the fabric. This will help maintain the integrity of your design and make it easier to handle.
- Start from the center: Begin quilting from the center of each section and work your way outward. This will help distribute any potential fabric tension more evenly and prevent the creation of noticeable wrinkles or puckering. Quilt in a consistent pattern or design to maintain a cohesive look.
- Maintain consistent tension: As you move from one section to another, pay attention to your tension settings. Ensure that they remain consistent throughout the entire quilt. Test your tension on scrap fabric before quilting each new section to ensure a balanced stitch.
- Overlap your stitches: To create a seamless transition between sections, overlap your stitches slightly. This will help blend the quilting lines and prevent any gaps or unevenness. Be mindful of your design and try to plan the stitching path to ensure smooth continuity.
- Take breaks and readjust: Throughout the quilting process, take breaks to assess your work and make any necessary tension or machine speed adjustments. This will help you maintain a consistent quilting quality across different sections.
- Rotate your quilt: If necessary, rotate your quilt periodically to access different areas more comfortably. Adjusting the orientation can provide better visibility and maneuverability, especially when working on intricate designs or borders.
- Secure loose threads: As you finish quilting each section, make sure to secure any loose threads by either backstitching or tying them off manually. This will prevent them from unraveling later.
Working on different sections allows you to take a systematic approach to your quilting, ensuring you cover the entire quilt evenly and consistently. By following these tips, you’ll be able to achieve a beautifully quilted project.
Next, let’s explore how you can add texture and detail to your quilt using a technique called stippling.
Read more: How Do I Quilt
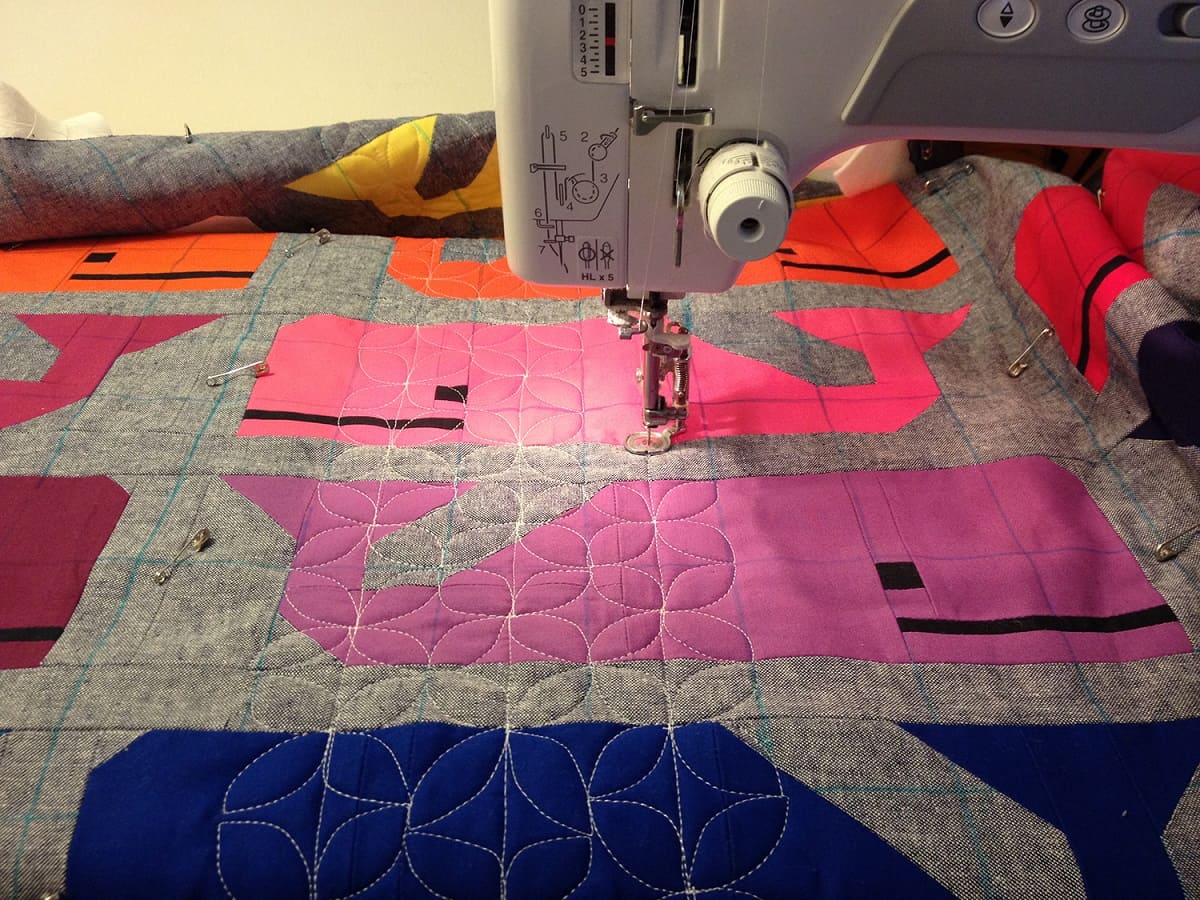
Adding Texture and Detail with Stippling
Stippling is a popular technique in free motion quilting that adds texture, depth, and visual interest to your quilt. It involves creating small, random, and closely spaced stitches throughout a section of fabric. Stippling can be used as an all-over design or in specific areas to emphasize certain elements. Here’s how you can incorporate stippling into your quilting:
- Select a section: Choose a section of your quilt where you want to add texture and detail. This can be the entire quilt, a specific block, or areas surrounding a focal point.
- Start with a straight line: To begin stippling, create a straight line of quilting stitches. This line will serve as a guide to help you maintain consistent spacing and direction as you quilt.
- Create small curvy loops: From the straight line, start forming small curvy loops or “S” shapes, varying the size and shape as you go. Stippling is all about creating organic and random patterns, so don’t worry about perfection.
- Overlap your stitches: As you stipple, make sure to overlap your stitches slightly. This will ensure a continuous and fluid look to the design. The overlapping stitches will create density and texture within the section.
- Fill the space: Continue stippling and filling the space within the section, gradually moving from one area to another. Vary the density of the stippling to add visual interest and create emphasis on certain elements.
- Practice control and consistency: Stippling requires control and consistency in your stitching. Focus on maintaining even stitch length and regulating your speed as you move the fabric under the needle. Practice on scrap fabric before working on your quilt to build your skills.
- Blend sections together: As you move between sections, use stippling to blend them together seamlessly. Overlap the stippling lines from one section to another to create a smooth transition and avoid any noticeable breaks or gaps.
- Experiment with variations: Stippling offers endless possibilities for creativity. Feel free to experiment with variations such as echoing, spiraling, or adding additional motifs within the stippling pattern. This will add more dimension and complexity to your quilt.
Stippling is a versatile technique that can be used in conjunction with other quilting designs or as a standalone pattern. It adds a beautiful textural element to your quilt, transforming it into a work of art.
Next, let’s explore some other free motion quilting designs that you can incorporate into your projects.
Exploring Other Free Motion Designs
Free motion quilting offers a myriad of design options beyond stippling. Let’s explore some other popular designs that you can incorporate into your quilting projects to add interest and variety:
- Feathers: Feather designs are elegant and timeless. They can be quilted as individual feathers or in continuous motifs. Feathers can be used to frame a block, create borders, or add a touch of elegance to any section of your quilt.
- Meandering: Meandering is a versatile and fluid design that consists of random curves and swirls. It can be used as an all-over quilting pattern or in specific areas to fill empty spaces. Meandering adds beautiful texture and movement to your quilt.
- Loops and swirls: Loops and swirls create a whimsical and playful effect. They can be quilted in various sizes and densities to add depth and visual interest. This design is especially popular for children’s quilts and modern quilt designs.
- Gridwork: Quilting a grid pattern creates a structured and geometric look. It involves stitching straight lines in a crisscross fashion to form a grid. Gridwork can be used to highlight specific sections or create a modern and contemporary feel.
- Echo quilting: Echo quilting involves stitching parallel lines around a shape or motif to create emphasis and dimension. By varying the spacing between the lines, you can add depth and visual impact to your quilt.
- Circles and spirals: Creating circles and spirals with your quilting adds a sense of movement and liveliness to your project. These designs can be combined with other motifs or used as standalone patterns to create focal points.
Feel free to combine different designs within your quilting to create unique and eye-catching effects. The key is to let your creativity guide you and experiment with various patterns to find the perfect fit for your quilt.
Next, let’s discuss the process of finishing and binding your quilt once you’ve completed the quilting phase.
Finishing and Binding Your Quilt
Once you have completed the free motion quilting on your quilt, it’s time to finish it off and bind the edges. Follow these steps to give your quilt a polished and professional look:
- Trim the excess batting and backing: Using a ruler and rotary cutter, carefully trim any excess batting and backing fabric along the edges of your quilt. This will ensure that all layers are neatly aligned.
- Create a binding strip: Cut fabric strips for your binding, typically 2.5 to 3 inches wide. Join the strips together at a 45-degree angle to create a continuous strip long enough to go around your quilt.
- Prepare the binding: Fold the strip in half lengthwise with wrong sides together and press it using an iron. This will create a neat and crisp edge for your binding.
- Attach the binding: Starting in the middle of one side of your quilt, align the raw edges of the binding with the raw edges of your quilt. Sew the binding in place using a ¼ inch seam allowance, mitering the corners as you go.
- Secure the binding: Once you’ve sewn the binding all around the quilt, fold it over to the back, covering the raw edges. Pin or clip the binding in place and hand stitch it to the back of the quilt using a blind stitch or ladder stitch. Take care to make your stitches invisible from the front.
- Label your quilt: Add a label to your quilt to document your work and add a personal touch. Include your name, the date, and any other information you want to include. Attach the label securely to the back of the quilt.
- Finishing touches: Give your quilt a final press to smooth out any wrinkles or creases. Trim any loose threads and ensure everything is tidy and secure.
Once your quilt is finished and bound, take a step back and admire your beautiful creation. Your quilt is now ready to be used, gifted, or showcased proudly.
In the next section, we’ll cover some common troubleshooting issues that may arise during the free motion quilting process and how to overcome them.
Troubleshooting Common Issues
While free motion quilting, you may encounter some common issues that can affect the quality of your stitching. Here are a few troubleshooting tips to help you overcome these challenges:
- Uneven stitch length: If your stitch length is inconsistent, it can detract from the overall appearance of your quilting. Ensure that you are maintaining a steady machine speed and a consistent hand movement. Practice on scrap fabric to develop control and maintain even stitch length.
- Thread breakage: Thread breakage can be frustrating, but there are a few potential fixes. First, check if your thread is appropriately threaded through the machine’s tension discs. Make sure the thread is not caught on any parts of the machine. Additionally, ensure that the needle is the correct size for your thread and fabric, as a mismatch can cause breakage.
- Skipped stitches: If you notice skipped stitches in your quilting, first check if the needle is correctly installed and not bent or dull. Also, consider using a new needle appropriate for your fabric and thread. Ensure that you’re using the correct tension setting and that the fabric is moving smoothly under the needle.
- Tension issues: Imbalanced tension can result in thread showing on the top or bottom of your quilt. Before starting, ensure that your machine is properly threaded and that the tension discs are free from debris. Adjust the tension gradually, testing on scrap fabric until you achieve balanced stitches.
- Puckering or gathering: If your fabric is puckering or gathering as you quilt, it may be due to a variety of factors. Ensure that the quilt layers are smooth and properly basted together before quilting. Experiment with different tension settings and machine speeds to find the sweet spot that works best for your fabric and batting combination.
- Fabric bunching or dragging: If you experience fabric bunching or dragging, it may be an issue with your machine’s feed dogs or the pressure on the foot. Ensure that your feed dogs are lowered or covered for free motion quilting. If the fabric is still dragging, try using quilting gloves or a Supreme Slider to help the fabric glide smoothly.
When troubleshooting any quilting issue, a combination of patience, practice, and persistence is essential. Keep experimenting, adjusting, and practicing on scrap fabric to refine your technique and overcome any challenges you encounter.
Congratulations! You’ve now learned the fundamentals of free motion quilting, from gathering the necessary materials to troubleshooting common issues. With practice and creativity, you can continue to improve your skills and create stunning quilts that reflect your personal style.
Now go forth and embrace the art of free motion quilting!
Remember to have fun along the way and enjoy the journey of creating beautiful quilts that will be cherished for years to come.
Happy quilting!
Conclusion
Congratulations on completing your journey through the world of free motion quilting! You’ve learned how to gather the necessary materials, set up your machine, prep your quilt, choose designs, practice on scrap fabric, adjust tension and machine speed, start quilting, work on different sections, add texture with stippling, explore other designs, finish and bind your quilt, and troubleshoot common issues. Armed with this knowledge, you are ready to take your quilting projects to new heights!
Remember that free motion quilting is an art form that requires practice and patience. Don’t be disheartened by initial imperfections. With each project, your skills will improve and your creativity will grow. Embrace the opportunity to experiment, explore new designs, and find your personal quilting style.
As you embark on your future quilting endeavors, continue to seek inspiration from books, online resources, and fellow quilters. Attend quilting workshops or join quilting communities to connect with like-minded individuals who share your passion. The quilting world is a vast and supportive community, ready to cheer you on and help you along your journey.
Remember to enjoy the process of quilting, where every stitch tells a story and every quilt is a labor of love. Whether you create quilts for yourself, loved ones, or for charity, know that you are leaving a piece of your creativity and artistry for generations to come.
So, gather your materials, set up your machine, and let your imagination soar as you embark on your next free motion quilting project. With practice, determination, and a touch of creativity, you will create quilts that are not just functional but true works of art.
Happy quilting!
Frequently Asked Questions about How To Do Free Motion Quilt
Was this page helpful?
At Storables.com, we guarantee accurate and reliable information. Our content, validated by Expert Board Contributors, is crafted following stringent Editorial Policies. We're committed to providing you with well-researched, expert-backed insights for all your informational needs.


0 thoughts on “How To Do Free Motion Quilt”