Articles
How To Do Quilt Sashing
Modified: August 22, 2024
Learn how to add quilt sashing to your articles with our step-by-step guide. Enhance your quilting projects with this essential technique.
(Many of the links in this article redirect to a specific reviewed product. Your purchase of these products through affiliate links helps to generate commission for Storables.com, at no extra cost. Learn more)
Introduction
Quilt sashing is an essential technique in quilting that adds structure, visual interest, and a finishing touch to your quilt blocks. Whether you’re making a traditional patchwork quilt or a modern design, sashing can help bring your quilt together and create a cohesive look. In this article, we will guide you through the process of quilt sashing, step by step, so you can achieve professional-looking results.
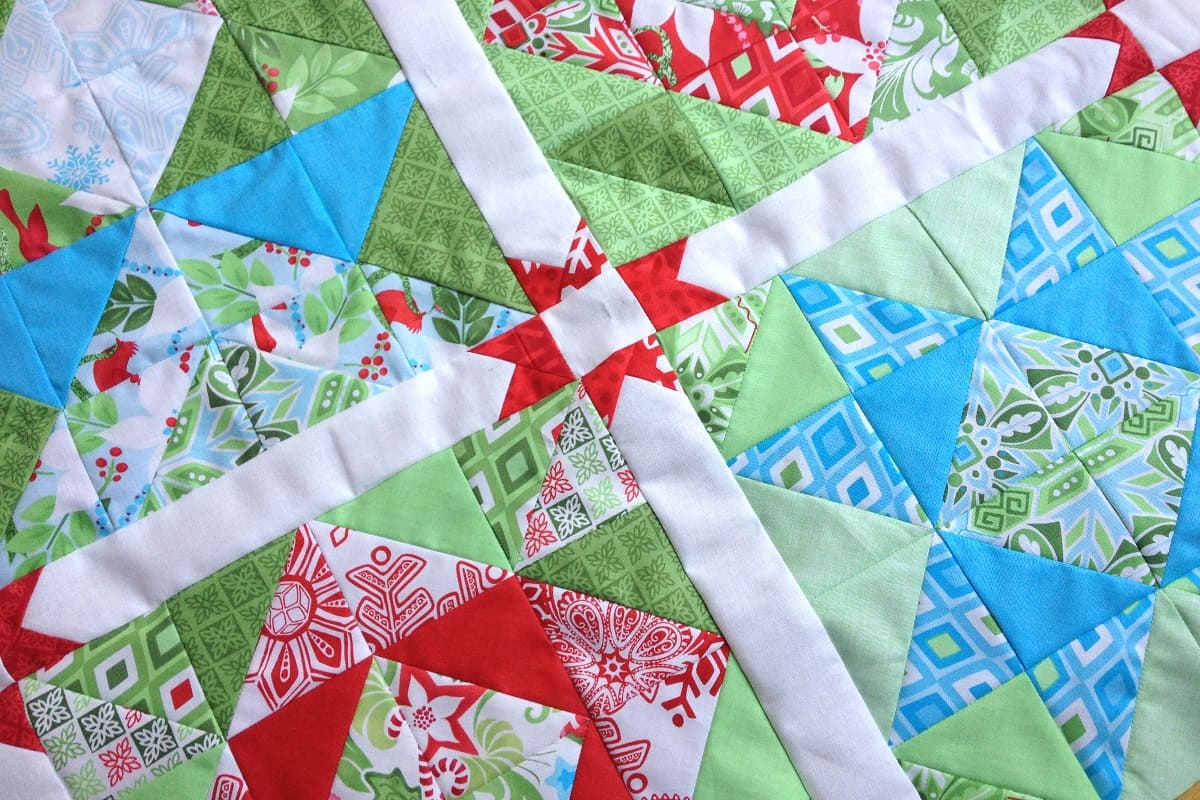
When it comes to quilting, the sashing is the fabric strip that is sewn between the quilt blocks. It acts as a border, separating the blocks and providing a frame for each individual block. Sashing not only adds visual appeal but also brings balance and enhances the overall design of your quilt.
Before you dive into the world of quilt sashing, you will need a few materials to get started. Here’s a list of what you’ll need:
- Fabric for your quilt blocks and sashing
- Cutting mat
- Rotary cutter
- Quilting ruler
- Pins
- Sewing machine
- Thread
- Iron and ironing board
- Quilt batting
- Backing fabric
- Quilting pins or basting spray
- Quilting needle and thread
Now that you have gathered your materials, it’s time to dive into the steps of quilt sashing. Remember, practice makes perfect, so don’t worry if you’re new to quilting. With a little patience and attention to detail, you’ll be creating beautiful quilted masterpieces in no time.
Key Takeaways:
- Quilt sashing is a versatile technique that adds visual appeal, structure, and balance to your quilts. By carefully selecting fabrics and following the step-by-step process, you can achieve professional-looking results and unleash your creativity.
- The process of quilt sashing involves careful preparation, precise measuring and cutting, and meticulous sewing. It not only enhances the overall design of your quilt but also offers opportunities for customization and personal expression.
Read more: How Do I Quilt
What is Quilt Sashing?
Quilt sashing is a technique used in quilting where fabric strips are sewn between the quilt blocks to create a border and separate each block. The sashing strips can vary in width and can be the same or different fabric from the quilt blocks, depending on the desired design.
Not only does quilt sashing add visual interest and structure to a quilt, but it also provides a venue for creativity and customization. By carefully selecting the sashing fabric, you can create contrast, complement the colors of the quilt blocks, or even incorporate a theme or pattern.
Sashing plays a vital role in the overall design of the quilt. It helps define individual blocks and creates a sense of unity among them. It also contributes to the balance and flow of the quilt and allows each block to shine on its own while still being part of a larger composition.
One of the main benefits of using quilt sashing is that it can enhance the overall visual appeal of the quilt. It can make the quilt appear more polished and finished, elevating it from a collection of individual blocks to a cohesive and professional-looking piece of art.
Quilt sashing also offers practical advantages. It can make it easier to assemble the quilt top, providing a clear structure and guide for joining the blocks. It can also help stabilize the quilt top, reducing the risk of distortion or warping during the quilting process.
Another advantage of quilt sashing is the opportunity it provides for customizing the quilt’s design. By varying the width or color of the sashing strips, you can create different effects and alter the overall look and feel of the quilt. For example, narrow sashing can create a more modern and sleek aesthetic, while wider sashing can evoke a traditional and timeless feel.
Quilt sashing can be used in various styles of quilting, from simple and traditional designs to more complex and intricate patterns. It is a versatile technique that allows quilters to express their creativity and style while enhancing the overall structure and beauty of the quilt.
Now that you have a better understanding of what quilt sashing is and its importance in quilting, let’s move on to the next step: gathering the necessary materials.
Materials Needed
Before you dive into the world of quilt sashing, it’s important to gather all the necessary materials. Here’s a list of what you’ll need:
- Fabric for your quilt blocks and sashing: Choose fabrics that complement each other and the overall theme of your quilt. Consider using a variety of colors, prints, and textures to add visual interest.
- Cutting mat: A self-healing cutting mat will provide a smooth and resilient surface for accurate cutting.
- Rotary cutter: This tool allows for precise and efficient cutting of fabric. Make sure to use a sharp blade for clean cuts.
- Quilting ruler: A clear and non-slip quilting ruler is essential for measuring and cutting fabric strips accurately.
- Pins: Use straight pins to hold your fabric in place while sewing. Opt for pins with glass heads to avoid melting under the iron.
- Sewing machine: A reliable sewing machine with a straight stitch setting is needed for sewing the quilt blocks and sashing together.
- Thread: Choose a thread color that matches or coordinates with your fabric. Use a high-quality cotton thread for durability and smooth stitching.
- Iron and ironing board: Pressing your fabric and seams is essential for achieving crisp and professional-looking quilting results.
- Quilt batting: This is the layer of material that goes between the quilt top and backing to provide warmth and loft. Choose a batting that suits your preferences and the desired thickness of your quilt.
- Backing fabric: Select a fabric that complements your quilt’s design and is wide enough to accommodate the quilt top and batting.
- Quilting pins or basting spray: These are used to temporarily secure the layers of the quilt together before quilting. Quilting pins can be traditional safety pins or specialized quilting pins. Basting spray is an adhesive spray that temporarily holds the layers together.
- Quilting needle and thread: For quilting the layers together, you’ll need a needle specifically designed for quilting and a thread that matches your quilt’s design.
Gathering these materials will ensure that you have everything you need to successfully complete your quilt sashing project. Now that you’re equipped with the necessary tools and supplies, let’s move on to the next step: preparing the quilt blocks.
Step 1: Preparing the Quilt Blocks
Before you can begin sashing your quilt, you’ll need to prepare the quilt blocks that will be sewn together. Here’s how to do it:
- Trim and square your quilt blocks: Start by trimming the excess fabric from each quilt block to ensure they are all the same size. Use a rotary cutter and quilting ruler to trim the edges of the blocks, making sure they are straight and even. Square up the blocks by aligning the ruler with the corners and trimming any uneven edges.
- Press the quilt blocks: Iron each quilt block to remove any wrinkles or creases. Press gently with a hot iron, using a pressing motion rather than sliding the iron to avoid distorting the shape of the blocks. Be careful not to stretch the fabric while pressing.
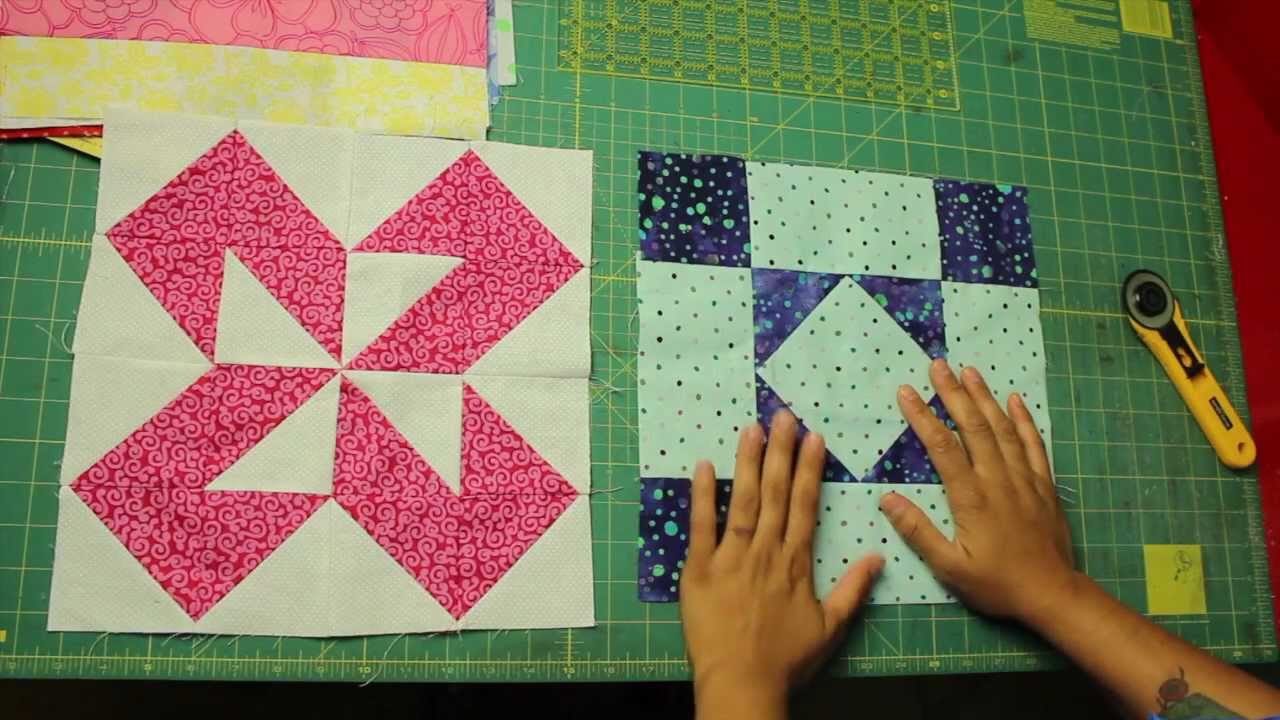
- Arrange the blocks: Lay out your quilt blocks on a flat surface in the desired pattern. Experiment with different layouts until you find a design that you’re happy with. Take a photo or make a sketch of the layout for reference.
- Label the blocks: To avoid confusion during the sashing process, label each block with a small piece of masking tape or a fabric marker. Use numbers or letters to identify the order in which they will be sewn together.
By carefully preparing your quilt blocks, you’ll ensure that they are evenly sized, free from wrinkles, and organized for easy assembly. With your quilt blocks ready, it’s time to move on to the next step: measuring and cutting the sashing strips.
Step 2: Measuring and Cutting the Sashing Strips
Once you have prepared your quilt blocks, the next step is to measure and cut the sashing strips. These strips will be sewn between the blocks to create the border and separation. Here’s how to do it:
- Measure the length and width of your quilt blocks: Use a quilting ruler to measure the length and width of your quilt blocks. Take accurate measurements to ensure the sashing strips fit perfectly.
- Determine the width of the sashing strips: Decide on the desired width of the sashing strips. This will depend on your design preferences and the overall size of your quilt. Common widths range from 1 inch to 3 inches. Consider using a contrasting fabric for the sashing to make it stand out or choose a fabric that complements the quilt blocks.
- Calculate the length of the sashing strips: To determine the length of each sashing strip, add the measurement of the quilt block width to the measurement of the desired sashing width. Multiply this sum by the number of blocks in the quilt row, and then add the measurement of the quilt block width again. This will give you the total length needed for the sashing strip in that row.
- Cut the sashing strips: Using a rotary cutter and quilting ruler, cut fabric strips according to the measurements calculated in the previous step. Make sure the strips are straight and even.
Remember to cut enough sashing strips to accommodate the number of blocks in your quilt and the desired width of the sashing. It’s always better to have a few extra strips in case of mistakes or miscalculations.
With your sashing strips cut and ready to go, you’re now prepared to move on to the next step: attaching the sashing to the quilt blocks.
When adding sashing to a quilt, be sure to measure and cut the sashing strips accurately to ensure they fit properly between the quilt blocks. Use a consistent seam allowance when sewing the sashing to maintain a uniform look.
Read more: What To Do With Quilt Scraps
Step 3: Attaching the Sashing
Now that you have your quilt blocks and sashing strips prepared, it’s time to begin attaching the sashing to the blocks. This step will create the borders and separation between the blocks. Here’s how to do it:
- Take one sashing strip and one quilt block: Start by laying one quilt block flat on your workspace. Take a sashing strip and place it right sides together along one side of the block. Align the raw edges of the fabric.
- Sew the sashing to the block: Using a ¼-inch seam allowance, sew the sashing strip to the quilt block. Backstitch at the beginning and end of the seam to secure it. Press the seam towards the sashing strip.
- Repeat the process for the remaining blocks: Take the next quilt block and another sashing strip. Place them right sides together, aligning the raw edges, and sew the sashing strip to the second block. Repeat this process for all remaining blocks in the row.
- Join the rows: Once all the blocks in a row are attached to their respective sashing strips, it’s time to join the rows. Take the first block of the second row and place it right sides together with the last block of the first row. Align the raw edges and sew the sashing strip between the two blocks. Repeat this process for all remaining rows.
- Press the seams: After attaching the sashing, press the seams with an iron. Set the seams by pressing them flat, and then open them up and press them to one side. This will help create crisp and flat seams.
Remember to take your time and be precise when sewing the sashing to the blocks. Accuracy in seam allowance and alignment will contribute to a neat and professional-looking result. Also, make sure to press the seams at each step to ensure a smooth and polished finish.
Once you have attached the sashing strips to all the blocks and joined the rows, it’s time to move on to the next step: sewing the rows together.
Step 4: Sewing the Rows Together
Now that you have attached the sashing strips to your quilt blocks and joined the rows, it’s time to sew the rows together. This step will bring your quilt top together and create a cohesive design. Here’s how to do it:
- Take the first two rows: Lay out your quilt rows in the desired order. Take the first two rows and place them right sides together, aligning the sashing strips and quilt blocks.
- Sew the rows together: Using a ¼-inch seam allowance, sew the first two rows together along the seam where the sashing strips meet. Start at one end and sew all the way to the other end. Backstitch at the beginning and end of the seam to secure it. Press the seam open or towards one side, depending on your preference.
- Continue sewing the remaining rows: Repeat the process of sewing the rows together, one by one, until all the rows are sewn together into a quilt top. Make sure to align the sashing strips and blocks accurately for a neat and aligned result.
- Press the seams: Once all the rows are sewn together, press the seams with an iron. Set the seams by pressing them flat, and then open them up or press them to one side. This will help create a smooth and flat quilt top.
Pay attention to the alignment of the sashing strips and blocks as you sew the rows together. Taking your time and being meticulous in this step will ensure a tidy and cohesive quilt top.
With the rows sewn together, your quilt top is nearly complete. Now, let’s move on to the final step: adding the finishing touches.
Step 5: Finishing Touches
Congratulations! You’ve made it to the final step of quilt sashing – adding the finishing touches to your quilt top. This step involves preparing your quilt for layering and quilting. Here’s what you need to do:
- Trim the excess threads and square up the quilt top: Carefully trim any excess threads from the quilt top to give it a clean and polished look. Check the edges of the quilt top and square them up if needed, ensuring all sides are straight and the corners are sharp.
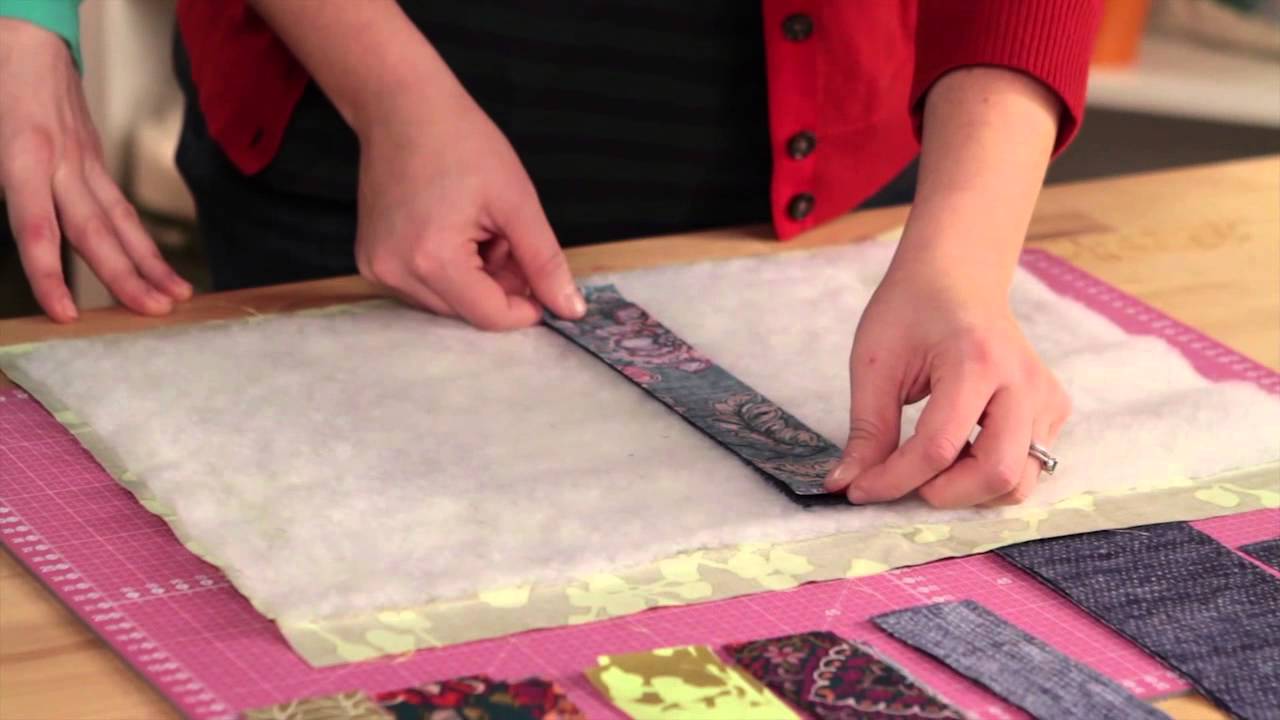
- Layer the quilt: Prepare for the quilting process by layering your quilt top, batting, and backing fabric. Lay the backing fabric on a flat surface, wrong side up. Smooth out any wrinkles or creases. Place the batting on top of the backing fabric, ensuring it covers the entire quilt top. Finally, lay your quilt top on the batting, right side up.
- Baste the layers: Hold the layers in place by basting them together. You can choose to use quilting pins or a basting spray to secure the layers. Place the pins or spray at regular intervals to prevent shifting during the quilting process.
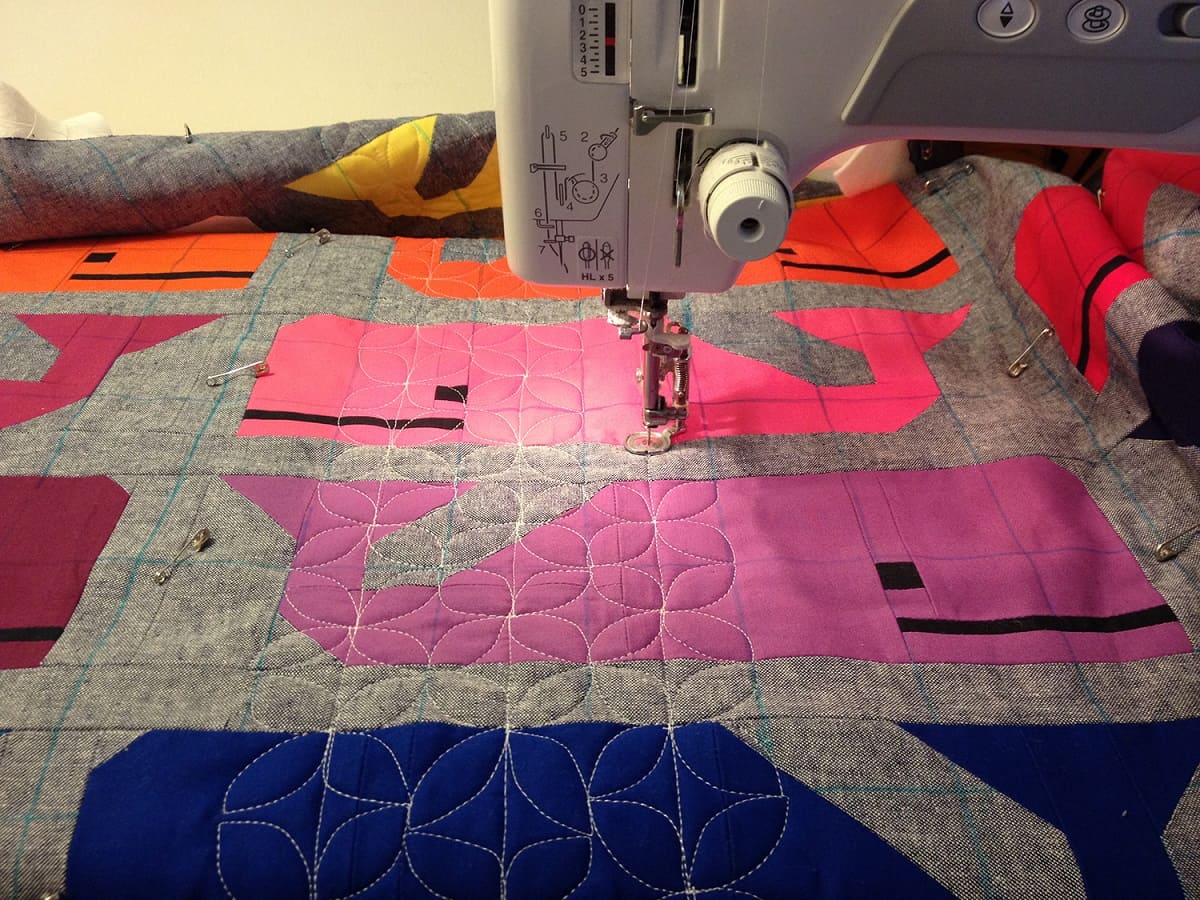
- Quilt the layers: Use your preferred quilting method to stitch the layers together. This can be done by hand using a quilting needle and thread, or by machine using a quilting foot and a straight or decorative stitch. Quilt along the sashing lines or explore other quilting patterns to enhance the design of your quilt.
- Bind the quilt: Once you have finished quilting, trim away any excess batting and backing fabric from the edges of the quilt. Prepare and attach the binding fabric to cover the raw edges of the quilt. There are various methods for binding, including double-fold binding and bias binding. Choose a method that suits your style and preferences.
After you have completed the finishing touches, your quilt is ready to be admired and cherished. Take a step back, admire your hard work, and revel in the beauty of your completed quilt with perfectly executed sashing.
Remember, quilt sashing adds not only structural integrity but also an extra touch of aesthetic appeal to your quilt. Enjoy the process and have fun exploring different design possibilities with sashing. Happy quilting!
Conclusion
Quilt sashing is a valuable technique that adds structure, visual interest, and a professional touch to your quilts. By following the steps outlined in this article, you can confidently incorporate quilt sashing into your quilting projects and achieve stunning results.
We began by understanding the concept of quilt sashing and its significance in quilting. We explored the materials needed, emphasizing the importance of having the right tools and supplies on hand.
Next, we delved into the step-by-step process of preparing the quilt blocks, measuring and cutting the sashing strips, attaching the sashing, sewing the rows together, and adding the finishing touches. Each step was carefully explained to ensure accuracy and precision in your quilting project.
Quilt sashing not only provides structure and separation between quilt blocks but also allows for creativity and customization. By selecting the right fabric and width for your sashing strips, you can create unique designs and enhance the overall aesthetic of your quilt.
Remember to take your time, be patient, and enjoy the quilt-making process. Experiment with different fabric combinations, sashing widths, and quilting patterns to create quilts that reflect your personal style and creativity.
Now that you are equipped with the knowledge and skills to incorporate quilt sashing into your quilting projects, it’s time to embark on your quilting journey with confidence. So gather your materials, immerse yourself in the art of quilting, and let your creativity shine!
Happy quilting!
Frequently Asked Questions about How To Do Quilt Sashing
Was this page helpful?
At Storables.com, we guarantee accurate and reliable information. Our content, validated by Expert Board Contributors, is crafted following stringent Editorial Policies. We're committed to providing you with well-researched, expert-backed insights for all your informational needs.

0 thoughts on “How To Do Quilt Sashing”