Articles
How To Do Vinyl Plank On Stairs
Modified: October 22, 2024
Learn how to install vinyl plank on stairs with our comprehensive step-by-step articles. Find expert tips and tricks to achieve a professional-looking finish.
(Many of the links in this article redirect to a specific reviewed product. Your purchase of these products through affiliate links helps to generate commission for Storables.com, at no extra cost. Learn more)
Introduction
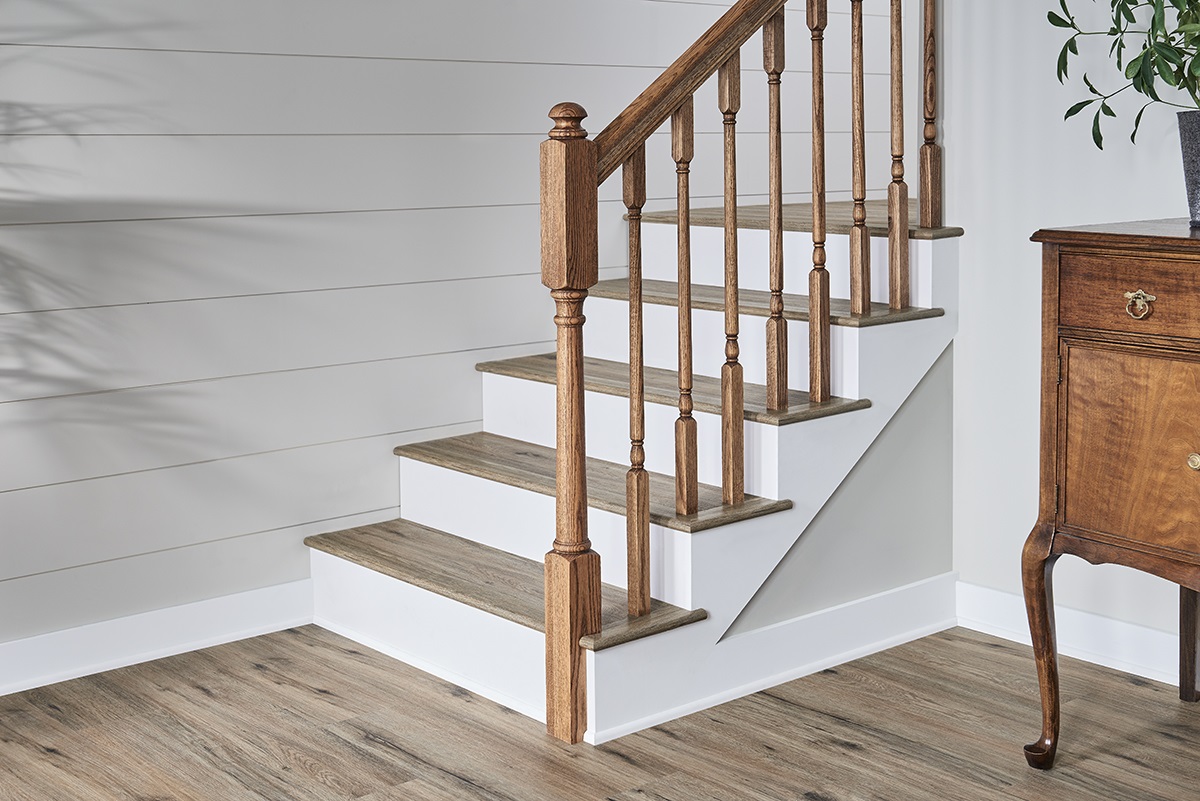
Welcome to our comprehensive guide on how to do vinyl plank on stairs. Whether you’re looking to update the appearance of your staircase or add an extra layer of protection, installing vinyl plank flooring is a great option. Vinyl plank is not only durable and easy to maintain, but it also offers a wide range of styles and colors to suit any design preference.
While installing vinyl plank flooring on flat surfaces may seem straightforward, tackling stairs can be a bit more challenging. However, with the right tools, materials, and step-by-step instructions, you can achieve professional-looking results and transform your staircase into a stunning focal point of your home.
In this guide, we will walk you through the process of installing vinyl plank on stairs. From gathering the necessary materials to trimming and securing the planks, we’ll cover every step in detail to ensure your project is a success.
Before we dive in, it’s important to note that every staircase is unique, and some steps may need adjustments based on the specific dimensions and structure of your stairs. However, this guide will provide you with a solid foundation and general guidelines to follow.
So, if you’re ready to take on the challenge and give your stairs a stylish makeover, let’s get started with step one: gathering the materials and tools you’ll need for the project.
Key Takeaways:
- Elevate your staircase with durable and stylish vinyl plank flooring. Follow our comprehensive guide for a professional-looking result that enhances your home’s aesthetic and functionality.
- Achieve a stunning staircase makeover with our step-by-step instructions. From preparation to final adjustments, transform your stairs into a durable and visually appealing feature of your home.
Read more: How To Do Vinyl Flooring On Stairs
Step 1: Gather Materials and Tools
Before you start the installation process, it’s essential to gather all the necessary materials and tools. Having everything ready at hand will help streamline the installation and prevent unnecessary delays. Here are the key items you’ll need:
Materials:
- Vinyl plank flooring: Measure and calculate the amount needed based on the size and number of stairs.
- Underlayment: Provides support and helps reduce noise.
- Tape measure: Essential for accurately measuring the dimensions of the stairs.
- Pencil: Use it to mark measurements and cut lines on the vinyl planks.
- Straightedge: Helps create straight and precise cut lines.
- Utility knife or vinyl plank cutter: Used to cut the vinyl planks to the desired size and shape.
- Adhesive: Depending on the type of vinyl plank flooring you choose, you may need adhesive to secure the planks to the stairs.
- Caulk or silicone sealant: Seals the edges and ensures a clean and finished look.
- Finishing nails or brad nails: Used to secure the vinyl planks to the stairs, especially on the nose of the treads.
- Hammer or nail gun: Required for driving the finishing nails into the stairs.
- Safety goggles and gloves: Protect your eyes and hands during the installation process.
Tools:
- Hammer
- Chisel
- Power drill with drill bits
- Level
- Measuring tape
- Screwdriver
- Pry bar
- Notched trowel
- Roller or hand roller
Make sure to check the manufacturer’s instructions for the vinyl plank flooring you choose, as they may recommend specific tools or materials based on their product.
Once you have gathered all the necessary materials and tools, you’ll be well-prepared to move on to the next step: measuring and preparing the stairs.
Step 2: Measure and Prepare the Stairs
Accurate measurements are crucial for a successful installation, so before you begin installing vinyl plank on your stairs, it’s important to measure and prepare them properly. Here’s how to do it:
Read more: How To Install Vinyl Plank Flooring
1. Measure the Stair Dimensions:
Start by measuring the depth, width, and height of each individual stair. Use a tape measure to get precise measurements and record them for reference. Take note of any variations in size between stairs, as you may need to make adjustments during the installation process.
2. Remove any Existing Flooring:
If there is any existing flooring on the stairs, such as carpet, laminate, or hardwood, remove it completely. Use a pry bar or chisel to carefully remove any adhesive or nails that may be holding the flooring in place.
3. Inspect the Stairs:
Thoroughly inspect the stairs for any damage, such as loose or squeaky stair treads. If you find any issues, now is the time to address them by tightening screws, fixing loose boards, or reinforcing weak areas.
4. Level the Stairs:
Using a level, check if the stairs are level from side to side and front to back. If you notice any unevenness, you may need to make adjustments by adding shims or sanding down high spots. It’s crucial to have a level surface for proper installation.
Read more: What To Use To Mop Vinyl Plank Flooring
5. Remove any Carpet Tack Strips or Staples:
If you had carpet on the stairs, you’ll need to remove any carpet tack strips or staples that were used to secure it. Use pliers or a pry bar to carefully remove these items, taking care not to damage the stair treads.
6. Clean the Stairs:
Before installing the vinyl plank, it’s important to clean the stairs thoroughly. Remove any dirt, dust, or debris using a broom, vacuum cleaner, or damp cloth. Make sure the surface of the stairs is dry and free from any obstructions.
By taking the time to measure and prepare the stairs properly, you’ll ensure a smooth and hassle-free installation process. With the stairs ready, you can proceed to the next step: cleaning and preparing the surface for vinyl plank installation.
Step 3: Clean and Prepare the Surface
Before installing vinyl plank on your stairs, it is crucial to clean and prepare the surface to ensure optimal adhesion and a successful installation. Here’s how to clean and prepare the surface:
1. Remove any Dust and Debris:
Begin by thoroughly cleaning the stairs to remove any dust, dirt, or debris. Use a broom or vacuum cleaner to sweep the stairs, paying close attention to the corners and edges. For stubborn dirt or residue, you can use a damp cloth or gentle cleaner to wipe the surface clean. Allow the stairs to dry completely before proceeding to the next step.
2. Sand the Surface (if necessary):
If the surface of the stairs is rough or uneven, you may need to sand it lightly. Use a fine-grit sandpaper to smooth out any imperfections, ensuring a smooth and even surface for the vinyl plank installation. Be sure to wipe away any dust or debris after sanding.
3. Fill in Gaps or Holes:
If you notice any gaps, holes, or cracks on the stair surface, it is important to fill them in before proceeding. Use a suitable wood filler or putty to fill in any imperfections, following the manufacturer’s instructions. Allow the filler to dry completely and sand it down if necessary for a seamless surface.
4. Check for Loose or Squeaky Stair Treads:
While cleaning, inspect the stair treads for any loose or squeaky areas. If you identify any, reinforce them by adding screws or nails as needed to secure the treads firmly in place. This will prevent any movement or noise when walking on the stairs.
5. Smooth the Edges of the Stairs:
Using sandpaper or a file, smooth out any rough or jagged edges on the stair nosing or edges. This will ensure a clean and professional finish when the vinyl plank is installed.
6. Clean the Surface Again:
Finally, give the surface of the stairs one last clean to remove any dust or debris that may have accumulated during the preparation process. Use a vacuum cleaner, broom, or damp cloth to ensure a clean and dust-free surface.
By properly cleaning and preparing the surface, you will create an ideal foundation for the vinyl plank to adhere to, ensuring a durable and long-lasting installation. Once the surface is prepped, it’s time to move on to the next step: installing the underlayment.
Step 4: Install the Underlayment
Installing underlayment is an essential step when installing vinyl plank on stairs. Underlayment helps provide a cushioning layer, improves sound insulation, and helps smooth out any imperfections in the surface. Follow these steps to install the underlayment:
1. Measure and Cut the Underlayment:
Start by measuring the dimensions of the stairs and cut the underlayment accordingly. Use a utility knife or scissors to carefully cut the underlayment to the correct size, allowing for a slight overlap at the edges.
2. Lay the Underlayment:
Starting at the bottom of the stairs, lay the underlayment on each step, ensuring that it fits snugly and covers the entire surface. Avoid any wrinkles or creases, as they can cause unevenness in the vinyl plank flooring.
Read more: How To Install Wood Ceiling Planks
3. Secure the Underlayment:
Use double-sided tape or adhesive to secure the underlayment to the stairs. Apply the tape or adhesive along the edges and in the middle of the underlayment to ensure it remains in place during the installation process.
4. Trim the Excess Underlayment:
Once the underlayment is secured, use a utility knife or scissors to trim any excess material along the edges of the stairs. Trim it flush with the stair nosing to create a clean and neat finish.
5. Repeat for Each Step:
Continue installing the underlayment on each step, following the same process. Remember to measure, cut, lay, secure, and trim the underlayment for every individual stair.
Installing underlayment provides a smooth and stable surface for the vinyl plank flooring, ensuring optimal performance and durability. With the underlayment in place, you’re ready for the next step: cutting and attaching the vinyl planks on the horizontal stair treads.
Step 5: Cut and Attach the Vinyl Planks on the Horizontal Stair Treads
Now that the underlayment is installed, it’s time to move on to cutting and attaching the vinyl planks on the horizontal stair treads. This step requires precision and attention to detail to ensure a seamless and professional-looking installation. Follow these steps to complete this part of the process:
Read more: How To Do Stairs With Trex Decking
1. Measure and Cut the Vinyl Planks:
Measure the width and depth of the horizontal stair treads and transfer these measurements onto the vinyl planks. Use a pencil and a straightedge to create a guide for cutting. Double-check your measurements to ensure accuracy. Use a utility knife or a vinyl plank cutter to cut the planks according to the measured dimensions, following the guide you’ve created.
2. Dry Fit the Vinyl Planks:
Before applying any adhesive, dry fit the cut vinyl planks on the horizontal stair treads to ensure they fit properly. Check for any gaps or unevenness. If adjustments are needed, make any necessary cuts to achieve a perfect fit.
3. Apply Adhesive:
Apply a thin layer of adhesive on the backside of each cut vinyl plank, following the manufacturer’s instructions. Ensure that the adhesive is evenly spread and covers the entire surface that will come in contact with the stair tread.
4. Press and Smooth the Vinyl Planks:
Press the adhesive-coated side of the vinyl plank firmly onto the corresponding stair tread. Use your hands or a roller to smooth out any air bubbles or wrinkles, ensuring a secure and even bond. Continue this process for each vinyl plank, working your way up the stairs.
Read more: How Do You Calculate Stairs For A Deck?
5. Trim Excess and Repeat for All Treads:
Once the vinyl planks are attached to the horizontal stair treads, use a utility knife or vinyl plank cutter to trim any excess material at the edges of the stairs. Make precise cuts for a clean and finished look. Repeat these steps for all treads, ensuring a consistent installation.
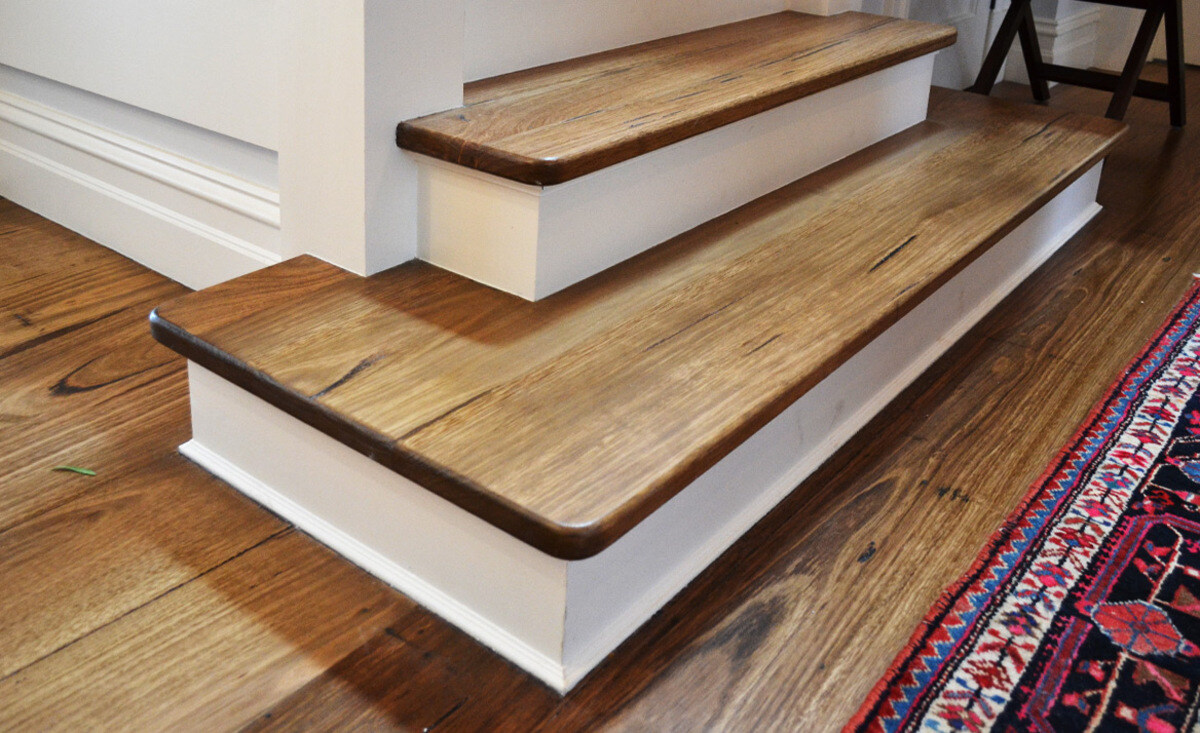
By carefully cutting and attaching the vinyl planks on the horizontal stair treads, you’ll create a smooth and visually appealing surface that complements your staircase. With this step complete, it’s time to move on to the next: installing the vinyl planks on the vertical stair risers.
Step 6: Install the Vinyl Planks on the Vertical Stair Risers
After completing the installation of the vinyl planks on the horizontal stair treads, it’s time to move on to the vertical stair risers. This step will give your staircase a polished and cohesive look. Follow these steps to install the vinyl planks on the vertical stair risers:
Read more: How To Do Stairs With Trex Decking
1. Measure and Cut the Vinyl Planks:
Measure the height and width of each vertical stair riser and transfer these measurements onto the vinyl planks. Use a pencil and straightedge to create a guide for cutting. Double-check your measurements for accuracy. Use a utility knife or vinyl plank cutter to cut the planks according to the measured dimensions, following the guide you’ve created.
2. Dry Fit the Vinyl Planks:
Before applying any adhesive, dry fit the cut vinyl planks on the vertical stair risers to ensure they fit properly. Check for any gaps or unevenness. Make any necessary adjustments by trimming the planks to achieve a perfect fit.
3. Apply Adhesive:
Apply a thin layer of adhesive on the backside of each cut vinyl plank, following the manufacturer’s instructions. Ensure that the adhesive is evenly spread and covers the entire surface that will come in contact with the stair riser.
4. Press and Smooth the Vinyl Planks:
Press the adhesive-coated side of the vinyl plank firmly onto the corresponding stair riser. Use your hands or a roller to smooth out any air bubbles or wrinkles, ensuring a secure and even bond. Repeat this process for each vinyl plank, working your way up the stairs.
5. Trim Excess and Repeat for All Risers:
Once the vinyl planks are attached to the vertical stair risers, use a utility knife or vinyl plank cutter to trim any excess material at the edges of the stairs. Make precise cuts for a clean and finished look. Repeat these steps for all risers, ensuring a consistent installation.
By successfully installing the vinyl planks on the vertical stair risers, you’ll achieve a cohesive and stylish appearance for your staircase. With this step complete, it’s time to move on to the subsequent step: trimming and finishing the edges.
Step 7: Trim and Finish the Edges
Trimming and finishing the edges of the vinyl plank on your stairs is an important step to achieve a polished and professional look. It involves creating clean and precise edges and ensuring that all transitions are smooth. Follow these steps to trim and finish the edges:
Read more: What Is Hardie Plank Siding Made Of
1. Measure and Mark the Edges:
Measure the edges of the vinyl planks to determine the excess material that needs to be trimmed. Mark the areas that require trimming using a pencil or tape, ensuring straight and even lines.
2. Trim the Excess Material:
Using a utility knife or vinyl plank cutter, carefully trim along the marked lines to remove the excess material. Make sure to apply gentle pressure and use a steady cutting motion for clean cuts. Take your time and make precise cuts to achieve neat and well-finished edges.
3. Smooth the Trimmed Edges:
After trimming, use sandpaper or a file to smooth any rough or uneven edges. Carefully sand the trimmed areas to blend them with the rest of the vinyl plank surface, creating a seamless transition.
4. Seal the Edges (Optional):
If desired, you can apply a small bead of caulk or silicone sealant along the trimmed edges to create a finished and water-resistant seal. This step can help prevent moisture from seeping beneath the vinyl planks and ensure a long-lasting installation.
Read more: How Much Do Floating Stairs Cost
5. Clean the Stairs:
Once the edges are trimmed and finished, give your stairs a final cleaning. Remove any dust or debris using a broom, vacuum cleaner, or damp cloth to ensure a clean and pristine appearance of your newly installed vinyl plank staircase.
By taking the time to trim and finish the edges of the vinyl plank, you’ll achieve a polished and professional look for your staircase. With this step complete, it’s time to move on to securing the vinyl planks on the stairs in the next step.
Step 8: Secure the Vinyl Planks on the Stairs
After successfully installing the vinyl planks on the stairs and trimming the edges, it’s crucial to secure them in place to ensure a long-lasting and sturdy installation. By securing the vinyl planks, you can prevent shifting, lifting, or any potential damage. Follow these steps to securely attach the vinyl planks on the stairs:
1. Assess the Stair Structure:
Before securing the vinyl planks, assess your stair structure and determine the best method of attachment. The specific method will depend on the type of vinyl planks you used and the manufacturer’s recommendations. Some options include adhesive, finishing nails, or brad nails.
2. Apply Adhesive:
If using adhesive, carefully lift each vinyl plank and apply a small amount of adhesive on the underlayment or stair surface. Follow the manufacturer’s instructions for the recommended adhesive type and application techniques. Place the vinyl plank back on the adhesive and press it firmly to ensure a secure bond.
Read more: How Do You Fix A Hole In Vinyl Siding
3. Use Finishing Nails or Brad Nails:
If using finishing nails or brad nails, start by pre-drilling pilot holes along the edges of the vinyl planks. This helps prevent the planks from cracking or splitting when nails are driven in. Position the vinyl plank back in place and drive the nails through the pre-drilled holes. Use a hammer or nail gun to secure the planks firmly onto the stairs.
4. Space the Nails:
Space the nails evenly along the edges of the vinyl planks for a secure and balanced installation. Make sure to follow the manufacturer’s recommendations for the appropriate spacing to ensure the planks are properly secured without causing any damage.
5. Check Alignment:
As you secure each vinyl plank, check for proper alignment and ensure that the planks are laid evenly and snugly against each other. Make any necessary adjustments as you go along to maintain a clean and uniform appearance.
6. Inspect the Installation:
Once all the vinyl planks are secured, take a final look at the installation to ensure everything is aligned, securely attached, and visually appealing. Make any adjustments as needed to achieve the desired result.
By securely attaching the vinyl planks on the stairs, you’ll create a stable and durable installation that can withstand daily use. With this step complete, it’s time for the final step: inspecting and making any necessary final adjustments.
Read more: How Do I Apply Vinyl Wall Art
Step 9: Inspect and Make Final Adjustments
After completing the installation and securing the vinyl planks on the stairs, it’s important to take the time to inspect the work and make any final adjustments. This step ensures that the installation is flawless and meets your expectations. Follow these steps to inspect and make any necessary final adjustments:
1. Check for Alignment and Uniformity:
Take a step back and visually inspect the entire staircase. Ensure that the vinyl planks are aligned properly and that there is a consistent appearance throughout. Look for any areas that may require adjustments to improve the overall uniformity of the installation.
2. Verify the Stability and Security:
Walk up and down the stairs, paying attention to the stability and security of the vinyl planks. Make sure they feel firm and secure underfoot. If you notice any areas that seem loose or unstable, address them by reinforcing with additional adhesive or nails.
3. Check for Gaps or Overlaps:
Inspect the seams between the vinyl planks for any gaps or overlaps. Gently run your hands along the seams to ensure they are flush and smooth. If you notice any gaps or overlaps, make any necessary adjustments by repositioning or reattaching the affected vinyl planks.
Read more: How Do You Measure Carpet For Stairs
4. Inspect the Stair Nosing:
Pay special attention to the stair nosing, the angled edge of the stair tread. Ensure that the vinyl planks are securely attached and that the nosing is properly aligned. Make any final adjustments to the nosing for a clean and professional finish.
5. Clean Up:
Once you are satisfied with the installation, clean up any excess adhesive, dust, or debris from the staircase. Use a damp cloth or vacuum cleaner to carefully remove any residue, leaving your staircase looking clean and pristine.
6. Step Back and Admire:
Stand back and admire your newly installed vinyl plank staircase. Take a moment to appreciate your hard work and enjoy the transformation of your stairs into a stylish and durable feature of your home.
By thoroughly inspecting the installation and making any necessary final adjustments, you can ensure that your vinyl plank staircase is not only visually appealing but also secure and functional for years to come.
Congratulations! You have successfully completed the installation process for vinyl plank on your stairs. We hope this guide has been helpful in transforming your staircase and achieving a professional-looking result. Enjoy your new and improved stairs!
Conclusion
Installing vinyl plank on stairs can elevate the appearance of your staircase and provide a durable and low-maintenance flooring solution. With the right materials, tools, and step-by-step instructions, you can achieve a professional-looking result that enhances the overall aesthetic of your home.
In this comprehensive guide, we walked you through the process of installing vinyl plank on stairs. From gathering materials and preparing the surface to cutting, attaching, and securing the vinyl planks, each step was carefully outlined to ensure a successful installation.
By measuring and preparing the stairs, cleaning and prepping the surface, installing the underlayment, cutting and attaching the vinyl planks on the horizontal stair treads, installing the vinyl planks on the vertical stair risers, trimming and finishing the edges, securing the vinyl planks, and finally inspecting and making final adjustments, you have completed a detailed and thorough installation process.
Remember to always follow the manufacturer’s instructions for the specific vinyl plank flooring you choose, as well as any safety precautions. Each staircase is unique, so adjustments may be necessary based on the dimensions and structure of your stairs.
Now, step back and admire the stunning transformation of your staircase. Your vinyl plank installation is not only visually appealing but also adds value and functionality to your home. Enjoy the beauty and durability of your new stairs for years to come!
Curious about other flooring options? If you're weighing choices for your next home improvement, you might find our detailed discussion on linoleum vs vinyl flooring enlightening. Deciding which is better depends on various factors including durability, cost, and ease of installation. Dive into our comprehensive article to better understand which flooring type suits your space most effectively.
Frequently Asked Questions about How To Do Vinyl Plank On Stairs
Was this page helpful?
At Storables.com, we guarantee accurate and reliable information. Our content, validated by Expert Board Contributors, is crafted following stringent Editorial Policies. We're committed to providing you with well-researched, expert-backed insights for all your informational needs.
0 thoughts on “How To Do Vinyl Plank On Stairs”