Articles
How Do You Fix A Hole In Vinyl Siding
Modified: October 18, 2024
Discover effective methods for fixing a hole in vinyl siding with helpful articles. Learn step-by-step instructions and tips for repairing damaged vinyl siding.
(Many of the links in this article redirect to a specific reviewed product. Your purchase of these products through affiliate links helps to generate commission for Storables.com, at no extra cost. Learn more)
Introduction
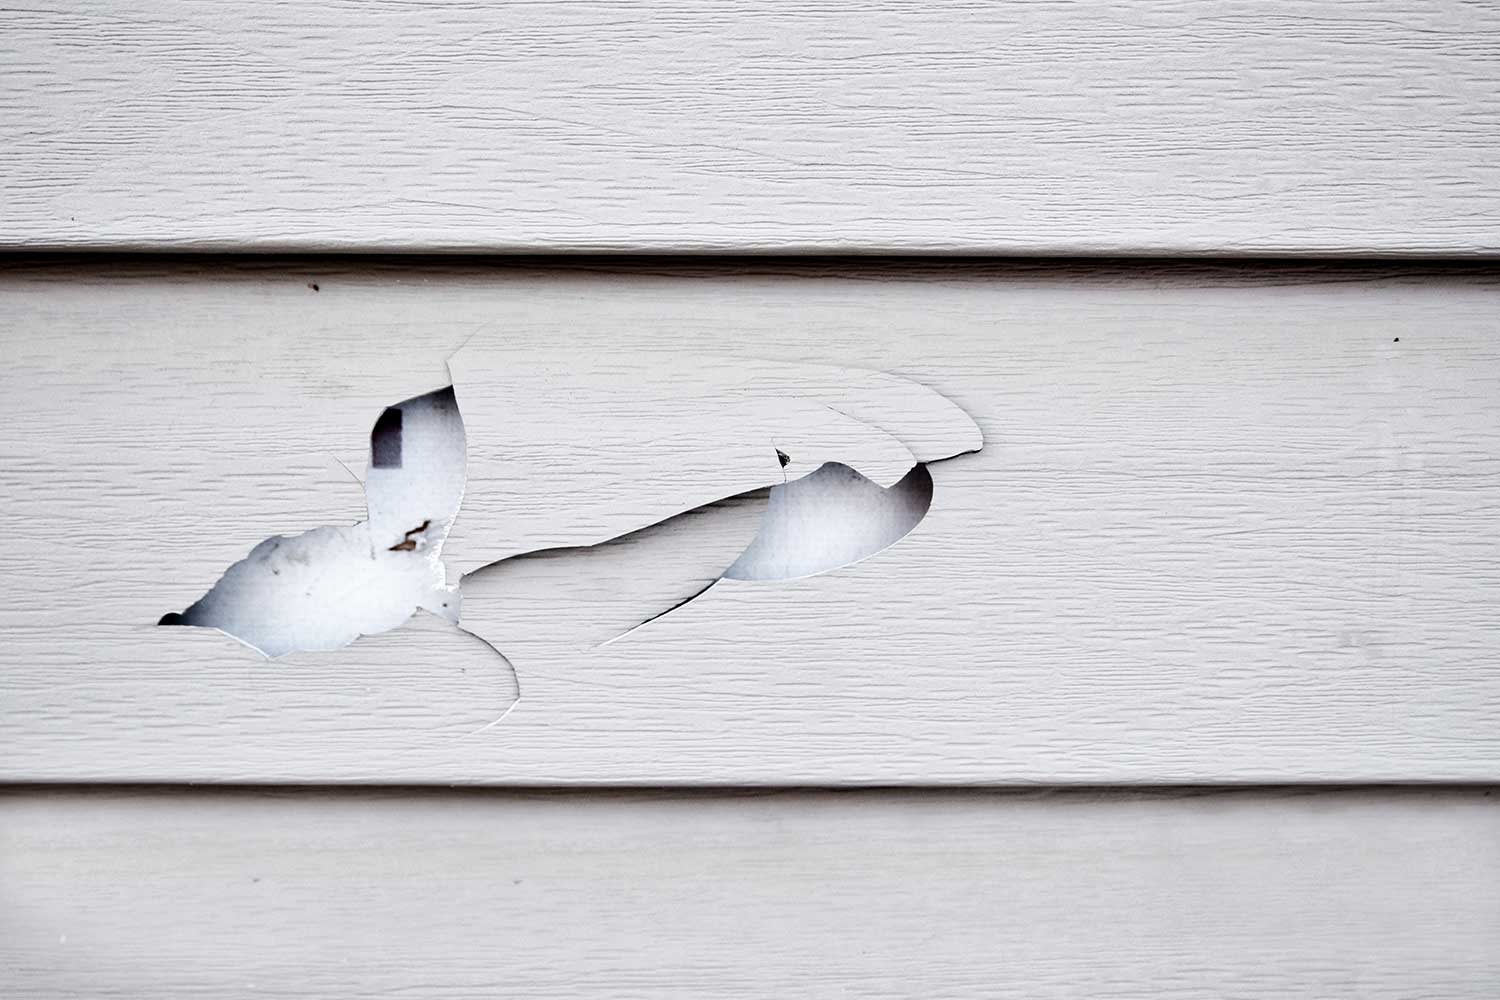
Welcome to our comprehensive guide on how to fix a hole in vinyl siding. Vinyl siding is a popular and durable choice for many homeowners due to its affordability, low maintenance, and versatility in matching various architectural styles. However, even the most well-maintained vinyl siding can occasionally suffer damage, such as holes or punctures caused by hailstones, fallen branches, or accidents during home improvement projects.
Fortunately, repairing a hole in vinyl siding is a relatively straightforward process that can be done by homeowners with some basic tools and materials. In this article, we will walk you through the step-by-step process of fixing both small and large holes in vinyl siding, ensuring that your home’s exterior regains its pristine appearance while also protecting it from further damage.
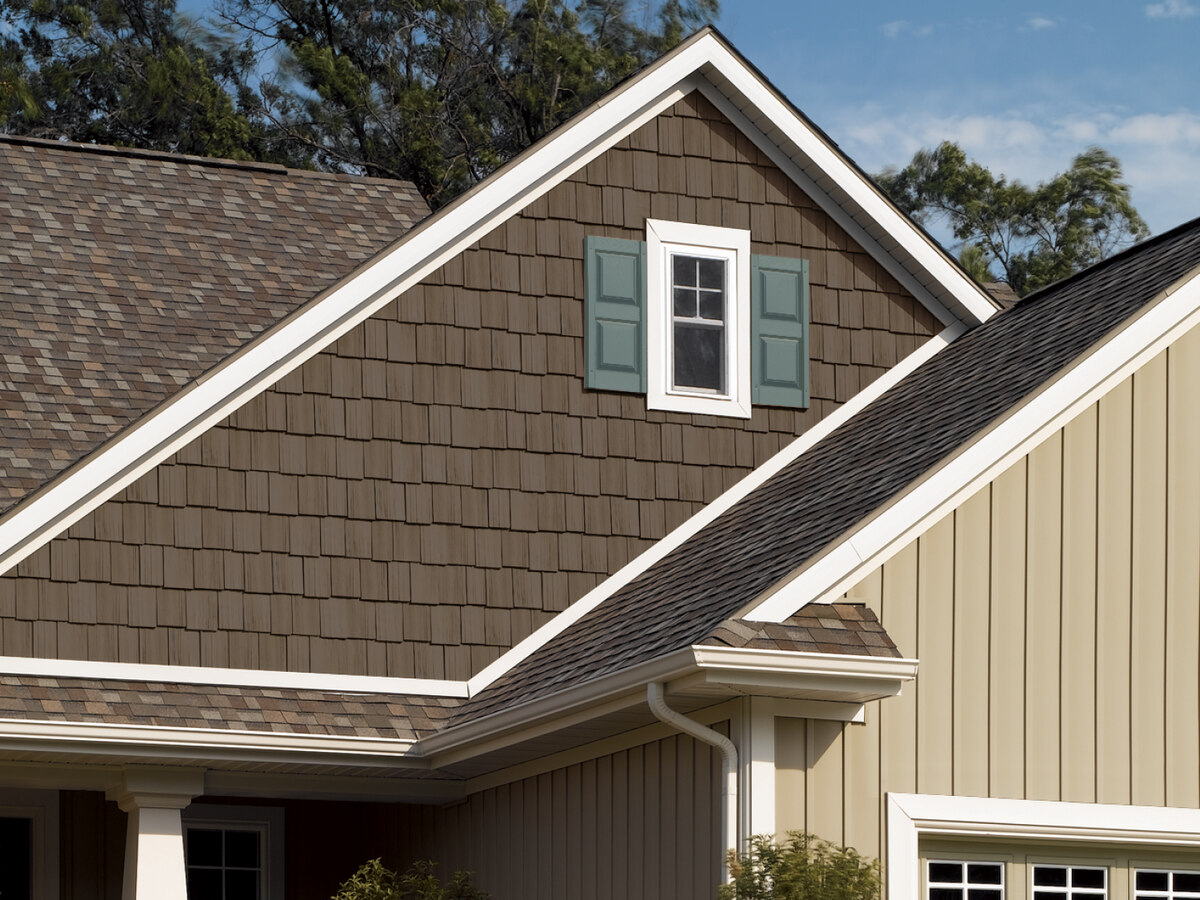
Before we delve into the repair process, it’s important to have a solid understanding of vinyl siding and how it is designed to protect and beautify your home. Vinyl siding is typically made from a durable and weather-resistant PVC (polyvinyl chloride) material. It comes in a variety of colors, styles, and textures, allowing homeowners to enhance the aesthetic appeal of their homes while providing a protective layer against the elements.
However, despite its durability, vinyl siding is not immune to damage. Holes can occur due to a variety of reasons, including impact from heavy objects, accidents during installation or maintenance, or even prolonged exposure to extreme weather conditions. Neglected holes can lead to water penetration, which can cause further damage to the house’s structure and interior.
When it comes to fixing a hole in vinyl siding, the size of the hole will determine the repair method. Small holes, such as those caused by nails or screws, can be easily patched using specialized vinyl siding repair kits. On the other hand, larger holes may require replacing a section of the damaged siding. Rest assured that regardless of the size of the hole, we will guide you through the necessary steps to fix it effectively.
Now that we’ve introduced the topic and discussed the importance of repairing holes in vinyl siding, let’s move on to the next section where we will delve deeper into how to assess the damage to determine the best course of action for repair.
Key Takeaways:
- Repairing small holes in vinyl siding is a manageable DIY task that involves cleaning the area, selecting a matching patch, and applying adhesive for a seamless and professional-looking repair.
- Prevent future damage to your vinyl siding by regularly inspecting, cleaning, and maintaining it, as well as taking precautions with outdoor equipment, heat sources, and decorations to ensure its long-term durability and appearance.
Read more: How To Fix Holes In Siding
Understanding Vinyl Siding
Before you begin repairing a hole in vinyl siding, it’s essential to have a basic understanding of how vinyl siding is designed and installed. This knowledge will help you make informed decisions throughout the repair process and ensure that your repairs blend seamlessly with the existing siding.
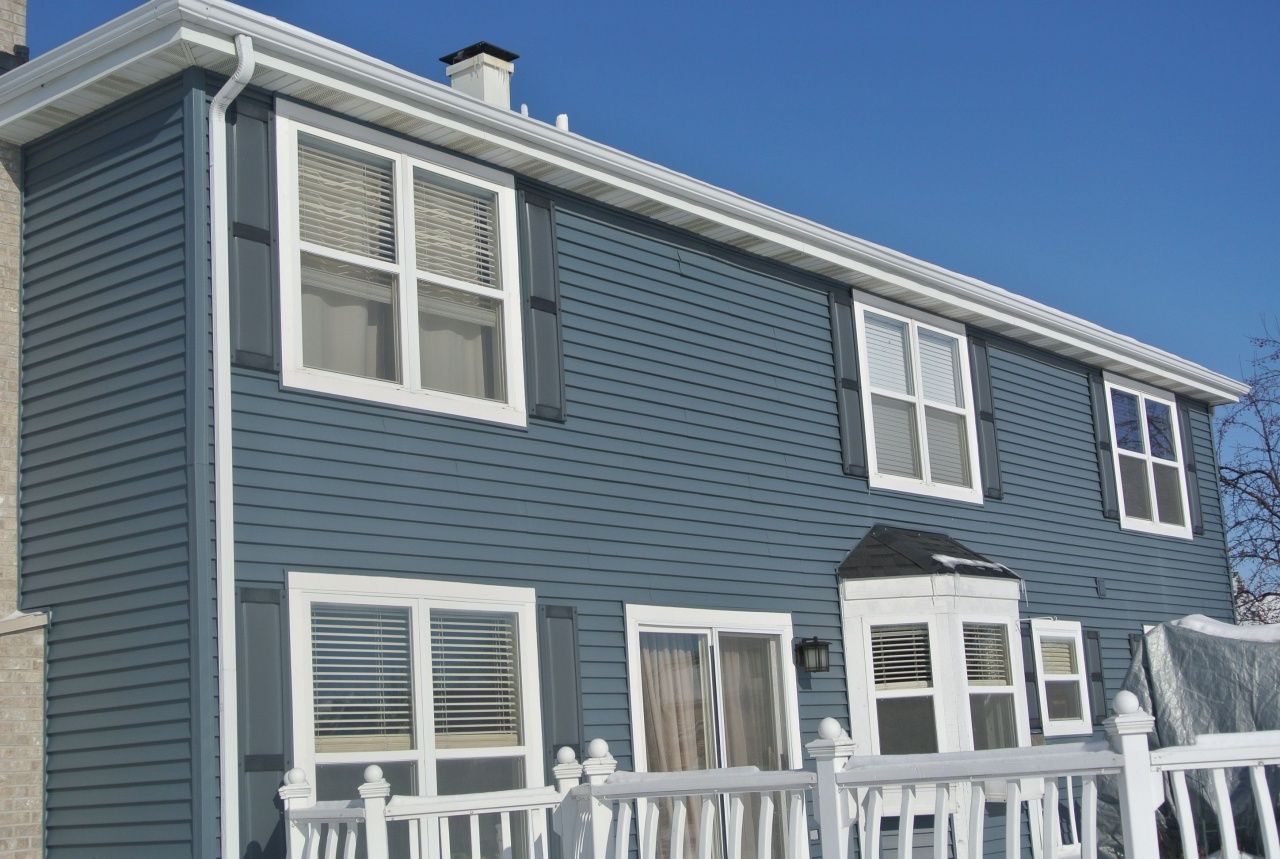
Vinyl siding is composed of a series of interlocking panels that are designed to mimic the appearance of traditional wood siding. These panels are made from polyvinyl chloride (PVC), a durable and weather-resistant material that requires minimal maintenance. Vinyl siding is available in a wide range of colors, textures, and styles, allowing homeowners to choose a look that complements their architectural aesthetic.
The panels are typically attached to the exterior walls of a home using nails or screws. The interlocking design helps to create a tight and secure fit, preventing water and wind from penetrating the siding. However, despite its durable construction, vinyl siding can still be susceptible to damage over time.
Common causes of damage to vinyl siding include impact from heavy objects, such as hailstones or tree branches, accidents during home improvement projects, and prolonged exposure to extreme weather conditions. These damages can range from small punctures and holes to larger cracks or breaks in the panels.
One of the advantages of vinyl siding is its ease of repair. Small holes, such as those caused by nails or screws, can often be patched using specialized vinyl siding repair kits. This allows homeowners to maintain the integrity and appearance of their siding without having to replace entire panels or sections.
However, in situations where the damage is extensive or the integrity of the siding has been compromised, it may be necessary to replace entire panels or sections of the siding. This is typically a more involved process that requires careful measuring, cutting, and installation to ensure a seamless and visually appealing result.
Additionally, it’s important to note that not all vinyl siding is created equal. Different manufacturers may offer variations in quality, thickness, and durability. When repairing or replacing vinyl siding, it’s advisable to match the material as closely as possible to ensure a cohesive and uniform appearance. If you’re unsure about the specific type or brand of vinyl siding used on your home, consult with a professional or take a sample to a local hardware store for assistance in finding a suitable match.
By understanding the basic principles of vinyl siding and the factors that can lead to damage, you’ll be better prepared to tackle the repair process. In the next section, we will discuss how to assess the damage to determine the best approach for fixing a hole in vinyl siding.
Assessing the Damage
Before you can begin repairing a hole in your vinyl siding, it’s important to assess the extent of the damage. This will help you determine the appropriate repair method and ensure that you have all the necessary materials on hand.
Start by examining the hole or puncture in the vinyl siding. Determine the size and shape of the damage, as well as any surrounding areas that may have been affected. Small holes and punctures caused by nails or screws are relatively easy to repair, while larger holes or cracks may require more involved repairs.
Next, check for any signs of water damage or moisture intrusion. If the hole has allowed water to seep into the underlying structure or has been present for an extended period of time, you may notice signs such as mold or rot. It’s essential to address any water damage before proceeding with the repair to prevent further deterioration or structural issues.
Assess the stability of the surrounding vinyl siding. If the damage is localized and the rest of the siding is in good condition, a patch or small repair may be sufficient. However, if the surrounding panels are also showing signs of wear or damage, it may be necessary to consider replacing an entire section of siding to ensure a seamless and cohesive appearance.
Consider the location of the damage. Is it in a prominent, highly visible area of your home? If so, take extra care in selecting a repair method that blends well with the existing siding and doesn’t compromise the overall aesthetics of your home’s exterior. On the other hand, if the damage is in a less noticeable area, such as a side facing a backyard, you may have more flexibility in terms of repair options.
Finally, assess your own skill level and comfort with DIY repairs. Some repairs, such as patching a small hole, can be done easily by homeowners with basic tools and materials. However, more complex repairs or panel replacements may require the expertise of a professional to ensure a proper and long-lasting fix.
By carefully assessing the damage, you can make an informed decision about the best course of action for repairing the hole in your vinyl siding. Whether it’s a quick patch or a larger-scale repair, addressing the damage promptly will help maintain the integrity and appearance of your home’s exterior. In the next section, we will discuss the materials you’ll need to gather before beginning the repair process.
Gathering the Necessary Materials
Before you can begin repairing a hole in your vinyl siding, it’s important to gather all the necessary materials to ensure a smooth and successful repair. Having everything on hand before you start will save you time and frustration during the repair process. Here are the key materials you’ll need:
- Vinyl siding repair kit: These kits are readily available at hardware stores and typically contain all the essential items needed for small repairs, such as patching small holes or punctures. The kit may include vinyl siding patches, adhesive, and a putty knife.
- Replacement siding: If the damage is more extensive and requires replacing a section of siding, you’ll need to have the appropriate replacement panels. Take a sample of your existing vinyl siding to the store to ensure that you find the closest match in terms of color, style, and texture.
- Utility knife: A sharp utility knife will be necessary for cutting and shaping the patch or replacement siding.
- Tape measure: Accurate measurements are crucial when it comes to cutting the patch or replacement panels to ensure a proper fit.
- Level: A level will help you ensure that the replacement panels are installed in a straight and level manner, maintaining the overall aesthetics of your siding.
- Hammer or screwdriver: Depending on how the siding is attached, you’ll need either a hammer or a screwdriver to remove any nails or screws holding the damaged section in place.
- Adhesive or caulk: Depending on the specific repair method you choose, you may need adhesive or caulk to secure the patch or replacement panels in place.
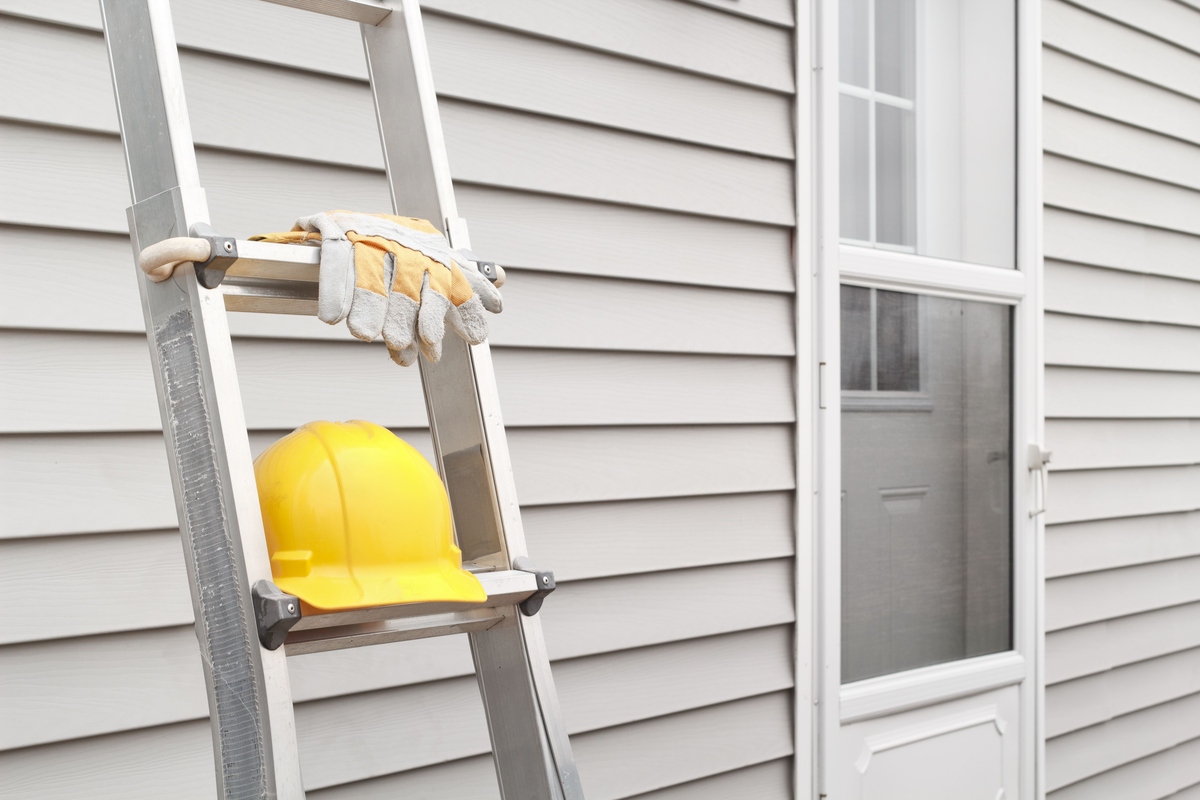
- Ladder or scaffolding: Depending on the location of the damage, you may need a ladder or scaffolding to reach and safely work on the affected area.
- Gloves and safety goggles: It’s always a good idea to protect your hands and eyes while working, especially when using tools or working at heights.
It’s important to note that the exact materials needed may vary depending on the size and location of the damage, as well as the repair method chosen. It’s always a good idea to consult the instructions provided with your vinyl siding repair kit and any additional resources specific to your repair project.
Once you’ve gathered all the necessary materials, you’ll be ready to move on to the next steps of preparing the work area and actually repairing the hole in your vinyl siding. We’ll cover these steps in detail in the following sections.
Preparing the Work Area
Before you begin repairing a hole in your vinyl siding, it’s important to properly prepare the work area. Taking the time to prepare the area will ensure that the repair process goes smoothly and that you achieve the best possible results. Here are the steps to follow when preparing the work area:
- Clean the surrounding area: Start by cleaning the area around the hole in your vinyl siding. Use a soft brush or a cloth to remove any dirt, debris, or loose pieces of siding. This will help create a clean and smooth surface for the repair.
- Protect nearby surfaces: Vinyl siding repairs often involve the use of adhesives, caulk, or other materials that can be messy. To avoid damaging nearby surfaces, cover them with plastic sheeting, drop cloths, or painter’s tape.
- Ensure proper ventilation: If you’re using adhesives or caulk that emit strong fumes, ensure that the work area is well-ventilated. Open windows, use fans, or work in an outdoor area if possible to prevent inhaling harmful vapors.
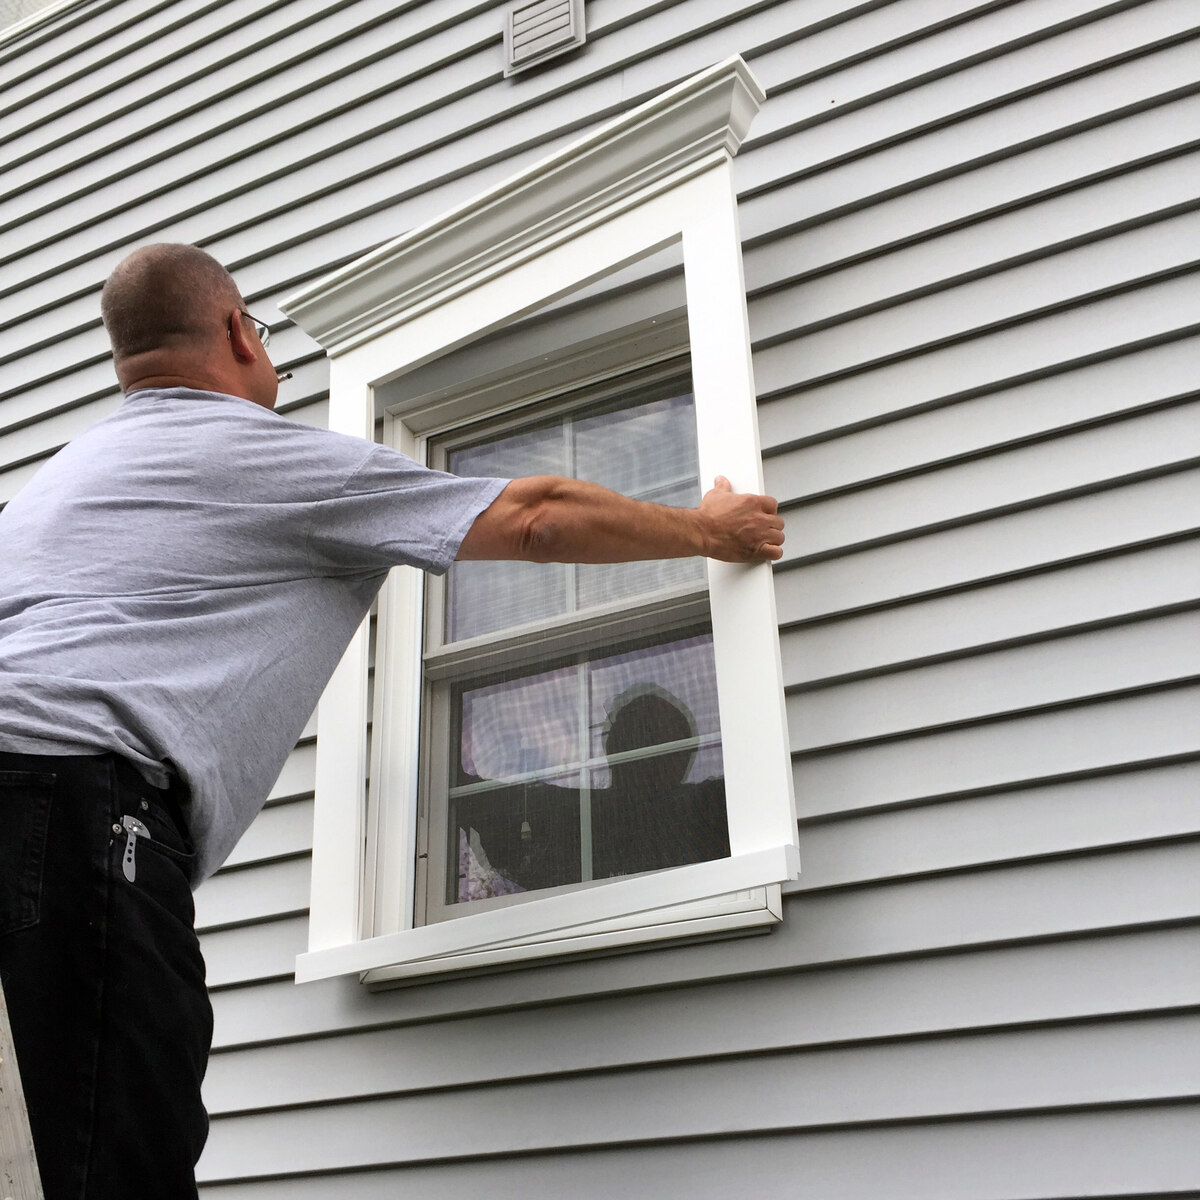
- Secure the surrounding vinyl siding: If the damaged area is close to intact sections of vinyl siding, ensure that they are securely fastened. Use a hammer or screwdriver to check for loose or protruding nails or screws. Gently tap them back into place or tighten them as needed.
- Check for signs of moisture or mold: Before proceeding with the repair, inspect the area for any signs of moisture or mold growth. If you notice any, it may be an indication of water damage or an underlying issue. Address these concerns before proceeding to prevent further damage or health hazards.
- Ensure proper lighting: Adequate lighting is crucial during the repair process to ensure accuracy and precision. If the work area is not well-lit, consider using additional lighting sources like work lights or portable lamps.
By properly preparing the work area, you’ll create a clean, safe, and well-managed space in which to complete the vinyl siding repair. With the work area ready, you can now proceed to repair the hole in your vinyl siding. The specific repair method will depend on the size and location of the damage, which we will cover in the next sections.
Use a vinyl siding repair kit to fix a hole in vinyl siding. Clean the area, apply adhesive, and patch with a matching piece of siding. Sand and paint for a seamless finish.
Read more: What Do You Use To Cut Vinyl Siding
Repairing a Small Hole in Vinyl Siding
If you have a small hole or puncture in your vinyl siding, the good news is that repairing it is a relatively straightforward process. Here’s a step-by-step guide to help you fix a small hole in your vinyl siding:
- Start by cleaning the area around the hole with a soft brush or cloth to remove any dirt or debris.
- Next, use a utility knife to carefully trim away any loose or frayed edges around the hole. This will ensure a clean and neat repair.
- Take a vinyl siding repair kit and select a patch that matches the color and texture of your existing siding.
- Cut the patch to a size slightly larger than the hole, using a utility knife. This will ensure that the patch adequately covers the damaged area.
- Apply a thin layer of adhesive from the repair kit onto the back of the patch.
- Press the adhesive side of the patch firmly onto the hole, making sure it adheres completely to the siding.
- Use a putty knife or your fingers to smooth out any wrinkles or air bubbles in the patch. This will ensure a seamless and professional-looking repair.
- Allow the adhesive to dry according to the manufacturer’s instructions.
- Once the adhesive has dried, inspect the repaired area to ensure that the patch is securely in place and blends well with the surrounding siding.
- Finally, clean the repaired area with a gentle cleaner or soap and water to remove any residue or marks.
Following these steps should result in a successful repair of a small hole in your vinyl siding. It’s important to note that this method is most suitable for small, localized damage. If you have multiple or larger holes, or if the surrounding vinyl siding is in poor condition, you may need to consider a different repair approach or consult a professional for assistance.
Now that you have learned how to repair a small hole in vinyl siding, let’s move on to discussing how to patch a larger hole in vinyl siding, which may require a slightly different approach.
Patching a Large Hole in Vinyl Siding
If you have a larger hole or significant damage in your vinyl siding, a patching method may be necessary to ensure a proper repair. Patching a large hole requires a slightly different approach than repairing a small hole. Here is a step-by-step guide to help you patch a large hole in your vinyl siding:
- Assess the size and shape of the hole. If the damage is extensive and covers a large area, you may need to consider replacing a section of the vinyl siding rather than attempting to patch it.
- If the hole is manageable for patching, start by cleaning the area around the hole with a soft brush or cloth to remove any dirt or debris.
- Using a utility knife, carefully trim away any loose or protruding edges around the hole. This will create a clean and smooth surface for patching.
- Measure the size of the hole and transfer those measurements onto a new piece of vinyl siding that closely matches your existing siding. Use a utility knife to cut the replacement panel to the appropriate size.
- Place the replacement panel over the hole, ensuring that it aligns with the surrounding siding. The panel should overlap the hole on all sides to provide a secure and seamless repair.
- Secure the replacement panel in place by driving nails or screws through the overlapping edges into the underlying structure. Be sure to use fasteners specifically designed for vinyl siding to prevent cracking or damaging the siding.
- Check the surrounding vinyl siding panels for any loose or damaged sections. If necessary, reinforce or replace these panels to ensure a cohesive and uniform appearance.
- Once the patch is secure, use a putty knife to apply a layer of adhesive or caulk around the edges of the replacement panel. This will help seal and protect the patched area from moisture and weather elements.
- Smooth out any excess adhesive or caulk, ensuring that it blends well with the surrounding siding. Clean any tools and surfaces with a damp cloth before the adhesive or caulk dries.
- Allow the adhesive or caulk to dry completely according to the manufacturer’s instructions.
Following these steps should result in a successful patch of a large hole in your vinyl siding. However, if you feel unsure about your ability to handle this repair, it’s always a good idea to consult a professional for assistance. They will have the expertise and tools necessary to ensure a proper and durable repair.
Now that you’ve learned how to patch a large hole, we will discuss the final steps of finishing and blending the patch in the next section.
Finishing and Blending the Patch
After repairing a hole in vinyl siding, it’s important to take the necessary steps to finish and blend the patch seamlessly with the surrounding siding. This will ensure that the repair is not only structurally sound but also aesthetically pleasing. Here are the steps to follow to finish and blend the patch:
- Inspect the repaired area for any rough edges or uneven surfaces. Use a fine-grit sandpaper or a sanding block to gently smooth out any imperfections, creating a flush and even finish.
- Check the color and texture of the patch. If it doesn’t perfectly match the surrounding siding, consider using vinyl siding paint or a color-matched vinyl siding pen to adjust the color and blend the patch seamlessly. Test the color on a small, inconspicuous area before applying it to the patch.
- If the patch still appears slightly different, consider applying a thin, even layer of vinyl siding cleaner or restorer to the entire surface. This can help even out any color discrepancies and restore the original vibrancy of the siding.
- Blend the repair visually by stepping back and assessing the overall appearance. Ensure that the patch is not noticeable from a distance and that it harmonizes with the rest of the siding.
- If necessary, touch up any areas or edges with paint or a color-matched vinyl siding pen to create a smooth transition between the patch and the surrounding siding.
- Once you are satisfied with the appearance of the repaired area, clean the entire surface of the vinyl siding with a gentle cleaner or a mixture of water and mild detergent. This will remove any residue or markings from the repair process and ensure a clean and polished look.
By following these steps, you’ll be able to finish and blend the patch seamlessly with the rest of your vinyl siding. Taking the time to ensure a visually seamless repair will not only enhance the appearance of your home but also protect it from further damage and deterioration.
Now that you’ve successfully finished and blended the patch, we’ll share some valuable tips and precautions to help prevent future damage to your vinyl siding.
Tips for Preventing Future Damage
Once you’ve successfully repaired a hole in your vinyl siding, it’s important to take proactive measures to prevent future damage and maintain the integrity of your siding. Here are some valuable tips to help you protect your vinyl siding:
- Regularly inspect your siding: Routinely check your vinyl siding for any signs of damage, such as cracks, warping, or loose sections. Catching these issues early can help prevent further damage and avoid more costly repairs down the line.
- Trim trees and shrubs: Make sure to keep trees and shrubs trimmed away from your home. Overhanging branches or shrubbery can scrape against the siding and potentially cause damage during windy conditions.
- Be cautious with lawn equipment: Take care when using lawn equipment near your vinyl siding. A stray rock or object thrown by a lawnmower or trimmer can cause dents or punctures. Keep a safe distance and be mindful of the direction debris may travel.
- Avoid heat sources: Be cautious when using heat sources near your vinyl siding, such as grills or outdoor heaters. Direct heat can cause the siding to warp or melt, compromising its integrity and appearance.
- Protect against excessive heat and sunlight: Vinyl siding can expand and contract with temperature changes, so excessive heat and sunlight exposure can cause bending or warping. Consider using sunshades or awnings to provide shade and protect the siding from prolonged sun exposure.
- Secure outdoor items: Ensure that any outdoor items, such as bicycles, ladders, or gardening tools, are properly secured and cannot accidentally damage the siding during strong winds or storms.
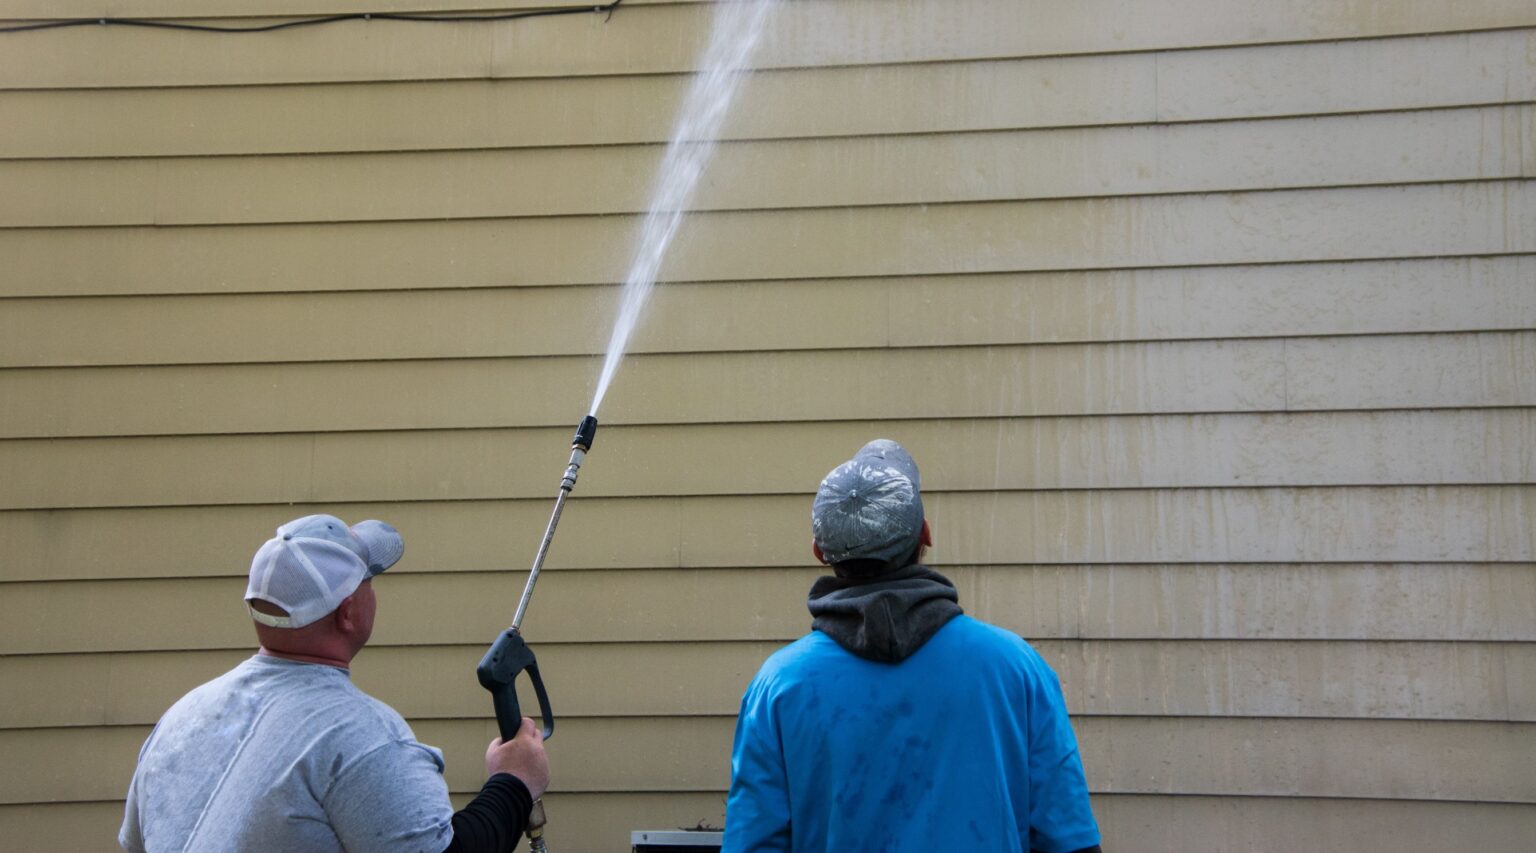
- Regularly clean your siding: Cleaning your vinyl siding at least once or twice a year can help maintain its appearance and prolong its lifespan. Use a gentle cleaner, soft brush, or low-pressure washer to remove dirt, mold, and mildew.
- Use caution when hanging decorations: If you plan to hang decorations on your vinyl siding, such as holiday lights or signs, use appropriate hooks or clips designed specifically for vinyl siding. Avoid using nails or screws that can puncture and damage the material.
- Consider professional inspections: Periodically hire a professional to inspect your vinyl siding. They can identify any potential issues or areas of concern that may require attention or repairs. Regular maintenance can help prevent problems before they worsen.
- Keep gutters clean and clear: Clogged gutters can lead to water overflow, which can seep behind the siding and cause damage. Regularly clean and maintain your gutters to ensure proper water drainage.
By following these tips, you can help prevent future damage to your vinyl siding and maintain its beauty and durability for years to come. Remember, proactive maintenance and a watchful eye are key to preserving your siding’s integrity.
Now that you have a comprehensive understanding of repairing holes in vinyl siding and preventing future damage, you’re ready to take on any repairs and keep your home looking fantastic!
Read more: How To Fix A Hole In Aluminum Siding
Conclusion
Repairing a hole in your vinyl siding doesn’t have to be an overwhelming task. With the right knowledge, tools, and patience, you can successfully restore the integrity and appearance of your home’s exterior. Throughout this guide, we’ve walked you through the steps of fixing small and large holes in vinyl siding, as well as provided tips for preventing future damage. By following these guidelines, you can ensure that your vinyl siding remains in top condition for years to come.
First, understanding the basics of vinyl siding and assessing the damage are crucial steps. By familiarizing yourself with the material and evaluating the extent of the damage, you can determine the best course of action for repair.
Gathering the necessary materials and preparing the work area are important steps that should not be overlooked. Having all the materials on hand and creating a clean and organized work area will make the repair process smoother and more efficient.
Whether it’s repairing a small hole or patching a larger one, following the step-by-step instructions will guide you through the repair process. From cleaning the damaged area to applying patches or replacing sections of siding, attention to detail is essential to achieve a seamless and professional-looking repair.
Finishing and blending the patch is the final touch that ensures a visually appealing result. Smoothing out any imperfections, matching the color and texture of the surrounding siding, and cleaning the repaired area contribute to a polished repair job that seamlessly integrates with the rest of your vinyl siding.
Lastly, by implementing preventative measures, you can protect your vinyl siding from future damage. Regular inspections, proper maintenance, and mindful behavior, such as avoiding heat sources and securing outdoor items, will help prolong the lifespan of your vinyl siding and reduce the need for frequent repairs.
We hope this comprehensive guide has provided you with the confidence and knowledge to tackle any hole repairs in your vinyl siding. Remember, if you’re unsure about any aspect of the repair process or if the damage is extensive, it’s always a good idea to seek professional assistance. With proper care and maintenance, your vinyl siding will continue to enhance the beauty and protect the exterior of your home for years to come.
Frequently Asked Questions about How Do You Fix A Hole In Vinyl Siding
Was this page helpful?
At Storables.com, we guarantee accurate and reliable information. Our content, validated by Expert Board Contributors, is crafted following stringent Editorial Policies. We're committed to providing you with well-researched, expert-backed insights for all your informational needs.


0 thoughts on “How Do You Fix A Hole In Vinyl Siding”