Articles
How To Embroider A Blanket By Hand
Modified: August 27, 2024
Learn how to embroider a blanket by hand with these helpful articles. Find step-by-step tutorials and expert tips to create beautiful handmade designs.
(Many of the links in this article redirect to a specific reviewed product. Your purchase of these products through affiliate links helps to generate commission for Storables.com, at no extra cost. Learn more)
Introduction
Welcome to the world of hand embroidery! Embroidering a blanket by hand is a delightful and rewarding craft that allows you to add a personal touch to a cozy and comforting item. Whether you’re a beginner or an experienced embroiderer, this guide will take you through the step-by-step process of creating a beautifully embellished blanket.
Hand embroidery has a long and rich history, dating back centuries as a way to decorate garments and textiles. It involves using a needle and thread to create stitches and designs on fabric, resulting in intricate and artistic patterns. Embroidering a blanket not only adds decorative value but also makes it a cherished heirloom or a thoughtful gift.
In this article, we will explore the materials needed, techniques involved, and tips for creating a stunning embroidered blanket. From choosing the right blanket to selecting embroidery threads, transferring designs, and mastering basic stitches, you’ll gain the knowledge and skills to create your own unique masterpiece.
Embroidering a blanket by hand allows for endless creativity, as you can experiment with different stitch patterns, colors, and motifs. It’s a versatile craft that can be customized to suit your personal style and preferences. You can choose to create a simple and elegant design or go all out with a bold and intricate pattern.
Not only is embroidery a satisfying and relaxing activity, but it also offers numerous benefits. It promotes mindfulness and can be a form of meditation, allowing you to focus your attention on the present moment. It also serves as a creative outlet, allowing you to express your artistic side and bring beauty to everyday objects.
So, whether you’re looking to enhance your embroidery skills or just want to try your hand at a new hobby, this guide will equip you with the knowledge and inspiration to embroider a blanket by hand. Grab your needle and thread, and let’s get started on this exciting journey of creativity and self-expression!
Key Takeaways:
- Embroidering a blanket by hand is a creative and therapeutic journey that allows you to add a personal touch to a cherished item. From selecting materials to mastering stitches, each step reflects your unique style and vision.
- Proper care and maintenance are essential to preserve the beauty and longevity of your hand-embroidered blanket. By following recommended guidelines, you can ensure that your creation remains vibrant and beautiful for years to come.
Read more: How To Hand-Knit A Chunky Blanket
Materials Needed
Before you begin embroidering a blanket by hand, it’s important to gather all the necessary materials. Here’s a list of the essential items you’ll need:
- A Blanket: Choose a blanket made of a durable and sturdy fabric that can withstand the weight of the embroidery without tearing. Natural fabrics, such as cotton or linen, work best for embroidery.
- Embroidery Thread: Select high-quality embroidery thread in various colors. Embroidery floss, which typically consists of six strands, is the most commonly used thread for hand embroidery.
- Embroidery Needles: Use sharp embroidery needles with a large eye that can accommodate multiple strands of embroidery thread. The size of the needle will depend on the thickness of the fabric and the weight of the thread you’re using.
- Embroidery Hoop: An embroidery hoop is essential for keeping the fabric taut and preventing it from puckering while you embroider. Choose a hoop that comfortably fits the size of your blanket.
- Scissors: Have a pair of sharp embroidery scissors to cut thread and trim excess fabric.
- Transfer Method: Depending on the design you choose, you’ll need a transfer method to transfer the design onto the blanket. Options include carbon transfer paper, water-soluble pens, or iron-on transfer designs.
- Design Template: Find or create a design template that suits your style and desired embroidery motif. You can find free templates online or create your own using paper and a pencil.
- Embroidery Stabilizer (Optional): If your blanket fabric is very delicate or loosely woven, you may need to use an embroidery stabilizer or backing to provide additional support.
Having all these materials ready and easily accessible will make the embroidery process more enjoyable and efficient. Make sure to gather them before you start working on your blanket project.
Choosing a Blanket
When it comes to embroidering a blanket by hand, choosing the right blanket is an important first step. The blanket you select will impact the overall look and feel of your embroidery design. Here are some factors to consider when choosing a blanket:
Material: Opt for a blanket made of a natural fabric, such as cotton or linen. These fabrics are not only durable and long-lasting but also provide a smooth surface for embroidery. Avoid synthetic fabrics, as they may not hold the stitches well and could be difficult to work with.
Weight and Thickness: Consider the weight and thickness of the blanket fabric. A medium-weight fabric will be easier to handle and embroider compared to a thick or heavy blanket. However, if you prefer a thicker blanket, make sure the fabric is still suitable for embroidery and can withstand the weight of the stitches without distorting the design.
Color: The color of the blanket is important as it will impact the visibility of the embroidery. Darker-colored blankets will require lighter-colored embroidery thread for the design to stand out, while lighter-colored blankets provide more versatility in terms of thread color options. Consider the color contrast you want to achieve and choose a blanket that complements your desired embroidery design.
Size: The size of the blanket is a personal preference. Consider whether you want to embroider a small section, such as a corner or border, or if you prefer embroidering the entire blanket. Keep in mind that embroidering a large blanket will require more time and effort.
Texture: Pay attention to the texture of the blanket fabric. Smooth and evenly woven fabrics are easier to embroider than textured or loosely woven fabrics. However, if you prefer a textured effect, select a blanket with a surface that complements your desired embroidery style.
Pre-washed: It’s recommended to pre-wash and dry the blanket before embroidering. This will prevent any shrinkage or color bleeding that may occur during the embroidery process. Follow the care instructions provided by the manufacturer to ensure the blanket is properly prepared for embroidery.
By taking these factors into consideration, you can choose a blanket that provides the ideal canvas for your hand embroidery project. Remember, the quality and suitability of the blanket will play a significant role in the overall success and appearance of your embroidered design. So, take your time in selecting a blanket that meets your preferences and sets the foundation for your beautiful embroidery work.
Selecting Embroidery Thread
Choosing the right embroidery thread is crucial to ensure that your hand-embroidered blanket looks stunning and stands the test of time. Here are some key factors to consider when selecting embroidery thread:
Quality: Opt for high-quality embroidery thread to ensure durability and colorfastness. Cheap or low-quality threads may break easily or fade over time, compromising the integrity of your embroidery work. Look for well-known brands that specialize in embroidery threads for the best results.
Type of Thread: The most commonly used thread for hand embroidery is embroidery floss. It consists of six strands that can be separated and used individually or combined for a thicker, more dimensional effect. Embroidery floss comes in a wide range of colors, making it easy to find the perfect shades for your design. However, you can also experiment with other types of embroidery threads, such as pearl cotton or silk, depending on the desired look and feel of your embroidery.
Color: Consider the color palette of your design and the overall look you want to achieve. Embroidery floss is available in a vast array of colors, allowing you to match or contrast with the blanket fabric. It’s a good idea to have a variety of colors on hand to create depth and highlight different elements of your design. If you’re unsure about color choices, you can create a sample swatch on a scrap piece of fabric to visualize how the colors will work together.
Thread Thickness: Thread thickness, also known as weight, can influence the overall appearance and texture of your embroidery. Embroidery floss typically comes in different thicknesses, ranging from a finer size 12 to a thicker size 3. Thinner threads are suitable for delicate and intricate details, while thicker threads can provide a bolder and more textured effect. Consider the size of your design and the density of stitches you want to achieve when choosing the thread thickness.
Compatibility with Fabric: Ensure that the embroidery thread you choose is compatible with the fabric of your blanket. Natural fibers such as cotton and linen work well with most embroidery threads. However, if your blanket is made of a delicate or loosely woven fabric, it’s advisable to use a lighter weight thread to avoid distorting the fabric or causing it to pucker.
Quantity: Estimate the amount of thread you’ll need for your embroidery project. This will depend on the size of your design and the stitch density. It’s always better to have more thread than you think you’ll need, as running out in the middle of your project can be frustrating. As a general rule, multiply the length of your design by the number of strands you’ll be using to determine the amount of thread required.
By considering these factors, you can confidently select the right embroidery thread that complements your design and ensures a beautiful and durable result. Remember, the thread you choose will play a significant role in bringing your embroidery to life, so take the time to select high-quality threads that meet your requirements and inspire your creativity.
Preparing the Blanket
Before you start embroidering, it’s essential to prepare the blanket to ensure optimal results and prevent any unwanted issues. Here are some steps to follow in the preparation process:
Washing and Ironing: If your blanket is new, it’s advisable to wash and dry it before embroidering. This will remove any sizing, chemicals, or dirt that may be present, ensuring a clean surface for your embroidery. Follow the care instructions provided by the manufacturer to avoid any damage to the fabric. Once the blanket is clean and dry, iron it to remove any wrinkles or creases. A smooth and flat surface is easier to work on and will result in more precise embroidery stitches.
Positioning: Decide on the placement of your embroidery design on the blanket. You can choose to embroider a specific section, such as a corner, or cover a larger area. Use pins or fabric chalk to mark the starting point and boundaries of your design. Remember to leave enough space around the design to accommodate any additional elements or borders you may want to add later.
Securing the Blanket: To prevent the fabric from shifting while you embroider, secure the blanket to your working surface. You can use embroidery clips, quilting clips, or even regular office binder clips to hold the edges of the blanket taut. Alternatively, you can use an embroidery hoop or frame to keep the fabric stable and prevent it from puckering or distorting during the stitching process.
Trimming Excess Threads: Before you start embroidering, it’s a good idea to trim any excess threads or loose fibers from the blanket. These can get tangled in your embroidery stitches or create a messy appearance. Using small embroidery scissors, carefully snip off any stray threads, ensuring a clean and smooth surface to work on.
Backing or Stabilizer (Optional): Depending on the fabric type and the complexity of your design, you may choose to use an embroidery backing or stabilizer. These add support to the fabric, minimize puckering, and provide a smoother surface for embroidery. A backing or stabilizer is particularly useful for fragile or loosely woven fabrics. Follow the manufacturer’s instructions to determine the appropriate type and application method for your blanket.
By properly preparing your blanket, you create the ideal foundation for your hand embroidery project. Taking the time to wash, iron, secure, and trim will ensure that your stitches are even, your design is well-positioned, and your embroidery experience is smooth and enjoyable. So, invest in preparing your blanket to set the stage for a beautifully embroidered masterpiece!
Read more: How To Embroider On A Pillowcase
Transferring the Design
Once you have selected your design and prepared the blanket, the next step is transferring the design onto the fabric. Transferring the design accurately is essential for ensuring a precise and well-executed embroidery. Here are several methods you can use to transfer your design:
Transfer Paper: Carbon transfer paper is a popular method for transferring designs onto fabric. Place the transfer paper, color side down, on the fabric and position your design on top. Trace over the design with a pencil or ballpoint pen, applying firm pressure to transfer the design onto the fabric. Be cautious not to shift the paper during the tracing process. Once the design is transferred, remove the transfer paper and you’re ready to start embroidering.
Water-Soluble Marking Pens: Water-soluble pens or markers are another excellent option for transferring designs. Using a marking pen, trace the design directly onto the fabric. The marks will disappear with a damp cloth or by washing the finished embroidery. It’s important to do a test on a scrap piece of the fabric to ensure the marks do indeed wash out before using this method.
Iron-On Transfer Designs: Iron-on transfer designs are pre-printed designs that can be transferred onto fabric using heat. Place the iron-on transfer paper, design-side down, on the fabric. Apply heat from the iron according to the instructions provided with the transfer paper. Once the design is transferred, you’re ready to embroider!
Tracing: If you have a clear and visible design, you can trace it directly onto the fabric using a light source, such as a lightbox or a sunny window. Place the fabric on top of the design and trace the lines with a pencil or disappearing ink pen. Ensure that the fabric remains secure and doesn’t shift during the tracing process.
Freehand Drawing: For those with artistic flair, you can skip the transferring process altogether and simply draw or sketch the design directly onto the fabric. Use a pencil or a fabric marker to outline your design and start embroidering without the need for transferring.
Remember to transfer the design accurately and with care to ensure that your embroidery stitches align with the intended pattern. Take your time during the transferring process to ensure precision, as any mistakes or misalignment can affect the overall appearance of your embroidered blanket.
Once the design is transferred, it’s time to move on to the exciting part – the actual embroidery. Gather your materials, thread your needle, and let your creativity and stitching skills bring your design to life!
When embroidering a blanket by hand, use a stabilizer to prevent the fabric from stretching or distorting. This will make the embroidery process much easier and ensure a professional-looking result.
Basic Embroidery Stitches
Mastering a few basic embroidery stitches is key to creating beautiful and varied designs on your hand-embroidered blanket. Here are some essential stitches to get you started:
Back Stitch: The back stitch is commonly used for outlining and adding fine details. Start by bringing the needle up through the fabric at point A, then insert it back into the fabric at point B, a short distance away. Bring the needle up again at point C, which is one stitch length away from point B. Continue this process, stitching backward each time and keeping the stitches even for a smooth and continuous line.
Satin Stitch: The satin stitch is perfect for filling in large areas and creating a smooth, satin-like texture. Start by bringing the needle up at the beginning of the area you want to fill. Make parallel stitches close together, ensuring that each stitch covers the fabric completely. Continue stitching until the area is filled, maintaining the same angle and stitch length for a neat and even appearance.
French Knot: The French knot adds texture and dimension to your embroidery. Bring the needle up through the fabric at the desired location. Hold the thread taut with your other hand and wrap it around the needle a few times. Insert the needle back into the fabric close to where it came up, but slightly away from the starting point. Gently pull the thread through while holding the wraps in place. This creates a knot on the fabric surface. Adjust the tension and the number of wraps to achieve the desired size and fullness of the knot.
Chain Stitch: The chain stitch is a versatile stitch that can be used for outlines, borders, and decorative motifs. Bring the needle up through the fabric and insert it back into the same hole. Leave a small loop and bring the needle up through the fabric again, catching the loop. Repeat this process, working in a continuous line, to create a chain-like effect.
Running Stitch: The running stitch is a simple yet effective stitch used for decorative borders, outlines, and adding texture. Bring the needle up through the fabric and insert it back into the fabric at an equal distance away. Repeat this process continuously, creating even and parallel stitches. You can vary the stitch length to achieve different effects.
Lazy Daisy Stitch: The lazy daisy stitch is perfect for creating flower petals and decorative elements. Start by bringing the needle up through the fabric and forming a loop on the surface. Insert the needle back into the fabric very close to the starting point, catching the loop with the needle. Gently pull the thread through to secure the loop and create a petal shape. Repeat this process to create as many petals as desired.
These are just a few of the many embroidery stitches you can explore. As you gain more experience, you can experiment with different stitches and combine them to create unique patterns and textures on your hand-embroidered blanket. Practice these basic stitches and gradually incorporate more advanced techniques to unleash your creativity and make your designs truly remarkable.
Starting the Embroidery
Now that you have your design transferred and are familiar with some basic embroidery stitches, it’s time to start embroidering your blanket. Here are some steps to help you begin:
Select the First Thread: Choose the color and type of embroidery thread you want to start with. Consider the design elements you want to emphasize or any specific areas you want to begin stitching. Thread your needle with a suitable length of thread and knot the end.
Choose the Starting Point: Determine the starting point for your embroidery. This is often the center or the focal point of the design. If you’re stitching an outline, start at a corner or a prominent feature. Mark the starting point with a small dot or a pencil mark if necessary.
Start Stitching: Bring the threaded needle up through the fabric at the starting point. If you’re using a backstitch, insert the needle back into the fabric slightly ahead of the starting point and bring it up again to create the first stitch. For other stitches like the satin stitch or French knot, follow the specific instructions for those stitches to create the desired effect. Take your time, work at your own pace, and maintain a steady hand.
Consistency and Evenness: As you stitch, aim for consistency and evenness throughout your embroidery. Keep your stitches of the same length, tension, and angle to maintain a clean and professional look. Take breaks if needed to rest your hand and eyes, but try to resume stitching with the same rhythm to keep the overall appearance cohesive.
Progression and Layering: As you complete stitches, consider the sequence and progression of your design. Work from background areas to foreground details or follow a logical flow that enhances the overall composition. If you are layering stitches or colors, plan ahead and work one layer at a time, allowing previous stitches to be fully visible.
Practice and Refine: Embroidery is a skill that improves with practice. If you’re new to embroidery, start with small sections or simpler stitches before tackling more complex designs. Don’t be discouraged by mistakes or imperfect stitches; they are part of the learning process. Take the time to refine your technique and experiment with different stitch combinations to achieve the desired effects.
Remember to enjoy the process of embroidering your blanket. It’s an opportunity to unleash your creativity and bring your design to life. Take breaks when needed, stretch your hands, and keep your workspace organized and comfortable. As you progress, your stitching skills will improve, and you’ll gain a deeper understanding of the art of embroidery.
So, pick up your needle, thread, and hoop, and let the embroidery journey unfold as you embark on creating a one-of-a-kind masterpiece on your cherished blanket.
Adding Colors and Patterns
One of the most exciting aspects of embroidering a blanket is the ability to add vibrant colors and creative patterns to enhance the overall design. Here are some tips and techniques for adding colors and patterns to your hand-embroidered blanket:
Color Selection: Consider the color scheme you want to incorporate into your design. Look for inspiration in nature, art, or even your personal preferences. Choose colors that complement each other and the overall aesthetic of your blanket. Experiment with different hues and shades to bring depth and visual interest to your embroidery.
Color Placement: Plan out the placement of different colors within your design. Determine which areas will be filled with certain colors and how they will interact with adjacent sections. Think about how different colors can create contrast, highlight specific elements, or add dimension to your embroidery.
Color Blending: You can create beautiful effects by blending colors together. This can be achieved by using different shades of a single color or by blending two or more colors together within the stitches. Experiment with different blending techniques, such as working with different thread shades in the same needle or using long and short stitches to create a gradient effect.
Pattern Variety: Incorporate a variety of patterns to add interest to your embroidery. Experiment with stitches such as cross-stitch, seed stitch, or herringbone stitch to create texture and visual appeal. Combine different stitch patterns within your design to create contrast and make certain elements stand out.
Motifs and Appliqué: Consider adding motifs or appliqué pieces to your embroidery design. Motifs are small decorative elements that can be scattered throughout the design, enhancing its overall aesthetic. Appliqué involves attaching pieces of fabric or other materials onto the blanket and securing them with embroidery stitches. This technique allows for additional texture, color, and dimension.
Borders and Frames: To give your embroidery a polished look, consider adding borders or frames around your design. Borders can be as simple as a line of backstitches or more intricate patterns such as chain stitch borders or scalloped edges. Frames can be embroidered directly onto the blanket or created separately and sewn on after completing the embroidery.
Mixing Techniques: Don’t be afraid to mix different embroidery techniques within your design. Combining techniques such as satin stitch, outline stitch, and French knots can produce stunning effects and bring your design to life. Think about how you can integrate different stitch styles to create depth, emphasis, and harmony within your embroidery.
Remember to experiment and let your creativity guide you. Take inspiration from various sources, but also trust your instincts and personal style. The beauty of hand embroidery lies in its ability to showcase your unique artistic expression.
By adding colors and patterns thoughtfully, you can transform your hand-embroidered blanket into a true work of art that reflects your creativity and personality. Enjoy the process of exploring different techniques and seeing your design come to life stitch by stitch.
Read more: How To Embroider On A Quilt
Finishing Touches
As you near the completion of your hand-embroidered blanket, it’s important to give attention to the finishing touches that will enhance the overall appearance and longevity of your embroidery. Here are some key steps to consider when adding those final details:
Secure Loose Threads: Take a close look at your embroidery and identify any loose threads that may be sticking out. Use small embroidery scissors to carefully trim any stray threads, making sure not to cut the surrounding stitches. This step will give your embroidery a neater and more professional finish.
Block or Press: Depending on the fabric and stitches used, you may want to consider blocking or pressing your finished embroidery to give it a smoother and more polished look. Blocking involves gently stretching the fabric and pinning it into shape, allowing it to dry in that position. Pressing can be done with a warm iron held slightly above the embroidery or by placing a cloth over the embroidery and pressing gently. Remember to follow the care instructions specific to your blanket fabric.
Seal Knots: If you have any knots on the back of your embroidery to secure the thread, consider sealing them to prevent them from coming undone over time. You can use a small amount of fabric glue or apply a clear nail polish on the knot and let it dry. This will ensure that your stitches remain secure and the embroidery retains its integrity.
Inspect and Mend: Carefully examine your embroidery for any loose stitches or areas that may need reinforcement. If you notice any weak spots or areas where the fabric may be pulling, reinforce them with additional stitches. This step will strengthen your embroidery and help it withstand regular use and washing.
Consider Embellishments: If you want to add a touch of extra flair to your embroidered blanket, consider incorporating embellishments such as beads, sequins, or embroidery floss in metallic or variegated colors. These additions can accentuate certain elements of your design or create eye-catching decorative details. Be mindful not to overcrowd or overpower the embroidery with too many embellishments.
Trimming and Binding: Once your embroidery is complete and any final touches have been added, you can consider trimming the excess fabric around the embroidered area if desired. Be cautious while trimming, ensuring that you do not cut any stitches or damage the embroidery. If you prefer a more finished look, you can also bind the edges of the blanket with bias tape or fabric strips that complement the embroidery.
Document and Sign: If your hand-embroidered blanket holds sentimental value or serves as a special keepsake, consider documenting the details of your embroidery. Write down the date, the inspiration behind the design, and any other meaningful information. Additionally, you may choose to sign your name or leave a small embroidered mark as a personal touch.
By paying attention to these finishing touches, you can ensure that your hand-embroidered blanket is not only visually appealing but also well-crafted and enduring. These final steps add that extra level of care and attention that will make your embroidery stand out and be treasured for years to come.
Care and Maintenance of Embroidered Blankets
Taking proper care of your hand-embroidered blanket is essential to preserve its beauty and longevity. Here are some guidelines for caring for and maintaining your embroidered blanket:
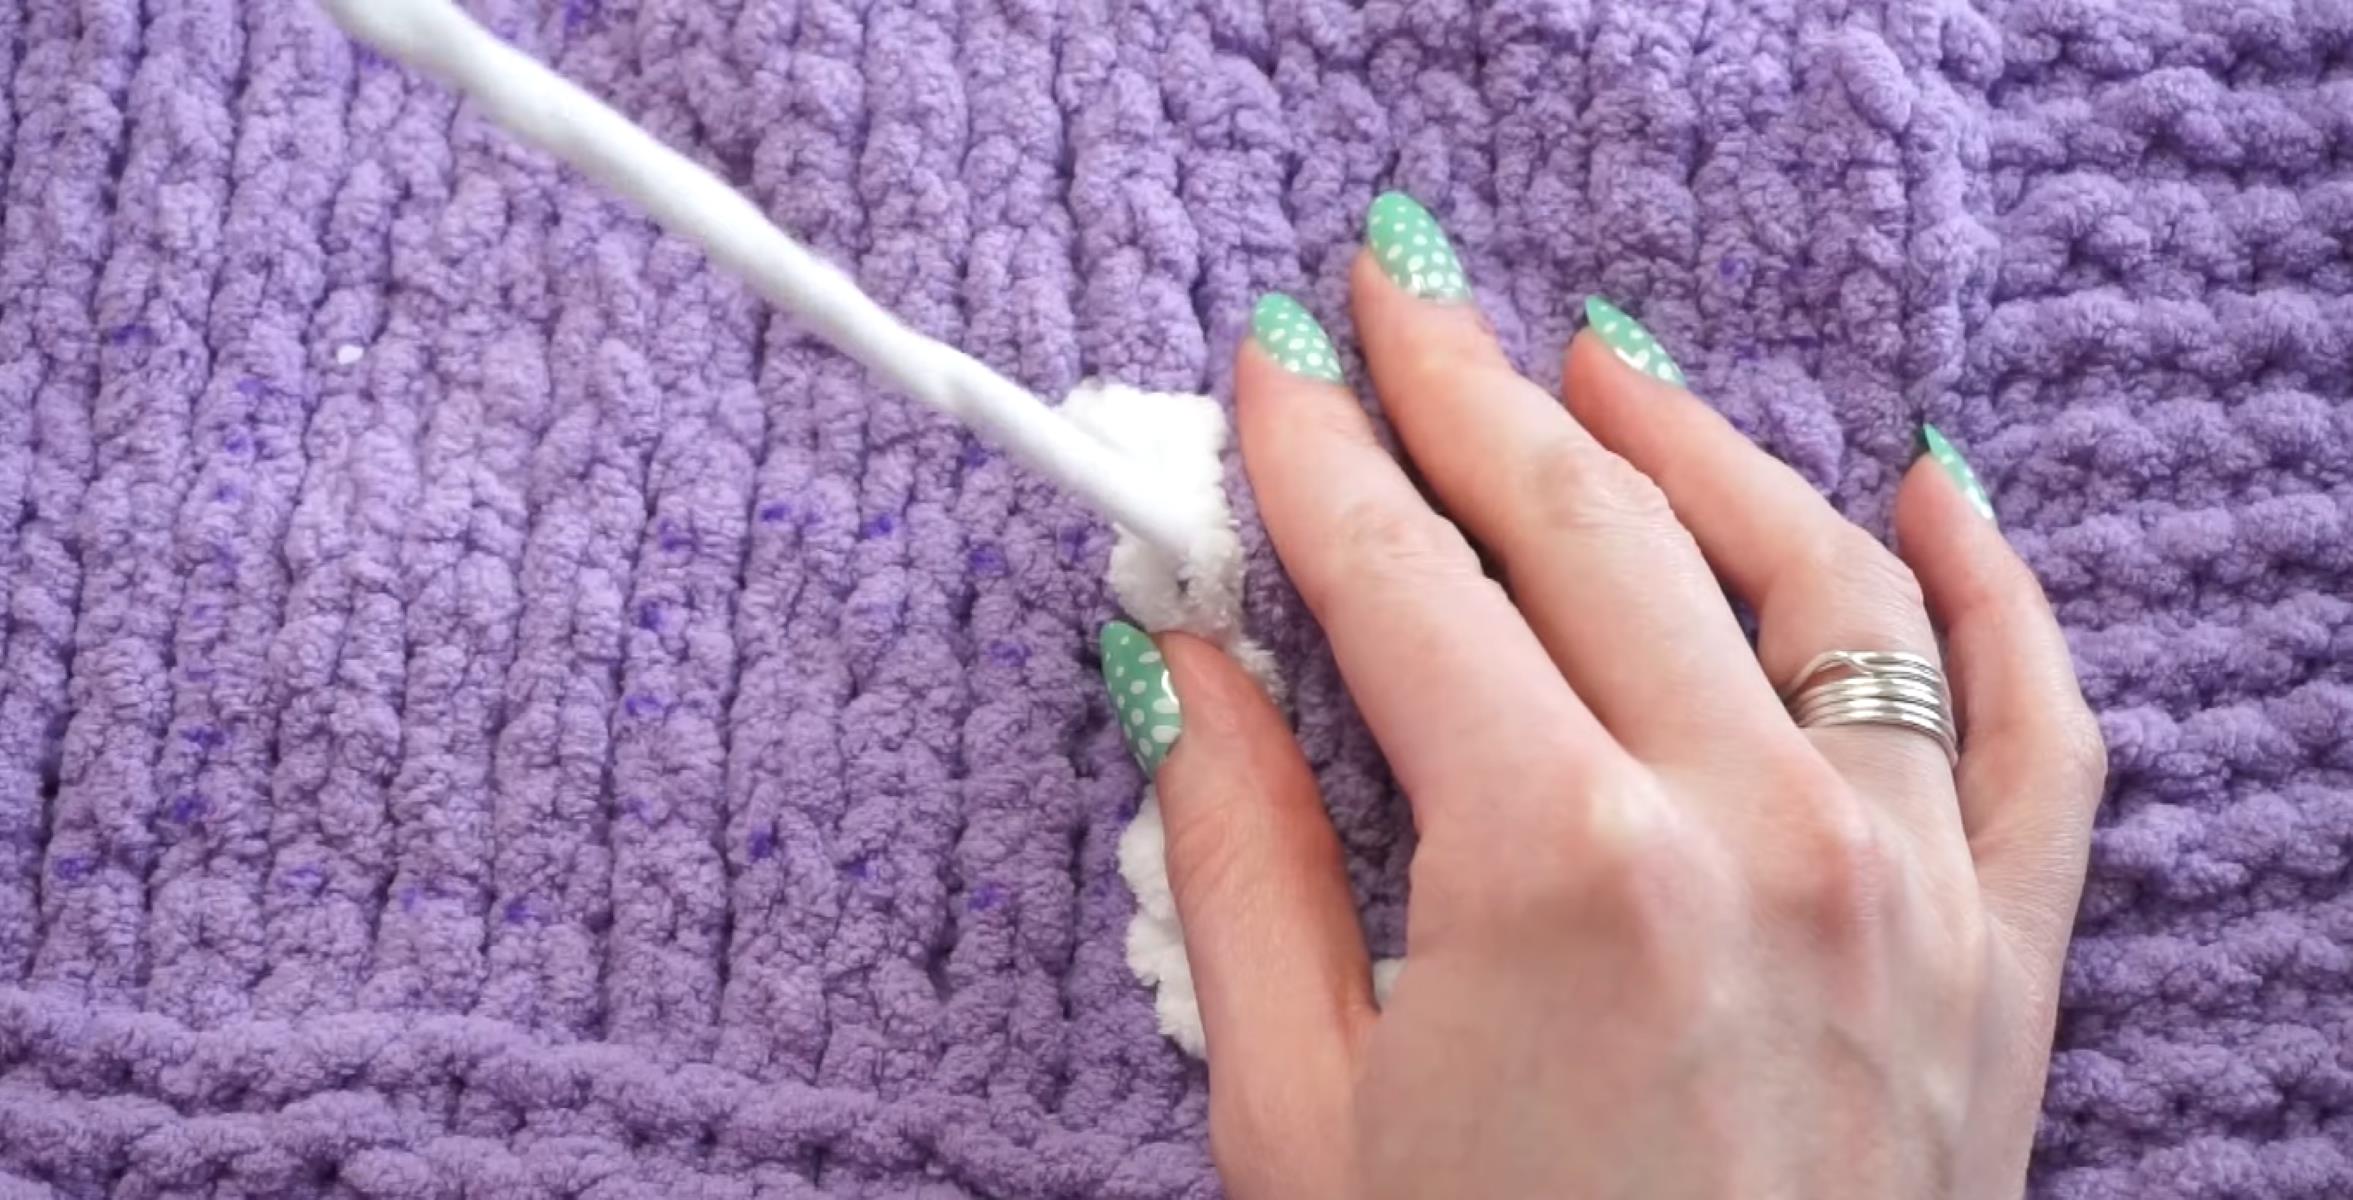
Washing: Before washing your embroidered blanket, check the care instructions for both the blanket fabric and the embroidery thread. Follow these instructions carefully to ensure that you maintain the integrity of both the fabric and the stitches. In general, hand-washing or using a gentle machine wash setting in cold water is recommended for embroidered blankets. Avoid harsh detergents, bleach, or fabric softeners, as they can damage the embroidery and cause color fading. If your blanket is particularly delicate or has intricate embroidery, consider using a laundry bag or washing it inside out to protect the stitches.
Drying: After washing, gently wring out excess water from the blanket without twisting or pulling on the embroidery. Lay the blanket flat to dry, preferably on a clean and dry towel or drying rack. Avoid hanging the blanket, as this can lead to stretching or distortion of the fabric and the embroidery. Direct sunlight can also cause fading, so dry your embroidered blanket in a shaded area. Once it’s dry, you can lightly press the embroidered areas using a warm iron with a pressing cloth.
Storage: When storing your embroidered blanket, make sure it is clean and dry. Fold it carefully, avoiding sharp creases that could damage the embroidery. You can place acid-free tissue paper between folds for added protection. Store the blanket in a cool, dry place away from direct sunlight, as exposure to sunlight can cause the fabric and embroidery colors to fade over time. Consider storing it in a breathable fabric bag or a plastic storage container to protect it from dust and insects.
Avoid Friction and Abrasion: Be mindful of activities or objects that could cause friction or abrasion on the embroidered areas. Avoid placing heavy objects on top of the blanket or using it in high-traffic areas where it could be subjected to excessive rubbing or pulling. Be cautious with sharp objects that could snag or pull on the embroidery. Treat the embroidered areas with care to avoid damaging the stitches or causing unraveling.
Spot Cleaning: In the case of small stains or spills, it’s best to spot clean the affected area rather than washing the entire blanket. Use a mild detergent or a specialized fabric stain remover that is safe for both the fabric and the embroidery. Gently dab the stain with a clean cloth or sponge, avoiding harsh rubbing that could damage the embroidery. Rinse with clean water and allow the area to air dry completely.
Regular Inspection: Periodically inspect your embroidered blanket for any loose threads or areas that may require mending. If you notice any loose stitches, secure them with a few extra stitches to prevent unraveling. Promptly address any minor repairs to maintain the integrity of the embroidery and prevent more significant issues from developing.
By following these care and maintenance guidelines, you can ensure that your hand-embroidered blanket remains beautiful and in excellent condition for years to come. Treat it with love and care, and it will continue to bring warmth and joy while preserving the craftsmanship of your embroidery.
Conclusion
Embroidering a blanket by hand is a delightful and creative endeavor that allows you to add a personal touch to a cherished item. Throughout this comprehensive guide, we have explored the step-by-step process of creating a beautifully embroidered blanket, from selecting the materials and transferring the design to mastering basic stitches and adding colors and patterns.
With each stitch, you have embarked on a journey of creativity and self-expression, transforming a simple blanket into a unique work of art. The choice of materials, colors, and stitches reflects your individual style and vision, making the embroidery truly one-of-a-kind.
Along the way, you have learned about the importance of proper preparation, from choosing the right blanket and embroidery thread to transferring the design accurately. You have practiced basic embroidery stitches and explored different techniques to bring your design to life, adding depth, texture, and visual appeal.
As you near the completion of your hand-embroidered blanket, you have also gained insight into the finishing touches and the importance of caring for and maintaining your embroidery. By following the recommended care guidelines, you can ensure that your creation remains vibrant and beautiful for years to come.
Embroidering a blanket by hand not only produces a stunning finished product but also provides a therapeutic and rewarding experience. With each stitch, you have allowed yourself to immerse in the present moment, finding solace and creative fulfillment. The act of hand embroidery is not just a craft but also a form of self-care, allowing you to slow down, focus, and connect with your creative instincts.
So, whether you are creating an embroidered blanket for yourself, a loved one, or as a special gift, embrace the joy and satisfaction that comes with this timeless craft. Let your imagination soar, experiment with different techniques, and infuse your blanket with your unique artistic voice.
Embroidery is an art form that has withstood the test of time, and by incorporating it into your blanket, you are adding a touch of tradition and craftsmanship. So, pick up your needle, thread your favorite colors, and let your creativity flow as you embark on this beautiful journey of hand-embroidery.
Frequently Asked Questions about How To Embroider A Blanket By Hand
Was this page helpful?
At Storables.com, we guarantee accurate and reliable information. Our content, validated by Expert Board Contributors, is crafted following stringent Editorial Policies. We're committed to providing you with well-researched, expert-backed insights for all your informational needs.
0 thoughts on “How To Embroider A Blanket By Hand”