Articles
How To Embroider On A Quilt
Modified: January 6, 2024
Learn how to embroider on a quilt with our helpful articles. Get step-by-step instructions and expert tips for creating stunning embroidered designs on your quilts.
(Many of the links in this article redirect to a specific reviewed product. Your purchase of these products through affiliate links helps to generate commission for Storables.com, at no extra cost. Learn more)
Introduction
Welcome to the world of embroidery! If you’re looking to add a touch of creativity and personalization to your quilt, embroidery is a fantastic way to do just that. Embroidery allows you to add beautiful designs, patterns, and textures to your quilt, making it a unique and eye-catching piece of artwork.
In this article, we’ll guide you through the steps of embroidering on a quilt, from preparing the quilt to adding the finishing touches. Whether you’re a beginner or an experienced embroiderer, you’ll find helpful tips and techniques to create stunning embroidered designs on your quilt.
Before we dive into the embroidery process, it’s important to gather the materials you’ll need. Here’s a quick overview of the essentials:
- Quilt: Choose a quilt that is made of a fabric and size suitable for embroidery.
- Embroidery Hoop: This will hold your quilt tightly in place, allowing you to embroider with precision.
- Embroidery Needles: Use needles specifically designed for embroidery to ensure smooth stitching.
- Embroidery Floss: This is the thread that you will use to create your embroidered designs.
- Transfer Paper or Pens: These will help transfer your chosen design onto the quilt.
- Scissors: Essential for cutting the embroidery floss and trimming excess fabric.
Now that you have your materials ready, let’s move on to the first step: preparing the quilt for embroidery.
Key Takeaways:
- Personalize your quilt with stunning embroidered designs by following the step-by-step process, from preparing the quilt to adding embellishments. Unleash your creativity and enjoy the rewarding journey of quilt embroidery.
- Ensure the longevity of your quilt embroidery by carefully finishing and preserving your masterpiece. Take pride in your creativity and craftsmanship, and showcase your unique embroidered quilt with joy.
Read more: How To Embroider On A Pillowcase
Materials Needed
Embroidering on a quilt requires a few specific materials to ensure successful and satisfying results. Here’s a detailed list of the materials you’ll need:
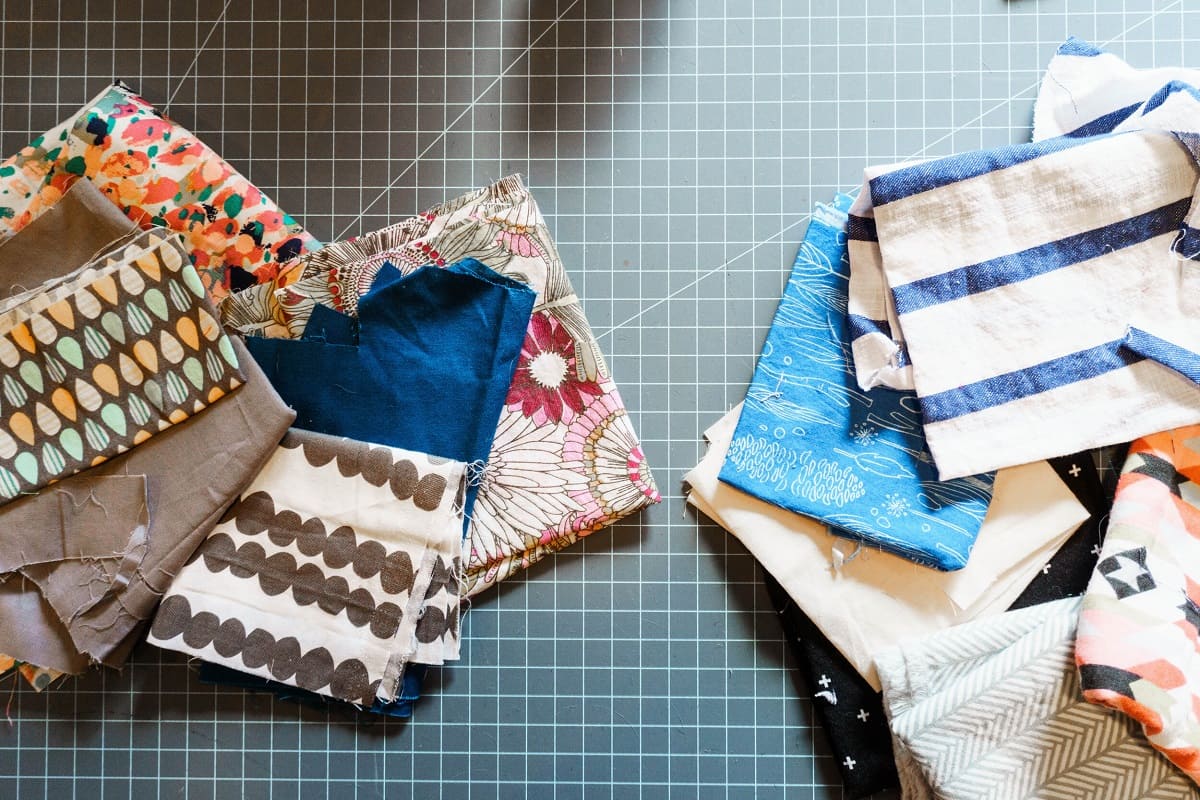
- Quilt: Choose a quilt made of a fabric suitable for embroidery. It should have a tight and even weave to provide a stable surface for stitching. Quilts made of cotton or linen are great options.
- Embroidery Hoop: An embroidery hoop is a circular or oval-shaped frame made of wood or plastic. It consists of an inner and outer ring that can be adjusted to hold the quilt taut. The hoop helps maintain tension in the fabric and prevents it from puckering or wrinkling during embroidery.
- Embroidery Needles: Select embroidery needles that are sharp, have a large eye for threading the floss, and are suitable for the thickness of your quilt. Needles with a sharp point are ideal for piercing through the fabric without damaging the fibers.
- Embroidery Floss: Embroidery floss is a loosely twisted thread made of mercerized cotton or silk. It comes in a wide range of colors and is available in skeins or spools. Choose floss colors that complement your quilt design and ensure they are colorfast – meaning they won’t bleed or fade when washed.
- Transfer Tools: There are various methods to transfer the design onto the quilt. You can use transfer paper, which is coated with a transferable material that activates when heat is applied. Alternatively, you can use transfer pens or pencils designed specifically for transferring designs onto fabric.
- Scissors: Sharp scissors are essential for cutting embroidery floss and trimming excess fabric. Invest in a pair of embroidery scissors with small, pointed tips for precision cutting.
- Design Template: Choose a design template that you want to embroider onto your quilt. You can find free designs online or create your own. Make sure the design is compatible with the size and scale of your quilt.
- Light Source: A well-lit workspace is crucial for embroidery. Make sure you have a good source of light, whether it’s natural daylight or a bright lamp, to help you see the fabric and stitches clearly.
By gathering these materials, you’ll have everything you need to start embroidering on your quilt. Now, let’s move on to the next step: preparing the quilt for embroidery.
Step 1: Preparing the Quilt
Before diving into the embroidery process, it’s important to properly prepare the quilt to ensure smooth stitching and precise embroidery. Follow these steps to get your quilt ready for embroidery:
- Wash and Press: Begin by washing your quilt to remove any dirt, chemicals, or starch that may be present. Use a gentle detergent and follow the fabric’s care instructions. Once washed, press the quilt with an iron to remove any wrinkles or creases. This will provide a flat and smooth surface for embroidery.
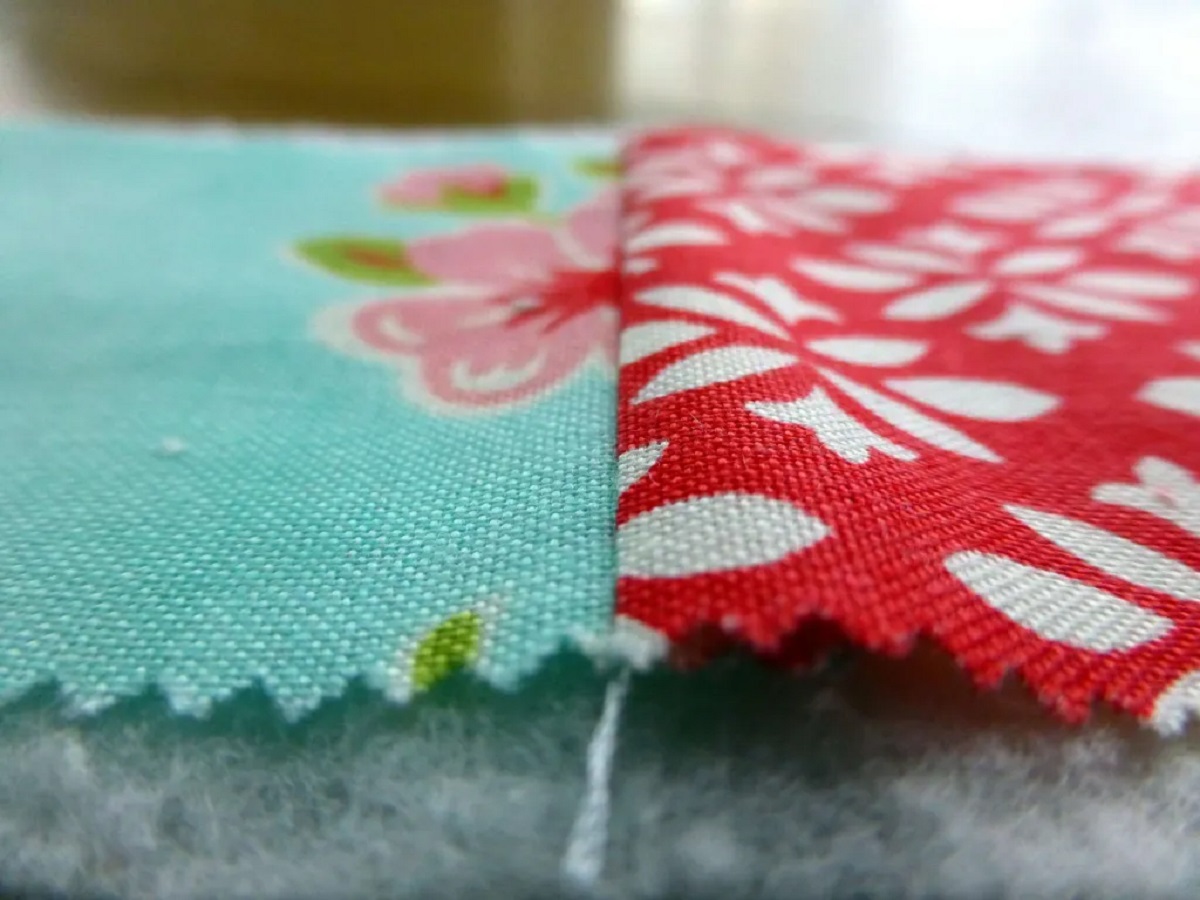
- Secure the Edges: Since quilts can have raw edges or loose threads, it’s important to secure the edges to prevent unraveling or fraying. You can use a serger or a zigzag stitch on a sewing machine to secure the edges. Alternatively, if your quilt has a binding, make sure it is properly stitched in place.
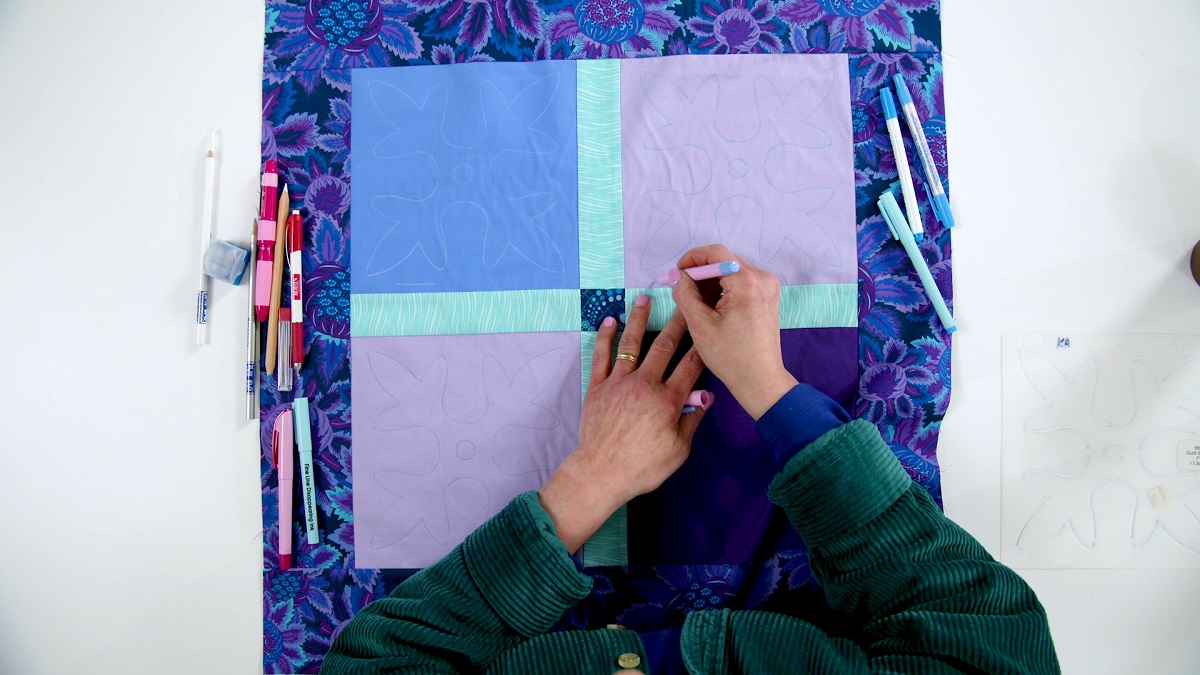
- Plan Your Design Placement: Take some time to plan the placement of your embroidered design on the quilt. Consider the size and scale of both the quilt and the design. You can use a fabric marker or chalk to lightly mark the center or any specific placement guidelines on the quilt.
- Stabilize the Quilt: To prevent the quilt from shifting or stretching while you embroider, it’s important to stabilize it. Use an embroidery hoop that is slightly larger than the design area and place it over the marked area. Fit the inner and outer rings of the hoop together, ensuring that the quilt is taut and the fabric is evenly stretched.
- Trim Excess Fabric: If your quilt has excess fabric or borders that extend beyond the design area, consider trimming them to make the embroidery process more manageable. Use fabric scissors to carefully trim the excess fabric while being mindful not to cut into the design area.
By following these steps, you will have properly prepared your quilt for embroidery. The next step is to choose a design that you want to embroider onto your quilt. We’ll explore design selection and transfer in the next step.
Step 2: Choosing a Design
Choosing the right design for your quilt embroidery is a crucial step in the process. It sets the tone and visual impact of your finished piece. Here are some tips to help you select a design that will complement your quilt:
- Consider the Quilt’s Theme: Think about the overall theme or style of your quilt. Is it modern, traditional, floral, geometric, or something else? Choose a design that aligns with the theme and enhances the overall aesthetic of the quilt.
- Size and Scale: Take into account the size and scale of your quilt. If it’s a small quilt, a large and intricate design may overpower the quilt’s visual impact. On the other hand, a large quilt can accommodate more intricate and detailed designs. Consider the proportion and balance between the size of the design and the size of the quilt.
- Personal Preference: Consider your personal style and preferences. Choose a design that resonates with you and reflects your unique taste. It could be a favorite flower, an animal, a geometric pattern, or anything that speaks to you creatively.
- Consider Skill Level: Take into account your embroidery skill level. For beginners, it’s best to start with simple designs that involve basic stitches. As you gain more confidence and experience, you can gradually tackle more complex and intricate designs.
- Adaptability: Look for designs that can be adapted to fit the shape and size of your quilt. Consider how the design will flow across the quilt’s surface and how it will interact with other elements and blocks in the quilt.
- Research and Inspiration: Browse through embroidery books, magazines, websites, and social media platforms for inspiration. Look for designs that catch your eye and explore different styles, techniques, and motifs. Don’t be afraid to mix and match elements from different designs to create a truly unique embroidery.
Once you have chosen a design, it’s time to transfer it onto the quilt. In the next step, we’ll discuss different methods of transferring the design accurately onto the fabric.
Step 3: Transferring the Design onto the Quilt
Now that you have selected a design for your quilt embroidery, the next step is to transfer the design onto the quilt. There are several methods you can use to accomplish this. Let’s explore some popular techniques:
- Transfer Paper: Transfer paper is a convenient option for transferring designs onto fabric. Place the transfer paper (colored side down) on top of the quilt, then place your design on top of the transfer paper. Use a pencil or pen to trace the design, applying enough pressure to transfer the image onto the fabric. Ensure that the transfer is clear and visible before removing the transfer paper.
- Embroidery Transfer Pens or Pencils: These pens or pencils are specifically designed for transferring designs onto fabric. Use a light-colored pen or pencil to trace your design directly onto the quilt fabric. Make sure to use a fine-tip pen or pencil for accurate and precise lines. The transferred lines will disappear or fade after stitching or can be washed away.
- Carbon Paper: Carbon paper is another option for transferring designs. Place the carbon paper (colored side down) on top of the quilt fabric, with your design on top of the carbon paper. Use a pencil or pen to trace the design, applying enough pressure to transfer the carbon onto the fabric. Check the transferred lines for clarity before removing the carbon paper.
- Stencil or Template: If your design is available as a stencil or template, you can use it directly on the quilt. Place the stencil or template on the fabric and use a fabric marker or chalk to trace the design onto the quilt. Make sure the lines are clear and visible before removing the stencil or template.
- Freehand Drawing: If you’re confident in your drawing skills, you can freehand the design directly onto the fabric using a fabric marker or chalk. This method allows for more creativity and customization, but it requires a steady hand and practice to achieve accurate results.
Choose the method that suits you best based on your design complexity, personal preference, and ease of use. Make sure to transfer the design accurately and clearly onto the quilt fabric so that it serves as a guide for your embroidery stitches.
Now that you have transferred the design onto the quilt, it’s time to set up the embroidery hoop and prepare to begin stitching. In the next step, we’ll guide you through the process of setting up the embroidery hoop.
Read more: How To Embroider A Blanket By Hand
Step 4: Setting Up the Embroidery Hoop
Setting up the embroidery hoop is an essential step in the quilt embroidery process. The hoop helps to keep the fabric taut, allowing for precise and even stitching. Here’s how to set up your embroidery hoop:
- Select the Correct Hoop Size: Choose an embroidery hoop that is slightly larger than the design area on your quilt. This allows enough space for maneuvering the needle and thread. If the hoop is too small, it may compress the quilt fabric and distort the stitches. A larger hoop will provide a more stable and even surface for embroidery.
- Separate the Inner and Outer Rings: Hold the embroidery hoop with the screw at the top and loosen it to separate the inner and outer rings. Place the inner ring under the quilt fabric, ensuring that the design area is centered within the hoop.
- Stretch the Fabric: Gently pull the quilt fabric outward, making sure it is taut and smooth. Adjust the tension by slightly tightening or loosening the screw on the hoop. Be careful not to overstretch the fabric, as it may distort the design or cause puckering.
- Tighten the Screw: Once the fabric is stretched and centered, tighten the screw on the embroidery hoop to secure the fabric in place. Make sure the fabric remains taut and does not shift as you embroider.
- Verify Design Placement: Double-check the design placement within the hoop to ensure it aligns with your desired position on the quilt. Adjust the hoop as needed to make sure the design is centered and positioned correctly.
Setting up the embroidery hoop correctly is crucial for achieving neat and precise embroidery. It provides stability to the fabric, allowing you to focus on your stitching technique without worrying about the fabric slipping or becoming loose.
Now that the hoop is set up, it’s time to select and prepare the embroidery floss. In the next step, we’ll discuss how to choose the right embroidery floss for your quilt embroidery project.
When embroidering on a quilt, use an embroidery hoop to keep the fabric taut and prevent puckering. This will make your stitching more even and professional-looking.
Step 5: Selecting Embroidery Floss
Choosing the right embroidery floss is crucial for achieving the desired effect in your quilt embroidery. The right colors, textures, and types of floss can bring your design to life. Follow these guidelines to select the best embroidery floss for your project:
- Consider the Design and Color Scheme: Take into account the colors and shades used in your quilt design. Choose embroidery floss that complements and enhances those colors. You can match the floss colors exactly or opt for contrasting colors to create visual interest and dimension.
- Quality and Type of Floss: Embroidery floss is available in a variety of materials, such as cotton, silk, satin, and metallic. Consider the texture and sheen you want to achieve in your embroidery. Cotton floss is the most common and widely used type, known for its versatility and availability in an array of colors.
- Number of Strands: Embroidery floss consists of multiple strands twisted together. Most commonly, floss is separated into six individual strands. You can easily adjust the thickness of your stitches by using fewer or more strands. Laying multiple strands together can create a bolder and fuller effect.
- Variegated Floss: Variegated floss is a type of embroidery floss that features multiple colors in a single strand. It creates a unique and gradient effect as you stitch. Consider using variegated floss to add visual interest and dimension to certain areas of your design.
- Specialty Threads and Embellishments: Depending on your design and desired effect, you might consider incorporating specialty threads like metallic floss, silk ribbon, or beads. These embellishments can add sparkle, texture, and depth to your quilt embroidery.
- Thread Organization: To keep your embroidery floss neat and easily accessible, consider using floss bobbins, plastic organizers, or other thread storage solutions. Keeping your floss organized will save time and prevent tangles during the embroidery process.
Take your time to select the embroidery floss that will help you achieve your desired outcome. Experiment with different colors and types of floss to find the perfect match for your quilt embroidery project.
Now that you have chosen your embroidery floss, it’s time to start the embroidery process. In the next step, we’ll guide you through the process of starting your embroidery stitches on the quilt.
Step 6: Starting the Embroidery
Now that you have your quilt prepared, the design transferred, and the embroidery hoop set up, it’s time to start the embroidery process. Follow these steps to begin stitching your design onto the quilt:
- Select the First Color: Decide which color of embroidery floss you want to start with. Thread your embroidery needle with an appropriate length of floss, typically about 18 inches, and knot the end to secure it.
- Bring the Needle Up: Place the needle from the backside of the quilt fabric, bringing it up through the fabric at the starting point of your design. Leave a small tail of floss at the back to prevent it from slipping through.
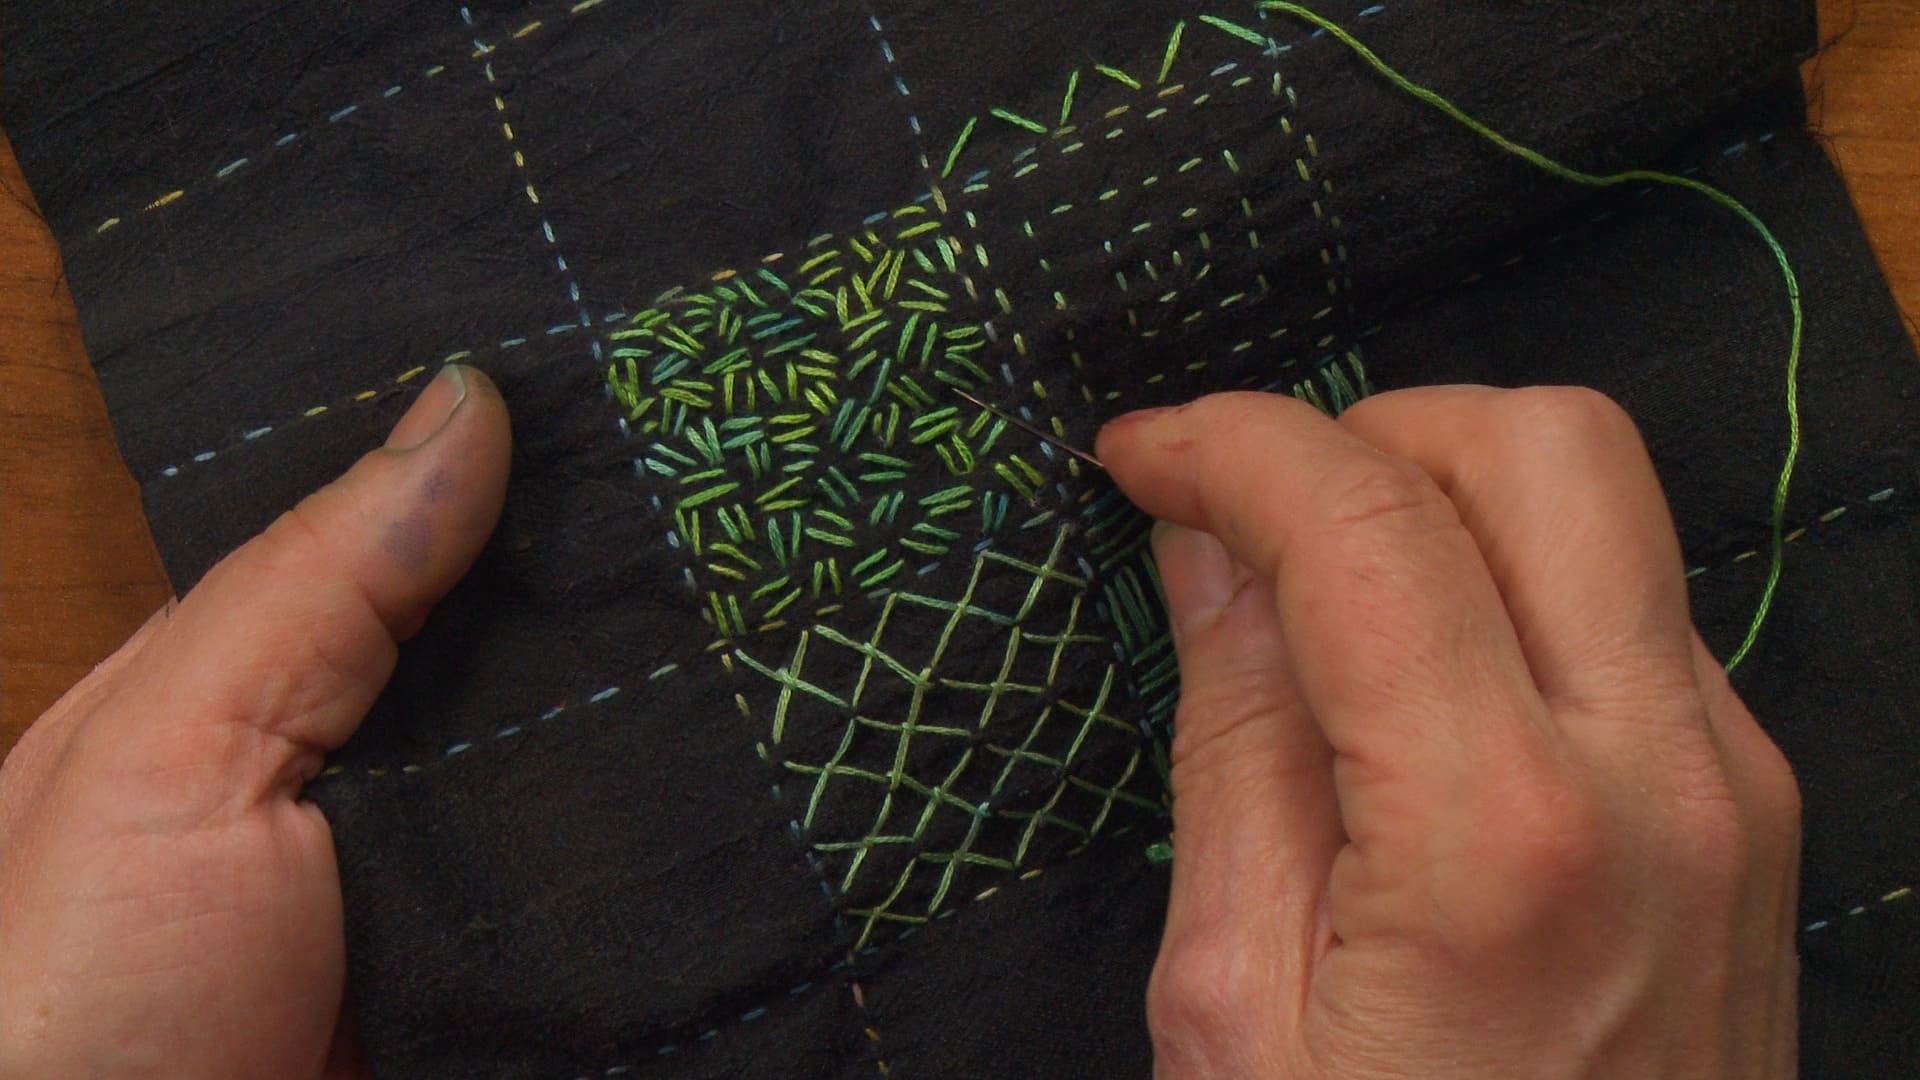
- Create Your First Stitch: Determine the type of stitch you will be using for your design, such as backstitch, satin stitch, or French knot. Start stitching according to your chosen stitch, following the lines or shapes outlined in the design.
- Secure the Stitches: As you continue stitching, make sure to periodically secure your stitches by weaving the needle under previously made stitches or creating small anchor stitches along the way.
- Consistency and Neatness: Pay attention to the tension of your stitches to ensure consistency and neatness. Keep your stitches even and properly spaced to achieve a professional-looking result.
- Change Colors as Needed: When you need to switch to a different color of embroidery floss, finish off the current color by weaving the needle under existing stitches on the backside of the fabric. Secure the new color by bringing it up through the fabric and continuing your stitching.
- Take Breaks and Rest: Embroidery can be a time-consuming process, so remember to take breaks and give your fingers and eyes some rest. It’s important to maintain a relaxed grip on the needle and take breaks as needed to prevent strain or fatigue.
- Enjoy the Process: Embroidery is a creative and meditative activity. Enjoy the process of stitching, watch your design come to life, and allow yourself to relax and focus on the beauty of your embroidery journey.
Remember, practice makes perfect, so don’t be discouraged if your stitches aren’t perfect at first. With time and practice, your skills will improve, and you’ll create beautiful embroidered designs on your quilt.
In the next step, we’ll delve into different stitching techniques that you can use to enhance your quilt embroidery further.
Step 7: Stitching Techniques
As you continue your quilt embroidery journey, exploring different stitching techniques can add depth, texture, and visual interest to your design. Here are some common stitching techniques to consider:
- Backstitch: The backstitch is a versatile and commonly used stitch in embroidery. It creates a continuous line with a solid and defined appearance. Start by bringing the needle up at the beginning of the line, then insert it back down slightly ahead. Bring the needle up again, passing it through the previous stitch’s end, and repeat to create a continuous line.
- Satin Stitch: The satin stitch creates a smooth and solid filled-in area. Start by bringing the needle up at one edge of the shape you want to fill and insert it back down on the opposite edge. Continue stitching close together, parallel to the shape’s outline, until the area is completely filled in. Make sure the stitches lie side by side without any gaps.
- French Knot: French knots are small, decorative knots that add texture and dimension to your design. Bring the needle up through the fabric at the desired location. Wrap the floss around the needle once or twice, keeping it taut. Insert the needle back down close to the spot where it came up, holding the floss taut with your other hand. Gently pull the needle through to create a small knot.
- Chain Stitch: The chain stitch creates a line of connected loops, resembling a chain. Bring the needle up at the starting point and insert it back down slightly ahead. Leave a small loop of floss on the surface of the fabric and bring the needle up again through the loop. Continue this process, stitching in a continuous line and linking the loops to create the chain effect.
- Lazy Daisy Stitch: The lazy daisy stitch is used to create individual petal or leaf shapes. Start by bringing the needle up at the base of the shape. Insert the needle back down at the same point, creating a loop of floss on the surface. Bring the needle up again right next to the loop, and insert it back down through the same point, securing the loop. Repeat this process to create multiple loops, forming a flower or leaf shape.
- Stem Stitch: The stem stitch creates a twisted line, perfect for outlining shapes or creating flowing lines. Start by bringing the needle up at the beginning of the line. Insert the needle back down slightly ahead and to one side of the initial point. Bring the needle back up through the center of the previous stitch and repeat this process, creating a twisted effect along the line.
These are just a few stitching techniques to get you started. Feel free to experiment and combine different stitches to create unique textures and effects in your quilt embroidery. Remember to maintain consistency and neatness in your stitches for a polished finish.
In the next step, we’ll explore the option of adding embellishments to your quilt embroidery, if desired.
Read more: How To Machine Quilt A Large Quilt
Step 8: Adding Embellishments (if desired)
Adding embellishments to your quilt embroidery can elevate the design and create additional visual interest. While it is optional, embellishments can add a touch of uniqueness and personality to your quilt. Consider these ideas for adding embellishments to your embroidery:
- Beads: Embroidery beads can be used to add sparkle and texture to your design. You can stitch beads directly onto your quilt using a small needle and beading thread. Experiment with different sizes, shapes, and colors of beads to create varying effects.
- Sequins: Sequins are another popular choice for adding shimmer and shine to your embroidery. Stitch sequins onto your quilt using a sewing needle and thread that matches the sequin color. You can create unique patterns, borders, or focal points with strategically placed sequins.
- Ribbon: Incorporating ribbon into your quilt embroidery can add dimension and texture. Stitch ribbon alongside or within your embroidery stitches to create unique patterns, bows, or accents. Use different widths and colors of ribbon to create a dynamic look.
- Fabric Appliques: Consider adding fabric appliques to your quilt embroidery for a three-dimensional effect. Cut out desired shapes from fabric and stitch them onto your quilt using a needle and thread. This technique adds depth and texture to your design.
- Threadwork Embellishments: Enhance your embroidery by incorporating additional threadwork techniques. You can create raised or padded areas using techniques such as couching, raised satin stitch, or bullion knots. These techniques can add texture and a tactile element to your quilt embroidery.
- Mixed Media: Get creative by incorporating other materials into your quilt embroidery. Consider using items like buttons, lace, beads, feathers, or even small pieces of fabric to add unique elements and textures to your design.
When adding embellishments, ensure they are securely attached to the quilt to prevent them from coming loose during use or washing. Use appropriate stitching techniques or adhesives to attach the embellishments firmly to the fabric.
Remember, embellishments should complement and enhance your embroidery design without overpowering it. Use them sparingly and strategically to create a balanced and visually appealing quilt embroidery.
In the final step, we’ll discuss the process of finishing your embroidery and ensuring it stays intact for years to come.
Step 9: Finishing the Embroidery
As you near the completion of your quilt embroidery, it’s important to take the necessary steps to ensure the longevity and preservation of your hard work. Here are some key steps to consider when finishing your embroidery:
- Check for Loose Threads: Carefully examine your embroidery to identify any loose threads or knots. Use a needle or a small pair of embroidery scissors to trim them close to the fabric. This will prevent any accidental snagging or unraveling of your work.
- Secure the Knots: Take the time to double-check and secure any loose knots at the back of your embroidery. Thread the needle through a few back stitches or under existing stitches to ensure the knots are well-anchored and won’t come undone over time.
- Remove Tracing Marks: If you used a transfer method that leaves visible marks, such as transfer paper or pencils, use a fabric eraser, a damp cloth, or follow the manufacturer’s instructions to remove the marks from your quilt. Be gentle to avoid disturbing the embroidery stitches.
- Block and Press: To give your quilt a professional finish, consider blocking and pressing the embroidered area. Blocking involves dampening the embroidered section and shaping it to remove any puckering or unevenness. Allow it to dry completely before pressing gently with an iron on the reverse side, using a pressing cloth to protect the stitches.
- Final Inspection: Do a final inspection of your quilt embroidery, looking for any areas that may require additional stitching or touch-ups. Check for any missed stitches, irregularities, or areas that need reinforcement. Make the necessary adjustments to ensure a polished and well-finished result.
- Protect and Store: Once you are satisfied with the finished embroidery, consider protecting it by placing a clean cloth or acid-free tissue paper on top. Fold or roll the quilt carefully to avoid crushing or damaging the embroidery. Store it in a cool, dry place away from direct sunlight, extreme temperatures, and humidity to prevent fading or discoloration.
By following these steps, you can ensure that your quilt embroidery remains in good condition for many years to come. Regularly inspect and clean your quilt to maintain its beauty and longevity.
Congratulations on completing your quilt embroidery! Take pride in your finished piece and showcase it with joy. Now you can enjoy the fruits of your creativity and hard work, or perhaps gift it to someone special.
With this final step, your journey in embroidering on a quilt comes to an end. We hope you found this guide helpful, and may you continue to explore and enjoy the world of embroidery.
Happy stitching!
Conclusion
Embroidering on a quilt is a rewarding and creative endeavor that allows you to add a personal touch to your beloved quilt. Throughout this article, we’ve covered the step-by-step process of embroidery on a quilt, from preparing the quilt to finishing the embroidery. By following these steps and incorporating your own style and creativity, you can create stunning embroidered designs that bring your quilt to life.
We started by gathering the necessary materials, including a suitable quilt, embroidery hoop, needles, floss, and transfer tools. The importance of properly preparing the quilt by washing, securing the edges, and planning the design placement was emphasized. Then, we discussed selecting a design that complements your quilt, transferring the design onto the quilt fabric accurately, and setting up the embroidery hoop for stability.
Choosing the right embroidery floss and exploring different stitching techniques, such as backstitch, satin stitch, and French knot, allows you to create intricate and beautiful designs. Additionally, we explored the option of adding embellishments like beads, sequins, ribbons, and fabric appliques to add texture and personalization to your embroidery.
To ensure the longevity of your embroidery, taking care of loose threads, securing knots, removing tracing marks, and blocking and pressing the finished embroidery are essential steps. Finally, we discussed storing your quilts in a safe and protected environment to preserve their beauty for years to come.
Embroidery on a quilt is an art form that requires practice, patience, and a creative eye. But the end result is a unique masterpiece that reflects your personal style and craftsmanship. So, gather your materials, unleash your creativity, and enjoy the journey of embroidering on a quilt!
Frequently Asked Questions about How To Embroider On A Quilt
Was this page helpful?
At Storables.com, we guarantee accurate and reliable information. Our content, validated by Expert Board Contributors, is crafted following stringent Editorial Policies. We're committed to providing you with well-researched, expert-backed insights for all your informational needs.


0 thoughts on “How To Embroider On A Quilt”