Articles
How To Hand Crochet A Blanket With Thick Yarn
Modified: February 24, 2024
Learn how to hand crochet a cozy blanket using thick yarn with our informative articles. Get step-by-step instructions and helpful tips to create your own beautiful and warm masterpiece.
(Many of the links in this article redirect to a specific reviewed product. Your purchase of these products through affiliate links helps to generate commission for Storables.com, at no extra cost. Learn more)
Introduction
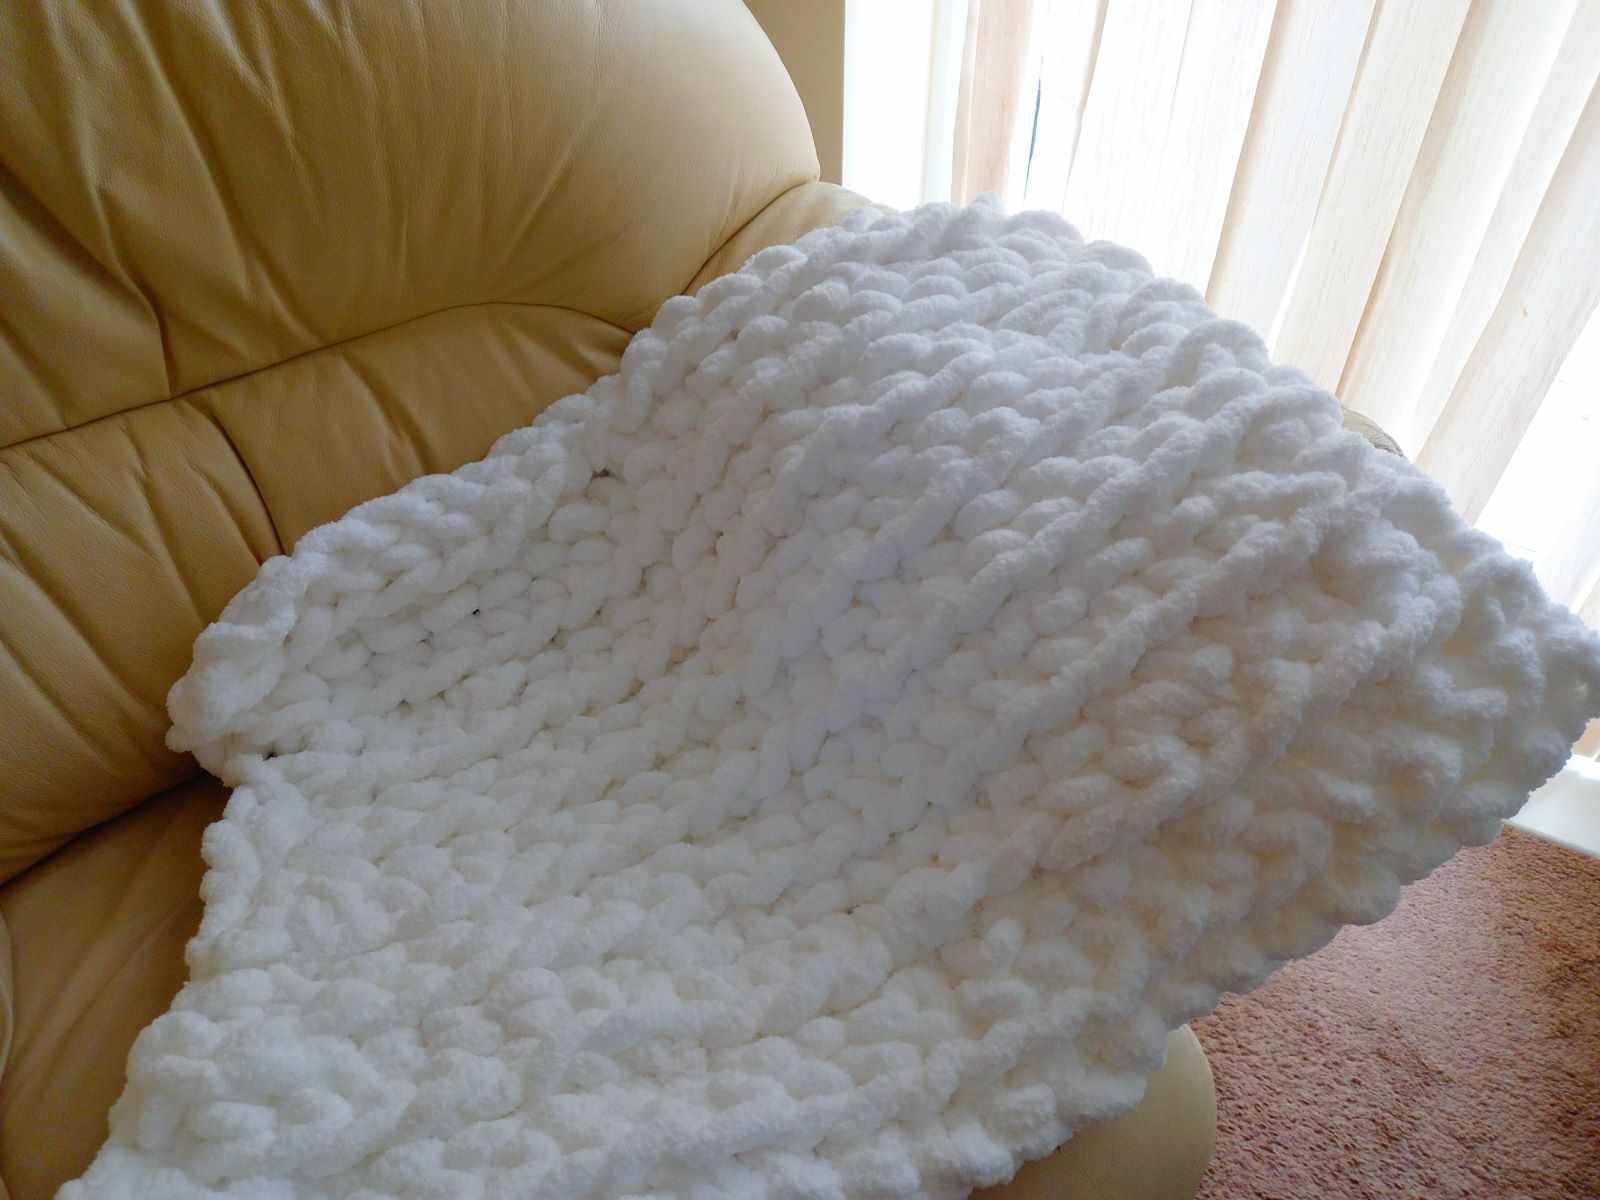
Welcome to the world of hand crocheting! If you’re looking for a fun and cozy project to tackle, why not try hand crocheting a blanket with thick yarn? This DIY project is not only a great way to unleash your creativity, but it also produces a beautiful and warm blanket that is perfect for snuggling up on chilly nights.
Hand crocheting a blanket with thick yarn is a popular choice for many craft enthusiasts. The chunky texture of the yarn creates a luxurious and inviting feel, making it an ideal choice for blankets. Plus, with the right techniques and a little patience, you can create a stunning, one-of-a-kind blanket that will be cherished for years to come.
In this article, we will guide you through the process of hand crocheting a blanket with thick yarn. We’ll cover everything from choosing the right yarn and preparing it for crocheting to creating the foundation chain and working through the rows. So grab your favorite mug of hot cocoa, find a cozy spot, and let’s get started on this exciting crocheting adventure!
Key Takeaways:
- Unleash your creativity and create a cozy masterpiece by hand crocheting a blanket with thick yarn. Follow the step-by-step guide to choose the right yarn, prepare it, and add finishing touches for a personalized touch.
- Embrace the soothing rhythm of crocheting and enjoy the process of creating a one-of-a-kind blanket. With patience and practice, you can turn thick yarn into a warm and inviting masterpiece perfect for chilly nights.
Read more: How To Crochet A Blanket With Thick Yarn
Materials Needed
Before we dive into the hand crocheting process, let’s make sure you have everything you need to get started. Here are the essential materials you’ll need for this project:
- Thick yarn: It’s essential to choose a yarn that is thick and chunky, as this will give your blanket its cozy and inviting texture. Look for yarn that is specifically labeled as “chunky” or “super bulky” for the best results.
- Crochet hook: The size of the crochet hook you’ll need depends on the thickness of your yarn. Check the label on your yarn for the recommended hook size. Typically, a hook size of 8mm or larger works well with thick yarn.
- Tapestry needle: This needle will come in handy for weaving in any loose ends or sewing together pieces of the blanket, if necessary.
- Scissors: A good pair of scissors is essential for cutting the yarn and trimming any excess threads.
- Measuring tape: To ensure your blanket is the desired size, a measuring tape will help you keep track of your progress and make any necessary adjustments.
Once you have gathered these materials, you’ll be well-equipped to start your hand crocheting journey. Feel free to personalize your blanket by choosing yarn colors and patterns that speak to your style and taste. Remember, this is your creative project, so let your imagination run wild!
Step 1: Choosing the Right Thick Yarn
The first step in hand crocheting a blanket with thick yarn is to choose the right yarn for your project. When selecting your yarn, consider the following factors:
- Weight: Look for yarn that is labeled as “chunky” or “super bulky.” These weights are ideal for creating a thick and cozy blanket.
- Material: Yarn can be found in a variety of materials, such as acrylic, wool, or cotton. Each material has its own unique characteristics, so choose one that suits your preferences and the intended use of your blanket
- Color: Consider the color palette you want for your blanket. Opt for solid colors for a classic look or mix and match different shades for a more vibrant and playful design.
- Texture: Some thick yarns have additional texture, such as chenille or boucle, which can add extra dimension to your blanket.
Take your time exploring different options and feel the yarn for yourself. Visualize how it will look and feel in a blanket. You may want to visit a local yarn store or browse online to find a wide selection of thick yarns. Don’t hesitate to ask the store staff or check online reviews for recommendations.
Remember, the yarn you choose will greatly influence the final look and feel of your hand crocheted blanket. So, take your time to find the perfect match. Once you’ve got the yarn, you’re ready to move on to the next step in the process!
Step 2: Preparing the Yarn
Once you have chosen the perfect thick yarn for your blanket, it’s time to prepare it for crocheting. Here’s what you need to do:
- Unwind the skein: If your yarn comes in a skein, gently unwind it. You may need to place it on a yarn swift or use a partner to hold it for you while you unwind it. This will prevent any tangles or knots that may impede your crocheting process.
- Make yarn balls: To make it easier to work with, wind the yarn into balls. Start by finding the end of the yarn and loosely wind it around your fingers. Once you have a base, continue winding the yarn around it until you have a compact ball. Remove your fingers and secure the yarn end by tucking it into the ball.
- Check for knots or tangles: Before you start crocheting, inspect the yarn for any knots or tangles. If you come across any, gently undo them to ensure a smooth and uninterrupted crocheting experience.
By taking the time to properly prepare your yarn, you’ll prevent any frustrations and ensure a more enjoyable crocheting process. Once your yarn is ready, you can move on to the next step and start creating your blanket!
Step 3: Creating a Slip Knot
Before you can start crocheting your blanket, it’s important to create a slip knot. The slip knot will serve as the first loop that you’ll attach to your crochet hook. Follow these steps to create a slip knot:
- Hold the end of the yarn in your hand, leaving a tail of about 6 inches.
- Create a loop by crossing the yarn over itself, with the tail end on top.
- Insert your fingers through the loop, grabbing the yarn that is underneath.
- Pull the yarn through the loop, creating a loose knot.
- Tighten the knot by pulling the tail end of the yarn.
Ensure that the slip knot is not too tight or too loose. It should be snug enough to stay secure on your crochet hook but still have some give for easy manipulation. Test the slip knot by gently pulling the yarn, and adjust if necessary.
The slip knot is a crucial starting point for your crocheting journey. It allows you to attach the yarn to the crochet hook and begin creating stitches. With your slip knot ready, you can move on to the next step: making the foundation chain.
When hand crocheting a blanket with thick yarn, use a larger crochet hook to accommodate the yarn’s thickness and create a looser, more comfortable fabric.
Step 4: Making the Foundation Chain
Now that you have your slip knot, it’s time to create the foundation chain for your blanket. The foundation chain serves as the base for the rest of your crochet stitches. Follow these steps to make the foundation chain:
- Hold the crochet hook in your dominant hand, with the slip knot attached to the hook.
- Using your non-dominant hand, hold the tail end of the yarn and create a loop around your index finger.
- With the crochet hook, catch the yarn from underneath and pull it through the loop on your finger, creating a new loop on the hook.
- Repeat this process, creating a loop for each desired stitch in the foundation chain.
The number of stitches in your foundation chain will depend on the desired width of your blanket. Refer to your crochet pattern or determine the length you want through trial and error.
Ensure that each loop in the foundation chain is not too tight or too loose. The stitches should be relatively even in size. You can adjust the tension by slightly tightening or loosening each loop as you go along.
By completing the foundation chain, you’ve set the groundwork for your blanket. Now, it’s time to move on to the next step: crocheting the first row.
Step 5: Crocheting the First Row
With your foundation chain complete, it’s time to start crocheting the first row of your blanket. This row will determine the height and structure of your stitches. Follow these steps to crochet the first row:
- Insert the hook into the second chain from the hook. This will be the first stitch of your first row.
- Yarn over, wrapping the yarn around the hook from back to front.
- Pull the yarn through the chain stitch, creating a loop on the hook.
- Yarn over again and pull it through both loops on the hook. This completes your first single crochet stitch.
- Continue crocheting single crochet stitches into each chain stitch across the row until you reach the end.
Ensure that each stitch is relatively tight, but not too tight that it becomes difficult to work with. Consistency in tension will create a neater and more even appearance for your blanket.
Count your stitches as you go along to ensure you have the correct number required by your pattern or desired for the width of your blanket. If you accidentally miss a stitch or add extra stitches, carefully undo them and correct the mistake to maintain the integrity of the blanket.
Once you’ve completed your first row of single crochet stitches, it’s time to continue building the subsequent rows of your blanket.
Step 6: Continuing Rows
With the first row of single crochet stitches completed, you’re ready to continue building the subsequent rows of your hand crocheted blanket. Follow these steps to continue crocheting the rows:
- Turn your work: After completing a row, turn your work clockwise, so you’re starting the next row from the opposite side.
- Chain stitches: To start the next row, make a certain number of chain stitches, depending on the height of the stitch you’ll be using.
- Stitch choice: Select the type of stitch you want to use for the next row, such as single crochet, double crochet, or any other crochet stitch you prefer.
- Crochet stitches: Insert the hook into the second stitch from the hook for single crochet (or as directed by your pattern). Yarn over, pull the yarn through the stitch, yarn over again, and pull it through both loops on the hook to complete the stitch.
- Repeat: Continue crocheting stitches across the row until you reach the end. Ensure that your stitches are even and consistent in size.
- Turn and repeat: Repeat steps 1-5 for each subsequent row, turning your work at the beginning of each row and crocheting the desired number of stitches.
Continue this process of turning and crocheting rows until your blanket reaches the desired length or you achieve your desired number of rows. Take breaks as needed, and be patient with yourself. Remember, practice makes perfect, and the more you crochet, the more comfortable and efficient you’ll become.
Throughout the process, periodically check the width and length of your blanket to ensure it’s meeting your expectations. Adjust the number of stitches or rows as needed to achieve the desired size.
Once you’ve reached your desired length, you’re ready for the final step: the finishing touches.
Step 7: Finishing Touches
Congratulations! You’re approaching the final stage of completing your hand crocheted blanket with thick yarn. Now, it’s time to add the finishing touches to give your blanket a polished and professional look. Follow these steps to complete the finishing touches:
- Weave in loose ends: Throughout the crocheting process, you may have accumulated some loose ends of yarn. Take a tapestry needle and carefully weave these ends back into the stitches to secure them and prevent unraveling.
- Block your blanket: Blocking is the process of shaping and smoothing your finished blanket. This step is optional but can greatly enhance the appearance of your work. Follow the instructions on your yarn label or consider wetting your blanket, gently shaping it to the desired dimensions, and allowing it to air dry.
- Add border or edging (optional): If you desire, you can add a border or edging to your blanket to give it a more polished look. There are various crochet stitch patterns you can use, such as a simple single crochet border or a more intricate lace edging.
- Inspect for any mistakes: Take a moment to examine your finished blanket. Check for any missed stitches, uneven rows, or other imperfections. If you notice any errors, you can carefully undo and correct them for a neater appearance.
Once you’ve completed these finishing touches, you can step back and admire your beautiful hand crocheted blanket. The time, effort, and creativity you put into this project have resulted in a cozy and customized masterpiece that you can be proud of.
Don’t forget to take some time to enjoy your newly completed blanket. Curl up in it, snuggle with loved ones, or simply admire the artistry and craftsmanship that went into its creation.
Remember, practicing and exploring different techniques will only enhance your crochet skills, so don’t be afraid to experiment with different yarns, stitches, and patterns in your future projects. Happy crocheting!
Read more: How Much Yarn Do I Need To Crochet A Blanket
Conclusion
Hand crocheting a blanket with thick yarn is a rewarding and enjoyable project that allows you to unleash your creativity and create a cozy, one-of-a-kind masterpiece. By following the steps outlined in this guide, you’ll be able to successfully complete your hand crocheted blanket from start to finish.
Throughout the process, we discussed the importance of choosing the right thick yarn, preparing it for crocheting, creating a slip knot, making the foundation chain, crocheting the first row, continuing with subsequent rows, and adding the finishing touches. Each step contributes to the overall quality and appearance of your blanket.
Along the way, remember to embrace your creativity and let your personal style shine through. Select yarn colors and patterns that resonate with you and make your blanket a reflection of your unique taste. Don’t be afraid to experiment with different stitches, edgings, and techniques to make your blanket truly stand out.
As you embark on this crocheting journey, be patient with yourself. Crocheting takes practice, and each project is an opportunity to hone your skills. Don’t be discouraged by mistakes or uneven stitches; they only add character to your handmade creation.
Lastly, enjoy the process. Crocheting is not just about the final result; it’s about the joy and relaxation that comes with each stitch. Embrace the soothing rhythm of crocheting, and let it be a source of comfort and satisfaction.
Now, armed with the knowledge and techniques shared in this article, you’re ready to dive into the world of hand crocheting. So gather your materials, find a cozy spot, and let your creativity flow as you hand crochet a beautiful blanket with thick yarn.
Happy crocheting!
Frequently Asked Questions about How To Hand Crochet A Blanket With Thick Yarn
Was this page helpful?
At Storables.com, we guarantee accurate and reliable information. Our content, validated by Expert Board Contributors, is crafted following stringent Editorial Policies. We're committed to providing you with well-researched, expert-backed insights for all your informational needs.