Articles
How To Extend An Electrical Box
Modified: August 27, 2024
Learn how to extend an electrical box with this informative article. Find step-by-step instructions and expert tips to ensure a safe and successful installation.
(Many of the links in this article redirect to a specific reviewed product. Your purchase of these products through affiliate links helps to generate commission for Storables.com, at no extra cost. Learn more)
Introduction
Extending an electrical box is a common task that many homeowners or electricians encounter when adding new electrical devices or making renovations to a room. A standard electrical box has a limited capacity to accommodate wires and devices, but with the right tools and techniques, it is possible to extend the box to create more space for additional wiring connections.
In this article, we will guide you through the step-by-step process of extending an electrical box. Whether you are planning to install new outlets, switches, or other electrical devices, this comprehensive guide will provide you with the necessary knowledge and expertise to successfully complete the project.
Before we delve into the specific steps, it is important to note that electrical work can be dangerous. If you are not confident in your abilities or do not have experience working with electricity, it is recommended to consult a licensed electrician. Your safety should always be the top priority.
Now, let’s get started with a quick assessment of the requirements for extending an electrical box!
Key Takeaways:
- Safety First!
Before extending an electrical box, prioritize safety by assessing requirements, gathering tools, powering off electricity, and testing connections. If unsure, consult a qualified electrician to ensure a safe and successful project. - Step-by-Step Guide
Extending an electrical box requires careful planning and execution. From removing the existing box to connecting the wiring and restoring power, following each step diligently ensures a successful extension.
Read also: 14 Amazing Electrical Box Extenders for 2025
Step 1: Assessing the Requirements
Before beginning the process of extending an electrical box, it is crucial to assess the requirements of your specific project. This step will help you determine the appropriate size and type of extension box you will need, as well as any additional materials or tools required.
Here are some factors to consider when assessing the requirements:
- Number of additional devices: Determine how many additional outlets, switches, or other electrical devices you plan to install. This will determine the size and capacity needed for the extension box.
- Space availability: Evaluate the space around the existing electrical box to determine if there is sufficient room for an extension. Consider any nearby walls, studs, or obstacles that may affect the installation process.
- Wire gauge and capacity: Take note of the wire gauge and amperage capacity of the existing wiring. It is important to ensure that the extension box can accommodate the appropriate wire size and handle the electrical load.
- Building codes and regulations: Familiarize yourself with local building codes and regulations to ensure compliance. Some jurisdictions may have specific requirements for the size and installation of electrical boxes.
Once you have assessed these requirements, you will have a clearer understanding of the necessary specifications for your project. This will help you determine the appropriate extension box size and select the required materials.
Remember, if you are unsure about any aspect of the assessment process, consult with a qualified electrician to ensure that you are meeting safety standards and code requirements.
Step 2: Gathering the Necessary Tools and Materials
Once you have assessed the requirements for extending an electrical box, it is time to gather the necessary tools and materials. Having everything prepared in advance will help streamline the installation process and ensure a smooth workflow.
Here is a list of the essential tools and materials you will need:
- Screwdriver: A Phillips or flathead screwdriver will be needed to remove screws and secure the extension box.
- Pliers: Pliers will come in handy for gripping and manipulating wires during the installation process.
- Wire cutters/strippers: These tools are essential for cutting and stripping electrical wires.
- Electrical tape: Electrical tape is used to insulate and protect wire connections.
- Wire nuts: Wire nuts are used to secure wire connections and ensure proper conductivity.
- Extension box: Select an extension box that matches the size and capacity required for your project.
- Mounting screws: These screws are used to secure the extension box to the wall or electrical box.
- Wire connectors: Wire connectors are used to join wires together securely.
- Circuit tester: A circuit tester is necessary for checking the power supply and ensuring the connections are properly functioning.
It is important to gather all the necessary tools and materials before starting the installation process. This will prevent any delays or interruptions and ensure a seamless workflow.
Now that you have all the tools and materials ready, it’s time to move on to the next step: powering off the electricity.
Step 3: Powering Off the Electricity
Prior to beginning any electrical work, it is crucial to ensure that the power supply is turned off. This step is essential for your safety and the prevention of electrical accidents.
Follow these steps to power off the electricity:
- Locate the electrical panel: Find the main electrical panel in your home. It is usually located in the basement, utility room, or garage.
- Identify the breaker: Look for the breaker that corresponds to the circuit you will be working on. Most breakers will be labeled, indicating which area or room they control.
- Switch off the breaker: Using caution, gently switch the breaker to the off position. Some breakers may have a lever that needs to be flipped, while others might be controlled by pushing a button.
- Double-check the power: To ensure the power is turned off, test the circuit with a circuit tester. This tool will indicate whether there is any electrical voltage present.
Once you have confirmed that the electricity is turned off, it is safe to proceed with the installation process. However, it is always a good idea to double-check and verify that the power is indeed off before starting any electrical work.
Remember, if you are not comfortable working with electrical systems or are unsure about any aspect of the process, it is recommended to seek the assistance of a qualified electrician.
Now that the power is off, you are ready to move on to the next step: removing the existing electrical box.
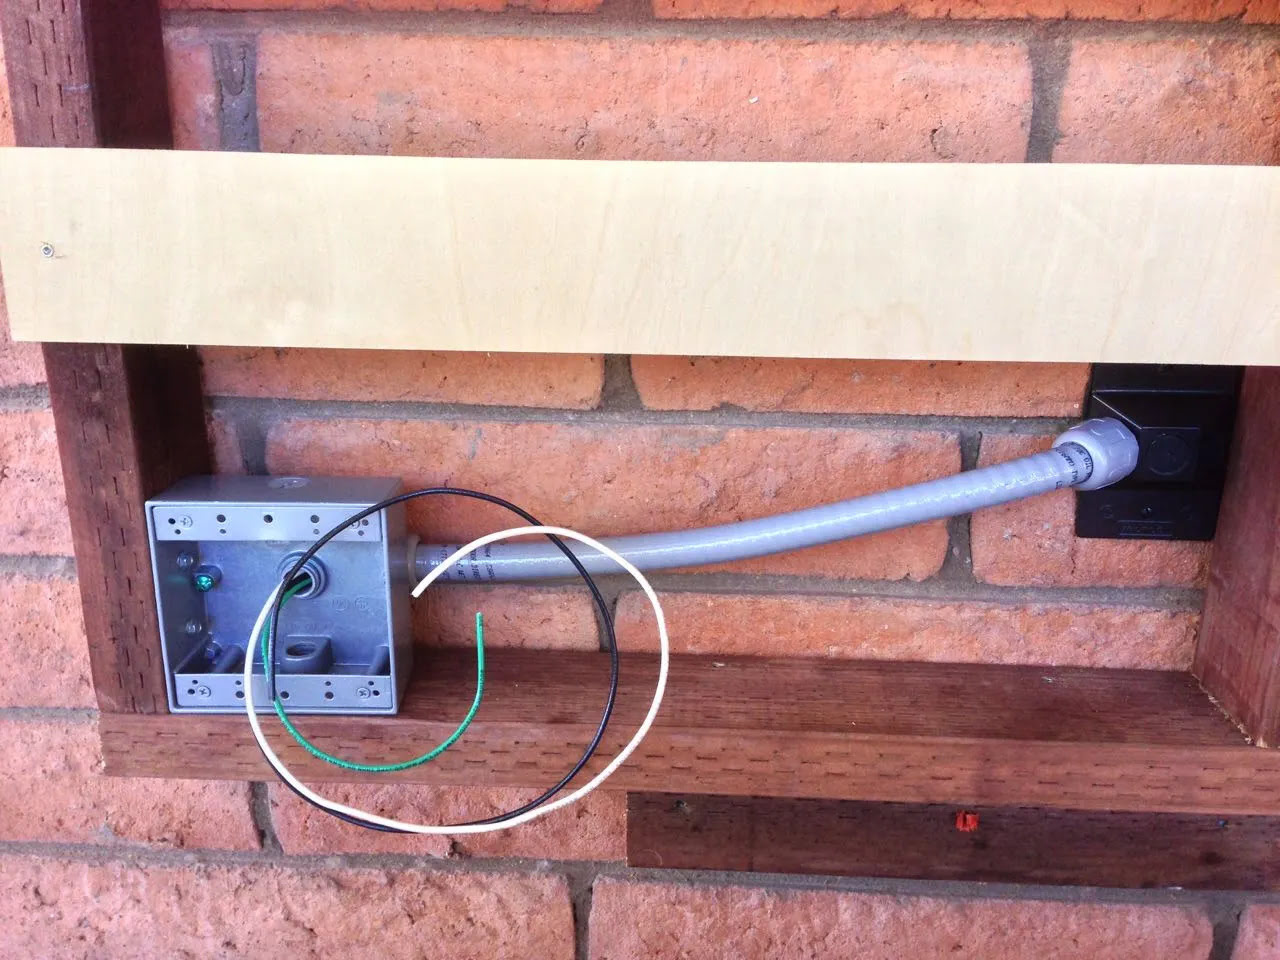
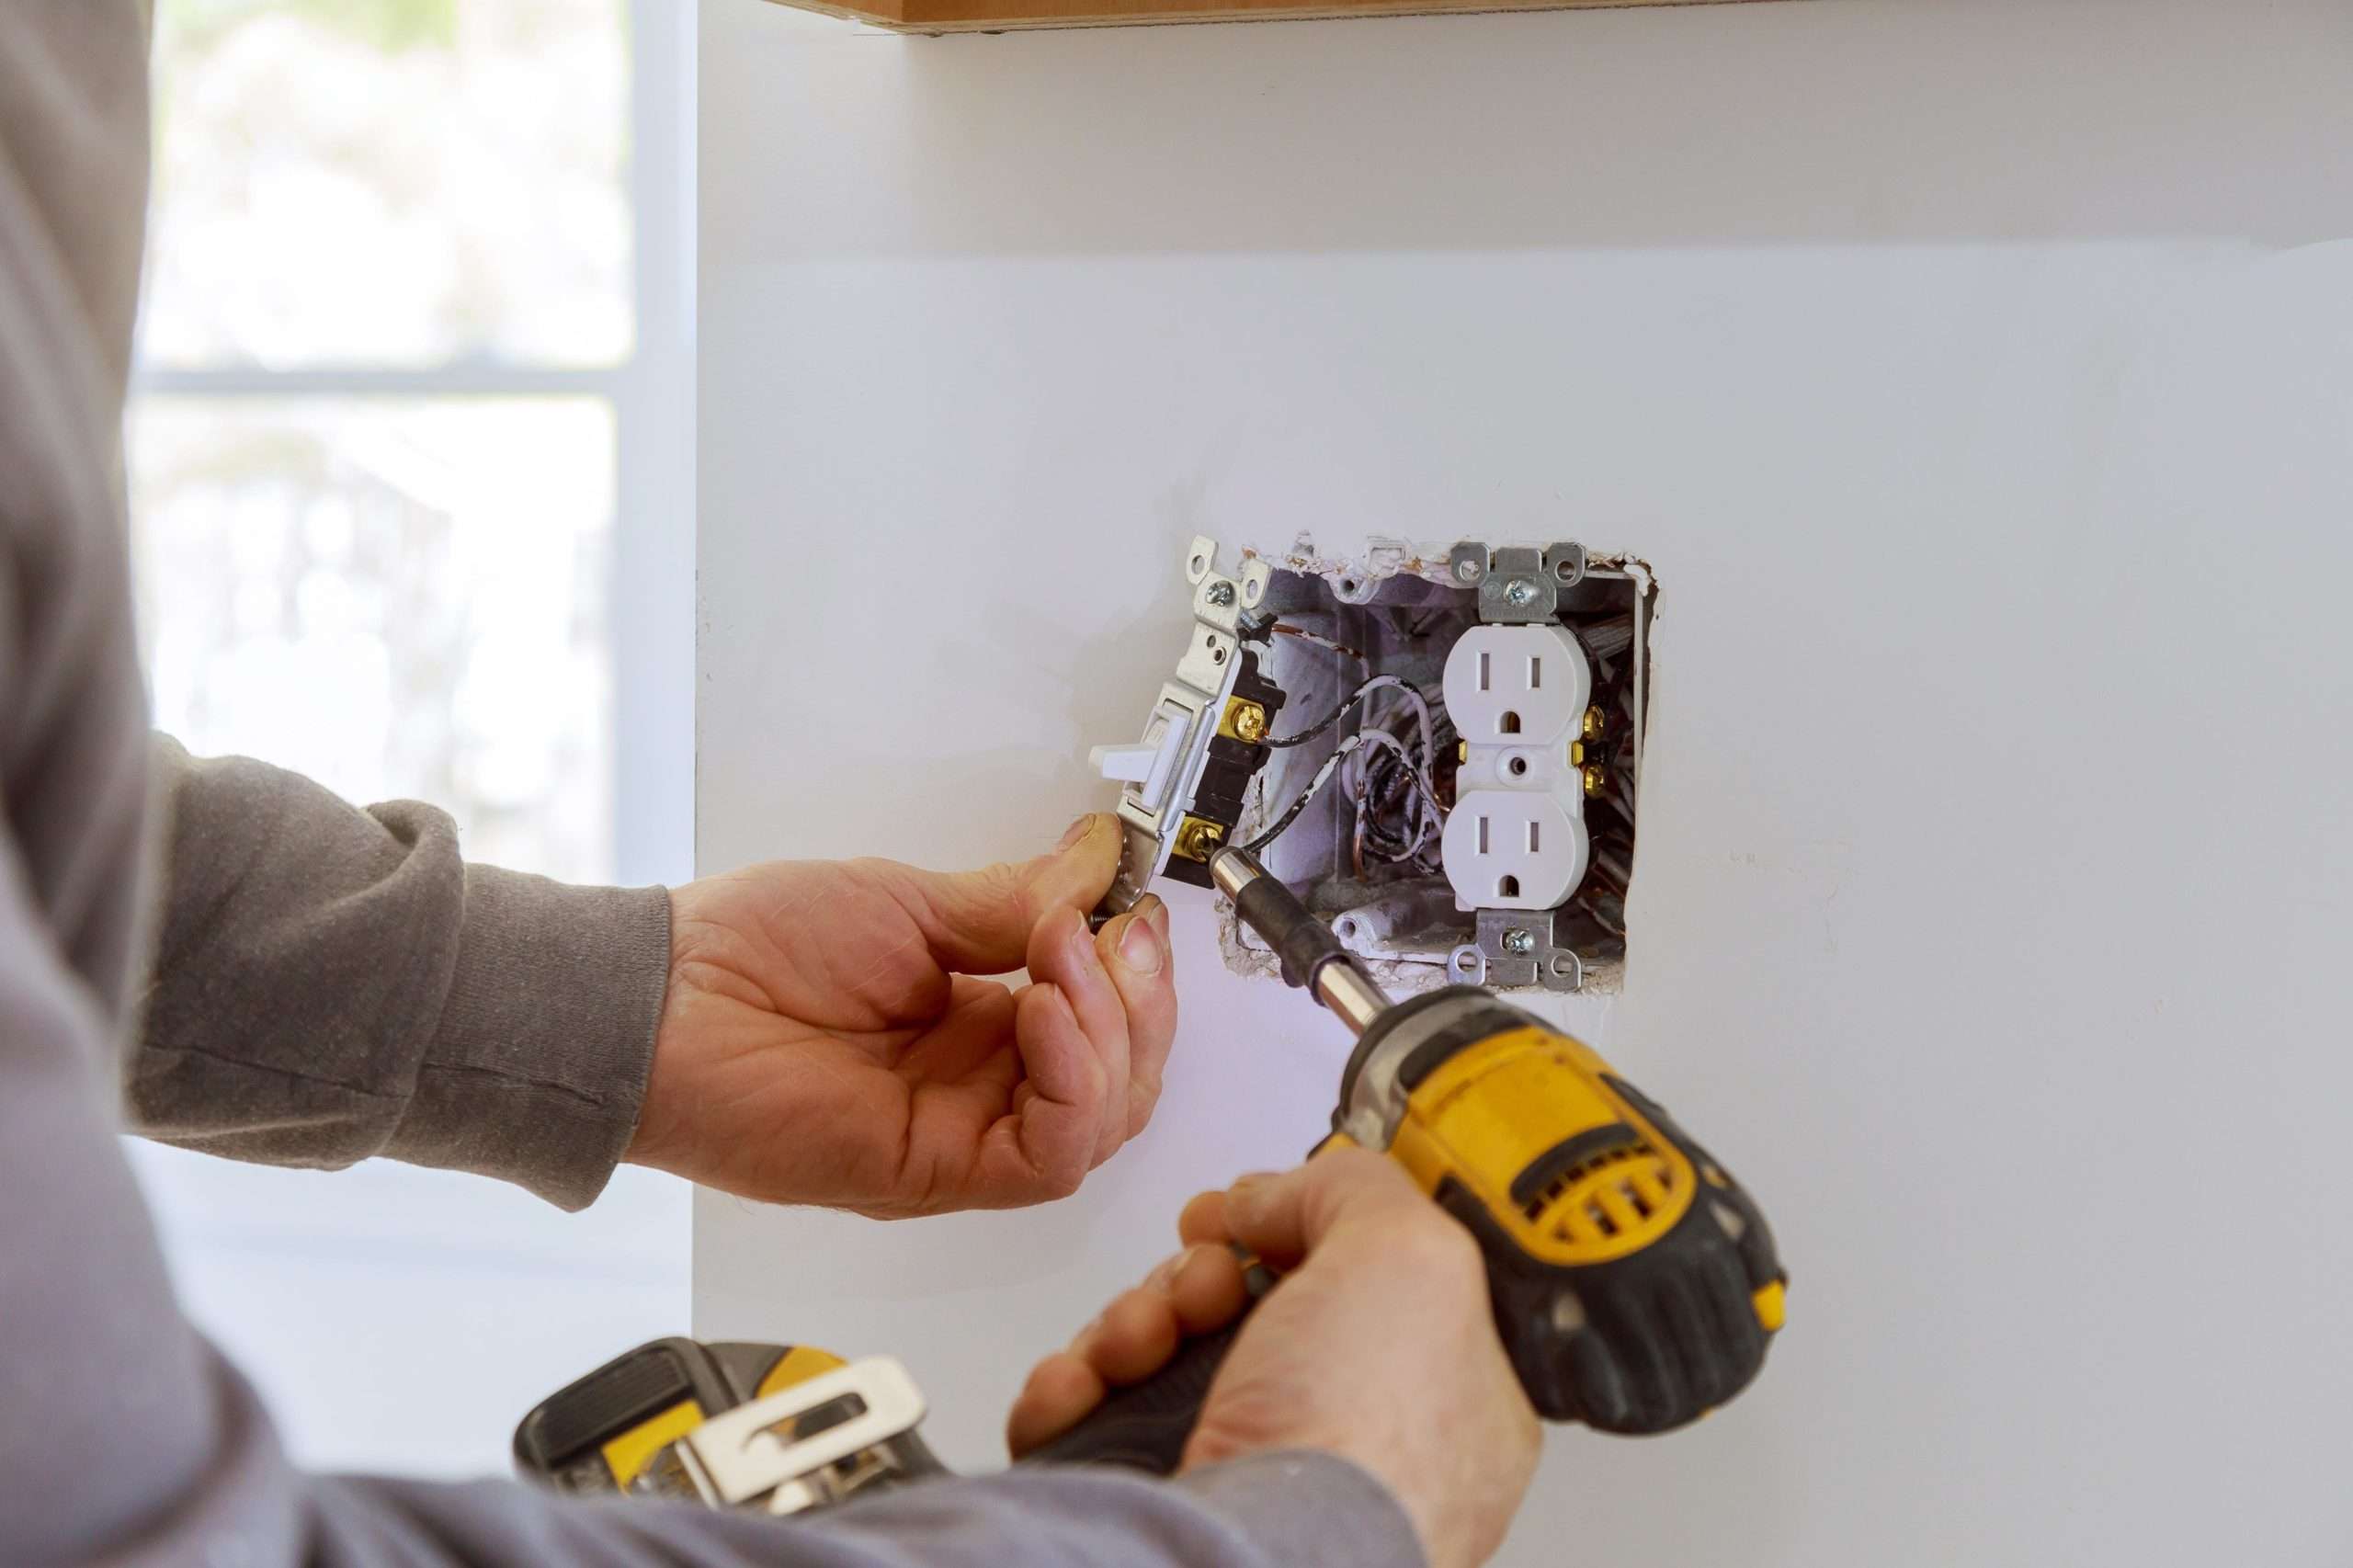
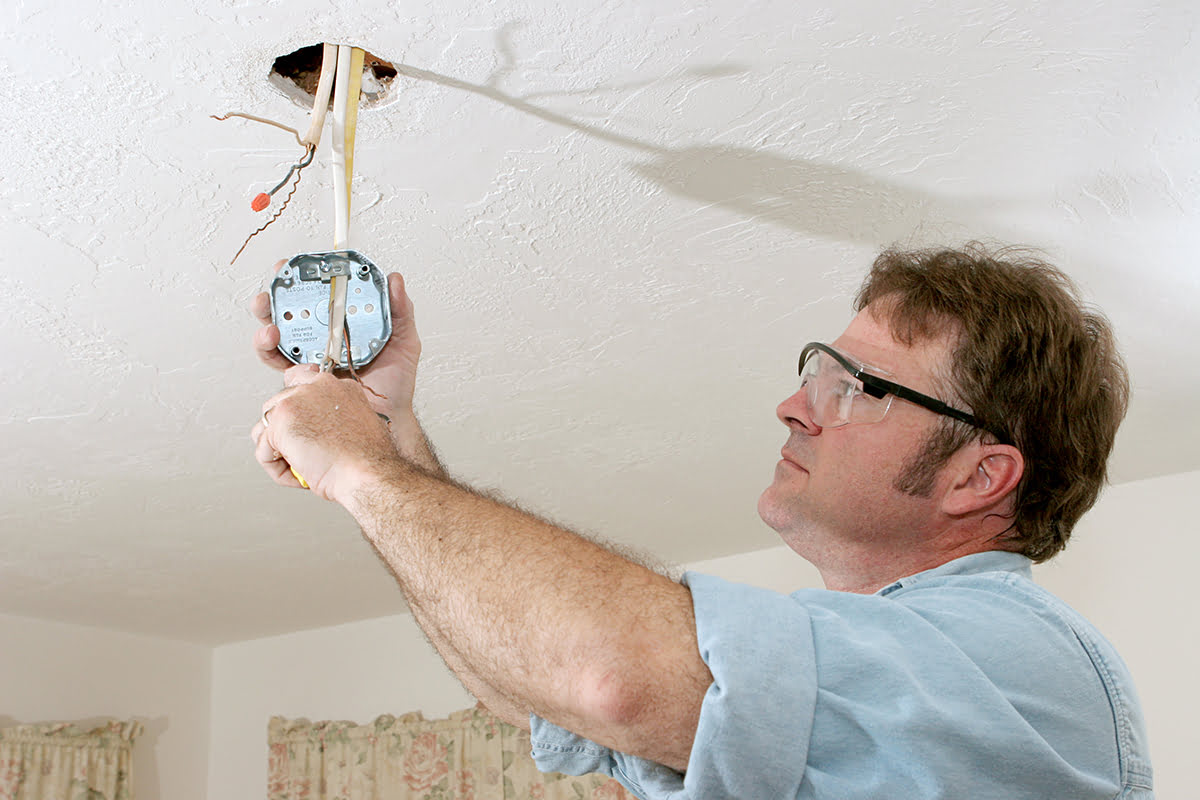
Step 4: Removing the Existing Box
With the electricity powered off, it is now time to remove the existing electrical box before extending it. Follow these steps to safely remove the box:
- Remove the cover plate: Start by removing the cover plate of the electrical box. Use a screwdriver to unscrew the screws holding the plate in place, and gently pull it off.
- Disconnect the wires: Once the cover plate is removed, carefully detach the wires connected to the existing box. Take note of the wire connections to ensure proper reconnection later.
- Unscrew the mounting screws: Using a screwdriver, unscrew the mounting screws that secure the electrical box to the wall. In some cases, the box might be nailed to a stud, so you may need to use a pry bar or pliers to loosen it.
- Remove the existing box: After releasing the mounting screws, gently pull the existing electrical box out of the wall. Be cautious of any wires or cables that may still be attached.
Once the existing box is removed, inspect the wiring and ensure that there are no damaged or frayed wires. If any issues are detected, it is important to address them before proceeding with the extension process. This will help ensure the overall safety and functionality of the electrical system.
When removing the existing box, be careful not to damage surrounding drywall or other structures. Take your time and use caution to avoid any unnecessary repairs or complications.
Now that the existing box is out of the way, it’s time to move on to the next step: extending the electrical box.
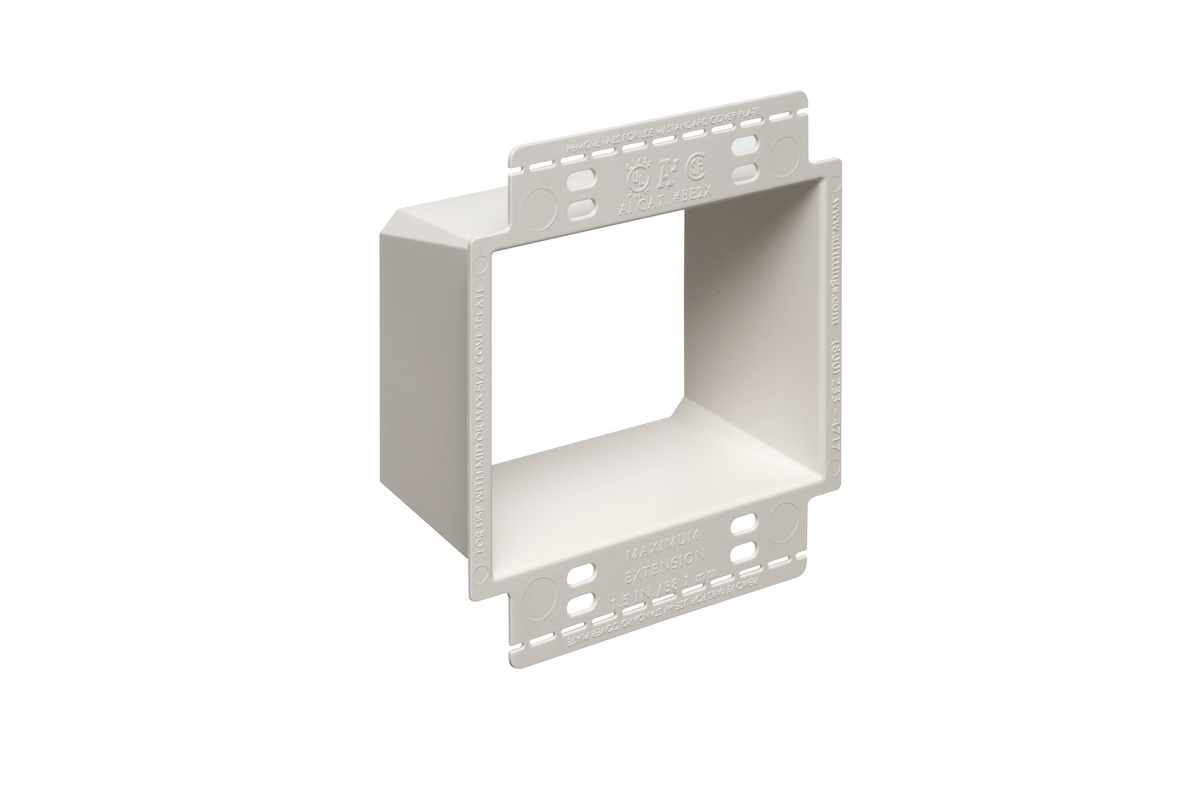
Step 5: Extending the Electrical Box
With the existing electrical box removed, it is time to extend it to create more space for additional wiring connections. Follow these steps to extend the electrical box:
- Measure and cut the extension ring: Select an extension ring that matches the size and type of the existing electrical box. Measure the depth needed to extend the box and use a saw or utility knife to cut the extension ring to the desired length.
- Align the extension ring: Position the extension ring over the existing electrical box, ensuring that it is properly aligned. The screw holes on the extension ring should match up with the mounting holes on the original box.
- Secure the extension ring: Use screws or nails to secure the extension ring to the existing electrical box. Make sure the connection is tight and secure.
- Check the alignment: Verify that the extension ring is properly aligned and flush with the wall surface. Adjust if necessary to ensure a proper fit.
Extending the electrical box will allow for additional wiring connections, ensuring that you have enough space to accommodate new devices or outlets. The extension ring acts as an expansion, creating a larger enclosure for the wiring.
Remember, when working with electrical systems, it is essential to follow proper safety procedures. Ensure that the power is still turned off during this step to avoid electrical hazards.
Now that you have successfully extended the electrical box, it’s time to move on to the next step: mounting the extension ring.
When extending an electrical box, always use a box extension ring to ensure there is enough space for the wiring and devices. Make sure to follow all local electrical codes and regulations.
Step 6: Mounting the Extension Ring
After extending the electrical box, the next step is to securely mount the extension ring. This will ensure that the wiring connections are stable and that the box is properly positioned for the installation of new devices. Follow these steps to mount the extension ring:
- Position the extension ring: Place the extension ring over the extended electrical box, aligning the screw holes on the ring with the mounting holes on the box.
- Insert mounting screws: Insert screws into the mounting holes on the extension ring and tighten them using a screwdriver. Ensure that the screws are snug but not overtightened, as this may cause damage to the ring or box.
- Check alignment: Verify that the extension ring is properly aligned and flush with the wall surface. Adjust if necessary to ensure a proper fit.
Mounting the extension ring securely is crucial to ensure a stable and reliable electrical box. It will provide a solid foundation for the installation of new devices and prevent any future issues or problems.
Once the extension ring is properly mounted, you are ready to move on to the next step: connecting the wiring.
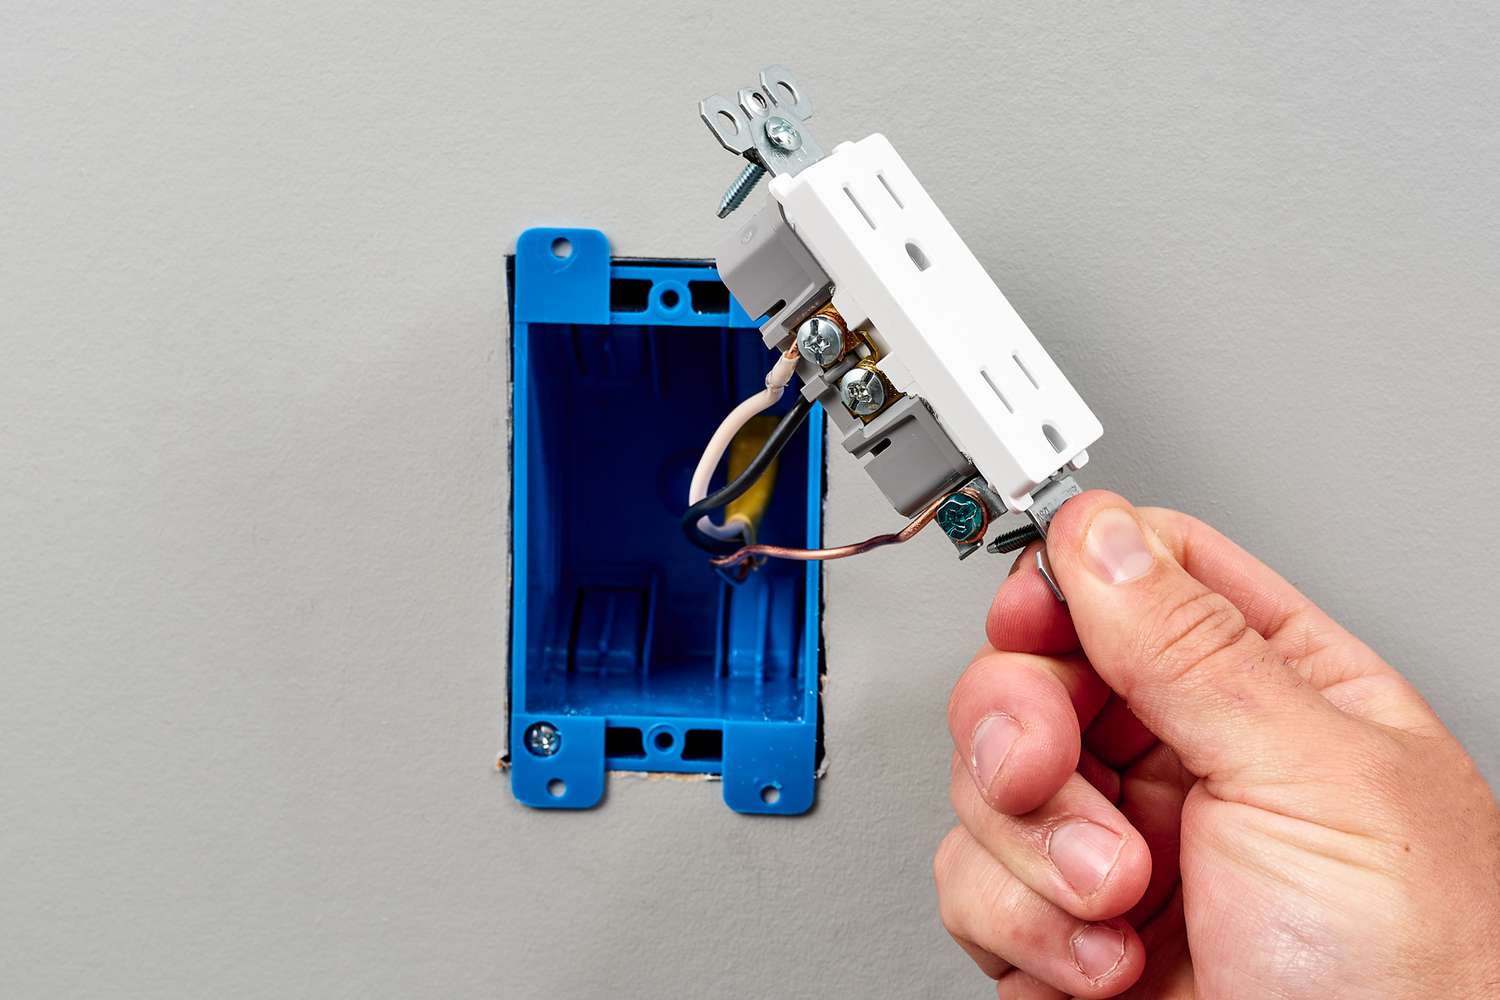
Step 7: Connecting the Wiring
With the extension ring securely mounted, it’s time to connect the wiring. This step involves making the necessary wire connections to ensure proper functionality and safety. Follow these steps to connect the wiring:
- Prepare the wires: Strip off about 3/4 inch of insulation from the ends of the wires that will be connected. Use wire strippers to achieve clean and precise cuts.
- Make wire connections: Match the corresponding wires (black to black, white to white, and bare copper/green to bare copper/green) and twist them together. Ensure that the wire connections are secure and tight.
- Secure the wire connections: Once the wires are twisted together, use wire nuts to secure the connections. Twist the wire nut clockwise until it is snug and firmly attached to the wires.
- Wrap the connections with electrical tape: To provide additional insulation and protection, wrap the wire connections with electrical tape. Start a few inches away from the wire nut and wrap several layers around the connection, extending a few inches beyond the nut.
It is important to note that all wire connections should be made following proper color-coding and wiring standards. This will ensure that the electrical circuit functions correctly and meets safety requirements.
Once all the wire connections have been made and secured, it’s time to move on to the next step: securing the extension box.
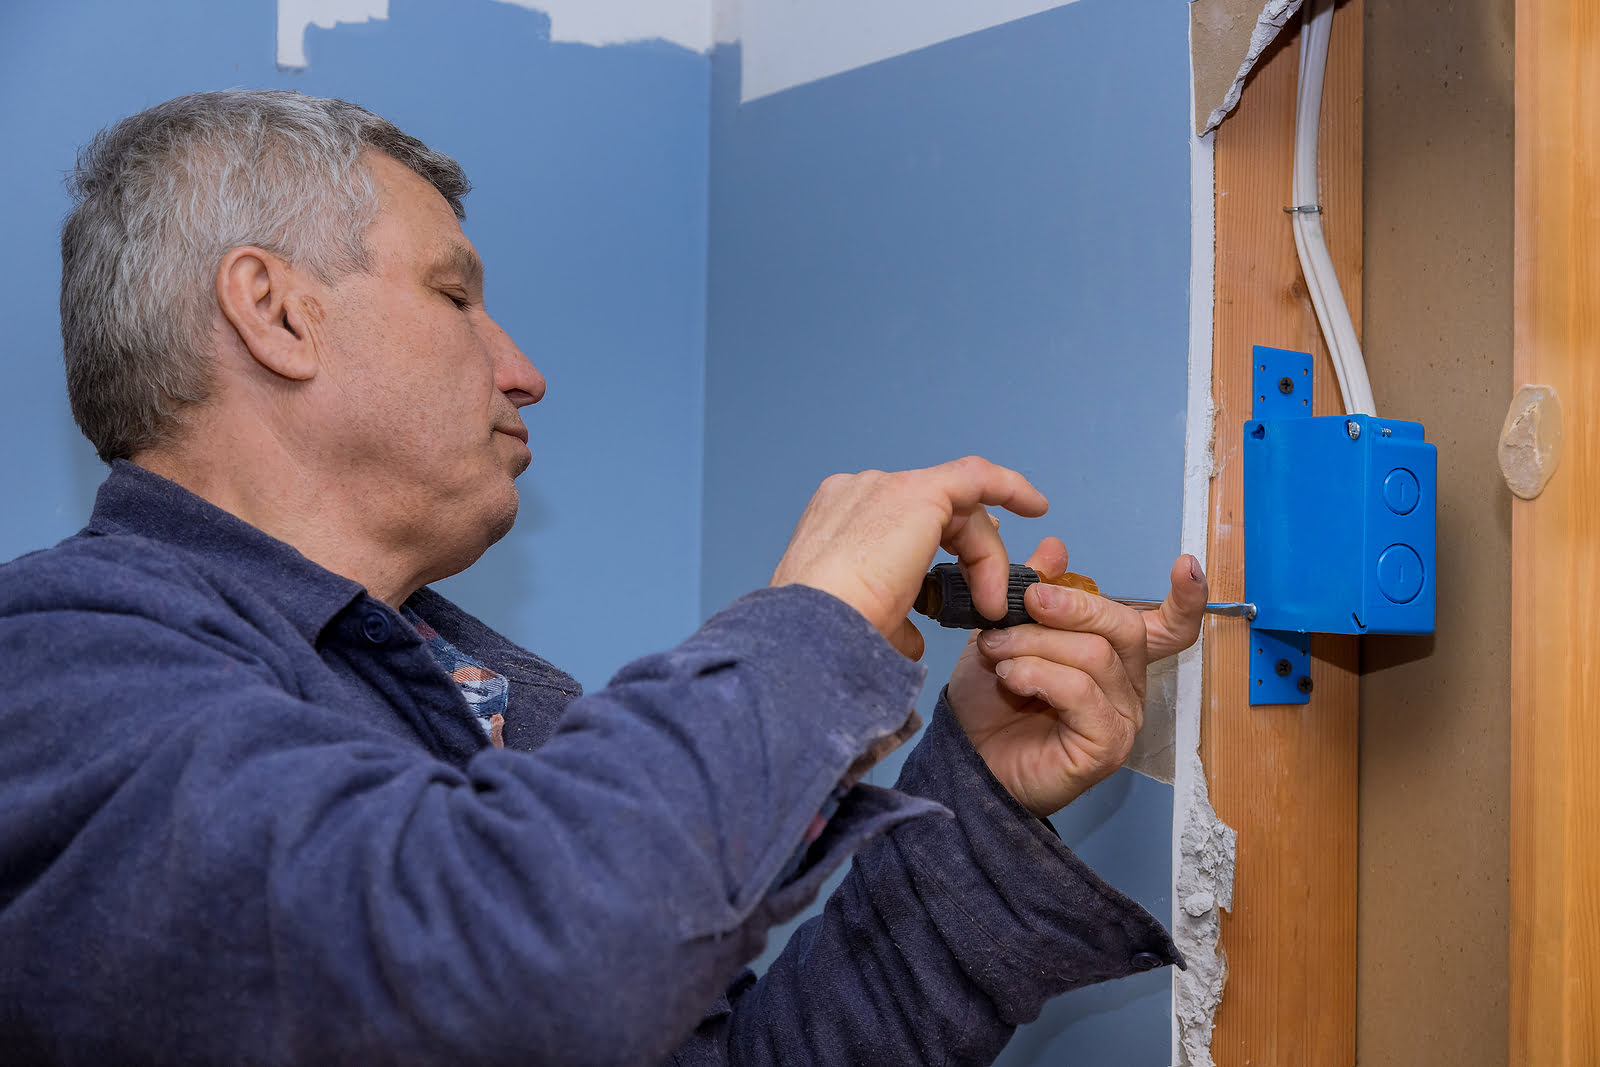
Step 8: Securing the Extension Box
After connecting the wiring, it is necessary to securely fasten the extension box to ensure stability and safety. Follow these steps to properly secure the extension box:
- Align the extension box: Position the extension box over the extension ring, ensuring that it is properly aligned and flush with the wall surface.
- Insert mounting screws: Insert screws or nails through the mounting holes on the extension box and into the corresponding holes on the extension ring. Use a screwdriver or hammer, depending on the fastening method, to secure the box in place.
- Tighten the screws or nails: Ensure that the screws or nails are tightened snugly, but avoid overtightening, as this could cause damage to the box or wall.
By securing the extension box, you are ensuring that it remains firmly in place, preventing any movement or potential hazards. This step is crucial for the overall stability and functionality of the electrical box.
Once the extension box is securely fastened, you are ready to move on to the next step: testing the connections.
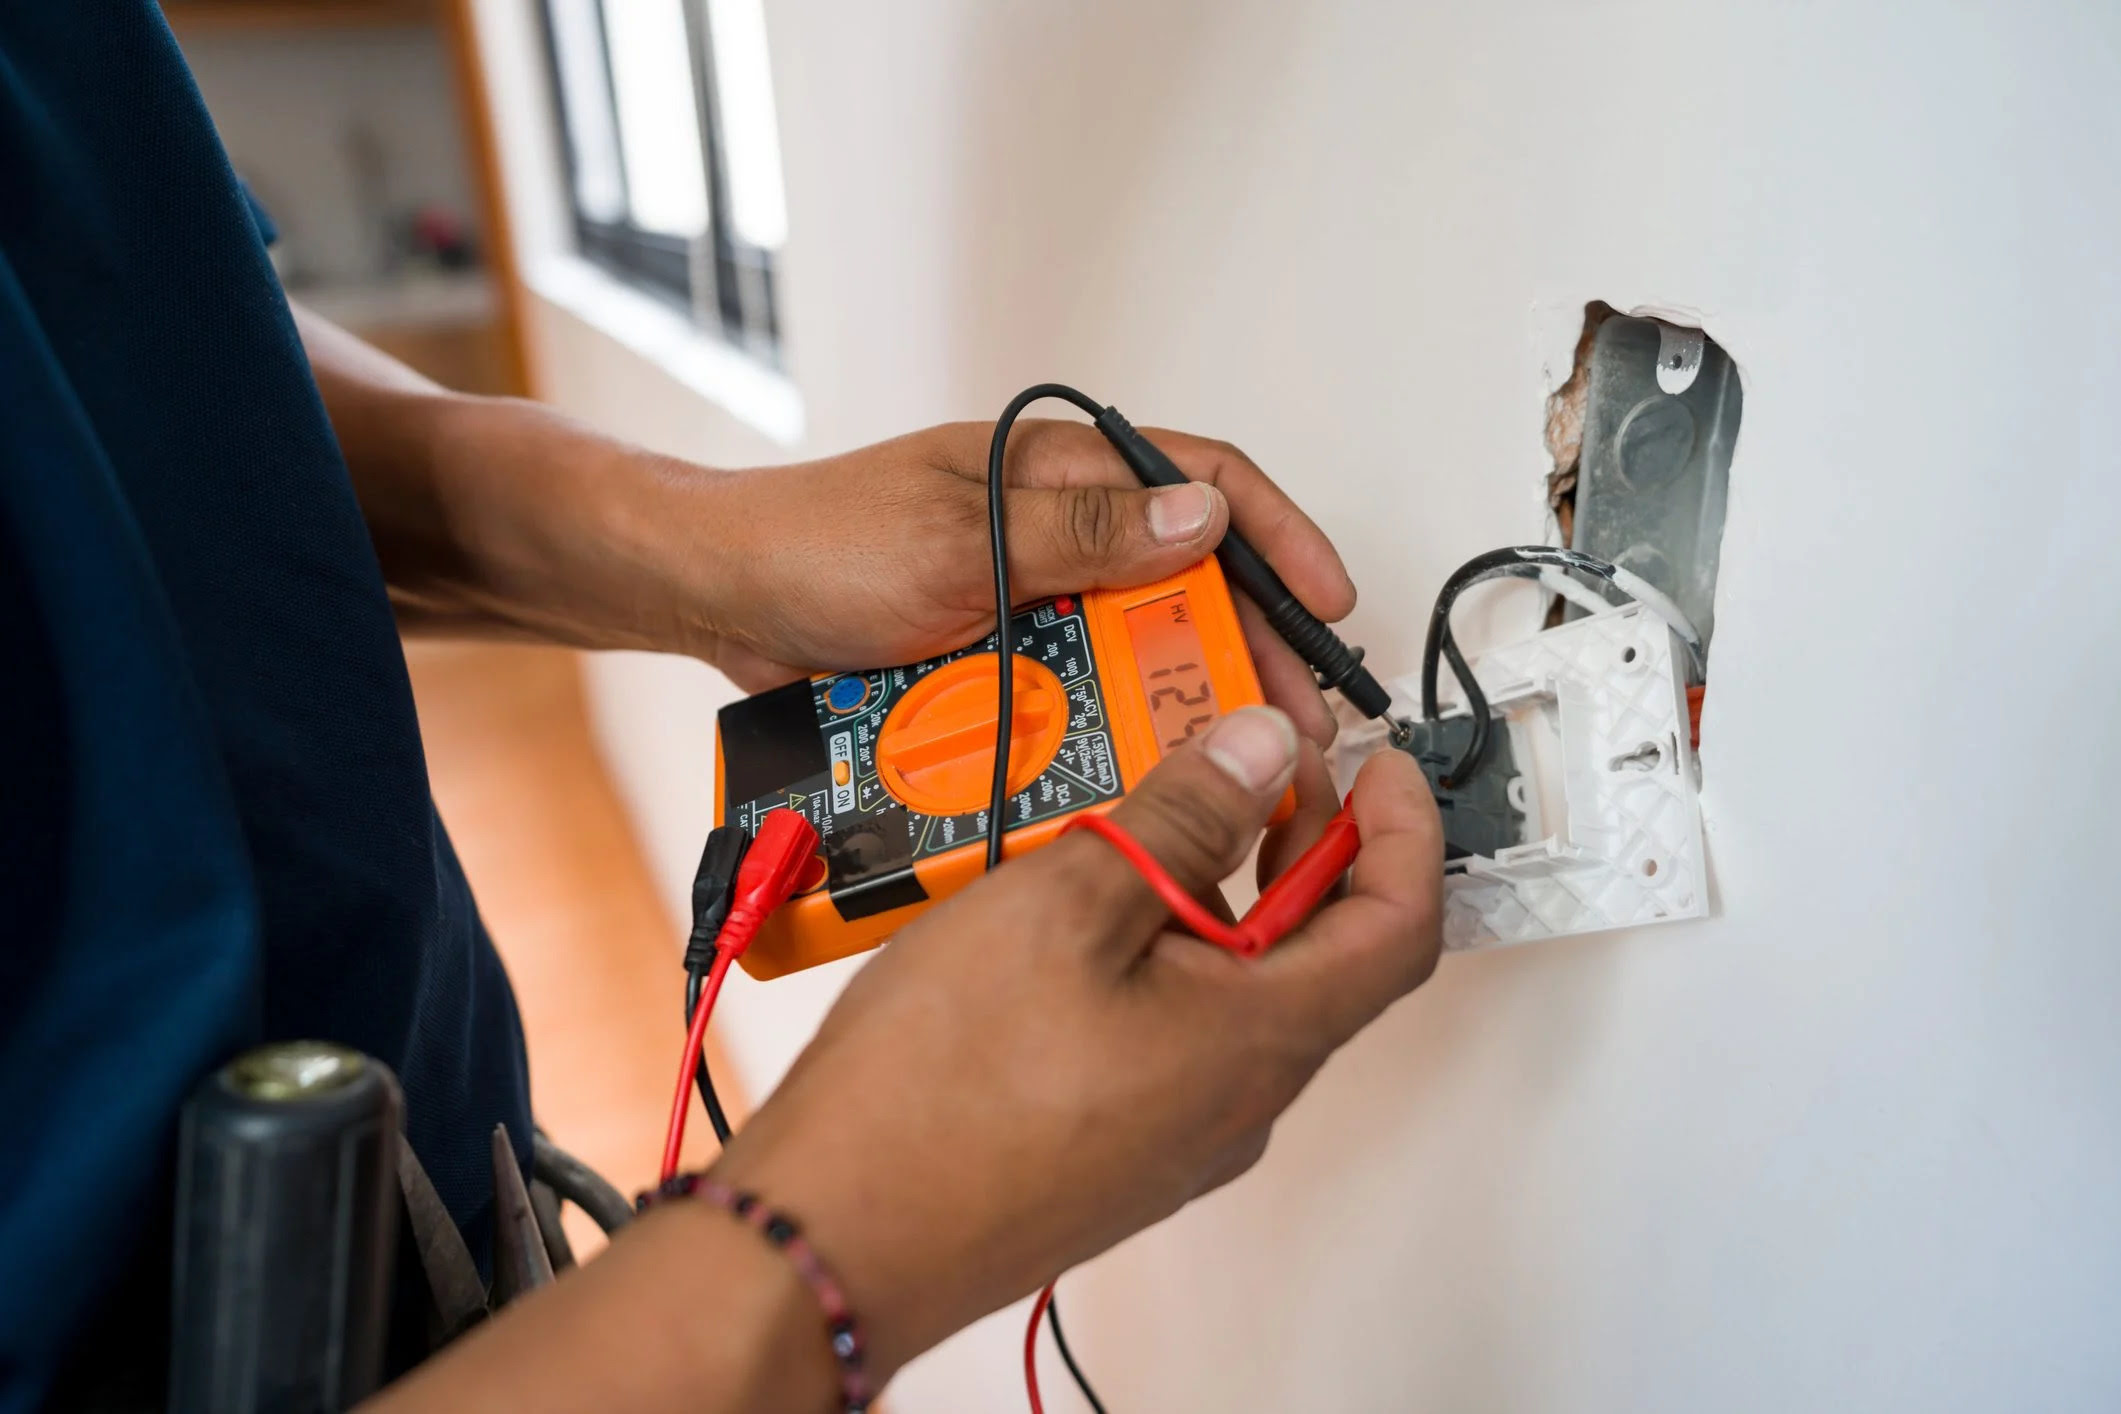
Step 9: Testing the Connections
Now that you have completed the installation of the extension box and secured the wiring connections, it is crucial to test the connections to ensure everything is working properly. This step will help identify any potential issues and allow for necessary adjustments or fixes. Follow these steps to test the connections:
- Turn on the electricity: Go to the electrical panel and switch on the breaker that corresponds to the circuit you have been working on. This will restore power to the electrical box.
- Test the new devices: Plug in or turn on the new devices that are connected to the extended electrical box. This could include outlets, switches, or any other electrical devices you have installed.
- Check for functionality: Make sure that the new devices are functioning properly. Test the outlets for power, check the switches for proper on/off functionality, and ensure that all connections are secure.
- Use a circuit tester: Test the outlets and switches with a circuit tester to verify that they are receiving power and are wired correctly. This will help identify any wiring issues or short circuits that may need to be addressed.
If you encounter any issues during the testing process, such as non-functional outlets or switches, flickering lights, or any signs of electrical problems, it is important to take the necessary steps to fix them. This may involve re-checking the connections, seeking professional help, or further troubleshooting the electrical system.
Remember, testing the connections is a critical part of the installation process, as it ensures the safety and functionality of your electrical system. Take the time to thoroughly check and verify that all connections are working properly before proceeding.
Once you have successfully tested the connections and everything is functioning as expected, you are ready to move on to the final step: restoring power.
Step 10: Restoring Power
After completing the installation, testing, and verification process, it’s time to restore power to the circuit. This final step ensures that electricity is flowing correctly and that all devices connected to the extended electrical box are operational. Follow these steps to restore power:
- Turn off the breaker: Go to the electrical panel and switch off the breaker that corresponds to the circuit you have been working on. This will turn off the power supply to the extended electrical box.
- Double-check the connections: Before proceeding, double-check all the wiring connections to ensure they are secure and properly insulated with wire nuts and electrical tape.
- Switch on the breaker: Carefully switch on the breaker that controls the circuit you have been working on. This will restore power to the extended electrical box and the devices connected to it.
- Test the devices: Verify that all the devices connected to the extended electrical box, such as outlets and switches, are functioning correctly. Test each outlet and switch to ensure they have power and are properly wired.
It is important to remember that safety is paramount when restoring power. Always exercise caution and follow proper electrical procedures to prevent any accidents or electrical hazards.
Once you have confirmed that power has been restored and all devices are working properly, congratulations! You have successfully extended an electrical box.
It is important to note that if you encounter any difficulties or are unsure about any aspect of the process, it is always best to seek the assistance of a qualified electrician who can provide expert guidance and ensure the safety and functionality of your electrical system.
With power restored and everything functioning as intended, you can now enjoy your newly extended electrical box and the additional capabilities it provides!
Conclusion
Extending an electrical box may seem like a daunting task, but with the right knowledge, tools, and techniques, it can be accomplished successfully. By following the step-by-step guide outlined in this article, you can effectively extend an electrical box, creating additional space for new devices and ensuring the safety and functionality of your electrical system.
Throughout the process, it is crucial to prioritize safety. Always turn off the power supply before starting any electrical work, and double-check connections and wiring to avoid any potential hazards. If you are uncertain or uncomfortable with any aspect of the process, it is wise to consult a qualified electrician.
Remember to assess the requirements of your project, gather the necessary tools and materials, and carefully follow each step, from removing the existing box to connecting the wiring and securing the extension box. Testing the connections and restoring power are the final steps to ensure everything is working as intended.
By extending an electrical box, you can accommodate new devices, outlets, or switches and enhance the functionality of your electrical system. This can be beneficial when making renovations or adding electrical capabilities to a room.
Always adhere to local building codes and regulations when working on electrical projects to ensure compliance and safety. If you are uncertain about the requirements or need assistance, it is advisable to consult with a licensed electrician who can offer expert advice and guidance.
With the information provided in this comprehensive guide, you are now equipped with the knowledge and steps necessary to extend an electrical box. Take your time, proceed with caution, and enjoy the benefits of an expanded electrical system!
Frequently Asked Questions about How To Extend An Electrical Box
Was this page helpful?
At Storables.com, we guarantee accurate and reliable information. Our content, validated by Expert Board Contributors, is crafted following stringent Editorial Policies. We're committed to providing you with well-researched, expert-backed insights for all your informational needs.


0 thoughts on “How To Extend An Electrical Box”