Home>Furniture>Outdoor Furniture>How To Extend A Patio Cheaply
Outdoor Furniture
How To Extend A Patio Cheaply
Modified: October 20, 2024
Learn how to extend your patio on a budget with our cost-effective tips and tricks. Create a comfortable outdoor space with affordable outdoor furniture.
(Many of the links in this article redirect to a specific reviewed product. Your purchase of these products through affiliate links helps to generate commission for Storables.com, at no extra cost. Learn more)
Introduction
Creating an inviting outdoor space is essential for enjoying the great outdoors. A patio serves as a versatile oasis where you can relax, entertain guests, or simply bask in the beauty of nature. However, if your current patio feels cramped or lacks the desired functionality, extending it can provide the perfect solution.
Extending a patio doesn’t have to break the bank. With some careful planning and the right materials, you can create a larger patio area that suits both your budget and lifestyle. In this article, we will explore various budget-friendly methods to extend your patio and transform it into a stunning outdoor retreat.
Before diving into the different extension methods, it’s important to assess and prepare the existing patio area. Take a close look at the layout and determine the shape and size of the extension you want to create. Consider factors such as the overall design aesthetic, intended usage, and any specific features you would like to include in the extended patio.
Once you have a clear vision in mind, it’s time to choose the right materials for your patio extension. The materials you select will not only contribute to the aesthetic appeal but also dictate the level of maintenance required in the future. Let’s explore some popular options:
- Gravel: Gravel is a cost-effective material that can be easily installed. Its natural and rustic appearance adds a charming touch to any patio extension. Plus, it provides excellent drainage and can help prevent water pooling during heavy rain.
- Pavers: Pavers come in a wide range of styles, colors, and shapes, allowing you to create a customized and visually attractive patio extension. They are durable, low-maintenance, and offer versatility in terms of design possibilities.
- Bricks: For a classic and timeless look, bricks are an ideal choice. They are durable, weather-resistant, and require minimal upkeep. Bricks can be arranged in various patterns to add visual interest to your extended patio.
- Concrete: Concrete is a versatile material that offers both durability and affordability. It can be poured in different shapes and sizes to create a seamless extension of your existing patio. Additionally, concrete can be stamped or stained to mimic the look of other materials such as stone or wood.
Now that you have an understanding of the materials, let’s delve into the budget-friendly patio extension methods. These methods will enable you to extend your patio without draining your bank account, ensuring that you can enjoy your outdoor space to the fullest:
Key Takeaways:
- Extending your patio on a budget is achievable with gravel, pavers, bricks, or concrete. Careful planning, preparation, and budget-friendly methods can transform your outdoor space without breaking the bank.
- After extending your patio, enhance it with comfortable seating, outdoor lighting, greenery, and decorative elements. Create a cozy and inviting atmosphere that reflects your personal style and allows for endless relaxation and entertainment.
Read more: How To Extend A Patio
Assessing and Preparing the Patio Area
Before embarking on a patio extension project, it’s crucial to assess and prepare the existing patio area. This step will help you determine the size, shape, and design of the extension, ensuring that it seamlessly integrates with the existing space.
Start by carefully measuring your current patio area. Note its dimensions, including length and width. This will give you a clear idea of the available space for the extension. Consider factors such as the layout of your backyard, existing landscaping features, and any potential obstacles that may need to be addressed.
Next, think about the purpose and functionality of your extended patio. Do you want it to be an area primarily for dining and entertaining, or would you prefer a cozy relaxation spot? Understanding how you plan to use the space will help you determine the appropriate size and layout.
Take a close look at the surrounding landscape and consider how the extended patio will blend with the overall aesthetic. Pay attention to elements such as trees, plants, and other outdoor structures. Incorporating these features into the design of your patio extension can create a harmonious and visually appealing outdoor space.
Once you have a clear vision of the extended patio, it’s time to prepare the existing area. Start by removing any furniture, planters, or other items from the current patio. Clean the surface thoroughly, removing any dirt, debris, or stains.
If your existing patio is made of concrete or pavers, inspect it for any cracks or damage. Repair any necessary areas before proceeding with the extension. This will ensure a solid and stable foundation for the new addition.
Consider the drainage system of your current patio and evaluate whether any modifications are needed. Proper drainage is essential to prevent water from accumulating on your patio during heavy rain. If necessary, consult with a professional to determine the best approach for efficient water runoff.
Finally, consider any additional features you want to include in the extended patio, such as outdoor lighting, seating areas, or a fire pit. Planning these elements ahead of time will allow you to create a cohesive and functional outdoor space.
By thoroughly assessing and preparing the patio area, you lay the foundation for a successful patio extension project. Taking the time to plan and address any necessary modifications will ensure a seamless integration of the new addition with your existing outdoor space.
Choosing the Right Materials
When extending your patio, selecting the right materials is essential to ensure durability, aesthetics, and functionality. The choice of materials will not only impact the overall look of your patio extension but also determine its maintenance requirements and lifespan. Here are some popular options to consider:
1. Gravel:
Gravel is a cost-effective and versatile material for patio extensions. It offers a natural, rustic look and can be easily installed. One of the main advantages of gravel is its excellent drainage properties, which helps prevent water pooling during rainy seasons. Additionally, gravel requires minimal maintenance and can be easily replenished or adjusted if needed.
2. Pavers:
Pavers are a popular choice for patio extensions due to their durability and wide range of design options. Available in various colors, shapes, and patterns, pavers allow you to create a customized and visually appealing patio space. They are also resistant to cracking and provide a stable surface for outdoor furniture. With proper installation and maintenance, pavers can last for many years.
Read more: How To Extend A Roof Over A Patio
3. Bricks:
Bricks are a timeless and classic material choice for patio extensions. They offer an elegant and traditional look and can be arranged in different patterns to add visual interest to your outdoor space. Bricks are durable, weather-resistant, and require minimal upkeep. They can withstand heavy foot traffic and are an excellent option for those seeking a long-lasting patio extension.
4. Concrete:
Concrete is a versatile and budget-friendly material for patio extensions. It can be poured in various shapes and sizes to create a seamless extension of your existing patio. Concrete offers durability, strength, and low maintenance. It can also be stamped or stained to mimic the appearance of other materials like stone or wood, giving you plenty of design options to choose from.
5. Composite Decking:
If you prefer a more modern look, composite decking is worth considering. Made from a combination of recycled materials and wood fibers, composite decking offers the appearance of wood without the maintenance requirements. It is resistant to rot, fading, and warping, making it an excellent choice for patio extensions in areas with harsh weather conditions.
When selecting the materials for your patio extension, consider factors such as your desired aesthetic, budget, climate, and maintenance preferences. It’s also a good idea to consult with a professional to ensure you choose materials that are suitable for your specific needs and will provide long-lasting enjoyment.
Budget-Friendly Patio Extension Methods
Extending your patio doesn’t have to be a costly endeavor. There are several budget-friendly methods you can use to expand your outdoor living space without breaking the bank. These methods allow you to create a larger patio area while still staying within your budget. Here are a few cost-effective options to consider:
Read more: How To Extend An Existing Patio Roof
1. Gravel Patio:
A gravel patio is one of the most affordable patio extension options. All you need is a leveled area, landscape fabric to prevent weed growth, and a layer of gravel. Gravel is inexpensive and easy to install. It provides a natural and rustic appearance while offering good drainage. You can enhance the gravel patio with potted plants, outdoor furniture, or a fire pit to create an inviting outdoor space.
2. Paver Patio:
Pavers offer a wide range of design possibilities at an affordable cost. You can create a beautiful and durable patio extension by choosing inexpensive concrete pavers or even salvaging used ones. Lay them in a grid pattern or in a herringbone layout to add visual interest. With proper installation, pavers can last for many years and require minimal maintenance.
3. Brick Patio:
Bricks are a classic and budget-friendly option for patio extensions. Look for discounted or salvaged bricks to keep costs down. Create a patterned design using different colored bricks or lay them in a simple, straight arrangement. Bricks are durable, weather-resistant, and require minimal upkeep, making them an excellent choice for a cost-effective patio extension.
4. Concrete Patio Extension:
Concrete is a versatile and budget-friendly material that can be poured to extend your patio. If you have some experience with concrete work, you can rent the necessary tools and pour the concrete yourself. Alternatively, you can hire a professional to ensure a smooth and level surface. Once the concrete is cured, you can enhance the patio by staining or stamping it to mimic the appearance of more expensive materials.
Remember, regardless of the method you choose, careful planning and preparation are key to a successful and cost-effective patio extension. Take the time to measure and assess the space, select the right materials, and create a design that fits your budget and aesthetic preferences. With a little creativity and ingenuity, you can transform your patio into a spacious and inviting outdoor retreat without breaking the bank.
Read more: How To Enclose A Carport Cheaply
Installing a Gravel Patio
A gravel patio is a simple and cost-effective way to extend your outdoor living space. The natural and rustic look of gravel adds charm and versatility to any patio extension. Follow these steps to install a gravel patio and create a beautiful outdoor retreat:
Step 1: Prepare the Area
Start by clearing the area where you want to install the gravel patio. Remove any existing vegetation, rocks, or debris. Ensure the ground is level and compacted. If necessary, use a rake or shovel to even out the surface.
Step 2: Add Landscape Fabric
To prevent weed growth and promote proper drainage, lay landscape fabric over the prepared area. This will help maintain the integrity of your gravel patio over time. Cut the fabric according to the size of the patio extension and secure it in place with landscape staples.
Step 3: Install Edging
Installing edging around the perimeter of your gravel patio will help keep the gravel in place and prevent it from spreading into surrounding areas. Choose a durable and weather-resistant material such as plastic or metal. Install the edging tightly against the landscape fabric and secure it with stakes.
Read more: How To Extend A Shed
Step 4: Add a Base Layer
Before adding the gravel, create a base layer using crushed stone or gravel fines. This base layer will provide stability and promote proper drainage. Spread a layer of 2-3 inches of crushed stone evenly over the landscape fabric. Use a rake or shovel to level and compact the base layer.
Step 5: Spread the Gravel
Now it’s time to add the main layer of gravel. Choose a gravel size that suits your preferences – smaller gravel for a smoother surface or larger gravel for a more textured look. Spread the gravel evenly over the base layer, aiming for a thickness of 2-3 inches. Use a rake to distribute the gravel evenly and create a level surface.
Step 6: Compact the Gravel
To ensure a stable and firm surface, use a hand tamper or plate compactor to compact the gravel. This will help create a solid foundation and prevent shifting or settling over time. Start from one end of the patio and work your way to the other, applying even pressure as you go.
Step 7: Add Finishing Touches
Once the gravel is compacted, you can add some finishing touches to enhance the aesthetics and functionality of your patio extension. Consider placing stepping stones or potted plants strategically to create focal points. You can also add outdoor furniture, a fire pit, or string lights to make the area more inviting and comfortable.
Installing a gravel patio is a cost-effective and versatile way to extend your outdoor living space. With a little effort and planning, you can create a charming and functional patio extension that adds beauty and value to your home.
Read more: How To Extend Extension Ladder
Creating a Paver Patio
A paver patio is a stylish and durable option for extending your outdoor living space. Pavers are available in various colors, shapes, and patterns, allowing you to create a customized and visually appealing patio extension. Follow these steps to create a stunning paver patio:
Step 1: Plan and Prepare
Start by planning the layout and design of your paver patio. Measure the area where you want to install the extension and mark the boundaries using stakes and strings. Consider the shape and size of your patio as well as any additional features you want to include, such as seating areas or planters.
Clear the area of any vegetation, rocks, or debris. Ensure the ground is level and compacted. If necessary, use a rake or shovel to even out the surface.
Step 2: Excavate and Level
Excavate the area to a depth suitable for your pavers, typically around 6-8 inches. Remove the soil and debris, ensuring that the base is level. Compact the soil using a tamper or plate compactor. This will provide a stable foundation for your paver patio.
Step 3: Add Base Material
Add a layer of base material, such as crushed stone or gravel fines, to the excavated area. Spread and level the base material to create an even surface. Use a rake or shovel to compact the base material, ensuring stability and proper drainage.
Read more: How To Extend Driveway With Pavers
Step 4: Install Edge Restraints
Install edge restraints around the perimeter of the patio area to keep the pavers in place and prevent shifting. Use plastic or metal edging material that is designed for use with pavers. Secure the edging tightly against the base material and anchor it with stakes.
Step 5: Lay the Pavers
Start laying the pavers from one corner or edge of the patio area. Follow the desired pattern or design, gently placing each paver onto the base material. Use a rubber mallet or wooden block to tap the pavers into place, ensuring they are level and snugly fit together. Continue this process until all the pavers are laid.
Step 6: Cut and Adjust
If necessary, cut pavers to fit the edges or irregular areas of the patio extension. Use a paver saw or a chisel and hammer to achieve the desired shape and size. Ensure that the cuts are clean and precise for a professional finish.
Step 7: Add Joint Sand
Once the pavers are in place, spread joint sand evenly over the surface. Use a broom to sweep the sand into the gaps between the pavers. This will help stabilize the pavers and prevent weed growth. Compact the pavers again using a plate compactor to ensure they are firmly in place.
Read more: How To Extend Recliner Footrest
Step 8: Finishing Touches
Complete your paver patio by adding some finishing touches. Install any desired accessories such as outdoor furniture, lighting, or a fire pit. Consider adding landscaping elements such as plants, shrubs, or a garden border to enhance the overall look of your patio extension.
Creating a paver patio allows you to design a visually stunning and functional outdoor space. With proper planning and execution, your paver patio will provide a durable and stylish extension to your home where you can relax and entertain in style.
Laying a Brick Patio
Creating a brick patio is a timeless and elegant way to extend your outdoor living space. With their durability and classic appeal, bricks can transform your patio into a charming and inviting area. Here are the steps to lay a brick patio:
Step 1: Plan and Prepare
Start by planning the design and layout of your brick patio. Measure the area where you want to install the extension and mark the boundaries with stakes and strings. Consider the shape, size, and pattern of the bricks you want to use. Take into account any existing features, such as trees or structures, as well as any additional elements you want to incorporate, such as seating areas or pathways.
Step 2: Prepare the Base
Prepare the base by clearing the area of any vegetation, rocks, or debris. Ensure the ground is level and compacted. If necessary, excavate the area to a depth suitable for your bricks, typically around 4-6 inches. Remove the soil and debris, and compact the area to create a stable foundation.
Step 3: Add Base Material
Add a layer of base material, such as crushed stone or gravel fines, to the excavated area. Spread and level the base material using a rake or shovel. Compact the base material to create a sturdy and even surface for your brick patio.
Read more: How To Extend Driveway With Pavers
Step 4: Install Edge Restraints
Install edge restraints around the perimeter of the patio area to keep the bricks in place and provide stability. Use plastic or metal edging material designed for use with bricks. Secure the edging tightly against the base material and anchor it with stakes.
Step 5: Lay a Bed of Sand
Spread a layer of sand evenly over the base material. This will provide a level surface for laying the bricks. Use a rake or a straight board to smooth out the sand and create an even bed for the bricks.
Step 6: Lay the Bricks
Starting from one corner or edge of the patio area, lay the bricks in the desired pattern or design. Use a brick set or mallet to tap each brick into place, ensuring it is level and aligned with adjacent bricks. Use a string or level to check the alignment as you go. Continue this process, laying one row at a time, until the entire patio area is covered.
Read more: How To Extend Chandelier Wire
Step 7: Fill the Gaps
Once all the bricks are laid, sweep sand into the gaps between the bricks. Use a broom to ensure the sand fills all the joints evenly. This helps secure the bricks in place and prevents weed growth. You may need to repeat this step a few times over the course of a couple of weeks to fill any settling gaps.
Read more: How To Extend Recliner Footrest
Step 8: Finishing Touches
Complete your brick patio by adding the finishing touches. Use a brush to remove any excess sand from the surface of the bricks. Consider adding a brick sealer to protect and enhance the color of the bricks. Add any desired outdoor furniture, potted plants, or decorative elements to bring your patio to life.
Laying a brick patio requires patience and attention to detail, but the end result is a beautiful and timeless addition to your outdoor space. With proper planning and execution, your brick patio will provide a durable and stylish extension where you can relax and entertain in the comfort of your own home.
Building a Concrete Patio Extension
Building a concrete patio extension is a versatile and durable option that adds a sleek and modern touch to your outdoor living space. Concrete provides a solid foundation and can be poured in various shapes and sizes to suit your design preferences. Here are the steps to build a concrete patio extension:
Step 1: Plan and Prepare
Start by planning the layout and design of your concrete patio extension. Measure the area where you want to install the extension and mark the boundaries using stakes and strings. Consider the shape, size, and desired finish of your concrete patio. Take into account any existing features, such as trees or structures, as well as any additional elements you want to incorporate, such as seating areas or outdoor kitchens.
Step 2: Excavate and Level
Excavate the area to a suitable depth for your concrete patio, typically around 4-6 inches. Remove the soil and debris, ensuring the ground is level and compacted. This will provide a solid foundation for your patio extension. Use a rake or shovel to even out the surface and ensure it is ready for the next step.
Step 3: Build Forms
Construct forms using wood or metal boards to create the mold for your concrete patio. Secure the forms with stakes to keep them in place. Ensure that the forms are level and properly aligned with the desired shape and size of the patio extension.
Step 4: Install Reinforcement
If desired, add reinforcement to your concrete patio by placing rebar or wire mesh within the forms. This helps increase the strength and durability of the patio. Position the reinforcement at an appropriate height within the forms to ensure it is fully encased within the concrete.
Step 5: Mix and Pour Concrete
Prepare the concrete mixture according to the manufacturer’s instructions. Mix the concrete thoroughly until it reaches a smooth and workable consistency. Pour the concrete into the forms, starting from one corner or edge. Use a shovel or trowel to evenly distribute the concrete within the forms.
Read more: How To Extend Length Of Curtains
Step 6: Level and Smooth
Level the concrete surface using a screed board, moving it in a back-and-forth motion across the forms. This will help achieve a smooth and even surface. Use a float or trowel to further smooth and finish the surface, eliminating any bumps or imperfections.
Step 7: Cure and Protect
After pouring and finishing the concrete, it’s crucial to properly cure and protect it. Cover the patio extension with plastic or a curing compound to retain moisture and promote proper curing. Allow the concrete to cure for at least 48 hours before removing the forms or applying any heavy loads.
Step 8: Add Finishing Touches
Once the concrete patio extension has fully cured, remove the forms and clean up any excess debris. If desired, you can enhance the appearance of the patio extension by staining or stamping the concrete. Apply a concrete sealer to protect the surface and add a polished finish. Finally, add any desired outdoor furniture, decorations, or landscaping to create a welcoming and comfortable outdoor space.
Building a concrete patio extension requires careful planning and execution, but the end result is a durable, low-maintenance, and visually appealing addition to your outdoor living area. With proper maintenance, your concrete patio will provide years of enjoyment and enhance the overall value of your home.
Enhancing the Patio with Outdoor Décor
Once you have extended your patio, it’s time to transform it into a welcoming and stylish outdoor retreat. Enhancing your patio with outdoor décor adds a personal touch and creates a cozy atmosphere for relaxation and entertainment. Here are some ideas to elevate the look and functionality of your patio:
Read more: How To Extend Fence Posts
Comfortable Seating:
Invest in comfortable and durable outdoor furniture to create a cozy seating area. Opt for weather-resistant materials such as teak or aluminum, and choose cushions and pillows made from outdoor-friendly fabrics. Arrange the furniture to encourage conversation and create separate zones for dining and lounging.
Outdoor Lighting:
Add ambient lighting to your patio to create a warm and inviting atmosphere. Incorporate string lights, lanterns, or pathway lights to illuminate the space. Install solar-powered or LED lights for energy efficiency and convenience. Lighting not only enhances the aesthetics but also extends the usability of your patio into the evening.
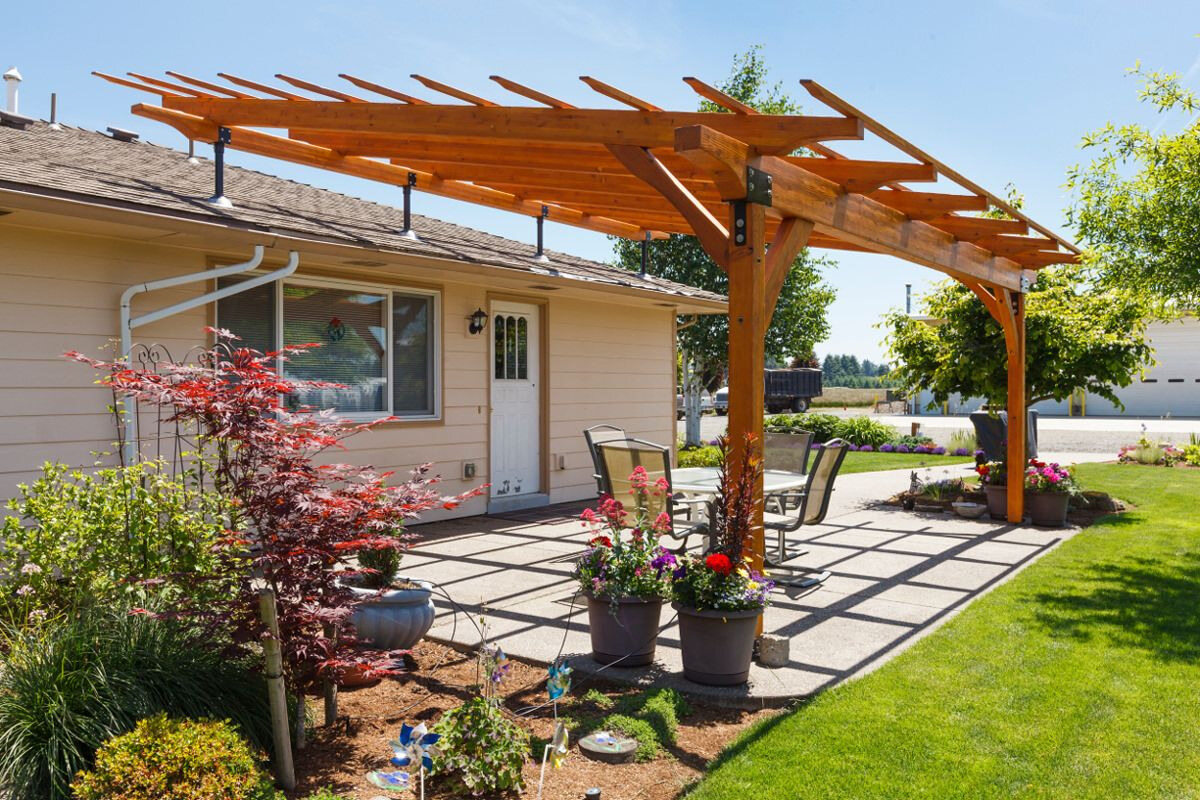
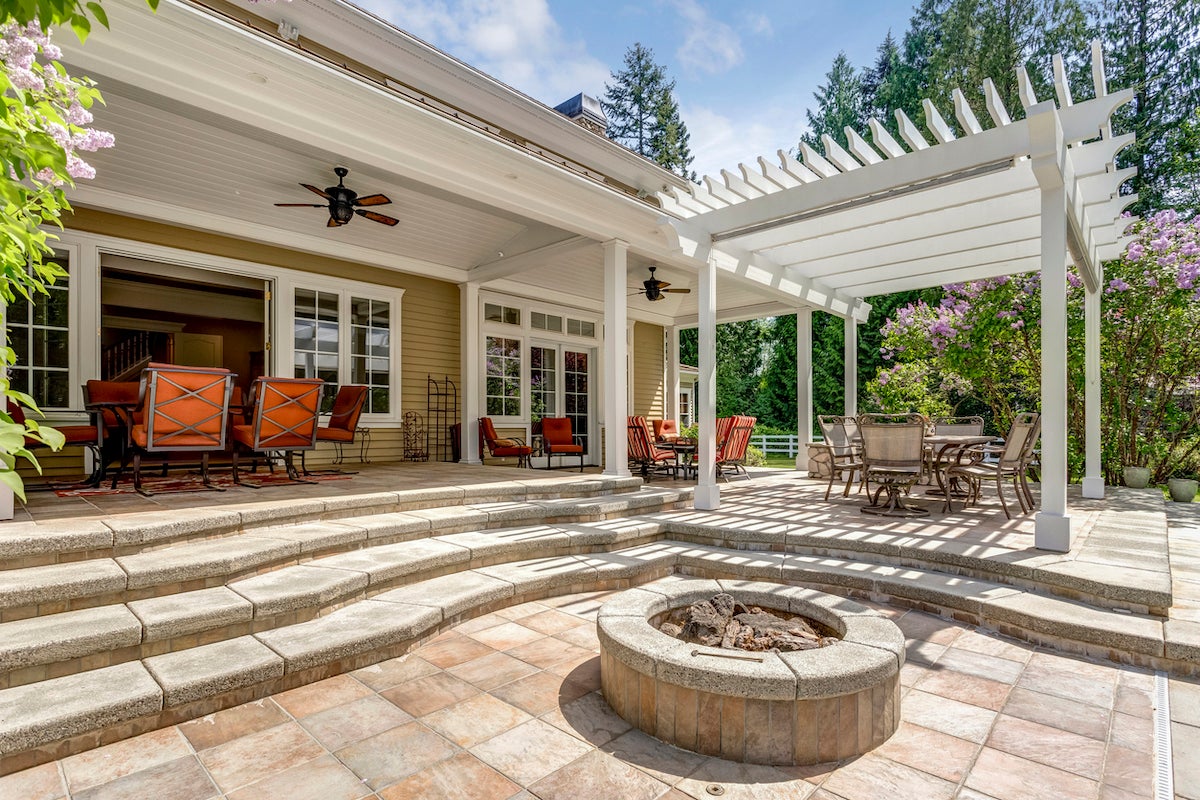
Shade and Privacy:
Create shade and privacy on your patio with the addition of outdoor umbrellas, pergolas, or canopies. These structures not only provide relief from the sun but also add a touch of elegance to your outdoor space. Consider adding curtains or outdoor blinds to enhance privacy and create an intimate setting.
Greenery and Plants:
Introduce greenery to your patio with plants and flowers. Incorporate potted plants, hanging baskets, or vertical gardens to add a touch of nature and color. Choose plants that thrive in your climate and require minimal maintenance. Plants not only enhance the aesthetics but also improve air quality and create a relaxing ambiance.
Read more: How To Extend An RV Awning
Outdoor Art and Decorations:
Add visual interest and personality to your patio with outdoor art and decorations. Hang wall art, sculptures, or wind chimes to create a focal point. Incorporate decorative elements like outdoor rugs, throw pillows, or outdoor curtains to add texture and style. Don’t forget to include a weather-resistant mirror to create the illusion of space and reflect natural light.
Fire Pit or Heat Source:
Extend the usability of your patio into the cooler months with a fire pit or heat source. A portable fire pit or a built-in fireplace creates a cozy gathering spot for friends and family. Add some comfortable seating around the fire pit to create a cozy and inviting atmosphere, perfect for chilly evenings.
Outdoor Kitchen or Bar Area:
If you enjoy outdoor cooking and entertaining, consider adding an outdoor kitchen or bar area to your patio. Install a grill, prep area, and storage for a seamless outdoor dining experience. Incorporate a bar or island with seating for a convenient place to entertain guests and serve refreshing beverages.
By incorporating these outdoor décor ideas, you can transform your patio into a stylish and inviting extension of your home. Create a space that reflects your personal style, provides comfort, and allows you to fully enjoy the beauty of the outdoors.
Conclusion
Extending your patio is a fantastic way to enhance your outdoor living space and create a versatile oasis right in your backyard. Whether you choose to install a gravel patio, lay pavers, use bricks, or opt for a concrete surface, each method offers its own unique benefits and aesthetic appeal. By carefully assessing and preparing the patio area, choosing the right materials, and employing budget-friendly techniques, you can successfully expand your patio without breaking the bank.
Once your patio extension is complete, it’s time to add those finishing touches that truly bring the space to life. Comfortable seating, outdoor lighting, shade options, and greenery all contribute to creating a welcoming and inviting atmosphere. Additionally, incorporating outdoor art, decorations, a fire pit, or even an outdoor kitchen will enhance your patio and provide endless opportunities for relaxation and entertainment.
Remember to consider your personal style, lifestyle, and climate when making decisions about your patio extension and outdoor décor. Aim for a balance between aesthetics, functionality, and budget. It’s crucial to plan and prepare carefully, ensuring that your patio extension seamlessly integrates with the existing space and meets your specific needs.
Ultimately, a well-designed and well-maintained patio extension can provide countless hours of enjoyment, whether you’re hosting gatherings, enjoying solitude with a book, or simply basking in the beauty of the outdoors. Embrace the opportunity to create an outdoor sanctuary that reflects your personality and transforms your backyard into a true haven.
So, roll up your sleeves, get creative, and begin the journey of extending and enhancing your patio. By following the steps and ideas outlined in this article, you can create a stunning and functional outdoor space that you’ll love and cherish for years to come.
Frequently Asked Questions about How To Extend A Patio Cheaply
Was this page helpful?
At Storables.com, we guarantee accurate and reliable information. Our content, validated by Expert Board Contributors, is crafted following stringent Editorial Policies. We're committed to providing you with well-researched, expert-backed insights for all your informational needs.
0 thoughts on “How To Extend A Patio Cheaply”