Articles
How To Fix Garage Door Opener
Modified: October 22, 2024
Get expert advice on fixing your garage door opener with our informative articles. Find step-by-step instructions and troubleshooting tips for common issues.
(Many of the links in this article redirect to a specific reviewed product. Your purchase of these products through affiliate links helps to generate commission for Storables.com, at no extra cost. Learn more)
Introduction
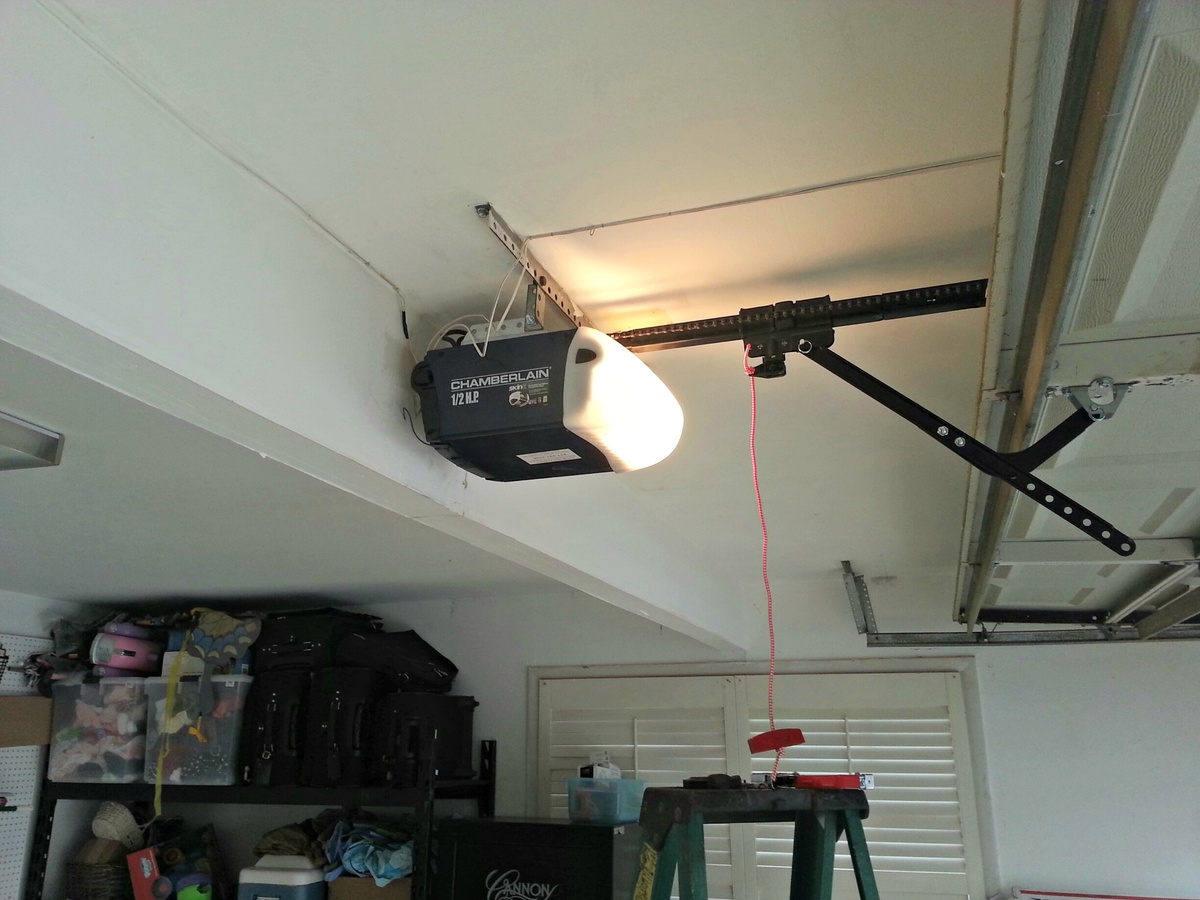
Garage door openers are essential for the smooth and convenient operation of your garage doors. They provide the convenience of opening and closing the doors with just a push of a button. However, like any mechanical device, garage door openers can sometimes encounter issues that can disrupt their normal functioning. Understanding how to troubleshoot and fix these common problems can save you time and money.
In this article, we will guide you through the process of fixing common issues with garage door openers. Whether your opener is not responding to remote control commands, experiencing power problems, or any other issue, we will provide you with step-by-step instructions on how to troubleshoot and resolve these problems.
Before we begin, it’s important to note that safety should always be a top priority. Ensure that you follow safety precautions and, if necessary, seek professional assistance if you are unsure about any steps or dealing with complex issues that require specialized knowledge.
Now, let’s dive into the common problems you may encounter with your garage door opener and how to fix them.
Key Takeaways:
- Troubleshooting common garage door opener issues involves checking power sources, inspecting remote control batteries, and verifying safety sensors. Regular maintenance and prompt repairs can ensure smooth and reliable operation.
- Proper lubrication and timely gear replacement are essential for maintaining the smooth and efficient operation of garage door openers. Following safety precautions and seeking professional assistance when needed is crucial for effective troubleshooting.
Read more: How To Fix Garage Door Opener Sensor
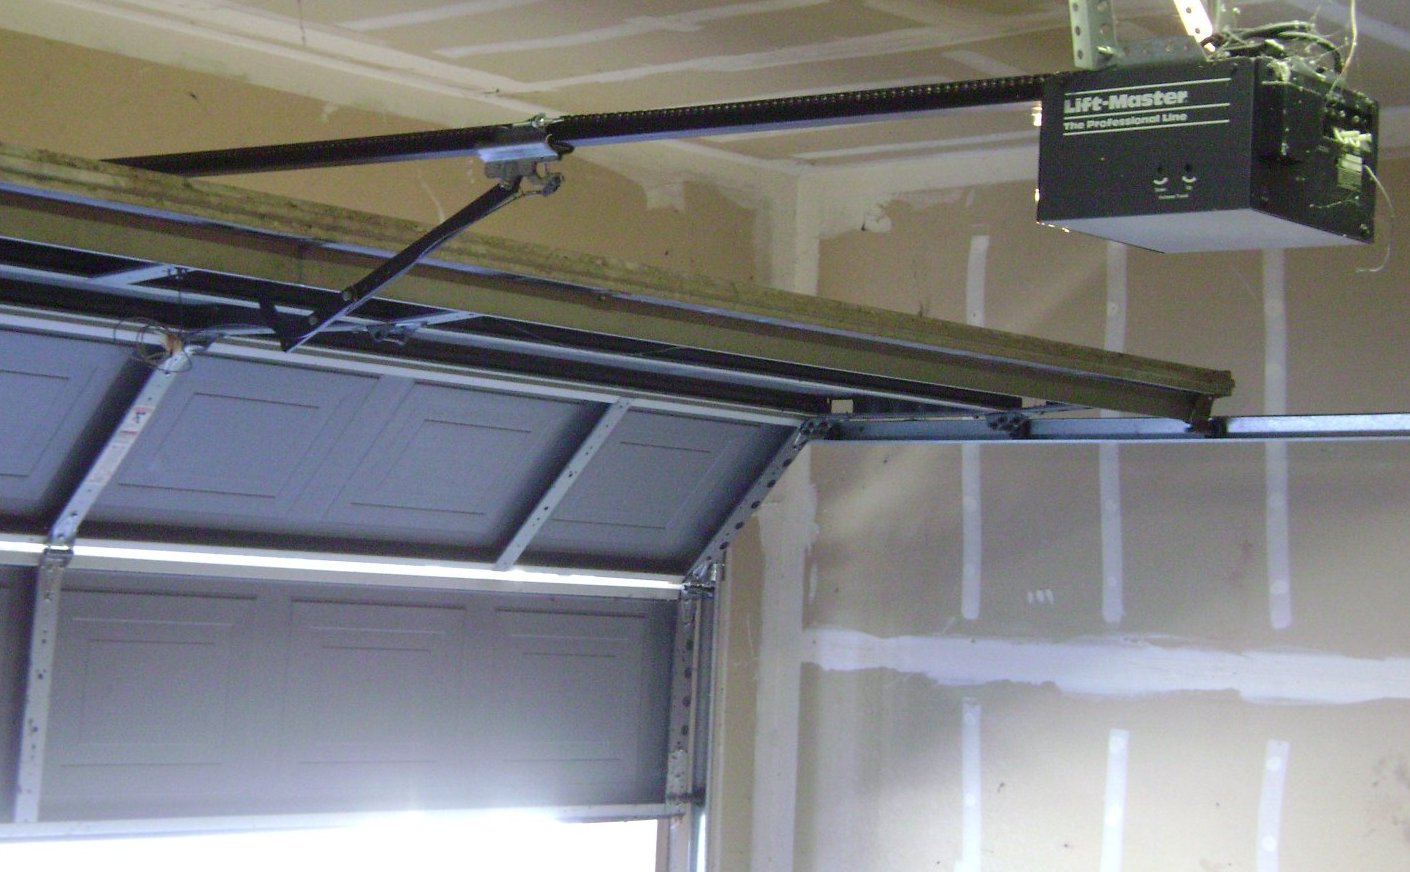
Common Issues with Garage Door Openers
Garage door openers are complex systems that rely on various components to function properly. While they are generally reliable, there are several common issues that you may encounter. Understanding these issues will help you diagnose and fix the problem quickly. Here are some of the most common problems with garage door openers:
- Opener not responding to remote control: This is a frustrating issue where pressing the remote control button does not open or close the garage door. It could be due to a dead battery in the remote control, a problem with the remote control itself, or a malfunctioning receiver in the garage door opener.
- Garage door not opening or closing completely: If your garage door doesn’t open or close all the way, it could be due to a problem with the limit settings. These settings control how far the garage door opens and closes. If they are not set correctly, the door may not open or close fully.
- Strange noises during operation: If you notice unusual grinding, squeaking, or banging noises when operating your garage door opener, it could be a sign of worn-out or damaged components. The noise could be coming from the motor, rollers, or other moving parts.
- Lack of power: If your garage door opener is not receiving power, it will not function. This could be due to a tripped circuit breaker, a blown fuse, or a problem with the electrical outlet or wiring.
- Interference from nearby devices: In some cases, the operation of your garage door opener may be affected by interference from other devices, such as nearby radios, cell phones, or Wi-Fi signals. This can cause erratic behavior or non-responsiveness.
These are just a few examples of the common issues that can occur with garage door openers. Fortunately, many of these problems can be resolved with some troubleshooting and basic repairs. In the following sections, we will walk you through the steps to diagnose and fix these issues.
Tools and Materials Needed
Before you start troubleshooting and fixing your garage door opener, it’s important to gather the necessary tools and materials. Having these items ready will make the process smoother and more efficient. Here are the tools and materials you may need:
- Screwdrivers: Both a Phillips and a flathead screwdriver may be required to remove screws and open panels on the garage door opener.
- Adjustable wrench: An adjustable wrench will be useful for tightening or loosening nuts and bolts.
- Pliers: Pliers can be used to grip and hold parts securely while making adjustments or repairs.
- Lubricant: A silicone-based lubricant or garage door lubricant will be needed to lubricate the moving parts of the garage door opener.
- New batteries: If the remote control or wall switch requires batteries, make sure you have fresh ones on hand to replace old or dead batteries.
- Replacement parts: Depending on the issue you are facing, you may need to purchase replacement parts such as safety sensors, gears, or motor components. Identify the specific parts required for your opener model and have them ready if needed.
- Safety equipment: It is essential to prioritize safety when working with garage door openers. Ensure you have safety glasses, gloves, and any other appropriate safety equipment.
By having these tools and materials readily available, you’ll be prepared to tackle the troubleshooting and repair process without unnecessary delays.
Now that you have gathered the necessary tools and materials, let’s move on to the troubleshooting steps to fix common issues with your garage door opener.
Troubleshooting Steps
When your garage door opener is not functioning properly, it’s important to go through a systematic troubleshooting process to identify and resolve the issue. Here are the steps you can follow to troubleshoot and fix common problems with your garage door opener:
- Checking Power Source: Begin by verifying that the opener is receiving power. Check the power cord for any damage or loose connections. If the opener is plugged into an outlet, ensure the outlet is working by testing it with another device. If the opener is hardwired, check the circuit breaker or fuse box to ensure the breaker is not tripped or the fuse is not blown.
- Inspecting Remote Control Batteries: If the opener is not responding to the remote control, the first step is to check the batteries. Replace the batteries with fresh ones and ensure they are inserted correctly into the remote control.
- Verifying Safety Sensors: Garage door openers are equipped with safety sensors that prevent the door from closing if there is an obstruction in the path. Make sure the sensors are properly aligned and there is nothing blocking their path. Clean the lenses of the sensors to ensure they are free from dirt or debris.
- Examining the Wall Switch: If the opener is not working with the remote control but operates with the wall switch, there may be an issue with the remote control itself. Check the batteries in the remote control and try reprogramming it according to the manufacturer’s instructions.
- Adjusting the Limit Settings: If the garage door doesn’t open or close fully, the limit settings may need adjustment. Locate the limit adjustment screws on the opener unit and make slight adjustments to the up and down limits until the door operates properly.
- Lubricating the Moving Parts: Over time, the moving parts of the garage door opener can become dry and prone to friction. Apply lubricant to the rollers, hinges, springs, and other moving parts to ensure smooth operation.
- Replacing the Garage Door Opener Gear: If you hear grinding or clicking noises coming from the opener, it could indicate a worn-out gear. Disconnect the power and visually inspect the gears for any signs of wear or damage. If necessary, replace the gear using the manufacturer’s instructions.
Remember, safety is paramount when working with garage door openers. Follow proper safety precautions, disconnect the power when necessary, and if you are unsure about any steps or dealing with complex issues, consult a professional for assistance.
By following these troubleshooting steps, you can often resolve common issues with your garage door opener and restore its smooth and reliable operation.
Now let’s conclude the article.
Checking Power Source
One of the first steps in troubleshooting a malfunctioning garage door opener is to ensure that it is receiving power. Without power, the opener will not function properly. Here are the steps to check the power source of your garage door opener:
- Start by visually inspecting the power cord of the garage door opener. Look for any visible damage, such as frayed wires or cuts. If you notice any damage, it’s important to replace the power cord to ensure safe and reliable operation.
- Next, check if the power cord is securely connected to the outlet. Make sure the plug is inserted fully into the outlet, and there are no loose connections or obstacles that may impair the connection.
- If your garage door opener is plugged into an outlet, you can test the power source by plugging in another device to see if it receives power. This will help determine if the issue lies with the opener or the outlet itself.
- In case your opener is hardwired, locate the circuit breaker or fuse box that controls the power supply to your garage door opener. Check if the breaker is in the “ON” position or if the fuse is intact. If the breaker is tripped or the fuse is blown, reset the breaker or replace the fuse and test the opener again.
- If none of these steps resolve the power issue, you may need to consult an electrician to investigate and fix any electrical problems.
Remember to always prioritize safety when dealing with electrical components. If you are unsure or uncomfortable working with electrical systems, it is best to seek professional assistance to ensure your safety and the proper functioning of your garage door opener.
Now that you have checked the power source of your garage door opener and confirmed that it is receiving power, you can proceed to the next troubleshooting step based on the specific issue you are experiencing.
Read more: How To Fix Garage Door Opener Remote
Inspecting Remote Control Batteries
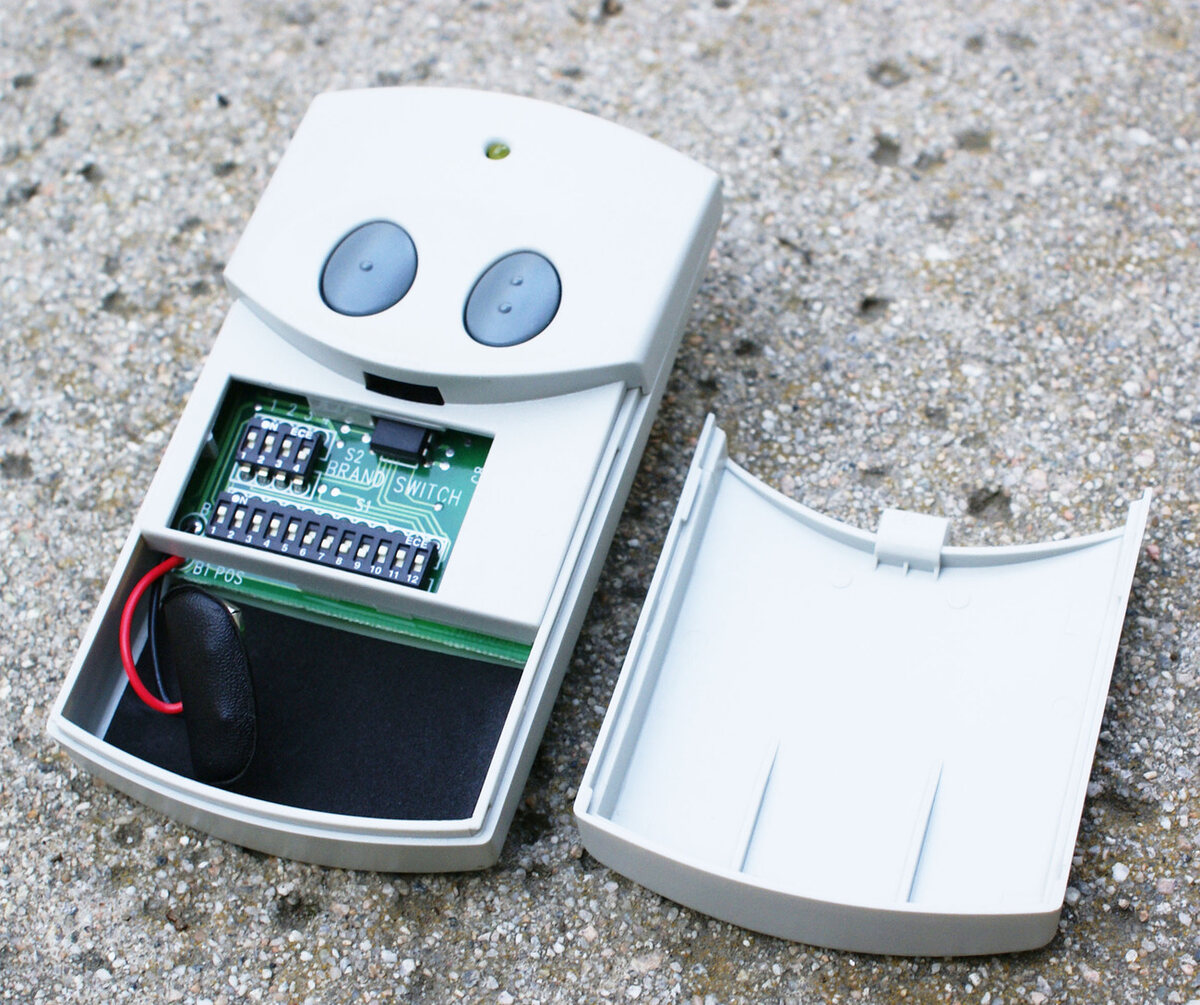
If your garage door opener is not responding to the remote control, the first step is to inspect the batteries. The batteries in the remote control may be dead or depleted, preventing it from sending signals to the opener. Here’s how you can inspect and replace the batteries in your remote control:
- Locate the battery compartment on the back of the remote control. It may have a small screw or a sliding panel that needs to be removed to access the batteries.
- Once you have access to the battery compartment, carefully remove the old batteries. Pay attention to the polarity (+/-) and make a note of how the batteries were originally inserted.
- Inspect the batteries for any signs of corrosion, leaks, or damage. If the batteries are corroded or leaking, make sure to handle them with care and dispose of them properly.
- Obtain fresh, compatible batteries for your remote control. Refer to the manufacturer’s instructions or the label on the battery compartment for the correct battery type and size.
- Insert the new batteries into the compartment, ensuring they are placed in the correct orientation (matching the polarity markings).
- Close the battery compartment securely, ensuring that it is tightly sealed to prevent any accidental disconnection.
- Now, test the remote control by pressing the buttons to see if it operates the garage door opener. If the opener responds, you have successfully resolved the issue. However, if the remote control still does not work, proceed to the next troubleshooting step.
If replacing the batteries does not solve the problem, there may be an issue with the remote control itself or the receiver in the garage door opener. In such cases, you can try reprogramming the remote control according to the manufacturer’s instructions. If the problem persists, it may be necessary to contact the manufacturer or a professional garage door technician for further assistance.
By inspecting and replacing the remote control batteries, you can ensure that it is functioning properly and effectively communicating with the garage door opener.
Now that you have checked and, if needed, replaced the batteries in your remote control, you can proceed to the next troubleshooting step based on the particular issue you are encountering.
Check the power source and make sure it’s connected properly. Also, inspect the sensors and clean any obstructions. Finally, lubricate the moving parts for smooth operation.
Verifying Safety Sensors
Safety sensors are a crucial component of a garage door opener. They are responsible for detecting any obstructions in the path of the garage door and preventing it from closing in order to avoid accidents or damage. If your garage door opener is not functioning properly, it’s essential to verify the alignment and functionality of the safety sensors. Here’s how you can do it:
- Locate the safety sensors, which are typically mounted near the bottom of the garage door tracks on both sides. They consist of a small housing with a sensor lens facing each other.
- Inspect the sensors to ensure they are not blocked or obstructed by any dirt, debris, or objects. Clear away any obstructions that may be preventing the sensors from receiving the infrared beam.
- Check the alignment of the sensors. The sensor lenses should be facing each other directly and perfectly aligned. Adjust the sensors as necessary to ensure they are parallel and aligned correctly.
- Once the sensors are properly aligned, clean the lenses with a soft, dry cloth to remove any dirt or smudges that could interfere with their function.
- Test the garage door opener by pressing the remote control or wall switch to close the door. If the sensors are functioning correctly, the door should start closing but reverse its direction as soon as the infrared beam is interrupted. This is an important safety feature that prevents the door from closing on a person, pet, or object.
- If the door does not reverse when an obstruction is detected, or if the safety sensor indicator lights are not illuminated or blinking, there may be an issue with the sensors. In such cases, consult the manufacturer’s instructions or contact a professional technician for further assistance.
Verifying the safety sensors and ensuring their proper alignment is vital for the safe operation of your garage door opener. By doing so, you can prevent accidents and ensure that your garage door functions smoothly and reliably.
Now that you have checked and adjusted the safety sensors, you can proceed to the next troubleshooting step based on the specific issue you are experiencing.
Examining the Wall Switch
If your garage door opener is not responding to the remote control but operates with the wall switch, there may be an issue with the remote control itself. However, before assuming that the problem lies with the remote control, it’s important to examine the wall switch to ensure it is functioning properly. Here are the steps to examine the wall switch:
- Locate the wall switch for your garage door opener. It is usually mounted near the entrance to the garage or inside the garage itself.
- Inspect the wall switch for any visible damage, such as loose connections, broken buttons, or signs of wear. If you notice any issues, it may be necessary to replace the wall switch.
- Check if the wall switch is securely connected to the wiring. Ensure that the wires are properly inserted into the terminals and there are no loose or exposed connections.
- If the wall switch requires batteries, replace them with fresh ones and ensure they are inserted correctly.
- Try operating the garage door opener using the wall switch. If the door responds to the wall switch commands but not the remote control, it indicates that the issue may be with the remote control itself.
If the wall switch is not functioning properly or if it does not operate the garage door opener, there may be a wiring or electrical issue. At this point, it is recommended to consult a professional electrician or garage door technician to diagnose and repair the problem.
Remember to always prioritize safety when working with electrical components. If you are unsure or uncomfortable working with electrical systems, it is best to seek professional assistance to ensure your safety and the proper functioning of your garage door opener.
Now that you have examined the wall switch and determined its functionality, you can proceed to the next troubleshooting step based on the particular issue you are encountering.
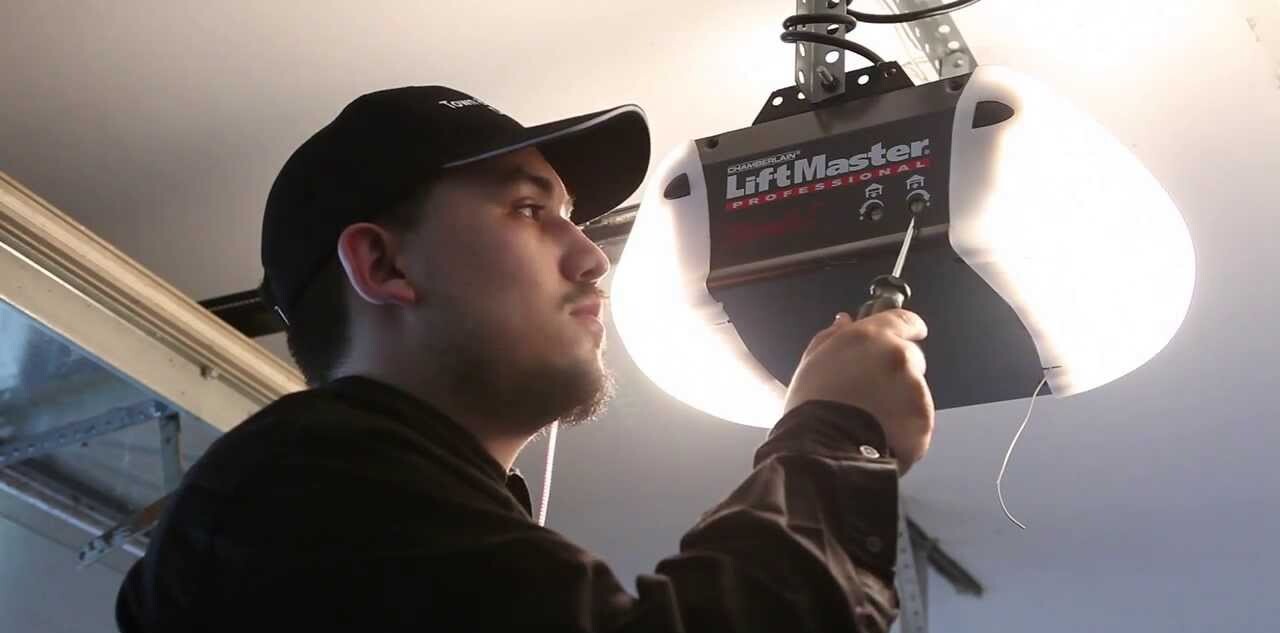
Adjusting the Limit Settings
If your garage door doesn’t open or close fully, the issue may lie with the limit settings of your garage door opener. The limit settings control how far the garage door opens and closes, and if they are not set correctly, the door may not operate as intended. Here’s how you can adjust the limit settings of your garage door opener:
- Locate the limit adjustment screws on the garage door opener unit. These screws are usually labeled “up” and “down” or “open” and “close”.
- Using a flathead or Phillips screwdriver, turn the appropriate limit adjustment screw in the direction indicated by the manufacturer’s instructions. Turning the screw clockwise will decrease the travel distance of the door, while turning it counterclockwise will increase the travel distance.
- Start with small adjustments, typically no more than a quarter turn at a time, and test the door after each adjustment to see if it opens and closes properly. Repeat the process until the door opens and closes fully without stopping prematurely or hitting the floor too forcefully.
- Make sure to adjust both the up and down limits to ensure the door operates correctly in both directions.
- Once you have achieved the desired limit settings, secure the adjustment screws to prevent them from moving or coming loose during operation.
- Test the garage door opener by using the remote control or wall switch to open and close the door. Observe if the door opens and closes fully according to the adjusted limit settings.
Keep in mind that improper adjustment of the limit settings can lead to damage to the garage door or cause it to malfunction. If you are unsure about adjusting the limit settings or if the issue persists after adjustment, it is recommended to consult the manufacturer’s instructions or contact a professional garage door technician for further assistance.
Now that you have adjusted the limit settings of your garage door opener, you can proceed to the next troubleshooting step based on the specific issue you are experiencing.
Read more: How To Open A Chamberlain Garage Door Opener
Lubricating the Moving Parts
Proper lubrication is essential for the smooth and efficient operation of your garage door opener. Over time, the moving parts of the opener can become dry, causing friction and potentially leading to increased wear and tear. Lubricating these parts regularly can help extend the lifespan of your opener and prevent potential issues. Here’s how you can lubricate the moving parts of your garage door opener:
- Start by disconnecting the power to the garage door opener. This is an important safety precaution to prevent any accidental activation of the opener during the lubrication process.
- Identify the moving parts that require lubrication, such as the rollers, hinges, springs, and tracks. These parts are typically made of metal and will benefit from lubrication.
- Clean any dirt, debris, or old lubricant from the surfaces of the moving parts using a soft cloth. This will ensure that the lubricant can properly adhere to the surfaces.
- Select a high-quality lubricant suitable for garage door openers. Silicone-based lubricants or garage door lubricants are commonly recommended. Avoid using lubricants such as WD-40, as they can attract dust and dirt.
- Apply a small amount of lubricant to the moving parts, focusing on areas where they come into contact or where friction is likely to occur. For example, apply lubricant to the rollers, hinges, springs, and tracks.
- Gently work the lubricant into the moving parts by manually opening and closing the garage door a few times. This will help distribute the lubricant evenly and ensure proper coverage.
- After lubricating the moving parts, wipe away any excess lubricant with a clean cloth. This will prevent any drips or buildup that could attract dirt and interfere with the operation of the opener.
- Reconnect the power to the garage door opener and test the operation of the door. You should notice smoother and quieter movement as a result of the lubrication.
It’s important to note that lubrication should be done periodically, typically every six months or as recommended by the manufacturer. Regular maintenance and lubrication will help keep your garage door opener in optimal condition and minimize the risk of issues arising from friction or inadequate lubrication.
Now that you have lubricated the moving parts of your garage door opener, you can proceed to the next troubleshooting step based on the specific issue you are experiencing.
Replacing the Garage Door Opener Gear
If you hear grinding or clicking noises coming from your garage door opener, it could indicate a worn-out gear. Over time, the gear inside the opener can wear down, leading to a loss of efficiency and potential malfunctions. Replacing the gear is a relatively advanced task, but with the right tools and guidance, you can do it yourself. Here’s how you can replace the garage door opener gear:
- Disconnect the power to the garage door opener to ensure your safety. This is an important precautionary measure that will prevent any accidental activation of the opener during the replacement process.
- Locate the gear assembly of your garage door opener. It is usually located near the motor and is connected to the drive shaft.
- Remove the retaining screws or clips that hold the gear assembly in place. This will vary depending on the model of your opener, so consult the manufacturer’s instructions for specific guidance.
- Gently detach the gear assembly from the opener, being careful not to damage any other components or wiring.
- Inspect the gear for any signs of wear, such as worn or broken teeth. If the gear is visibly damaged or worn, it indicates that it needs to be replaced.
- Obtain a replacement gear specifically designed for your garage door opener model. You can find these gears at hardware stores or order them from the manufacturer or online.
- Install the new gear by carefully aligning it with the shaft and secure it with the retaining screws or clips.
- Reconnect the power to the garage door opener and test the operation of the door. Listen for any unusual noises or grinding, and ensure that the gear is functioning properly.
If you are unsure about replacing the gear yourself or if you encounter any difficulties during the process, it is recommended to consult the manufacturer’s instructions or contact a professional garage door technician for assistance. They will have the expertise and knowledge to handle the replacement safely and effectively.
By replacing the worn-out gear in your garage door opener, you can restore its smooth operation and prevent further damage to other components. Regular maintenance and prompt gear replacement will help prolong the lifespan of your garage door opener.
Now that you have replaced the gear in your garage door opener, your troubleshooting journey is complete. Your garage door opener should now be operating smoothly and effectively.
If your issue persists or you encounter other problems, it is always advisable to consult a professional for further assistance and guidance.
Conclusion
Garage door openers provide convenience and security, allowing us to easily open and close our garage doors with a simple push of a button. However, like any mechanical device, they can encounter issues that may disrupt their normal functioning. By following the troubleshooting steps outlined in this article, you can diagnose and fix common problems with your garage door opener.
We started by discussing common issues that you may encounter, such as unresponsive remote controls, incomplete door movements, strange noises, power problems, and interference. These problems can often be resolved through systematic troubleshooting.
We then provided a list of tools and materials you will need, including screwdrivers, pliers, lubricant, fresh batteries, and replacement parts, if necessary. Having these items ready will help you successfully address the issues that arise.
Next, we walked through the essential troubleshooting steps, beginning with checking the power source and inspecting remote control batteries. We then moved on to verifying safety sensors, examining the wall switch, adjusting the limit settings, lubricating the moving parts, and finally, replacing the garage door opener gear.
Throughout the troubleshooting process, we emphasized the importance of safety precautions and seeking professional assistance when needed. Safety should always be a top priority when working with garage door openers or any electrical components.
By following these steps, you can often fix common issues with your garage door opener and restore its smooth operation. Regular maintenance, including lubrication and periodic inspections, can also help prevent future problems and extend the lifespan of your opener.
If you are unsure about any of the steps or encounter complex issues that require specialized knowledge, it is advisable to seek professional help. Garage door technicians have the expertise and experience to diagnose and resolve more intricate problems.
Remember, a well-functioning garage door opener contributes to the convenience, security, and smooth operation of your garage. By troubleshooting and addressing issues promptly, you can ensure that your garage door opener continues to serve you reliably for years to come.
Frequently Asked Questions about How To Fix Garage Door Opener
Was this page helpful?
At Storables.com, we guarantee accurate and reliable information. Our content, validated by Expert Board Contributors, is crafted following stringent Editorial Policies. We're committed to providing you with well-researched, expert-backed insights for all your informational needs.


0 thoughts on “How To Fix Garage Door Opener”