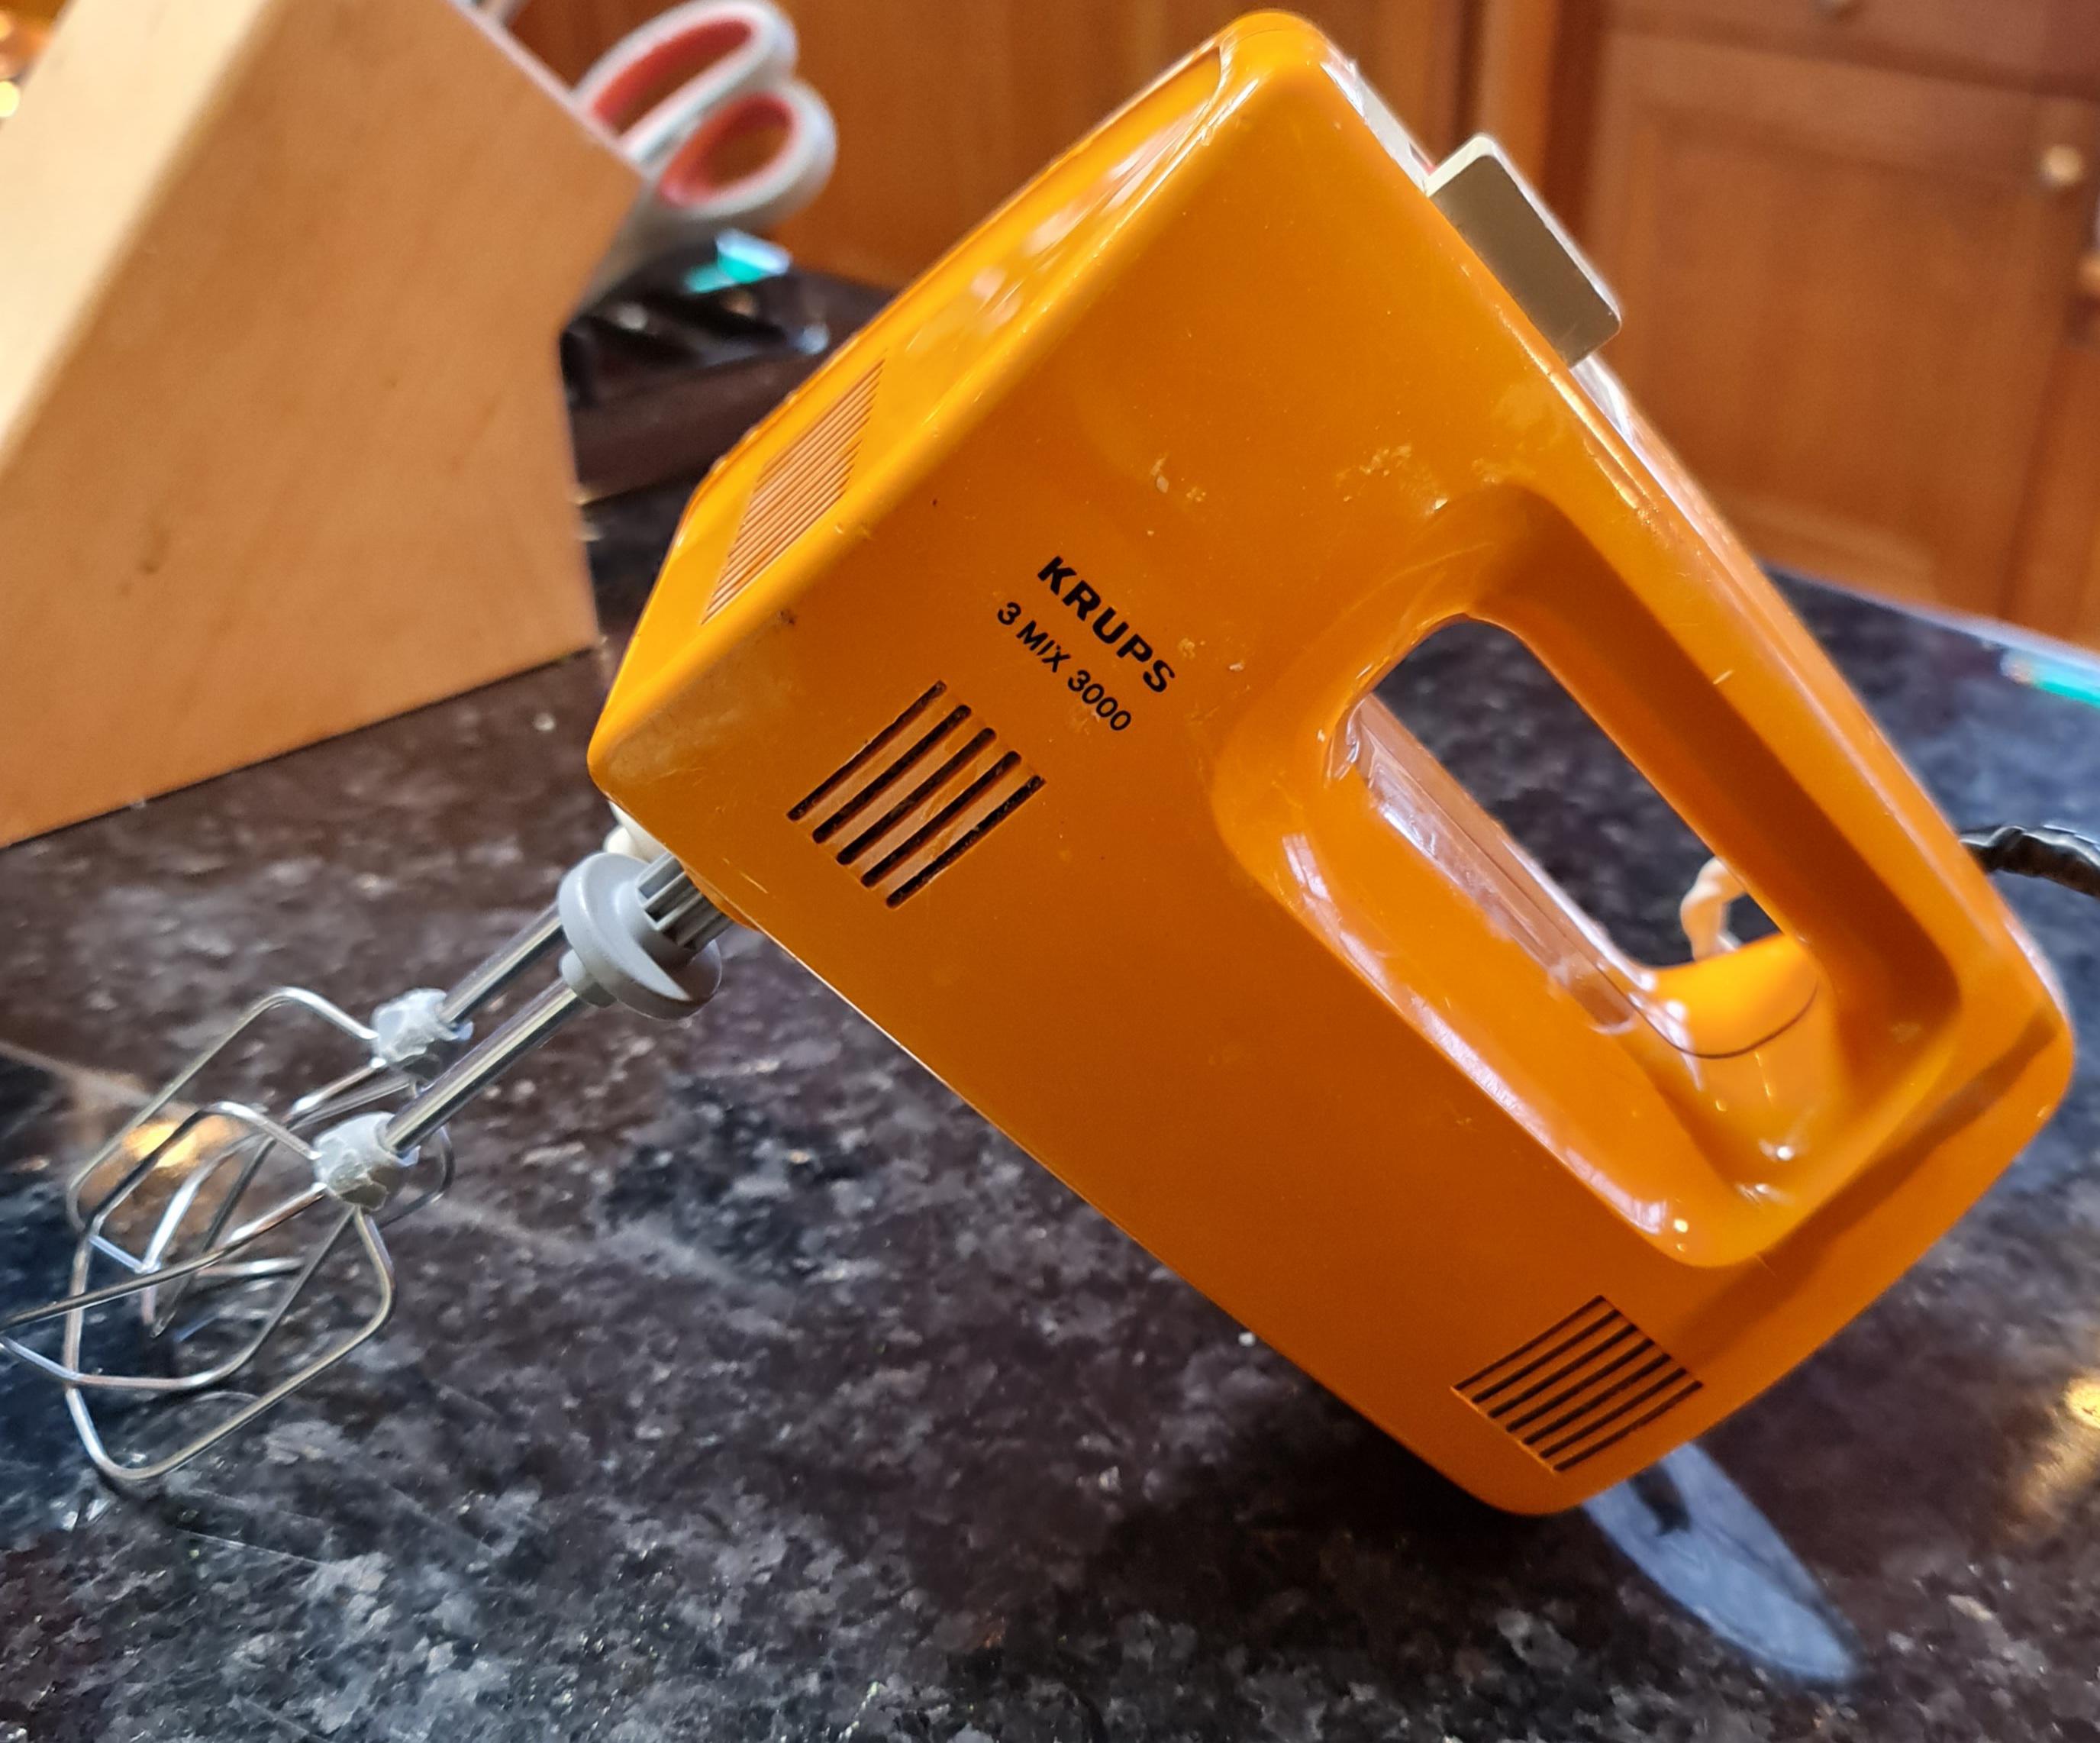
Home>Articles>How To Fix The Electrical Cord On A Krups Type F506 Mixer
Articles
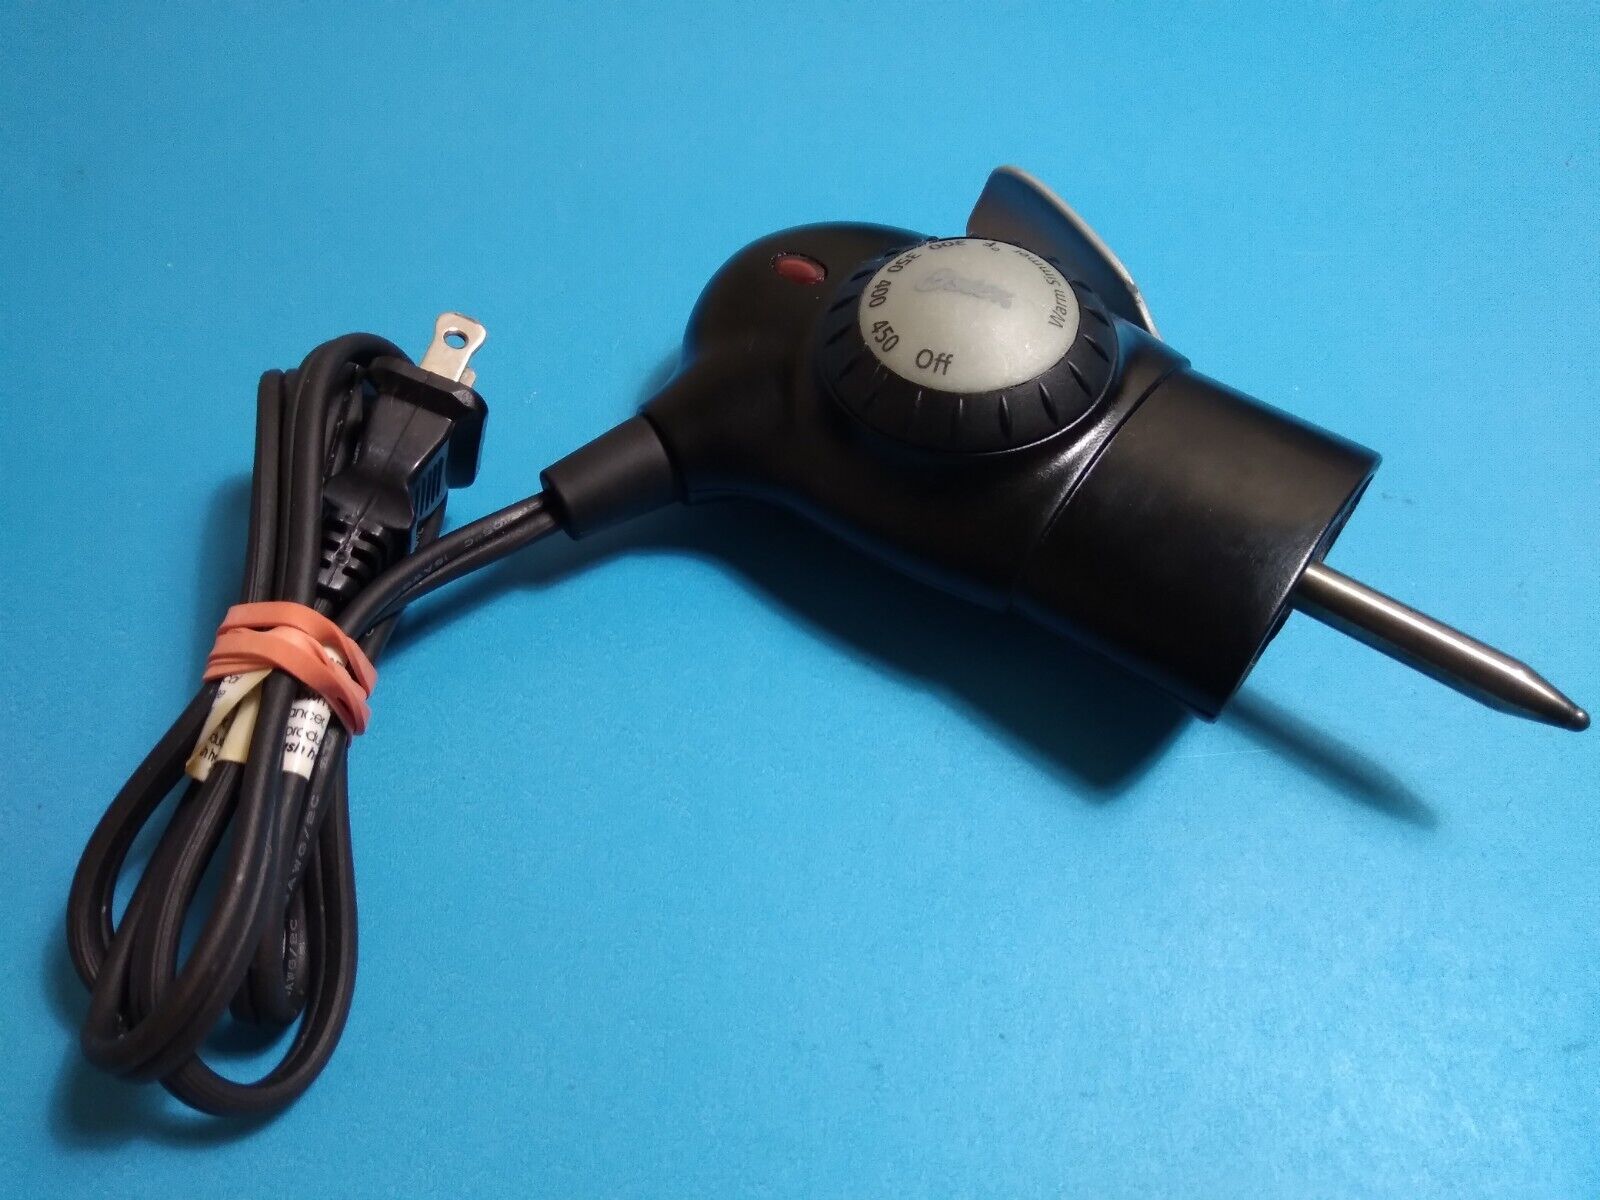
How To Fix The Electrical Cord On A Krups Type F506 Mixer
Modified: March 1, 2024
Learn how to fix the electrical cord on a Krups Type F506 P mixer with these helpful articles. Avoid the hassle of buying a new mixer and save money with our step-by-step guide.
(Many of the links in this article redirect to a specific reviewed product. Your purchase of these products through affiliate links helps to generate commission for Storables.com, at no extra cost. Learn more)
Introduction
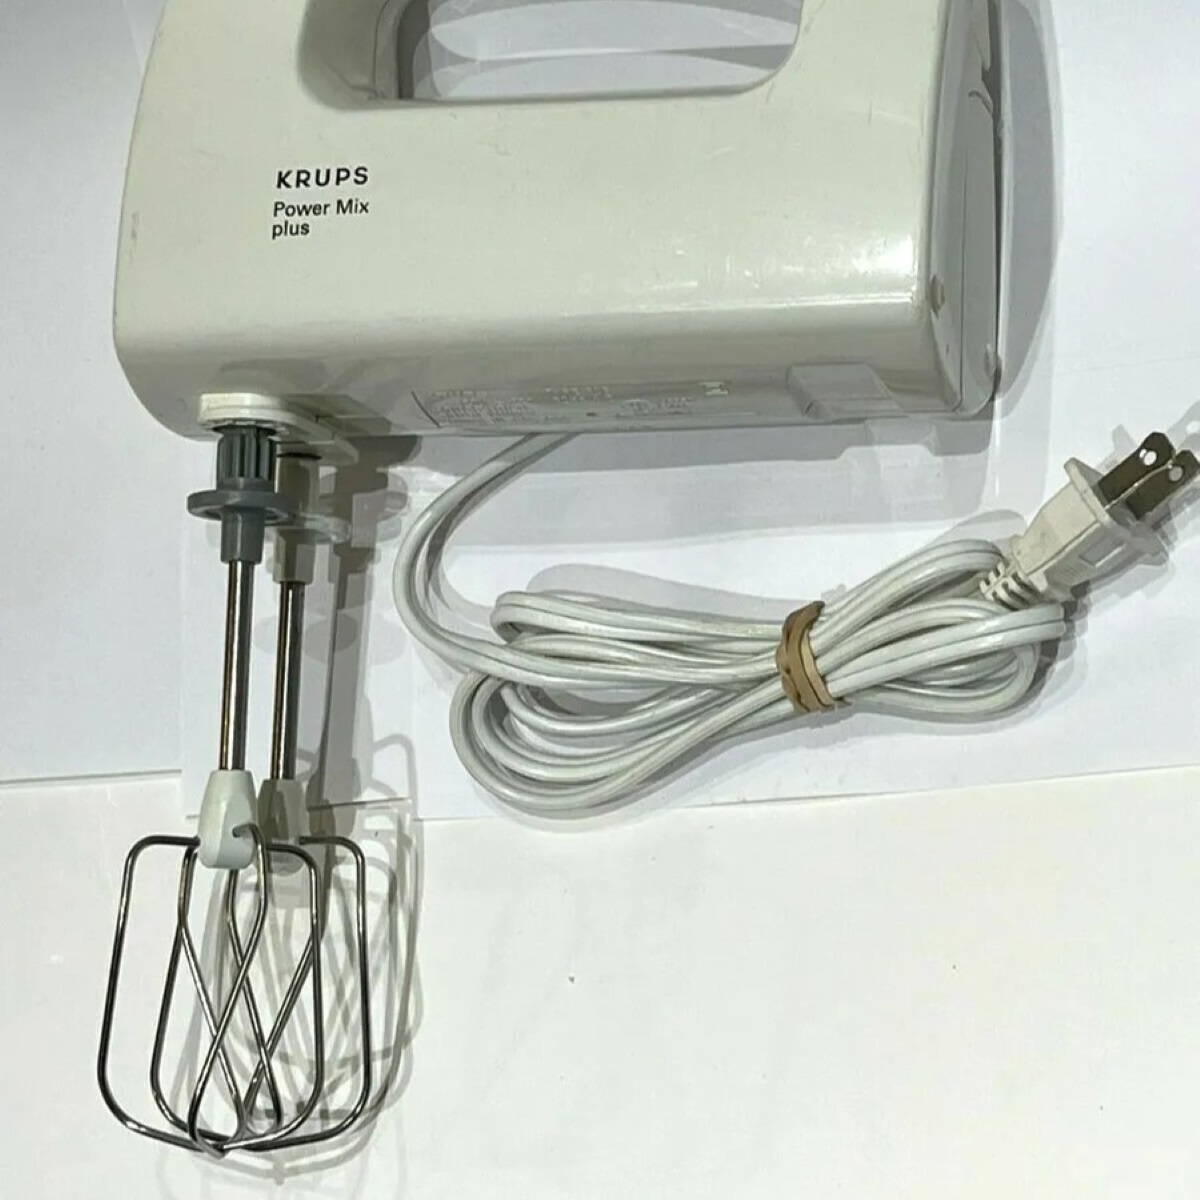
Welcome to this guide on how to fix the electrical cord on a Krups Type F506 P Mixer. If you’ve noticed any damage or malfunctioning in the electrical cord of your mixer, don’t worry, you can easily fix it yourself with some basic tools and materials.
The electrical cord is an essential component of any appliance, and over time, it can become worn out or damaged due to extensive use. Instead of replacing the entire mixer, you can save time and money by repairing the cord yourself.
In this article, we will walk you through step-by-step instructions on how to fix the electrical cord on your Krups Type F506 P Mixer. But before we dive into the process, let’s make sure you have everything you need to get the job done.
Key Takeaways:
- Save time and money by repairing the electrical cord of your Krups Type F506 P Mixer yourself. Follow the step-by-step guide to ensure safety, functionality, and DIY empowerment.
- Prioritize safety, gather necessary tools, examine, cut, strip, and connect the new cord securely. Test for functionality and reassemble the mixer for extended appliance lifespan.
Step 1: Gather necessary tools and materials
Before you start repairing the electrical cord on your Krups Type F506 P Mixer, it’s essential to gather all the necessary tools and materials. Having everything ready beforehand will make the process smoother and more efficient.
Here’s a list of the tools and materials you’ll need:
- Wire cutters
- Wire strippers
- Electrical tape
- Replacement electrical cord
- Screwdriver (if required)
You can find these tools at your local hardware store or online. It’s essential to use the correct tools for the job to ensure safety and efficiency during the repair process.
Once you have gathered all the necessary tools and materials, you’re ready to move on to the next step.
Step 2: Unplug the mixer and remove any attachments
Safety is paramount when working with electrical appliances. Therefore, before you begin repairing the electrical cord on your Krups Type F506 P Mixer, make sure the mixer is unplugged from the power source. This will prevent any potential accidents or electric shocks during the repair process.
Once the mixer is unplugged, remove any attachments or accessories that are currently attached to the appliance. This includes mixing bowls, beaters, or any other removable parts. Removing these attachments will provide easier access to the electrical cord.
Take a moment to inspect the attachments for any signs of wear or damage as well. If you notice any issues, replace them accordingly. It’s essential to ensure the overall safety and functionality of your mixer.
By unplugging the mixer and removing the attachments, you’re ready to move on to the next step of examining the electrical cord for any damage.
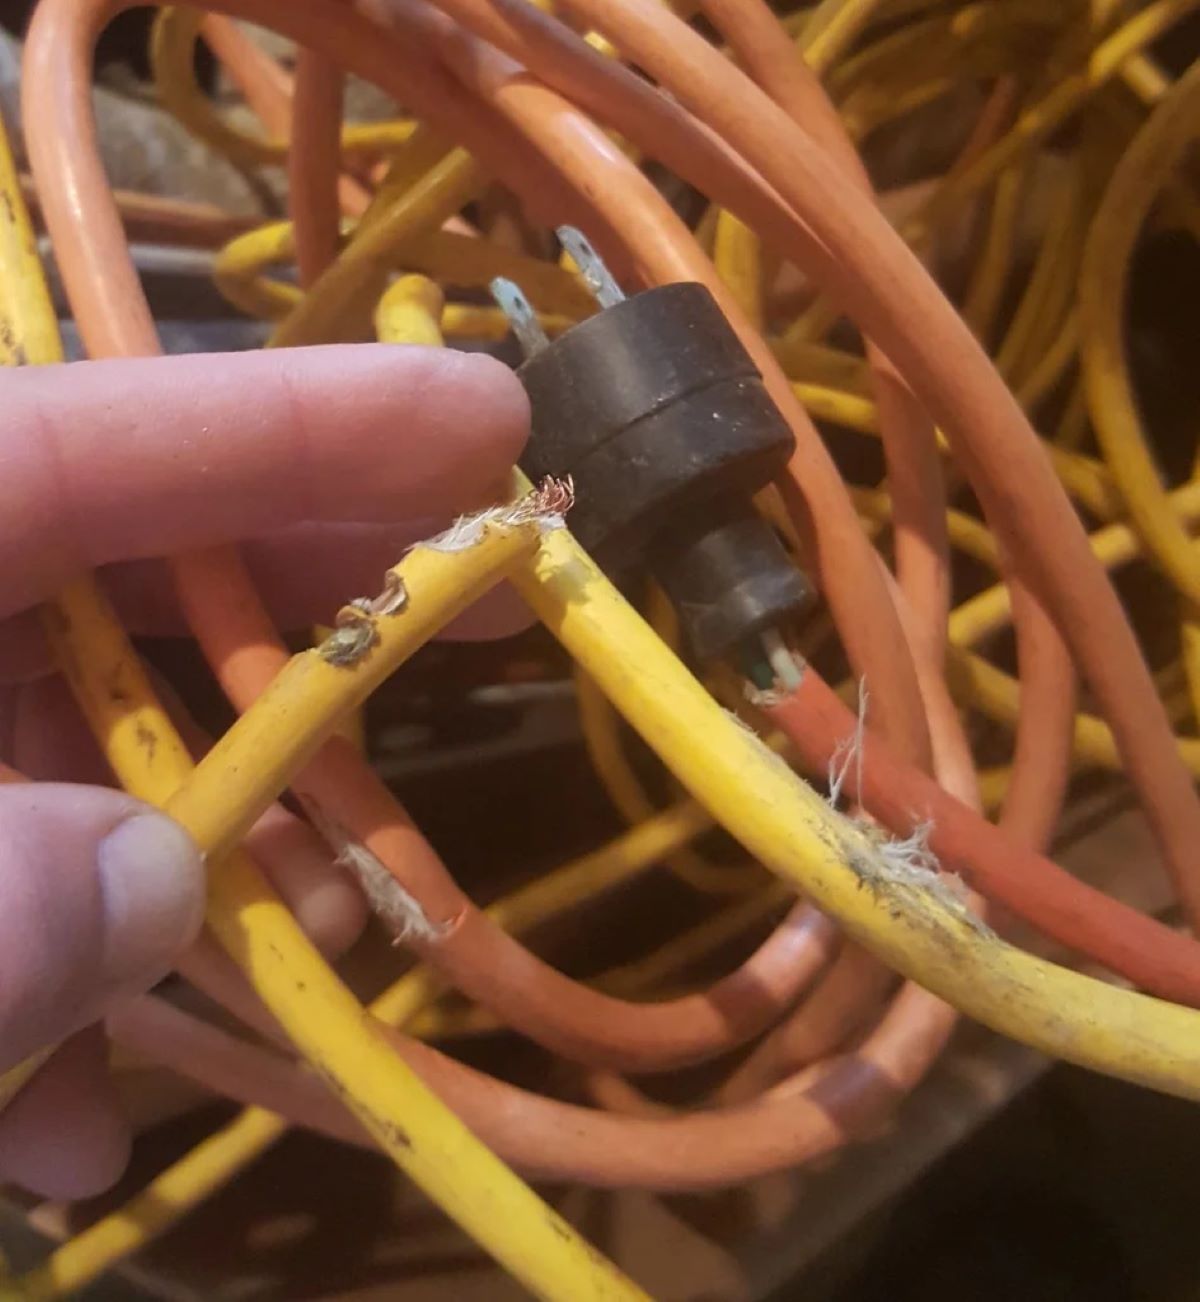
Step 3: Examine the electrical cord for damage
With the mixer unplugged and the attachments removed, it’s time to carefully inspect the electrical cord for any signs of damage. Over time, the cord may experience wear and tear, fraying, or even cuts, which can compromise its safety and functionality.
Start by visually examining the entire length of the cord. Look for any visible damage such as cuts, exposed wires, or frayed insulation. Pay close attention to areas where the cord may have been bent or twisted excessively, as these are common areas for wear and tear.
If you notice any damage to the cord, it’s crucial to address it immediately. Continuing to use a damaged cord can pose serious safety hazards and may lead to electrical malfunctions or even electrical shock.
If the damage is minor and limited to a small section of the cord, you may be able to repair it by cutting out the damaged portion and reconnecting the wires. However, if the damage is extensive or the cord is severely compromised, it’s recommended to replace the entire cord with a new one.
By thoroughly examining the electrical cord for any damage, you will be able to determine the best course of action for repair or replacement. Once you have assessed the condition of the cord, you can proceed to the next step of the repair process.
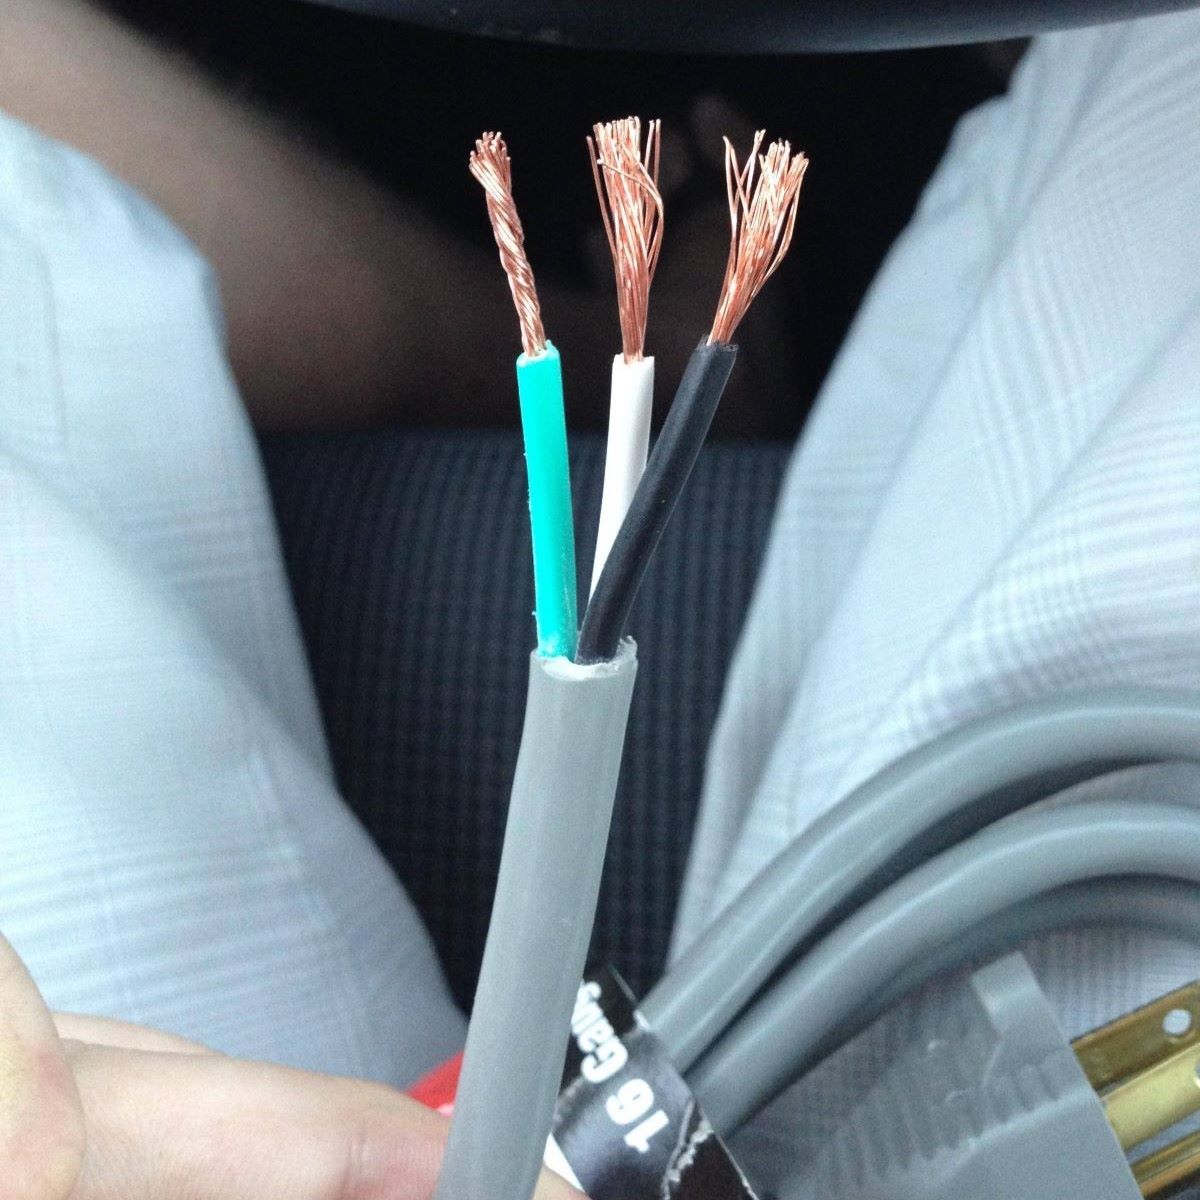
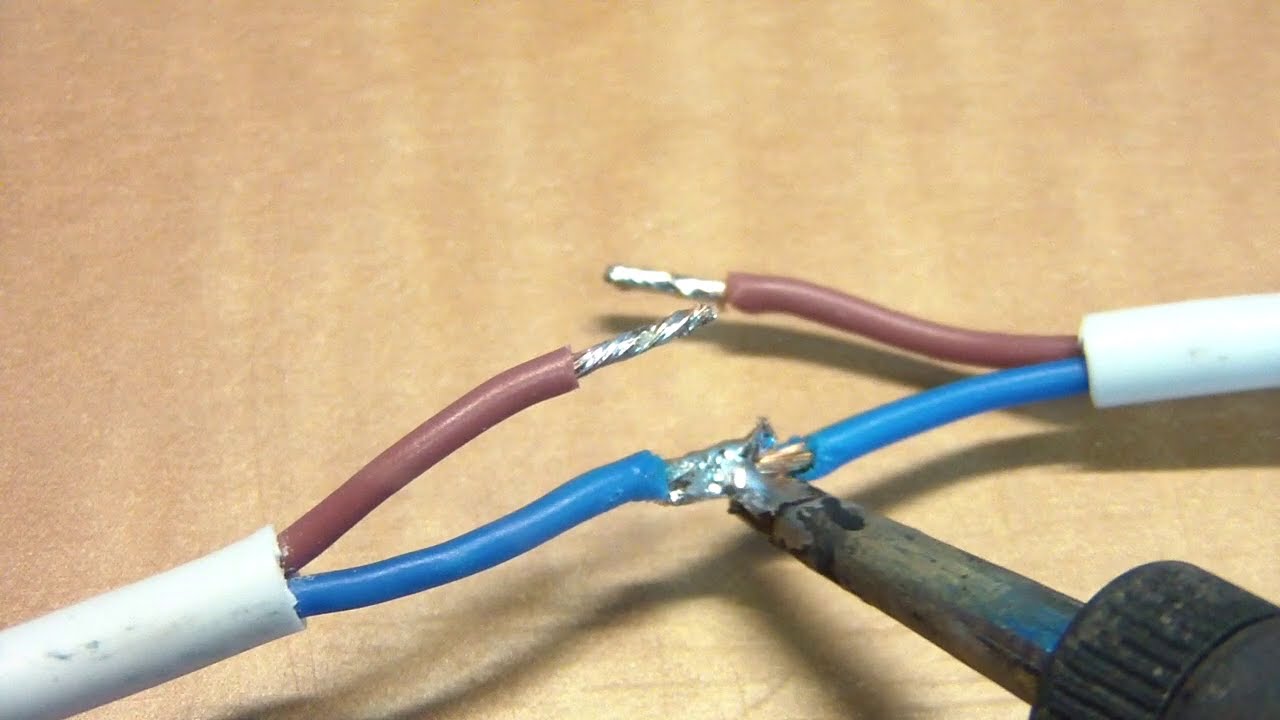
Step 4: Cut and strip the damaged portion of the cord
If you have determined that the damage to the electrical cord is repairable and limited to a specific section, you can proceed to cut and strip the damaged portion. This step will involve removing the damaged portion of the cord and exposing the wires for further repair.
Before you begin, make sure the mixer is still unplugged to avoid any potential electrical hazards. Then, follow these steps:
- Identify the damaged section of the cord: Use your inspection from Step 3 to pinpoint the location of the damage.
- Measure and mark the section to be cut: Leave some extra length on both sides of the damaged area so you have enough wire to work with.
- Using wire cutters, carefully cut through the cord: Ensure a clean and straight cut through the cord. Be cautious not to cut too deep and damage other wires.
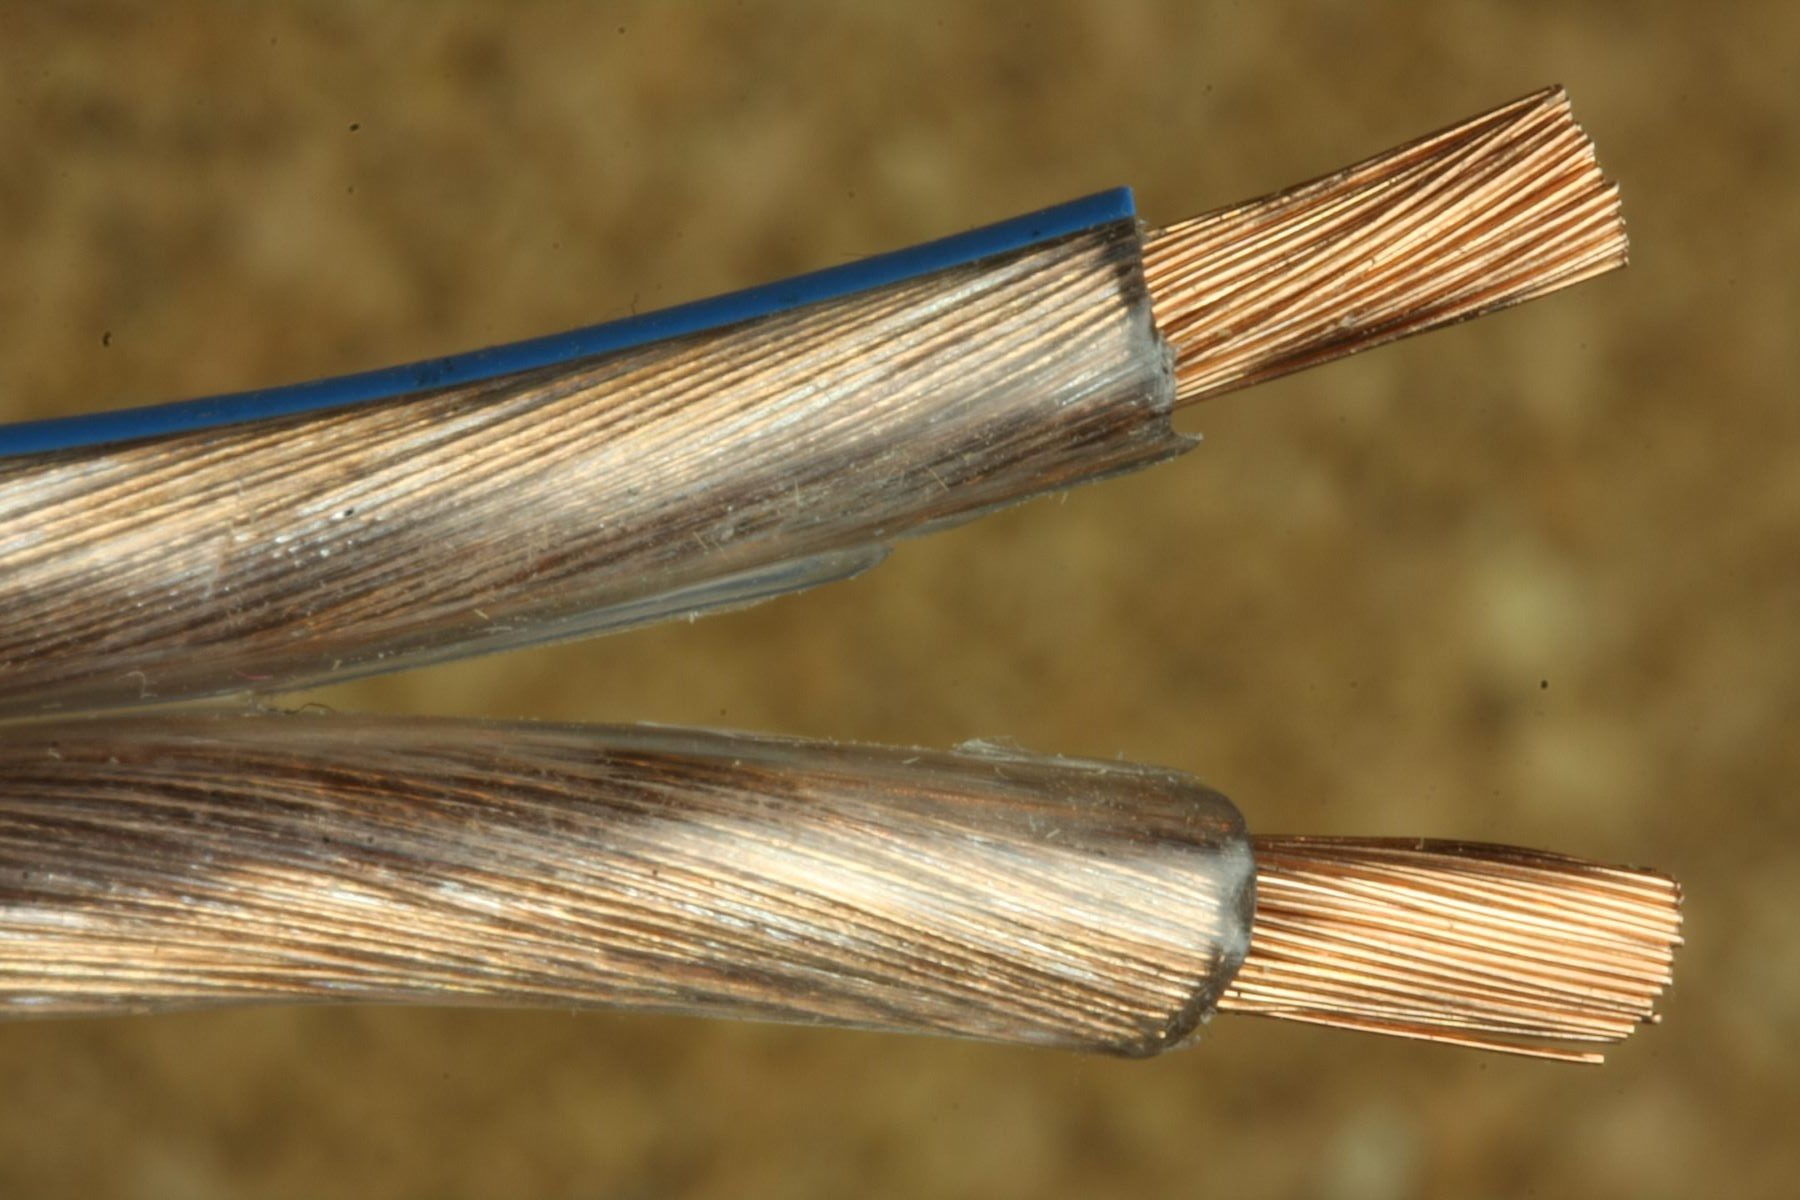
- Strip the insulation from the cut ends: Use wire strippers to remove the outer insulation from the cut ends of the cord. Follow the instructions on your specific wire strippers to determine the appropriate gauge size for the cord.
- Expose the individual wires: Within the cut ends, you will find several smaller wires with different colors. Gently strip the insulation from each wire, revealing the bare copper inside.
Once you have successfully cut and stripped the damaged portion of the cord, you can proceed to the next step of preparing the replacement cord or reconnecting the wires if you have opted for repairing instead of replacement.
Remember to exercise caution while handling the cut ends of the cord and the exposed wires to prevent any injuries or further damage. It’s always better to err on the side of caution and seek professional assistance if you are not confident in performing the repair yourself.
When fixing the electrical cord on a Krups Type F506 P Mixer, make sure to unplug the mixer and carefully inspect the cord for any damage. If there are any exposed wires or fraying, it’s best to replace the cord to ensure safety.
Read more: What Type Of Electrical Cord To Bury
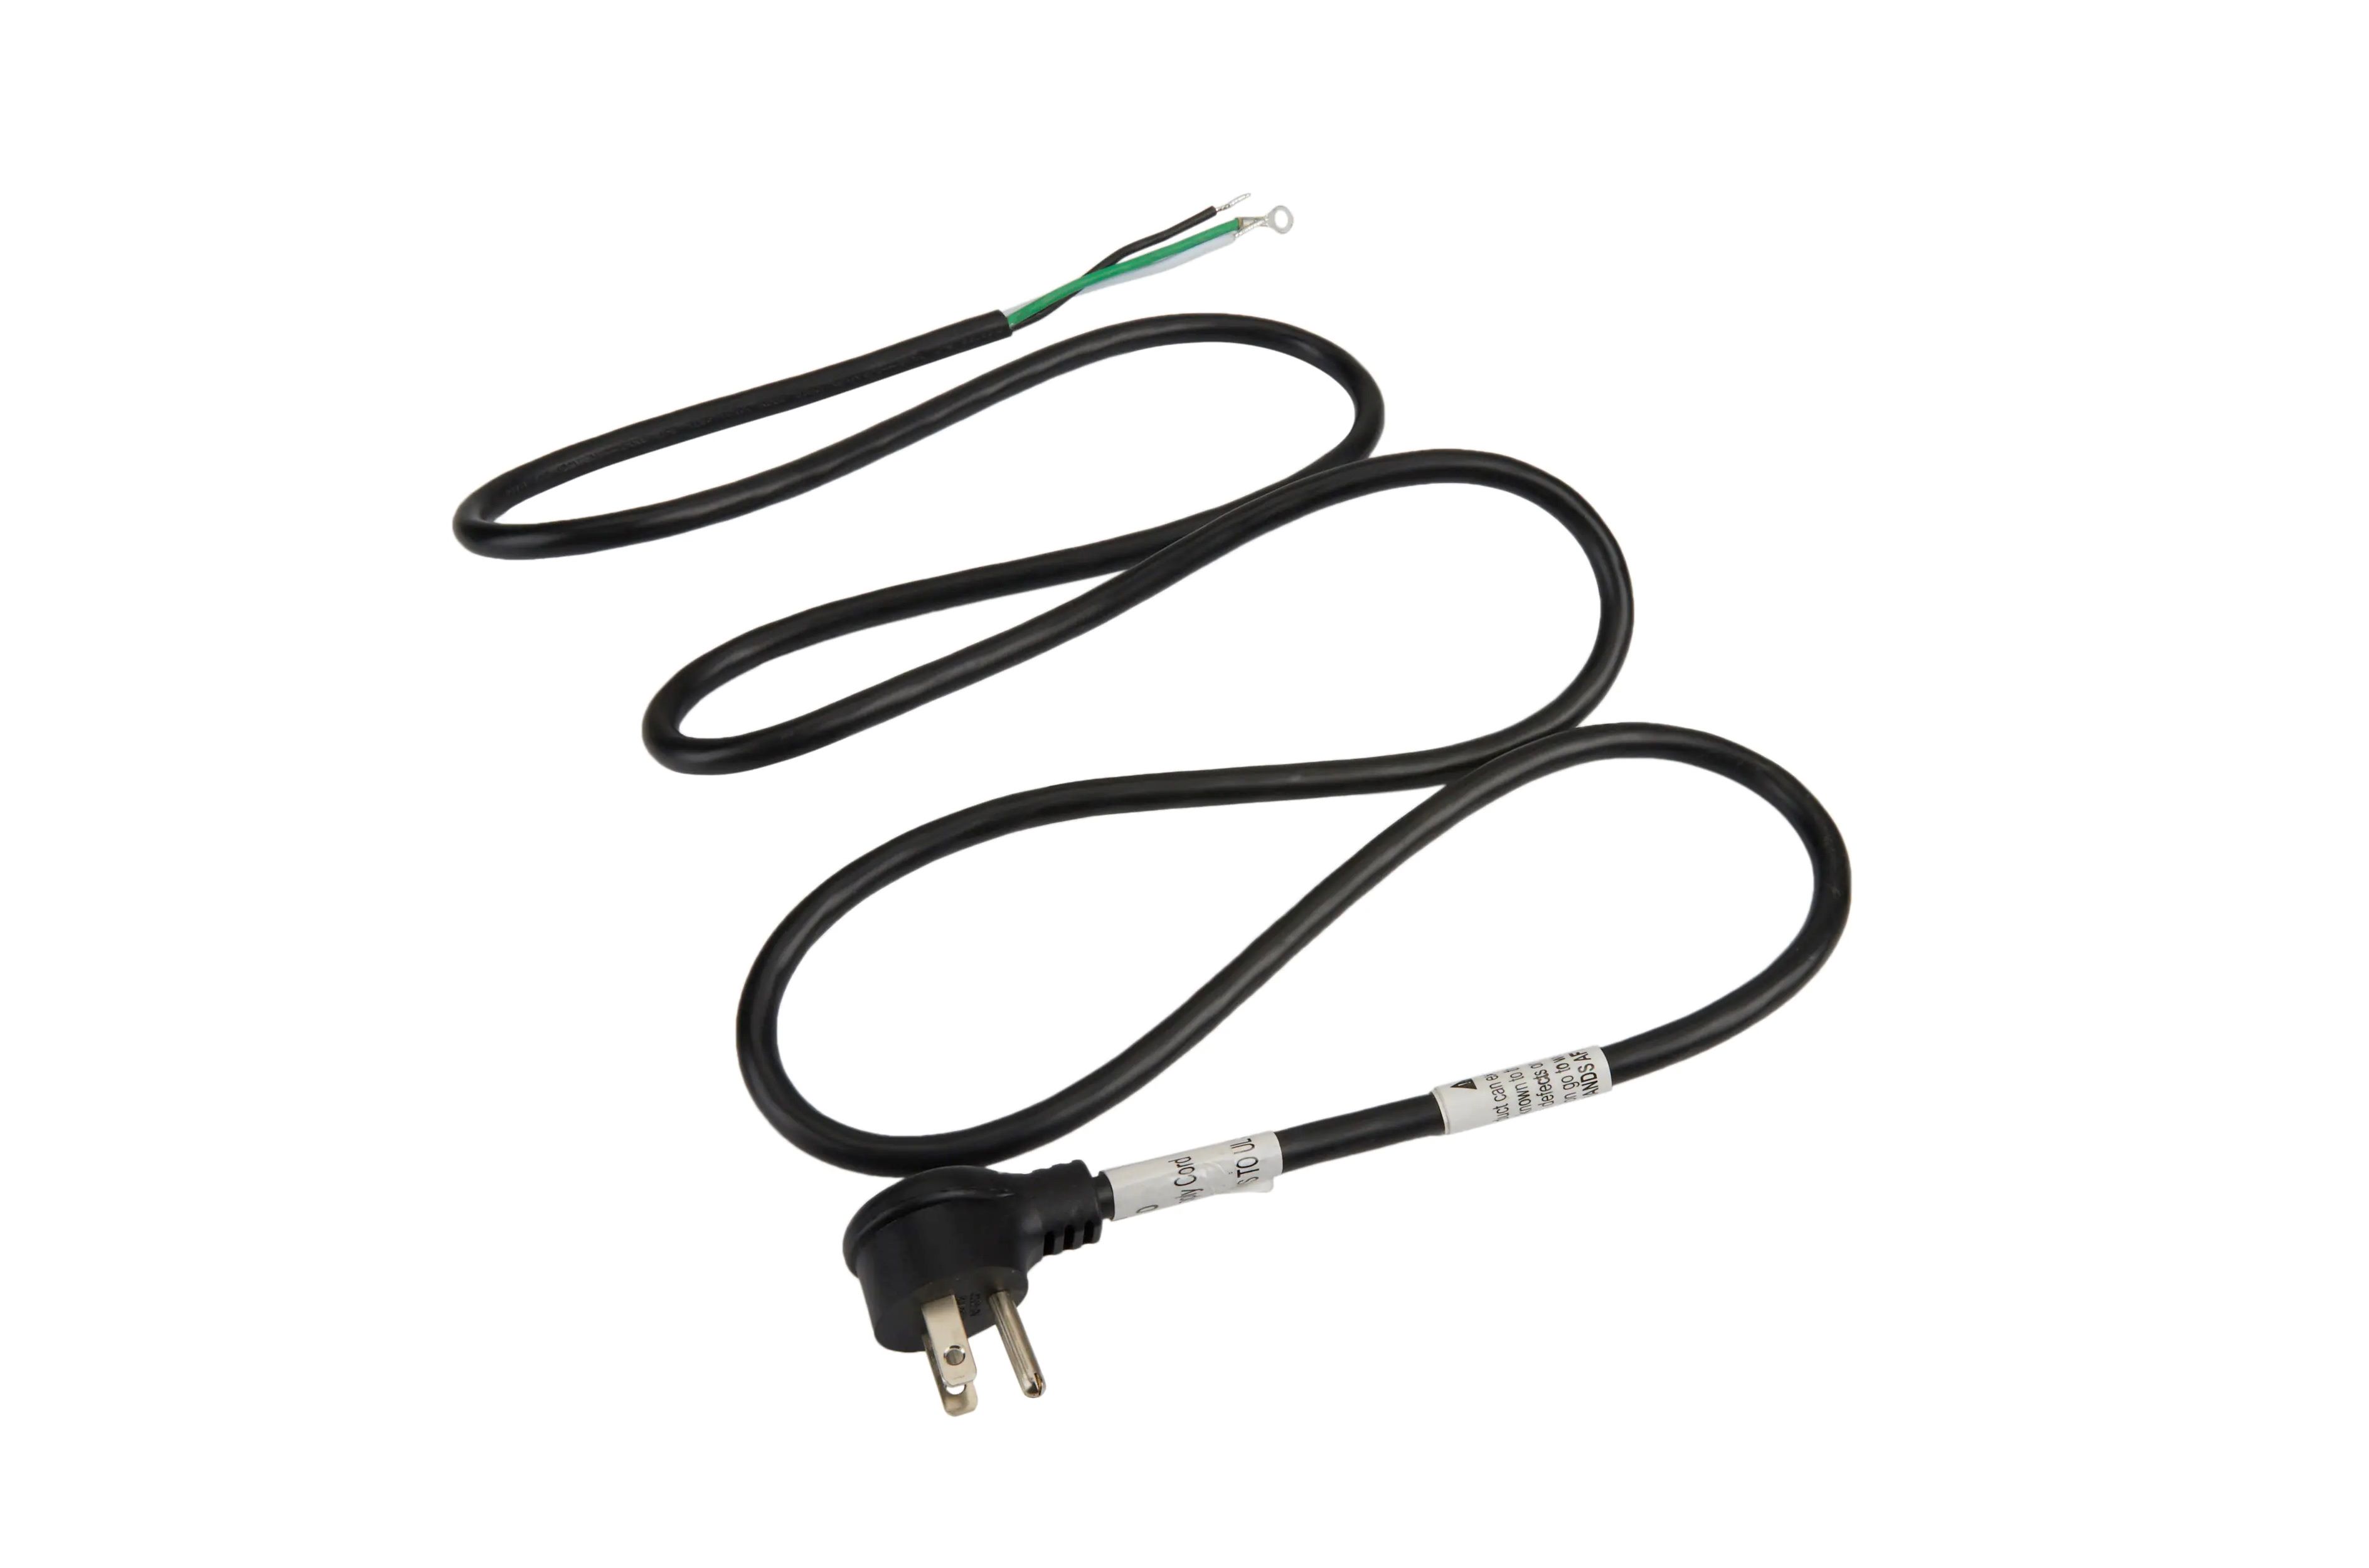
Step 5: Prepare the replacement cord
If you have decided to replace the entire electrical cord rather than repairing it, you will need to prepare the replacement cord before proceeding with the installation. This will involve matching the specifications of the original cord and ensuring a proper fit for your Krups Type F506 P Mixer.
Here’s how to prepare the replacement cord:
- Choose the right replacement cord: Look for a replacement cord that matches the specifications of the original cord. Check the voltage, current rating, and cord length to ensure compatibility with your mixer. You can find replacement cords at hardware stores or online retailers.
- Check the connectors: Verify that the replacement cord has the appropriate connectors or terminals that will fit into your mixer. It’s important to ensure a secure and snug connection for safety and proper functionality.
- Measure and cut the replacement cord: If necessary, measure the length of the original cord and cut the replacement cord to match that length. Use wire cutters to make a clean cut, ensuring that you have enough length to comfortably connect the cord to the mixer.
- Strip the insulation from the cut ends: Use wire strippers to remove the insulation from the cut ends of the replacement cord. Make sure to strip enough insulation to expose the necessary amount of wire for connection.
- Inspect the replacement cord: Take a moment to inspect the replacement cord for any visible damage or defects. It’s crucial to ensure that you are using a high-quality and safe replacement cord for your mixer.
By properly preparing the replacement cord, you will be ready to move on to the next step of connecting it to your Krups Type F506 P Mixer. Ensure that you have gathered all the necessary tools and materials before proceeding with the installation process.
Remember, if you’re unsure about any aspect of the replacement cord or the installation process, it’s always recommended to seek professional assistance for guidance and support.
Step 6: Connect the new cord to the mixer
With the replacement cord prepared, it’s time to connect it to your Krups Type F506 P Mixer. This step will ensure a secure and proper electrical connection, allowing the mixer to operate safely and effectively.
Follow these steps to connect the new cord to your mixer:
- Locate the cord entry point: Examine your mixer to find the area where the original cord was connected. This is typically located on the back or bottom of the mixer.
- Ensure the mixer is still unplugged: Double-check that the mixer remains disconnected from the power source throughout this process to ensure safety.
- Insert the new cord into the cord entry point: Gently insert the stripped ends of the replacement cord into the corresponding terminals or connectors inside the cord entry point. Follow any specific instructions or markings to ensure proper alignment.
- Secure the connection: If your mixer has screws or clamps to secure the cord in place, tighten them to ensure a reliable connection. This will prevent the cord from accidentally getting pulled out during use.
- Double-check the connection: Take a moment to verify that the wires are securely connected, and there is no exposed copper or loose connections. Ensuring a tight and reliable electrical connection is crucial for safety and proper functionality.
Once you have successfully connected the new cord to your mixer, you can proceed to the next step of testing the cord for proper functionality.
Remember, if you’re unsure about any aspect of connecting the new cord or encountering any difficulties, it’s always wise to consult the manufacturer’s instructions or seek professional assistance for guidance.
Step 7: Test the cord for proper functionality
After connecting the new cord to your Krups Type F506 P Mixer, it’s crucial to test it for proper functionality and safety. This step will ensure that the electrical connection is secure and that the mixer can operate without any issues.
Here’s how you can test the cord for proper functionality:
- Double-check the connections: Verify that all the wires are securely connected and that there are no loose connections or exposed copper. This ensures a reliable electrical connection.
- Plug in the mixer: Once you have confirmed the connections, plug the mixer into a power outlet. Make sure the outlet is functioning correctly.
- Turn on the mixer: Switch on the mixer using the designated power button or control. Observe the mixer to ensure that it powers up and operates as expected.
- Check for any signs of malfunctions: While the mixer is running, pay attention to any unusual sounds, vibrations, or sparks. These can be indicators of underlying issues with the cord or other components.
- Monitor for any heat buildup: Touch the cord and surrounding areas to check for excessive heat. A warm cord is normal, but if it becomes hot to the touch, it could signal a problem that needs further attention.
If you notice any abnormalities during the testing process, such as the mixer not functioning correctly or the cord exhibiting signs of malfunction, immediately unplug the unit and reassess the connections. It may be necessary to seek professional assistance or consult the manufacturer for further guidance.
However, if everything appears to be functioning properly and the cord operates safely, you can proceed to the final step of reassembling the mixer and securing the new cord in place.
Remember, safety should be your top priority throughout the testing phase. If you have any concerns or doubts, it’s always best to reach out to a professional for assistance.
Step 8: Reassemble the mixer and secure the new cord in place
With the cord tested and confirmed to be in proper working order, it’s time to reassemble your Krups Type F506 P Mixer and secure the new cord in place. This step will ensure the overall stability and safety of the appliance.
Follow these steps to reassemble the mixer and secure the new cord:
- Turn off the mixer and unplug it: Before proceeding with reassembling the mixer, make sure it is switched off and disconnected from the power source.
- Reattach any removable parts: If you had removed any attachments or accessories earlier, now is the time to reattach them. Secure them tightly according to the manufacturer’s instructions.
- Position the new cord correctly: Ensure that the new cord is positioned in a way that avoids any potential strain or tension when operating the mixer. Make sure it is not in the way of any moving parts or sharp edges.
- Secure the cord in place: If your mixer has specific cord clamps, brackets, or holders, use them to secure the new cord in place. This will prevent the cord from becoming entangled or getting pulled out accidentally.
- Double-check the connections: Once the cord is secured, double-check that all the electrical connections are intact and secure. Ensure that there are no loose wires or exposed copper.
- Perform a final visual inspection: Look over the entire mixer to make sure there are no loose screws, missing parts, or any other issues that could affect the performance of the appliance.
Once you have completed these steps and are satisfied with the reassembling process, you can enjoy using your Krups Type F506 P Mixer, knowing that the new cord is safely and securely in place.
Remember to periodically check the cord and the overall condition of your mixer for any signs of wear or damage. Regular maintenance and care will help prolong the lifespan of your appliance and ensure continued safe operation.
Congratulations! You have successfully fixed the electrical cord on your Krups Type F506 P Mixer. By following these steps, you have saved time and money while ensuring the safety and functionality of your appliance.
Read more: Types Of Fires Caused By Electrical Cords
Conclusion
Repairing the electrical cord on your Krups Type F506 P Mixer is a simple process that can save you time and money. By following the step-by-step guide outlined in this article, you can safely and effectively fix the cord yourself, without the need for professional assistance.
Remember to always prioritize safety throughout the repair process. Unplugging the mixer and taking precautions when handling the electrical components will help prevent any accidents or electrical hazards.
Gathering the necessary tools and materials, examining the cord for damage, cutting and stripping the damaged portion, and preparing the replacement cord are important initial steps to ensure a successful repair. Connecting the new cord securely to the mixer, testing it for proper functionality, and reassembling the appliance are equally crucial to ensure the cord functions safely and efficiently.
Regular maintenance, such as periodically inspecting the cord and overall condition of your mixer, will help identify and address any potential issues before they worsen. By caring for your appliance, you can extend its lifespan and continue to enjoy its functionality for many years to come.
Remember, if you have any doubts or concerns throughout the process, it’s always a good idea to consult the manufacturer’s instructions or seek professional assistance.
By successfully repairing the electrical cord on your Krups Type F506 P Mixer, you have demonstrated your resourcefulness and ability to DIY. Implementing these repair skills not only saves you money but also empowers you to handle other appliance repair tasks in the future.
Thank you for following this comprehensive guide. We hope that you have found it valuable and that it has helped you resolve the issue with your mixer. Enjoy using your newly repaired appliance!
Frequently Asked Questions about How To Fix The Electrical Cord On A Krups Type F506 Mixer
Was this page helpful?
At Storables.com, we guarantee accurate and reliable information. Our content, validated by Expert Board Contributors, is crafted following stringent Editorial Policies. We're committed to providing you with well-researched, expert-backed insights for all your informational needs.


0 thoughts on “How To Fix The Electrical Cord On A Krups Type F506 Mixer”