Home>Articles>How To Fix The Electrical Cord On A Brown Mixer
Articles
How To Fix The Electrical Cord On A Brown Mixer
Modified: August 20, 2024
Learn how to fix the electrical cord on a brown mixer with these helpful articles. Fix your appliance and get back to baking in no time!
(Many of the links in this article redirect to a specific reviewed product. Your purchase of these products through affiliate links helps to generate commission for Storables.com, at no extra cost. Learn more)
Introduction
When you rely on your trusty brown mixer to whip up delicious meals in the kitchen, the last thing you want is for its electrical cord to become damaged. A frayed or broken cord not only poses a safety hazard but can also prevent you from using your mixer altogether. Fortunately, fixing the electrical cord on a brown mixer is a relatively straightforward process that you can do yourself with a few simple tools and materials.
In this step-by-step guide, we will walk you through the process of repairing the electrical cord on your brown mixer. Whether the cord is frayed, has a loose connection, or needs to be completely replaced, we’ve got you covered. By following these instructions, you’ll be able to restore your mixer’s electrical cord to its full functionality and get back to creating culinary masterpieces in no time.
Before we dive into the repair process, it’s essential to ensure your safety. Always unplug the mixer from the power source before attempting any repairs. Additionally, take precautionary measures to avoid electrocution, such as wearing rubber gloves and working in a well-lit area.
Now that we’ve covered the basics, let’s gather the necessary tools and materials to get started.
Key Takeaways:
- Safety First
Before attempting to fix the electrical cord on your brown mixer, always prioritize safety by unplugging the appliance and creating a well-lit, clutter-free work environment to avoid any accidents. - Secure and Test
After replacing the cord, ensure it’s neatly arranged, secured with cable ties, and tested for proper functionality. This will prolong the life of your mixer and keep your kitchen safe.
Tools and Materials Needed
Before you begin the process of fixing the electrical cord on your brown mixer, make sure you have the following tools and materials at hand:
- Wire cutters or scissors: You’ll need these to cut and strip the wires.
- Electrical tape: This will be used to secure the connections and provide insulation.
- Screwdriver: Depending on your mixer model, you may need a screwdriver to access the internal components.
- New replacement cord: If the cord is damaged beyond repair, you will need a new one that matches the specifications of your brown mixer.
- Heat shrink tubing (optional): This can be used for added protection and to give the repaired cord a professional finish.
- Marker or label maker: It’s a good idea to label the wires or take note of their colors to ensure correct reconnection.
Make sure all the tools and materials are within reach before you begin the repair process. It’s always best to be prepared to avoid any interruptions or delays.
Once you have everything you need, move on to the next step: assessing the damage to your brown mixer’s electrical cord.
Step 1: Unplugging the Mixer
The first and most important step in repairing the electrical cord on your brown mixer is to ensure that it is completely unplugged from the power source. This is crucial to prevent any risk of electric shock while working on the cord.
Take a moment to locate the power cord on your mixer and trace it to its source. It may be connected to a wall outlet or a power strip. Carefully unplug the cord from the power source and ensure that it is disconnected completely.
Once the mixer is unplugged, it’s a good idea to move it to a well-lit and spacious area. This will allow you to have enough room to work comfortably during the repair process. Clear any clutter or obstacles around the mixer to minimize the risk of accidents.
Remember, safety is paramount when dealing with electrical appliances, so take the time to unplug the mixer and create a safe work environment before proceeding to the next steps.
With the mixer safely disconnected from the power source, we can now move on to step 2: assessing the damage to the electrical cord.
Step 2: Assessing the Damage
Now that the mixer is unplugged, it’s time to assess the damage to the electrical cord. This step will help you determine the severity of the issue and decide whether the cord can be repaired or needs to be replaced entirely.
Start by carefully examining the entire length of the cord, checking for any visible signs of damage such as fraying, cuts, or exposed wires. Pay close attention to areas near the plug and where the cord connects to the mixer. If you notice any damage, it’s crucial to address it promptly to avoid further complications.
If the damage appears minor, such as a small section of exposed wire or a loose connection, you may be able to repair it yourself. However, if the cord is severely frayed, has multiple cuts, or the damage is extensive, it is recommended to replace the cord entirely to ensure the safety and reliability of your brown mixer.
Once you have assessed the damage and made a decision about the course of action, you can proceed to the next step: gathering the necessary parts for the repair.
Note: If you are unsure about the severity of the damage or how to proceed with the repair, it is always best to consult a professional or contact the manufacturer for guidance.
Step 3: Gathering the Necessary Parts
After assessing the damage to the electrical cord on your brown mixer, it’s time to gather the necessary parts for the repair. Depending on the severity of the damage, you may need to acquire specific components to ensure a successful repair.
If the cord only requires minor repairs, such as patching up exposed wires or fixing loose connections, you may need the following materials:
- Electrical tape: This will be used to secure and insulate any exposed wires.
- Heat shrink tubing (optional): If you want to provide additional protection and a professional finish to the repaired cord, heat shrink tubing can be used.
If, on the other hand, the cord has sustained significant damage that cannot be easily repaired, you may need to purchase a replacement cord that matches the specifications of your brown mixer.
It’s important to ensure that you have all the necessary parts and materials before proceeding with the repair. This will prevent any delays or interruptions during the process and help you complete the repair efficiently.
Once you have gathered all the required parts, you can move on to the next step: preparing the replacement cord (if necessary) for installation.
Note: If you are unsure about the specific parts or materials you need for the repair, refer to your mixer’s user manual or contact the manufacturer for assistance.
Read more: How To Fix Chewed Electrical Cord
Step 4: Preparing the Replacement Cord
If you have determined that the damaged electrical cord on your brown mixer cannot be repaired and needs to be replaced, it’s time to prepare the replacement cord for installation.
Before purchasing a new cord, make sure to check the specifications of your brown mixer to ensure that you get the correct replacement. Look for details such as the cord length, the type of plug required, and any specific compatibility requirements.
Once you have procured the replacement cord, follow these steps to prepare it for installation:
- Uncoil the new cord: Carefully unravel the replacement cord, ensuring that it is free from any knots or tangles.
- Trim the cord to the appropriate length: Depending on the length of the original cord, you may need to trim the replacement cord to the correct size. Use wire cutters or scissors to make a clean cut.
- Strip the ends of the cord: Use wire strippers or a sharp knife to remove about 1 inch of insulation from the ends of the cord. This will expose the wires and allow for proper connection.
- If using heat shrink tubing: If you have opted to use heat shrink tubing for added protection, cut pieces of tubing that are slightly longer than the stripped ends of the cord. Slide the tubing over the exposed wires.
- Secure the tubing with heat: If using heat shrink tubing, use a heat gun or a hairdryer on medium heat to evenly shrink the tubing and provide a tight seal.
- Label the wires: Use a marker or label maker to mark or label each wire. This step is important for ensuring correct reconnection later on.
Once you have prepared the replacement cord, you are ready to proceed to step 5: removing the damaged cord from your brown mixer.
Note: If you are unsure about any of these steps or have difficulty preparing the replacement cord, consult a professional or seek guidance from the manufacturer.
When fixing the electrical cord on a brown mixer, first unplug the mixer and carefully inspect the cord for any damage. If there are any exposed wires or fraying, it’s best to replace the entire cord to ensure safety.
Step 5: Removing the Damaged Cord
Now that you have prepared the replacement cord for your brown mixer, it’s time to remove the damaged cord from the appliance. This step will involve disconnecting the old cord and preparing the mixer for the installation of the new one.
Follow these steps to remove the damaged cord:
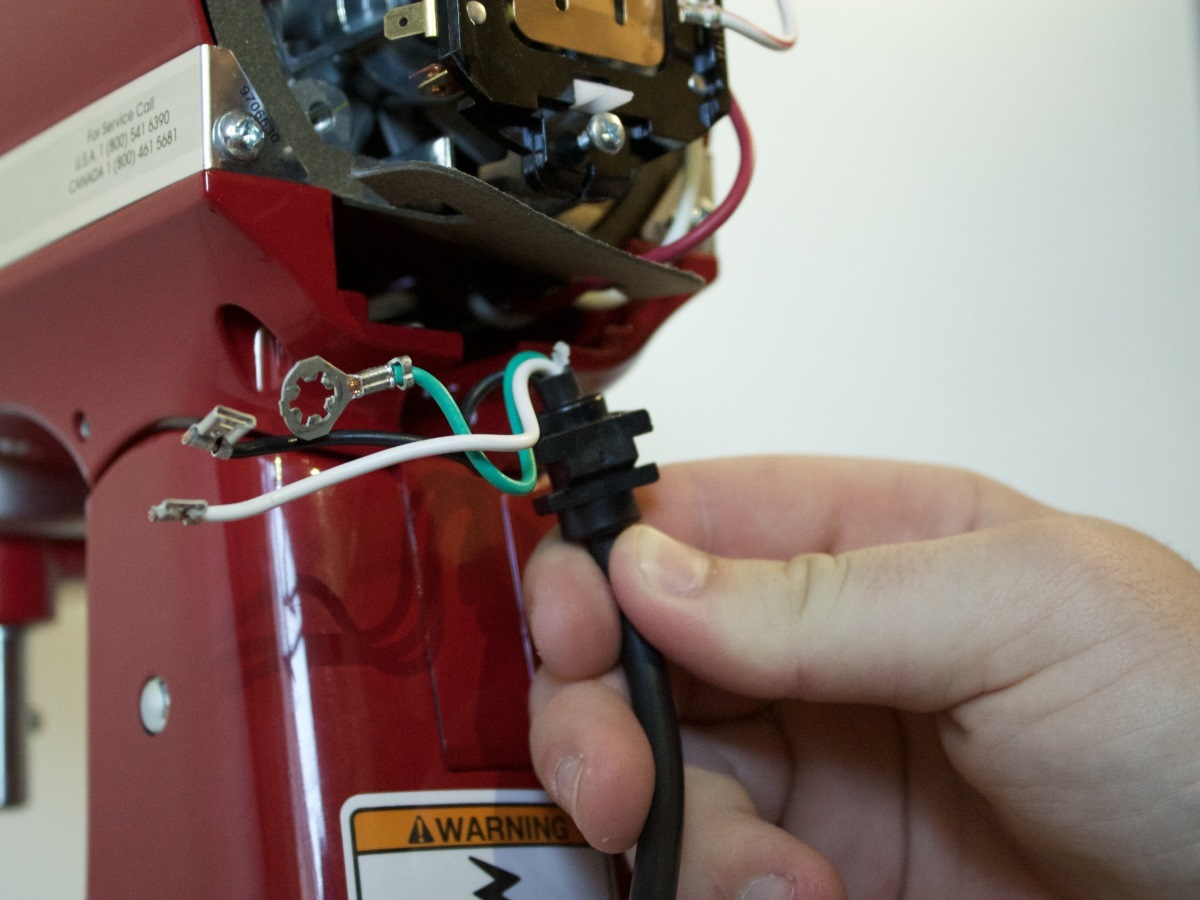
- Locate the power cord entry point: Examine the back or bottom of your brown mixer to find the entry point where the power cord is connected.
- Inspect the cord connection: Depending on the model of your mixer, the cord may attach via a plug or through a screw connection. Assess how the cord is secured to the mixer, as this will determine how you remove it.
- If it is a plug connection: Simply unplug the cord from the mixer by gripping the plug firmly and pulling it out of the socket.
- If it is a screw connection: Use a screwdriver to loosen and remove any screws securing the cord to the mixer. Take note of the location and number of screws for reconnection later.
- Gently pull the damaged cord out: Once the connection is loosened or disconnected, carefully pull the damaged cord out of the mixer. Take care not to damage any internal components as you remove it.
With the damaged cord successfully removed, we can now move on to the next step: connecting the replacement cord to your brown mixer.
Note: If you encounter any difficulties or are unsure about removing the cord, consult the mixer’s user manual or seek guidance from the manufacturer.
Step 6: Connecting the Replacement Cord
With the damaged cord removed from your brown mixer, it’s time to connect the replacement cord. Follow these steps carefully to ensure a proper and secure connection:
- Locate the cord entry point: Find the spot on your mixer where the replacement cord needs to be inserted. This is usually the same entry point where the old cord was connected.
- If necessary, open the access panel: Some mixers may have an access panel that needs to be removed to reach the cord connection point. Use a screwdriver to remove any screws, if applicable, and carefully remove the panel.
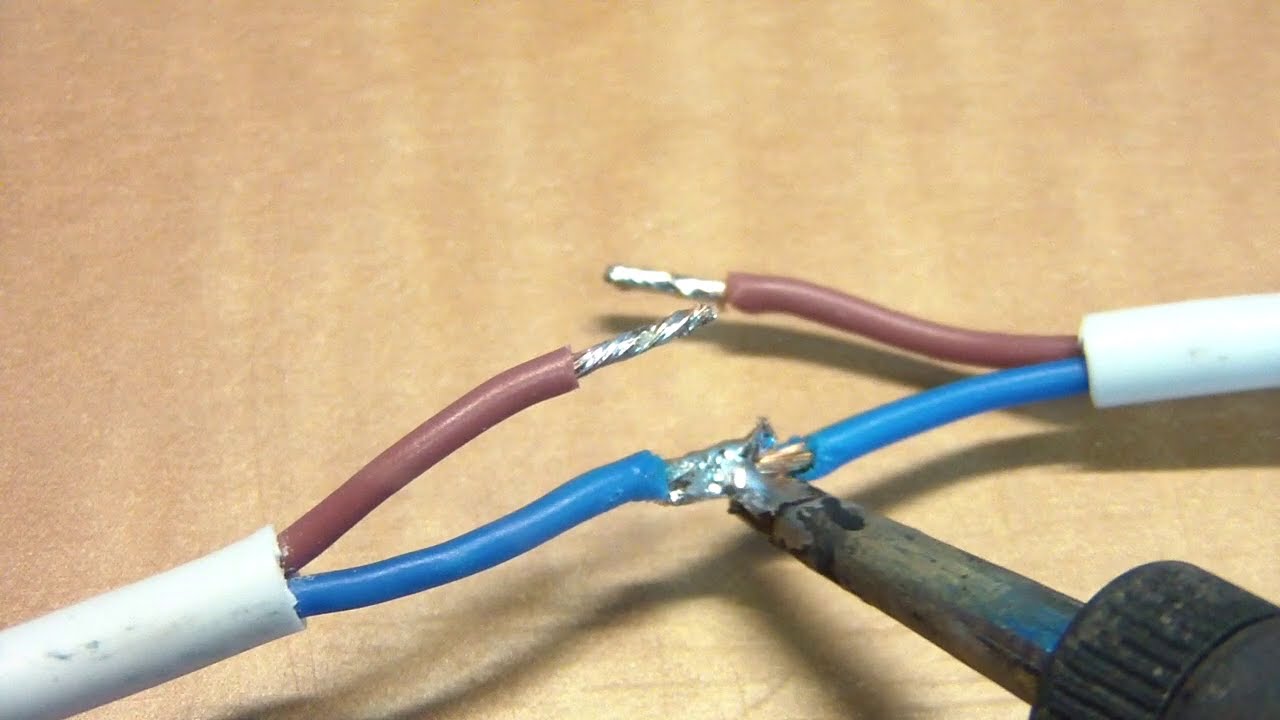
- Identify the wire connections: Examine the replacement cord and locate the individual wires. Usually, there will be three wires: live (typically black or red), neutral (typically white or blue), and ground (green or bare copper).
- Match the wires: Compare the colors or markings on the replacement cord wires with the corresponding labels or markings on the mixer’s wire terminals. Make sure to match the wires correctly to avoid any electrical issues.
- If using heat shrink tubing: Slide the tubing over the exposed ends of the replacement cord’s wires, ensuring it covers the stripped portion completely.
- Connect the wires: Insert each wire into its corresponding terminal, making sure they are securely fitted. Use a screwdriver to tighten any screws if necessary. Make sure the connections are tight and secure to ensure proper electrical contact.
- If using heat shrink tubing: Use a heat gun or hairdryer on medium heat to evenly shrink the tubing around the wire connections. This will provide insulation and protection.
- If an access panel was removed, reattach it: If you had to remove an access panel, use a screwdriver to reattach it securely.
Once you have successfully connected the replacement cord, we can move on to the next step: testing the mixer to ensure everything is functioning correctly.
Note: If you are uncertain about any of the wire connections or encounter any difficulties, consult the mixer’s user manual or contact the manufacturer for assistance.
Step 7: Testing the Mixer
Now that the replacement cord is securely connected to your brown mixer, it’s important to test the appliance to ensure that all the electrical connections are functioning correctly. Follow these steps to test the mixer:
- Double-check the cord connections: Before plugging the mixer back in, visually inspect the cord connections to make sure they are secure and properly aligned. Ensure that there are no loose wires or exposed terminals.
- Position the mixer for testing: Place the mixer on a stable surface, ensuring that it is clear from any obstructions.
- Plug the cord into a power source: Carefully insert the other end of the replacement cord into a wall outlet or a power strip.
- Switch on the mixer: Locate the power switch on your mixer, typically found on the main control panel. Flip the switch to the “On” position.
- Listen for power indication: If the mixer has a power indicator light or a sound that indicates it’s turned on, check if it lights up or makes the expected sound.
- Test the mixer functions: Depending on the type of mixer you have, test its various functions such as speed settings, pulse feature, or any special modes. Run the mixer for a short duration to ensure it operates smoothly without any issues.
If the mixer turns on and functions properly without any abnormalities or strange sounds, congratulations! You have successfully repaired the electrical cord on your brown mixer.
However, if you notice any issues, such as the mixer not turning on, erratic operation, or unusual noises, immediately unplug the mixer from the power source and reassess the cord connections. Double-check that all the wire connections are secure and properly matched.
If problems persist after rechecking the connections, it is advisable to seek professional assistance or contact the manufacturer for guidance.
Assuming the mixer functions correctly during testing, let’s move on to the final step: securing the new cord to ensure long-lasting reliability.
Read more: How To Fix Cut Electrical Cord
Step 8: Securing the New Cord
Now that you have successfully tested the brown mixer and ensured that it is functioning properly with the replacement cord, it is time to secure the new cord to prevent any future damage or issues. Follow these steps to secure the new cord:
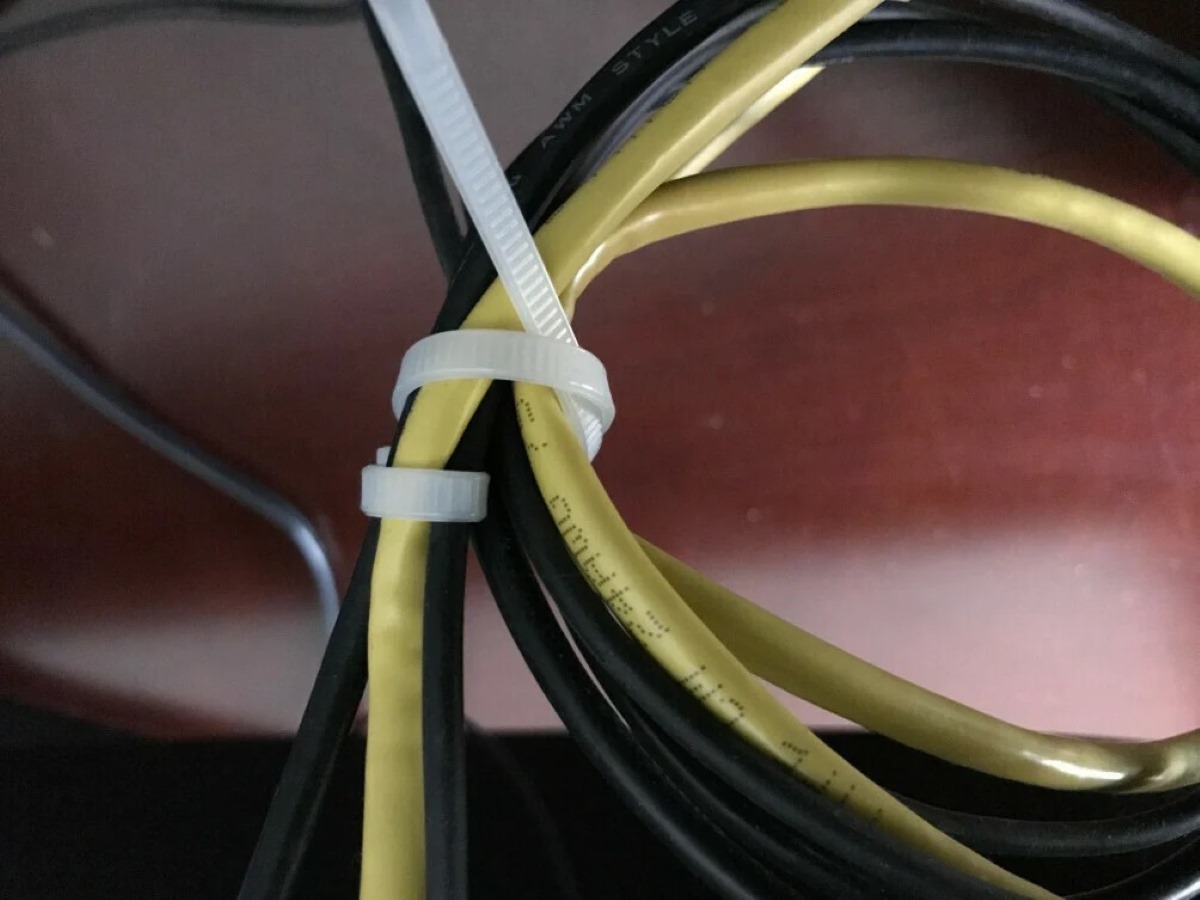
- Arrange the cord neatly: Take a few moments to arrange the cord in a neat manner, avoiding any twists, kinks, or tangles. This will help prevent future strain on the cord.
- Use cable ties or cord clips: Secure the cord to the mixer’s body using cable ties or cord clips. This will help keep the cord in place and prevent it from getting tangled or caught on objects.
- Route the cord away from heat sources or sharp edges: Make sure the cord is routed away from any heat sources, such as stove burners, and sharp edges that could potentially damage or cut the cord.
- If applicable, reattach any access panels: If you had to remove any access panels during the repair process, use a screwdriver to reattach them securely.
By securing the new cord properly, you are prolonging the lifespan of your brown mixer and reducing the risk of future damage or accidents.
Congratulations! You have now successfully fixed the electrical cord on your brown mixer. With the replacement cord in place and properly secured, you can confidently continue to use your mixer for all your culinary adventures.
Remember to always exercise caution when using electrical appliances and regularly inspect cords for signs of wear or damage. If you notice any issues or have concerns, it is best to address them promptly to maintain a safe kitchen environment.
Thank you for following this step-by-step guide. We hope it has been helpful in resolving the issue with your mixer’s electrical cord and getting you back to creating delicious meals and treats!
Happy cooking!
Conclusion
Repairing the electrical cord on your brown mixer is a task that can be accomplished with a little know-how and the right tools. By following the step-by-step guide outlined in this article, you can tackle the task with confidence and get your mixer back in working order.
We started by emphasizing the importance of safety, urging you to always unplug the mixer before attempting any repairs. We then went through the process of assessing the damage and gathering the necessary tools and materials for the repair.
With the replacement cord in hand, we prepared it for installation and carefully removed the damaged cord from the mixer. We then navigated through the process of connecting the new cord, ensuring that the wires were correctly matched and securely fastened.
After conducting a thorough testing of the mixer to ensure everything was functioning as expected, we moved on to the final step of securing the new cord to avoid any future issues. By neatly arranging the cord and using cable ties or cord clips, we took measures to protect the cord and prolong the life of our brown mixer.
By following these steps, you have successfully repaired the electrical cord on your brown mixer. It is crucial to prioritize safety when working with electrical appliances, so always exercise caution and consult a professional if you are unsure about any aspect of the repair.
We hope this comprehensive guide has provided you with the knowledge and confidence to fix the electrical cord on your brown mixer. Remember to keep an eye on the cord for any signs of wear or damage in the future, and address any issues promptly to maintain a safe and efficient kitchen environment.
Now that your brown mixer is back in action, it’s time to let your culinary creativity shine and whip up some delicious treats. Enjoy the benefits of a functional mixer and happy cooking!
Frequently Asked Questions about How To Fix The Electrical Cord On A Brown Mixer
Was this page helpful?
At Storables.com, we guarantee accurate and reliable information. Our content, validated by Expert Board Contributors, is crafted following stringent Editorial Policies. We're committed to providing you with well-researched, expert-backed insights for all your informational needs.


0 thoughts on “How To Fix The Electrical Cord On A Brown Mixer”