
Articles
How To Hide Electrical Box On Wall
Modified: August 23, 2024
Learn effective techniques and creative ways to hide your electrical box on the wall with these informative articles.
(Many of the links in this article redirect to a specific reviewed product. Your purchase of these products through affiliate links helps to generate commission for Storables.com, at no extra cost. Learn more)
Introduction
Electrical boxes are an essential part of any home’s electrical system. They house the connections and mechanisms that keep your lights, outlets, and appliances functioning. However, let’s face it – electrical boxes are not the most visually appealing elements to have on your walls. The sight of a plain and utilitarian box can disrupt the overall aesthetics of a room.
This is where the art of hiding an electrical box on the wall comes into play. Whether you want to conceal an exposed panel, fuse box, or junction box, there are multiple techniques and creative solutions to make it blend seamlessly with your decor. With a few tools and materials, you can transform an eyesore into a hidden gem.
In this article, we will explore various methods to hide an electrical box on the wall, providing you with step-by-step instructions and expert tips along the way. Whether you’re a DIY enthusiast or a homeowner looking to improve the look of your space, this guide will help you achieve a clean and polished finish.
Before diving into the techniques, it’s important to note that electrical boxes must always be accessible for safety reasons. Be sure to consult a licensed electrician or adhere to local building codes when making any modifications or concealing an electrical box. Additionally, always turn off the power supply and take necessary precautions when working with electricity.
Now, without further ado, let’s uncover the secrets of hiding an electrical box on the wall.
Key Takeaways:
- Concealing an electrical box on the wall is essential for maintaining a visually appealing and safe environment. By choosing a suitable concealing method and following proper installation and finishing steps, you can seamlessly integrate the box into your room’s design while prioritizing safety and aesthetics.
- Whether you opt for a decorative cover, a removable artwork or mirror, or a floating shelf or cabinet, each concealing method offers unique advantages for hiding an electrical box on the wall. Prioritize safety, follow the specific guidelines for each method, and enjoy the seamless integration into your room’s design.
Read more: How To Hide Outside Electrical Box
Why Hide an Electrical Box on the Wall?
You may wonder why it’s important to hide an electrical box on the wall when it serves a vital purpose in your home’s electrical system. There are several reasons why homeowners choose to conceal these boxes:
- Aesthetics: Electrical boxes can disrupt the visual harmony of a room, especially if they are placed in highly visible areas. By hiding them, you can create a cleaner and more appealing look.
- Interior Design: If you’ve put considerable effort into designing and decorating your home, an exposed electrical box can be an eyesore that detracts from the overall aesthetic. Concealing it allows you to maintain the integrity of your interior design.
- Furniture Placement: Sometimes, electrical boxes are located inconveniently behind furniture or near wall-mounted TVs, making it challenging to arrange your space. Hiding them frees up your options for furniture placement.
- Child Safety: If you have young children or curious pets, exposed electrical boxes can pose a safety risk. Concealing them eliminates the temptation for little ones to touch dangerous electrical components.
- Added Storage: Some hiding techniques, such as using a floating shelf or cabinet, provide additional storage space. This allows you to maximize the functionality of the area while disguising the presence of the electrical box.
These reasons highlight the importance of hiding an electrical box on the wall. By concealing it, you can create a more visually pleasing and safe environment while maintaining the functionality of your electrical system.
Tools and Materials Needed
Before you begin concealing an electrical box on the wall, gather the necessary tools and materials. The specific requirements may vary depending on the method you choose, but here are some general items that you may need:
Tools:
- Measuring tape
- Pencil or marker
- Level
- Screwdriver
- Drill
- Saw or cutting tool (if necessary)
- Sanding block or sandpaper
- Paintbrushes or rollers
Materials:
- Decorative cover materials (such as wood, fabric, or metal)
- Hanging hardware (hooks, brackets, etc.)
- Removable artwork, mirror, or panel
- Floating shelf or cabinet
- Paint or finish (matching the wall color or desired aesthetic)
- Fasteners (screws, nails, or wall anchors)
- Adhesive (if required)
These tools and materials will give you a general idea of what you may need. Depending on your chosen method, you may require additional items specific to that technique. Take the time to plan your project and ensure you have all the necessary tools and materials before getting started.
Remember, safety should always be a priority. When working with electrical components or tools, take precautions to protect yourself and follow proper safety guidelines. If you’re uncertain about any aspect of the project, consult a professional or licensed electrician for guidance.
Step 1: Assess the Electrical Box
Before you begin concealing an electrical box on the wall, it’s crucial to assess and understand the box’s dimensions, location, and any specific requirements. Taking the time to evaluate the electrical box will ensure that you choose the most suitable hiding method and make accurate measurements. Here’s how to assess the electrical box:
- Locate the box: Identify the exact location of the electrical box on the wall. It may be a junction box, a panel, or a fuse box. Ensure that you have easy access to it and that it complies with safety codes and regulations.
- Measure the dimensions: Measure the height, width, and depth of the electrical box. Use a measuring tape for accuracy. This step is essential as it will help you determine the size of any coverings or concealment materials you’ll need.
- Note the electrical connections: Pay attention to the electrical connections and wires that are housed within the box. Make a mental or written note of their placement and ensure that they remain accessible even after you conceal the box.
- Consider ventilation: If the electrical box requires ventilation to prevent overheating, make sure to factor this into your concealment plan. Some techniques, such as creating a decorative cover, may require incorporating vents or openings for proper airflow.
By thoroughly assessing the electrical box, you’ll have a clear understanding of its dimensions and specific requirements. This information will guide you in selecting the most suitable hiding method and ensure that you retain access to the electrical components when necessary. Taking the time to assess the box will make the rest of the project much smoother and more successful.
Step 2: Choose a Concealing Method
Once you have assessed the electrical box, it’s time to choose a concealing method that suits your preferences and complements your space. There are several creative techniques to hide an electrical box on the wall. Here are three popular options:
- Option 1: Create a Decorative Cover
- Option 2: Install a Removable Artwork or Mirror
- Option 3: Use a Floating Shelf or Cabinet
If you’re looking for a customizable and artistic approach, creating a decorative cover is an excellent choice. You can use materials such as wood, fabric, or metal to craft a cover that blends seamlessly with your room’s decor. Design the cover to match the style and theme of your space, ensuring that it complements the overall aesthetic.
An alternative method is to install a removable artwork or mirror over the electrical box. This technique allows you to hide the box while adding a functional and decorative element to your wall. Choose a piece of artwork or mirror that fits the dimensions of the electrical box and enhances the visual appeal of your room.
If you’re looking to maximize storage space while concealing the electrical box, consider using a floating shelf or cabinet. This method not only hides the box but also provides you with an additional area to display decorative items or store belongings. Ensure that the shelf or cabinet is securely installed and doesn’t obstruct access to the electrical components.
Consider the style of your room, the functionality you desire, and the complexity of the project when choosing a concealing method. Each option comes with its own set of requirements and considerations. Take into account factors such as the box’s dimensions, the availability of space, and the overall aesthetic you want to achieve.
By carefully selecting a concealing method that suits your needs and preferences, you’ll ensure a successful and visually pleasing outcome for your hidden electrical box.
Read more: How To Hide Electrical Cord On Wall
Option 1: Create a Decorative Cover
If you’re looking for a creative and customizable way to hide an electrical box on the wall, creating a decorative cover is a fantastic option. This method allows you to design a cover that seamlessly blends with your room’s decor. Here’s how you can create a decorative cover for your electrical box:
- Choose your materials: Select materials that match your desired aesthetic and the style of your room. You can use wood, fabric, metal, or a combination of these materials. Ensure that they are durable and suitable for the project.
- Measure and cut: Take precise measurements of the electrical box, including its height, width, and depth. Transfer these measurements to your chosen material and carefully cut it to size using a saw or cutting tool. Alternatively, you can have the material cut at a hardware store or hire a professional carpenter.
- Create openings: If the electrical box requires ventilation, incorporate openings or vents into your cover. These openings will ensure proper airflow and prevent the box from overheating. Use a drill or cutting tool to create the necessary openings, following safety guidelines and precautions.
- Attach the cover: Place the cover over the electrical box and fix it securely. Depending on the material used and the placement of the box, you can use adhesive, screws, nails, or brackets to attach the cover to the wall. Ensure that the cover is stable and doesn’t obstruct access to the electrical components when needed.
- Finish the cover: Sand any rough edges or surfaces of the cover to create a smooth finish. You can also paint or stain the cover to match the color of your wall or add decorative elements. Use a paintbrush or roller to apply the paint or finish, allowing it to dry completely before handling or mounting the cover.
Creating a decorative cover for your electrical box allows you to personalize the look and feel of your space while hiding the utilitarian box. Whether you opt for a rustic wooden cover, a fabric-covered design, or a sleek metal finish, this option provides endless possibilities for customization.
Remember to consult safety guidelines and building codes when concealing an electrical box. If you’re unsure about any aspect of the project, it’s always recommended to seek guidance from a professional electrician or contractor.
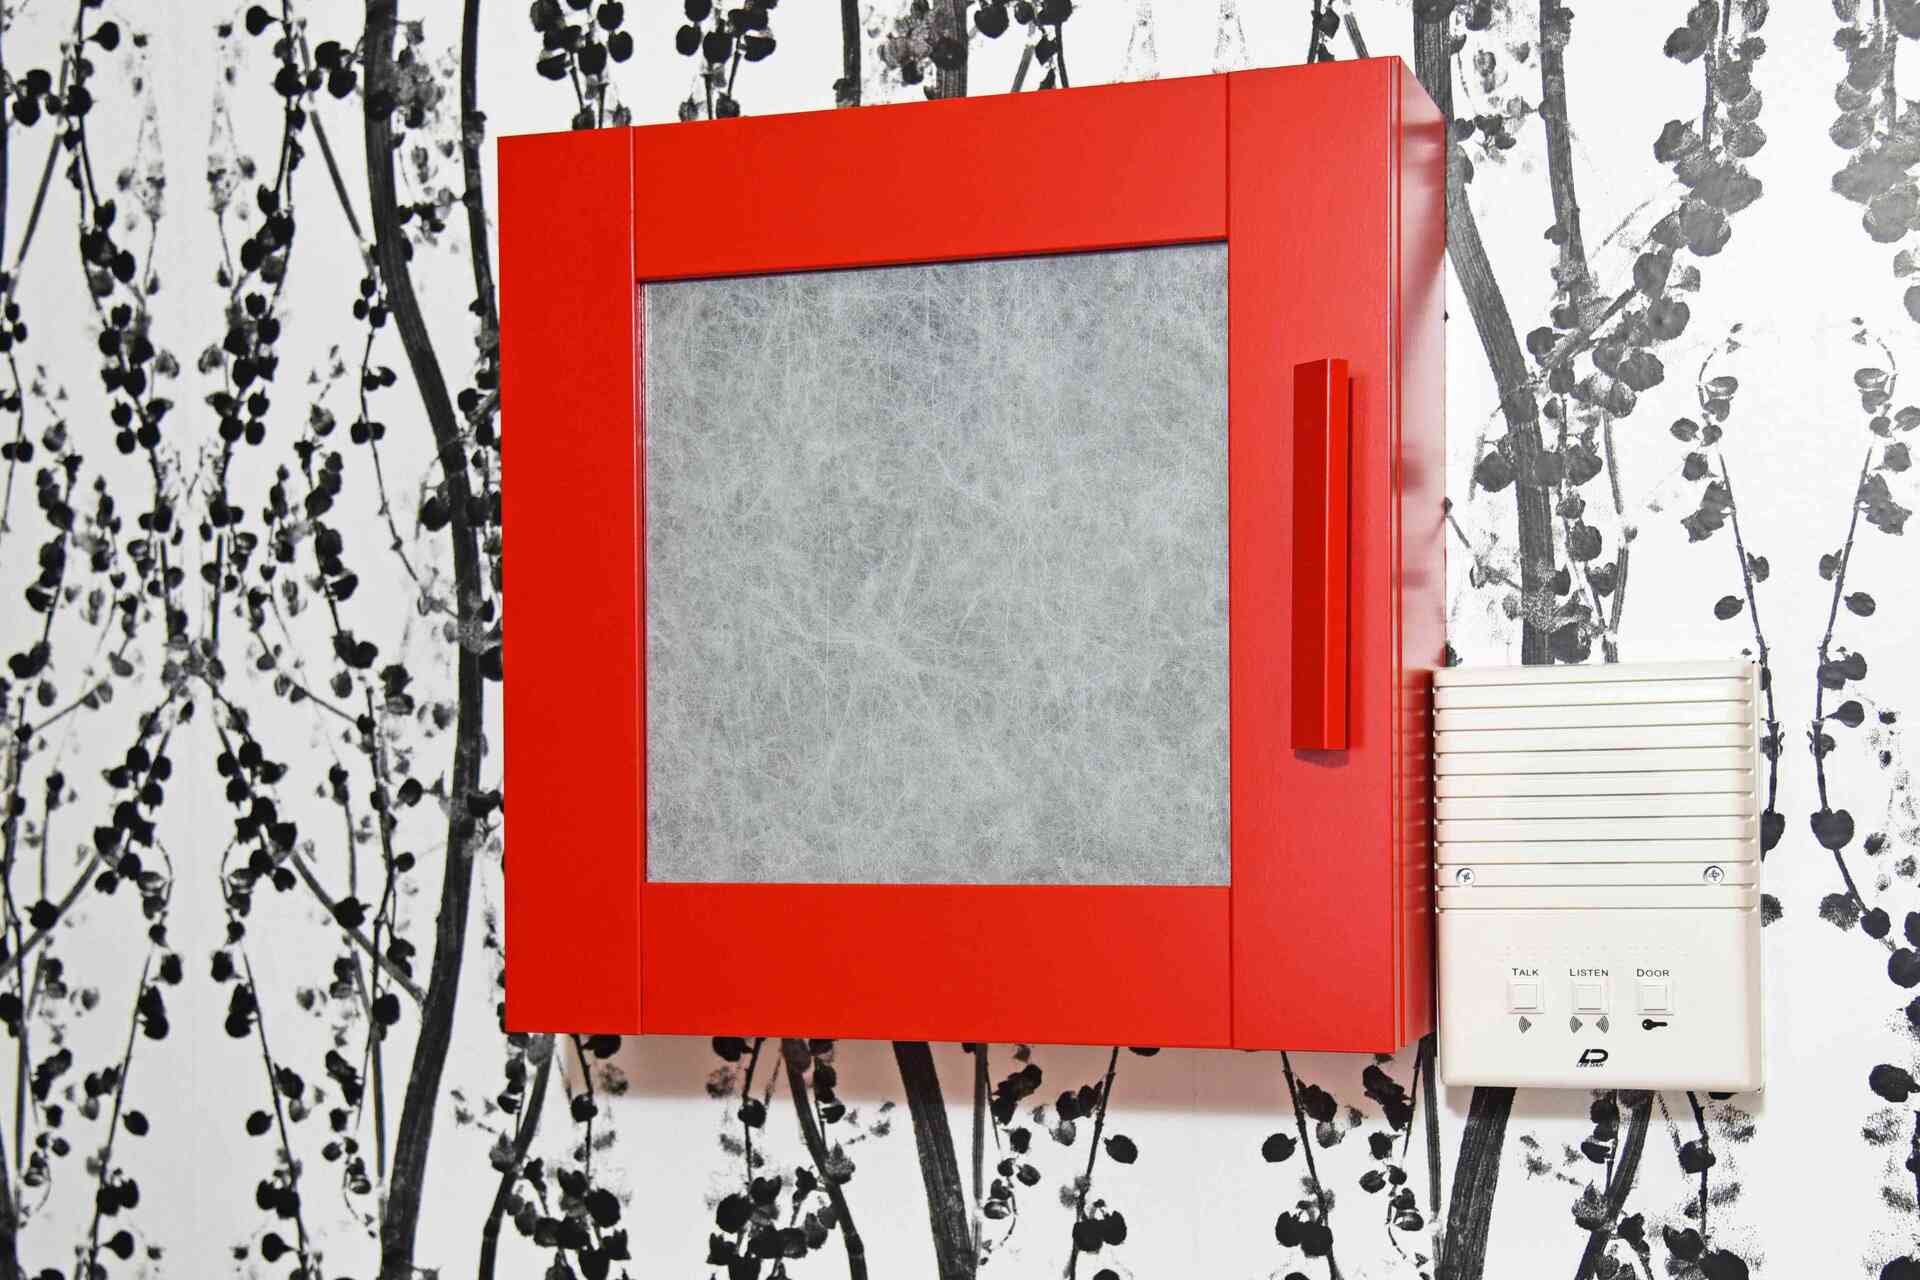
You can hide an electrical box on the wall by using a hinged painting or a decorative wall hanging to cover it. Just make sure the cover can easily be moved in case of an emergency.
Option 2: Install a Removable Artwork or Mirror
If you’re looking for a versatile and aesthetically pleasing way to hide an electrical box on the wall, consider installing a removable artwork or mirror. This option allows you to disguise the box while adding a functional and decorative element to your space. Follow these steps to successfully implement this method:
- Select the artwork or mirror: Choose a piece of artwork or a mirror that fits the dimensions of the electrical box and complements your room’s style. Consider the size, shape, and material of the artwork or mirror to ensure a seamless integration with your decor.
- Measure and mark: Measure the dimensions of the artwork or mirror, ensuring that it covers the electrical box completely. Use a measuring tape, level, and pencil to mark the desired placement on the wall. Double-check the measurements to ensure accuracy.
- Secure the wall mounting hardware: Depending on the weight of the artwork or mirror, choose appropriate wall mounting hardware, such as hooks, brackets, or picture hangers. Follow the manufacturer’s instructions to install the hardware securely on the wall. Ensure that the hardware can support the weight of the artwork or mirror.
- Hang the artwork or mirror: Carefully hang the artwork or mirror on the wall using the installed wall mounting hardware. Ensure that it is level and positioned correctly to cover the electrical box completely. Make any necessary adjustments to achieve the desired placement and alignment.
- Test the removability: Verify that the artwork or mirror can be easily removed to access the electrical box when needed. If it requires any special tools or complicated removal process, reconsider the method and choose an alternative that allows for easier access.
Installing a removable artwork or mirror not only conceals the electrical box but also adds visual interest and functionality to your space. It allows you to showcase your personal style and easily switch out the artwork or mirror whenever desired.
Remember to follow proper safety guidelines and consult with a professional if you have any concerns or uncertainties about the installation process. They can provide guidance on the appropriate weight limits, wall anchoring techniques, and overall safety considerations.
Option 3: Use a Floating Shelf or Cabinet
If you’re looking for a practical and space-saving way to hide an electrical box on the wall, using a floating shelf or cabinet is an excellent option. This method not only conceals the box but also provides additional storage or display space. Here’s how you can successfully implement this technique:
- Select the floating shelf or cabinet: Choose a floating shelf or cabinet that matches your room’s style and dimensions. Consider the weight capacity, size, and design of the shelf or cabinet to ensure it can effectively hide the electrical box while providing the desired functionality.
- Measure and mark: Measure the dimensions of the electrical box and mark the desired placement of the floating shelf or cabinet on the wall. Use a measuring tape, level, and pencil to ensure accurate measurements and alignment.
- Install the wall mounting hardware: Depending on the type of floating shelf or cabinet, follow the manufacturer’s instructions to install the appropriate wall mounting hardware. This may include brackets, screws, or wall anchors. Make sure the hardware is securely attached to the wall and can support the weight of the shelf or cabinet.
- Attach the shelf or cabinet: Place the floating shelf or cabinet onto the installed wall mounting hardware, ensuring it is level and securely attached. Double-check the alignment and adjust if necessary. Test the stability and weight-bearing capacity of the shelf or cabinet before proceeding further.
- Conceal the electrical box: Arrange your belongings, decorative items, or storage containers on the floating shelf or within the cabinet to effectively hide the electrical box. Make sure that the placement of objects does not obstruct access to the box when needed. Arrange items in an aesthetically pleasing and organized manner.
Using a floating shelf or cabinet not only conceals the electrical box but also maximizes storage space and adds a decorative element to your room. Whether you opt for a sleek and minimalist shelf or a stylish and functional cabinet, this option allows you to seamlessly integrate the electrical box into your room’s design.
Remember to check the weight-bearing capacity of the wall mounting hardware and ensure that it is securely installed. If you have any concerns or questions about the installation process, it’s best to consult a professional for guidance.
Step 3: Prepare the Surface
Before you can successfully hide an electrical box on the wall, it’s important to prepare the surface to ensure a smooth and seamless concealment. Preparing the surface involves a few key steps that will help you achieve a professional and polished finish. Here’s what you need to do:
- Clean the wall: Start by cleaning the wall around the electrical box. Remove any dust, dirt, or debris using a damp cloth or sponge. This will ensure that the concealment method adheres properly to the surface and prevents any imperfections from showing through.
- Repair any damage: Inspect the wall for any cracks, holes, or blemishes. Use a spackling compound or filler to patch up and smooth out any damaged areas. Allow the compound to dry completely, and then sand it down to create a seamless surface. This step is crucial for achieving a professional-looking concealment.
- Apply primer (if necessary): Depending on the concealment method and the type of surface you’re working with, you may need to apply a coat of primer. This is particularly important if you’re using a cover or artwork that requires a smooth and even surface for proper adhesion. Follow the manufacturer’s instructions when applying primer and allow it to dry completely before proceeding.
By thoroughly preparing the surface, you’ll create an ideal canvas for concealing the electrical box. A clean and smooth wall will ensure that your chosen concealment method adheres securely and seamlessly, resulting in a flawless finish.
Remember to take your time during this step and pay attention to detail. Small imperfections in the surface can affect the overall appearance of the concealment. If you’re unsure about any aspect of the surface preparation process, consider consulting a professional or doing further research to ensure the best results.
Step 4: Install the Concealment Method
With the surface prepared, it’s time to install the chosen concealment method and hide the electrical box on the wall. This step may vary depending on the technique you’ve selected. Here are some general guidelines to help you successfully install the concealment method:
- Follow the instructions: Review the instructions or guidelines provided with the specific concealment method you’ve chosen. Whether it’s a decorative cover, removable artwork, or floating shelf, understanding the manufacturer’s recommendations is crucial for a proper and secure installation.
- Position and align: Place the concealment method over the electrical box, ensuring that it fits securely and aligns correctly with the marked placement on the wall. Use a level to ensure that any horizontal or vertical components are straight and aligned with the surrounding space.
- Secure the concealment: Depending on the method, use the appropriate fasteners such as screws, brackets, or adhesive to secure the concealment to the wall. Follow the manufacturer’s recommendations and ensure that the concealment is stable and securely attached. Test the stability by gently applying pressure or giving it a slight shake.
- Check for accessibility: Verify that the electrical box remains easily accessible even after the concealment is installed. Ensure that you can remove or open the cover, artwork, or shelf to access the box when needed, such as for maintenance or repairs. Make any adjustments as necessary to ensure convenient access.
These guidelines provide a general framework for installing the concealment method. However, it’s important to follow the specific instructions provided by the manufacturer to ensure proper installation and functionality. If at any point you are unsure about the installation process, consult a professional for assistance.
By installing the concealment method correctly, you’ll effectively hide the electrical box on the wall, achieving a seamless and aesthetically pleasing appearance that seamlessly blends with your room’s design.
Step 5: Paint or Finish the Concealed Area
After successfully installing the concealment method for the electrical box on the wall, it’s time to blend the concealed area with the surrounding wall by applying a paint or finish. This step will help achieve a cohesive and seamless look. Here are the steps to paint or finish the concealed area:
- Select the paint or finish: Choose a paint color or finish that matches the existing wall or desired aesthetic. Take note of the wall surface type (e.g., drywall, plaster, etc.) to select the appropriate paint or finish for a smooth and consistent appearance.
- Prepare the area: Clean the concealed area by removing any dust, debris, or excess adhesive. Use a damp cloth or sponge to wipe the surface clean. Ensure the area is completely dry before proceeding.
- Apply primer (if necessary): Depending on the concealment method and the wall surface, applying a coat of primer may be necessary. Primer helps create an even base and improves paint adherence. Follow the manufacturer’s instructions to apply the primer and allow it to dry completely.
- Paint or finish the concealed area: Use a brush, roller, or sprayer to apply the paint or finish to the concealed area. Start from the edges and work your way toward the center, ensuring complete coverage. Apply multiple coats if necessary, following the drying time specified by the manufacturer between each coat.
- Blend with the surrounding wall: Feather the paint or finish gently onto the surrounding wall to achieve a seamless transition between the concealed area and the rest of the wall. This will help create a cohesive look where the electrical box is no longer noticeable.
Take your time during this step to ensure a smooth and even application of the paint or finish. Be mindful of any patterns or textures on the surrounding wall and aim to match them as closely as possible for a seamless result.
Allow the paint or finish to dry completely before touching or handling the concealed area. This will ensure that the finish is fully cured and won’t be easily damaged.
By painting or finishing the concealed area, you will effectively integrate the electrical box into your room’s design, making it appear as though it was never there.
Conclusion
Successfully hiding an electrical box on the wall can greatly enhance the aesthetics and functionality of your space. By following the steps outlined in this guide, you can transform an eyesore into a seamless part of your room’s design. Let’s recap the key points:
First, it’s important to assess the electrical box and understand its dimensions and requirements. This will guide you in choosing a suitable concealing method. Whether you opt for a decorative cover, a removable artwork or mirror, or a floating shelf or cabinet, each option has its advantages and considerations.
Preparing the surface is crucial for a professional finish. Clean the wall, repair any damage, and apply primer if needed. This will ensure that your chosen concealment adheres properly and creates a seamless appearance.
Installing the concealment method requires careful positioning and secure attachment. Follow the instructions provided by the manufacturer to properly install the cover, artwork, shelf, or cabinet. It’s important to ensure that the electrical box remains easily accessible for maintenance and repairs.
Lastly, paint or finish the concealed area to match the surrounding wall. Choose a suitable paint color or finish and apply it evenly for a seamless blend. Take your time during this step to achieve a professional result.
By concealing the electrical box on the wall, you can create a more visually appealing and harmonious space. However, it’s important to always prioritize safety and comply with local building codes. If you’re unsure about any aspect of the project, consult a professional electrician or contractor.
Now that you have the knowledge and steps to hide an electrical box on the wall, you can confidently embark on transforming your space into a visually pleasing and functional environment. Embrace the creativity and possibilities that come with concealing an electrical box, and enjoy the seamless integration into your room’s design.
Frequently Asked Questions about How To Hide Electrical Box On Wall
Was this page helpful?
At Storables.com, we guarantee accurate and reliable information. Our content, validated by Expert Board Contributors, is crafted following stringent Editorial Policies. We're committed to providing you with well-researched, expert-backed insights for all your informational needs.




0 thoughts on “How To Hide Electrical Box On Wall”