
Articles
How To Punch Out Electrical Box
Modified: October 20, 2024
Discover expert tips and techniques in our articles on how to safely punch out an electrical box. Enhance your knowledge and skills in electrical work with our comprehensive guides.
(Many of the links in this article redirect to a specific reviewed product. Your purchase of these products through affiliate links helps to generate commission for Storables.com, at no extra cost. Learn more)
Introduction
When it comes to electrical installations or repairs, the need to punch out an electrical box may arise. Whether you’re replacing an old electrical box, installing a new outlet, or making changes to the wiring, knowing how to punch out an electrical box is a valuable skill to have.
Punching out an electrical box involves removing the knockout, the small metal disk or tab that covers the hole where electrical wires enter or exit the box. By punching out the knockout, you create a space for wiring or conduit to pass through.
While punching out an electrical box may seem like a straightforward task, it’s crucial to approach it with caution and follow proper procedures to ensure your safety and avoid any damage to the electrical system. In this article, we’ll guide you through the steps to safely and effectively punch out an electrical box.
Before we begin, it’s important to note that electrical work should only be performed by individuals with the necessary knowledge and experience. If you’re unsure about your abilities or encounter any difficulties during the process, it’s always best to consult a licensed electrician.
Key Takeaways:
- Prioritize safety by turning off the power, using protective gear, and working in a well-ventilated area when punching out an electrical box. Inspect and secure wires carefully to ensure electrical safety.
- Prepare the knockout and punch it out with controlled force, then reattach the faceplate securely. Always seek professional assistance if unsure about electrical work to ensure safety and compliance.
Read more: How To Fix Electrical Box Sticking Out
Tools and Materials Needed
Before you start punching out an electrical box, it’s essential to gather the necessary tools and materials. Having everything ready beforehand will help streamline the process and ensure you have everything you need within reach.
Here are the tools and materials you’ll need:
- Wire cutters or strippers: These are necessary for cutting or stripping the insulation on electrical wires.
- Screwdriver: A flathead or Phillips screwdriver will be useful for removing the faceplate.
- Flashlight: A flashlight will help you see inside the electrical box and ensure accurate work.
- Pliers: Pliers can come in handy for gripping and manipulating wires.
- Protective gloves: It’s crucial to protect your hands with gloves to prevent injury or electrical shocks.
- Safety glasses: Safety glasses will shield your eyes from any debris or particles that may be dislodged during the process.
- Voltage tester: A voltage tester is essential to ensure that the power to the electrical box is turned off before you begin working.
- Replacement knockout: In case you need to replace the existing knockout, have a replacement on hand that matches the size and type needed for your electrical box.
It’s always a good idea to double-check if you have all the necessary tools and materials before starting your electrical box punching process. This will save you time and prevent any interruptions or delays during the project.
Step 1: Safety Precautions
Prior to punching out an electrical box, it’s crucial to prioritize safety. Working with electricity can be dangerous if proper precautions are not taken. By following these safety measures, you can minimize the risk of injury or electrical accidents.
Here are some important safety precautions to keep in mind:
- Turn off the power: Before starting any work on an electrical box, ensure that the power to the circuit you’ll be working on is turned off. Locate the appropriate circuit breaker in your electrical panel and switch it off.
- Use personal protective equipment (PPE): Wear protective gloves and safety glasses to protect yourself from potential hazards during the process. Electricity can be unpredictable, and these safety gears will provide an extra layer of protection.
- Work in a well-ventilated area: Make sure you’re working in a well-ventilated space to prevent the accumulation of any harmful fumes. If you’re working indoors, open windows or use a fan to improve air circulation.
- Avoid water or damp areas: Keep water and other liquids away from the electrical box to prevent electrical shocks or short circuits. Working in dry conditions is essential to ensure your safety.
- Inspect for any live wires: Always perform a visual inspection to check for any visible live wires before working on the electrical box. If you see any exposed or frayed wires, do not proceed. Contact a licensed electrician to address the issue.
- Work with a partner: Having a partner assist you during the process is beneficial, especially when dealing with electrical work. They can help with holding tools, providing additional lighting, or being an extra set of eyes for safety.
Remember, electrical work can be hazardous, and it’s important to take safety seriously. Taking the necessary precautions before starting will help protect yourself and others around you.
Step 2: Turn off the Power
Once you’ve taken the necessary safety precautions, the next step is to turn off the power to the electrical box you’ll be working on. This is an essential step to prevent any potential electrical shocks or accidents during the process.
Here’s how to turn off the power:
- Locate the electrical panel: The electrical panel, also known as the breaker box, is where the circuit breakers or fuses are located. You’ll need to access this panel to turn off the power.
- Identify the correct circuit: Locate the circuit breaker that corresponds to the electrical box or area you’ll be working on. This may require referring to a circuit map or using trial and error by switching off breakers until the power to the specific area is cut off.
- Switch off the circuit breaker: Once you’ve identified the correct circuit breaker, switch it to the “Off” position. This will disconnect the power supply to the designated area, including the electrical box you’ll be working on.
- Test for power: After turning off the circuit breaker, use a voltage tester to confirm that there’s no electricity running through the wires. Test the wires inside the electrical box to ensure they’re not live before proceeding with any work.
Remember, depending on your electrical system, you may need to turn off multiple circuit breakers to ensure the entire area is de-energized. It’s essential to take the time to correctly identify and switch off the right circuit breakers to avoid any accidents.
Once you’ve confirmed that the power is off, you can proceed to the next steps of punching out the electrical box safely.
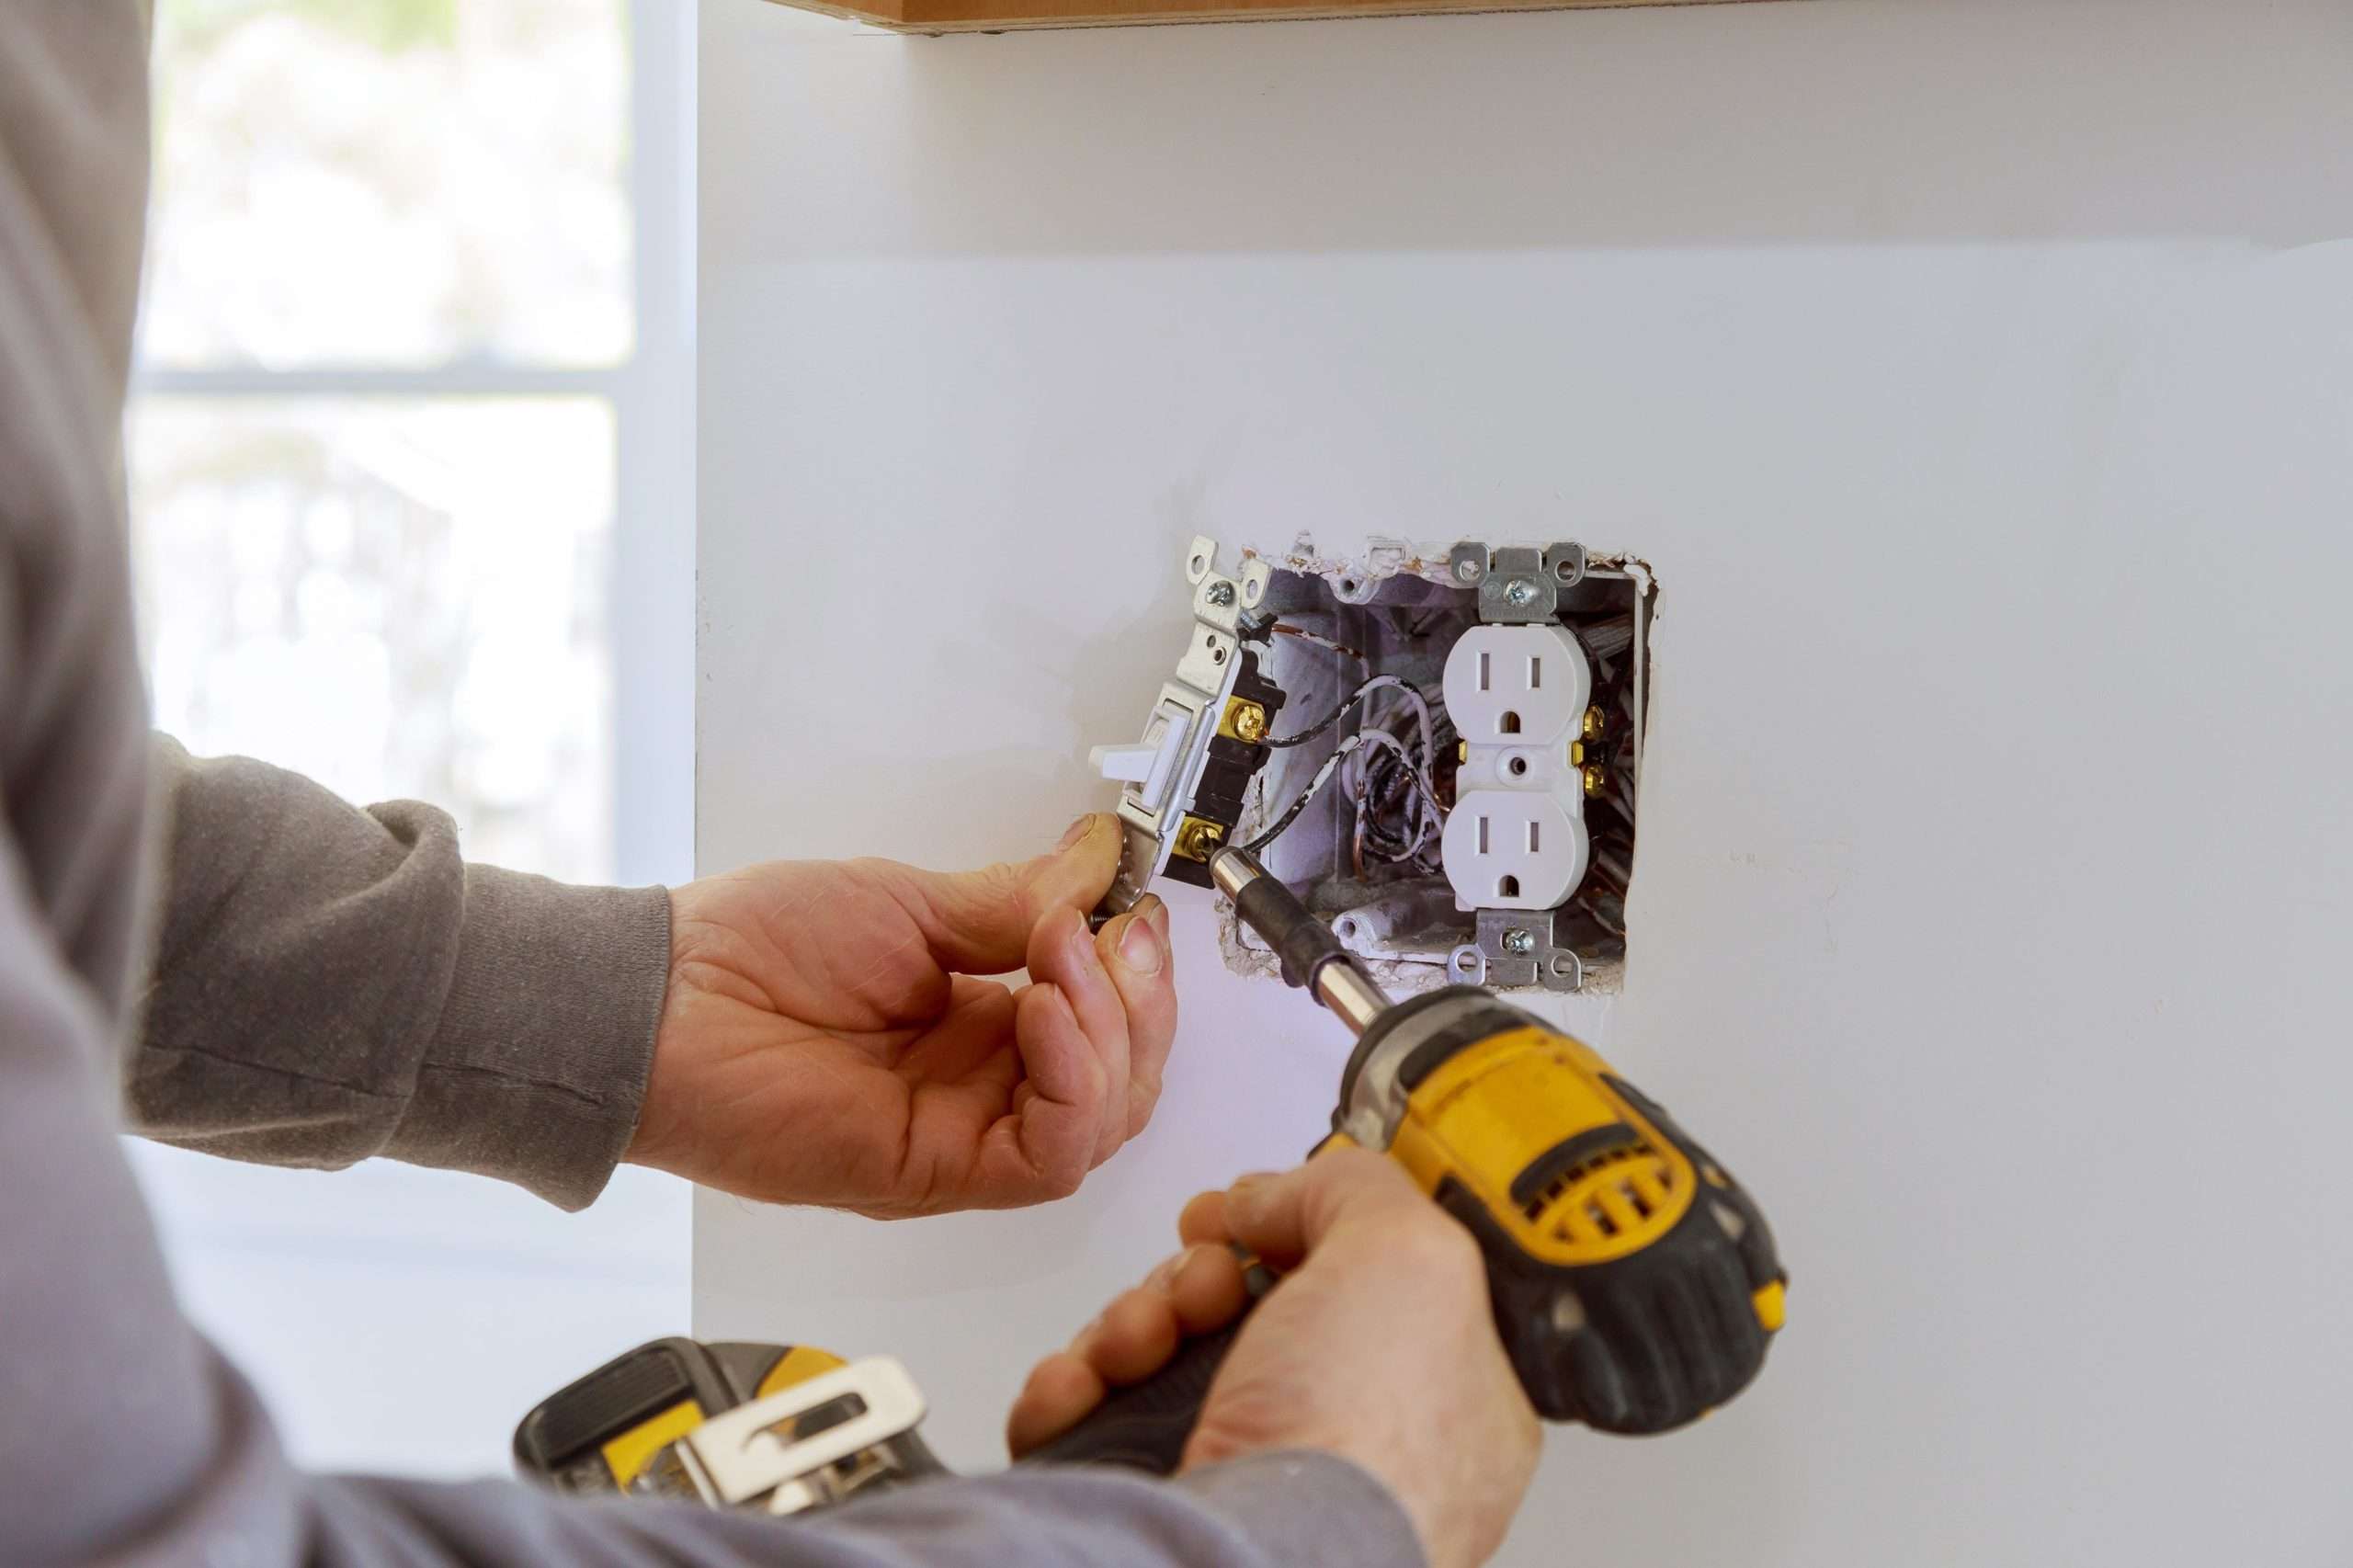
Step 3: Remove the Faceplate
With the power turned off and safety measures in place, it’s time to remove the faceplate of the electrical box. The faceplate covers the front of the box and needs to be removed to access the knockout and punch it out.
Follow these steps to remove the faceplate:
- Inspect the faceplate screws: Take a look at the faceplate and identify the screws holding it in place. Most faceplates have one or more screws located at the top and bottom.
- Loosen the screws: Use a screwdriver that matches the type of screws (flathead or Phillips) and begin loosening the screws. Turn them counterclockwise to release them from the electrical box.
- Remove the faceplate: Once the screws are loose, gently pull the faceplate away from the wall or mounting surface. Be careful not to damage any wires or connectors behind the faceplate while removing it.
- Set aside the faceplate: Place the removed faceplate in a safe and easily accessible location. You may need it later to reinstall once you’ve completed the punching out process.
It’s a good practice to inspect the faceplate for any signs of damage or wear. If you notice any cracks, breaks, or other issues, it’s recommended to replace the faceplate with a new one to ensure proper electrical safety.
Removing the faceplate grants you access to the electrical box itself, allowing you to proceed with punching out the knockout in the next steps.
Read more: How To Make A Trash Can Punch
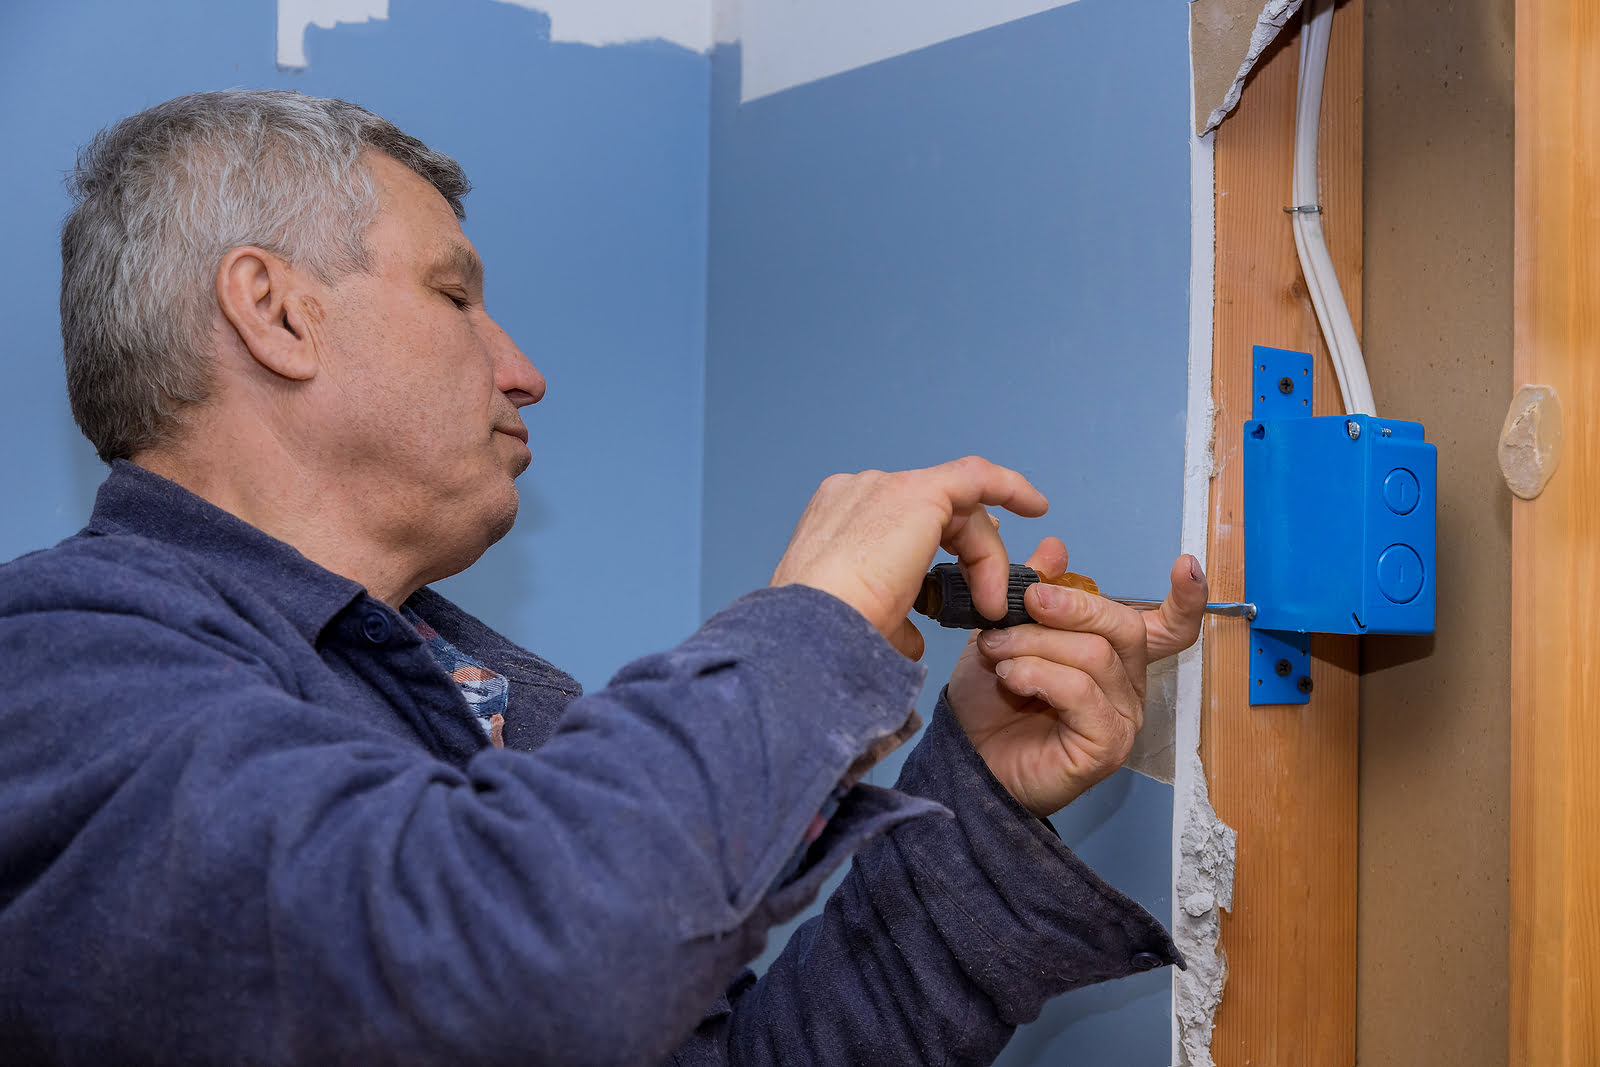
Step 4: Locate the Electrical Box
After removing the faceplate, the next step is to locate the electrical box. The electrical box is the enclosure that houses the electrical wires and connections. It’s important to identify its position and understand its layout before proceeding with punching out the knockout.
Here’s how to locate the electrical box:
- Examine the opening: With the faceplate removed, you should now have a clear view of the opening where the electrical box is located. Take a moment to inspect the area and familiarize yourself with its surroundings.
- Identify the box: Look for a rectangular or square-shaped metal or plastic box within the opening. The box will typically be secured to the wall or mounting surface using screws or screws with built-in brackets.
- Determine its depth: Take note of the depth of the electrical box. This will be crucial to ensure that the knockout is punched out to the correct depth, allowing sufficient space for wiring or conduit.
- Understand the layout: Examine the wires and connectors inside the electrical box. Take note of the wiring configuration, the presence of any junction boxes, and any specific instructions or markings for the knockout location.
It’s important to carefully observe and understand the layout of the electrical box to avoid damaging any wires or components during the punching out process. If you have any doubts or are unsure about the box’s layout, consult a licensed electrician for assistance.
Once you’ve located the electrical box and have a clear understanding of its positioning and layout, you can move on to preparing the knockout in the next step.
When punching out an electrical box, use a screwdriver or hammer and chisel to carefully remove the knockout tabs. Be sure to wear safety goggles and gloves to protect yourself from any sharp edges.
Step 5: Prepare the Knockout
Before punching out the knockout, it’s important to prepare it properly to ensure a clean and precise removal. The knockout is the metal tab or disk that covers the hole in the electrical box and needs to be removed to create a space for wiring or conduit.
Follow these steps to prepare the knockout:
- Inspect the knockout: Take a close look at the knockout to ensure that it’s the correct one for your electrical box. Verify its size, shape, and compatibility with the box.
- Secure the electrical box: If the box is not already securely attached to the wall or mounting surface, use screws or brackets to secure it in place. This will ensure stability during the punching out process.
- Choose the appropriate knockout: Depending on your specific needs, select the correct knockout to remove. There may be multiple knockouts on the electrical box, so choose the one that aligns with your wiring or conduit requirements.
- Make markings (if necessary): If there are specific instructions or markings on the electrical box indicating the knockout location, use a pencil or marker to make additional markings. This will help guide your punching process.
- Gather the necessary tools: Ensure you have the required tools within reach, including a hammer and a screwdriver with a flathead or chisel tip.
By carefully preparing the knockout and having the necessary tools on hand, you’ll be ready to punch it out cleanly and efficiently. Taking the time to prepare the knockout ensures a smoother process and reduces the risk of damage to the electrical box or wires.
With the knockout properly prepared, you can now move on to the next step of actually punching out the knockout from the electrical box.
Step 6: Punch Out the Electrical Box
Now that you’ve prepared the knockout, it’s time to punch it out from the electrical box. This step requires careful precision and controlled force to ensure a clean and precise removal of the knockout.
Here’s how to punch out the electrical box:
- Position the screwdriver or chisel: Take a screwdriver with a flathead or chisel tip and position it at the edge of the knockout. Ensure that the screwdriver or chisel is aligned with the marking or desired location.
- Apply controlled force: With one hand firmly holding the screwdriver or chisel, use the other hand to apply controlled force to strike the handle with a hammer. The force should be sufficient to slowly and gradually break through the knockout. Take care not to use excessive force, as it can damage the electrical box or wires.
- Repeat the process: Continue striking the screwdriver or chisel with the hammer until a hole is created in the knockout. Take breaks between strikes to assess the progress and ensure that you’re staying on track with the marking or desired hole size.
- Remove the knockout: Once a hole has been created, insert the screwdriver or chisel into it and pry the knockout away from the electrical box. Use caution and gentle pressure to avoid damaging the surrounding area or wires.
- Inspect the opening: After removing the knockout, inspect the opening to ensure that it’s clean, free of sharp edges, and properly sized for your wiring or conduit. Use a file or sandpaper to smooth any rough edges if necessary.
It’s important to maintain control and precision throughout the punching process to avoid any accidents or damage. Take your time and be patient to achieve the desired outcome safely.
Once you’ve successfully punched out the electrical box, you can move on to the next step of inspecting and securing the wires.
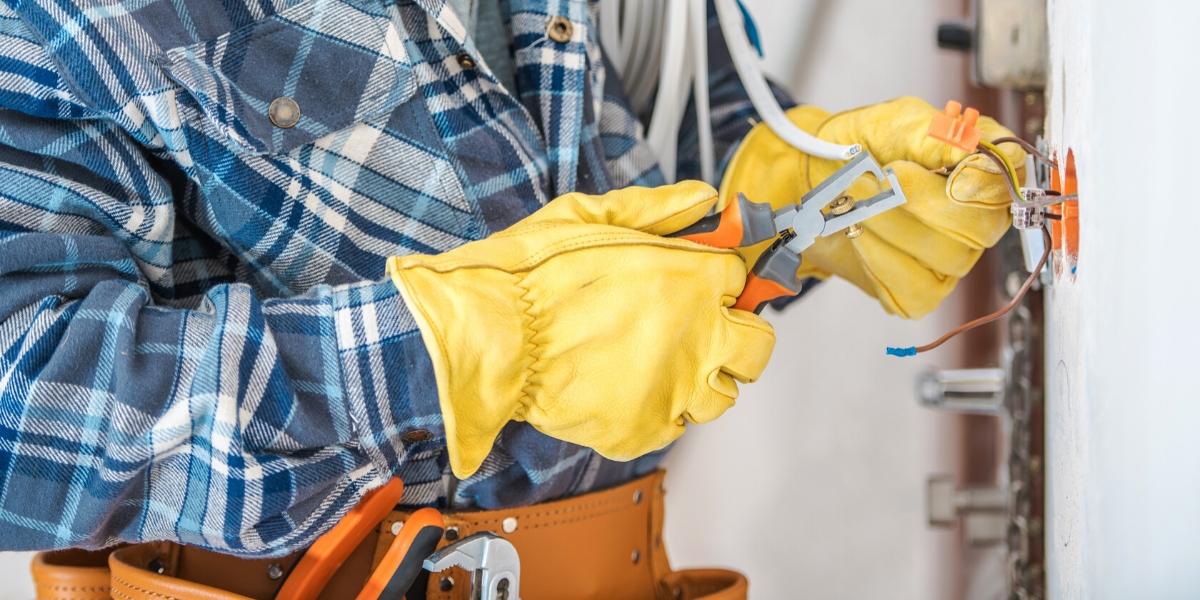
Step 7: Inspect and Secure the Wires
After punching out the electrical box, it’s essential to inspect the wires and ensure they are in good condition. Additionally, you’ll need to secure the wires properly to prevent any future issues or hazards.
Follow these steps to inspect and secure the wires:
- Inspect the wires: Carefully examine the wires inside the electrical box. Look for any signs of damage, such as frayed insulation, exposed conductors, or loose connections. If you notice any issues, it’s important to address them before proceeding.
- Trim and strip the wires (if necessary): If you need to trim or strip the wires to the appropriate length or to expose fresh conductors, use wire cutters or strippers to do so. Follow the manufacturer’s guidelines or best practices for wire stripping.
- Connect the wires (if necessary): If you’re adding or replacing wires in the electrical box, make the necessary connections using wire connectors or terminal blocks. Ensure that the connections are secure and tight to prevent any loose or exposed wiring.
- Organize and route the wires: Arrange the wires neatly inside the electrical box, avoiding any unnecessary twisting or bending. Use wire clips or cable ties to secure the wires and keep them organized.
- Insulate and protect the wires: If there are any exposed conductors, insulate them with electrical tape or heat-shrink tubing. This will provide an extra layer of protection and prevent any accidental contact.
- Double-check the connections: Before proceeding further, double-check that all the wire connections are secure and properly insulated. This will ensure the safety and integrity of the electrical installation.
Properly inspecting and securing the wires is essential for electrical safety and functionality. Take your time during this step to ensure that the wires are in good condition and properly connected.
With the wires inspected and secured, you can now move on to the next step of replacing the faceplate.
Read also: 12 Best Conduit Punch for 2025
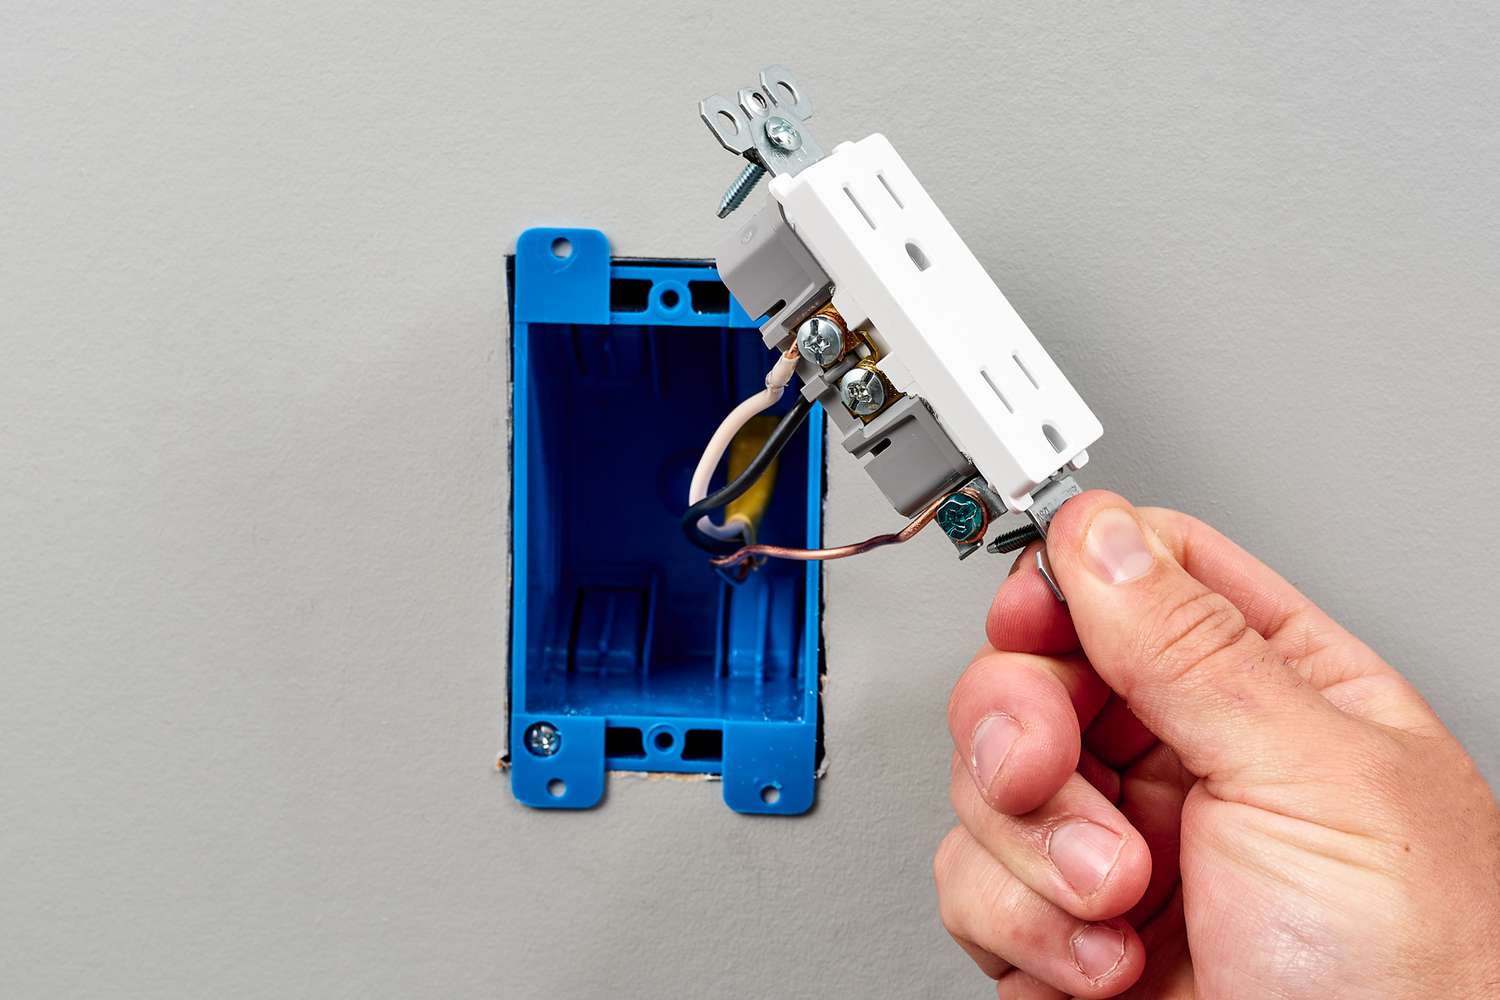
Step 8: Replace the Faceplate
After completing the necessary work inside the electrical box, it’s time to replace the faceplate. The faceplate serves as a protective cover and provides a finished look to the electrical installation. It’s important to reattach it properly to ensure a secure and safe enclosure.
Follow these steps to replace the faceplate:
- Align the faceplate: Hold the faceplate in the correct position, aligning it with the screw holes on the electrical box. Ensure that any switches, outlets, or other components are properly aligned with their respective openings on the faceplate.
- Insert the screws: Insert and tighten the screws into the screw holes on the faceplate. Use a screwdriver to tighten them, but be careful not to overtighten as it may damage the faceplate or the electrical box.
- Check for proper fit: Once the screws are tightened, check if the faceplate fits snugly against the wall or mounting surface. Ensure that it sits flush and does not wobble or move when touched.
- Test the switches or outlets: Turn the power back on from the electrical panel and test the switches or outlets associated with the electrical box. Verify that they’re working correctly and that there are no issues with the electrical connection.
Replacing the faceplate not only enhances the appearance of the electrical box but also provides a protective barrier and prevents any accidental contact with live wires. It’s crucial to ensure a proper fit and secure attachment of the faceplate for safety purposes.
With the faceplate securely in place, you have successfully completed the process of punching out an electrical box. Remember to clean up any tools or materials used during the process and tidy up the work area.
It’s always a good idea to review your work and, if necessary, consult a licensed electrician to validate the completion of the task and ensure compliance with electrical codes and regulations.
Conclusion
Punching out an electrical box is a necessary skill for various electrical installations and repairs. By following the proper steps and taking the necessary safety precautions, you can safely and effectively punch out a knockout and create space for wiring or conduit.
In this guide, we covered the step-by-step process of punching out an electrical box, starting with safety precautions and turning off the power. We then proceeded to remove the faceplate, locate the electrical box, prepare the knockout, and punch it out using controlled force. We also discussed the importance of inspecting and securing the wires, followed by the reinstallation of the faceplate for a finished look.
It’s important to remember that electrical work should only be performed by individuals with the necessary knowledge and experience. If you’re unsure or encounter any difficulties during the process, it’s always best to consult a licensed electrician.
By following the guidelines outlined in this article, you can confidently punch out an electrical box and tackle various electrical projects with greater ease. Safety should always be a priority, so make sure to turn off the power, use appropriate personal protective equipment, and proceed with caution throughout the process.
Remember, proper electrical maintenance and repairs are crucial for the safety and functionality of your electrical system. If you have any doubts or concerns, it’s best to seek professional assistance to ensure the job is done correctly.
With this newfound knowledge, you’ll be able to confidently approach electrical projects that require punching out an electrical box and make necessary modifications or installations with precision and safety.
Frequently Asked Questions about How To Punch Out Electrical Box
Was this page helpful?
At Storables.com, we guarantee accurate and reliable information. Our content, validated by Expert Board Contributors, is crafted following stringent Editorial Policies. We're committed to providing you with well-researched, expert-backed insights for all your informational needs.


0 thoughts on “How To Punch Out Electrical Box”