Articles
How To Install Ceiling Electrical Box
Modified: October 20, 2024
Learn how to install a ceiling electrical box with our informative articles. Get step-by-step instructions and expert tips for a successful installation.
(Many of the links in this article redirect to a specific reviewed product. Your purchase of these products through affiliate links helps to generate commission for Storables.com, at no extra cost. Learn more)
Introduction
Installing a ceiling electrical box is a crucial step when it comes to adding lighting fixtures or ceiling fans to your home. Whether you are a DIY enthusiast or a professional electrician, having a solid understanding of the installation process is essential for a safe and successful project.
Ceiling electrical boxes are designed to securely hold and protect electrical connections, providing a stable base for mounting fixtures. These boxes house the wiring and allow for easy access to connect the wires from the fixture to the main electrical system of the house.
In this article, we will guide you through the step-by-step process of installing a ceiling electrical box. From gathering the necessary tools and materials to safely connecting the wires and mounting the fixture, we will cover everything you need to know.
Before we dive into the installation process, it’s important to note that electrical work should always be approached with caution. If you are not comfortable working with electricity, it is highly recommended to hire a licensed electrician for the job. Safety should always be the top priority when dealing with electrical systems.
Now, let’s move on to the first step – gathering the necessary tools and materials.
Key Takeaways:
- Proper installation of a ceiling electrical box is crucial for adding lighting fixtures or ceiling fans. Prioritize safety, gather necessary tools, and follow step-by-step instructions for a successful and safe installation process.
- Turning off the power, marking the location, running electrical wiring, and testing the electrical connection are essential steps in ensuring a stable and reliable electrical connection. Prioritize safety, follow manufacturer’s instructions, and enjoy the benefits of a well-installed fixture or fan.
Read more: How To Install A Ceiling Fan Electrical Box
Step 1: Gather Necessary Tools and Materials
Before you begin the installation of a ceiling electrical box, it is important to gather all the necessary tools and materials. Having everything you need on hand will make the installation process much smoother and efficient. Here is a list of the tools and materials you will need:
1. Ceiling electrical box: Choose a box that is suitable for the weight and size of the fixture you will be installing. Make sure it is rated for the type of electrical system in your home, whether it is a standard residential system or a specific type like a knob and tube.
2. Measuring tape: Use a measuring tape to accurately mark the location for the electrical box on the ceiling.
3. Pencil: Use a pencil to mark the exact spot where the electrical box will be installed.
4. Stud finder: A stud finder will help you locate the ceiling joists, which are important for securely attaching the electrical box.
5. Drywall saw or reciprocating saw: You will need a saw to cut the opening in the ceiling for the electrical box. A drywall saw works well for small openings, while a reciprocating saw is suitable for larger openings or when dealing with thicker materials.
6. Screwdriver: A screwdriver is necessary for attaching the electrical box to the ceiling joists.
7. Wire strippers: Wire strippers are used to remove the insulation from the electrical wires, allowing for proper connection.
8. Wire nuts: Wire nuts are used to secure the connections between the wires. Choose wire nuts that are the appropriate size for the wire gauge you are working with.
9. Electrical tape: Electrical tape is used to insulate and protect the wire connections.
10. Wire clamps: Wire clamps are used to secure the electrical wiring to the electrical box, providing strain relief and preventing accidental disconnection.
11. Electrical wire: Depending on the specific requirements of your project, you will need electrical wire of the appropriate gauge and length to connect the fixture to the electrical system.
12. Ladder or scaffolding: A sturdy ladder or scaffolding will be needed to safely reach and work at the height of the ceiling.
Make sure to gather all the tools and materials before starting the installation process. This will ensure a smooth and efficient workflow, allowing you to complete the project without unnecessary interruptions. With all the necessary tools and materials in hand, you are ready to move on to the next step – turning off the power.
Step 2: Turn off the Power
Before you begin any electrical work, it is crucial to turn off the power to the area where you will be installing the ceiling electrical box. This step is essential to prevent the risk of electric shock or injury. Follow these steps to safely turn off the power:
1. Locate the electrical panel: The electrical panel, also known as the circuit breaker box, is usually located in the basement, garage, or utility room of your home. It contains all the circuit breakers or fuses that control the electrical supply to different areas of your house.
2. Identify the circuit: Identify the circuit that supplies power to the area where you will be installing the ceiling electrical box. Look for labels or markings on the circuit breaker that correspond to the specific area or room.
3. Switch off the circuit breaker: Once you have identified the correct circuit, switch off the corresponding circuit breaker by flipping it to the “off” position. This will cut off the power supply to the area where you will be working.
4. Test the power: To ensure that the power is indeed turned off, use a non-contact voltage tester to check for the presence of electricity. Simply hold the tester near the wires or the electrical box to confirm that there is no voltage.
5. Double-check the power: While the non-contact voltage tester can provide a quick indication of whether the power is off, it is always a good practice to double-check by using a voltage tester with probes. Carefully touch the probes to the wires to check for any voltage. If there is no voltage, it is safe to proceed with the installation. If you detect any voltage, double-check the circuit breaker and ensure it is switched off.
6. Notify others: If there are other people in the house, let them know that you are working on the electrical system and have turned off the power. This will help prevent accidents or incidents where someone unknowingly turns the power back on while you are working.
It is important to note that if you are unsure or uncomfortable working with electricity, it is best to hire a licensed electrician to turn off the power and handle the electrical work. Your safety should always be the top priority.
By turning off the power, you have taken an important step to ensure a safe working environment. Now that the power is off, you can move on to the next step – marking the location for the electrical box.
Step 3: Mark the Location for the Electrical Box
Once you’ve turned off the power, the next step in installing a ceiling electrical box is to mark the exact location where it will be installed. Proper placement of the electrical box is crucial for a secure and stable installation. Follow these steps to mark the location:
1. Determine the desired placement: Consider the placement of your lighting fixture or ceiling fan, as well as any additional factors such as the ceiling joists or studs. Ensure that the electrical box will be centered and aligned with the fixture or fan.
2. Measure and mark the location: Use a measuring tape to determine the desired location for the electrical box. Measure and mark this spot on the ceiling with a pencil. Make sure the markings are clear and visible.
3. Find the ceiling joists: Use a stud finder to locate the ceiling joists near the marked location. Joists provide support and stability for the electrical box. Once you’ve located the joists, mark them with a pencil to indicate their position.
4. Ensure proper spacing: Check the manufacturer’s instructions for the electrical box to determine the recommended spacing between the box and surrounding joists. This spacing is necessary to ensure a secure attachment.
5. Double-check the measurements: Double-check your measurements and markings to ensure accuracy. Measure the distance between the marked location and the adjacent walls or fixtures to maintain proper alignment.
6. Adjust if necessary: If the initial markings do not align with the joists or if the spacing doesn’t meet the manufacturer’s recommendations, make the necessary adjustments. It is better to spend a few extra minutes ensuring proper alignment than to face difficulties during the installation.
Properly marking the location for the electrical box is essential to ensure a successful installation. Taking the time to accurately measure and mark the location will contribute to the stability and functionality of your lighting fixture or ceiling fan. Once you are satisfied with the markings, you are ready to move on to the next step – cutting the opening in the ceiling.
Step 4: Cut the Opening in the Ceiling
With the location for the electrical box marked, the next step in installing a ceiling electrical box is to cut the opening in the ceiling. This opening will accommodate the box, allowing for the wiring to pass through. Follow these steps to cut the opening:
1. Prepare the work area: Clear the area below the marked location and cover the floor with a drop cloth or plastic sheet to catch any debris or dust.
2. Put on safety gear: Before you begin cutting, make sure to put on safety gear such as safety glasses and a dust mask. This will protect your eyes and respiratory system from any airborne particles.
3. Choose the appropriate cutting tool: Depending on the size of the opening and the material of your ceiling, select the appropriate cutting tool. For small openings or drywall ceilings, a drywall saw will suffice. For larger openings or ceilings made of thicker materials like plaster or wood, a reciprocating saw or jigsaw may be necessary.
4. Cut along the marked lines: Carefully align the blade of the cutting tool with the marked lines. Start cutting from one corner of the marked opening and proceed along the lines, applying gentle but steady pressure. Take your time to ensure smooth and precise cuts.
5. Support the cutout: Once you’ve cut along all sides of the marked opening, gently push up on the cutout section to detach it from the ceiling. Have someone assist you if needed. Set the cutout aside, ensuring it doesn’t cause any damage or obstruction.
6. Inspect the opening: Examine the cutout for any irregularities or rough edges. Smooth out any rough edges or protrusions using sandpaper or a file to prevent any future issues during the installation process.
7. Clean up the debris: Use a brush or a vacuum cleaner to remove any debris or dust from the now-opened ceiling. This will ensure a clean and clear workspace for the next steps.
Cutting the opening in the ceiling is a critical step in the installation process. Paying careful attention to detail and employing proper cutting techniques will result in an accurate and clean opening. With the opening in place, you are ready to move on to the next step – running the electrical wiring.
Read more: How To Install Electrical Box
Step 5: Run the Electrical Wiring
With the opening cut in the ceiling, it’s time to run the electrical wiring for the ceiling electrical box. Properly running the wiring ensures a safe and efficient electrical connection for your lighting fixture or ceiling fan. Follow these steps to run the electrical wiring:
1. Plan the wire route: Determine the path the electrical wiring will take from the electrical panel to the ceiling electrical box. Consider the most direct and convenient route while avoiding any obstacles such as existing wiring or structural components.
2. Turn off the power: Before you begin working with the electrical wiring, make sure to turn off the power at the circuit breaker or fuse box. Use a voltage tester to confirm that the power is indeed off before proceeding.
3. Prepare the wires: Measure and cut the appropriate length of electrical wire for the intended distance between the electrical panel and the ceiling electrical box. Leave a little extra length at each end to accommodate any necessary adjustments during the installation.
4. Route the wires: Starting from the electrical panel, carefully route the electrical wires along the planned path. Use wire staples, cable clips, or conduit as needed to secure and protect the wiring. Avoid bending the wires at sharp angles or pulling them too tightly.
5. Fish the wires through the wall or ceiling: If necessary, use a fish tape or wire fish to guide the wires through walls, ceilings, or other hidden areas. Make sure to feed the wires through any pre-drilled holes or conduits to ensure a clean and organized installation.
6. Feed the wires into the electrical box: Once the wires have been routed to the location of the ceiling electrical box, feed them through the knockout or cable clamp on the box. Leave enough excess wire inside the box to make the necessary connections.
7. Strip the wire insulation: Use wire strippers to carefully remove about ¾ inch of insulation from the ends of the wires. Be cautious not to nick or damage the wires during this process.
8. Group the wires: Group the wires based on their color and purpose. Typically, the black wire is the live or hot wire, the white wire is the neutral wire, and the green or bare wire is the ground wire. Follow the wiring instructions provided with your lighting fixture or ceiling fan for any additional wires or color codes.
9. Connect the wires: Match the corresponding color-coded wires from the electrical box to the wires from the lighting fixture or ceiling fan. Twist the wire ends together and secure them with wire nuts. Wrap the wire connections with electrical tape for added insulation and protection.
10. Secure the wires: Use wire clamps or cable connectors to secure the wires to the electrical box. This provides strain relief and prevents accidental disconnection.
Running the electrical wiring requires careful planning and attention to detail. By following these steps, you can ensure a safe and efficient electrical connection for your ceiling electrical box. With the wiring in place, you are ready to move on to the next step – installing the ceiling electrical box.
When installing a ceiling electrical box, make sure to turn off the power at the breaker before beginning. Use a stud finder to locate a ceiling joist for secure mounting. Always follow local building codes and regulations.
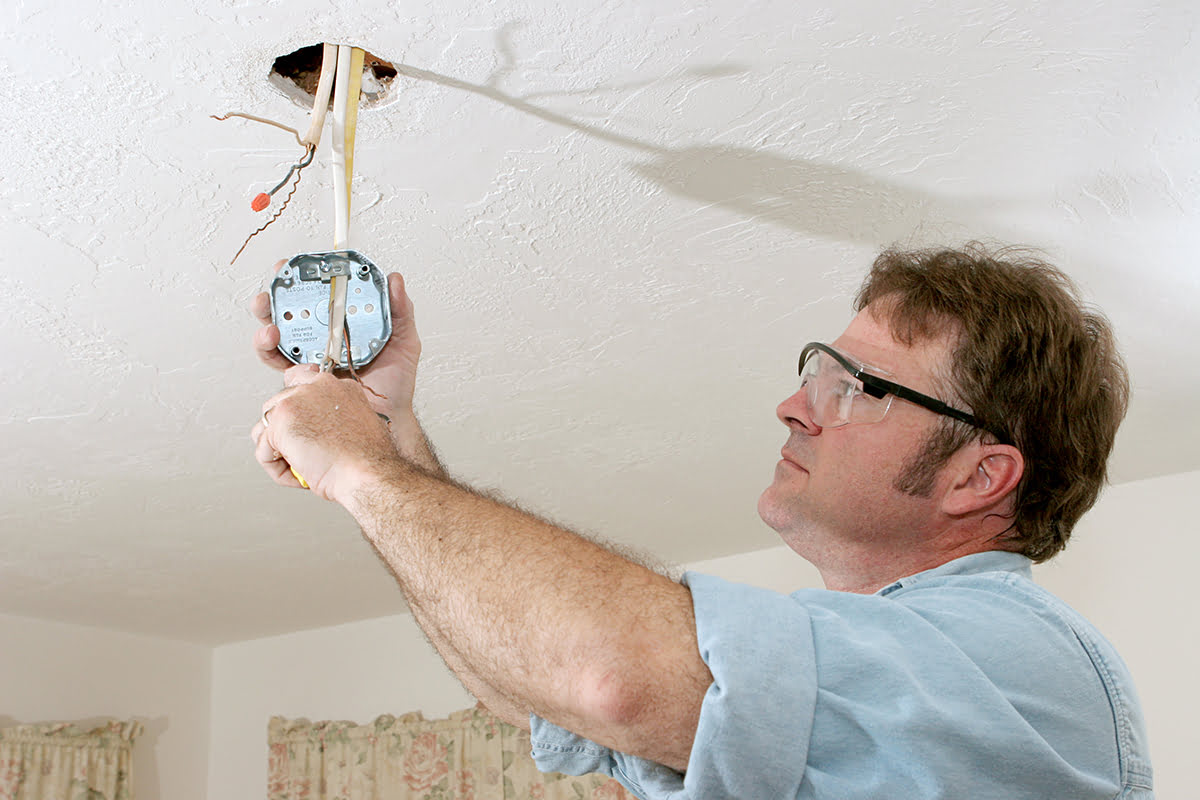
Step 6: Install the Ceiling Electrical Box
Now that the electrical wiring is properly run through the ceiling, it’s time to install the ceiling electrical box. The electrical box provides a secure and stable mounting point for your lighting fixture or ceiling fan. Follow these steps to install the ceiling electrical box:
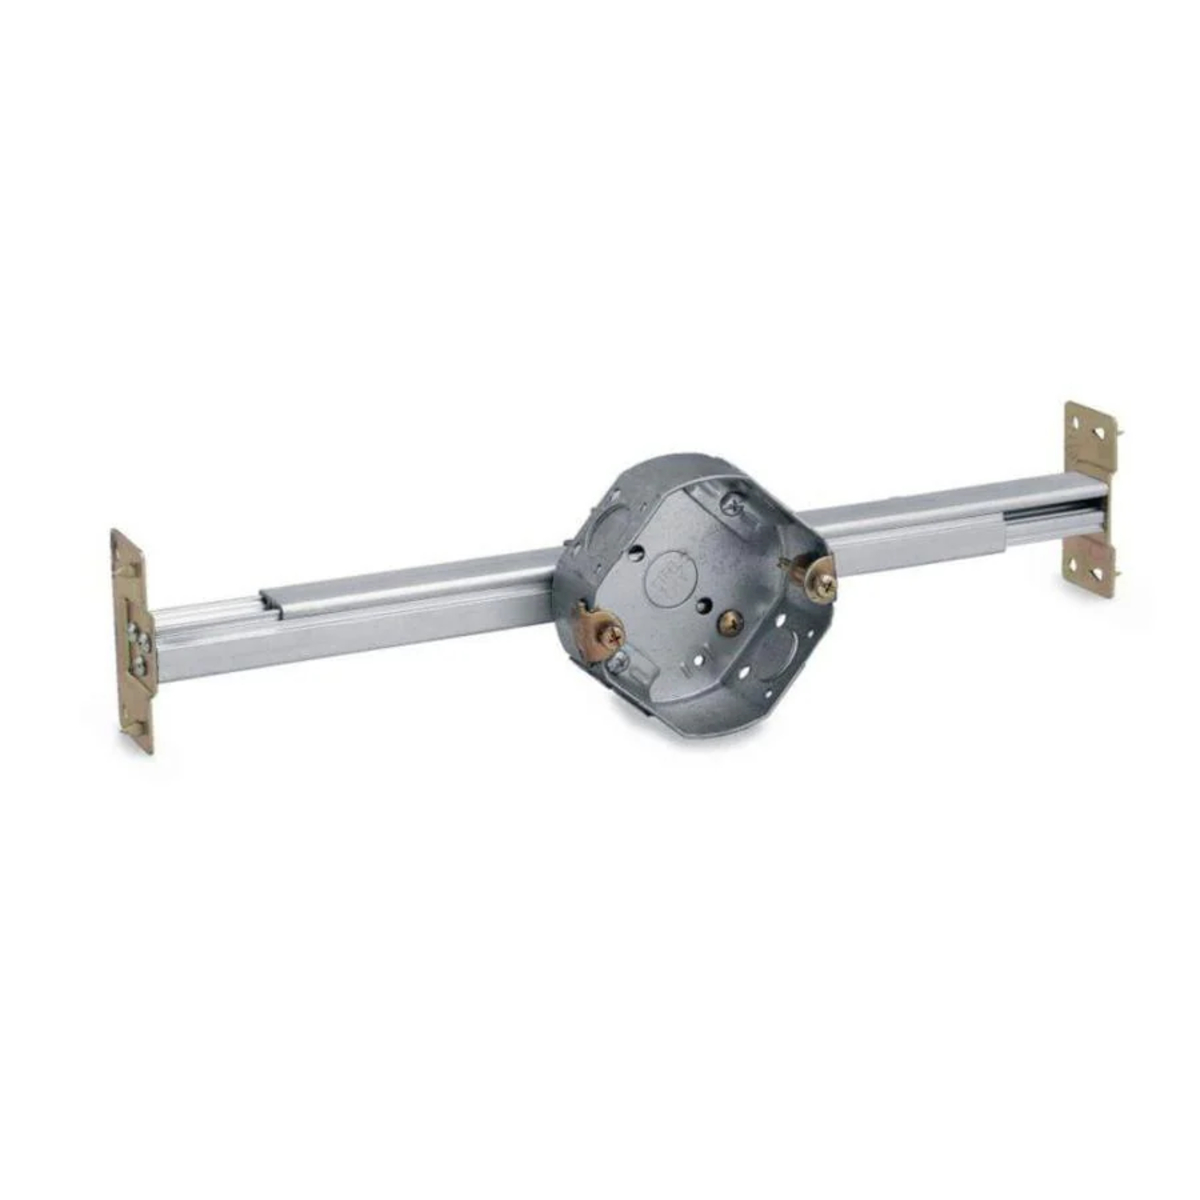
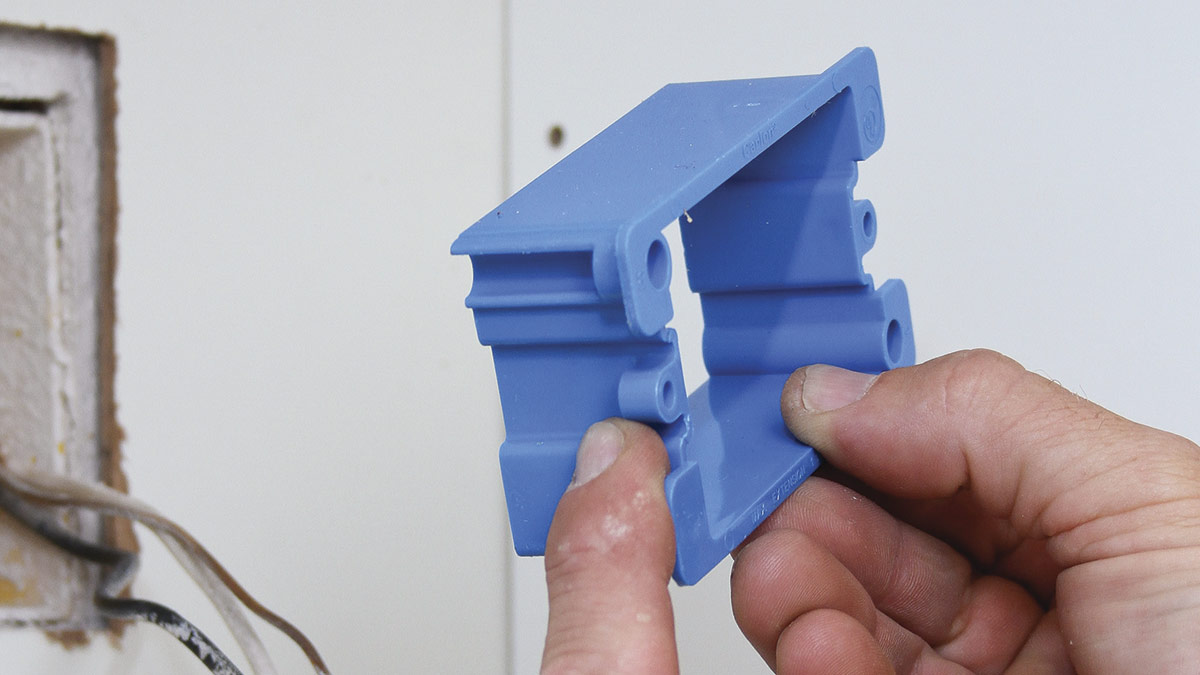
1. Choose the right box: Select an electrical box that is appropriate for the size and weight of your lighting fixture or ceiling fan. Ensure that the box is compatible with the wiring system in your home.
2. Position the box: Align the electrical box with the marked location on the ceiling. Ensure that the box is centered and level with the surrounding area. If necessary, use a level to double-check the alignment.
3. Mark the mounting points: Once the box is in position, mark the mounting points on the ceiling. These points will correspond to the holes in the box where screws or nails will be inserted to secure it to the ceiling.
4. Attach the box: Using the marked mounting points as a guide, securely attach the electrical box to the ceiling. Depending on the type of box, you may use screws, nails, or a mounting bracket. Ensure that the box is firmly fixed in place and does not wobble.
5. Ensure proper depth: Verify that the box is installed at the appropriate depth. The box should be flush with or slightly recessed from the surface of the ceiling. This will allow the lighting fixture or ceiling fan to be mounted properly.
6. Check clearance requirements: Check the clearance requirements specified by the manufacturer of your lighting fixture or ceiling fan. Ensure that there is sufficient space within the box to accommodate the wires and make the necessary connections.
7. Secure the wiring: Inside the box, securely fasten the electrical wiring using wire clamps. This will provide strain relief and prevent accidental disconnection of the wires.
8. Inspect the installation: Double-check the installation to ensure that the electrical box is securely attached to the ceiling and properly positioned. Make any adjustments if necessary.
By following these steps, you can install the ceiling electrical box with confidence. A properly installed box will provide a sturdy and secure base for your lighting fixture or ceiling fan. With the electrical box in place, you are ready to move on to the next step – connecting the wires to the box.
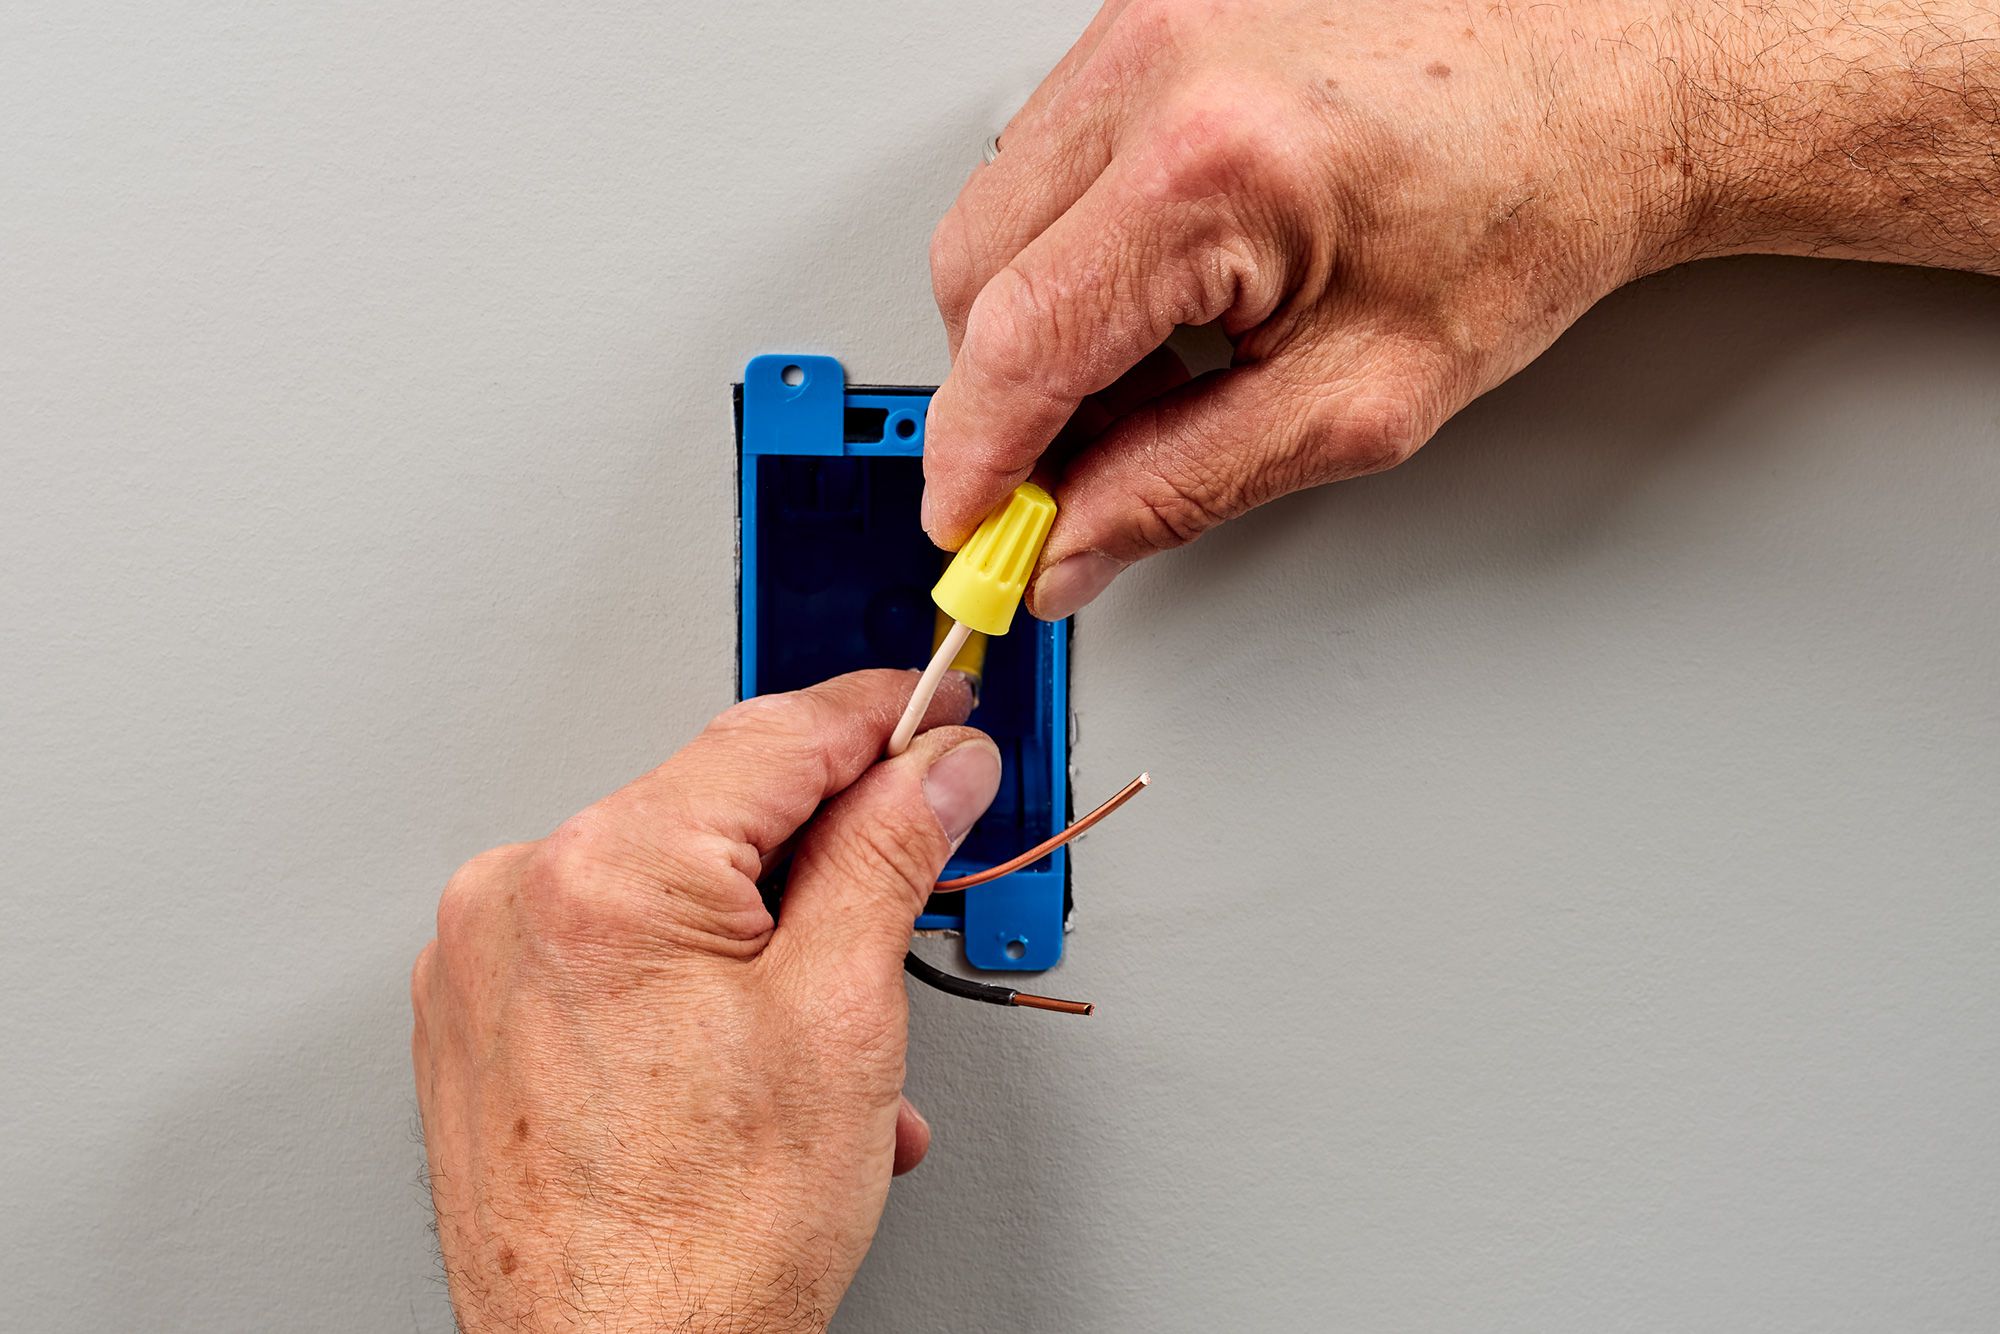
Step 7: Connect the Wires to the Electrical Box
With the ceiling electrical box securely installed, it’s time to connect the wires to the box. Properly connecting the wires ensures a safe and reliable electrical connection for your lighting fixture or ceiling fan. Follow these steps to connect the wires to the electrical box:
1. Identify the wires: Identify the different wires coming from the electrical box – typically, you will have a black (hot) wire, a white (neutral) wire, and a green or bare (ground) wire. If there are any additional wires or cables, consult the wiring instructions provided with your lighting fixture or ceiling fan.
2. Strip the wire ends: Use wire strippers to carefully strip about ¾ inch of insulation from the ends of the wires. Take care not to nick or damage the wires during this process.
3. Connect the ground wire: Start by connecting the green or bare ground wire. Insert the stripped end of the ground wire into the green grounding screw or grounding clip inside the electrical box. Tighten the screw or clip securely to ensure a solid connection.
4. Connect the neutral wires: Connect the stripped end of the white (neutral) wire from the electrical box to the white wire from the lighting fixture or ceiling fan. Twist the ends of the wires together clockwise and secure them with a wire nut. Wrap the connection with electrical tape for added insulation and protection.
5. Connect the hot wires: Connect the stripped end of the black (hot) wire from the electrical box to the black wire from the lighting fixture or ceiling fan. Again, twist the ends of the wires together clockwise and secure them with a wire nut. Wrap the connection with electrical tape for added insulation and protection.
6. Tuck the wires into the electrical box: Carefully tuck the connected wires into the electrical box, ensuring they are not pinched or strained. Arrange the wires neatly and avoid overcrowding the box to allow for easy installation of the lighting fixture or ceiling fan.
7. Inspect the connections: Double-check all the wire connections to ensure they are secure and properly insulated. Make sure there are no exposed wires or loose connections that could pose a safety hazard.
8. Replace the box cover: Once all the wire connections have been made and inspected, replace the cover or faceplate on the electrical box. Ensure that it is properly secured and aligned with the box.
By following these steps, you can effectively connect the wires to the electrical box. Proper connections are crucial for a safe and reliable electrical installation. With the wires securely connected, you are ready to move on to the final step – mounting the lighting fixture or ceiling fan.
Step 8: Mount the Lighting Fixture or Ceiling Fan
Now that the wires are securely connected to the electrical box, it’s time to mount your lighting fixture or ceiling fan. Proper mounting ensures stability and safety for your chosen fixture. Follow these steps to mount the lighting fixture or ceiling fan:
1. Read the manufacturer’s instructions: Carefully read and familiarize yourself with the manufacturer’s instructions for mounting the specific lighting fixture or ceiling fan you have chosen. These instructions will provide the necessary guidance for a successful installation.
2. Prepare the fixture: If you are installing a lighting fixture, assemble it according to the manufacturer’s instructions. Make sure all the parts are securely attached and any required bulbs are properly inserted.
3. Lift the fixture or fan: With the help of another person if needed, carefully lift the lighting fixture or ceiling fan and position it close to the electrical box. Take care not to damage any wires during this process.
4. Align the mounting bracket: For ceiling fans, align the mounting bracket provided with the fan to the electrical box. Ensure that the bracket is secured with the appropriate screws or bolts. For lighting fixtures, consult the manufacturer’s instructions for the specific mounting method.
5. Attach the fixture or fan: Once the mounting bracket is properly aligned and secured, attach the lighting fixture or ceiling fan to the bracket. Follow the manufacturer’s instructions for the specific mounting method, which may involve screws, bolts, or other mounting hardware.
6. Secure the fixture or fan: Tighten all screws or bolts according to the manufacturer’s instructions. Ensure that the lighting fixture or ceiling fan is securely mounted and does not wobble.
7. Install any additional components: For ceiling fans, this step may involve attaching the fan blades, light kit, or other accessories according to the manufacturer’s instructions. Take care to follow all the necessary steps and secure any included hardware.
8. Check for proper clearance: Verify that there is sufficient clearance between the fixture or fan and any surrounding objects, such as walls or furniture. This will help prevent any potential obstructions or hazards.
9. Test the fixture or fan: Before finishing the installation, turn the power back on at the circuit breaker or fuse box and test the lighting fixture or ceiling fan. Ensure that all functions, such as lights or fan speed, are working properly.
10. Make any final adjustments: If needed, make any final adjustments to the position, alignment, or functionality of the lighting fixture or ceiling fan. Double-check all screws and connections to ensure they are properly tightened.
By following these steps, you can successfully mount your lighting fixture or ceiling fan. Ensure that the fixture or fan is securely attached and aligned, providing a stable and visually appealing addition to your space. With the fixture or fan mounted, you are ready to move on to the final step – turning on the power and testing the electrical connection.
Read more: How To Install A Ceiling Light Fixture Box
Step 9: Turn on the Power and Test the Electrical Connection
After mounting the lighting fixture or ceiling fan, the final step in the installation process is to turn on the power and test the electrical connection. This step ensures that the wiring is properly installed and that the fixture or fan is functioning correctly. Follow these steps to turn on the power and test the electrical connection:
1. Double-check the setup: Before turning on the power, visually inspect the entire installation to ensure that all connections are secure, wires are properly insulated, and the fixture or fan is securely mounted. Look for any signs of damage, loose wires, or exposed connections.
2. Restore power: Go to the electrical panel or circuit breaker box and switch on the circuit breaker or fuse that corresponds to the area where you installed the ceiling electrical box. This will restore the power supply to the fixture or fan.
3. Test the lights or fan: Turn on the switch or pull the chain to activate the lights or fan. Check if the fixture or fan functions properly, including the on/off functionality, light illumination, and fan speed (if applicable). Ensure there are no flickering lights, unusual noises, or vibrations.
4. Test the switches: Test the switches on the wall to control the lighting fixture or ceiling fan. Make sure they turn the fixture or fan on and off effectively, without any delay or issues. Check if any dimmer switches function properly with the lights (if applicable).
5. Inspect for any issues: Observe the fixture or fan for any signs of electrical issues, such as sparks, burning smells, or overheating. Look for loose connections, flickering lights, or any abnormal behavior. If you notice any concerning signs, immediately turn off the power and consult a licensed electrician.
6. Ensure proper grounding: Use a voltage tester to ensure that the electrical box and the fixture or fan are properly grounded. This provides an additional safety measure to protect against electrical shocks.
7. Make any necessary adjustments: If you encounter any issues during testing, such as flickering lights or abnormal functionality, double-check the connections and make any necessary adjustments or repairs. Ensure all connections are secure and the wiring is properly insulated.
8. Safety precautions: During testing, be careful not to touch any exposed wires or connections. Avoid making any adjustments or repairs while the power is on to prevent accidents or electric shock. If you’re unsure or uncomfortable with the testing process, consult a licensed electrician.
By following these steps, you can turn on the power and test the electrical connection of your lighting fixture or ceiling fan. Ensuring proper functionality and safety is crucial before completing the installation process. With the power on and the electrical connection verified, you have successfully completed the installation. Now you can enjoy your newly installed fixture or fan in your space.
Conclusion
Installing a ceiling electrical box for your lighting fixture or ceiling fan is a rewarding project that enhances the functionality and aesthetic appeal of your space. By following the step-by-step process outlined in this article, you can confidently tackle the installation and ensure a safe and successful outcome.
From gathering the necessary tools and materials to turning off the power, marking the location, cutting the opening, running the electrical wiring, and connecting the wires to the electrical box, each step plays a crucial role in a well-executed installation. Properly mounting the lighting fixture or ceiling fan and testing the electrical connection are the final steps that guarantee a functional and visually pleasing addition to your room.
Throughout the installation process, it is important to prioritize safety. If you are not comfortable working with electricity, it is wise to consult a licensed electrician to handle the installation. Always turn off the power before working on electrical components, and use precautionary measures such as safety glasses, gloves, and dust masks.
Remember to carefully read and follow the manufacturer’s instructions for your specific lighting fixture or ceiling fan. These instructions provide invaluable guidance for proper installation, ensuring a good fit and optimal performance.
By successfully installing a ceiling electrical box, you have created a solid foundation for a secure and efficient electrical connection. Whether you are adding a new lighting fixture to brighten up your space or installing a ceiling fan for improved comfort, the installed electrical box guarantees stability and safety.
Now that the installation is complete, take a step back and admire your work. Enjoy the benefits and functionality that your new lighting fixture or ceiling fan brings to your space. With a properly installed ceiling electrical box, you can have peace of mind knowing that your electrical connection is reliable and safe.
Remember, if you are ever uncertain about any aspect of the installation, it is always recommended to seek the assistance of a qualified professional. By following the guidelines and taking the necessary precautions, you can successfully install a ceiling electrical box and enhance the atmosphere of your home.
Now that you've mastered installing a ceiling electrical box, why stop there? Expand your DIY skills by learning how to extend your home’s power reach safely. Our next guide walks you through running overhead electrical wiring to your garage, ensuring you manage every step with precision and ease. Perfect for homeowners looking to power up distant spaces without compromising safety or aesthetics. Get ready to light up your garage like never before!
Frequently Asked Questions about How To Install Ceiling Electrical Box
Was this page helpful?
At Storables.com, we guarantee accurate and reliable information. Our content, validated by Expert Board Contributors, is crafted following stringent Editorial Policies. We're committed to providing you with well-researched, expert-backed insights for all your informational needs.


0 thoughts on “How To Install Ceiling Electrical Box”