Home>Articles>How To Install An Electrical Box At The Depth Of Drywall In Framing
Articles
How To Install An Electrical Box At The Depth Of Drywall In Framing
Modified: November 2, 2024
Looking for articles on how to install an electrical box at the depth of drywall in framing? Learn step-by-step instructions and expert tips for a successful installation.
(Many of the links in this article redirect to a specific reviewed product. Your purchase of these products through affiliate links helps to generate commission for Storables.com, at no extra cost. Learn more)
Introduction
In any home or building construction project, electrical systems play a crucial role in providing power and lighting. When it comes to electrical installations, one important component is the electrical box. The electrical box acts as a protective enclosure for the electrical connections, ensuring safety and providing a convenient access point for future maintenance or repairs.
Installing an electrical box at the depth of drywall in framing requires careful planning and precision to ensure a secure and code-compliant installation. In this article, we will guide you through the step-by-step process of installing an electrical box at the appropriate depth of drywall in framing.
Before we dive into the installation process, it’s important to note that electrical work should only be carried out by trained professionals or experienced individuals with a good understanding of electrical systems and safety regulations. If you are unsure or uncomfortable with any aspect of the installation, it is highly recommended to consult a licensed electrician for assistance.
Throughout the installation process, we will refer to the National Electrical Code (NEC) guidelines, which outline the standard practices for safe electrical installations. It is essential to adhere to these guidelines to ensure a safe and compliant installation.
Installing an electrical box at the proper depth of drywall involves several steps, including determining the location of the box, marking the outline on the drywall, cutting out the opening, measuring and cutting the hole in the framing, inserting and securing the box, connecting the electrical wiring, and finally, installing the wall plate and testing the connections.
By following these steps, you can ensure a safe and reliable electrical installation that meets the necessary code requirements. So, let’s get started with step one: determining the location of the electrical box.
Key Takeaways:
- Precision and careful planning are crucial when installing an electrical box at the depth of drywall in framing. Prioritize safety, adhere to electrical code requirements, and consult professionals when needed for a successful and compliant installation.
- Properly securing the electrical box, making precise wire connections, and testing the installation are essential steps to ensure a reliable and efficient electrical system. Always prioritize safety and seek professional assistance if needed.
Read more: How To Put Electrical Box In Drywall
Step 1: Determine the Location of the Electrical Box
Before you begin the installation, it’s important to carefully determine the location where you want to install the electrical box. The location will depend on the specific electrical appliance or fixture that you are planning to connect. Here are some guidelines to help you determine the ideal location:
1. Consider the wiring requirements: Take into account the wiring requirements for the electrical device you will be connecting to the box. For example, if you’re installing an outlet, you’ll need to ensure that there is an existing electrical circuit nearby that you can tap into.
2. Accessibility: Ensure that the electrical box will be easily accessible for future maintenance or repairs. Avoid installing it in hard-to-reach or concealed areas, as this can make troubleshooting or upgrading more challenging.
3. Code requirements: Familiarize yourself with the local electrical code requirements for box placement. Codes may vary depending on your location, but generally, there are guidelines for the minimum and maximum height at which the box should be installed.
4. Clearances: Consider any clearance requirements specified by the NEC. For example, you may need to maintain a certain distance from flammable materials or ensure that the box is not obstructed by obstructions such as pipes or structural elements.
Once you have carefully determined the ideal location for the electrical box, mark the spot lightly with a pencil or use masking tape to indicate the placement. This will serve as a reference point as you proceed with the installation process.
Remember, it is crucial to ensure that the location you choose complies with the electrical code in your area. This will help guarantee the safety and functionality of the electrical installation. If you are unsure about code requirements or need assistance in determining the best location, consult with a licensed electrician who can provide expert guidance.
With the location of the electrical box determined, we can now move onto step two: marking the outline of the box on the drywall.
Step 2: Mark the Outline of the Electrical Box on the Drywall
With the location for the electrical box determined, the next step is to mark the outline of the box on the drywall. This will serve as a guide for cutting out the opening for the electrical box. Here’s how you can do it:
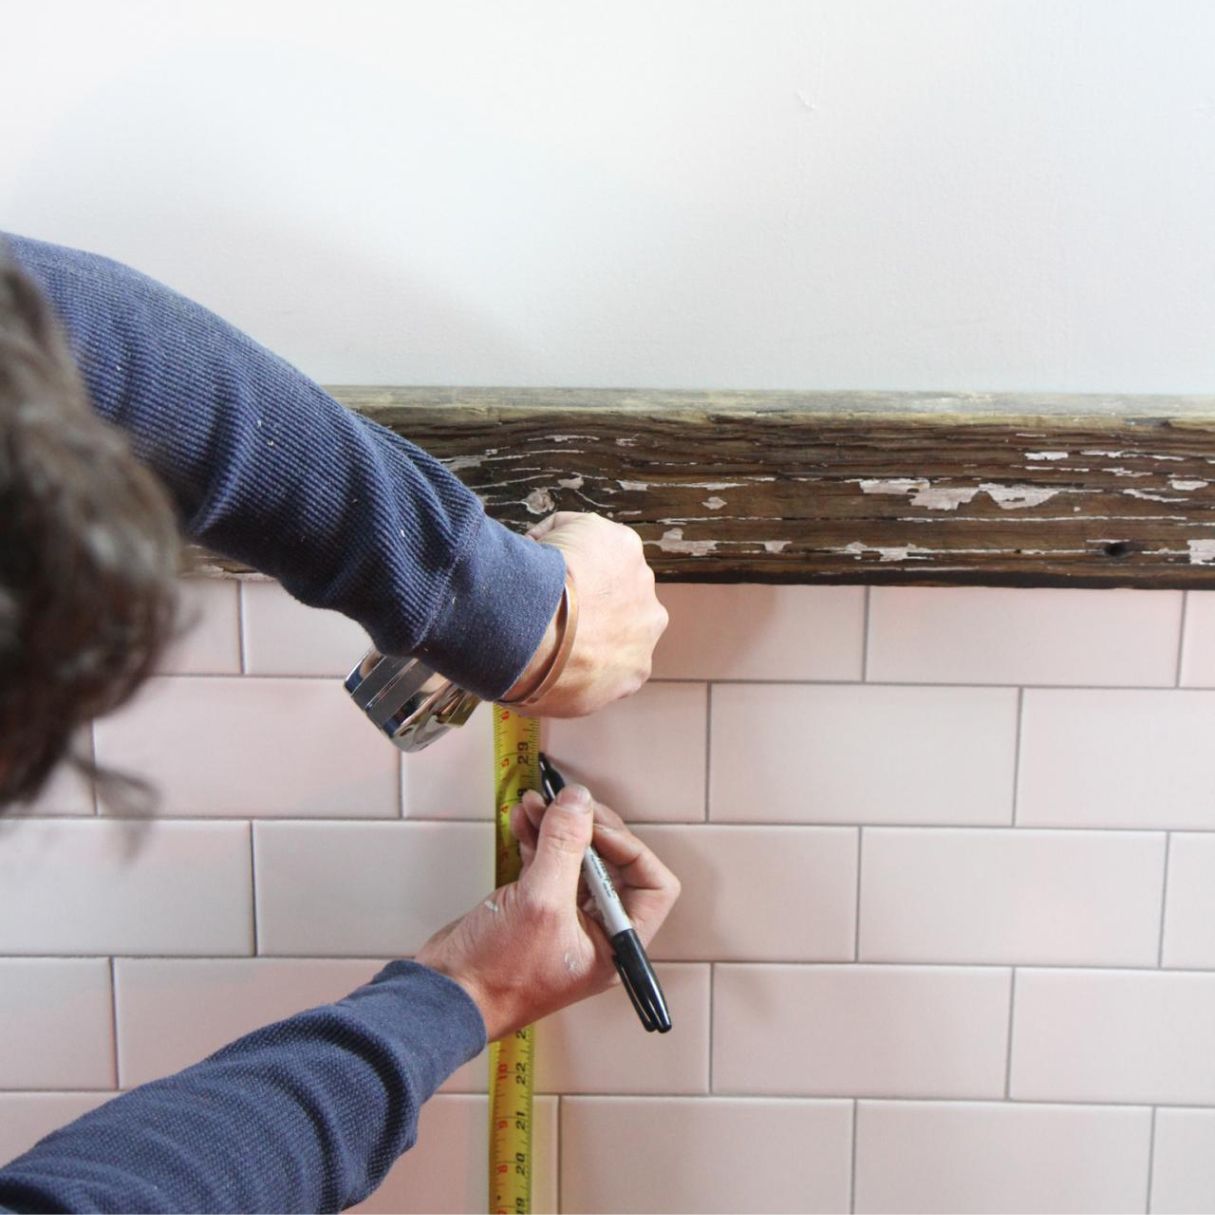
1. Gather the necessary tools: To mark the outline of the electrical box, you will need a pencil or a marker, a measuring tape, and a level. Having these tools on hand will ensure accuracy in marking the outline.
2. Measure and mark the dimensions: Measure the dimensions of the electrical box, including its height and width. Use the measuring tape to transfer these measurements onto the drywall, starting from the reference point you marked in Step 1.
3. Use a level for accuracy: To ensure that the outline is properly aligned, use a level to check that the lines are straight and horizontal or vertical, depending on the orientation of the electrical box. This will help ensure a clean and professional-looking installation.
4. Account for the box depth: When marking the outline, remember to account for the depth of the electrical box. The depth will vary depending on the specific box you are using. Typically, boxes have a depth of around 1.5 to 2 inches. Make sure to extend the outline accordingly to accommodate the box’s depth.
5. Double-check the location: Before proceeding with the cut, double-check the marked outline to ensure it is in the correct location and aligns with your initial placement decision. Take a step back and visualize how the box will fit into the wall.
Once you have accurately marked the outline of the electrical box on the drywall, double-check all measurements and ensure that it aligns with your needs and preferences. This step is crucial as it provides a clear guide for the next step: cutting out the opening for the electrical box.
Remember, precision and accuracy are key in this step to ensure a proper fit for the electrical box. Take your time and make any necessary adjustments before moving forward. With the outline marked, we are ready to proceed to step three: cutting out the opening for the electrical box.
Step 3: Cut Out the Opening for the Electrical Box
Now that you have marked the outline of the electrical box on the drywall, it’s time to cut out the opening. This step requires careful precision to ensure a clean and accurate cut. Here’s how you can proceed:
1. Safety first: Before you begin cutting, make sure to turn off the power supply to the area where you will be working. This will prevent any accidental contact with live wires and reduce the risk of electrical shock.
2. Gather the necessary tools: To cut out the opening, you will need a drywall saw or a keyhole saw. These types of saws have small, sharp teeth that make it easier to cut through drywall. Additionally, you may want to have a utility knife and a screwdriver on hand.
3. Begin cutting: Start by using the drywall saw to carefully cut along the marked outline of the electrical box. Take your time and make slow, controlled cuts to ensure accuracy. It’s important to follow the outline closely to create a neat and precise opening.
4. Check for obstructions: As you cut, be mindful of any potential obstructions behind the drywall, such as electrical wires, plumbing pipes, or structural elements. Use a screwdriver or a utility knife to carefully probe the area and ensure that there are no hidden obstructions that could be damaged during the cutting process.
5. Remove the cut section: Once you have completed the cut, gently pry the cut section of drywall away from the wall. Use a utility knife to score along any remaining edges if necessary. Be cautious not to damage the surrounding drywall.
6. Inspect the opening: After removing the cut section, inspect the opening to ensure that it matches the outline of the electrical box. Make any necessary adjustments or minor cuts to ensure a proper fit.
Cutting out the opening for the electrical box requires patience and precision. Take your time and double-check your work before proceeding to the next step. It’s crucial to create a clean and accurate opening to ensure a secure installation.
Now that the opening is complete, we can move on to step four: measuring and cutting the electrical box hole in the framing.
Step 4: Measure and Cut the Electrical Box Hole in the Framing
With the drywall opening completed, the next step is to measure and cut the electrical box hole in the framing. This step ensures that the box is securely mounted within the wall structure. Here’s how you can proceed:
1. Locate the framing: Before you can measure and cut the electrical box hole, you need to identify the position of the wall studs or other framing members behind the drywall. Use a stud finder or tap along the wall to locate the framing.
2. Measure and mark the box hole dimensions: Measure the dimensions of the electrical box, including its height, width, and depth. Transfer these measurements onto the adjacent framing member behind the cut drywall to mark the box hole.
3. Ensure proper positioning: Ensure that the marked box hole aligns with the electrical box opening in the drywall. Double-check the measurements to make sure the hole will accommodate the box without any obstructions or interference.
4. Use a reciprocating saw or keyhole saw: Once the box hole is marked, use a reciprocating saw or keyhole saw to carefully cut along the lines. Take caution to stay within the marked box hole dimensions and avoid cutting into any nearby wires, pipes, or other obstacles.
5. Finishing the cut: Once the initial cut is made, use a utility knife to score along the edges of the framing member, allowing for a clean and precise cut. Be careful not to apply excessive force that could damage the surrounding structure.
6. Test the fit: After cutting the electrical box hole, test the fit by attempting to insert the electrical box into the hole. Ensure that the box fits securely and flush within the framing, without any gaps or wobbling.
Remember, accuracy is crucial when measuring and cutting the electrical box hole in the framing. Take your time to ensure precise measurements and cuts. It’s essential that the box fits snugly within the framing to provide stability and support for the electrical connections.
With the electrical box hole cut in the framing, we can now proceed to step five: inserting the electrical box into the hole and securing it to the framing.
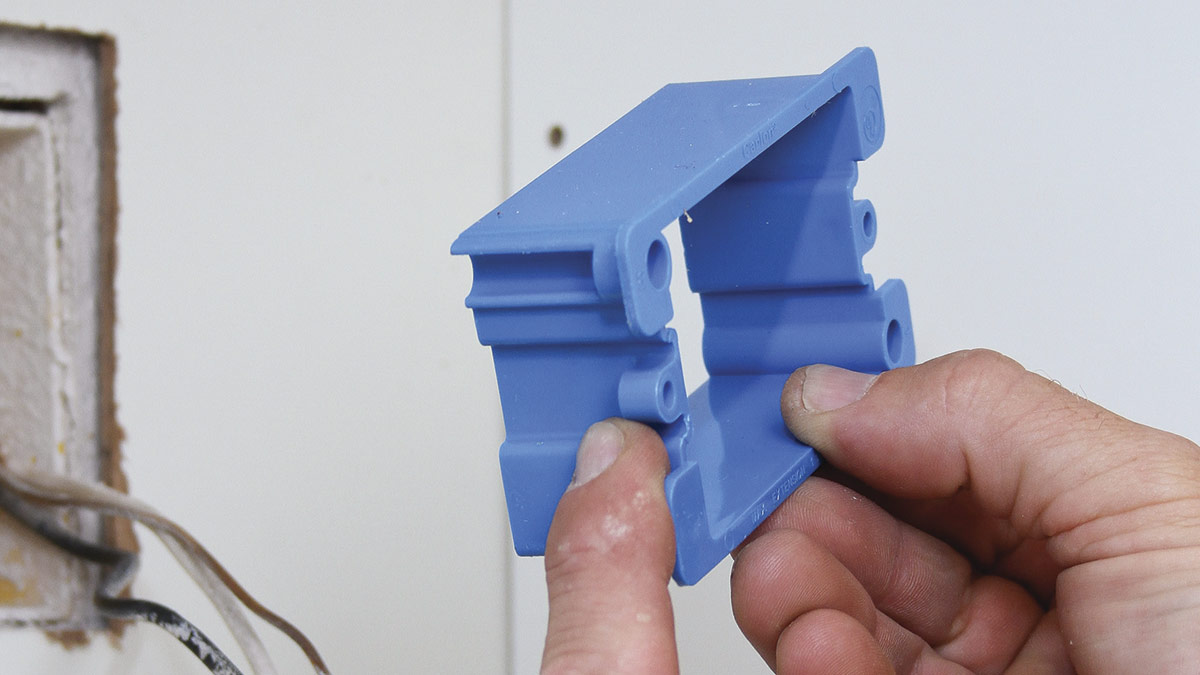
When installing an electrical box at the depth of drywall in framing, make sure to use a box extender to bring the box flush with the finished wall surface. This will ensure a proper fit for switches and outlets.
Read more: How To Install Electrical Box
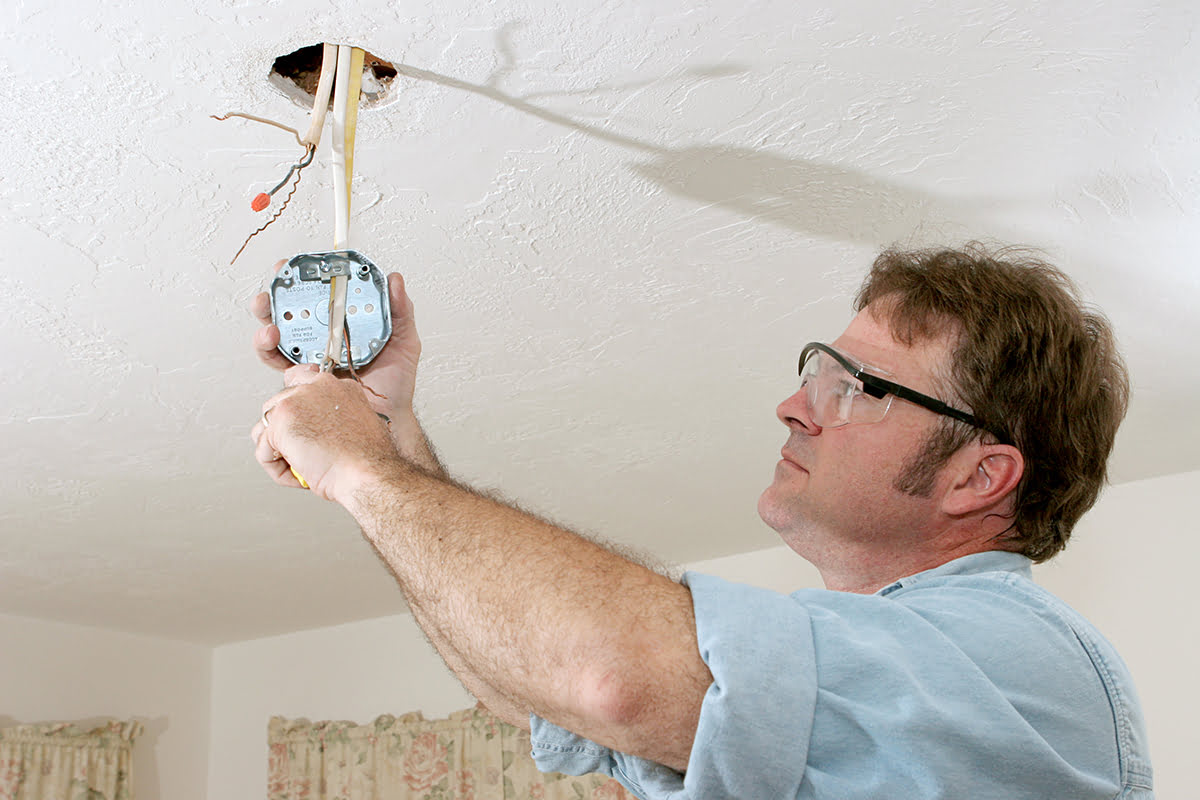
Step 5: Insert the Electrical Box into the Hole
Now that the electrical box hole has been cut in the framing, it’s time to insert the electrical box into the hole. This step ensures that the box is securely placed within the wall, ready for the electrical connections. Here’s how you can proceed:
1. Prepare the electrical box: Before inserting the box, remove any covers or knockout holes that are not needed for your specific installation. These knockout holes are designed to allow access for electrical wiring. Use a screwdriver or pliers to remove them as necessary.
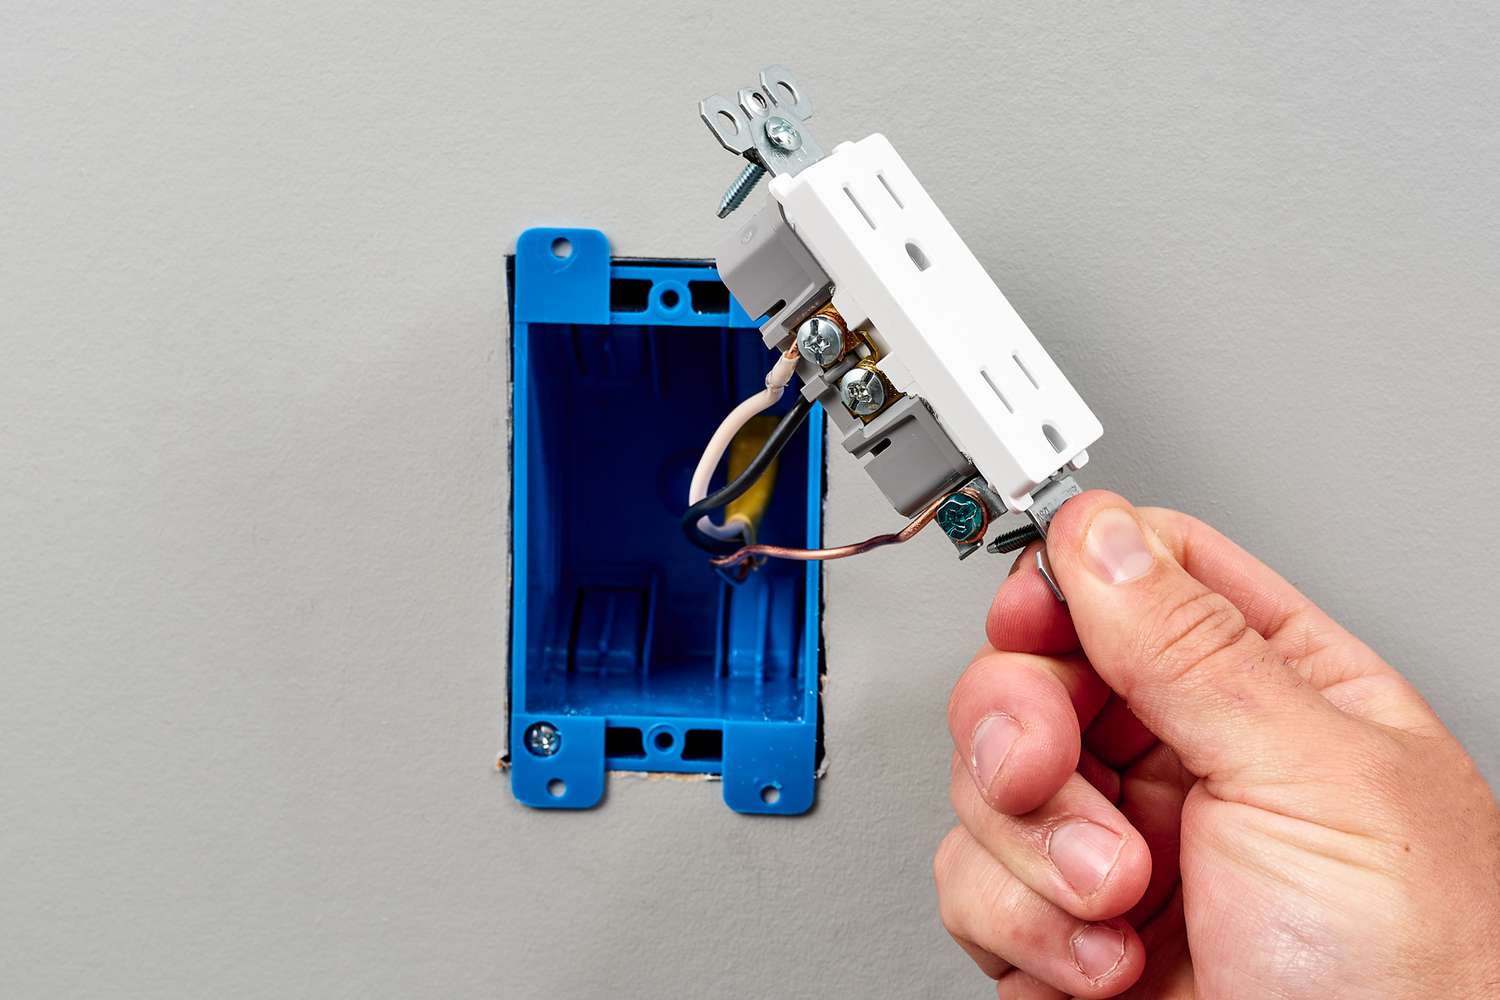
2. Orient the box correctly: Ensure that the electrical box is oriented correctly with the openings facing the front, allowing easy access for wiring connections. Align any screw holes on the box with the corresponding holes in the framing for secure attachment.
3. Insert the box into the hole: Gently insert the electrical box into the hole in the framing. Take care not to damage the box or apply excessive force that could potentially deform the box or the surrounding wall structure.
4. Check the box position: Once the box is inserted, check that it is flush with the front of the drywall. The front of the box should be level with or slightly protrude from the wall surface. Use a level to ensure proper alignment.
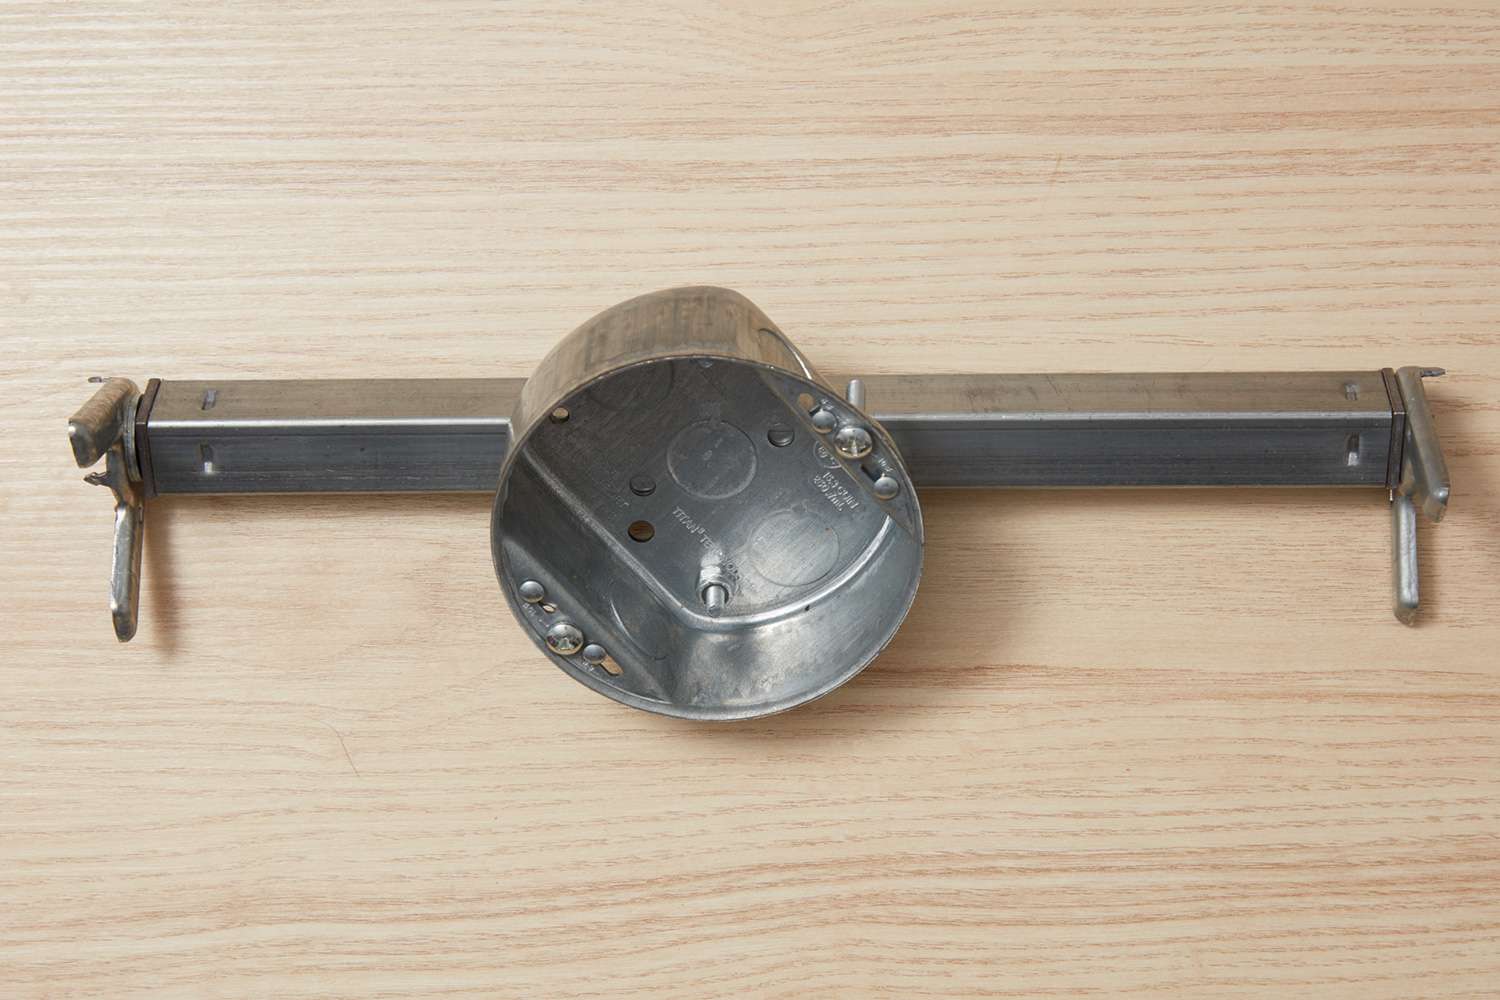
5. Secure the box to the framing: To secure the electrical box in place, use screws or nails to fasten it to the adjacent framing members. Insert the screws or nails through the provided screw holes in the box and into the framing, ensuring a tight and secure fit.
6. Double-check the stability: After securing the electrical box, give it a gentle shake to check for any looseness or movement. It should feel stable and secure within the wall. If there is any movement, tighten the screws or nails further to ensure a secure attachment.
By properly inserting and securing the electrical box into the hole in the framing, you ensure that it is adequately supported and stable for the electrical connections. The snug fit and secure attachment are essential for the longevity and safety of your electrical installation.
With the electrical box securely inserted, we can now move on to step six: connecting the electrical wiring to the box.
Step 6: Secure the Electrical Box to the Framing
Once you have inserted the electrical box into the hole in the framing, the next step is to secure it in place. Properly securing the electrical box ensures that it remains stable and stationary during the electrical wiring process. Here’s how you can securely attach the electrical box to the framing:
1. Use appropriate fasteners: Select the appropriate screws or nails to secure the electrical box to the framing. The size and type of fasteners may vary depending on the specific electrical box and the framing material being used. Refer to the manufacturer’s instructions for recommended fasteners.
2. Align the screw holes: Align the screw or nail holes on the electrical box with the corresponding holes in the framing. Ensure that the box is properly positioned and level with the front of the drywall.
3. Insert the fasteners: Insert the screws or nails through the provided screw holes in the electrical box and into the framing. Apply enough pressure to create a secure connection, but be cautious not to overtighten, as this can cause damage to the box or the framing.
4. Check for stability: Once all the fasteners are in place, give the electrical box a gentle shake to check for any movement or looseness. It should feel stable and securely attached to the framing. If any movement is detected, tighten the fasteners further to ensure a tight fit.
5. Trim excess wiring: If there is excess electrical wiring protruding from the box, use wire cutters or a wire stripper to carefully trim it to the appropriate length. Ensure that there is enough wiring remaining to make the necessary electrical connections.
6. Inspect the box: After securing the electrical box, visually inspect it to ensure that it is flush and level with the surrounding surface. There should be no gaps between the box and the drywall. If any adjustments are needed, reposition the box as necessary and secure it again.
Securing the electrical box to the framing is a critical step in the installation process. The stable attachment ensures that the box remains in place during future use and minimizes the risk of any unintended movement or damage to the wiring connections.
With the electrical box securely attached to the framing, we can now move on to step seven: connecting the electrical wiring to the box.
Step 7: Connect the Electrical Wiring to the Box
With the electrical box securely attached to the framing, it’s time to connect the electrical wiring. This step involves making the necessary wiring connections within the box, ensuring proper electrical conductivity and safety. Follow these steps to connect the electrical wiring to the box:
1. Turn off the power: Before you begin any electrical work, turn off the power supply to the circuit at the main breaker or fuse box. Use a voltage tester to double-check that there is no electrical current flowing to the area where you will be working.
2. Prepare the wires: Strip the insulation off the ends of the electrical wires using a wire stripper. Be sure to remove just enough insulation to expose the bare wire, without cutting into the wire itself. If needed, trim the wires to the appropriate length for a clean and efficient connection.
3. Attach grounding wires: If you have a grounding wire (typically green or bare copper), attach it to the grounding screw inside the electrical box. Wrap the wire around the screw in a clockwise direction and tighten securely. The grounding wire is essential for safety and should be connected properly.
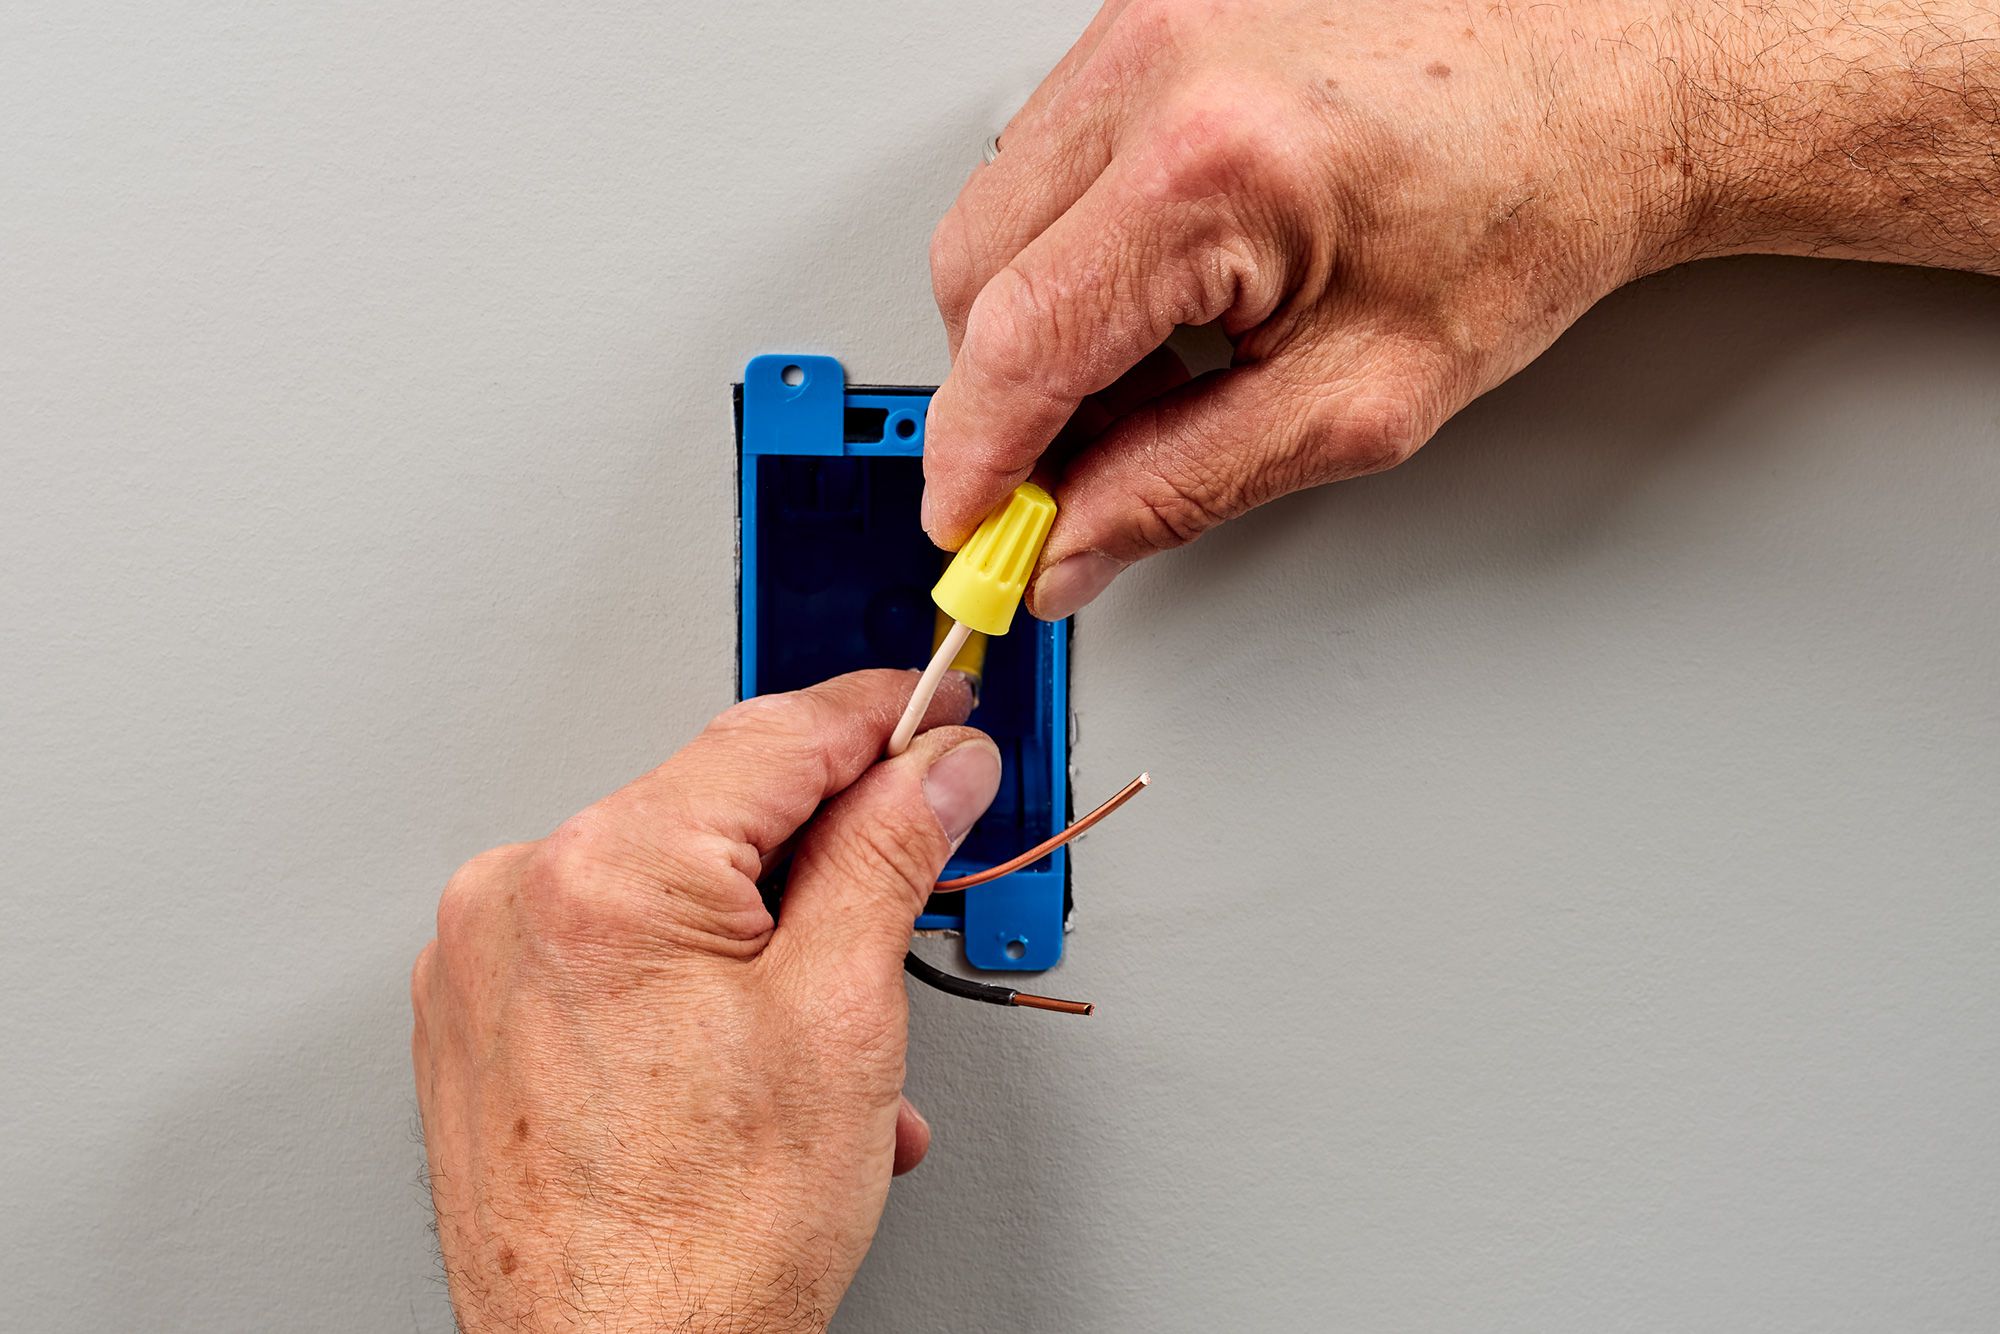
4. Install wire connectors: Depending on the specific installation, you may need to use wire connectors, such as wire nuts, to secure the connections. Twist the wires together, ensuring that the same color wires are connected (black to black, white to white, etc.), and then screw on the appropriate wire connectors. Follow the manufacturer’s instructions for proper installation.
5. Properly route and secure the wires: Arrange the wires neatly within the electrical box, ensuring that there is no tension or strain on the connections. Use cable clamps or staples to secure the wiring to the framing, following the electrical code requirements.
6. Check the connections: Inspect all the wiring connections to ensure they are secure and properly tightened. Make sure there are no loose or exposed wires. Pay close attention to avoid any crossed or touching wires, as this can cause electrical hazards.
7. Install a grounding screw strap (if required): In some cases, you may need to install a grounding screw strap for metal electrical boxes or when connecting armored cables. Refer to the product instructions or consult an electrician to ensure proper grounding if required.
8. Double-check the wiring: Once the connections are made, re-test the wires with a voltage tester to confirm that there is no electrical current present. This is an essential safety step to ensure that the circuit is completely turned off.
Properly connecting the electrical wiring is crucial for the overall functionality and safety of your electrical installation. Ensure that all connections are secure, properly insulated, and follow the electrical code requirements.
With the electrical wiring connected to the box, we can now move on to step eight: installing the wall plate and testing the connections.
Step 8: Install the Wall Plate and Test the Connections
After connecting the electrical wiring to the box, the final step is to install the wall plate and test the connections. This step ensures that the electrical installation is complete, safe, and ready for use. Follow these steps to install the wall plate and test the connections:
1. Choose the appropriate wall plate: Select a wall plate that matches the style and function of the electrical device you have installed, such as a switch or outlet. Ensure that the wall plate is compatible with the electrical box and properly covers the opening.
2. Align the screw holes: Position the wall plate over the electrical box, aligning the screw holes on the plate with the corresponding holes on the box. Ensure that the plate is level and centered on the box.
3. Secure the wall plate: Insert the screws provided with the wall plate through the screw holes and into the screw holes on the electrical box. Use a screwdriver to tighten the screws until the wall plate is firmly attached, but avoid over-tightening, as this can damage the plate or the box.
4. Test the connections: With the wall plate installed, restore power to the circuit by turning the breaker back on at the main breaker or fuse box. Test the connections to ensure that everything is functioning properly. For outlets, plug in a device to verify power. For switches, flip the switch and observe the corresponding lights or devices.
5. Check for any issues: While testing the connections, be vigilant for any unusual sounds, sparks, or flickering lights. These can indicate faulty wiring or improper connections. If you notice any issues, immediately turn off the power and consult a licensed electrician for further inspection and repairs.
6. Inspect for proper fit and cover: Verify that the wall plate is securely fastened and covers the electrical box completely. Make sure there are no gaps or exposed wiring. The wall plate should fit snugly against the wall, providing a finished appearance.
7. Final safety check: Once you have tested the connections and ensured the proper fit of the wall plate, double-check that all wiring is properly secured within the box. Inspect for any loose wires or potential hazards. Ensure that there are no signs of overheating or damage to the box or wiring.
By installing the wall plate and testing the connections, you confirm that the electrical installation is complete and ready for safe use. The wall plate not only provides a finished look but also acts as a protective barrier, preventing accidental contact with the electrical components within the box.
Remember, if at any point during the installation process you encounter difficulties or are unsure about proper procedures, it is advisable to seek the assistance of a licensed electrician to ensure a safe and compliant electrical installation.
With the wall plate installed and the connections tested, your electrical box installation is complete. Enjoy the benefits of a properly installed and functioning electrical system in your home or building.
Read more: How To Install A Box Spring On A Bed Frame
Conclusion
Installing an electrical box at the appropriate depth of drywall in framing is an important part of any electrical installation project. By following the step-by-step process outlined in this article, you can ensure a safe and code-compliant installation.
Throughout the installation process, it is crucial to prioritize safety. Always turn off the power supply before beginning any work and double-check that there is no electrical current present. Take the necessary precautions to protect yourself and others from electrical hazards.
Careful planning, accurate measurements, and precise cuts are essential to achieve a successful installation. Take the time to determine the ideal location for the electrical box, mark the outline on the drywall, and cut out the opening with precision. Properly securing the electrical box to the framing ensures stability and support for the connections.
Connecting the electrical wiring to the box requires attention to detail and following the electrical code guidelines. Safely make the necessary wire connections, ensuring proper insulation and the correct alignment of wires.
Finally, installing the wall plate and testing the connections provide the finishing touches to the installation. It not only enhances the aesthetic appearance but also provides a protective covering for the electrical components.
Remember, if at any point during the installation process you have doubts or concerns, it is advisable to seek the assistance of a licensed electrician. They have the expertise and knowledge to ensure a safe and professional installation.
By following the step-by-step guide outlined in this article, you can confidently install an electrical box at the depth of drywall in framing. With proper installation, you can enjoy a reliable and efficient electrical system that meets the necessary safety standards.
Always prioritize safety, adhere to the electrical code requirements, and consult professionals when needed. With these considerations in mind, you are well on your way to a successful and hassle-free electrical box installation.
Frequently Asked Questions about How To Install An Electrical Box At The Depth Of Drywall In Framing
Was this page helpful?
At Storables.com, we guarantee accurate and reliable information. Our content, validated by Expert Board Contributors, is crafted following stringent Editorial Policies. We're committed to providing you with well-researched, expert-backed insights for all your informational needs.


0 thoughts on “How To Install An Electrical Box At The Depth Of Drywall In Framing”