
Articles
How To Install Blackout Roller Blinds
Modified: February 24, 2024
Learn how to install blackout roller blinds with our informative articles. Step-by-step guides and expert tips to make the process easy and hassle-free.
(Many of the links in this article redirect to a specific reviewed product. Your purchase of these products through affiliate links helps to generate commission for Storables.com, at no extra cost. Learn more)
Introduction
Blackout roller blinds are an excellent addition to any home or office, providing privacy and blocking out unwanted light. Whether you want to enjoy a movie in a darkened room, get a good night’s sleep, or create a productive working environment, blackout roller blinds offer the perfect solution. In this article, we will guide you through the step-by-step process of installing blackout roller blinds, ensuring that you can enjoy their benefits in no time.
Before diving into the installation process, it is crucial to have the right measurements to ensure a precise fit. In Step 1, we will walk you through how to measure your window accurately. After that, in Step 2, we will discuss how to choose the right size of blackout roller blinds based on your window measurements.
Once you have your measurements and the correct blinds, it’s time to move on to Step 3, where we will cover the tools and materials you will need for the installation. Having these ready in advance will streamline the process and prevent any unnecessary delays.
In Step 4, we will dive into the installation process itself. You will learn how to install the bracket securely, which serves as the foundation for the roller blinds. Following that, in Step 5, we will provide guidance on attaching the roller blinds to the bracket, ensuring a snug and secure fit.
After the blinds are installed, it is important to make any necessary adjustments to ensure smooth operation. Step 6 will guide you through adjusting and testing the blinds to ensure they open, close, and roll up smoothly.
In Step 7, we will discuss the importance of securing the cord or chain for safety reasons. It is crucial to follow proper safety measures to prevent accidents, especially in households with children or pets.
Lastly, in Step 8, we will provide tips on how to maintain and clean your blackout roller blinds to prolong their lifespan and keep them looking their best.
By following these step-by-step instructions, you will be able to successfully install blackout roller blinds in your home or office. Embrace the benefits of privacy and light control that these blinds offer, and create a comfortable and visually appealing environment in any room. Now, let’s get started.
Key Takeaways:
- Properly measuring your window and choosing the right size of blackout roller blinds are crucial for a seamless installation. Prioritize safety, maintenance, and cleaning to ensure long-lasting functionality and a visually appealing space.
- By following the step-by-step installation guide, you can enjoy the benefits of increased privacy, light control, and a comfortable environment. Embrace the convenience of blackout roller blinds and prioritize safety for a worry-free experience.
Read more: What Are Roller Blinds
Step 1: Measure the Window
The first step in installing blackout roller blinds is to accurately measure your window. Proper measurements are crucial for ensuring that the blinds fit perfectly and provide sufficient coverage. Here’s how you can measure your window:
- Start by using a metal tape measure. It’s important to use a metal tape measure rather than a cloth one as it provides more accurate measurements.
- Measure the width of the window frame from left to right. Take the measurement at three different points: the top, middle, and bottom of the window. Record the smallest measurement as the width.
- Next, measure the height of the window frame from the top to the bottom. Again, take the measurement at three different points: the left, center, and right side of the window. Note down the smallest measurement as the height.
- Once you have the width and height measurements, add an extra allowance to ensure the blinds cover the entire window. A good rule of thumb is to add 2-3 inches to the width and 4-6 inches to the height for better light control and privacy.
It’s important to note that the measurements should be taken from the inside of the window frame. If you prefer the blinds to hang outside the frame for a more aesthetic look or to prevent any light leakage, measure accordingly.
Additionally, if you have multiple windows that you want to install blackout roller blinds on, make sure to measure each window individually. Even windows from the same room may have slightly different measurements, so it’s always better to be precise.
By accurately measuring your window, you’ll ensure the perfect fit for your blackout roller blinds. Taking the time to measure correctly from the start will save you from any potential issues during the installation process. With the measurements in hand, you’re now ready to move on to Step 2: Choosing the right size of blackout roller blinds.
Step 2: Choose the Right Size of Blackout Roller Blinds
Choosing the right size of blackout roller blinds is crucial for a proper installation and optimal light control. Here’s how you can ensure you select the appropriate size:
- Refer to the measurements you obtained in Step 1. The width and height measurements will determine the size of the blinds you need.
- When shopping for blackout roller blinds, pay attention to the product descriptions, which typically provide the exact dimensions. Look for blinds that closely match your window measurements.
- If you are unable to find blinds with exact measurements, choose the closest size that is slightly larger than your window. Blinds that are too small will not provide adequate coverage, while blinds that are too large may be difficult to install or obstruct the window frame.
- Keep in mind that most blackout roller blinds can be cut to fit your specific window size. If you find blinds that are slightly larger than your window, you can trim them down to achieve a perfect fit. However, exercise caution when cutting the blinds and follow the manufacturer’s instructions to avoid any damage.
It’s important to note that blackout roller blinds come in a variety of sizes, so you are likely to find options that suit your specific window dimensions. Additionally, some manufacturers may offer custom blinds, which can be tailor-made to fit your windows perfectly.
When selecting the right size, consider not only the dimensions but also the desired aesthetic. A properly sized blind will cover the window frame adequately and provide a clean and polished look.
By choosing the right size of blackout roller blinds, you’ll ensure a seamless installation and optimal light control in your space. Now that you have the correct measurements and have considered the size, you’re ready to move on to Step 3: Preparing the tools and materials for the installation process.
Step 3: Prepare the Tools and Materials
Before beginning the installation process, it’s important to gather all the necessary tools and materials. This will save you time and ensure a smooth installation. Here’s what you’ll need:
Tools:
- Power drill or screwdriver: This will be used to install the brackets and secure the roller blinds in place.
- Tape measure: It’s essential to have a tape measure handy to double-check measurements during installation.
- Pencil or marker: You’ll need a writing instrument to mark where the brackets will be installed.
- Level: A level is useful for ensuring that the blinds will be installed straight and level.
- Scissors or a utility knife: These tools may be needed to trim the blinds to the correct size, depending on your specific requirements.
Materials:
- Blackout roller blinds: Ensure that you have selected the correct size of blackout roller blinds, as discussed in Step 2.
- Mounting brackets: These brackets will serve as the support for the roller blinds. They are typically included with the blinds or can be purchased separately.
- Screws and wall anchors: Depending on the type of wall you have (drywall, concrete, etc.), you may need screws and wall anchors for secure installation.
- Cord or chain tensioner: This is important for securing the cords or chains of the blinds to prevent accidents, especially in households with children or pets.
It’s important to ensure that you have all the tools and materials ready before starting the installation. This will prevent any unnecessary interruptions or delays during the process. Check that you have everything on the list, and if not, make a trip to the hardware store to gather any missing items.
With the necessary tools and materials at hand, you’re now ready to move on to Step 4: Installing the bracket for the blackout roller blinds.
Step 4: Install the Bracket
The bracket is a crucial component in the installation of blackout roller blinds. It provides stability and support for the blinds, ensuring they stay securely in place. Follow these steps to install the bracket:
- Start by positioning the bracket on the wall or window frame where you want to install the blinds. Use a pencil or marker to mark the locations where the screws will go.
- Check that the bracket is level using a level. Adjust as needed to ensure a straight installation.
- If your window has a recessed frame, align the bracket with it. This will help the blinds fit neatly within the frame.
- Once the bracket is in the desired position, take your power drill or screwdriver and secure the bracket to the wall or window frame using the screws provided. If you’re installing into drywall, make sure to use wall anchors for added stability.
- Tighten the screws securely, but be cautious not to overtighten and damage the bracket or wall surface.
It’s important to note that the number of brackets required will depend on the width and weight of the blinds. Most standard-sized blinds will come with at least two brackets, but larger or heavier blinds may require additional brackets for proper support.
Once the bracket is securely installed, give it a gentle tug to ensure it can withstand the weight of the blinds. If it feels loose or unstable, double-check the screws and make any necessary adjustments.
By properly installing the bracket, you lay the foundation for a successful installation of blackout roller blinds. With the bracket securely in place, you’re now ready to move on to Step 5: Attaching the roller blinds to the bracket.
When installing blackout roller blinds, make sure to measure the window accurately before purchasing the blinds. This will ensure a perfect fit and maximum light blockage.
Read more: How To Make Blackout Blinds
Step 5: Attach the Roller Blinds to the Bracket
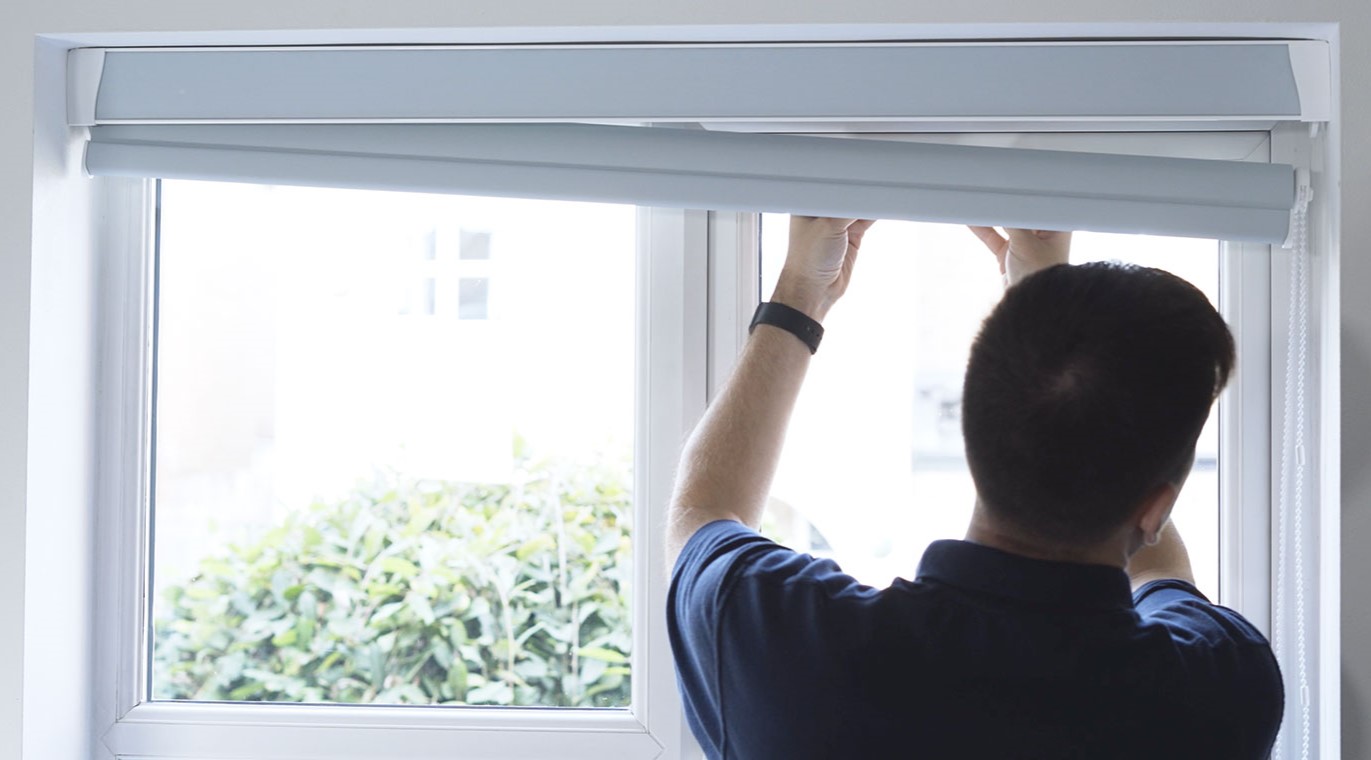
With the bracket securely installed, you’re ready to attach the blackout roller blinds. This step will ensure that the blinds are properly aligned and smoothly roll up and down. Follow these steps to attach the roller blinds to the bracket:
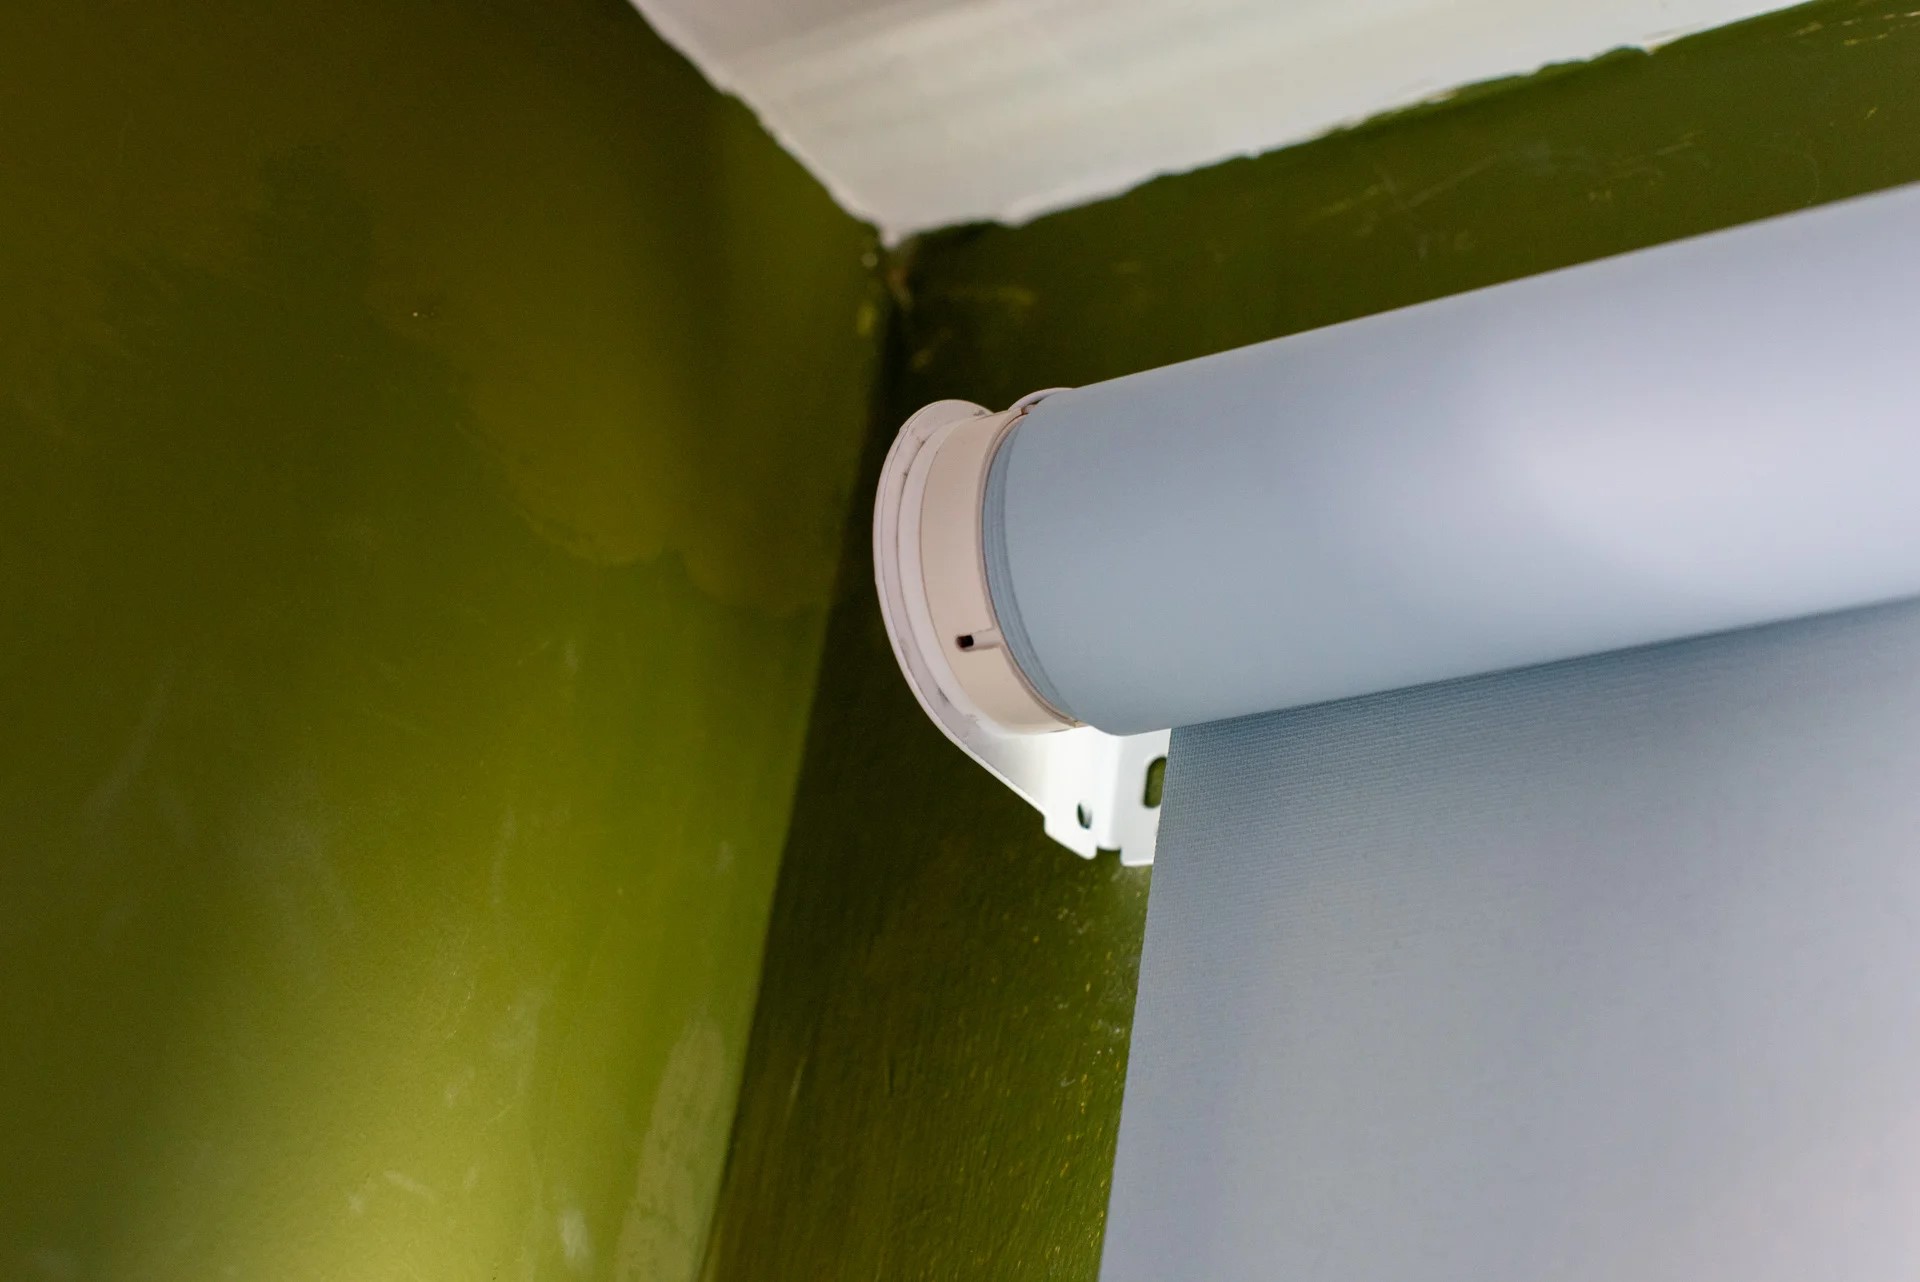
- Take your blackout roller blinds and locate the side that has the rolling mechanism and fabric.
- Position the roller blinds in front of the bracket, aligning the rolling mechanism with the bracket.
- Slide the pin or rod on the roller blinds into the opening on the bracket. The pin or rod should fit snugly into place.
- Push or snap the opposite end of the roller blinds into the other side of the bracket, ensuring that it is securely attached.
- Test the blinds by gently pulling on the fabric to check if they roll up and down smoothly. If there are any issues with the movement, adjust the placement or alignment of the roller blinds until they function properly.
It’s important to take your time during this step to ensure that the roller blinds are attached correctly. Proper alignment and attachment will prevent any incidents of the blinds falling off or not rolling up and down smoothly.
Once the blinds are properly attached, take a step back and observe the appearance and fit. Ensure that the blinds are centered and hanging evenly. Adjust the position, if necessary, to achieve a balanced and visually pleasing look.
By successfully attaching the roller blinds to the bracket, you’re now ready to move on to Step 6: Adjusting and testing the blinds to ensure smooth operation. This step will ensure that the blinds open, close, and roll up without any issues.
Step 6: Adjust and Test the Blinds
Once the blackout roller blinds are attached to the bracket, it’s important to make any necessary adjustments to ensure their smooth operation. This step will ensure that the blinds open, close, and roll up without any issues. Follow these steps to adjust and test the blinds:
- Start by gently pulling the blinds down until they reach the desired length.
- Observe the movement of the blinds as you pull them down and release. They should roll up smoothly without any resistance or uneven rolling.
- If the blinds do not roll up or down smoothly, check for any obstructions or misalignments. Adjust the position or alignment of the blinds and the bracket as needed.
- Test the blinds multiple times to ensure consistent and smooth operation. Make any necessary adjustments until the blinds operate seamlessly.
- If you notice any excessive sagging or bending of the blinds, consider adding additional support brackets to distribute the weight and prevent any strain on the rolling mechanism.
It’s important to take the time to properly adjust and test the blinds to ensure their functionality and longevity. Proper adjustment will prevent any issues such as jamming, uneven rolling, or damage to the rolling mechanism.
Once you’re satisfied with the adjustment and the smooth operation of the blinds, you can move on to the next step with peace of mind. In Step 7, we will discuss the importance of securing the cord or chain for safety reasons, especially in households with children or pets.
Step 7: Secure the Cord or Chain
Ensuring the safety of your household, especially when there are children or pets present, is paramount when it comes to window coverings with cords or chains. In this step, we will discuss how to effectively secure the cord or chain of your blackout roller blinds:
- Start by examining the cord or chain of the blinds to identify any potential hazards or loose ends.
- Review the safety guidelines provided by the manufacturer for securing the cord or chain. These guidelines are typically included in the packaging or provided on the manufacturer’s website.
- If the blinds come with a built-in safety feature, such as a cord or chain tensioner, make sure to follow the instructions for proper installation.
- If the blinds do not have a built-in safety feature, consider purchasing cord or chain safety devices separately. These devices are designed to secure the cord or chain and prevent any accidental entanglement.
- Install the cord or chain safety device according to the manufacturer’s instructions. Ensure that it is positioned high enough to be out of reach of children or pets.
- Regularly inspect the cord or chain safety device to ensure it is still securely in place and functioning properly. Replace any worn-out or damaged safety devices immediately.
It’s crucial to prioritize safety when it comes to window coverings with cords or chains. Accidental entanglement can lead to serious injuries, especially for young children or curious pets. By taking the time to secure the cord or chain, you can enjoy the benefits of blackout roller blinds while keeping your household safe.
With the cord or chain effectively secured, you’re now ready to proceed to the next step. Step 8 will cover the maintenance and cleaning of your blackout roller blinds to ensure longevity and keep them looking their best.
Step 8: Maintain and Clean the Blackout Roller Blinds
To prolong the lifespan and maintain the appearance of your blackout roller blinds, regular cleaning and maintenance are essential. Follow these steps to effectively clean and maintain your blinds:
- Start by dusting the blinds with a dry, microfiber cloth or a feather duster. Gently wipe along the surface of the blinds to remove any accumulated dust or debris.
- If there are any stains or spots on the fabric, dampen a clean cloth with warm water and mild detergent. Lightly blot the affected area to lift the stain. Avoid using harsh chemicals or abrasive cleaners, as they may damage the fabric.
- For more stubborn stains, consult the manufacturer’s guidelines for spot cleaning. They may provide specific instructions on how to safely remove tougher stains.
- Take care not to wet the entire surface of the blinds, as excessive moisture may cause damage or affect the blackout properties of the fabric.
- If your blinds have detachable fabric, follow the manufacturer’s instructions for removing and washing the fabric separately. This will allow for a more thorough cleaning and ensure that the fabric maintains its quality.
- Once the blinds are clean, allow them to air dry completely before reattaching or rolling them up.
- Regularly inspect the blinds for any signs of wear and tear, such as frayed edges or broken mechanisms. Replace any damaged components promptly to ensure the continued functionality of the blinds.
- Lastly, avoid excessive force or rough handling when operating the blinds. Gentle and smooth movements will help maintain their longevity and prevent any unnecessary damage.
By following these tips for maintenance and cleaning, you can ensure that your blackout roller blinds remain in optimal condition. Regular upkeep will not only keep them looking their best but also prolong their lifespan, allowing you to continue enjoying their benefits for years to come.
With the final step completed, you have successfully installed, adjusted, and maintained your blackout roller blinds. Congratulations on enhancing the privacy, light control, and overall aesthetic of your space. Sit back, relax, and enjoy the benefits of your newly installed blackout roller blinds!
Read more: How To Make Roller Blinds
Conclusion
Installing blackout roller blinds is a practical and stylish way to enhance privacy, control light, and create a comfortable environment in your home or office. By following the step-by-step guide outlined in this article, you’ve learned how to measure your window accurately, choose the right size of blinds, prepare the necessary tools and materials, install the bracket, attach the roller blinds, and adjust and test their functionality.
Throughout the installation process, it’s important to prioritize safety by securing the cord or chain of the blinds, especially in households with children or pets. Additionally, regular maintenance and cleaning will help prolong the lifespan of your blackout roller blinds and keep them looking their best.
With your new blackout roller blinds installed, you can enjoy the benefits of increased privacy, light control, and a visually appealing space. Whether you’re watching a movie, sleeping, or working, these blinds will create a comfortable and enjoyable environment.
Remember, proper measurements, precise installation, and regular upkeep are key to ensuring the functionality and longevity of your blackout roller blinds. Follow the guidelines provided in this article, as well as any specific instructions from the manufacturer, for optimal results.
Thank you for taking the time to learn how to install blackout roller blinds. We hope this guide has been valuable and that you enjoy the benefits of your newly installed blinds for years to come. Sit back, relax, and embrace the privacy and light control that blackout roller blinds provide!
Frequently Asked Questions about How To Install Blackout Roller Blinds
Was this page helpful?
At Storables.com, we guarantee accurate and reliable information. Our content, validated by Expert Board Contributors, is crafted following stringent Editorial Policies. We're committed to providing you with well-researched, expert-backed insights for all your informational needs.
