Articles
How To Fix The Floor
Modified: October 18, 2024
Learn effective ways to fix floor issues with our informative articles. Discover expert tips, techniques, and step-by-step guides for a successful floor repair.
(Many of the links in this article redirect to a specific reviewed product. Your purchase of these products through affiliate links helps to generate commission for Storables.com, at no extra cost. Learn more)
Introduction
Having a damaged floor can be frustrating and unsightly. Whether it’s a cracked tile, a squeaky plank, or a worn-out linoleum sheet, a damaged floor can detract from the overall aesthetics of your space and even pose a safety hazard. Fortunately, many floor issues can be easily fixed without the need for expensive professional help.
In this article, we will guide you through the step-by-step process of fixing various floor problems, from minor damages to larger sections that require repair or replacement. By following these instructions and using the right tools and materials, you can restore your floor to its former glory and create a safe and beautiful living environment.
Please note that the specific methods and materials required may vary depending on the type of flooring you have, such as hardwood, laminate, tile, or vinyl. It is essential to identify the specific type of flooring in your space before proceeding with any repairs to ensure you choose the most appropriate solution.
Before we dive into the repair process, let’s discuss the importance of identifying the source of the problem. Understanding the root cause will help you address the issue effectively and prevent future damage.
Key Takeaways:
- Proper identification of floor damage sources, gathering necessary tools, and thorough area preparation are crucial for successful floor repairs. Whether fixing minor scratches or replacing larger sections, attention to detail is key.
- While DIY floor repairs can be rewarding, seeking professional assistance for complex issues is advisable. Prioritize safety, follow manufacturer instructions, and enjoy the process of restoring your flooring.
Read more: How To Fix Linoleum Floor
Step 1: Identify the source of the problem
Before you can begin fixing your damaged floor, it is crucial to identify the source of the problem. This step is essential because it allows you to address the underlying cause and prevent further damage in the future.
Begin by inspecting the area for any visible signs of damage. Look for cracks, chips, warping, or any other anomalies that may be affecting the floor’s stability or appearance. Take note of the specific location and extent of the damage.
Next, try to determine what could have caused the damage. Common causes include water leaks, excessive moisture, heavy furniture, pet scratches, or general wear and tear over time. Understanding the cause will help you choose the most appropriate repair method and ensure that the problem doesn’t recur.
If you suspect water damage, check for any nearby plumbing issues or signs of moisture in the surrounding area. Addressing the water source is crucial to prevent further damage and mold growth. In cases of excessive moisture or humidity, consider installing a dehumidifier or improving ventilation to mitigate future damage.
If the damage seems to be the result of heavy furniture or foot traffic, consider rearranging your furniture or using rugs or protective pads to distribute the weight more evenly. This can help prevent further damage in those areas.
Lastly, if the damage appears to be due to general wear and tear, it may be time to assess the overall condition of your flooring. Determine if the damage is isolated or if it is a symptom of a larger issue. This will help you decide whether to repair the affected sections or consider replacing the flooring altogether.
By thoroughly inspecting the damage and identifying its source, you will be better equipped to address the issue effectively and prevent future problems. Let’s move on to the next step, where we gather the necessary tools and materials for the repair process.
Step 2: Gather necessary tools and materials
Before you embark on fixing your damaged floor, it is important to gather all the necessary tools and materials. Having everything at hand will save you time and ensure a smooth repair process.
The specific tools and materials you need will depend on the type of flooring you have and the extent of the damage. Here are some commonly used items that might be required:
- Replacement flooring: If you are dealing with a significant or irreparable damage, you might need to purchase replacement flooring that matches your existing flooring. Measure the area accurately to determine the quantity needed.
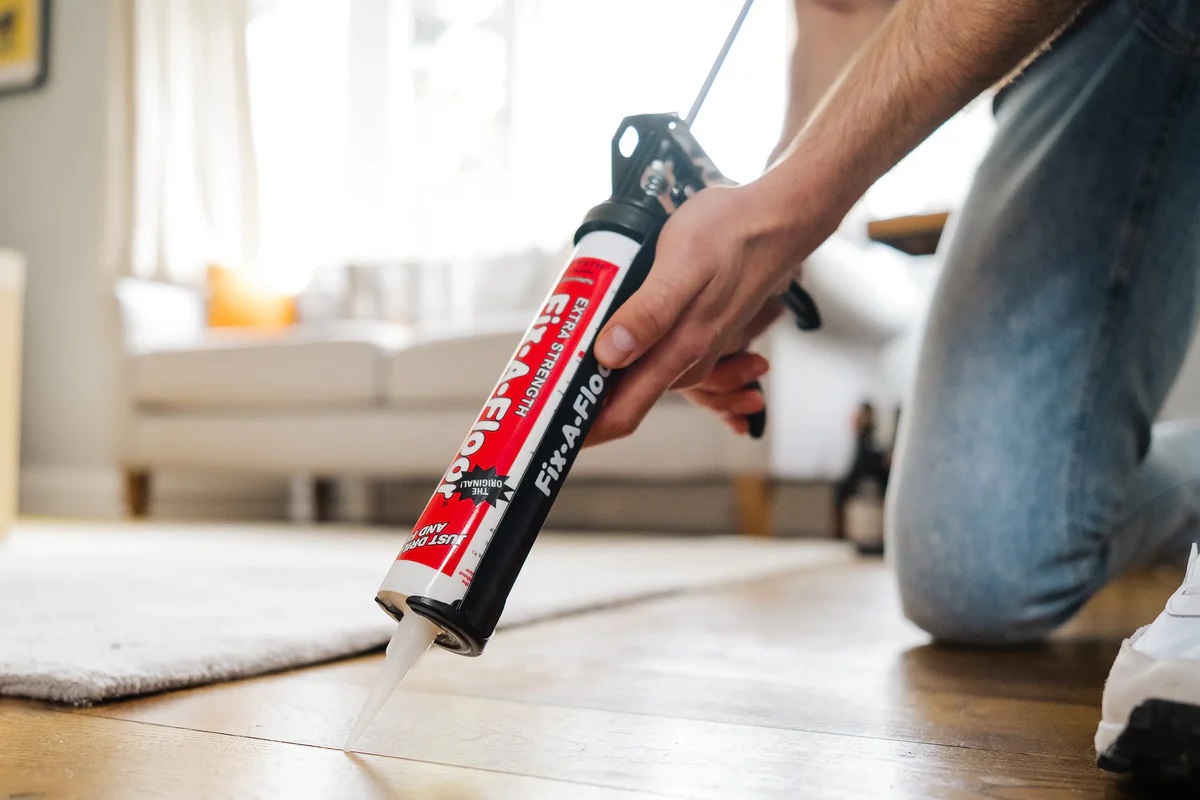
- Adhesive or flooring glue: If you are repairing loose tiles or planks, you might need adhesive or flooring glue to secure them back in place.
- Putty or filler: For minor scratches, cracks, or holes, you will need a suitable putty or filler to fill in the damaged areas and create a smooth surface.
- Utility knife or flooring saw: These tools will be useful for cutting and shaping replacement flooring, especially when dealing with intricate cuts or fitting in tight spaces.
- Trowel or putty knife: These tools are essential for applying adhesive, filler, or putty evenly and smoothly onto the damaged areas.
- Sanding tools: Depending on the type of flooring, you might need sandpaper, a sanding block, or a power sander to smooth out the repaired areas and blend them with the rest of the floor.
- Cleaners and sealers: If your flooring requires specific cleaning or sealing products, make sure to have them on hand to maintain the longevity and appearance of your floor.
- Protective gear: Safety should always be a priority. Consider wearing gloves, goggles, and a dust mask to protect yourself during the repair process.
Double-check the manufacturer’s recommendations and guidelines for your specific flooring type, as they might recommend additional tools or materials.
Once you have gathered all the necessary tools and materials, you can proceed to the next step – preparing the area for repair.
Step 3: Prepare the area
Preparing the area before repairing the damaged floor is crucial to ensure a successful and efficient repair. Proper preparation will not only make the repair process smoother but also help achieve a seamless result.
Begin by removing any furniture or objects that may obstruct your access to the damaged area. Clearing the space will allow you to work freely and prevent any accidental damage or obstruction.
Next, ensure that the floor is clean and free from dust, debris, or any loose materials. Use a broom or vacuum cleaner to remove any loose dirt or particles. For stubborn stains or spills, follow the manufacturer’s recommended cleaning method for your specific flooring type.
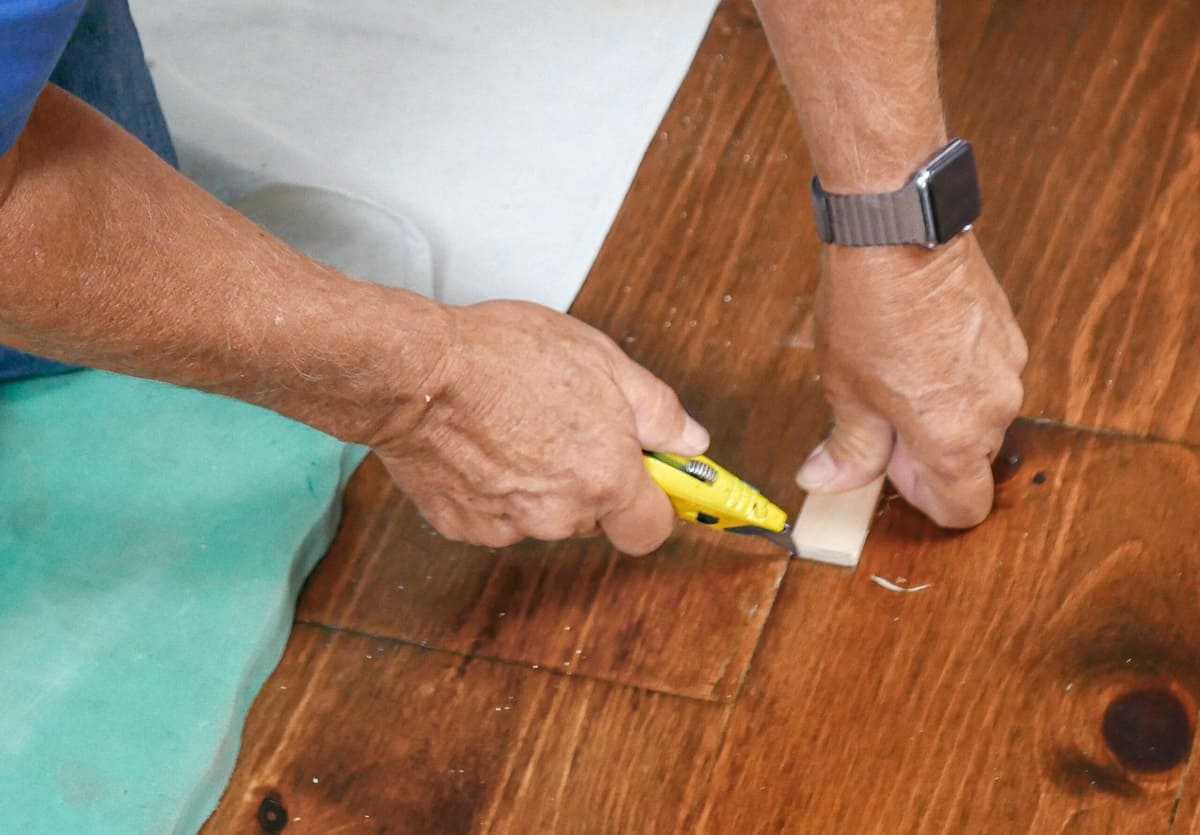
If you are repairing a specific section of the floor, you may need to remove any trim or molding around the damaged area. Carefully pry them off using a pry bar or a similar tool. Be gentle to avoid damaging the trim or the surrounding wall. Set aside the removed trim or molding safely for later reinstallation.
Before proceeding with the actual repair, take a moment to assess the subfloor or underlayment. Check for any signs of damage or instability, such as rotting wood or uneven surfaces. If you notice any issues with the subfloor, it is important to address them before moving forward with the repair to ensure a solid and long-lasting fix.
Lastly, if you are working with adhesive or flooring glue, make sure to follow the manufacturer’s instructions regarding cure time and temperature requirements. This will ensure that the adhesive sets properly and provides a strong bond between the repaired flooring and the subfloor.
By properly preparing the area, you are setting the stage for a successful repair. Now, let’s move on to fixing minor floor damages in the next step.
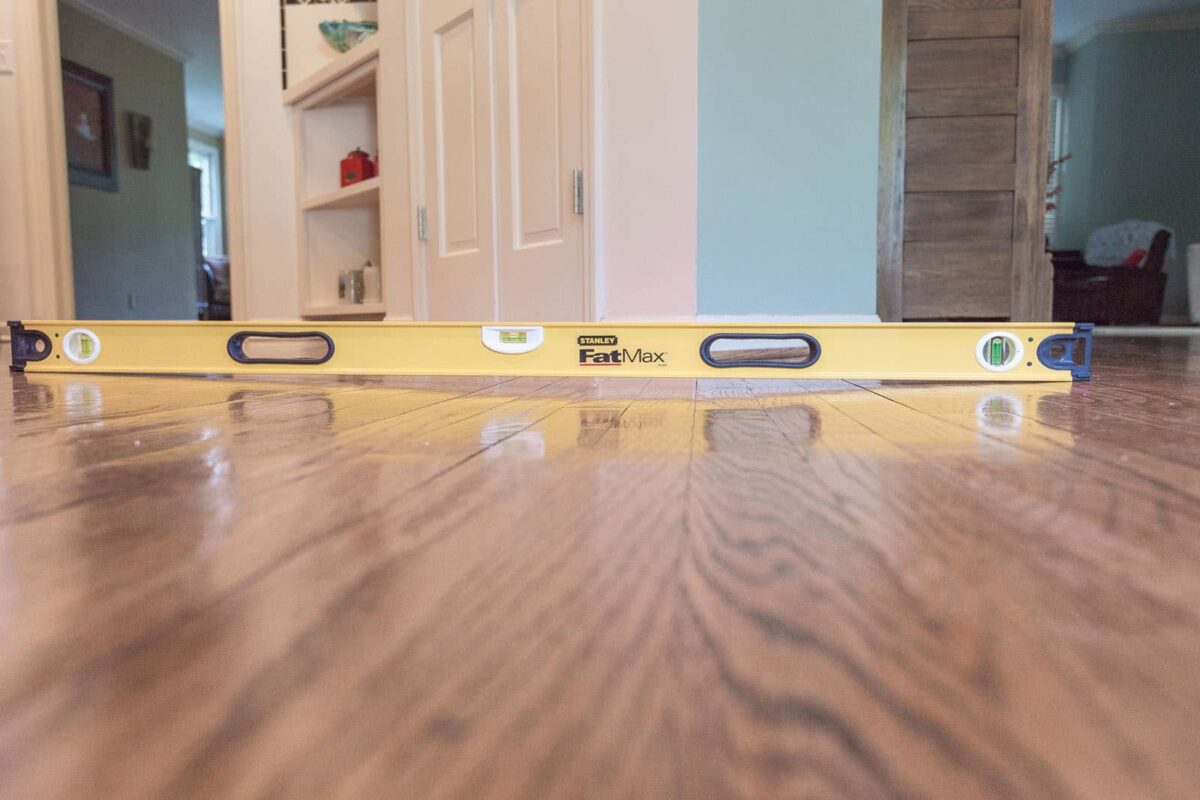
Inspect the floor for any damage or unevenness. Use a level to check for any dips or bumps. Repair any damaged areas and level the floor using a self-leveling compound if necessary. Finally, consider adding a new flooring material for a fresh look.
Step 4: Fixing minor floor damage
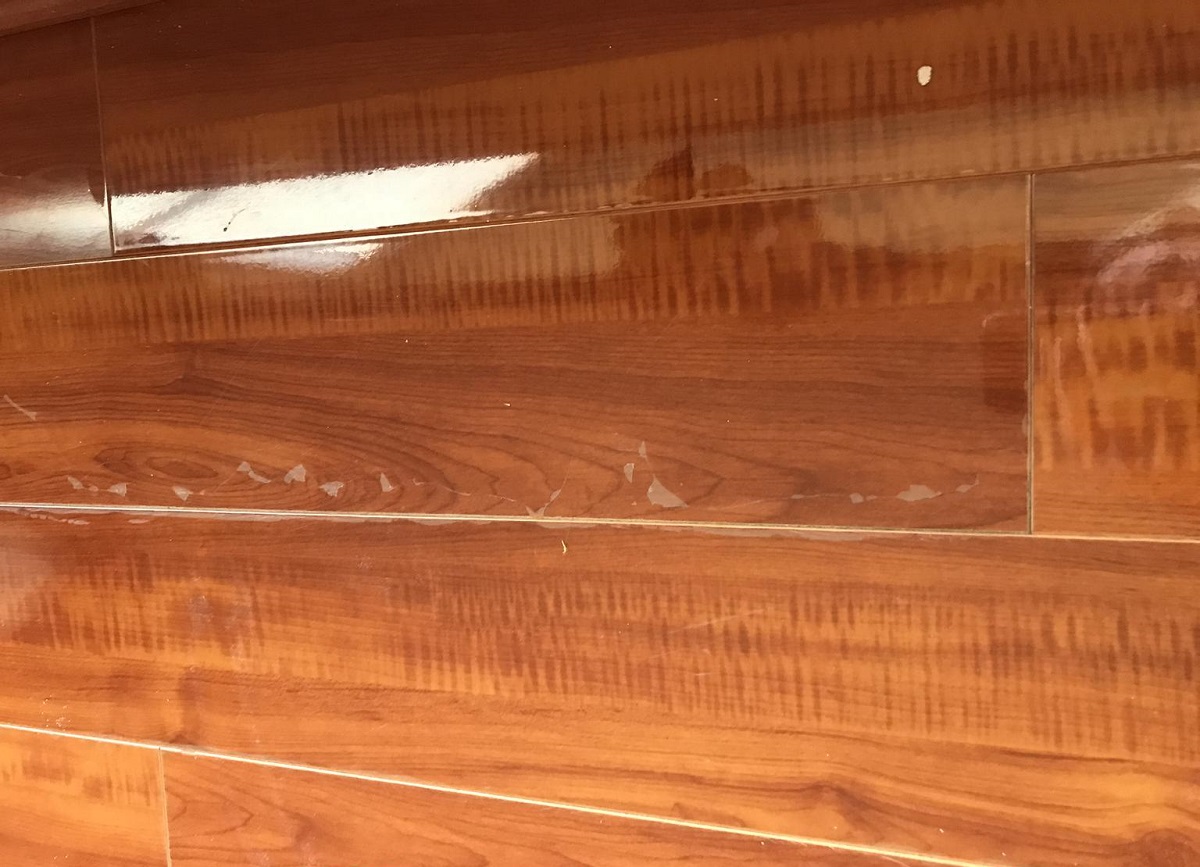
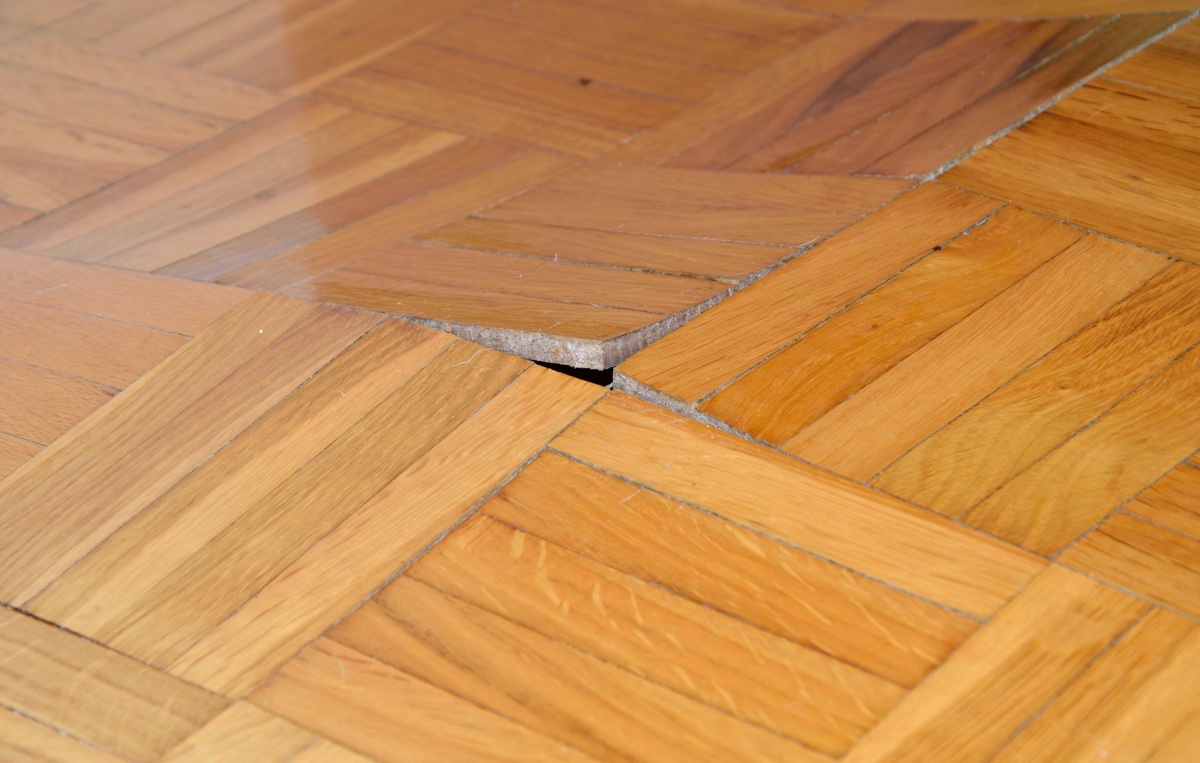
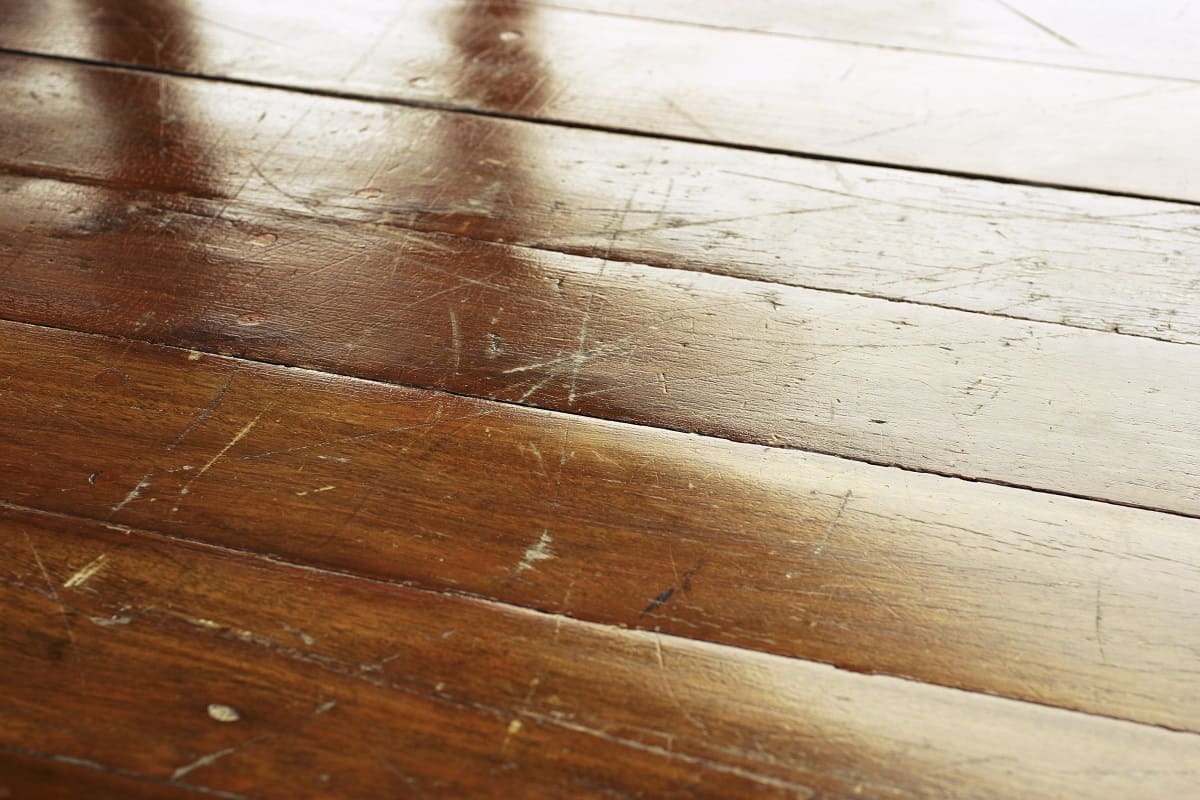
Minor floor damages, such as scratches, small cracks, or holes, can often be repaired without the need for extensive replacements. In this step, we will guide you through the process of fixing these minor issues.
Start by cleaning the damaged area thoroughly to ensure a clean and smooth surface for the repair. Remove any loose debris or particles using a broom or vacuum cleaner.
If there are scratches on the floor, you can use a suitable floor cleaner and a soft cloth to clean the area. For shallow scratches, applying a small amount of floor wax or a scratch repair kit can help camouflage the imperfections. Gently rub the wax into the scratch using a soft cloth, following the product instructions.
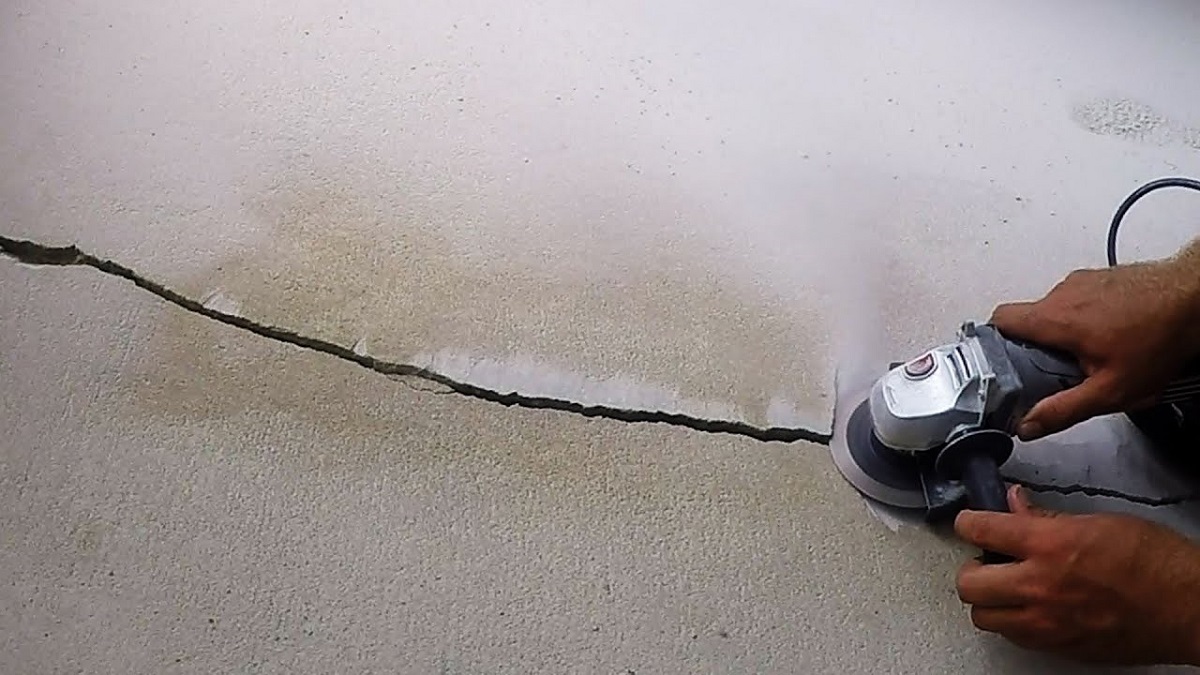
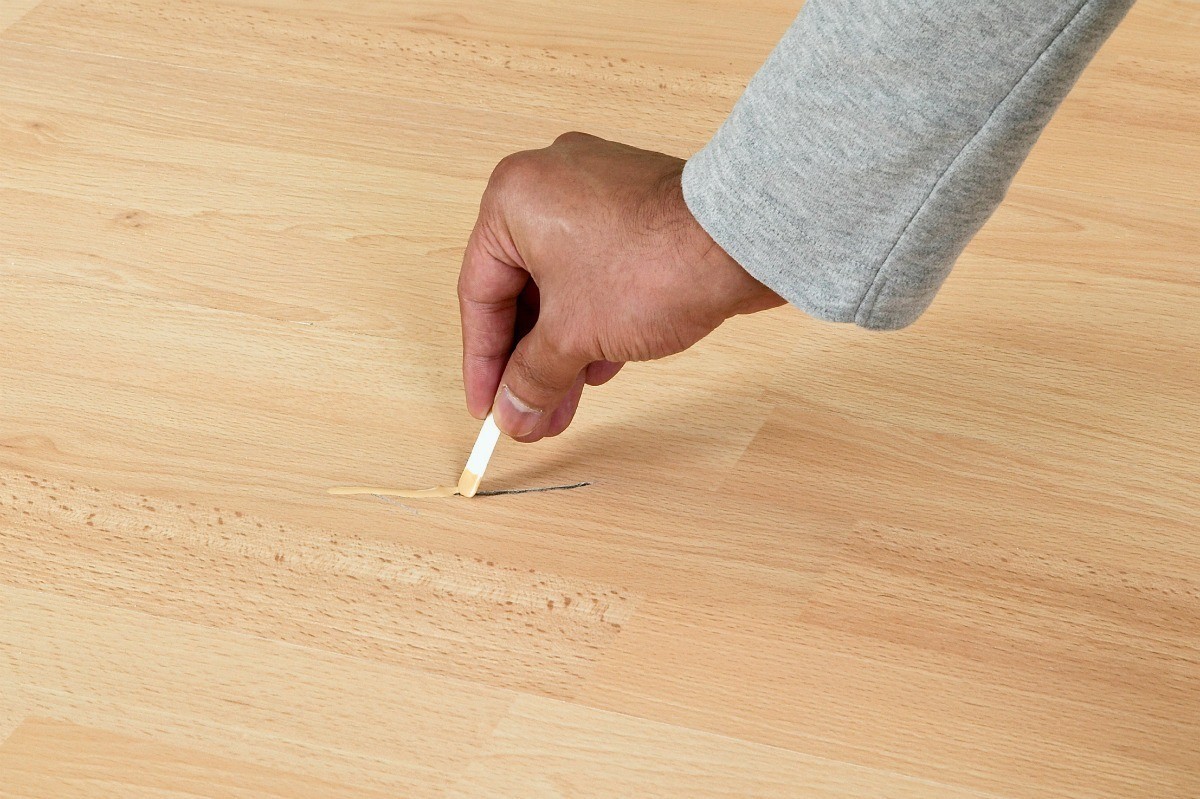
For small cracks or holes, fill them with a suitable putty or filler. Choose a product that matches the color and texture of your flooring. Apply the filler generously onto the damaged area, smooth it out using a putty knife, and let it dry according to the product instructions. Once dry, you can sand the area lightly to create a level surface, using sandpaper or a sanding block.
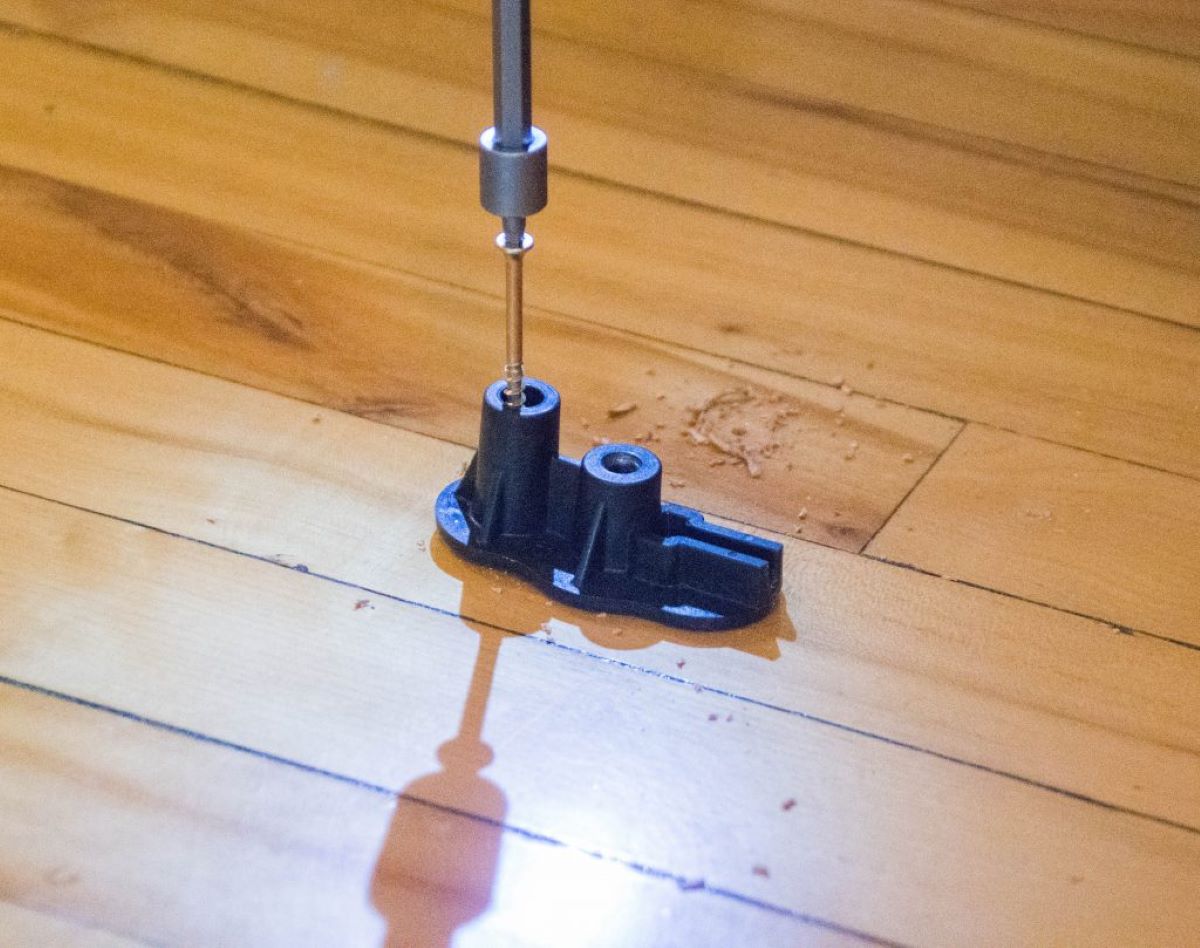
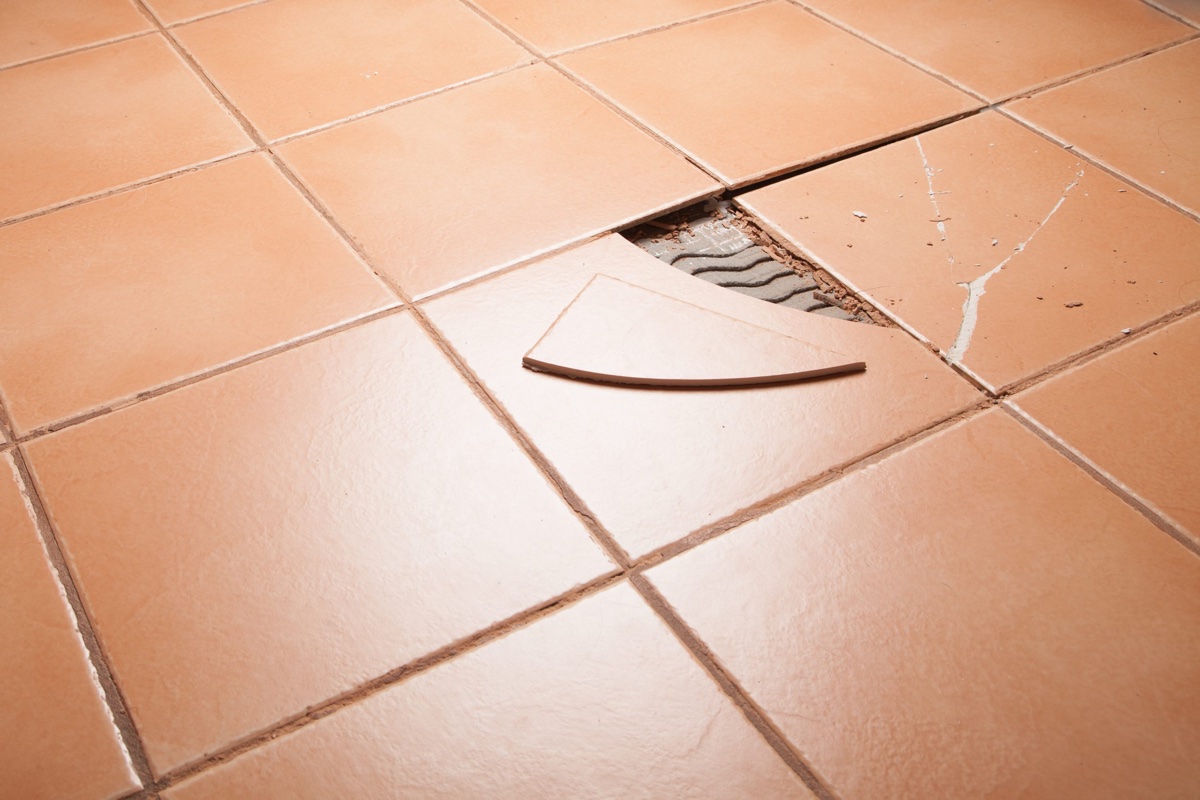
If the damaged area is a tile or hardwood plank, you may be able to reattach it using adhesive or flooring glue. Apply a small amount of adhesive to the back of the tile or plank and carefully press it back into place. Wipe away any excess adhesive with a damp cloth and place a weight on top to ensure a secure bond. Follow the adhesive manufacturer’s instructions for drying time.
After completing the necessary repairs, inspect the area to ensure that the repairs blend seamlessly with the rest of the floor. If needed, touch up the repaired area with a matching paint or finish, taking care to follow the manufacturer’s recommendations.
Always allow sufficient drying or curing time for any applied products before subjecting the repaired area to regular use.
Fixing minor floor damage is often a simple and cost-effective solution that can significantly improve the appearance and longevity of your flooring. However, for more extensive damage or larger floor sections that require repair or replacement, continue to step 5.
Read more: How To Fix A Sagging Floor
Step 5: Repairing larger floor sections or replacing damaged flooring
If you are dealing with larger floor sections that are severely damaged or irreparable, or if you have decided to replace the flooring altogether, this step will guide you through the process of repairing or replacing these areas.
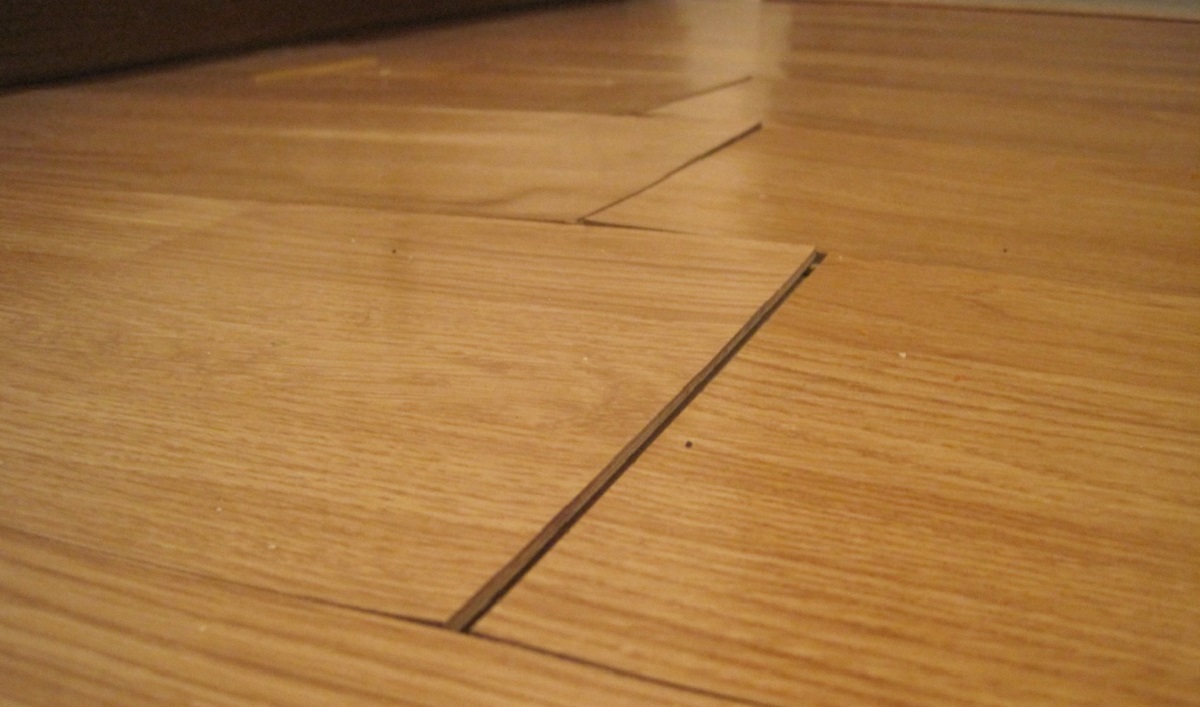
Start by carefully removing the damaged flooring. This may involve prying up tiles or planks using a pry bar or gently lifting linoleum or vinyl sheets. Take care not to damage the surrounding flooring during the removal process.
Once the damaged flooring is removed, inspect the subfloor for any underlying issues. If you notice any damage or instability, it is crucial to address it before proceeding with the repair or replacement. This may involve replacing or reinforcing the subfloor as necessary.
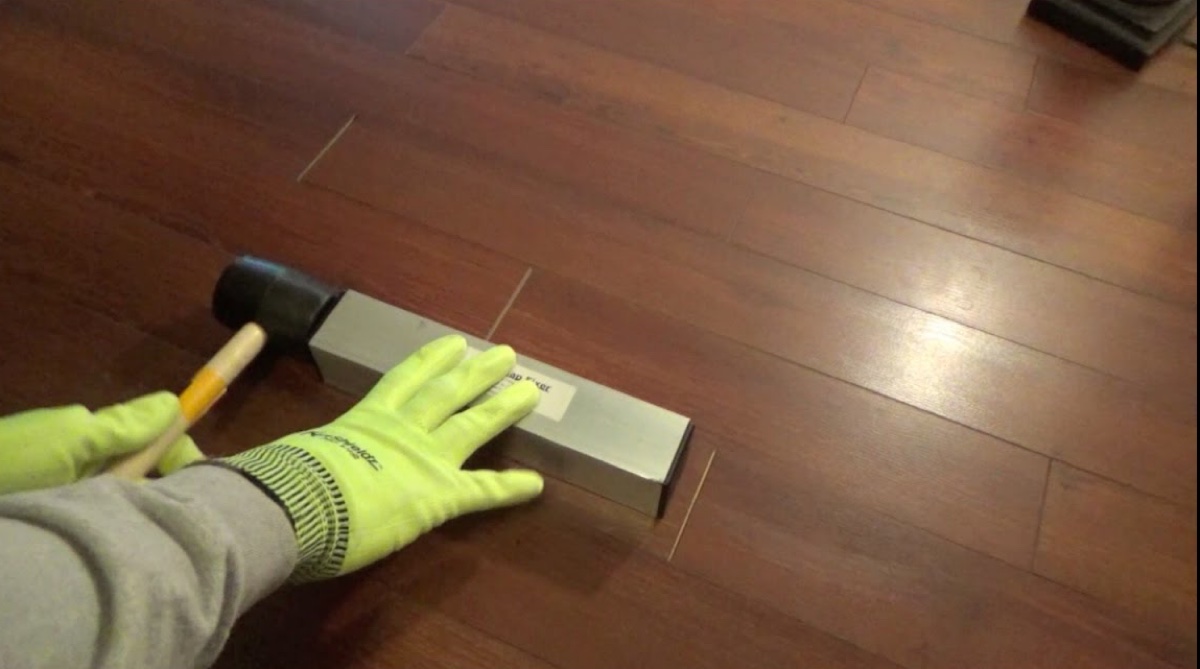
If you are repairing a wood floor, you may need to replace the affected boards or planks. Measure and cut the replacement pieces to fit snugly in the damaged area, leaving a small gap for expansion. Secure the new boards in place using a hammer and nails or a flooring nail gun. Make sure the new boards align properly with the existing ones to maintain a seamless look.
For other types of flooring, such as tiles or vinyl, you will need to prepare the subfloor properly before installing the new flooring. This may involve removing any adhesive residue, smoothing out uneven surfaces, or applying a suitable underlayment to create a level base for the new flooring.
When installing the new flooring, follow the manufacturer’s instructions for your specific flooring type. This may include using adhesive, interlocking mechanisms, or other installation methods. Take your time to ensure proper alignment and a secure fit.
After installing the new flooring, clean the area thoroughly and inspect for any gaps or inconsistencies. Use transition strips or trim to create a seamless transition between the new and existing flooring if needed.
Remember to allow ample time for the new flooring to acclimate to the room’s temperature and humidity levels before installation.
Repairing larger floor sections or replacing damaged flooring may require more time, effort, and expertise. If you are unsure about tackling this step, it is advisable to consult a professional to ensure a proper and professional result.
Now that you have repaired or replaced the damaged floor sections, let’s move on to the final step – adding the finishing touches.
Step 6: Finishing touches
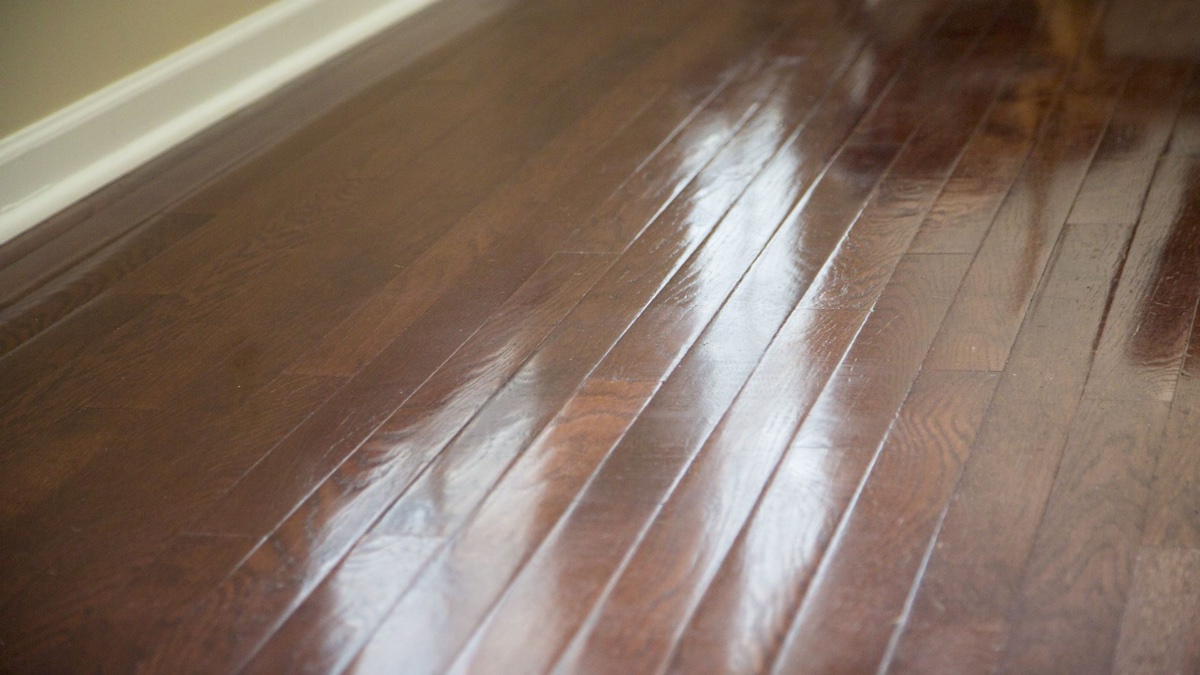
After completing the repairs or replacement of your damaged flooring, it’s time to add the finishing touches to ensure a polished and cohesive look.
Start by cleaning the entire floor surface, including the repaired or replaced sections. Remove any dust, debris, or residue using a broom, vacuum cleaner, or appropriate cleaning product for your flooring type. This will give your floor a fresh and clean appearance.
If necessary, touch up any paint or finish on the repaired or replaced sections to match the surrounding flooring. Use a brush or applicator designed for the specific finish you are using. Follow the manufacturer’s instructions for drying time and proper application techniques.
Inspect the repaired or replaced sections to ensure they blend seamlessly with the rest of the floor. Run your hand over the area to check for any unevenness or rough edges. If needed, use fine-grit sandpaper or a sanding block to smooth out any imperfections, being careful not to damage the surrounding flooring.
After all the repairs and touch-ups have been completed, consider applying a protective sealant to the entire floor surface. This will help protect the flooring from future damage, such as stains or scratches, and extend its lifespan. Follow the manufacturer’s instructions for the appropriate sealant for your flooring type.
Finally, re-install any trim or molding that was removed during the repair process. Use a hammer or a nail gun to secure it in place, ensuring it aligns with the rest of the trim in the room. This will provide a finished look and help cover any gaps or seams between the flooring and the walls.
Once the finishing touches have been added, allow sufficient time for any applied products to dry or cure fully before resuming regular foot traffic or moving furniture back into the space.
Congratulations! You have successfully repaired or replaced your damaged flooring and added the finishing touches to create a beautiful and functional space. Remember to continue regular maintenance and care to preserve the quality and appearance of your floor over time.
We hope this step-by-step guide has been helpful in guiding you through the process of fixing your floor. If you encounter any challenges or have specific concerns, it is always recommended to consult with a professional for expert advice.
Thank you for reading, and best of luck with your floor repair project!
Conclusion
Repairing a damaged floor can seem like a daunting task, but with the right knowledge and tools, it can be a manageable and rewarding project. By following the steps outlined in this guide, you can effectively address minor damages or even tackle larger sections that require repair or replacement.
Remember, the key to a successful floor repair is proper identification of the problem, gathering the necessary tools and materials, and thorough preparation of the area. Whether you are fixing scratches, filling in small cracks, or replacing entire sections, taking the time to do it right will ensure a long-lasting and aesthetically pleasing result.
Throughout the process, it’s essential to pay attention to the specific needs of your flooring type and to follow the manufacturer’s instructions. This will help you choose the right products, installation techniques, and finishing touches to maintain the integrity and appearance of your floor.
However, if you are unsure or uncomfortable with the repair process, it is always a good idea to seek professional assistance. Professionals have the knowledge, experience, and specialized tools to handle complex repairs and ensure the best outcome for your floor.
By taking care of your damaged floor promptly and effectively, you not only enhance the overall aesthetics of your space but also create a safe and welcoming environment for you and your family.
We hope this comprehensive guide has provided you with the information and guidance you need to successfully fix your floor. Remember to prioritize safety, take your time, and enjoy the process as you restore and rejuvenate your flooring.
Thank you for reading, and best of luck with your floor repair project!
Frequently Asked Questions about How To Fix The Floor
Was this page helpful?
At Storables.com, we guarantee accurate and reliable information. Our content, validated by Expert Board Contributors, is crafted following stringent Editorial Policies. We're committed to providing you with well-researched, expert-backed insights for all your informational needs.

0 thoughts on “How To Fix The Floor”