Articles
How To Laser Level A Baseball Field
Modified: October 31, 2024
Learn how to laser level a baseball field with these helpful articles. Ensure a smooth playing surface for optimal performance.
(Many of the links in this article redirect to a specific reviewed product. Your purchase of these products through affiliate links helps to generate commission for Storables.com, at no extra cost. Learn more)
Introduction
Welcome to the world of baseball, where precision and accuracy are essential. A properly leveled baseball field not only enhances the aesthetics of the game but also ensures fair play. One of the most efficient tools for achieving a level playing surface is a laser level.
In this article, we will guide you through the step-by-step process of using a laser level to properly level a baseball field. Whether you are a groundskeeper, a coach, or a dedicated player, understanding the intricacies of leveling a baseball field will help you create an optimal playing experience.
Before we dive into the details, it’s important to note that safety should always be a priority when using any tools or equipment. Always follow the manufacturer’s instructions and take necessary precautions to ensure a safe working environment.
Now, let’s gather the equipment needed to get started!
Key Takeaways:
- Precision and safety are paramount when leveling a baseball field using a laser level. Proper marking, infield and outfield leveling, and meticulous attention to detail are essential for creating an optimal playing surface.
- The finishing touches, including edging, watering, lining, and regular maintenance, are crucial for maintaining a level and visually appealing baseball field. Consultation with experts and prioritizing safety ensure a professional and enjoyable playing experience.
Equipment Needed
Before you begin leveling a baseball field with a laser level, make sure you have the following equipment at your disposal:
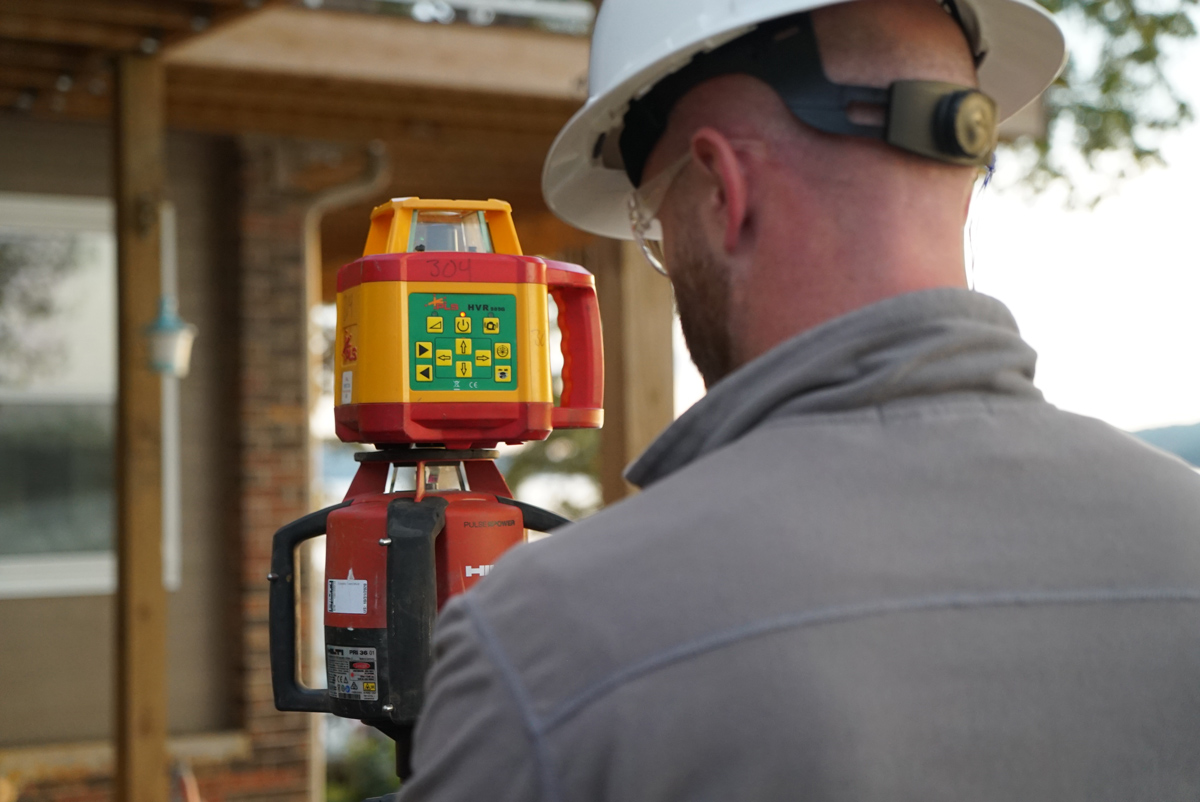
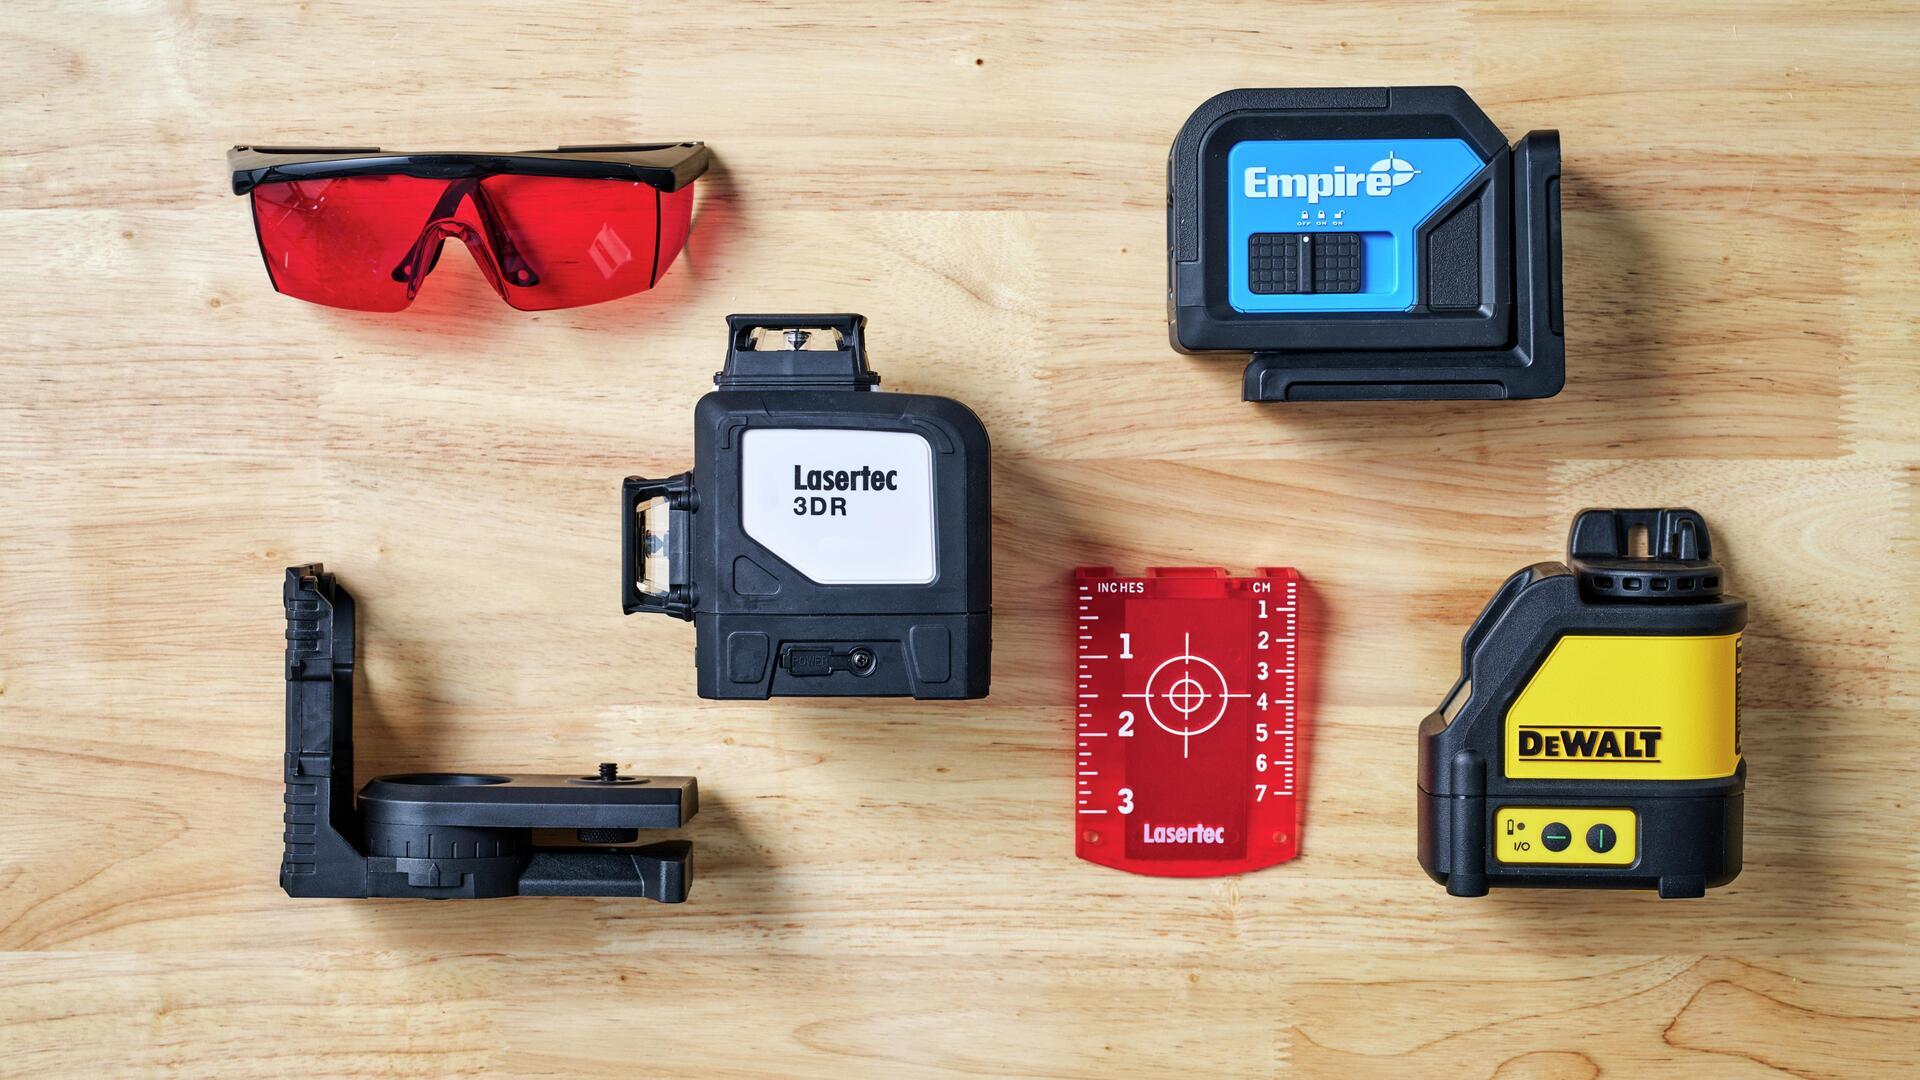
- Laser Level: The heart of the operation, a laser level emits a bright, highly visible laser beam that allows for precise measurements. Opt for a self-leveling laser level to ensure accurate results.
- Tripod: To stabilize the laser level and adjust its height, a tripod is essential. Look for a sturdy tripod with adjustable legs to accommodate different field terrains.
- Measuring Tape: A measuring tape is necessary for taking accurate measurements and ensuring that the field dimensions meet the required specifications.
- Field Marking Spray Paint: Choose a marking spray paint specifically designed for outdoor use. This will help you create clear and visible lines on the field.
- Infield Rake: An infield rake is indispensable for maintaining the playing surface. Use it to level the infield dirt and remove any debris or uneven patches.
- Cutout Square: A cutout square is a handy tool for achieving precise angles and corners. It will help you maintain consistency while marking the field.
- Hand Level: A hand level is useful for checking the field’s slope. It will ensure that the playing surface is even and meets the required standards.
- Bases and Home Plate: Lastly, make sure you have the necessary bases and home plate to complete the field setup. These components are crucial for gameplay.
Now that you have all the required equipment, let’s move on to marking the field!
Marking the Field
Before you start leveling the baseball field, it’s essential to mark the boundaries and key areas. This will provide a clear visual guide as you work with the laser level. Here’s how to mark the field:
- Foul Lines: Begin by marking the foul lines. Measure from home plate to the outfield fence and use the marking spray paint to create a straight line from the foul poles.
- Fair Territory: Use the marking spray paint to mark the area within the foul lines. It’s crucial to ensure that the field dimensions adhere to the required standards.
- Infield: Measure and mark the infield dimensions. Use the cutout square to create crisp corners and square off the base paths.
- Base Paths: Place the bases in their appropriate positions and mark the base paths using the measuring tape and marking spray paint. Ensure the base paths are straight and aligned correctly.
- Home Plate Area: Measure and mark the home plate area, ensuring it is centered in the field. Use the cutout square to create the corners and remove any excess dirt.
Once you have marked the field, it’s time to set up the laser level and begin the leveling process. Keep in mind that marking the field accurately is essential for achieving a properly leveled playing surface.
Next, we will delve into the details of setting up the laser level.
Setting Up the Laser Level
Now that the field is properly marked, it’s time to set up the laser level. Follow these steps to ensure accurate leveling:
- Choose a Level Spot: Find a spot on the field that is relatively level and can serve as a reference point. This will be the starting point for leveling the rest of the field.
- Attach the Laser Level to the Tripod: Securely attach the laser level to the tripod using the mounting bracket. Make sure it is stable and positioned at the desired height.
- Turn on the Laser Level: Switch on the laser level and allow it to self-level. Wait for the laser beam to project onto the field. Ensure that the laser is aligned with the starting point.
- Stabilize the Tripod: Adjust the tripod legs to stabilize it on the field. Use the built-in level bubble on the tripod to ensure it is perfectly level.
- Lock the Tripod: Once the tripod is stable and level, lock the legs in place to prevent any movement during the leveling process.
With the laser level set up and ready, it’s time to move on to leveling the infield. Keep in mind that precision and attention to detail are crucial for achieving a professional playing surface.
In the next section, we will explore the process of leveling the infield.
Leveling the Infield
Leveling the infield is a crucial step in creating a smooth and even playing surface. Follow these steps to ensure an accurately leveled infield:
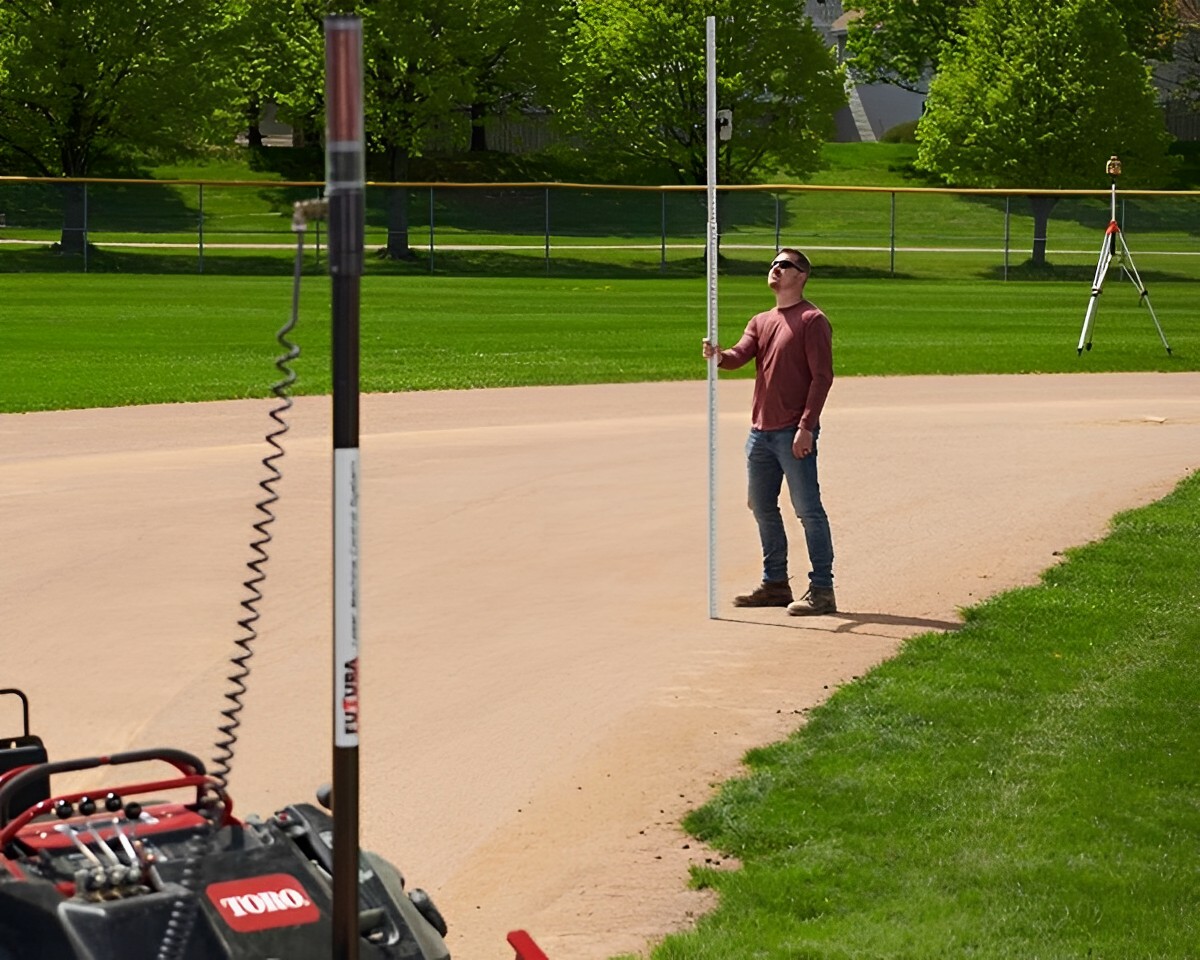
- Start at the Starting Point: Begin the leveling process at the starting point, where the laser level is set up. This will serve as the reference point for the rest of the infield.
- Use the Hand Level: Using the hand level, check the slope of the infield. Make adjustments as necessary to ensure a consistent slope from the starting point to the outfield.
- Fill Low Spots: Identify any low spots in the infield and fill them with topsoil or infield mix. Level the filled areas using an infield rake or levelling tool.
- Distribute the Material: Spread the infield material evenly across the infield. Use the rake to distribute the material and create a smooth playing surface.
- Pack and Compact: Use a field roller to pack and compact the infield material. This will help ensure stability and minimize any uneven areas.
- Repeat the Leveling Process: Repeat the leveling process as necessary, taking measurements and adjusting the infield material until you achieve a perfectly level surface.
Keep in mind that the infield surface plays a crucial role in the game, affecting the speed of the ball and the overall playability. Take your time during this step to achieve the desired results.
Next, we will move on to leveling the outfield, which is equally important for a well-balanced playing field.
When laser leveling a baseball field, make sure to calibrate the laser level properly and double check the measurements to ensure the field is perfectly level for optimal play.
Leveling the Outfield
Leveling the outfield is essential for maintaining a consistent playing surface and ensuring fair gameplay. Follow these steps to effectively level the outfield:
- Start from the Infield: Begin the leveling process from the edge of the infield, where it meets the outfield. This will help create a seamless transition between the two areas.
- Check for Low Areas: Inspect the outfield for any low areas or depressions. These areas can affect the ball’s roll and player movement, so it’s important to address them.
- Add Topsoil or Infield Mix: Fill in any low areas with topsoil or infield mix. Use an infield rake or leveling tool to distribute and level the material evenly.
- Rake and Smooth: Use a landscape rake to rake and smooth the outfield surface. Work in small sections, making sure the entire outfield is even and free of any bumps or uneven spots.
- Compact the Surface: Use a field roller or lawn roller to compact the outfield surface. This will help stabilize the soil and create a smoother playing area.
- Repeat the Leveling Process: Walk the entire outfield, checking for any remaining low areas or uneven spots. Make any necessary adjustments to ensure a level playing surface.
Remember that a properly leveled outfield enhances the gameplay experience and reduces the risk of injuries. Take the time to meticulously level the outfield to achieve the best results.
Now that the infield and outfield are leveled, let’s move on to checking and adjusting the base paths.
Checking and Adjusting Base Paths
The base paths are an integral part of a baseball field, and it’s crucial to ensure they are properly leveled. Follow these steps to check and adjust the base paths:
- Measure the Base Paths: Use a measuring tape to measure the distance between the bases. Double-check that the base paths meet the required specifications for the specific league or level of play.
- Check for Evenness: Walk along each base path and look for any uneven spots or deviations. These areas can affect player safety and fair play, so it’s important to address them.
- Level the Base Paths: If you encounter any uneven spots, use an infield rake or leveling tool to adjust the base paths. Fill in low spots and redistribute the infield material as needed.
- Compact the Base Paths: Use a hand tamp or a compacting tool to tamp down the infield material along the base paths. This will ensure stability and prevent any shifting or unevenness.
- Re-Measure for Accuracy: After leveling and compacting the base paths, re-measure to confirm that they still meet the required specifications. Make any final adjustments if needed.
Properly leveled base paths are essential for accurate baserunning and can impact the outcome of the game. Pay attention to detail during this step to maintain fairness and ensure optimal gameplay.
Next, let’s move on to checking and adjusting the area around home plate.
Checking and Adjusting Home Plate Area
The home plate area is a critical focal point on a baseball field, and it’s important to ensure it is level and properly aligned. Follow these steps to check and adjust the home plate area:
- Check the Alignment: Verify that home plate is centered and aligned with the pitcher’s mound. Use a measuring tape to measure the distance from home plate to the pitcher’s rubber and make any necessary adjustments.
- Inspect the Surrounding Area: Walk around home plate and closely examine the surrounding dirt or turf. Look for any unevenness or low spots that could affect gameplay.
- Level the Area: If you find any uneven spots, fill them with topsoil or infield mix. Use an infield rake or leveling tool to distribute and level the material evenly.
- Smooth the Surface: Rake the dirt or turf around home plate to create a smooth and even surface. Pay attention to the batter’s boxes and the area adjacent to the plate to provide a consistent playing area.
- Compact the Dirt: Use a hand tamp or a compacting tool to lightly compact the dirt in the home plate area. This will help stabilize the surface and prevent any shifting or unevenness.
- Test the Plate Area: Walk on and around home plate to test its stability and levelness. Make any final adjustments to ensure the plate area is solid and ready for gameplay.
The home plate area is where most of the game’s action takes place, so it’s crucial to have it properly leveled and aligned. Take the time to meticulously check and adjust this area to ensure fair play and a professional playing experience.
With the home plate area addressed, it’s time to move on to the finishing touches to complete the leveling process.
Finishing Touches
Now that the baseball field has been leveled, it’s time to focus on the finishing touches to enhance the overall appearance and functionality. Here are some key steps to consider:
- Edge the Field: Use an edging tool or a shovel to create clean and defined edges around the infield and outfield. This gives the field a polished look and helps contain the infield material.
- Water and Settle the Infield: After leveling, water the infield to help settle the material and ensure a firm playing surface. Avoid overwatering, as it can lead to soft spots and unevenness.
- Line the Field: Utilize a marking machine and designated field marking paint to create clear, crisp lines throughout the field. This includes the foul lines, base paths, and other necessary markings.
- Maintain the Field: Regular maintenance is vital to preserve the levelness of the field. This includes regular dragging, raking, and rolling of the infield, as well as mowing and grooming the outfield grass.
- Inspect and Repair: Regularly inspect the field for any signs of wear, damage, or drainage issues. Address any repairs promptly to maintain a safe and playable surface.
- Consult the Experts: If you are unsure about any aspect of field maintenance, reach out to professional groundskeepers or experts in baseball field management. They can provide valuable guidance and advice.
By completing these finishing touches, you will not only create an attractive and well-maintained field but also ensure a safe and enjoyable playing experience for all athletes.
Before we conclude, let’s summarize what we have covered in this article.
Read more: How To Level A Laser Level Tripod
Conclusion
Leveling a baseball field is a crucial aspect of field maintenance that requires precision and attention to detail. By utilizing a laser level and following the steps outlined in this article, you can ensure a level playing surface that enhances gameplay and promotes fair competition.
Starting with marking the field accurately, setting up the laser level, and leveling both the infield and outfield, you can create a smooth and professional playing surface. Checking and adjusting the base paths and the home plate area are essential to maintain accuracy and prevent any potential hazards.
Don’t forget the importance of the finishing touches, such as edging the field, proper watering and settling of the infield, lining the field, and regular maintenance. These steps will help maintain the levelness of the field and provide a visually appealing and safe environment for players.
Remember, safety is always a priority when working with tools and equipment. Be sure to follow the manufacturer’s instructions, take necessary precautions, and consult professional groundskeepers when needed.
With a properly leveled baseball field, you can create an optimal playing experience where athletes can focus on their skills and enjoy the game. So, grab your laser level and get ready to elevate your field maintenance game!
Frequently Asked Questions about How To Laser Level A Baseball Field
Was this page helpful?
At Storables.com, we guarantee accurate and reliable information. Our content, validated by Expert Board Contributors, is crafted following stringent Editorial Policies. We're committed to providing you with well-researched, expert-backed insights for all your informational needs.


0 thoughts on “How To Laser Level A Baseball Field”