Articles
How To Set Slope With Laser Level
Modified: November 1, 2024
Learn how to set slope with a laser level in this informative article. Gain valuable insights and expert tips on achieving precise and accurate measurements.
(Many of the links in this article redirect to a specific reviewed product. Your purchase of these products through affiliate links helps to generate commission for Storables.com, at no extra cost. Learn more)
Introduction
Welcome to a comprehensive guide on how to set slope with a laser level. Whether you’re a DIY enthusiast or a professional contractor, understanding how to accurately set and measure slope is essential for various construction projects. A laser level is a powerful tool that enables you to achieve precise and consistent slope measurements, ensuring the quality and integrity of your work.
In this article, we will dive into the process of setting slope using a laser level. We will explore the necessary tools and materials, discuss the significance of proper calibration, and provide step-by-step instructions on how to set the desired slope. Additionally, we will cover tips and safety precautions to help you optimize your slope-setting experience.
So, let’s get started and unlock the secrets of using a laser level to achieve accurate and reliable slopes.
Key Takeaways:
- Mastering the art of setting slope with a laser level is essential for accurate and reliable construction projects. Prioritize safety, follow guidelines, and embrace the efficiency of laser level technology.
- Understanding slope, selecting the right tools, and following step-by-step instructions are key to achieving precise and consistent slope measurements with a laser level. Prioritize safety, double-check measurements, and document adjustments for successful slope-setting experiences.
Read more: How To Use A Laser Level To Determine Slope
Understanding Slope
Before we jump into the process of setting slope with a laser level, it’s important to have a clear understanding of what slope actually is. In construction and engineering, slope refers to the angle at which a surface or object deviates from the horizontal level. It is typically expressed as a percentage or a ratio.
Slope plays a crucial role in many construction projects, such as grading landscapes, installing drainage systems, or building roads and ramps. It determines the proper runoff of water, ensures structural stability, and facilitates accessibility.
In general, there are two types of slopes: positive slope and negative slope. A positive slope rises in elevation as you move along the surface, while a negative slope decreases in elevation. Both types of slopes can be created artificially or naturally, depending on the project requirements.
When it comes to measuring slope, there are different units of measurement used, including degrees, percent, and ratio. Degrees represent the angle of inclination, percent is a ratio of rise to run, and ratio compares the vertical change to the horizontal distance.
For example, a slope of 1:4 means that for every 1 unit of vertical rise, there is a 4-unit horizontal run. Similarly, a slope of 25% means that the incline rises 25 units vertically for every 100 units horizontally.
Understanding slope measurements and how they relate to your project is essential for achieving precise and accurate results. A laser level provides a reliable and efficient way to set the desired slope by projecting a laser beam at a specific angle, allowing you to align your work according to the required specifications.
Now that we have a solid understanding of slope and its importance, let’s move on to the tools and materials you’ll need to successfully set slope with a laser level.
Tools and Materials Needed
Setting slope with a laser level requires the use of specific tools and materials to ensure accuracy and efficiency. Here is a list of essential items you’ll need:
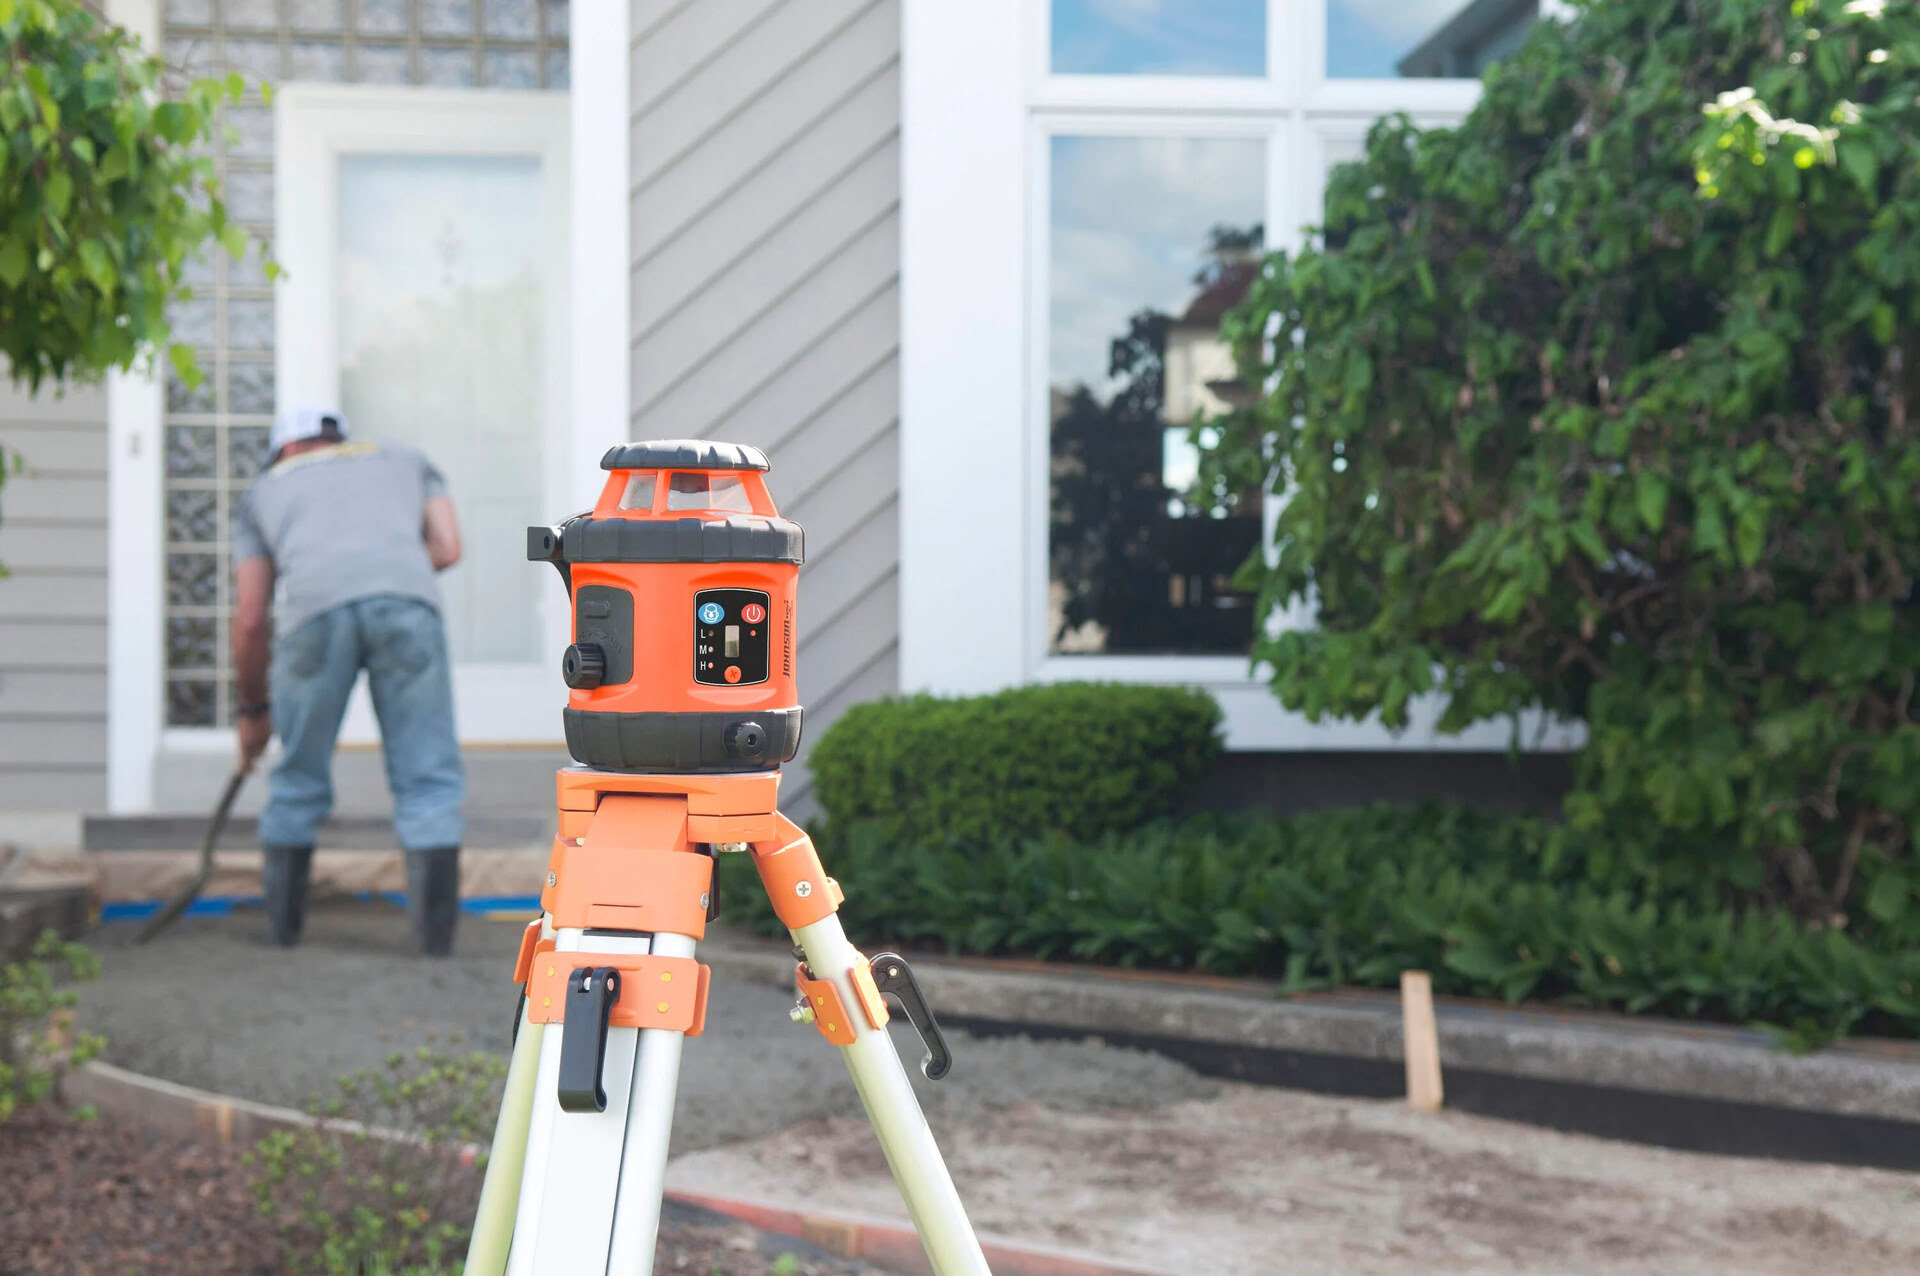
- Laser Level: The core tool for this task is a laser level. Choose a quality laser level with slope capabilities and a self-leveling feature to ensure accurate measurements.
- Tripod: A sturdy tripod is necessary to mount the laser level and keep it stable during operation. Look for a tripod with adjustable height to suit different working conditions.
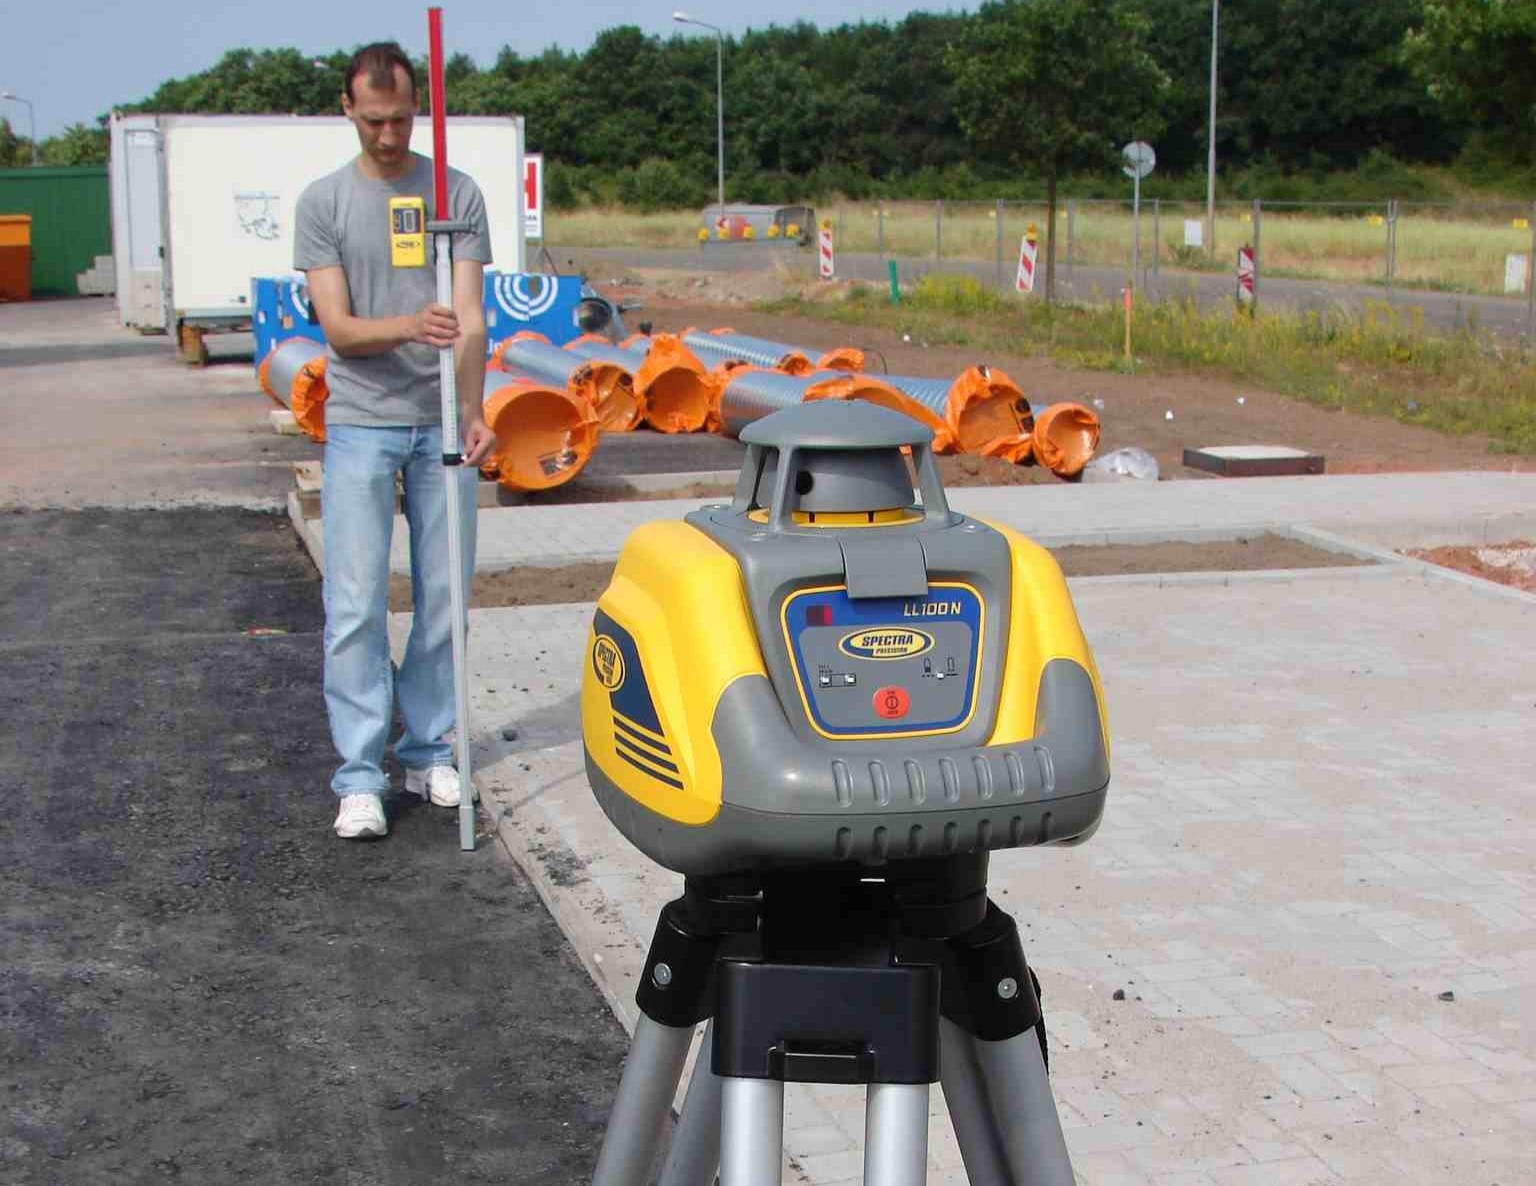
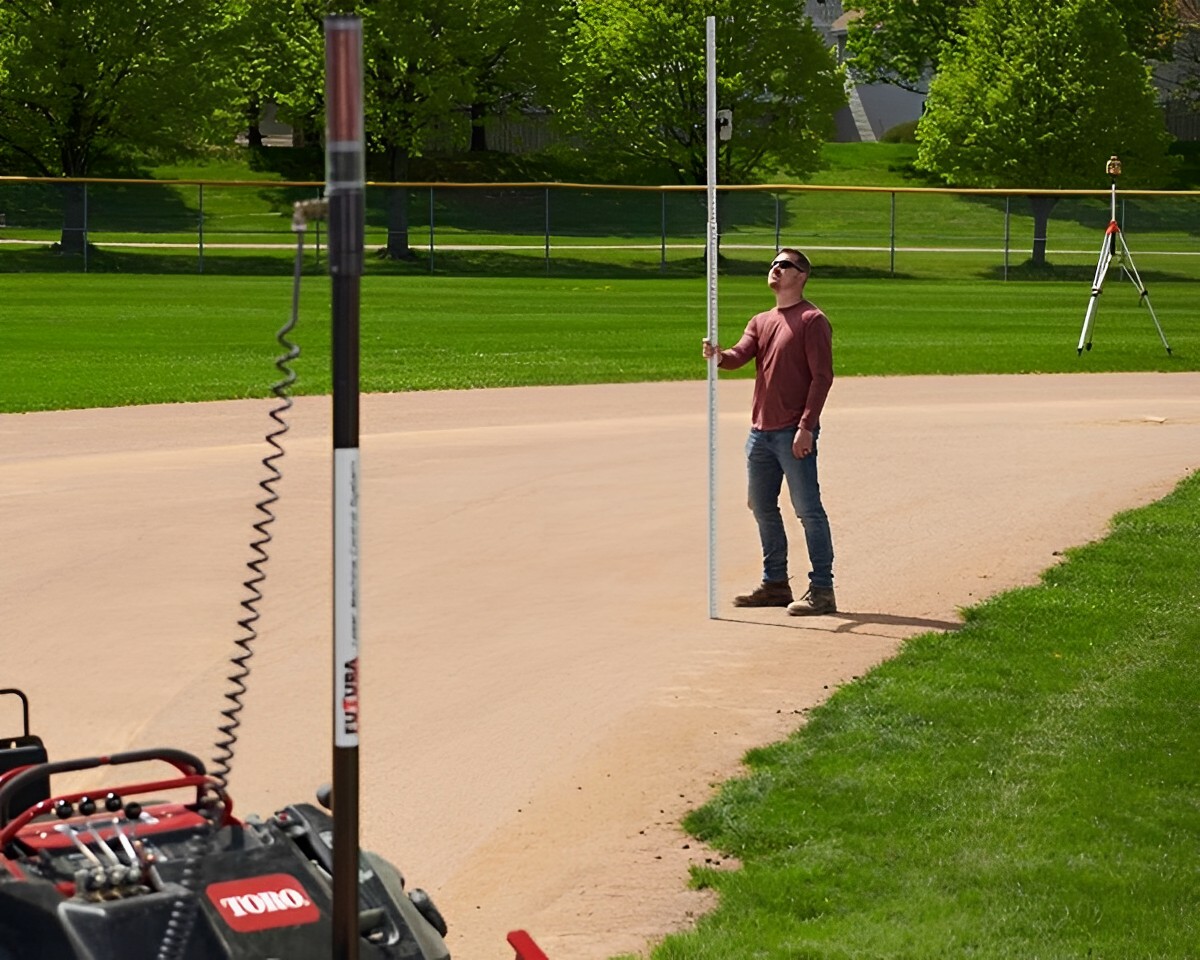
- Grade Rod: A grade rod, also known as a leveling rod or measuring rod, is used to measure the difference in elevation. It should be durable and marked with precise measurements.
- Receiver: A receiver, also called a detector or sensor, is used to detect the laser beam emitted by the laser level. It helps in accurately determining the slope and provides visual and audio signals to indicate the laser’s position.
- Tape Measure: A tape measure is essential for taking precise measurements of distances and elevations. Opt for a durable and reliable tape measure with clear markings.
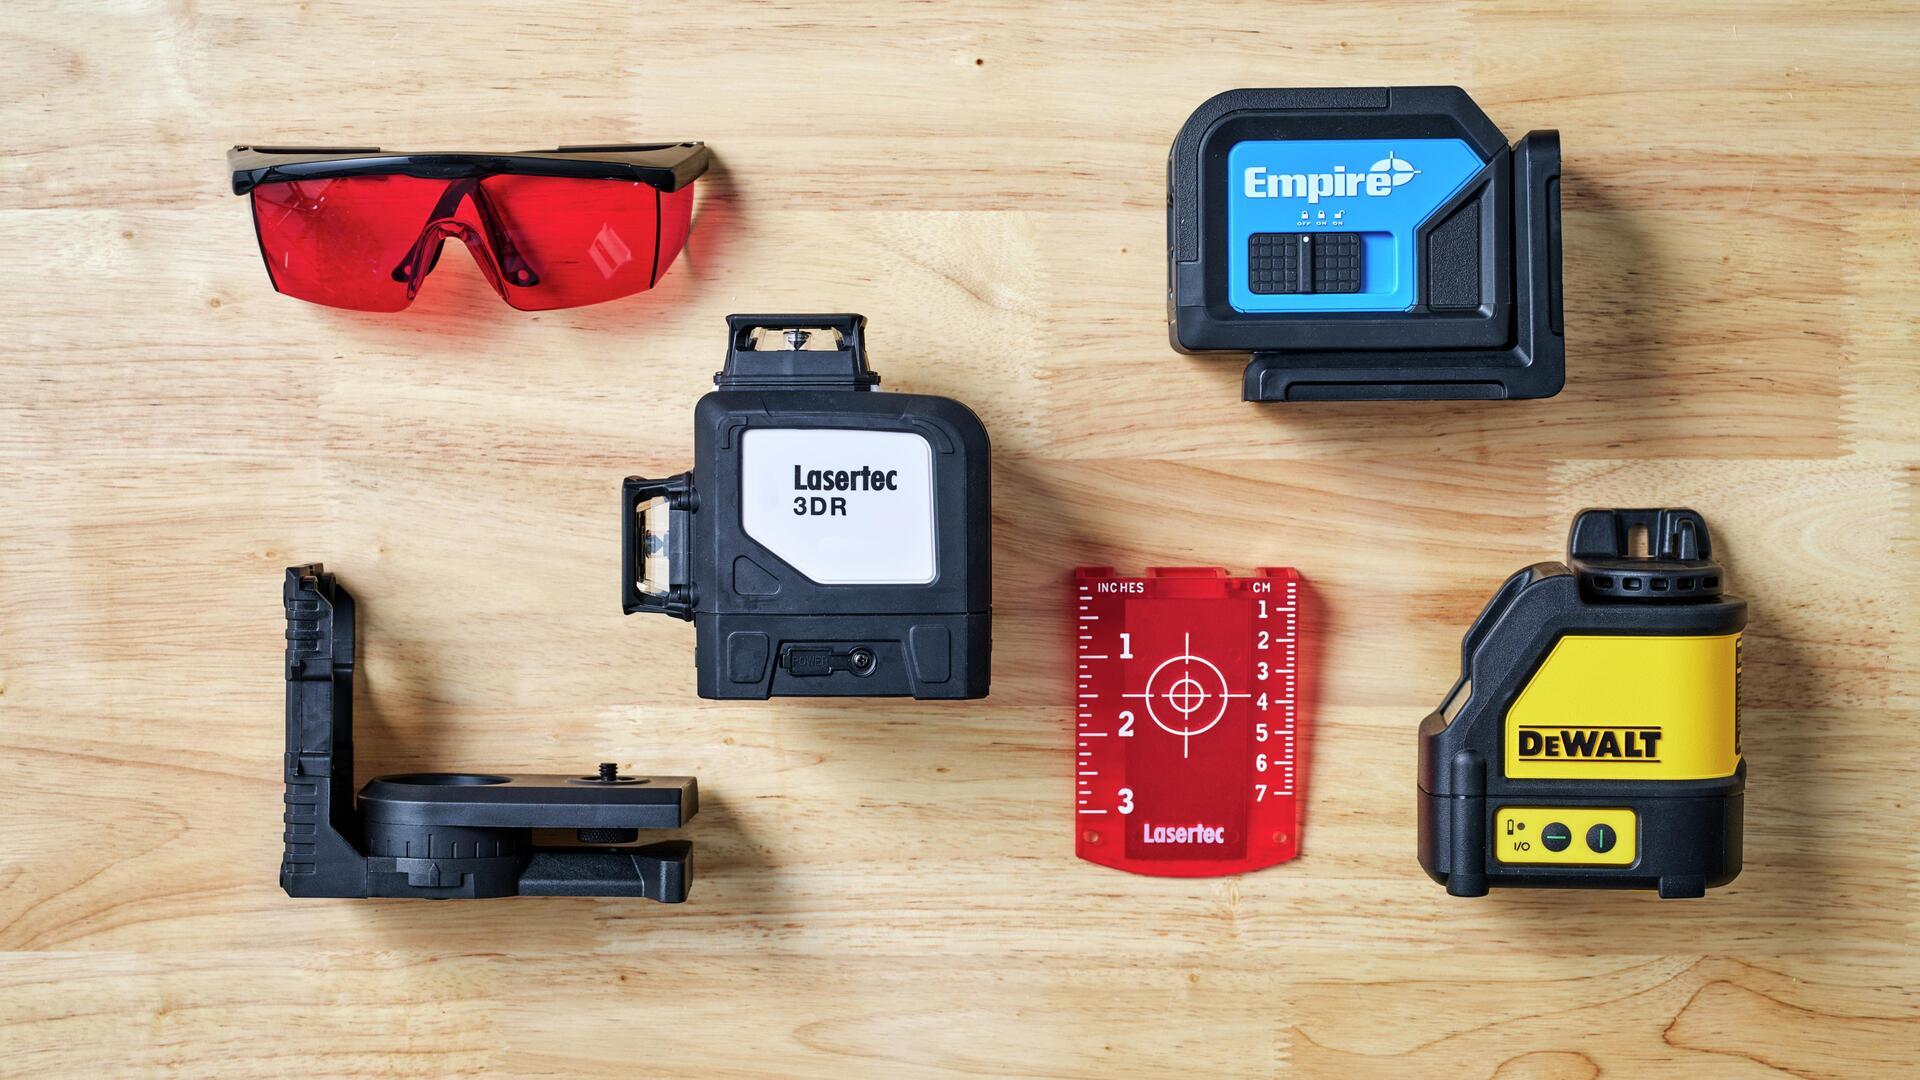
- Auxiliary Accessories: Depending on the specific project requirements, you may need additional accessories such as a laser target card for long-range measurements, a remote control for convenience, and batteries or a power supply for the laser level.
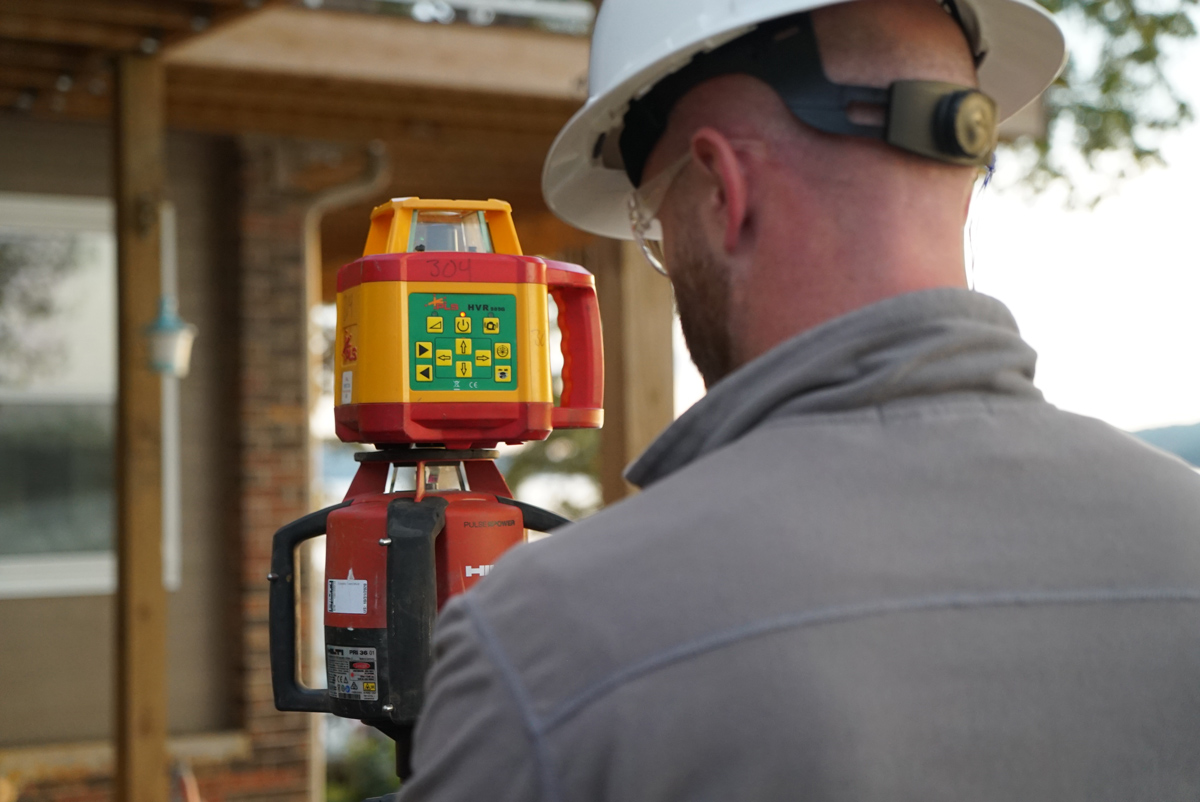
- Personal Protective Equipment (PPE): Always prioritize safety by wearing appropriate PPE, including safety glasses to protect your eyes from laser radiation and debris, and appropriate footwear and attire for the specific job site.
Before you begin setting slope with a laser level, make sure you have all the necessary tools and materials readily available. This will ensure a smooth workflow and allow you to achieve accurate and reliable slope measurements.
With your tools and materials in hand, the next step is to prepare the laser level for operation. We will cover this process in the following section.
Preparing the Laser Level
Before you can start setting slope with a laser level, it’s crucial to properly prepare the device for operation. Follow these steps to ensure the laser level is ready to provide accurate and reliable measurements:
- Read the Manual: Familiarize yourself with the manufacturer’s instructions and guidelines provided in the user manual. This will help you understand the specific features and functions of your laser level.
- Inspect the Laser Level: Thoroughly inspect the laser level for any visible damage or defects. Check for cracks, loose parts, or signs of wear and tear. If you notice any issues, contact the manufacturer or service center for assistance.
- Check the Batteries or Power Supply: If your laser level operates on batteries, ensure they are fully charged or replace them if necessary. For models that use a power supply, make sure it is connected and functioning properly.
- Calibrate the Laser Level: Calibration is a critical step to ensure the accuracy of your laser level. Follow the manufacturer’s instructions to calibrate the device properly. This typically involves placing the laser on a known stable surface and allowing it to self-level.
- Check the Self-Leveling Function: Activate the self-leveling function of your laser level to confirm that it is working correctly. This feature allows the laser line or dot to automatically adjust and remain level within a specified range.
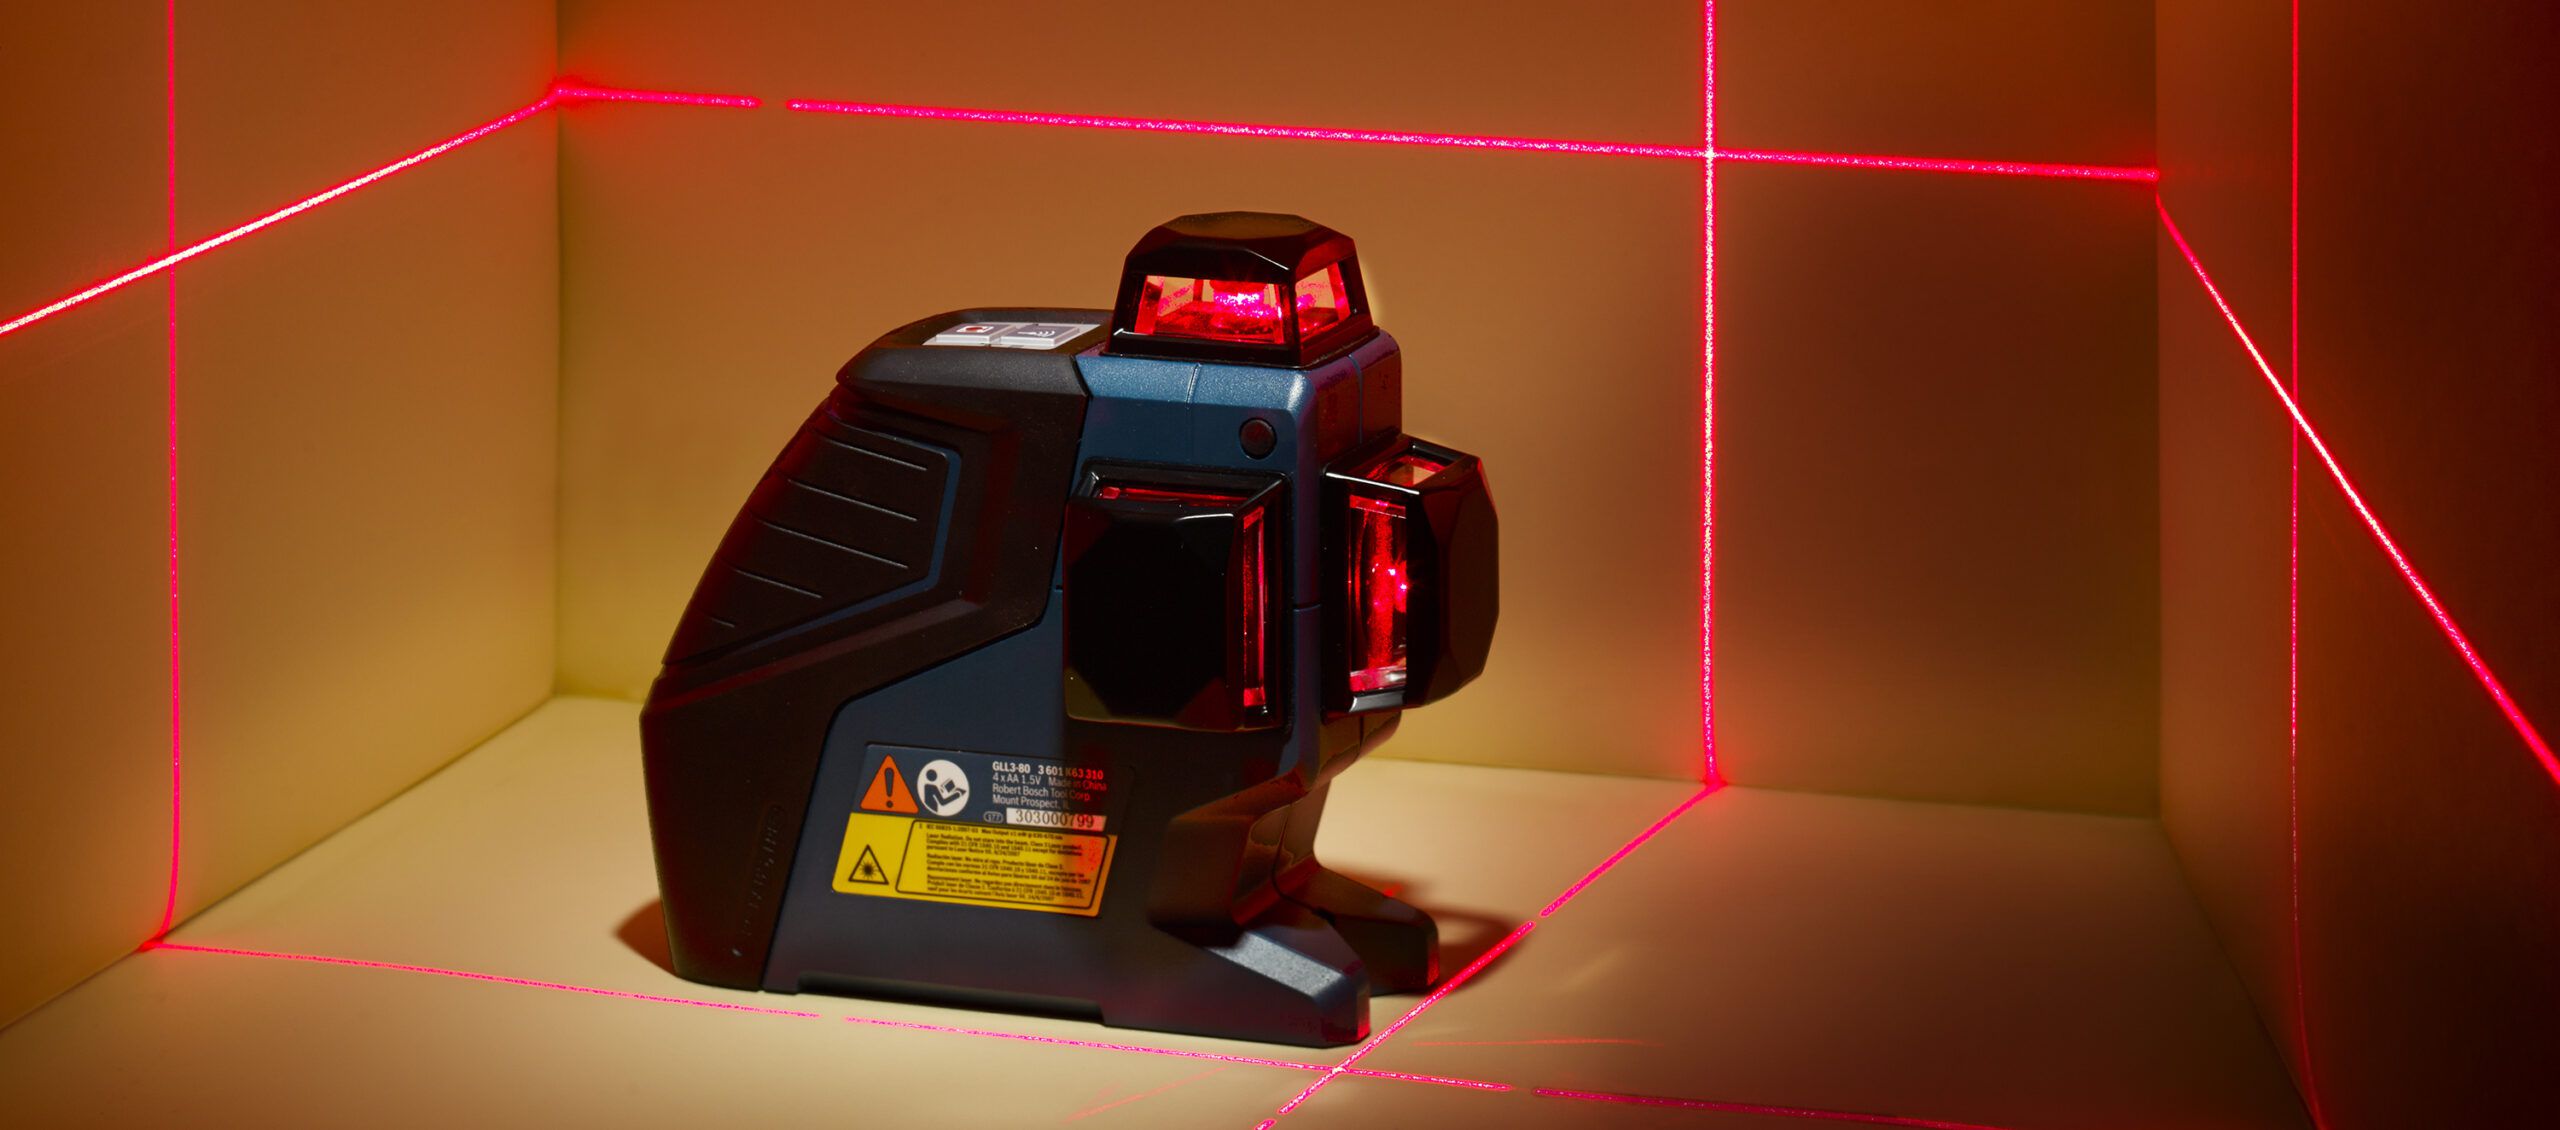
- Test the Laser Beam: Turn on the laser level and check the visibility and clarity of the laser beam. Make sure it is bright and easily visible, both indoors and outdoors. Adjust the brightness settings, if applicable, for optimal visibility in different lighting conditions.
- Secure the Laser Level: Mount the laser level securely on a tripod, ensuring it is stable and positioned at the desired height. Use the locking mechanisms and adjustments on the tripod to secure the laser level in place.
- Attach the Receiver (If Needed): If your project requires measuring slopes at longer distances, attach the receiver to the grade rod. The receiver will detect the laser beam and provide accurate slope measurements.
By following these preparation steps, you can ensure that your laser level is ready to provide accurate and reliable measurements for setting slope. With the laser level set up and calibrated, you are now ready to move onto the next step: setting up the laser level.
Setting Up the Laser Level
Setting up the laser level properly is crucial to ensure accurate slope measurements. Follow these steps to set up the laser level in the desired location:
- Select the Project Area: Determine the area where you will be setting the slope. Clear the area of any obstacles or debris that may interfere with the laser beam.
- Choose the Reference Point: Identify a reference point from which you will measure the slope. This can be an existing benchmark or a point you determine based on your project requirements.
- Position the Laser Level: Place the laser level at a suitable location, ensuring it is at a consistent height and secured firmly on the tripod. Make sure it is within the working range of the receiver, if one is being used.
- Level the Laser: Activate the self-leveling feature of the laser level and allow it to adjust until it becomes level. Use the built-in bubble vials or digital level indicators to ensure the device is perfectly horizontal.
- Aim the Laser: Once the laser level is leveled, adjust the orientation of the laser to align with your desired slope direction. Use the laser target card, receiver, or other methods to visualize and align the laser beam accurately.
- Secure the Laser Level Position: Once the laser beam is aligned, tighten the tripod’s locking mechanisms to secure the position of the laser level. Double-check that the laser beam remains within the desired tolerance and alignment.
Ensuring the laser level is properly set up and aligned is crucial for accurate slope measurements. Take your time to adjust and verify the position of the laser level before proceeding to the next steps.
Now that your laser level is in position and aligned, the next step is to calibrate the laser level for slope measurements. We will cover this process in the following section.
Read more: How To Level A Laser Level Tripod
Calibrating the Laser Level
Calibrating the laser level is an essential step to ensure accurate slope measurements. Follow these steps to calibrate your laser level:
- Select a Reference Point: Choose a stable flat surface or a reference point that is known to be level. This can be a benchmark or a previously measured point.
- Place the Laser Level: Position the laser level on the reference point or a stable surface nearby. Ensure that it is securely mounted and doesn’t wobble or move during the calibration process.
- Activate the Self-Leveling Function: Turn on the laser level and activate the self-leveling function. This allows the laser level to automatically adjust and find the horizontal position.
- Wait for the Laser Level to Stabilize: Give the laser level some time to stabilize and settle into a level position. This may take a few seconds or minutes depending on the model and the surface conditions.
- Check the Level Indicators: Use the built-in bubble vials or the digital level indicators on the laser level to determine if it is truly level. Adjust the position or reposition the laser level if necessary until the level indicators confirm that it is perfectly horizontal.
- Verify Calibration with a Measuring Device: Use a grade rod or a tape measure to measure the distance from the reference point to the laser level in different directions. Make sure the distances are equal, confirming that the laser level is accurately calibrated.
- Repeat the Calibration Process if Needed: If you find any discrepancies or inconsistencies in the calibration, repeat the process by repositioning the laser level and adjusting until it is perfectly level.
Calibrating the laser level ensures that it provides accurate and precise slope measurements. Taking the time to calibrate the laser level before using it for slope setting will help avoid any errors or inaccuracies in your measurements.
Once your laser level is calibrated, you can proceed to the next step: setting the desired slope.
When setting slope with a laser level, always ensure that the laser level is securely positioned and calibrated correctly to ensure accurate results. Additionally, double check the slope measurements before proceeding with any construction or installation work.
Setting the Desired Slope
Now that you have prepared and calibrated your laser level, it’s time to set the desired slope. Follow these steps to achieve the desired slope for your project:
- Understand the Project Requirements: Familiarize yourself with the specific slope requirements of your project. This can include the desired angle or percentage of slope, the direction of the slope, and any specific elevations that need to be achieved.
- Measure the Starting Point: Determine the starting point from which you will measure the slope. This can be the reference point you previously established or another point of your choosing.
- Attach the Receiver (If Necessary): If you are working over longer distances, attach the receiver to the grade rod. Ensure that the receiver is properly powered and synchronized with the laser level.
- Move the Grade Rod Along the Slope: Position the grade rod at the starting point and move it along the slope direction. Use the receiver to detect the laser beam and determine the current elevation.
- Calculate the Difference in Elevation: Measure the difference in elevation between your starting point and the desired slope point. This will determine the amount of change that needs to be made to achieve the desired slope angle or percentage.
- Adjust the Grade Rod: Lower or raise the grade rod to match the desired elevation. Use the measurements from the receiver to guide you in achieving the correct slope. Make small adjustments and check the measurements frequently to ensure accuracy.
- Ensure Consistency: As you move along the slope, continue checking the measurements and adjusting the grade rod as needed to maintain a consistent slope. This will ensure uniformity and accuracy throughout the project.
Setting the desired slope may require some trial and error, especially for larger projects or complex slope requirements. Take your time, double-check your measurements, and make gradual adjustments to achieve the desired slope accurately.
After setting the desired slope, it’s crucial to verify the slope accuracy, which we will cover in the next section.
Checking the Slope Accuracy
After successfully setting the desired slope using your laser level, it’s important to verify the accuracy of the slope. This step ensures that your measurements are correct and that the slope meets the requirements of your project. Follow these steps to check the slope accuracy:
- Measure Known Points: Locate and measure several known points along the slope using a grade rod or tape measure. These points should be evenly spaced and represent different sections of the slope.
- Compare Measurements: Compare the measured elevations of these points with the expected elevations based on the desired slope. Calculate the differences between the measured and expected values.
- Check for Consistency: Ensure that the differences in elevation between the measured and expected values are within an acceptable tolerance. The tolerance will depend on the specific requirements of your project.
- Adjust if Necessary: If you notice significant discrepancies in the measurements, recheck your setup and make any necessary adjustments to the slope. This may involve repositioning the laser level, recalibrating, or adjusting the grade rod.
- Re-measure and Verify: Once you have made any necessary adjustments, re-measure the known points along the slope to verify that the measurements are now accurate and consistent.
- Document the Results: Record the measurements and any adjustments made to ensure proper documentation of the slope accuracy. This information can be useful for future reference, quality control, and project completion.
Checking the slope accuracy is a critical step to ensure the quality and integrity of your work. By verifying that the measured elevations align with the desired slope, you can have confidence that your project will meet the necessary specifications.
If the slope accuracy meets your expectations, congratulations! You have successfully set an accurate slope. However, if adjustments need to be made, proceed to the next step: adjusting the slope if needed.
Adjusting the Slope if Needed
During the process of checking the slope accuracy, you may discover that adjustments are necessary to align the slope with the desired specifications. Follow these steps to adjust the slope if needed:
- Analyze the Discrepancies: Review the measurements and discrepancies you obtained while checking the slope accuracy. Identify the areas where the slope deviates from the desired specifications.
- Determine the Required Changes: Based on the analysis, determine the necessary changes to achieve the desired slope. This may involve adjusting the grade rod or repositioning the laser level to align the slope accurately.
- Make Gradual Adjustments: When adjusting the slope, it’s important to make gradual changes to maintain precision. Make small tweaks to the grade rod or reposition the laser level slightly and remeasure the elevations to assess the impact of the adjustments.
- Recheck the Slope Accuracy: After making adjustments, recheck the slope accuracy by measuring and comparing the known points along the slope. This will help you verify if the changes have successfully aligned the slope with the desired specifications.
- Repeat as Necessary: If the slope accuracy still falls outside the acceptable tolerance range, continue making incremental adjustments and rechecking the measurements until the desired slope is achieved.
- Document the Final Adjustments: Once the slope is accurately adjusted, record the final adjustments made to document the process and ensure consistent documentation of the project. This information may be valuable for future reference or project completion.
Adjusting the slope may require patience and careful attention to detail. By taking the time to make precise adjustments and thoroughly rechecking the slope accuracy, you can achieve the desired specifications for your project.
Remember, it is crucial to prioritize safety throughout the adjustment process. Adhere to safety guidelines and use appropriate personal protective equipment to avoid accidents or injuries.
With the adjustments made and the slope properly aligned, you can now proceed confidently with your construction project. In the next section, we will provide some helpful tips and safety precautions to optimize your slope-setting experience.
Read more: How To Work A Water Level Or Laser Level
Tips and Safety Precautions
When setting slope with a laser level, it’s important to keep in mind some helpful tips and safety precautions to ensure a successful and safe experience. Consider the following advice:
- Read the User Manual: Familiarize yourself with the user manual provided by the manufacturer. Understanding the features, functions, and operational guidelines of your laser level will help you use it effectively and safely.
- Choose a Suitable Laser Level: Select a laser level that suits the specific needs of your project. Consider factors such as working range, slope capabilities, accuracy, and durability to ensure optimal performance.
- Verify the Stability of the Tripod: Make sure the tripod used to mount the laser level is stable and secure. Double-check the locking mechanisms and adjust the height accordingly to maintain a solid foundation.
- Use Personal Protective Equipment (PPE): Always prioritize safety by wearing appropriate PPE. This includes safety glasses to protect your eyes from laser radiation and debris, sturdy footwear, and clothing suitable for the construction site.
- Handle the Laser Level with Care: Avoid dropping or mishandling the laser level, as it may result in damage to the device or compromise its accuracy. Follow the manufacturer’s instructions for proper handling and storage.
- Check Battery Life: If your laser level operates on batteries, regularly check the battery level and replace them if necessary to ensure uninterrupted operation. It’s recommended to keep spare batteries on hand, especially for longer projects.
- Calibrate Regularly: Regularly calibrate the laser level to maintain accurate measurements. Changes in temperature, transportation, or other factors may affect the calibration over time, so it’s important to recalibrate as needed.
- Ensure Proper Lighting Conditions: In bright outdoor environments or areas with excessive glare, use a laser target card or reflective target to enhance the visibility of the laser beam and ensure accurate measurements.
- Double-Check Measurements: Before proceeding with any construction work, double-check the slope measurements to ensure accuracy. This will help you avoid costly mistakes and ensure the integrity of your project.
- Follow Local Regulations: Be aware of any local regulations or guidelines related to laser level usage, especially in public areas or construction sites. Comply with these rules to ensure safety and prevent any legal issues.
By following these tips and safety precautions, you can enhance your slope-setting experience and promote a safe working environment. Prioritize safety, accurate measurements, and adherence to guidelines to achieve successful slope results.
Now that you have a solid understanding of the process and safety considerations, you’re equipped to confidently and effectively set slope with a laser level. Good luck with your construction projects!
Note: Remember to always consult the specific user manual provided by the manufacturer for detailed instructions and guidelines regarding the operation and usage of your laser level.
Conclusion
Setting slope with a laser level is a crucial task in many construction projects. By understanding the concept of slope, acquiring the necessary tools and materials, properly preparing and calibrating the laser level, and following the step-by-step instructions, you can achieve accurate and reliable slope measurements.
Throughout the process, it’s important to prioritize safety by wearing appropriate personal protective equipment and following safety guidelines. Regularly check and calibrate the laser level to maintain accurate measurements, and document your adjustments for future reference.
Remember to take advantage of helpful tips such as reading the user manual, selecting a suitable laser level, and double-checking measurements. Following these guidelines will enhance your slope-setting experience and ensure the integrity of your construction projects.
Now that you are armed with knowledge about how to set slope with a laser level, it’s time to put it into practice. Embrace the accuracy and efficiency that a laser level provides, and confidently tackle your construction projects with precise and reliable slope measurements.
By mastering the art of setting slope with a laser level, you’ll not only enhance the quality of your work but also improve efficiency and save valuable time. So go ahead, apply these techniques, and accomplish outstanding results in your construction endeavors.
Frequently Asked Questions about How To Set Slope With Laser Level
Was this page helpful?
At Storables.com, we guarantee accurate and reliable information. Our content, validated by Expert Board Contributors, is crafted following stringent Editorial Policies. We're committed to providing you with well-researched, expert-backed insights for all your informational needs.


0 thoughts on “How To Set Slope With Laser Level”