Articles
How To Level A Ladder On Uneven Ground
Modified: October 18, 2024
Learn how to level a ladder on uneven ground with these helpful articles. Gain stability and safety for all your projects.
(Many of the links in this article redirect to a specific reviewed product. Your purchase of these products through affiliate links helps to generate commission for Storables.com, at no extra cost. Learn more)
Introduction
When it comes to using a ladder on uneven ground, safety should always be your top priority. A ladder that is not leveled properly can be unstable, increasing the risk of accidents and injuries. That’s why knowing how to level a ladder on uneven ground is crucial for any DIY enthusiast, homeowner, or professional worker.
In this article, we will guide you through the process of leveling a ladder on uneven ground. We’ll cover various methods that you can use to ensure stability and safety, as well as provide some additional tips to keep in mind. By following these guidelines, you’ll be able to confidently work at heights without compromising your well-being.
Before we dive into the methods, let’s take a moment to understand why leveling a ladder is so important. When a ladder is placed on uneven ground, it creates an unstable base. This instability can lead to the ladder wobbling or tipping over, causing serious harm to the user. By leveling the ladder, you create a secure and stable foundation that supports your weight and prevents any accidents.
Now that you understand the importance of leveling a ladder, let’s explore the necessary safety precautions that you should take before attempting to level your ladder on uneven ground.
Key Takeaways:
- Prioritize safety by inspecting, choosing the right ladder, and assessing ground conditions. Use adjustable legs, shims, or a stabilizer to level the ladder on uneven ground for a stable and secure working platform.
- Regularly inspect your ladder, maintain three points of contact, and secure the ladder to prevent shifting. Plan your work, seek assistance if needed, and prioritize safety at all times when working on a ladder.
Read more: How To Level Uneven Grass
Understanding the Importance of Leveling a Ladder
Leveling a ladder on uneven ground is essential for several reasons. First and foremost, it ensures your safety while working at heights. When a ladder is not properly leveled, it becomes unstable, increasing the risk of falls and accidents. A wobbly ladder can easily tip over, causing serious injuries or even fatalities.
Additionally, leveling a ladder provides a stable and secure platform for you to work on. This is particularly important when performing tasks that require precise movements or balancing, such as painting, installing fixtures, or repairing roofs. A leveled ladder allows you to focus on the task at hand without worrying about the ladder shifting or slipping.
Besides personal safety, leveling your ladder is also vital for the protection of the surrounding environment. An unbalanced ladder may cause damage to the structure you’re working on or the objects nearby. This could result in costly repairs or accidents involving others in the vicinity.
Furthermore, leveling a ladder properly helps to maximize its weight-bearing capacity. When a ladder is uneven, the weight distribution becomes uneven as well. This puts extra strain on certain sections of the ladder, potentially weakening it over time. By leveling the ladder, you ensure that the weight is evenly distributed, reducing the risk of structural damage and extending the ladder’s lifespan.
Lastly, leveling a ladder demonstrates professionalism and attention to detail. Whether you’re working on your own property or as a professional contractor, taking the time to level your ladder shows that you prioritize safety and quality workmanship. It also instills confidence in your clients or team members, giving them peace of mind knowing that you are taking every precaution necessary.
In summary, leveling a ladder on uneven ground is crucial for safety, stability, and longevity. It protects both you and your surroundings, minimizes the risk of accidents, and showcases professionalism. Now that we understand the importance of leveling a ladder, let’s move on to the safety precautions you should take before attempting to level a ladder.
Safety Precautions before Leveling a Ladder
Before you begin leveling your ladder on uneven ground, it’s important to prioritize safety. Taking proper precautions will help prevent accidents and ensure a smooth and successful leveling process. Here are some essential safety measures to follow:
1. Inspect the ladder: Before using a ladder, thoroughly inspect it for any signs of damage or wear. Check for loose or missing screws, cracked rungs, bent rails, or any other defects that could compromise its stability. Do not use a ladder that is damaged or in poor condition.
2. Choose the right ladder: Select a ladder that is appropriate for the task at hand and the terrain you’ll be working on. Different ladders have weight and height restrictions, so make sure to choose one that can safely support your weight and reach the desired height.
3. Ground conditions: Assess the ground conditions where you’ll be placing the ladder. Avoid using a ladder on slippery, soft, or unstable surfaces. Clear away any debris, rocks, or objects that could interfere with the ladder’s stability.
4. Positioning and angle: Position the ladder at the correct angle for maximum stability. The base of the ladder should be positioned approximately one foot away from the vertical surface for every four feet of ladder height. Check the ladder manufacturer’s instructions for specific recommendations on positioning and angle.
5. Firm support: Ensure that the ladder is placed on a firm and level surface. If the ground is uneven, level it using the methods we’ll discuss later in the article. Avoid placing the ladder on sloped or uneven surfaces without proper leveling.
6. Secure the ladder: Secure the ladder by using ladder stabilizers, anti-slip grips, or securing straps. These accessories can help prevent the ladder from shifting or sliding during use.
7. Proper footwear and attire: Wear sturdy, non-slip footwear with good traction to prevent slipping or tripping. Avoid loose clothing that may get caught on the ladder or interfere with your movements.
8. Use a spotter: If possible, have someone assist you by acting as a spotter. They can provide support and help ensure the ladder remains stable while you work.
9. Avoid overreaching: Do not overreach while on the ladder, as it can cause loss of balance and increase the risk of falling. Keep your center of gravity within the ladder’s sides, and if you need to reach an object, reposition the ladder instead of stretching.
10. Follow weight limits: Every ladder has a maximum weight capacity. Always adhere to these limits and avoid exceeding the recommended weight. Distribute your weight evenly and avoid carrying heavy tools or equipment while climbing the ladder.
By following these safety precautions, you can create a secure environment for leveling your ladder on uneven ground. Remember that safety should always be the top priority during any ladder-related task. Now that you’re aware of the necessary precautions, let’s move on to discussing the materials and tools you’ll need for the leveling process.
Materials and Tools Required
Before you begin leveling a ladder on uneven ground, it’s important to gather the necessary materials and tools to ensure a smooth and successful process. Here are the materials and tools you’ll need:
1. Ladder: Choose a ladder that is appropriate for the task and terrain. Consider the height and weight restrictions to ensure the ladder can safely support your weight and reach the desired height.
2. Leveling devices: Depending on the method you choose, you may need adjustable legs, leveling devices, or ladder levelers. These devices allow you to adjust the height of the ladder legs to accommodate uneven ground.
3. Shims or wedges: Shims or wedges are used to fill gaps and create a level surface. They are typically made of wood, plastic, rubber, or metal, and come in various sizes and shapes. Shims can be stacked or trimmed to achieve the desired height.
4. Measuring tape: Use a measuring tape to accurately measure the height differences in the ground and ensure equal leveling on all ladder legs. This is especially useful when using shims or wedges.
5. Hammer or mallet: A hammer or mallet is needed to gently tap the shims or wedges into place. This helps secure them underneath the ladder legs and create a stable foundation.
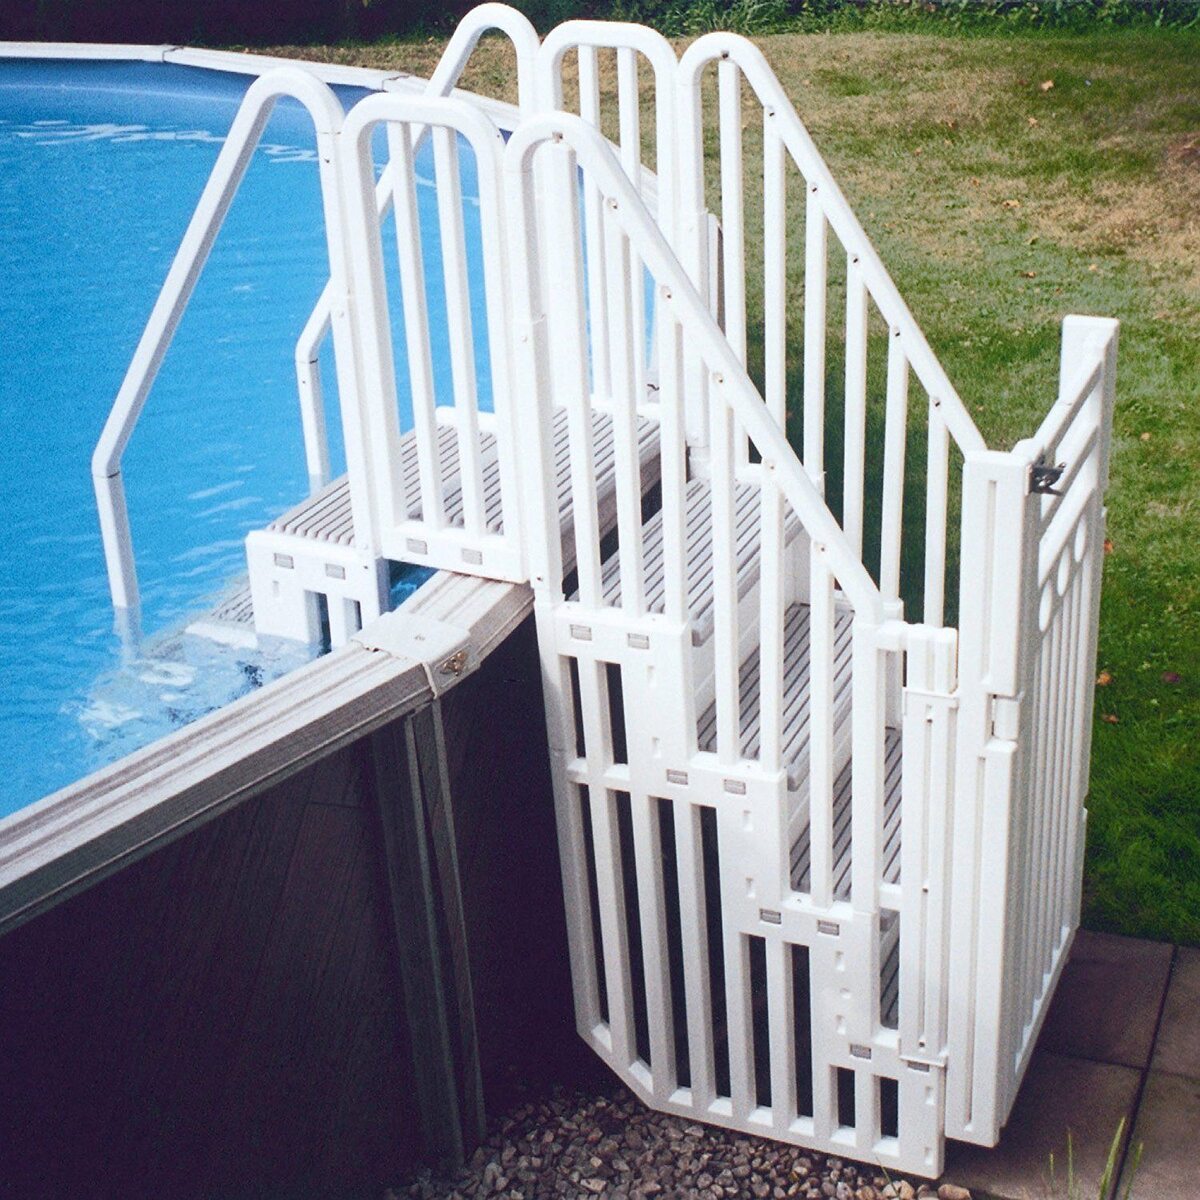
6. Ladder stabilizers: Ladder stabilizers are accessories that attach to the top of the ladder and provide additional stability and support. They can be especially helpful when working on uneven or soft ground.
7. Personal Protective Equipment (PPE): To prioritize safety, wear the appropriate personal protective equipment, including a hard hat, safety glasses, gloves, and non-slip footwear.
8. Spotter or assistant: Having a spotter or assistant can be beneficial, especially when maneuvering the ladder and adjusting the leveling devices. They can provide assistance and ensure the ladder remains stable during the process.
9. Additional support: Depending on the terrain and specific circumstances, you may need additional support, such as planks, boards, or scaffolding, to create a level base for the ladder.
10. Torch or flashlight: If you’re working in low-light conditions or in the evening, a torch or flashlight can help provide visibility and prevent accidents.
By gathering these materials and tools ahead of time, you’ll be well-prepared to level your ladder on uneven ground safely and effectively. Now that we’ve covered the essentials, let’s explore various methods you can use to level a ladder on uneven ground.
Method 1: Using Adjustable Legs or Leveling Devices
One of the most convenient methods for leveling a ladder on uneven ground is by using adjustable legs or leveling devices. These devices allow you to adjust the height of the ladder legs individually, ensuring stability on uneven surfaces. Here’s a step-by-step guide on how to use this method:
Read more: How To Level A Toilet On An Uneven Floor
1. Setting Up the Ladder on Uneven Ground
Place the ladder in the desired location on the uneven ground. Ensure that the ladder is positioned at the correct angle, with the base securely planted on the ground.
2. Adjusting the Legs/Leveling Devices
If your ladder has adjustable legs, start by determining which legs need adjustments. Use a measuring tape to identify the height differences on each leg. The goal is to level the ladder by adjusting the legs to reach the same height.
Begin by adjusting the longer legs first. Extend or retract the adjustable legs until they reach the desired height. Most ladders will have a locking mechanism that allows you to secure the legs in place once they are adjusted.
If your ladder does not have adjustable legs, you can use leveling devices specifically designed for this purpose. These devices, such as ladder levelers, attach to the ladder legs and provide adjustable height options. Follow the manufacturer’s instructions to properly install and adjust the leveling devices.
Using a level tool, check the ladder’s stability at various points and adjust the legs or leveling devices as needed to ensure that the ladder is level and secure.
Repeat this process for each leg or leveling device until the ladder is properly leveled on the uneven ground.
Using adjustable legs or leveling devices is a straightforward method that allows you to quickly and easily level your ladder on uneven ground. However, there are other methods you can use if adjustable legs or leveling devices are not available. Let’s explore another method: creating a level base for the ladder.
Method 1: Using Adjustable Legs or Leveling Devices
# 1.1 Setting Up the Ladder on Uneven Ground
The first step in leveling your ladder on uneven ground is to set up the ladder in the desired location. Before placing the ladder, make sure the ground is clear of any debris, rocks, or other obstructions that could affect its stability.
Choose a location that provides a solid and stable surface for the ladder base. Ideally, the ground should be level, but if it’s uneven, position the ladder in a way that minimizes the slope or unevenness.
Ensure that the ladder is placed at the correct angle for maximum stability. Most ladders have a recommended angle of about 75 degrees, which means the base of the ladder should be positioned about one-quarter of the ladder’s working length away from the vertical surface it is leaning against.
When setting up the ladder, make sure the ladder’s feet are firmly planted on the ground. If the ground is soft or slippery, consider using a ladder stabilizer or adding non-slip grips to the ladder feet for added stability.
It’s important to note that ladder setup should always be done on a solid and level surface whenever possible. However, if you find yourself working in an area with extremely uneven or unstable ground, it may be necessary to consider alternative methods or use additional support, such as planks or scaffolding, to create a level base for the ladder.
Once you have set up the ladder on the uneven ground, it’s time to proceed to the next step: adjusting the legs or leveling devices to ensure the ladder is stable and level.
Note: If your ladder does not have adjustable legs or leveling devices, please refer to the subsequent methods described in this article for alternative ways to level your ladder on uneven ground.
Method 1: Using Adjustable Legs or Leveling Devices
# 1.2 Adjusting the Legs/Leveling Devices
Once you have set up the ladder on the uneven ground, the next step is to adjust the legs or leveling devices to ensure the ladder is stable and level. This will help to prevent any wobbling or tipping of the ladder while you work. Follow these steps to adjust the legs or leveling devices:
1. Identify legs or devices: Take note of which legs or leveling devices need adjustment. This will depend on the specific unevenness of the ground and the ladder’s positioning.
2. Measure height differences: Use a measuring tape to measure the height difference between each leg or leveling device and the ground. This will help you determine how much adjustment is needed.
3. Adjust legs: If your ladder has adjustable legs, extend or retract them to match the desired height. Most adjustable legs have a locking mechanism to secure them in place. Make sure to adjust each leg individually until the ladder is leveled.
4. Use leveling devices: If your ladder does not have adjustable legs, use leveling devices specifically designed for this purpose. Attach the leveling devices to the ladder legs according to the manufacturer’s instructions. These devices typically have adjustable height options, allowing you to level the ladder on uneven ground.
5. Test for stability: Once you have adjusted the legs or leveling devices, test the ladder for stability. Gently shake the ladder to ensure it is secure and does not wobble. If needed, make further adjustments to the legs or leveling devices to achieve a stable and level ladder position.
6. Check with a level tool: To ensure the ladder is truly level, you can use a level tool. Place the level on the ladder rungs or on a flat surface of the ladder, and check both sides for a bubble centered within the level’s indicator lines. Adjust the legs or leveling devices as necessary until the ladder is perfectly leveled.
By adjusting the legs or leveling devices, you can create a stable and level base for your ladder on uneven ground. This will provide a secure platform for you to work on without compromising safety.
Once you have successfully adjusted the legs or leveling devices, you can proceed confidently with your tasks. However, if adjustable legs or leveling devices are not available, don’t worry. In the next methods, we will explore alternative ways to level your ladder on uneven ground.
Method 2: Creating a Level Base
Creating a level base is another effective method for leveling a ladder on uneven ground. This method involves preparing the ground and creating a stable foundation for the ladder. Here’s a step-by-step guide on how to create a level base:
2.1 Choosing the Right Location for the Ladder
Thoroughly assess the ground and select a location that is as level as possible. Look for areas without significant slopes, bumps, or unevenness. Avoid placing the ladder on soft or unstable surfaces, such as gravel or loose soil.
2.2 Clearing the Area and Preparing the Base
Prepare the base by clearing the area of any debris, rocks, or obstacles that may interfere with the stability of the ladder. Use a broom or shovel to remove any loose dirt or debris from the location where the ladder will be placed.
2.3 Leveling the Base
There are multiple options to create a level base for your ladder:
- Using a Leveling Material: You can use materials like sand, gravel, or crushed stones to create a level base. Spread the material on the ground and use a rake or shovel to level it out. Keep checking the level using a bubble or digital level until you achieve a level surface.
- Placing and Adjusting Planks: If the ground is highly uneven, you can use planks or boards to create a level surface. Place the planks parallel to each other and perpendicular to the ladder’s direction. Adjust the height of the planks by adding or removing shims underneath them until you achieve a level base.
- Building a Retaining Wall: In extreme cases of uneven ground, building a temporary retaining wall can provide a stable and level surface for the ladder. Use bricks, cinder blocks, or other suitable materials to construct a wall that supports and levels the ladder base.
Make sure that the base is sturdy and properly leveled before placing the ladder on it. Test the stability by gently applying pressure to different areas of the base to ensure it can support the ladder’s weight.
By creating a level base for your ladder, you can ensure stability and minimize the risk of accidents while working on uneven ground.
Now that you’ve learned about creating a level base, let’s move on to the next method: using shims or wedges to level the ladder.
Method 2: Creating a Level Base
# 2.1 Choosing the Right Location for the Ladder
Before you can create a level base for your ladder, it’s important to carefully choose the right location. The chosen location will determine the overall stability and safety of your ladder setup. Here are some factors to consider when selecting the location:
1. Ground Surface: Look for a ground surface that is as level as possible. Avoid areas with steep slopes or noticeable unevenness. Placing the ladder on a flat and stable surface provides a solid foundation for your ladder setup.
2. Ground Material: Consider the type of material the ground is made of. Different materials may affect the stability of the ladder. For example, concrete or paved surfaces provide better stability compared to loose soil or gravel. If possible, choose a location with a sturdy and solid ground material.
3. Accessibility: Ensure that the chosen location allows easy accessibility to the area where you need to work. Consider any obstacles or obstructions that could hinder your ability to safely ascend and descend the ladder.
4. Surrounding Objects: Take note of any objects or structures near the ladder’s placement. Ensure that there is ample space for you to maneuver and work safely without any obstruction. Also, consider the possibility of any objects or structures that could potentially cause damage or interfere with the ladder.
5. Overhead Clearance: Evaluate the overhead clearance in the selected location. Ensure that there are no low-hanging branches, power lines, or other obstacles that could interfere with your work or pose a safety hazard.
6. Visibility and Lighting: Consider the visibility and lighting conditions of the selected location. Ensure that there is adequate lighting to allow you to see clearly while working. If needed, use additional lighting sources, such as a flashlight or work lights, to improve visibility.
7. Work Area: Determine if the selected location provides enough space for you to carry out the intended tasks. Consider the size and scope of the project to ensure that the chosen location accommodates your needs.
By carefully assessing these factors, you can choose a suitable location that provides a stable and secure base for your ladder. Remember, the stability and safety of your ladder setup depend on selecting the right location, so take the time to evaluate the surroundings before proceeding with ladder placement.
Now that you understand the importance of choosing the right location, let’s move on to discussing the next step, which is clearing the area and preparing the base for your ladder.
Method 2: Creating a Level Base
# 2.2 Clearing the Area and Preparing the Base
Creating a level base for your ladder involves clearing the area and preparing a stable foundation. This step is essential to ensure the safety and stability of your ladder setup. Here’s how you can clear the area and prepare the base:
1. Clear the Area: Start by removing any debris, rocks, or other obstacles from the chosen location. Clearing the area will provide a clean and unobstructed space for placing your ladder. Use a broom, shovel, or rake to sweep away dirt, leaves, and other loose materials.
2. Assess the Ground: Evaluate the ground conditions to determine if further preparation is needed. Check for any unevenness, slopes, or soft spots in the ground that could affect the stability of your ladder. If necessary, use a level tool or your judgment to determine the extent of leveling required.
3. Level the Ground: If the ground is uneven, you’ll need to level it to create a stable base. One approach is to use leveling materials such as sand, gravel, or crushed stones. Pour the leveling material onto the uneven areas and spread it out with a rake or shovel. Continuously check the level of the ground using a level tool to ensure it is evenly distributed.
4. Compact the Base: After spreading the leveling material, use a tamper or the backside of a shovel to compact it. This will help stabilize the base and prevent shifting or sinking of the ladder. Compact the material by applying downward pressure and gentle tapping motions across the area.
5. Check the Level: Once you’ve compacted the base, recheck the level of the ground using a level tool. Ensure that the base is flat and even, with no significant slopes. Make any necessary adjustments by adding or removing leveling material to achieve a level surface.
6. Clear the Surroundings: Clear the immediate surroundings of the ladder base to provide ample space for safe movement. Remove any objects, tools, or equipment that might interfere with your access to the ladder or your range of motion while working.
7. Stabilize the Base: For added stability, consider using anti-slip pads or mats underneath the ladder’s feet. These can help prevent the ladder from shifting or sliding on smooth surfaces. Additionally, securing the ladder with ladder stabilizers or straps can enhance stability and safety.
By following these steps to clear the area and prepare the base, you create a stable foundation for your ladder. This ensures a safer and more secure working environment when using your ladder on uneven ground.
Now that you’ve prepared the base, it’s time to move on to the next step, which is leveling the base using shims or wedges.
Method 2: Creating a Level Base
# 2.3 Leveling the Base
After clearing the area and preparing the base for your ladder, the next step is to level the base. This step ensures that the ladder is stable and securely placed on the uneven ground. Here’s how you can level the base using shims or wedges:
1. Selecting the Right Shims or Wedges: Choose shims or wedges that are suitable for your specific situation. Shims are typically made of wood, plastic, rubber, or metal and come in different shapes and sizes. Select shims that are sturdy, durable, and can support the weight of the ladder.
2. Preparing the Shims or Wedges: If necessary, trim the shims or wedges to the desired height using a saw or utility knife. Ensure that they are the correct size to fit securely underneath the ladder legs. You may need multiple shims or wedges to level each leg of the ladder.
3. Inserting Shims or Wedges under the Ladder Legs: Starting with one leg at a time, lift the ladder slightly and slide the shims or wedges underneath the leg. Ensure that they are positioned evenly and provide stable support. Continue this process for each leg until the ladder is level.
4. Checking for Stability: Once the shims or wedges are in place, gently test the stability of the ladder by applying pressure to different areas. The ladder should feel secure and not wobble or shift. Adjust the shims or wedges as needed to achieve a stable and level ladder setup.
5. Rechecking the Level: Use a level tool to verify that the ladder is level after inserting the shims or wedges. Place the level on the ladder rungs or a flat surface of the ladder and check both sides for a bubble centered within the level’s indicator lines. Make further adjustments if necessary.
6. Securing the Shims or Wedges: If desired, you can secure the shims or wedges in place by applying adhesive or fasteners. This can provide additional stability and prevent the shims or wedges from shifting while you work.
By leveling the base of your ladder using shims or wedges, you ensure that it is securely positioned on the uneven ground. This helps to maintain stability and prevents any wobbling or shifting of the ladder during use.
Now that you have successfully leveled the base of your ladder, you can confidently carry out your tasks on uneven ground. However, if shims or wedges are not available or suitable for your situation, there are alternative methods we will explore in the following sections.
Read more: How To Level Ground For A Trampoline
Method 3: Using Shims or Wedges
Another effective method to level a ladder on uneven ground is by using shims or wedges. Shims or wedges are small objects that can be placed underneath the ladder legs to create a level and stable platform. Here’s a step-by-step guide on how to use shims or wedges to level your ladder:
3.1 Selecting and Preparing the Shims/Wedges
1. Choose the Right Material: Shims or wedges can be made of various materials such as wood, plastic, rubber, or metal. Select shims or wedges that are sturdy enough to support the weight of the ladder and durable enough to withstand the conditions in which you’ll be using them.
2. Determine the Necessary Size and Quantity: Consider the unevenness of the ground and measure the height difference between the ground and each ladder leg. This will help you determine the size and quantity of shims or wedges needed for leveling. You may need multiple shims or wedges for each ladder leg.
3. Prepare the Shims/Wedges: If needed, trim the shims or wedges to the required height using a saw or utility knife. Ensure that they are level and provide a stable surface when placed underneath the ladder legs.
3.2 Inserting Shims/Wedges under the Ladder Legs
1. Lift the Ladder: With the help of a spotter or assistant, slightly lift the ladder to create enough space to insert the shims or wedges underneath each leg.
2. Slide the Shims/Wedges: Insert the shims or wedges one at a time underneath each ladder leg. Position them evenly to ensure a stable and level base. Be cautious not to lift the ladder too high or insert the shims or wedges too tightly, as this could compromise stability.
3. Test for Stability: After inserting the shims or wedges, gently test the ladder’s stability by applying pressure on different areas. The ladder should feel secure and not wobble or shift. If there is any instability, adjust the shims or wedges accordingly.
4. Check the Level: Verify that the ladder is level by using a level tool. Place the level on the ladder rungs or a flat surface and check both sides for a bubble centered within the level’s indicator lines. Make further adjustments to the shims or wedges as necessary to achieve a level ladder setup.
5. Secure the Shims/Wedges (Optional): If desired, you can secure the shims or wedges in place by using adhesive or fasteners. This additional step can provide extra stability and prevent the shims or wedges from shifting during use.
By using shims or wedges, you can effectively level your ladder on uneven ground, ensuring stability and safety during your tasks. Remember to always prioritize your safety and follow proper ladder usage guidelines.
In the next section, we will explore another method to level a ladder on uneven ground using a ladder stabilizer or ladder leveler.
Read more: How To Level Ground For A Trampoline
Method 3: Using Shims or Wedges
Read more: How To Level Ground For Decking
# 3.1 Selecting and Preparing the Shims/Wedges
Selecting and preparing the right shims or wedges is crucial for successfully leveling your ladder on uneven ground. Here’s a step-by-step guide on how to select and prepare the shims or wedges:
1. Choose the Right Material: Shims or wedges can be made of various materials such as wood, plastic, rubber, or metal. The material you choose should be sturdy and durable enough to support the weight of the ladder and withstand the conditions in which you’ll be using them. Consider factors such as weather resistance and load-bearing capacity when selecting the material.
2. Determine the Necessary Size and Quantity: Before starting, assess the unevenness of the ground and measure the height difference between the ground and each ladder leg. This will help you determine the size and quantity of shims or wedges needed for leveling. It’s important to ensure that each leg is adequately supported to maintain stability.
3. Prepare the Shims/Wedges: If necessary, prepare the shims or wedges to the required size. Use a saw or utility knife to trim them to the desired height while ensuring they provide a stable surface when placed underneath the ladder legs. It’s important to create shims or wedges that are level and able to support the ladder evenly.
4. Consider Tapered or Adjustable Shims/Wedges: Depending on your specific needs and the degree of unevenness in the ground, consider using tapered or adjustable shims or wedges. Tapered shims have varying thicknesses, allowing for more precise leveling on uneven surfaces. Adjustable shims or wedges can be modified to different heights, providing flexibility and ease of use.
5. Test the Sturdiness: Before using the shims or wedges, check their sturdiness and ensure they are capable of securely supporting the weight of the ladder. Avoid using damaged or unstable shims or wedges that could compromise the ladder’s stability.
By selecting and preparing the appropriate shims or wedges, you can effectively level your ladder on uneven ground, providing a stable and secure base. In the next section, we will discuss the process of inserting the shims or wedges under the ladder legs to achieve a leveled position.
Read more: How To Level Ground For A Trampoline
Method 3: Using Shims or Wedges
# 3.2 Inserting Shims/Wedges under the Ladder Legs
Once you have selected and prepared the shims or wedges, the next step is to insert them under the ladder legs to achieve a leveled position. Follow these steps to properly insert the shims or wedges:
1. Lift the Ladder: Seek the assistance of a spotter or assistant to help you lift the ladder slightly off the ground. This will allow enough space to insert the shims or wedges under each leg.
2. Identify the Uneven Legs: Observe the ladder legs and identify the ones that require leveling. These are the legs that are shorter or not making proper contact with the ground due to the unevenness.
3. Insert the Shims/Wedges: Starting with one leg at a time, carefully slide the shim or wedge underneath the ladder leg. Push it in until it is snugly placed between the leg and the ground. Make sure to position the shims or wedges evenly and securely.
4. Leveling the Ladder: Slowly lower the ladder onto the shims or wedges and check for stability. Gently test the ladder by applying pressure to various areas to ensure it doesn’t wobble or shift. If any instability is detected, you may need to adjust the shims or wedges accordingly.
5. Repeat the Process: Repeat the process for each leg that requires leveling. Insert the appropriate shim or wedge underneath the leg, ensuring a secure fit. Maintain consistent spacing and make any necessary adjustments as you work through each leg.
6. Confirm Levelness: Check the levelness of the ladder by using a level tool. Place the level on the ladder rungs or a flat surface, and check both sides for a bubble centered within the level’s indicator lines. Make any final adjustments to the shims or wedges until the ladder is leveled.
7. Secure the Shims/Wedges (Optional): For added stability, you can consider using adhesive or fasteners to secure the shims or wedges in place. This will prevent them from shifting during use and provide extra support.
By inserting shims or wedges under the ladder legs, you can effectively level the ladder on uneven ground. Remember to prioritize safety and stability throughout the process. In the next section, we will explore another method to level your ladder using a ladder stabilizer or ladder leveler.
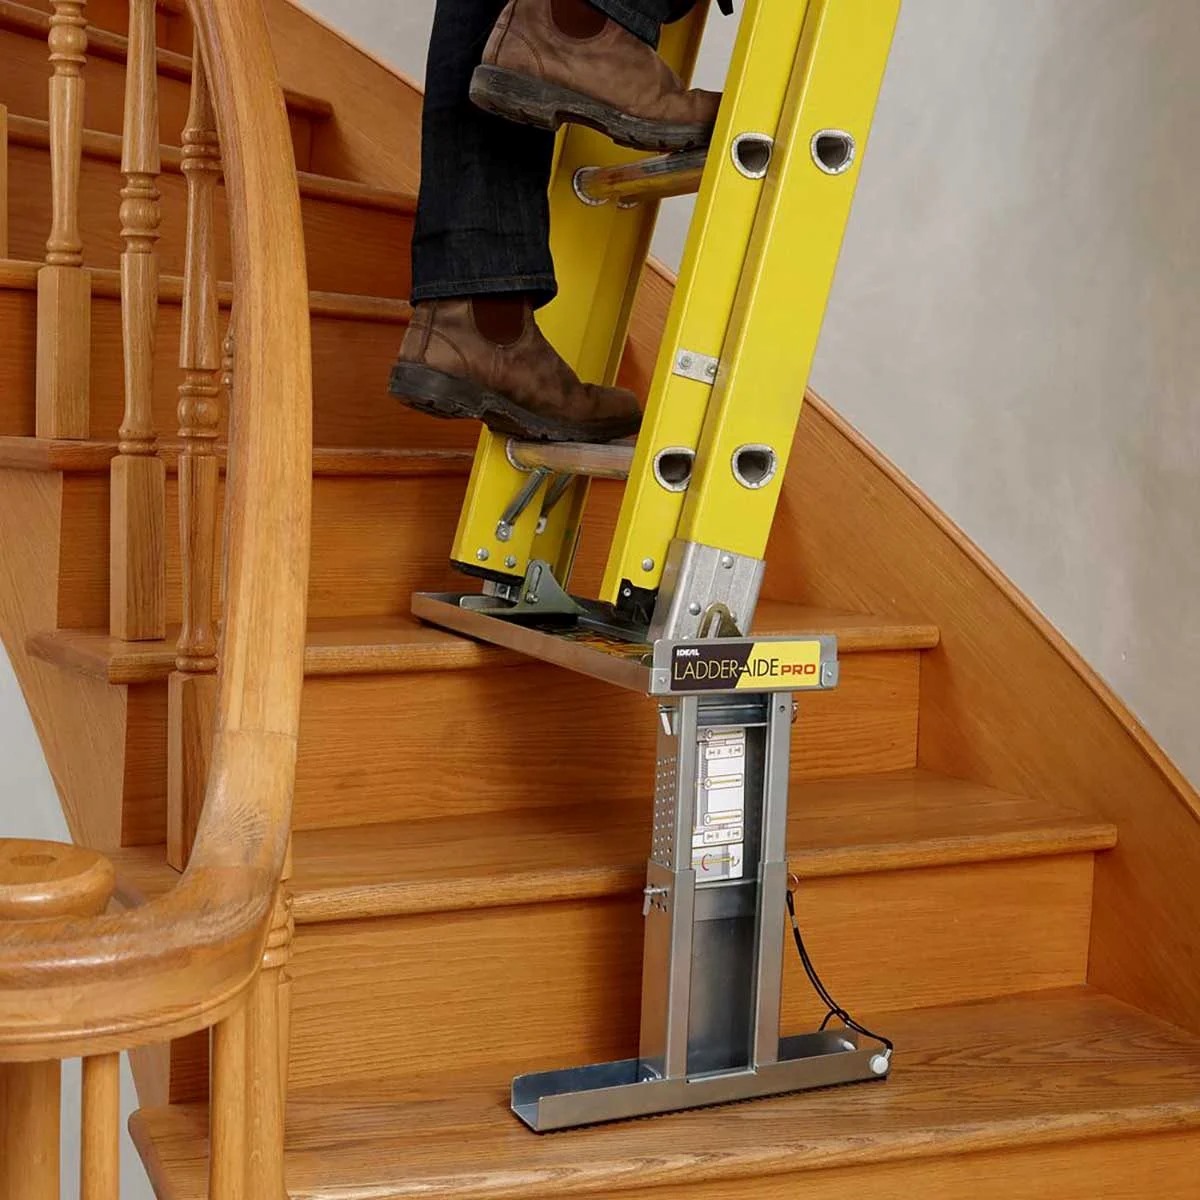
Method 4: Using a Ladder Stabilizer or Ladder Leveler
Using a ladder stabilizer or ladder leveler is another effective method to level your ladder on uneven ground. These accessories provide additional stability and adjustability to ensure a safe and level working platform. Here’s a step-by-step guide on how to utilize a ladder stabilizer or ladder leveler:
Read more: How To Level Ground For Patio Stones
4.1 Attaching and Adjusting the Ladder Stabilizer/Leveler
1. Choose a Suitable Stabilizer/Leveler: Select a ladder stabilizer or ladder leveler that is compatible with your ladder and suitable for the terrain you are working on. Different models may have varying mechanisms, so choose one that best fits your needs.
2. Position the Stabilizer/Leveler: Place the ladder on the uneven ground and attach the stabilizer or leveler to the top of the ladder. Ensure that it is securely fixed and properly aligned with the ladder rails.
3. Adjust the Stabilizer/Leveler: Some stabilizers or levelers have adjustable legs or feet that allow you to accommodate uneven ground. Extend or retract these legs to achieve the desired height and levelness. Lock them in place once you have achieved the proper adjustment.
4. Test for Stability: Gently shake the ladder to test the stability provided by the stabilizer or leveler. The ladder should feel secure and stable, without any wobbling or shifting. If needed, make further adjustments to the stabilizer or leveler to ensure optimal stability.
5. Check the Levelness: Use a level tool to verify that the ladder is level once the stabilizer or leveler is in place. Place the level on the ladder rungs or a flat surface, and check both sides for a bubble centered within the level’s indicator lines. If the ladder is not level, make the necessary adjustments until it is properly leveled.
6. Ensure Proper Usage: Follow the manufacturer’s instructions and guidelines for using the ladder stabilizer or leveler. This includes adhering to weight limits, securing any locking mechanisms, and using the accessory in accordance with recommended safety practices.
7. Monitor Stability Throughout Use: While working on the ladder, periodically check the stability of the ladder and the stabilizer or leveler. If any instability is detected, stop immediately and readjust the stabilizer or leveler as required.
Using a ladder stabilizer or ladder leveler can greatly enhance the stability and levelness of your ladder on uneven ground. However, it is important to exercise caution and proper usage to ensure your safety throughout the process.
Now that you have learned about using a ladder stabilizer or leveler, you are equipped with another method to level your ladder on uneven ground. In the next section, we will conclude our discussion and provide some additional tips for ladder safety on uneven ground.
Method 4: Using a Ladder Stabilizer or Ladder Leveler
# 4.1 Attaching and Adjusting the Ladder Stabilizer/Leveler
Using a ladder stabilizer or ladder leveler is an effective way to ensure stability and levelness when working on uneven ground. Follow these steps to properly attach and adjust the ladder stabilizer or leveler:
1. Choose a Suitable Stabilizer/Leveler: Select a ladder stabilizer or ladder leveler that is compatible with your ladder and designed for the specific terrain or surface you will be working on. Consider the weight capacity and features of the stabilizer or leveler to ensure it meets your needs.
2. Position the Stabilizer/Leveler: Place the ladder on the uneven ground in the desired location. Attach the stabilizer or leveler to the top of the ladder. Make sure to align it properly with the ladder rails and ensure a secure attachment.
3. Adjust the Stabilizer/Leveler: Some stabilizers or levelers have adjustable legs or feet that allow you to accommodate uneven ground. Extend or retract these legs to achieve the desired height or levelness. Follow the manufacturer’s instructions on how to adjust the stabilizer or leveler and lock it in place.
4. Test for Stability: Gently shake the ladder to test the stability provided by the stabilizer or leveler. The ladder should feel secure and stable, without any significant wobbling or shifting. If there is any instability, recheck the attachment and readjust the stabilizer or leveler as needed.
5. Check the Levelness: Use a level tool to verify that the ladder is level once the stabilizer or leveler is attached and adjusted. Place the level on the ladder rungs or a flat surface and check both sides for a bubble centered within the level’s indicator lines. If the ladder is not level, make the necessary adjustments to the stabilizer or leveler until the ladder is properly leveled.
6. Follow Manufacturer’s Guidelines: Read and follow the manufacturer’s guidelines and instructions for using the ladder stabilizer or leveler. Adhere to weight capacity limits, secure any locking mechanisms, and use the accessory in accordance with recommended safety practices.
7. Regularly Monitor Stability: While working on the ladder, periodically check the stability of the ladder and the stabilizer or leveler. If you notice any signs of instability or if adjustments are needed, stop working and make the necessary adjustments before continuing.
By properly attaching and adjusting the ladder stabilizer or leveler, you can enhance the stability and levelness of your ladder on uneven ground. Remember to prioritize safety and follow the manufacturer’s guidelines when using these accessories.
In the next section, we will conclude our discussion and provide additional tips for ladder safety on uneven ground.
Conclusion
Leveling a ladder on uneven ground is crucial for ensuring safety and stability while working at heights. By following the methods and tips discussed in this article, you can successfully level your ladder and minimize the risk of accidents or injuries. Here’s a summary of what we’ve covered:
– Understanding the importance of leveling a ladder: A leveled ladder provides stability and minimizes the risk of accidents, ensuring a safe working environment.
– Safety precautions before leveling a ladder: Inspect the ladder, choose the right ladder for the task, assess the ground conditions, ensure proper positioning and angle, use a spotter, and wear appropriate personal protective equipment.
– Materials and tools required: Ensure you have the ladder, adjustable legs or leveling devices, shims or wedges, measuring tape, hammer or mallet, ladder stabilizers, personal protective equipment, a spotter, and additional support if needed.
– Method 1: Using adjustable legs or leveling devices: Set up the ladder on the uneven ground and adjust the legs or leveling devices to level the ladder.
– Method 2: Creating a level base: Choose the right location, clear the area, prepare the base, and level the base using shims, wedges, or other materials.
– Method 3: Using shims or wedges: Select and prepare shims or wedges, lift the ladder, insert the shims or wedges under the ladder legs, and ensure stability and levelness.
– Method 4: Using a ladder stabilizer or leveler: Attach the stabilizer or leveler to the ladder, adjust its height or levelness, and ensure stability during use.
Remember to prioritize safety at all times when working on a ladder. Periodically check the ladder and its leveling mechanism during use and make any necessary adjustments to maintain stability. If at any point you feel uncomfortable or unsure, seek assistance from a professional or experienced individual.
With these methods and tips in mind, you can confidently level your ladder on uneven ground and carry out your tasks safely and effectively. Stay vigilant, adhere to safety guidelines, and prioritize your well-being throughout the entire process. Happy and safe ladder leveling!
Read more: How To Level The Ground For A Garden Bed
Additional Tips for Ladder Safety on Uneven Ground
Ensuring ladder safety on uneven ground goes beyond just leveling the ladder. Here are some additional tips to keep in mind:
1. Regularly inspect your ladder: Before each use, inspect your ladder for any signs of damage or wear. Look for cracks, loose or missing parts, and ensure that the ladder is in good working condition.
2. Use the right ladder for the job: Choose a ladder that is appropriate for the task at hand and the terrain you will be working on. Consider factors such as height, weight capacity, and stability.
3. Maintain three points of contact: Always maintain three points of contact with the ladder – two hands and one foot or two feet and one hand. This will help you maintain balance and stability while on the ladder.
4. Secure the ladder: Secure the ladder using ladder stabilizers, anti-slip grips, or straps to prevent it from shifting or sliding during use. Ensure that the ladder is properly secured to the structure or ground.
5. Watch your footing: Be cautious of your footing when climbing the ladder. Ensure that your shoes have good traction and are free of mud, grease, or any other substances that can cause slipping.
6. Avoid overreaching: Never overreach or lean too far to one side while on the ladder. This can cause the ladder to become unbalanced and lead to a fall. Instead, reposition the ladder as needed to maintain your balance.
7. Maintain a good center of gravity: Keep your body centered between the ladder rails and avoid leaning too far to either side. This will help you maintain better stability and balance while working.
8. Stay aware of your surroundings: Be mindful of the objects, structures, or other hazards in your surroundings. Take caution to avoid hitting or bumping into them while on the ladder.
9. Plan your work: Before starting any task on the ladder, plan your work and ensure you have all the necessary tools and materials within reach. This will help avoid unnecessary movements and minimize the risk of losing your balance.
10. Seek assistance if needed: If you are unsure about the stability of the ladder on uneven ground or if the task requires additional support, seek assistance from a professional or experienced individual.
Following these additional tips will help ensure your safety and reduce the risk of accidents while working on a ladder. Remember, safety should always be your top priority when working at heights. Stay alert, take precautionary measures, and exercise caution throughout the entire process.
Use a ladder leveler or a wedge to stabilize the ladder on uneven ground. Place the leveler or wedge under the low side of the ladder to ensure it is secure before climbing.
Frequently Asked Questions (FAQs)
Q1: Can I level a ladder on any type of uneven ground?
A1: While you can level a ladder on uneven ground, it’s important to assess the ground conditions and choose a stable and solid surface. Avoid placing the ladder on soft or unstable surfaces like loose soil or gravel, as this can compromise its stability.
Q2: Are ladder stabilizers or levelers necessary for every ladder?
A2: Ladder stabilizers and levelers are not necessary for every ladder, but they can greatly enhance stability, especially on uneven ground. They provide additional support and adjustability to ensure a level working surface. However, they may not be compatible with all ladder types, so choose one that is suitable for your ladder model.
Q3: How often should I inspect my ladder?
A3: It is recommended to inspect your ladder before each use. Check for any signs of damage, cracks, or loose parts. Regular inspections help ensure that your ladder is in good working condition and safe to use.
Q4: Can I level a ladder on a sloped surface?
A4: While it is not recommended to use a ladder on a sloped surface, certain methods can provide stability. Creating a level base using shims or wedges may be helpful, but it’s essential to exercise caution and ensure that the ladder is securely positioned before using it.
Q5: Is it safe to work on a ladder alone on uneven ground?
A5: It is always recommended to have another person present when working on a ladder, especially on uneven ground. They can provide assistance, act as a spotter, and help ensure your safety by stabilizing the ladder if needed.
Q6: Can I use any materials as shims or wedges?
A6: Shims or wedges should be made of sturdy and durable materials that can safely support the weight of the ladder. Common materials include wood, plastic, rubber, or metal. Ensure that the shims or wedges are stable and provide a secure base for the ladder.
Q7: What should I do if the ladder feels unstable after leveling?
A7: If the ladder feels unstable after leveling, stop using it immediately. Reassess the ladder setup, check the levelness, and make any necessary adjustments. If stability cannot be achieved, consider using alternative methods or seeking assistance from a professional.
Remember, while these FAQs may address some common concerns, prioritizing safety is paramount when working with ladders. Always follow manufacturer guidelines, incorporate safe practices, and remain cautious throughout the entire process.
Frequently Asked Questions about How To Level A Ladder On Uneven Ground
Was this page helpful?
At Storables.com, we guarantee accurate and reliable information. Our content, validated by Expert Board Contributors, is crafted following stringent Editorial Policies. We're committed to providing you with well-researched, expert-backed insights for all your informational needs.


0 thoughts on “How To Level A Ladder On Uneven Ground”