Home>Furniture>Outdoor Furniture>How To Fix Uneven Concrete Patio
Outdoor Furniture
How To Fix Uneven Concrete Patio
Modified: March 7, 2024
Learn how to fix an uneven concrete patio and create a level surface for your outdoor furniture. Quick and easy solutions for a sturdy and comfortable outdoor living space.
(Many of the links in this article redirect to a specific reviewed product. Your purchase of these products through affiliate links helps to generate commission for Storables.com, at no extra cost. Learn more)
Introduction
Welcome to the ultimate guide on how to fix an uneven concrete patio. If you’re noticing dips, cracks, or uneven sections on your patio, don’t worry – it’s a common issue that can be easily resolved with some basic tools and materials. A well-maintained patio not only improves the aesthetic appeal of your outdoor space but also ensures safety for your family and guests.
Uneven concrete can be caused by a variety of factors, including shifting soil, improper installation, or natural wear and tear over time. Neglected concrete patios can become hazards, leading to tripping hazards and potential water damage. By following the steps outlined in this guide, you’ll be able to restore your patio to its original smooth and level state.
Before we begin, it’s important to note that this guide is intended for minor repairs and leveling. If your patio has extensive damage or severe cracks, it’s recommended to consult with a professional concrete contractor to assess and resolve the issue.
Now, without further ado, let’s dive into the steps needed to fix an uneven concrete patio and bring new life to your outdoor space.
Key Takeaways:
- Transform your uneven concrete patio into a safe and visually appealing outdoor space by following simple steps like assessing damage, leveling uneven sections, and sealing the patio for long-lasting protection.
- With the right materials and tools, you can easily repair and revitalize your concrete patio, creating a beautiful and functional outdoor area for entertaining, relaxing, and enjoying the outdoors.
Read more: How To Fix An Uneven Concrete Floor
Step 1: Assessing the Damage
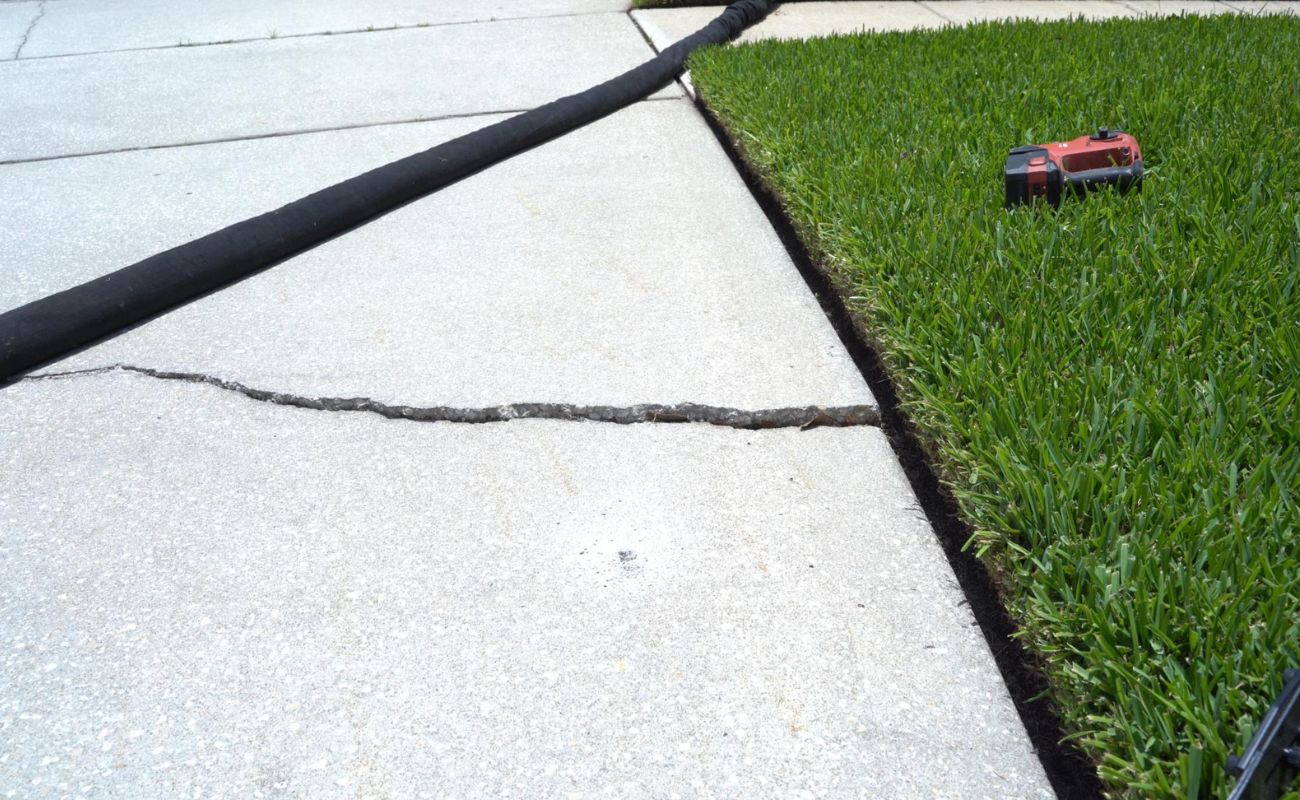
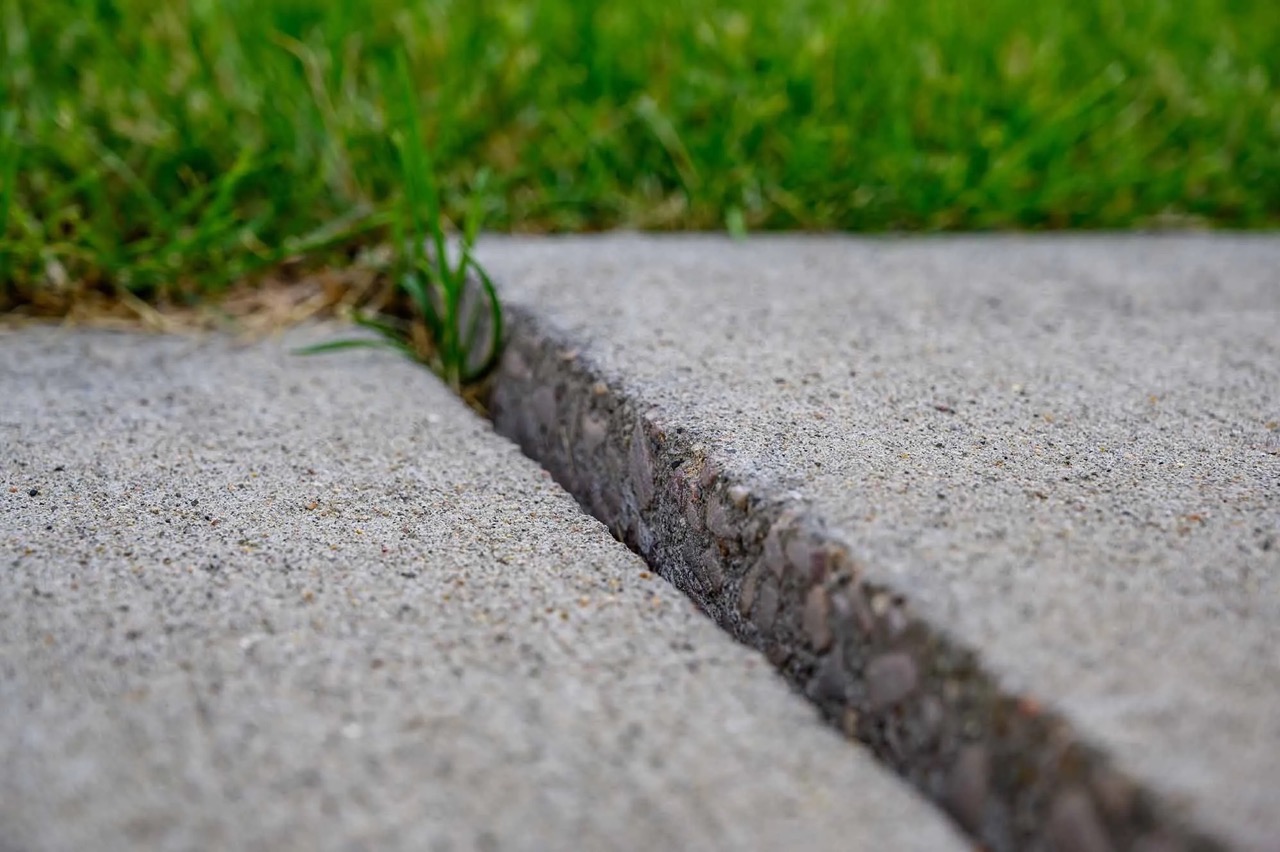
The first step in fixing an uneven concrete patio is to assess the extent of the damage. Take a thorough look at your patio and identify any areas that are noticeably uneven, cracked, or sunken. It’s important to note that small cracks are common and can often be repaired easily, but larger cracks or significant unevenness may require more extensive repairs.
Here are a few key things to look for when assessing the damage:
- Unevenness: Walk across your patio and pay attention to any areas that feel uneven or wobbly. These sections may indicate underlying issues that need to be addressed.
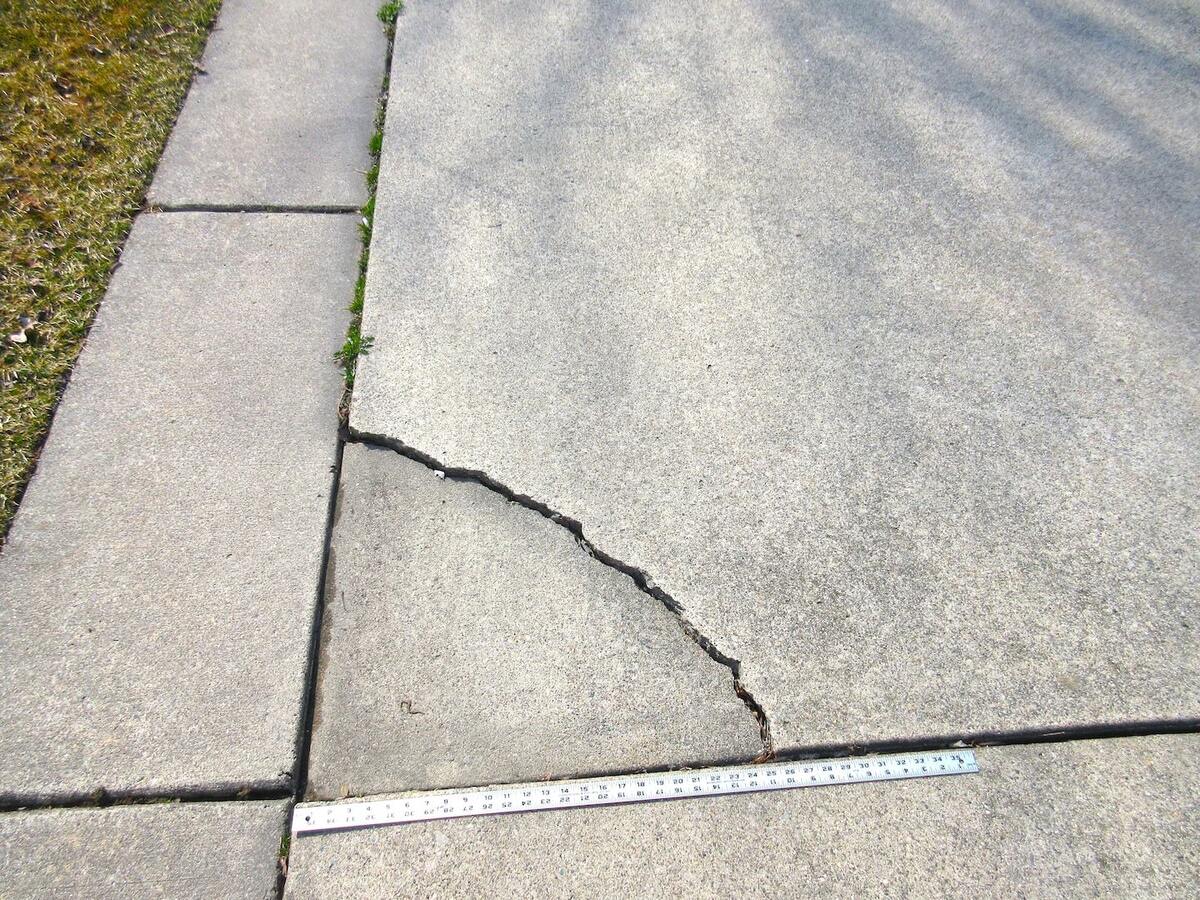
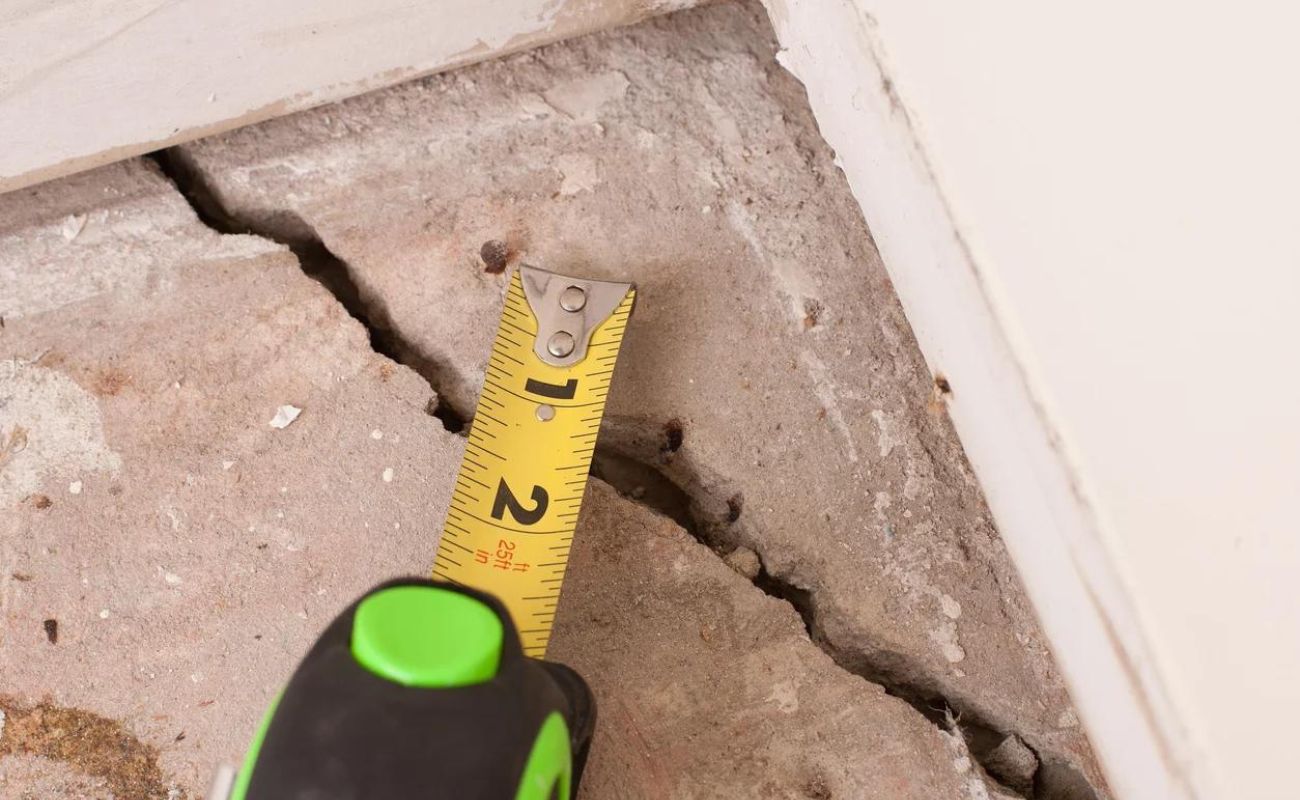
- Cracks and Holes: Look for cracks or holes in the concrete surface. Measure the length and depth of the cracks to determine the severity.
- Water Pooling: Check for areas where water consistently pools or does not drain properly. This can be a sign of poor concrete leveling.
- Wear and Tear: Take note of any general wear and tear, such as chipping, flaking, or crumbled edges. These areas may need to be repaired to ensure a smooth and safe surface.
Assessing the damage will help you determine the appropriate course of action. If the damage is minor, you may be able to fix it yourself. However, if the damage is extensive or beyond your expertise, it’s best to contact a professional concrete contractor to handle the repairs.
Once you’ve assessed the damage, you’ll be ready to move on to the next step: gathering the necessary materials and tools to fix your uneven concrete patio.
Step 2: Gathering Materials and Tools
Now that you’ve assessed the damage to your uneven concrete patio, it’s time to gather the materials and tools necessary for the repair process. Having everything you need ahead of time will ensure a smoother and more efficient repair job.
Here’s a list of commonly used materials and tools for fixing an uneven concrete patio:
- Concrete Patch or Resurfacer: This is used to fill in cracks and level out uneven sections. Choose a patch or resurfacer that is suitable for outdoor use and matches the color of your existing patio.
- Concrete Crack Filler: For smaller cracks, a crack filler can be used to prevent water from seeping in and further damaging the concrete.
- Cement Mixer or Mixing Container: Depending on the size of your repair job, you may need a cement mixer or a large mixing container to properly mix the concrete patch or resurfacer.
- Trowel or Concrete Float: These tools are used to apply and smooth out the concrete patch or resurfacer.
- Scraper or Chisel: Use a scraper or chisel to remove any loose or crumbled concrete from the damaged areas.
- Wire Brush: A wire brush is necessary for cleaning the surface and preparing it for the repair.
- Concrete Grinder: If your patio has severe unevenness or high spots, a concrete grinder can be used to level the surface before applying the patch or resurfacer.
- Safety Equipment: Ensure you have gloves, safety glasses, and a dust mask to protect yourself during the repair process.
Check your local hardware store or online retailers to gather all the necessary materials and tools. Remember to read the instructions on the packaging of the concrete patch or resurfacer to ensure proper application.
With your materials and tools in hand, you’re now ready to move on to the next step: cleaning the patio surface.
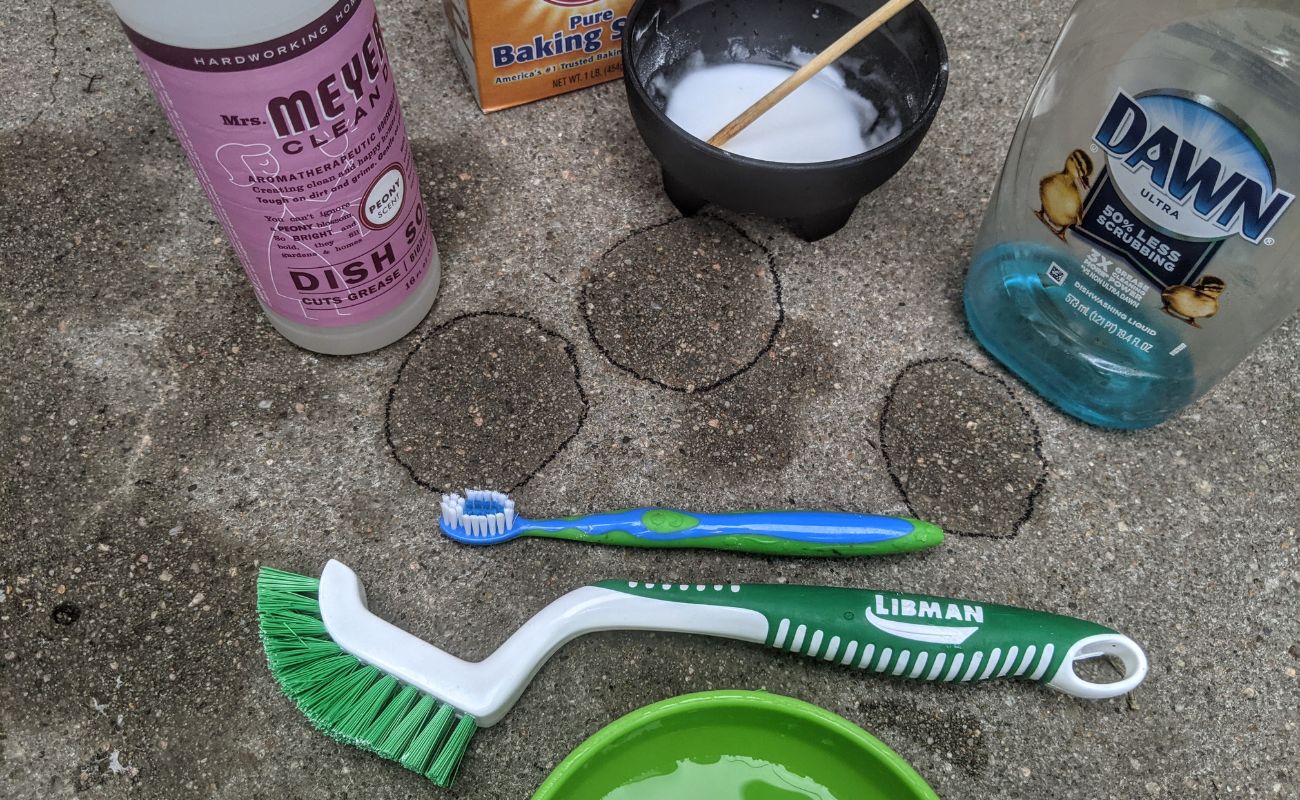
Step 3: Cleaning the Patio Surface
Before you can begin the repair process, it’s crucial to clean the patio surface thoroughly. Cleaning the surface will remove any dirt, debris, or loose material, ensuring that the concrete patch or resurfacer adheres properly.
Follow these steps to clean your patio surface effectively:
- Sweep: Start by using a broom or outdoor brush to sweep away loose dirt, leaves, and debris from the patio surface. Pay close attention to the cracks and uneven sections to remove any trapped debris.
- Scrub: Use a wire brush to scrub the affected areas of your patio. This will help remove any lingering dirt, moss, or other contaminants that may interfere with the repair process.
- Pressure Wash (Optional): If your patio is particularly dirty or has stubborn stains, you may consider using a pressure washer to deep clean the surface. Be sure to follow the manufacturer’s instructions and use the appropriate pressure setting for your patio.
- Dry: Allow the patio surface to dry completely before proceeding to the next step. This will ensure that the concrete patch or resurfacer adheres properly.
It’s important to note that if you’re planning to use a concrete patch or resurfacer that requires the surface to be moist before application, follow the instructions provided by the manufacturer. Some products may require a damp surface for optimal adhesion.
By cleaning your patio surface thoroughly, you’ll create an ideal foundation for the repair materials and ensure a more successful and long-lasting result. Once the surface is clean and dry, you can move on to the next step: leveling the uneven sections of your patio.
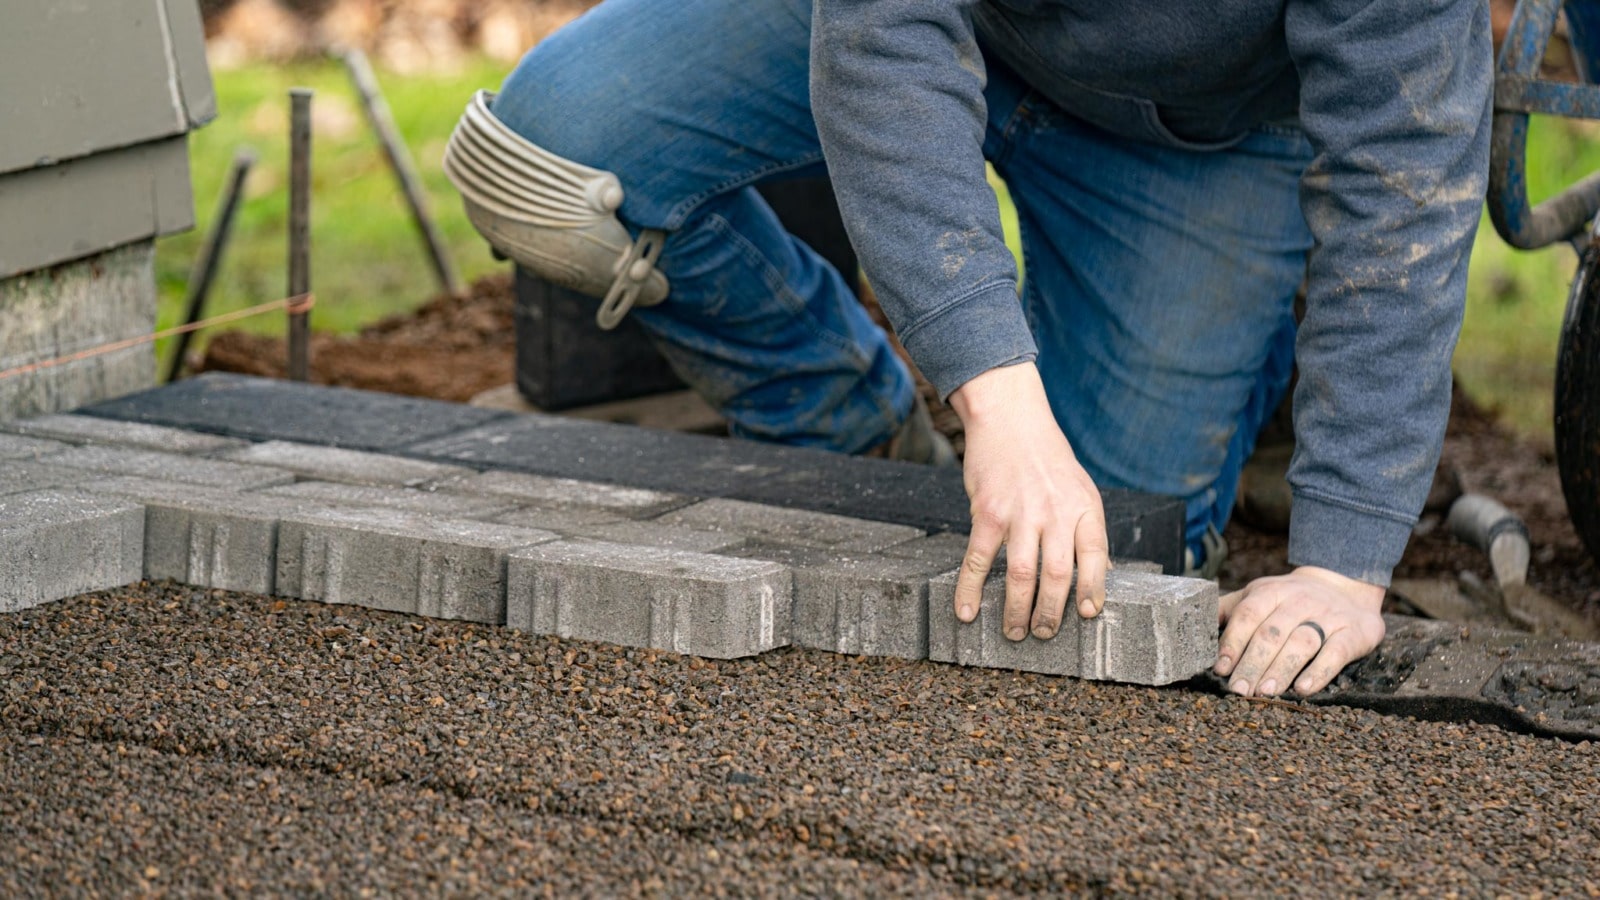
Step 4: Leveling the Uneven Sections
Now that you have a clean patio surface, it’s time to tackle the uneven sections and level them out. This step will help create a smooth and even surface for your repaired patio.
Follow these steps to level the uneven sections:
- Apply Bonding Agent: Before applying the concrete patch or resurfacer, it’s recommended to apply a bonding agent to the uneven sections. This will improve the adhesion between the existing concrete and the new material. Follow the manufacturer’s instructions for proper application.
- Mix the Patch or Resurfacer: Prepare the concrete patch or resurfacer according to the manufacturer’s instructions. Use a cement mixer or mixing container to ensure a consistent and smooth mixture.
- Apply the Patch or Resurfacer: Using a trowel or concrete float, apply the patch or resurfacer to the uneven sections of your patio. Spread it evenly and make sure to fill in any low spots or gaps. Work in small sections and blend the edges with the surrounding concrete for a seamless finish.
- Smooth and Level: Once the patch or resurfacer is applied, use the trowel or concrete float to smooth and level the surface. Feather out the edges to create a gradual transition between the old and new concrete. Avoid excessive troweling, which can cause surface imperfections.
For larger uneven sections, it may be necessary to build up the patch or resurfacer in layers, allowing each layer to dry before adding the next. This will ensure a more stable and durable result.
Remember to work in small sections and take your time to achieve a level surface. If necessary, use a level tool to check for evenness as you go. Once you’ve leveled the uneven sections, you can move on to the next step: filling cracks and holes.
Consider using a self-leveling concrete overlay to fix an uneven patio. This material can be poured over the existing concrete and will level itself out, providing a smooth and even surface.
Read more: How To Fix Uneven Concrete Walkway
Step 5: Filling Cracks and Holes
After leveling the uneven sections of your patio, it’s important to address any cracks and holes in the concrete surface. Filling these imperfections will help prevent further damage and ensure a smooth and seamless finish.
Follow these steps to fill cracks and holes in your patio:
- Clean the Cracks and Holes: Use a wire brush or scraper to remove any loose debris, dirt, or old filler from the cracks and holes. Ensure that the areas to be repaired are clean and free from any loose material.
- Apply Concrete Crack Filler: For smaller cracks, use a concrete crack filler that is specifically designed for outdoor use. Apply the filler into the cracks, ensuring it fills the entire depth. Smooth the surface using a trowel, and let it dry according to the manufacturer’s instructions.
- Fill Larger Holes: If you have larger holes in your patio, use a concrete patch or a mixture of concrete resurfacer and fine sand to fill them. Build up the material in layers, allowing each layer to dry before adding the next. Use a trowel to ensure a level and smooth finish.
- Smooth the Surface: Once the filler has dried, use a trowel or concrete float to smooth the filled cracks and holes. Blend the edges with the surrounding patio to create a seamless appearance.
It’s important to note that larger or more severe cracks may require additional steps or different repair techniques. If you have extensive cracking or structural issues, it’s recommended to consult with a professional concrete contractor for the best course of action.
With the cracks and holes filled, your patio surface is one step closer to being restored. The next step is to apply a concrete patch or resurfacer to the entire patio surface for a consistent and appealing finish.
Step 6: Applying Concrete Patch or Resurfacer
With the uneven sections leveled and cracks and holes filled, it’s time to apply a concrete patch or resurfacer to the entire patio surface. This step will help restore the appearance of your patio and provide a uniform, durable finish.
Follow these steps to apply the concrete patch or resurfacer:
- Mix the Patch or Resurfacer: Follow the manufacturer’s instructions to prepare the concrete patch or resurfacer. Use a cement mixer or large mixing container to ensure a consistent and smooth mixture.
- Moisten the Patio Surface: Before applying the patch or resurfacer, moisten the entire patio surface with water. This will prevent the existing concrete from absorbing moisture from the patch or resurfacer too quickly, ensuring proper adhesion.
- Apply the Patch or Resurfacer: Begin applying the patch or resurfacer to the patio surface using a trowel or concrete float. Work in small sections, covering the entire surface evenly. Spread the material in a smooth and consistent manner, using long, sweeping motions.
- Feather the Edges: As you apply the patch or resurfacer, carefully feather out the edges to create a seamless transition between the old and new concrete. This will help achieve a more natural and visually pleasing finish.
- Smooth and Level: Use the trowel or concrete float to smooth and level the applied patch or resurfacer. Ensure that the surface is even and free from any trowel marks or inconsistencies. Work diligently to achieve a professional-looking finish.
It’s important to work efficiently while applying the patch or resurfacer, as it typically has a limited working time before it starts to set. The specific drying time and curing requirements will depend on the product you’re using, so be sure to follow the manufacturer’s instructions for the best results.
Once you’ve applied the concrete patch or resurfacer to the entire patio surface, allow it to dry and cure thoroughly according to the manufacturer’s instructions. Then, you can proceed to the next step: using a concrete grinder if necessary.
Step 7: Using a Concrete Grinder (if necessary)
In some cases, your uneven concrete patio may have high spots or rough areas that require further leveling or smoothing. If this is the case, using a concrete grinder can help you achieve a more even surface and improve the overall appearance of your patio.
Here’s how to use a concrete grinder, if necessary:
- Select the Right Grinder: Choose a concrete grinder that is suitable for the size of your patio and the specific job requirements. There are different types of grinders available, including handheld grinders for smaller areas and larger walk-behind grinders for more extensive projects.
- Prepare the Area: Clear the patio of any furniture, plants, or obstacles that may interfere with the grinding process. Cover nearby surfaces and plants to protect them from dust and debris.
- Put on Safety Gear: Before operating the grinder, ensure that you are wearing appropriate safety gear, including safety glasses, a dust mask, and ear protection. Concrete grinding can produce a significant amount of dust and noise.
- Start Grinding: Begin grinding the high spots or rough areas of your patio using the concrete grinder. Move the grinder back and forth in a side-to-side motion, overlapping each pass slightly. Apply even pressure to achieve a smooth and level surface.
- Check for Evenness: Regularly check the surface with a level or by sight to ensure that you are achieving the desired levelness. Continue grinding until the high spots or rough areas have been smoothed out.
- Clean Up: Once you have finished grinding, thoroughly clean up the dust and debris using a shop vacuum or sweeping tools. Dispose of the waste material properly.
It’s important to note that using a concrete grinder requires experience and caution. If you’re not confident in your ability to use the grinder safely and effectively, it’s recommended to hire a professional concrete contractor to handle the grinding process.
After using a concrete grinder, the next step is to seal and finish your patio for long-lasting protection and a polished appearance.
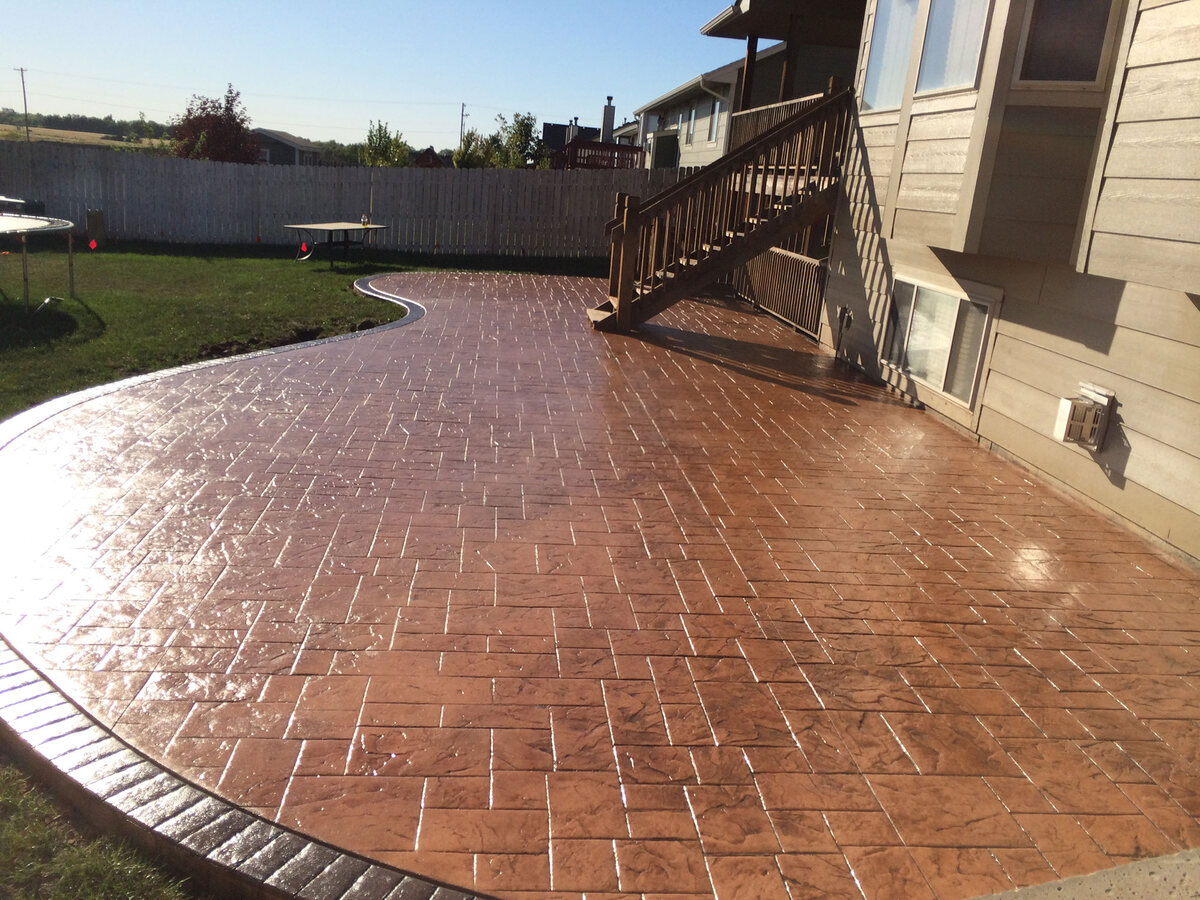
Step 8: Sealing and Finishing the Patio
Once you have repaired, leveled, and smoothed out your concrete patio, it’s important to seal and finish it to enhance its durability and appearance. Sealing your patio will protect it from moisture, staining, and UV damage, while also providing a glossy or matte finish, depending on your preference.
Follow these steps to seal and finish your patio:
- Clean the Surface: Before sealing, ensure that the patio surface is clean and free from any dust, debris, or residue. Sweep or use a blower to remove loose dirt, and wash the surface with water and a mild detergent if necessary. Allow it to dry completely.
- Choose the Right Sealer: Select a concrete sealer that is specifically designed for outdoor use and suitable for your patio. There are various types of sealers available, including penetrating sealers for a natural look and film-forming sealers for a glossy or matte finish.
- Apply the Sealer: Follow the manufacturer’s instructions for proper application of the sealer. Use a brush, roller, or sprayer to evenly apply the sealer to the entire patio surface. Work in small sections to ensure thorough coverage.
- Allow the Sealer to Dry: Give the sealer sufficient time to dry and cure according to the manufacturer’s instructions. This typically takes several hours or even a full day, depending on the product and weather conditions.
- Add Additional Coats (Optional): If desired, you can apply additional coats of sealer for added protection and a deeper finish. Follow the recommended drying time between each coat.
- Finishing Touches: Once the sealer has dried completely, you can add any finishing touches, such as furniture, potted plants, or outdoor decor, to complete the transformation of your patio.
Sealing your patio not only protects it from external elements but also makes cleaning and maintenance easier in the long run. Remember to periodically check the condition of the sealer and reapply as necessary to maintain its effectiveness.
With your patio sealed and finished, you can now enjoy a revitalized and visually appealing outdoor space. Take a moment to marvel at your hard work and bask in the beauty of your newly restored concrete patio.
Final Thoughts
Fixing an uneven concrete patio may seem like a daunting task, but with the right materials, tools, and guidance, it can be successfully accomplished. By following these detailed steps, you can bring new life to your outdoor space and create a safe and enjoyable area for entertaining, relaxing, and creating memories.
If you’re unsure or uncomfortable with any aspect of the repair process, it’s always recommended to seek the help of a professional concrete contractor who can provide expert guidance and ensure a flawless finish. Remember, a well-maintained patio not only adds value to your home but also enhances your outdoor living experience for years to come.
Read more: How To Fix Concrete Cracks On The Patio
Conclusion
Repairing an uneven concrete patio may seem like a daunting task, but with the right knowledge and tools, it can be easily accomplished. By following the steps outlined in this guide, you can transform your uneven and damaged patio into a smooth and visually appealing outdoor space.
Assessing the damage, gathering the necessary materials and tools, cleaning the patio surface, leveling the uneven sections, filling cracks and holes, applying a concrete patch or resurfacer, using a concrete grinder if necessary, and sealing and finishing the patio are all important steps in the repair process.
Throughout each step, it’s important to take your time, follow the manufacturer’s instructions, and pay attention to detail. This will help ensure a long-lasting and professional-quality repair job.
Remember, safety should always be a priority. Wear appropriate safety gear, such as gloves, safety glasses, and a dust mask, when working with concrete and power tools. If you’re uncertain about any aspect of the repair process or if you’re dealing with significant damage, it’s recommended to consult with a professional concrete contractor for expert advice and assistance.
Once your patio is repaired, leveled, and sealed, you can enjoy a beautiful and functional outdoor space. Whether you’re hosting gatherings, lounging in the sun, or simply enjoying the tranquility of your backyard, your newly restored concrete patio will provide a safe and comfortable environment.
Remember to periodically inspect and maintain your patio to ensure its longevity. Regular cleaning and occasional resealing will help protect your patio from the elements and maintain its visual appeal.
Now that you have the knowledge to fix an uneven concrete patio, it’s time to roll up your sleeves and get to work. Embrace the process, have fun, and enjoy the satisfaction of transforming your outdoor space into a beautiful oasis.
Frequently Asked Questions about How To Fix Uneven Concrete Patio
Was this page helpful?
At Storables.com, we guarantee accurate and reliable information. Our content, validated by Expert Board Contributors, is crafted following stringent Editorial Policies. We're committed to providing you with well-researched, expert-backed insights for all your informational needs.


0 thoughts on “How To Fix Uneven Concrete Patio”