Home>Furniture>Outdoor Furniture>How To Level Ground For Decking
Outdoor Furniture
How To Level Ground For Decking
Modified: August 27, 2024
Learn how to level the ground for your outdoor furniture with this step-by-step guide. Ensure a sturdy foundation for your decking and enjoy a beautiful outdoor space.
(Many of the links in this article redirect to a specific reviewed product. Your purchase of these products through affiliate links helps to generate commission for Storables.com, at no extra cost. Learn more)
Introduction
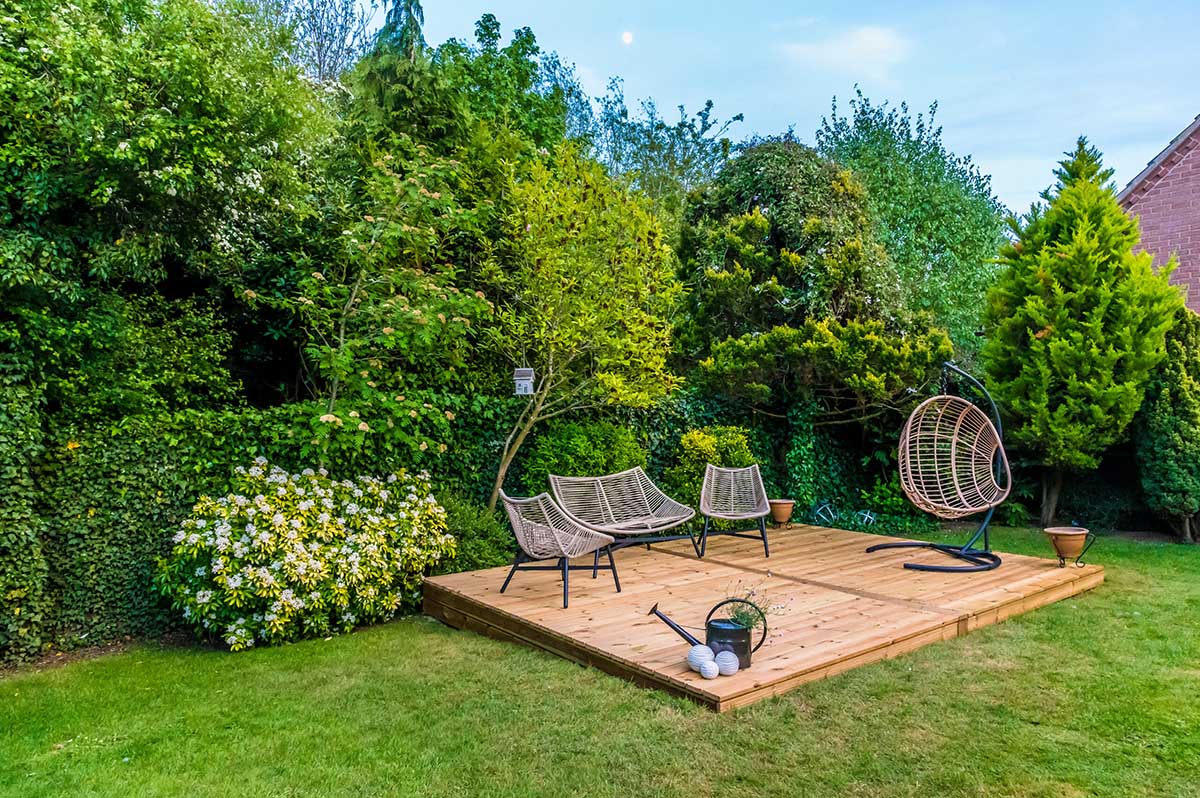
Welcome to our guide on how to level the ground for decking. If you’re planning on installing a deck in your outdoor space, proper ground leveling is essential to ensure a stable and long-lasting structure. Uneven ground can lead to an unsteady deck, which can pose safety risks and cause structural damage over time.
Leveling the ground may seem like a daunting task, but with the right approach and tools, it can be accomplished effectively. In this article, we will walk you through the step-by-step process of leveling the ground for decking, from assessing the site to finalizing the surface.
By following our guidelines, you will be able to create a solid foundation for your deck, providing a flat and even surface for your outdoor furniture and enjoyable gatherings with family and friends.
Key Takeaways:
- Properly leveling the ground for your deck is crucial for stability, safety, and longevity. It ensures a solid foundation and a visually appealing outdoor space for gatherings and relaxation.
- By following the step-by-step process, you can create a stable and durable foundation for your deck. Attention to detail and thorough preparation will lead to a successful and enjoyable outdoor space.
Read more: How To Level The Ground For A Shed
Why Leveling the Ground is Important for Decking
Leveling the ground before installing a deck is crucial for several reasons:
- Stability: A level base ensures that your deck remains stable and secure. Uneven ground can cause the deck to shift or sink, compromising its structural integrity.
- Safety: A level surface reduces the risk of tripping or falling hazards. It eliminates potential gaps or awkward steps that could lead to accidents, especially for children or elderly individuals.
- Proper Drainage: Leveling the ground allows for proper water drainage, preventing pooling and potential damage to the deck materials. It helps to avoid waterlogged conditions that can cause rot and decay.
- Longevity: By creating a level base, you ensure that the weight of the deck is distributed evenly, reducing the risk of structural damage over time. It helps to minimize stress on the deck components and extends its lifespan.
- Aesthetics: An even surface provides a visually appealing look to your deck. It allows for seamless placement of outdoor furniture and enhances the overall aesthetic appeal of your outdoor space.
Ignoring proper ground leveling can lead to various problems, such as sagging, warping, or even complete failure of the deck. It’s essential to invest time and effort in preparing the ground before starting the deck installation. This upfront work will save you from costly repairs and ensure a solid foundation for your deck.
Assessing the Site
The first step in leveling the ground for decking is to assess the site where you plan to build your deck. This involves evaluating the terrain, identifying any potential obstacles or issues, and determining the overall slope of the area.
Here are some important considerations during the site assessment:
- Terrain: Take a close look at the terrain where the deck will be located. Is it flat, sloped, or uneven? Understanding the natural contours of the land will help you determine the amount of leveling required.
- Obstacles: Identify any obstacles in the area that may need to be removed or worked around, such as large rocks, tree roots, or existing structures. Clearing these obstacles beforehand will make the leveling process easier.
- Slope: Determine the slope of the ground. If the slope is minimal, it can often be leveled out using basic techniques. However, if the slope is significant, additional measures may be necessary, such as building retaining walls or using a deck leveling system.
- Water Drainage: Consider the natural water flow in the area. Ensure that your deck will not hinder proper water drainage or cause water to pool around the structure. If necessary, you may need to incorporate a drainage system during the leveling process.
By thoroughly assessing the site, you can gain a better understanding of the work required to level the ground. It will help you plan your approach and gather the necessary materials and tools for the project. Remember, proper assessment lays the foundation for a successful and durable deck installation.
Clearing the Area
Once you have assessed the site for your deck and identified any obstacles or issues, the next step is to clear the area. Clearing the area is necessary to create a clean and open space for leveling the ground and building your deck.
Here are the steps to clear the area:
- Remove vegetation: Clear away any grass, weeds, or plants in the designated area. Use a shovel or a garden rake to loosen the soil and remove the vegetation. Make sure to dig deep enough to remove the root systems as well.
- Clear debris: Check the area for any debris, such as rocks, sticks, or stones. Remove these obstacles to create a smooth and even surface.
- Consider tree removal: If there are any trees within the area where your deck will be constructed, you may need to consider removing them. Trees can pose a risk to the deck’s stability or interfere with its construction. Consult a professional if you are unsure about removing trees or if they require expert handling.
- Check for underground utilities: Before digging, it is essential to check for any underground utilities, such as gas lines or electrical cables. Contact your local utility company to mark the locations of these utilities to avoid accidents or disruptions during the clearing process.
Clearing the area ensures that you have a clean canvas to work on. It helps to create a smooth and level surface, allowing for accurate measurements and proper ground preparation. Take the time to clear the area thoroughly, as it will set the stage for the next steps in the deck installation process.
Gathering Materials and Tools
Before you begin leveling the ground for your decking project, it’s important to gather all the necessary materials and tools. Having the right equipment on hand will make the process more efficient and ensure that you have everything you need to complete the job.
Here are the materials and tools you will likely need:
Read more: How To Level Ground For A Trampoline
Materials:
- Lumber or concrete blocks for creating a level base
- Different sizes of gravel or sand for leveling and drainage
- Weed barrier fabric to prevent weed growth
- Drainage pipes and connectors (if required)
- Fasteners (screws, nails) for securing the deck
Tools:
- Shovel for digging and removing soil
- Garden rake for clearing debris and leveling the surface
- Tape measure for taking accurate measurements
- Level for checking the evenness of the ground
- String and stakes for marking the area
- Wheelbarrow or bucket for transporting materials
- Compactor or tamper for compacting the soil
- Circular saw or miter saw for cutting lumber (if needed)
- Drill or hammer for fastening the deck boards
Make a checklist of all the required materials and ensure that you have them readily available before you begin. This will save you time and avoid interruptions during the leveling process.
Additionally, consider personal protective equipment (PPE) such as gloves, safety glasses, and dust masks to protect yourself during the project.
Gathering the appropriate materials and tools upfront will enable you to work efficiently and effectively, ensuring a successful and well-prepared ground for your decking project.
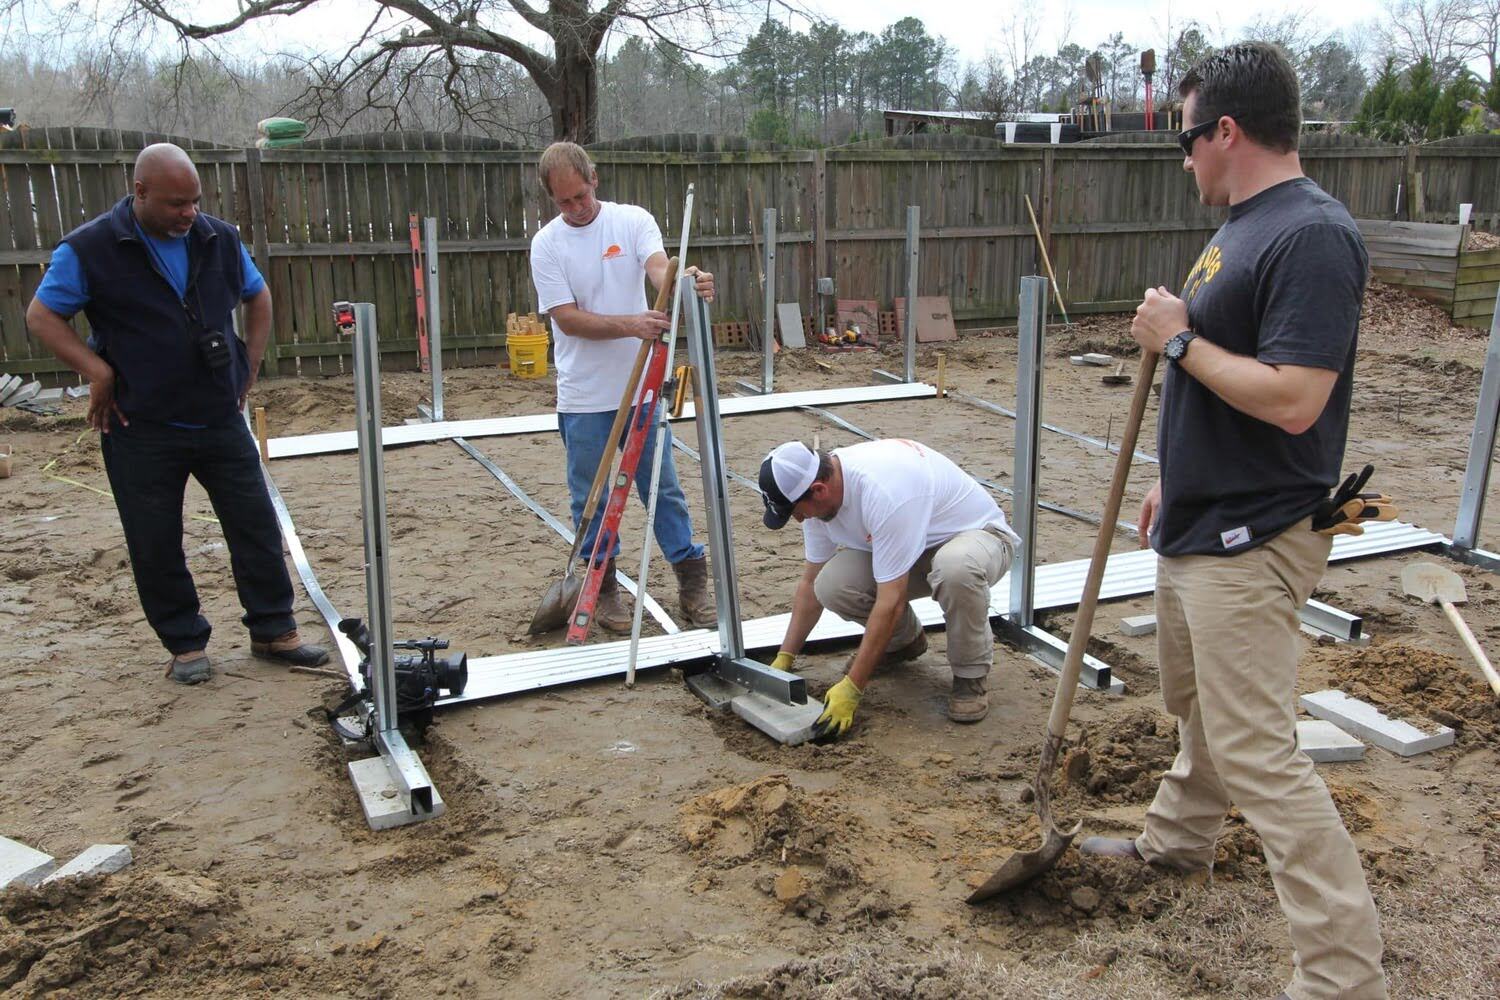
Measuring and Marking the Area
Once you have cleared the area and gathered all the necessary materials and tools, the next step in leveling the ground for decking is to measure and mark the area. Accurate measurements and clear markings are crucial to ensure that the deck is properly aligned and positioned.
Follow these steps to measure and mark the area:
- Plan the deck dimensions: Determine the desired size and shape of your deck. Consider factors such as available space, intended use, and any existing structures or features in your outdoor area.
- Measure the area: Use a tape measure to carefully measure the length and width of the designated deck area. Double-check your measurements to ensure accuracy.
- Mark the corners: Place stakes or markers at each corner of the measured area. Use a string to connect the stakes, creating a visual outline of the deck dimensions.
- Mark the post locations: Depending on your deck design, mark the locations for the deck posts along the outer edges of the deck area. Ensure that the spacing between the posts is even and aligns with your design plans.
- Double-check the measurements: Use a measuring tape and level to recheck the accuracy of your markings. Adjust the stakes or markers as needed to ensure the proper alignment of your deck.
Using precise measurements and clear markings will guide you throughout the leveling process and ensure that your deck is built to the desired specifications. Taking the time to measure and mark accurately will result in a visually pleasing and structurally sound deck.
It’s important to note that if you are unsure about measuring or marking the area, consulting with a professional or experienced builder can provide valuable guidance and expertise.
Excavating the Ground
With the area measured and marked, the next step in leveling the ground for decking is to excavate the ground. Excavation involves removing the soil to create a level surface for the deck base.
Follow these steps to excavate the ground:
- Start digging: Use a shovel to begin digging within the marked area. Begin by removing the top layer of grass, soil, and any other vegetation. Dig to a depth that allows for the desired thickness of your deck base.
- Check for level: As you dig, periodically check the level of the ground to ensure that you are maintaining an even depth. Adjust the excavation depth as needed to achieve a consistent level.
- Remove debris: While excavating, remove any rocks, roots, or other debris that may hinder the levelness of the ground. Clear the excavated area to create a clean and even surface.
- Double-check the measurements: Use a tape measure to confirm that the excavated area matches the desired dimensions and depth for your deck. Make any necessary adjustments before proceeding.
- Smooth the surface: Use a garden rake to smooth out the excavated surface. Remove any remaining bumps or unevenness to achieve a flat and level base.
Excavating the ground is a crucial step to create a solid foundation for your deck. Take your time with this process to ensure that the levelness of the ground is consistent across the entire area. Proper excavation will contribute to the stability and longevity of your deck.
Remember, if your deck will be built on a slope, additional considerations and adjustments may be necessary during the excavation process. The gradient of the slope will influence the depth and leveling requirements. Seek guidance from a professional or experienced builder if needed.
Read more: How To Level Ground For Patio Stones
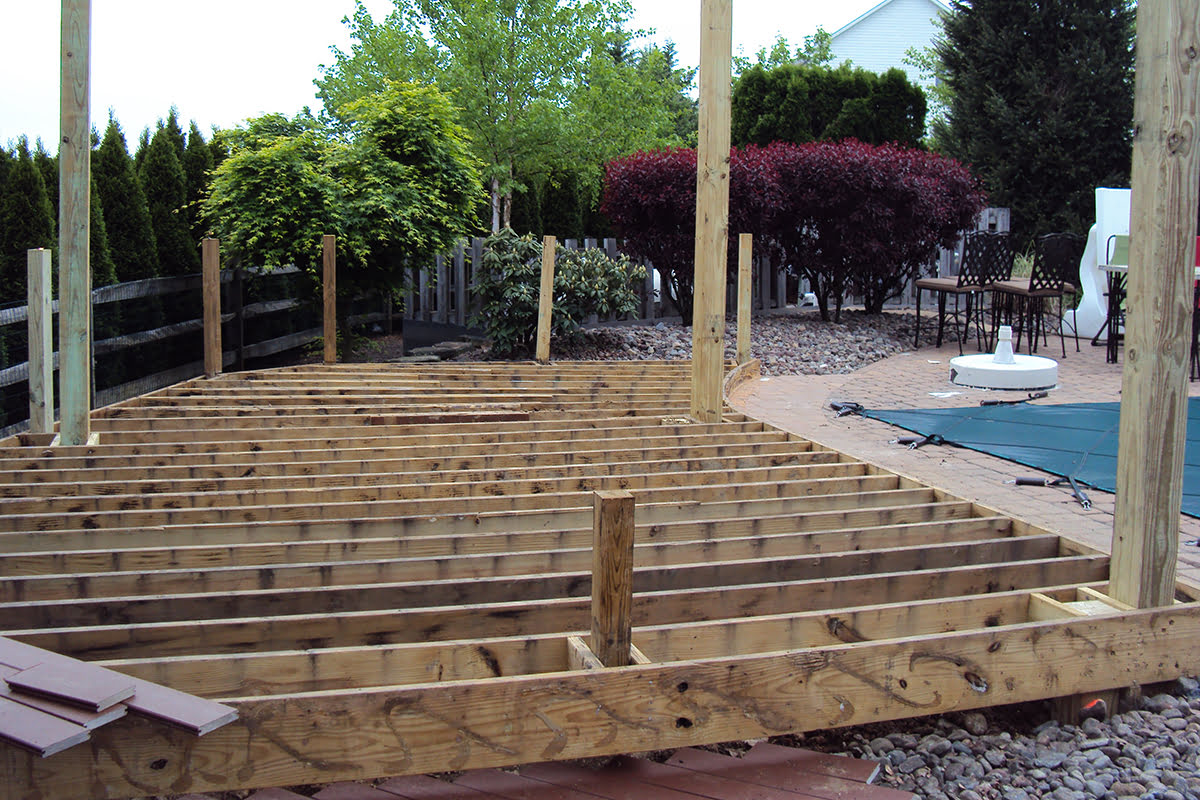
Creating a Level Base
After excavating the ground, the next step in leveling the ground for decking is to create a level base. This base provides a sturdy and even surface upon which the deck will be built.
Follow these steps to create a level base:
- Check for levelness: Use a level to ensure that the excavated ground is level and even. Make any necessary adjustments by adding or removing soil as needed.
- Use lumber or concrete blocks: Depending on your preference and the specific requirements of your deck, you can either use pressure-treated lumber or concrete blocks to create a level base. Take into consideration the durability and weight-bearing capacity of the materials.
- Place the lumber or concrete blocks: Lay the pressure-treated lumber or place the concrete blocks on the excavated ground, ensuring that they are positioned securely and evenly spaced. Use a level to check their alignment.
- Secure the lumber or concrete blocks: Depending on the chosen method, use screws or a construction adhesive to secure the lumber or interlock the concrete blocks to prevent shifting or movement.
- Double-check for levelness: Once the base is in place, use the level again to confirm that it is perfectly level. Make adjustments as needed to ensure an even surface.
Creating a level base is vital to ensure the stability, safety, and longevity of your deck. A sturdy and even base will provide a solid foundation for the entire structure. Take the time to properly align and secure the base materials, as this will significantly contribute to the overall quality of your deck.
If you are unsure about the best method for creating a level base or if your deck design requires specific considerations, consulting with a professional or experienced builder can provide valuable guidance and expertise.
Compacting the Soil
After creating a level base for your deck, the next step is to compact the soil. Compacting the soil involves compressing it to increase its density and stability. This is an important step to prevent the ground from settling and ensure a solid foundation for your deck.
Here’s how to compact the soil:
- Prepare the soil: Use a garden rake or shovel to break up any large clumps of soil and remove any remaining debris or rocks. Ensure the surface is as smooth as possible before compacting.
- Use a compactor: Rent or purchase a plate compactor or a hand tamper. A plate compactor is a motorized machine with a flat vibrating plate that is ideal for larger areas, while a hand tamper is manually operated and suitable for smaller spaces.
- Start compacting: Begin at one corner of the area and slowly move the compactor across the surface. Apply even pressure and make multiple passes in different directions to ensure thorough compaction.
- Overlap passes: Overlap each pass of the compactor by a few inches to ensure that the entire area is evenly compacted.
- Check for compaction: Periodically check the levelness of the ground using a level. If you notice any low or uneven spots, add more soil and repeat the compaction process in those areas.
- Continue compacting: Continue compacting the soil until the entire surface is firm and resistant to movement. The compacted soil should provide a solid foundation for your deck.
Compacting the soil is an essential step to ensure the stability and longevity of your deck. It helps to prevent future settling or shifting of the ground, which can lead to an uneven and unstable deck surface. Taking the time to properly compact the soil will contribute to the overall durability and safety of your deck.
It’s important to note that if you are dealing with expansive or clay soil, additional measures may be necessary to address potential issues such as soil expansion and contraction. Consulting with a professional or experienced builder can provide valuable guidance in such cases.
Installing Drainage if Required
Depending on the specific location and conditions of your deck site, installing drainage may be necessary to ensure proper water management. Adequate drainage helps prevent water buildup, which can damage the deck structure and compromise its longevity. Here’s how to install drainage if required:
- Assess the site: Evaluate the natural water flow on your property and determine if there are any potential drainage issues in the area where your deck will be constructed.
- Create a slope: If your deck site is prone to water pooling, consider adjusting the slope of the ground away from the deck. This will promote natural water runoff and prevent water from accumulating around the deck.
- Add drainage pipes: Install perforated drainage pipes if your deck site experiences excessive water buildup or is located in a low-lying area. Place these pipes in trenches dug around the perimeter of the deck area, ensuring they slope away from the deck.
- Direct the pipes: Connect the drainage pipes to existing drainage systems or lead them to a suitable drainage outlet, such as a rain garden or a stormwater drain. This will facilitate the proper flow of water away from the deck area.
- Use gravel or stone: Fill the trenches containing the drainage pipes with gravel or stone. This will promote water filtration as it flows through the pipes and prevent blockages caused by soil or debris.
- Consider a French drain: In some cases, a French drain may be necessary to address specific drainage challenges. This involves creating a subsurface drainage system using perforated pipes and gravel to redirect water away from the deck.
Installing drainage, if required, is crucial for protecting the structural integrity of your deck. It ensures that water is properly managed, preventing excessive moisture which can lead to rot, decay, and damage to the deck materials.
If you are uncertain about the drainage requirements for your deck or if your deck site poses unique challenges, consulting with a professional or experienced builder can provide valuable insight and expertise.
Before starting to level the ground for decking, make sure to remove any rocks, roots, and debris from the area. This will help ensure a smooth and even surface for your deck.
Adding a Weed Barrier
When leveling the ground for decking, it’s important to take measures to prevent weed growth and minimize maintenance efforts in the future. Adding a weed barrier is an effective way to achieve this. A weed barrier acts as a barrier between the soil and the surface of your deck, inhibiting the growth of weeds and unwanted vegetation. Here’s how to add a weed barrier:
- Clean the surface: Ensure that the ground is clear of any debris, rocks, or remaining vegetation before laying the weed barrier.
- Measure and cut: Measure the dimensions of the deck area and cut the weed barrier fabric to the appropriate size. Leave a few extra inches of overlap around the edges to ensure sufficient coverage.
- Lay the weed barrier: Place the weed barrier fabric directly on the compacted soil. Smooth it out and ensure it covers the entire deck area, including the perimeter and any gaps.
- Secure the barrier: Fasten the weed barrier using landscape fabric pins or staples. Space them out every few feet along the edges and throughout the covered area to keep the barrier in place.
- Overlap seams: If multiple pieces of weed barrier fabric are required, overlap the seams by a few inches. This ensures that there are no gaps for weeds to penetrate and grow through.
- Cut openings for posts: If you have pre-marked post locations for your deck, use scissors or a utility knife to carefully cut openings in the weed barrier for the posts to pass through.
- Inspect and finalize: Before proceeding with the deck construction, inspect the weed barrier to ensure it is securely in place and covers the entire surface. Make any necessary adjustments or additions as needed.
Adding a weed barrier beneath your deck helps to prevent weed growth, reduce maintenance, and maintain the appearance of your outdoor space. It acts as a protective layer between the soil and the deck surface, creating a barrier that inhibits weeds from penetrating and taking root.
While a weed barrier significantly reduces weed growth, some determined weeds may still find a way through over time. Regular monitoring and weed control measures, such as hand-pulling or spot treating, can help maintain a weed-free deck area.
By incorporating a weed barrier during the ground leveling process, you ensure a low-maintenance and aesthetically pleasing deck space for years to come.
Read more: How To Level The Ground For A Garden Bed
Adding Gravel or Sand
After installing the weed barrier, the next step in leveling the ground for decking is to add a layer of gravel or sand. This layer serves multiple purposes, including providing stability, promoting proper drainage, and enhancing the longevity of your deck. Here’s how to add gravel or sand:
- Select the material: Choose between gravel or sand based on your preferences, local availability, and the specific requirements of your deck. Both materials offer excellent stability and drainage properties.
- Prepare the area: Ensure that the ground is clear of any debris or remaining vegetation before adding the layer of gravel or sand. Smooth out the weed barrier fabric to create a flat and even surface.
- Calculate the quantity: Measure the deck area and calculate the amount of gravel or sand needed. Consider the desired thickness of the layer and adjust your calculation accordingly.
- Spread the material: Use a shovel or a garden rake to evenly spread the gravel or sand over the weed barrier. Start at one end of the deck area and work your way towards the other end, ensuring consistent coverage.
- Level the surface: Use a long board or a screed tool to level the surface of the gravel or sand. Move it back and forth in a sawing motion to distribute the material evenly and create a smooth and level layer.
- Compact the material: Use a plate compactor or a hand tamper to compact the layer of gravel or sand. This helps to further stabilize the surface and increase the load-bearing capacity.
- Inspect and finalize: Inspect the surface to ensure it is level and even. Make any necessary adjustments by adding or removing gravel or sand. The final surface should provide a stable and well-prepared base for your deck.
Adding a layer of gravel or sand beneath your deck has several benefits. It improves the stability and load-bearing capacity of the ground, allowing for a more solid foundation. Additionally, it promotes proper drainage, preventing water buildup that can lead to deck damage. The layer also helps to discourage weed growth and maintain the aesthetics of your outdoor space.
Consider using angular gravel or coarse sand for improved stability, as they interlock better and offer greater resistance to shifting and settling.
By adding a layer of gravel or sand, you enhance the performance and longevity of your deck while ensuring a visually appealing and functional outdoor space.
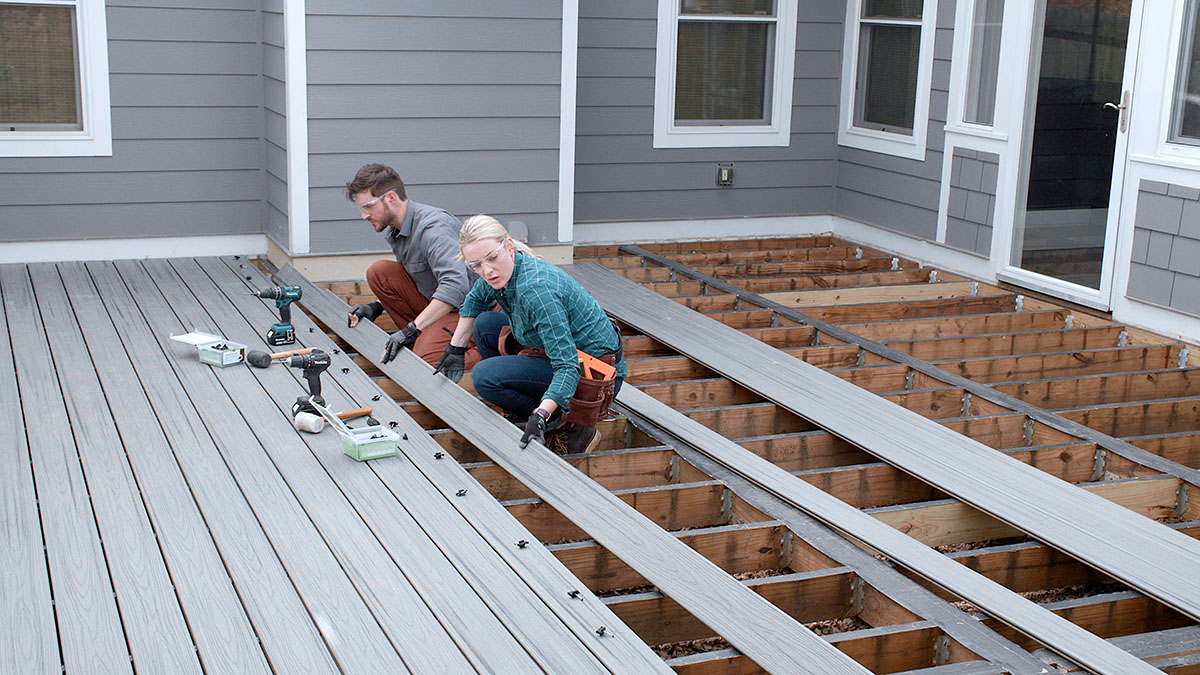
Leveling the Surface
Now that you have added the layer of gravel or sand, the next step in leveling the ground for decking is to ensure an even and level surface. This step is crucial to provide a solid foundation for your deck and ensure its stability and longevity. Here’s how to level the surface:
- Inspect the surface: Take a close look at the layer of gravel or sand to identify any high or low spots. These irregularities may have formed during the spreading and compacting process.
- Use a rake or board: Take a garden rake or a long board and drag it across the surface. This will help you identify any areas that are not level by revealing any unevenness.
- Remove excess material: If you encounter any high spots, simply remove some of the excess gravel or sand using a shovel or rake. Clearing away the excess material will help achieve a level surface.
- Add more material: If you come across any low spots or areas that need to be built up, add more gravel or sand to even out the surface. Use a shovel or rake to distribute the material evenly.
- Compact the surface: Once the surface is level, use a plate compactor or a hand tamper to compact the gravel or sand layer once again. This will ensure that the surface is stable and firmly in place.
- Double-check the levelness: Use a long board or a level to verify that the surface is perfectly level. Adjust as needed by adding or removing material until you achieve a consistently level surface.
Leveling the surface is a crucial step to ensure the stability and structural integrity of your deck. It provides a flat and even base for the deck materials, allowing for proper installation and reducing the risk of uneven wear and tear.
Take the time to carefully level the surface, as this will contribute to a more visually pleasing, durable, and functional deck. A properly leveled surface will also make the installation of your deck boards and other components much easier.
If you are uncertain about achieving a level surface or need assistance, consulting with a professional or experienced builder can provide valuable guidance and expertise.
Checking for Evenness
After leveling the surface, it’s important to check for evenness to ensure that your deck will be stable and visually appealing. Checking for evenness involves verifying that the entire surface is consistent and level throughout. Here’s how to check for evenness:
- Use a level: Grab a long, straight level and place it across the surface of the deck area. Check various points along the length and width of the deck to see if the bubble in the level is centered. This will indicate whether the surface is even or if adjustments are needed.
- Check for any dips or high spots: Move the level along the deck area, paying close attention to any areas where the bubble is not centered. These spots may indicate low or high points that can affect the stability and appearance of your deck.
- Make note of uneven areas: Use a pencil or tape to mark areas that are not level. This will help you identify specific spots that require further leveling or adjustment.
- Address any uneven areas: Depending on the severity of the unevenness, you may need to add or remove material from the low or high spots. Use a shovel or rake to add more gravel or sand to low areas, or remove excess material from high areas to achieve an even surface.
- Recheck for evenness: After making adjustments, use the level again to verify that the surface is now even and level. Make any further adjustments as needed.
- Repeat the process: Continue to check for evenness throughout the deck area, ensuring that the entire surface is level and consistent.
Checking for evenness is crucial to ensure the stability, safety, and aesthetic appeal of your deck. An uneven surface can lead to structural issues, uneven weight distribution, and an unattractive appearance.
Taking the time to carefully check for evenness and make necessary adjustments will provide you with a solid foundation for your deck. It will also save you potential headaches and costly repairs in the future.
If you are unsure about the leveling process or need assistance, consulting with a professional or experienced builder can provide valuable guidance and expertise.
Making Adjustments
After checking for evenness and identifying any uneven areas on the surface of your deck, the next step is to make the necessary adjustments. Making these adjustments will ensure that your deck is level and well-prepared for the installation of decking materials. Here’s how to make adjustments:
- Address low spots: If you have identified areas that are lower than the desired level, add additional gravel or sand to build up the surface. Use a shovel or rake to distribute the material evenly in these areas, gradually raising the surface height.
- Smooth and level the added material: After adding the necessary material, use a rake or board to evenly spread and level it. This will help achieve a consistent surface height across the entire deck area.
- Address high spots: If you have identified areas that are higher than the desired level, remove excess gravel or sand material. Use a shovel or rake to carefully scrape away the excess, gradually lowering the surface height.
- Carefully blend the surface: After making adjustments to both low and high spots, use a rake or board to blend and smooth the surface. This will ensure a seamless transition between the adjusted areas and the rest of the deck surface.
- Recheck for evenness: Use a level or straight edge to recheck the surface for evenness. Verify that the bubble or edge is centered, indicating a level surface. If needed, make additional adjustments until the entire deck surface is level.
- Double-check the measurements: Use a tape measure to reconfirm the dimensions and ensure that the adjusted surface matches the intended size and shape of your deck.
Making adjustments is a critical step to achieving a level and stable deck. Addressing low spots and high spots ensures a consistent surface height and proper weight distribution. These adjustments will also contribute to the overall longevity and structural integrity of your deck.
Take your time with this step, as the accuracy and precision of the adjustments will determine the success of your deck installation. Make sure to recheck for evenness and dimensions to confirm that the surface is ready for the next steps.
Consulting with a professional or experienced builder can provide valuable guidance and expertise if you are unsure about making the necessary adjustments or need assistance in achieving a level deck surface.
Read more: How To Level A Ladder On Uneven Ground
Finalizing the Surface
After making all the necessary adjustments, it’s time to finalize the surface of your leveled ground for your decking project. This step involves ensuring that the surface is well-prepared, smooth, and ready for the installation of your deck materials. Here’s how to finalize the surface:
- Inspect for any remaining irregularities: Take a careful look at the entire surface, checking for any remaining bumps, dips, or uneven areas. If you spot any inconsistencies, address them by making additional adjustments, adding or removing material as necessary.
- Smooth out the surface: Use a rake, board, or hand tamper to gently smooth out the surface, removing any minor imperfections. This will help create a flat and even foundation for your deck.
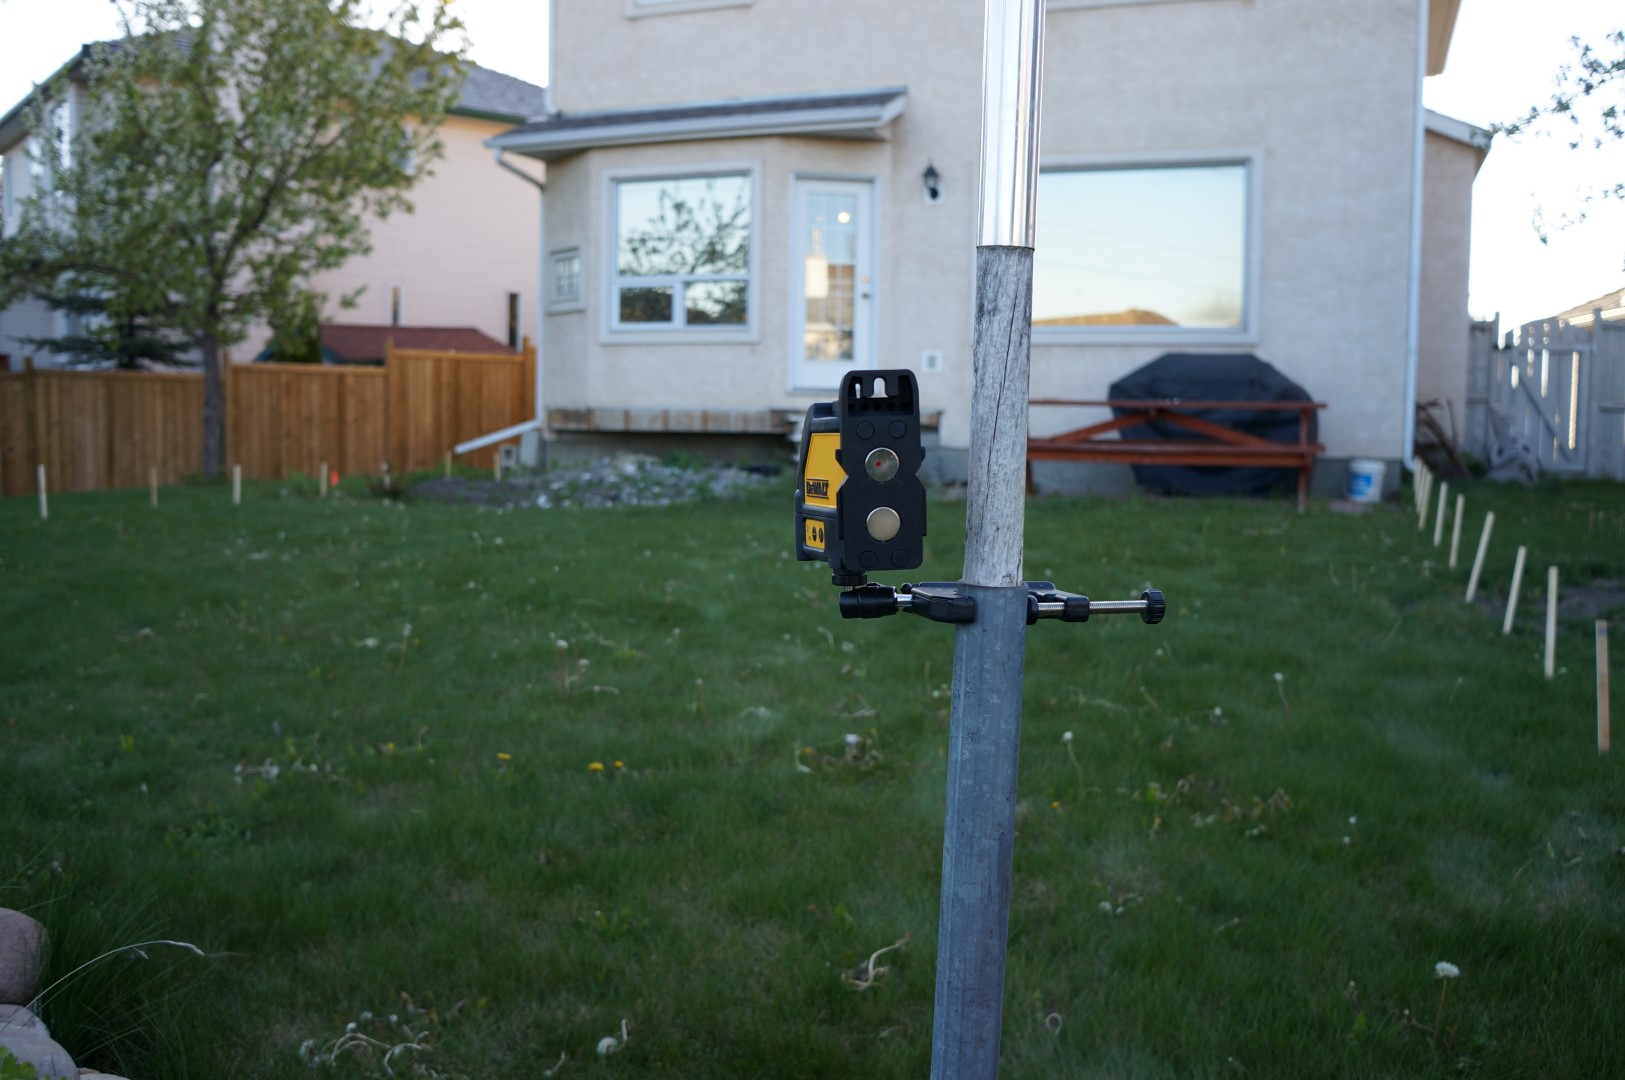
- Check the levelness once more: Use a level, straight edge, or laser level to recheck the surface for evenness. Verify that the bubble or edge is centered, indicating a level surface. Make any final adjustments if needed.
- Remove any remaining debris: Clear away any remaining debris, rocks, or other obstacles from the surface. This will ensure a clean and smooth base for your deck materials.
- Double-check dimensions and layout: Use a tape measure and check your initial dimensions and layout markings to ensure they align with the finalized surface. Make any necessary adjustments if there are discrepancies.
- Document the final surface: Take photos or note down any important details about the finalized surface. This documentation may be useful in the future for reference or potential follow-up construction.
Finalizing the surface of your leveled ground is a crucial step in ensuring the success of your decking project. By thoroughly inspecting, smoothing, and confirming the levelness of the surface, you are setting the stage for a solid and visually appealing deck.
Taking the time to make final adjustments and remove any debris will contribute to the overall quality, stability, and longevity of your deck. It will also make the installation of your decking materials much easier and more efficient.
If you have any uncertainties or need guidance during the finalization process, consulting with a professional or experienced builder can provide valuable insights and ensure a successful deck installation.
Conclusion
Congratulations! You have successfully learned how to level the ground for decking. By following the step-by-step process outlined in this guide, you have gained the knowledge and skills necessary to create a solid and stable foundation for your outdoor deck. Properly leveling the ground for your deck is essential for ensuring its longevity, stability, and aesthetic appeal.
Through the process of assessing the site, clearing the area, gathering the necessary materials and tools, measuring and marking the area, excavating the ground, creating a level base, compacting the soil, installing drainage if required, adding a weed barrier, adding gravel or sand, leveling the surface, checking for evenness, making adjustments, and finalizing the surface, you have taken the necessary steps to prepare the ground for your deck.
Remember, it’s crucial to pay attention to detail and take your time during each step of the process. Proper leveling will contribute to the overall quality and durability of your deck, providing a safe and enjoyable space for outdoor gatherings, relaxation, and entertainment.
Before proceeding with the rest of your deck installation, take a moment to review the entire process, ensuring that you have achieved a level, even, and well-prepared ground. Make any final adjustments if needed and document the finalized surface for future reference.
We hope this comprehensive guide has been valuable to you as you embark on your decking project. Enjoy the process of building your deck and creating a beautiful outdoor space that you will cherish for years to come.
Frequently Asked Questions about How To Level Ground For Decking
Was this page helpful?
At Storables.com, we guarantee accurate and reliable information. Our content, validated by Expert Board Contributors, is crafted following stringent Editorial Policies. We're committed to providing you with well-researched, expert-backed insights for all your informational needs.


0 thoughts on “How To Level Ground For Decking”