Articles
How Do You Lower Blinds With A String
Modified: August 26, 2024
Learn how to lower blinds with a string easily and efficiently with our informative articles. Find step-by-step instructions and expert tips to master this essential skill.
(Many of the links in this article redirect to a specific reviewed product. Your purchase of these products through affiliate links helps to generate commission for Storables.com, at no extra cost. Learn more)
Introduction
Blinds are a popular window treatment option, offering privacy, light control, and aesthetic appeal to any room. While there are several types of blinds available on the market, they all have one thing in common—a control system that allows you to adjust the position of the blinds. One common method for controlling blinds is by using a string.
In this article, we will explore how to lower blinds with a string and discuss the different types of blind control systems. Whether you are new to using blinds or simply want to learn more about the string control system, this guide will provide you with the necessary information to operate your blinds effectively.
Before we dive into the process of lowering blinds with a string, let’s first gain a better understanding of blinds and the various control systems available.
Key Takeaways:
- The string control system for blinds offers simplicity, precision, and improved safety, making it a popular choice for homeowners and businesses seeking an efficient and user-friendly method to control their blinds.
- When lowering blinds with a string control system, it’s crucial to follow safety precautions, such as securing loose cords and keeping them out of reach of children and pets, to ensure a safe and comfortable environment.
Read more: How To Lower Window Blinds Without Strings
Understanding Blinds
Blinds are window coverings made of horizontal or vertical slats that can be adjusted to control the amount of light entering a room. They serve as a versatile and practical window treatment option for both residential and commercial spaces. Blinds provide privacy when closed and allow natural light to filter through when open, creating a balance between aesthetics and functionality.
Blinds come in a variety of materials, including wood, faux wood, aluminum, vinyl, and fabric. Each material has its own unique set of advantages and can be customized to match the decor of any room. While the design and material of blinds are important considerations, the control system is equally crucial for a smooth and effortless use of the blinds.
Types of Blind Control Systems
Blinds can be controlled using various mechanisms, each offering different levels of convenience and ease of use. Let’s take a closer look at the different types of blind control systems:
- Traditional Control System: The traditional control system involves manually adjusting the position of the blinds by using a wand or a cord. This system requires physical effort and can be time-consuming.
- Roller Chain System: The roller chain system consists of a continuous loop chain that is attached to the blinds. By pulling the chain, you can raise or lower the blinds to your desired position.
- Cord Control System: The cord control system utilizes two cords that are looped through the blinds. By pulling one cord, you can raise the blinds, and by pulling the other cord, you can lower them.
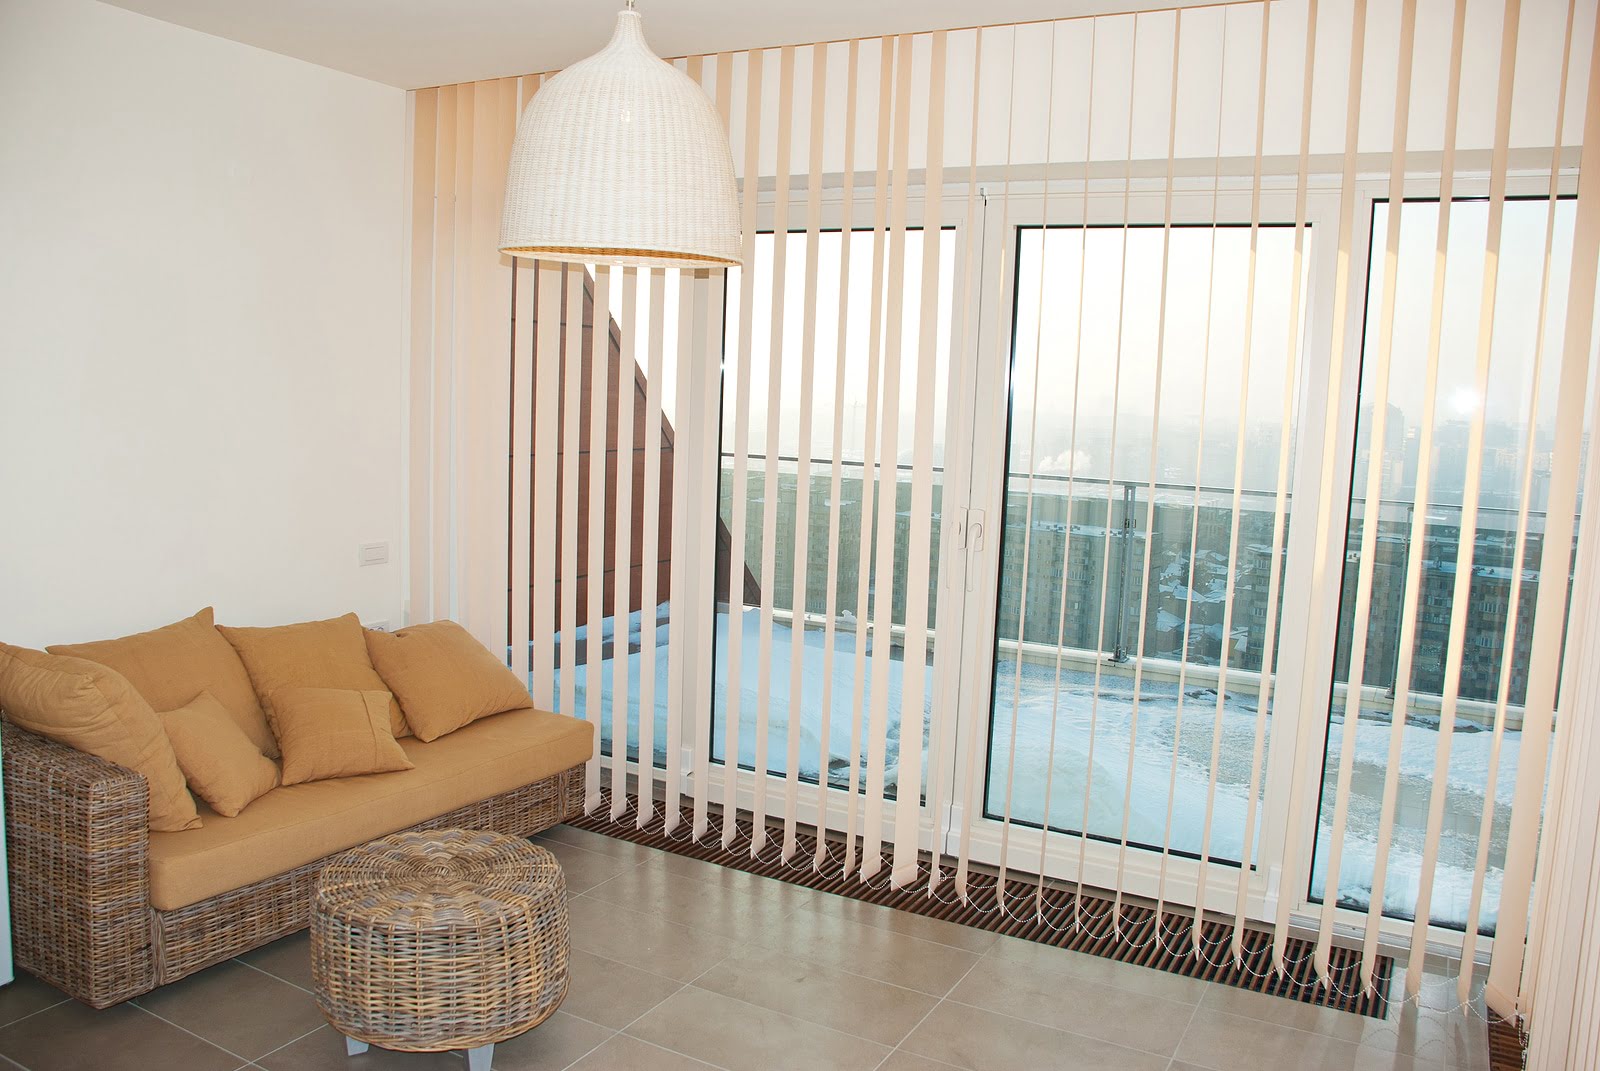
- String Control System: The string control system is similar to the cord control system but uses a single string instead of two cords. This system provides a simplified operation and is commonly found in modern blinds.
While all these control systems serve the same purpose of adjusting the position of the blinds, the string control system offers distinct advantages in terms of convenience and ease of use.
Traditional Control System
The traditional control system for blinds involves manual adjustment using a wand or cord. This system has been commonly used for many years and can still be found in older blinds or certain types of window treatments.
In this system, a wand or cord is attached to the blinds, typically located on one side. By rotating the wand or pulling the cord, you can manipulate the position of the blinds. Rotating the wand will tilt the slats of the blinds to control the amount of light and privacy, while pulling the cord will raise or lower the entire blind.
While the traditional control system is functional, it does require some physical effort and can be time-consuming compared to more modern control systems. It is important to note that the cords in this system can sometimes pose a safety risk, especially for young children or pets. Therefore, it is essential to ensure that cords are properly secured and out of reach of children or to consider upgrading to a safer control system, such as the string control system.
Despite the availability of more advanced control systems, the traditional control system can still be found and may be a suitable option for those who prefer a more hands-on approach and do not mind the extra effort involved in adjusting the blinds.
Roller Chain System
The roller chain system is a popular control system used in blinds, offering a convenient and efficient way to adjust the position of the blinds. This system utilizes a continuous loop chain that is attached to the blinds.
To operate the roller chain system, you simply need to pull the chain in either direction. By pulling the chain downward, you can lower the blinds, and by pulling the chain upward, you can raise them. The chain is designed to smoothly glide over a series of sprockets or rollers, allowing for effortless control.
One of the key advantages of the roller chain system is its ease of use. The continuous loop chain provides a seamless operation where you can easily achieve the desired position for your blinds. Additionally, the chain can be adjusted to a specific length, allowing you to customize it according to the height and preference of the user.
The roller chain system is commonly found in roller blinds, which consist of a single piece of fabric or material that rolls up onto a cylinder when raised and unrolls when lowered. This type of control system is popular in both residential and commercial settings due to its simplicity and durability. The roller chain system ensures smooth and reliable operation, making it a convenient choice for those who prefer a hassle-free experience when controlling their blinds.
However, it is important to note that the roller chain system may not be suitable for homes with young children or pets. The chain can present a potential hazard if not properly secured or if it hangs loose. Ensure that the chain is properly installed and safely positioned, or consider choosing a different control system that offers enhanced safety features.
Read more: How To Fix The String On Blinds
Cord Control System
The cord control system is a popular method for operating blinds, providing an effective way to adjust the position of the blinds with ease. This system utilizes two cords that are looped through the blinds.
To operate the cord control system, you can pull one cord to raise the blinds and the other cord to lower them. By pulling one side of the looped cord, the blinds will be raised, and by pulling the other side, the blinds will be lowered. This mechanism allows for precise control over the height of the blinds, giving you the flexibility to adjust them to your desired level of privacy and light control.
The cord control system offers several advantages. Firstly, it provides a balanced operation, ensuring that the blinds raise and lower uniformly. Secondly, the presence of two cords allows for independent control of each side of the blinds, giving you the ability to tilt the slats to control the amount of light entering the room.
One key aspect to consider with the cord control system is the length of the cords. It is important to ensure that the cords are properly adjusted and do not pose a safety hazard, especially in households with young children or pets. Excess cord length can pose a risk of entanglement or strangulation. Make sure to secure any loose cords and consider using cord cleats or cord tensioners to prevent accidents.
While the cord control system is widely used and offers convenient operation, it is important to be mindful of safety precautions to ensure the well-being of your household members. If safety is a concern, it may be worth exploring alternative control systems, such as the string control system, which can provide a safer and more user-friendly experience.
String Control System
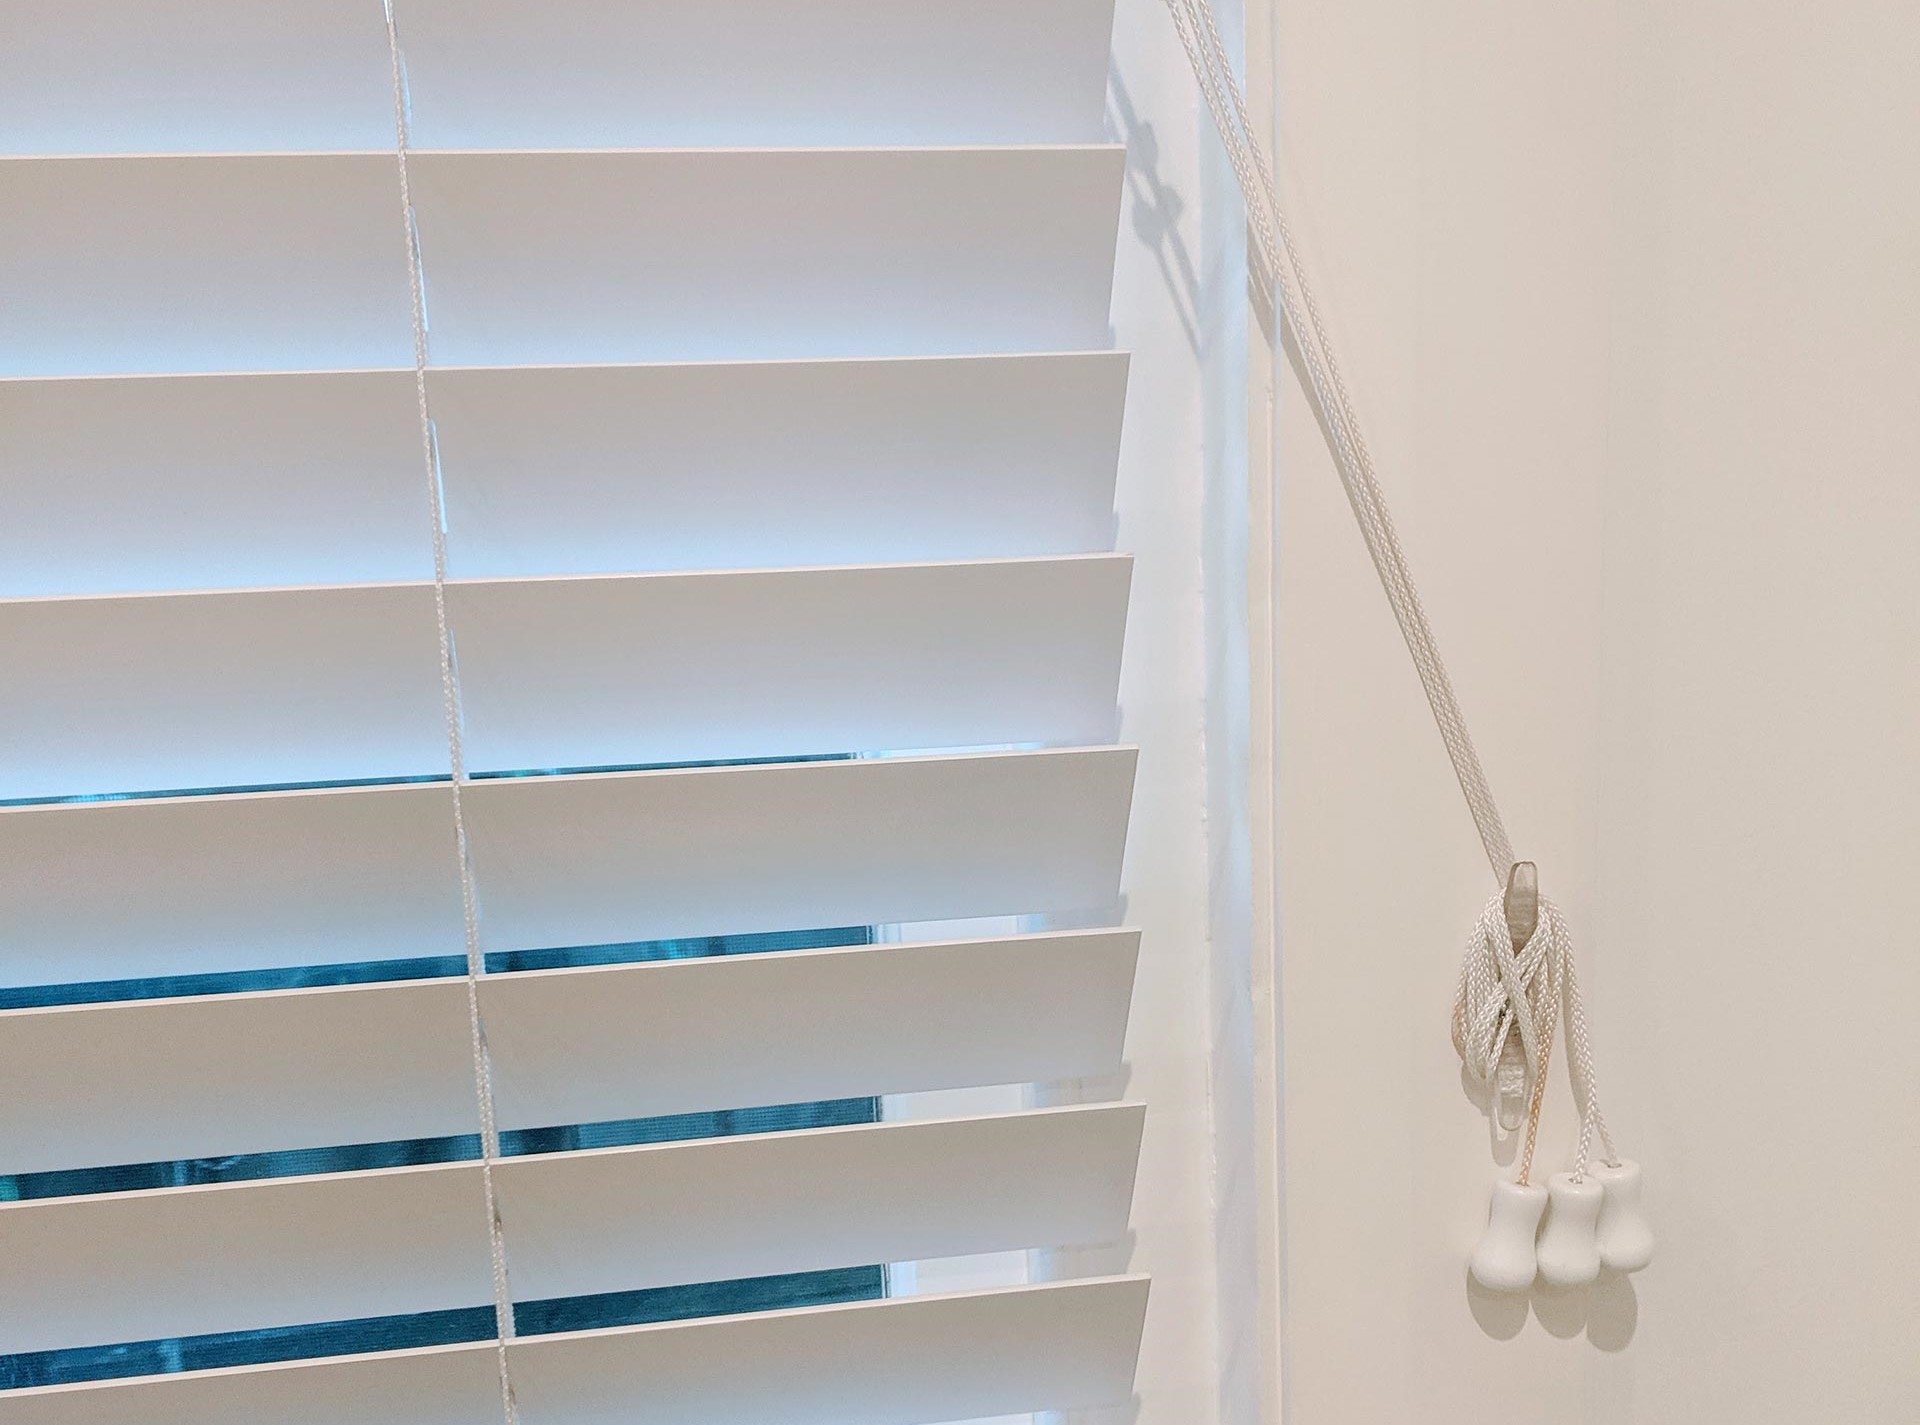
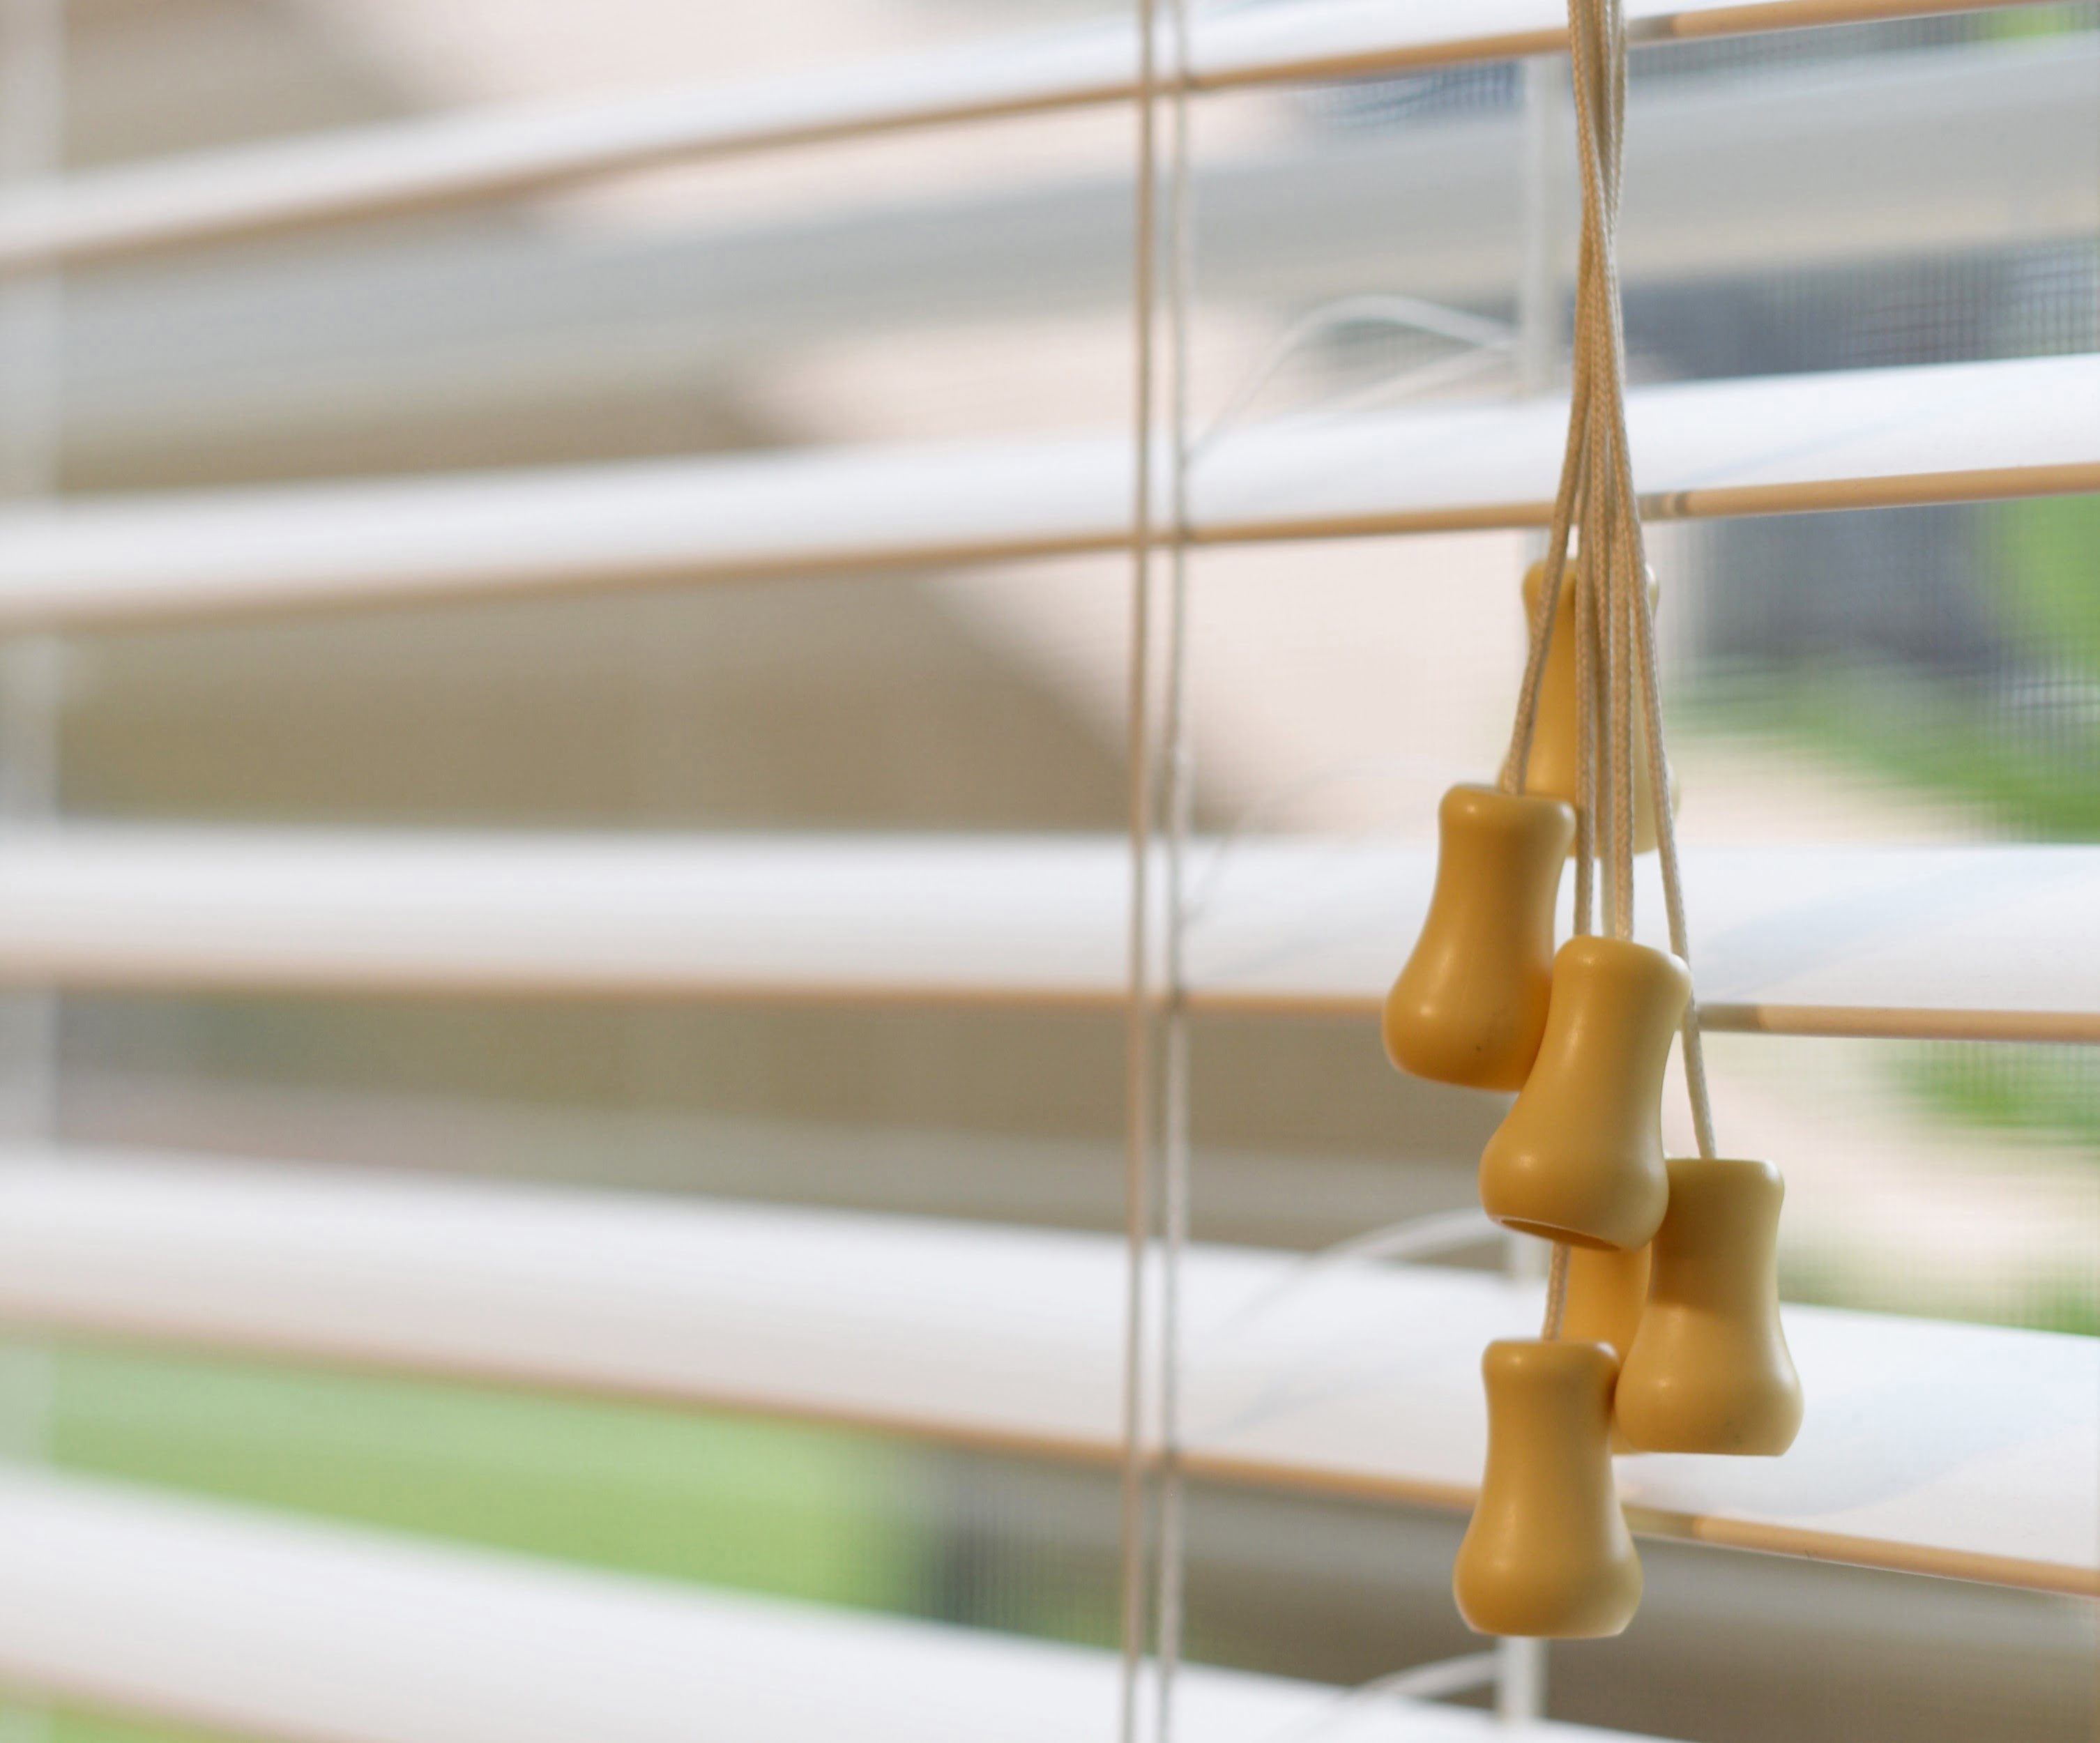
The string control system is a modern and efficient method for operating blinds, providing a simplified and user-friendly approach to adjusting their position. This system utilizes a single string that is looped through the blinds, allowing for easy control with minimal effort.
To lower blinds with a string control system, you simply need to pull the string downward. The string is often equipped with a pull cord or a tab that can be easily grasped. By pulling the string in a downward motion, the blinds will gradually lower to your desired position.
One of the advantages of the string control system is its simplicity and ease of use. The single string design eliminates the need for multiple cords or chains, providing a streamlined and clutter-free appearance. Additionally, the string control system allows for smooth and precise adjustment of the blinds, giving you greater control over light and privacy.
The string control system is commonly found in various types of blinds, including vertical blinds, venetian blinds, and cellular shades. Its user-friendly interface and intuitive operation make it a popular choice for both residential and commercial spaces.
Aside from its convenience, the string control system also offers enhanced safety features compared to traditional cord control systems. With no loose cords or chains hanging, the risk of entanglement and strangulation is significantly reduced. However, it is still important to ensure that the string is properly secured and out of reach of young children or pets to maintain a safe environment.
Overall, the string control system provides a practical and efficient way to lower blinds with ease. Its simplicity, precise control, and improved safety features make it a desirable choice for those seeking a modern and user-friendly blind control system.
Advantages of a String Control System
The string control system for blinds offers several advantages that make it a preferred choice for many homeowners. Let’s explore some of the key benefits of using a string control system:
- Simplicity: The string control system features a straightforward design with a single string that is easy to operate. This simplicity makes adjusting the blinds a hassle-free task, even for those who are new to using blinds.
- Precision: The string control system allows for precise adjustment of the blinds’ position. By pulling the string, you can lower the blinds to the desired height, giving you greater control over light levels and privacy.
- Smooth Operation: The string control system ensures smooth and seamless operation when lowering or raising the blinds. This eliminates any jerky movements or uneven positioning, providing a more aesthetically pleasing appearance.
- Improved Safety: Compared to traditional cord control systems, the string control system offers enhanced safety features. With no loose cords or chains, the risk of entanglement or strangulation is minimized, making it a safer choice, especially for households with small children or pets.
- Clean Aesthetic: The single string design of the control system contributes to a clean and uncluttered appearance. There are no tangled cords or chains, allowing the blinds to have a sleek and minimalist look that can complement any interior decor.
- Durability: The string control system is typically built to be durable and long-lasting. The string is designed to withstand frequent use, ensuring that the blinds can be operated smoothly and reliably over time.
Overall, the advantages of a string control system, including its simplicity, precision, smooth operation, improved safety, clean aesthetic, and durability, make it an appealing option for those looking for an efficient and user-friendly method to control their blinds.
When lowering blinds with a string, gently pull the string downwards and release it slowly to control the descent of the blinds. Avoid pulling too hard to prevent damage to the blinds or the string.
How to Lower Blinds with a String
Lowering blinds with a string control system is a simple and intuitive process. Follow these step-by-step instructions to lower your blinds effectively:
- Step 1: Identify the String: Locate the string on your blinds. It is usually found on the side or bottom of the blinds and may have a tab or pull cord attached for easy grasping.
- Step 2: Locate the Pull Cord: If your string has a pull cord or tab, ensure that it is accessible and in a position that allows you to pull it downward.
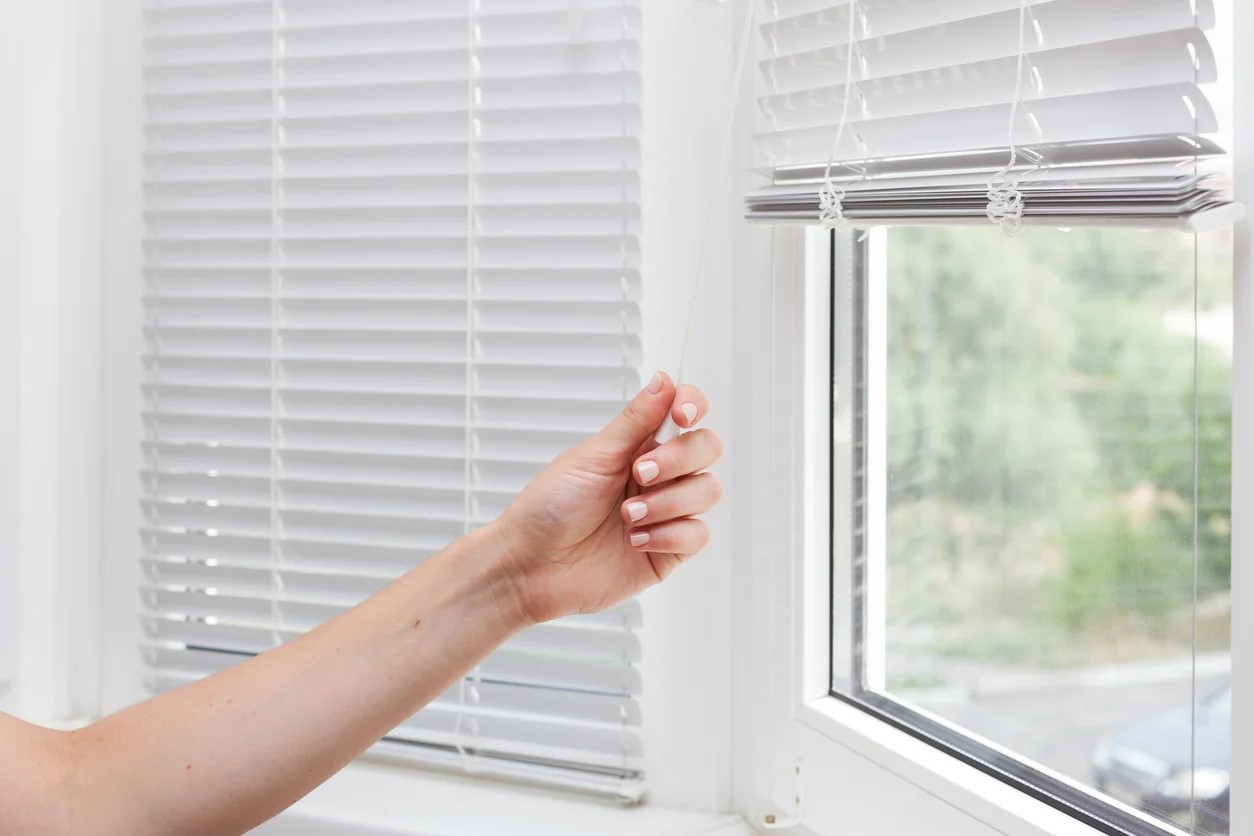
- Step 3: Pull the String Downward: Grasp the pull cord or tab attached to the string and gently pull it downward. As you pull the string, you will notice the blinds gradually lowering to the desired height.
- Step 4: Adjust the Position of Blinds: Continue pulling the string until the blinds reach the desired position. You can stop at any point to adjust the level of light and privacy as needed.
- Step 5: Secure the String: Once the blinds are lowered to the desired height, release the pull cord or tab. Ensure that the string is properly secured or tucked away to prevent any loose strings from hanging.
It is important to note that the exact process may vary slightly depending on the specific type and brand of blinds you have. Always refer to the manufacturer’s instructions for any specific guidelines or recommendations.
By following these steps, you can easily lower your blinds using the string control system. Enjoy the flexibility and convenience of adjusting the blinds to create the desired ambiance and level of privacy in your space.
Read more: How To Adjust Blinds String
Step 1: Identify the String
Before you can lower your blinds using the string control system, you need to identify where the string is located. The string is typically found on the side or bottom of the blinds and is used to manipulate their position.
Here are some tips to help you identify the string:
- Look for a hanging string: Examine your blinds closely, paying attention to the sides or bottom, and look for a string that is hanging down. The string may be visible on one side or both sides of the blinds.
- Feel for a cord: If you don’t immediately see a hanging string, run your fingers along the bottom or sides of the blinds to feel for a cord. The string could be tucked away discreetly.
- Check for a pull cord or tab: Once you locate the string, see if it has a pull cord or tab attached to it. This makes it easier to handle and pull the string downward.
- Inspect both sides of the blinds: In some cases, the string might be on one side of the blinds only. However, for certain types of blinds, such as vertical blinds, the string may be present on both sides to control the movement of the slats.
If you are having trouble locating the string, refer to the manufacturer’s instructions or consult the user manual provided with your blinds.
Identifying the string is the first step to lowering your blinds using the string control system. Once you have located the string, you can proceed to the next steps to adjust the position of your blinds and enjoy the benefits of light control and privacy.
Step 2: Locate the Pull Cord
After identifying the string on your blinds, the next step is to locate the pull cord or tab that is attached to the string. The pull cord or tab makes it easier to grasp and manipulate the string to lower the blinds.
Here are some tips to help you locate the pull cord:
- Examine the string: Look closely at the string and follow it along the length of the blinds. You may find a small plastic or metal tab attached to the string at a certain point.
- Inspect the bottom rail or valance: In some blinds, the pull cord or tab may be integrated into the bottom rail or valance. Check these areas to see if there is a designated spot for you to grasp the cord.
- Check both sides of the blinds: Depending on the type of blinds, the pull cord may be located on one side or both sides. Inspect both sides of the blinds to ensure you don’t miss the pull cord.
- Feel for a small handle or knob: Some pull cords feature a small handle or knob, making it easier to grip and pull downward. Use your fingers to feel along the length of the string for any distinct protrusions.
If you are unsure about the location of the pull cord or tab, consult the user manual or instruction guide that came with your blinds. The manufacturer’s instructions will provide specific details on where to find and how to handle the pull cord.
Locating the pull cord is crucial as it allows you to have a firm grip and better control over the string when lowering the blinds. Once you have located the pull cord, you are ready to proceed to the next step and begin adjusting the position of your blinds.
Step 3: Pull the String Downward
After identifying the string and locating the pull cord, it’s time to start lowering the blinds. This step involves pulling the string downward to gradually lower the blinds to your desired height.
Here’s how to pull the string downward effectively:
- Grasp the pull cord: Hold onto the pull cord or tab firmly with your hand. Ensure that you have a secure grip so that you can control the movement of the blinds smoothly.
- Apply gentle downward pressure: Begin pulling the string downward slowly and steadily. Apply a gentle, consistent pressure to guide the blinds as they lower.
- Keep a steady hand: Make sure to maintain a steady hand as you pull the string. Avoid jerky or sudden movements, as they can cause the blinds to lower unevenly.
- Monitor the blinds: As you pull the string down, keep an eye on the blinds to ensure they are lowering smoothly and in alignment. Adjust your pulling speed if necessary to ensure even movement.
- Stop at the desired height: Continue pulling the string until the blinds reach the desired height. You can stop at any point to achieve the desired level of light and privacy in your space.
Remember, the speed at which you pull the string will affect the rate at which the blinds lower. Take your time and be mindful of maintaining control over the blinds throughout the process.
By following these steps, you can effectively pull the string downward to lower your blinds. This allows you to adjust the blinds to your desired position, controlling the amount of light and privacy in your room.
Step 4: Adjust the Position of Blinds
Once you have successfully lowered the blinds to the desired height, the next step is to adjust their position to achieve the ideal amount of light and privacy in your space. This step involves fine-tuning the blinds to suit your preferences.
Here are some tips for adjusting the position of the blinds:
- Tilt the slats (if applicable): If your blinds have adjustable slats, you can tilt them to control the amount of light entering the room. Use the tilt mechanism, typically located at the top of the blinds, to angle the slats to your desired position.
- Experiment with different angles: Play around with different slat angles to find the optimal balance between privacy and sunlight. Angling the slats upward allows more light to filter through, while angling them downward restricts visibility from the outside.
- Observe the lighting conditions: Take a moment to observe how the lowered blinds affect the lighting conditions in your space. Assess if any adjustments are necessary to achieve the desired ambiance.
- Consider the view: If you have a particular view you’d like to preserve, ensure that the blinds are positioned in a way that allows you to enjoy the scenery without compromising privacy.
- Make small adjustments: You can make small adjustments to the position of the blinds by gently tugging on the string or using the control mechanism provided. Take your time to find the perfect balance that suits your needs.
Remember, the goal is to create a comfortable and visually pleasing environment by adjusting the blinds to your desired position. Take the time to experiment and find the arrangement that best suits your needs.
Once you have adjusted the blinds to your satisfaction, move on to the final step to ensure the string is properly secured.
Read more: How Do You Lower The PH In A Hot Tub
Step 5: Secure the String
After you have adjusted the position of the blinds to your liking, it’s important to take a moment to properly secure the string. This ensures that the blinds remain in the desired lowered position and prevents any loose strings from hanging.
Here’s what you need to do to securely fasten the string:
- Inspect the string: Check the string to ensure there are no tangles, knots, or obstructions. Smooth out any twists or loops to ensure it is free from any entanglements.
- Tie a secure knot: If the string does not come with a built-in mechanism for securing it, tie a secure knot at the end of the string to prevent it from slipping back through the blinds.
- Use cord cleats or tensioners: For added convenience and safety, consider using cord cleats or tensioners. These accessories can be attached to the window frame or wall near the blinds and provide a designated spot to wrap and secure the string.
- Wrap the string around a cord cleat: If you have a cord cleat installed, wrap the string around it a few times to create a secure hold. This prevents the string from dangling and keeps it out of reach of children or pets.
- Tuck away any excess string: If the string is longer than necessary, you can neatly tuck away any excess length by wrapping it around the cord cleat or using a plastic cord holder. This helps to minimize any potential hazards and keeps the blinds looking tidy and organized.
By properly securing the string, you ensure that the blinds will remain in the desired lowered position until you are ready to raise them again. It also helps to maintain a neat and safe environment, preventing any accidents or entanglements with loose strings.
Remember to follow the manufacturer’s recommendations and guidelines for securing the string, as some blinds may have specific mechanisms or instructions for fastening the string.
Safety Precautions
While operating blinds with a string control system, it’s important to keep safety in mind. Here are some key safety precautions to follow:
- Secure loose cords: Ensure that the string and any accompanying cords are properly secured and out of reach of children or pets. Loose cords can pose a strangulation hazard, so it’s important to take steps to prevent accidents.
- Use cord cleats or tensioners: Install cord cleats or tensioners near the blinds to provide a designated spot to wrap and secure the string. This helps keep the cords organized and prevents them from hanging loosely.
- Keep furniture away from cords: Position furniture, such as beds or cribs, away from windows with blinds to prevent children from reaching the cords. Ensure that cords are not hanging within reach of children who may climb or pull on them.
- Inspect the blinds: Regularly inspect the blinds for any signs of wear, frayed cords, or malfunctioning mechanisms. If you notice any issues, discontinue use and have the blinds repaired or replaced as necessary.
- Follow manufacturer’s instructions: Always refer to the manufacturer’s instructions for your specific blinds. They will provide guidelines on how to properly use and maintain the blinds, as well as any additional safety measures to consider.
- Supervise children and pets: Never leave children or pets unattended near blinds. Young children and pets are naturally curious and may be tempted to play with the cords, potentially leading to accidents. Always supervise them and ensure a safe environment.
- Consider cordless alternatives: If safety is a concern, consider opting for cordless blinds or blinds with built-in safety features, such as motorized or wand control systems. These eliminate the need for cords and provide a safer operation.
By following these safety precautions, you can minimize the risk of accidents and create a safer environment when using blinds with a string control system. It’s important to prioritize the well-being of your household members and take the necessary steps to prevent any potential hazards associated with blind cords.
Conclusion
Lowering blinds with a string control system is a simple and efficient way to adjust the position of your blinds, providing you with control over light levels and privacy in your space. Understanding the various types of blind control systems, such as traditional, roller chain, cord, and string, allows you to choose the option that best suits your needs and preferences.
The string control system offers distinct advantages, including simplicity, precision, smooth operation, improved safety, a clean aesthetic, and durability. Its user-friendly interface and intuitive operation make it a popular choice for homeowners and businesses alike.
To lower your blinds with a string control system, follow the step-by-step process of identifying the string, locating the pull cord, pulling the string downward, adjusting the position of the blinds, and securely fastening the string. By adhering to safety precautions, such as securing loose cords and keeping them out of reach of children and pets, you can ensure a safe and comfortable environment.
When it comes to blinds, it’s important to strike a balance between functionality, convenience, and safety. By selecting a suitable control system and following the proper techniques for operating and securing your blinds, you can enjoy the benefits of privacy, light control, and an aesthetically pleasing atmosphere in your home or workplace.
Remember to refer to the manufacturer’s instructions and guidelines specific to your blinds for further details on their operation and maintenance. Should you have any concerns or uncertainties, it is always advisable to consult the manufacturer or seek professional assistance.
With an understanding of how to lower blinds with a string and the importance of safety precautions, you are now well-equipped to confidently operate your blinds and enhance the functionality and visual appeal of your space.
Frequently Asked Questions about How Do You Lower Blinds With A String
Was this page helpful?
At Storables.com, we guarantee accurate and reliable information. Our content, validated by Expert Board Contributors, is crafted following stringent Editorial Policies. We're committed to providing you with well-researched, expert-backed insights for all your informational needs.