Articles
How To Make A Driveway Ramp For Lowered Cars
Modified: February 17, 2024
Learn how to create a safe and functional driveway ramp for lowered cars with our informative articles. Discover step-by-step instructions and expert tips to ensure a smooth entry and exit for your vehicle.
(Many of the links in this article redirect to a specific reviewed product. Your purchase of these products through affiliate links helps to generate commission for Storables.com, at no extra cost. Learn more)
Introduction
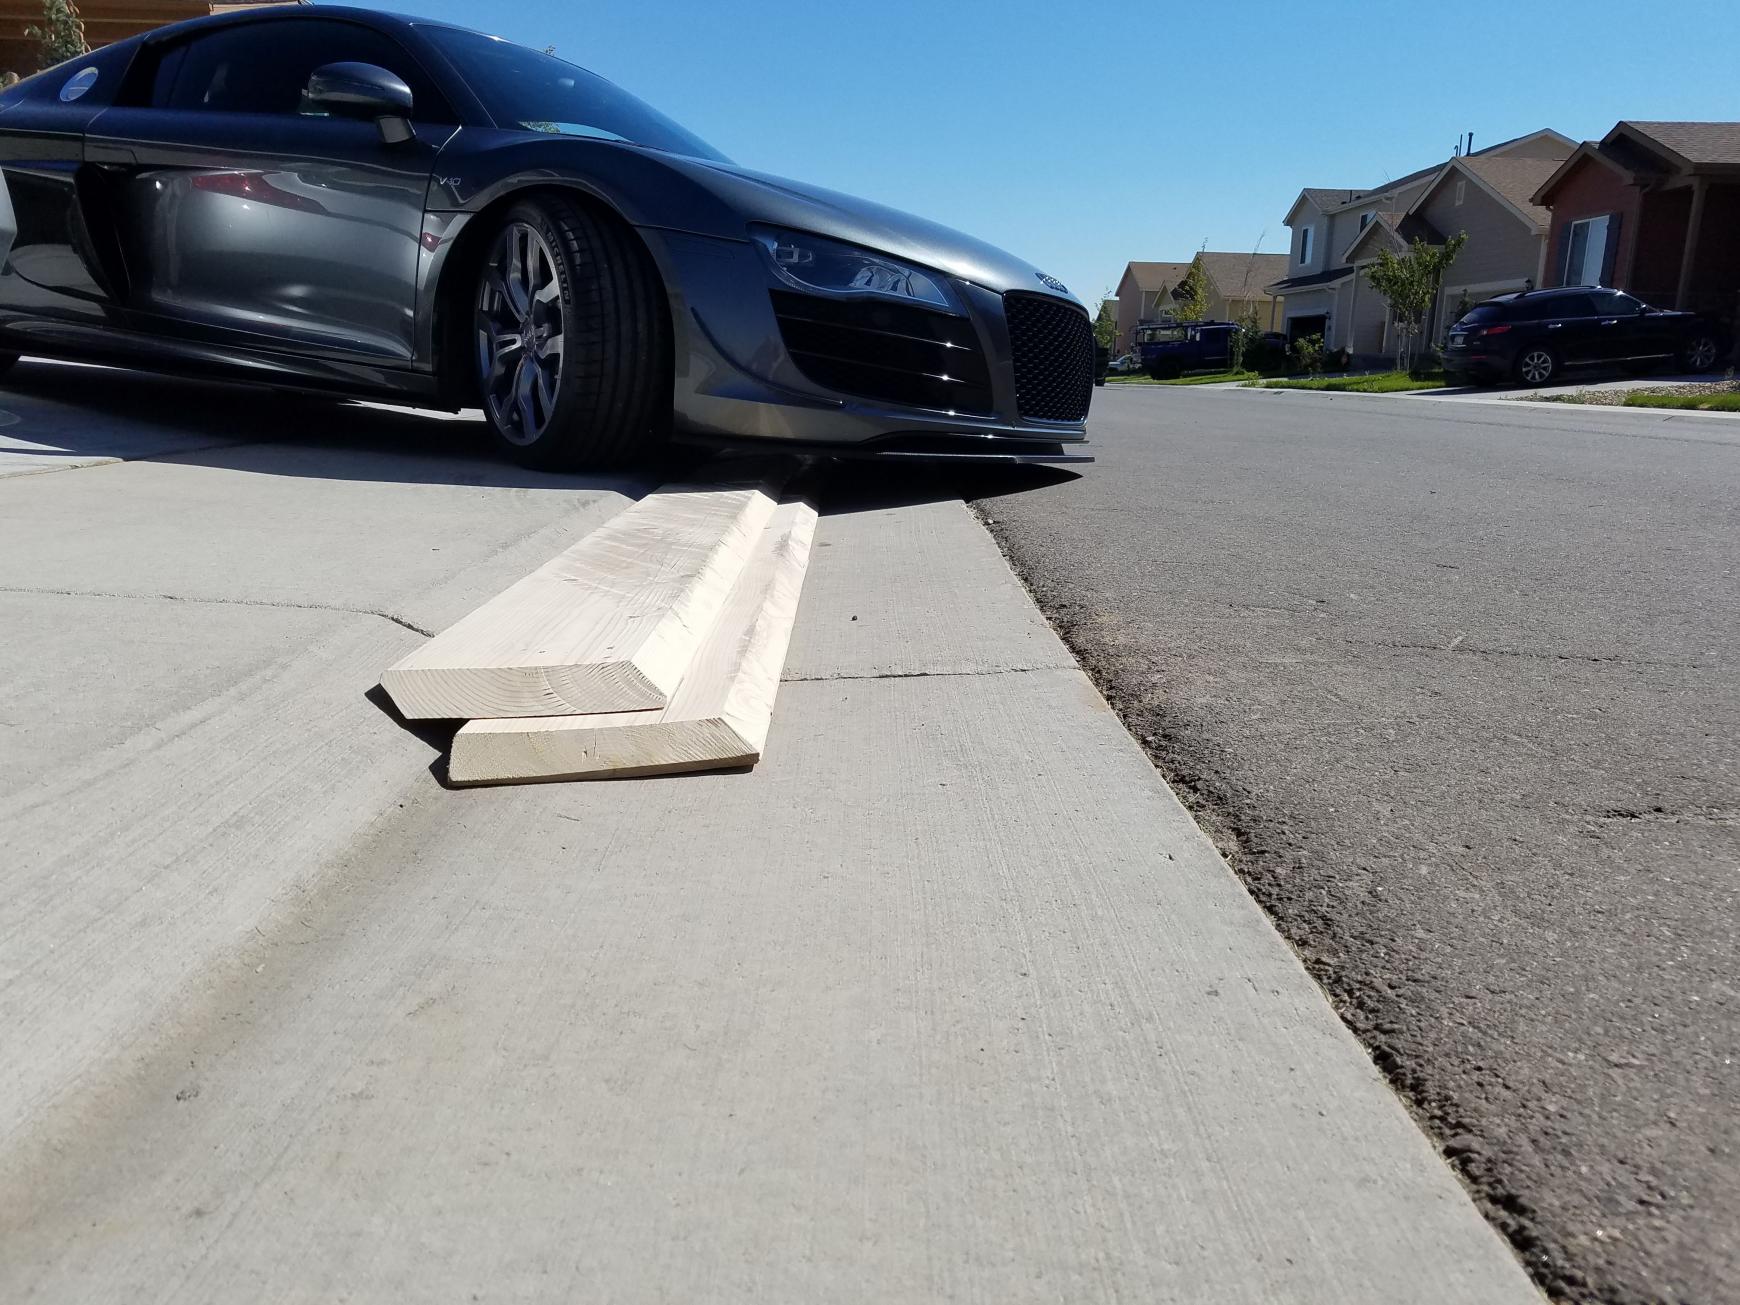
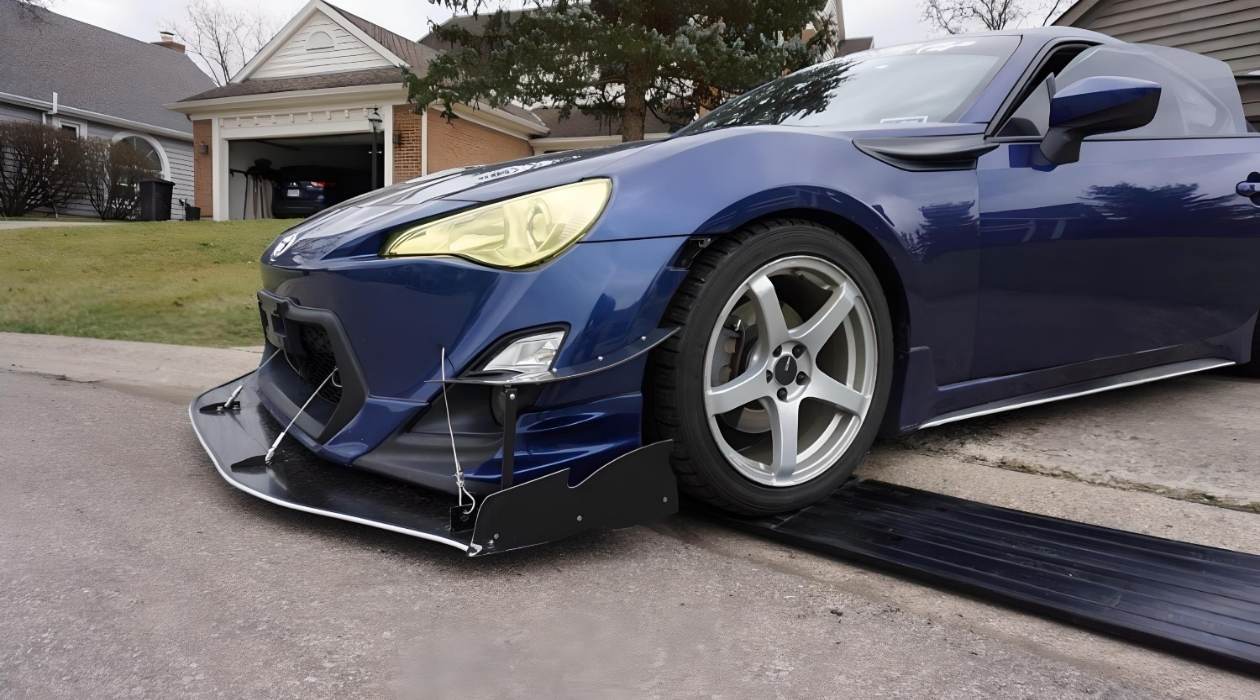
Having a lowered car comes with many benefits, including improved handling and a sleek look. However, it also presents challenges when it comes to navigating driveways, speed bumps, and other elevated surfaces. One effective solution to overcome these obstacles is to build a driveway ramp specifically designed for lowered cars.
In this article, we will guide you through the step-by-step process of creating a driveway ramp that is suitable and safe for lowered cars. Whether you have a sports car, a modified vehicle, or simply want to ensure a smooth entry and exit for your vehicle, this DIY project will be a game-changer.
Before we dive into the construction process, let’s take a look at the materials and tools you will need to successfully complete the project.
Key Takeaways:
- Building a driveway ramp for lowered cars involves precise measurements, proper reinforcement, and careful concrete pouring. Adding a non-slip surface enhances safety and ensures a smooth transition for vehicles.
- Prioritize safety and compliance with local regulations when constructing a driveway ramp. Proper curing and maintenance are essential for durability, providing a convenient and comfortable driving experience for lowered cars.
Read more: How To Change Car Ramps In My Tool Shed
Materials and Tools
Before getting started, gather the necessary materials and tools for building your driveway ramp. Here’s a list to help you get organized:
- Concrete mix: Choose a high-quality concrete mix that is suitable for driveways and can withstand heavy loads.
- Rebar: Reinforcing bars are essential for adding strength to the ramp. Opt for corrosion-resistant rebar to ensure longevity.
- Plywood or boards: These will be used to create the formwork for the ramp.
- Nails or screws: To secure the formwork in place.
- Shovel: You’ll need a sturdy shovel to dig out the ramp area.
- Level: This tool is crucial for ensuring that the ramp is perfectly level during construction.
- Tape measure: Use a tape measure to accurately measure the dimensions of your ramp.
- Trowel: A trowel will be necessary for smoothing and finishing the concrete surface.
- Float: A float is used to remove excess water from the concrete and achieve a smooth finish.
- Broom: A broom will come in handy for adding texture to the surface and reducing slipperiness.
- Protective gear: Don’t forget to wear safety glasses, gloves, and a dust mask to protect yourself during the construction process.
Now that you have all the necessary materials and tools in place, we can move on to the step-by-step instructions for building your driveway ramp.
Step 1: Determine the Required Height and Length of the Ramp
The first step in building a driveway ramp for lowered cars is to determine the required height and length of the ramp. This will largely depend on the specific vehicle you have and the amount of ground clearance it requires.
Start by measuring the height difference between the lowest point on your car and the ground when it is parked or driving. This will give you an idea of how high the ramp needs to be. It’s important to ensure that the ramp provides sufficient clearance for your vehicle to pass over without scraping the bottom.
Next, measure the length of the ramp. Consider factors such as the slope of your driveway and the available space for constructing the ramp. The length of the ramp should be long enough to provide a gradual incline for a smooth transition onto and off of the ramp.
Once you have determined the required height and length of the ramp, mark the starting and ending points on your driveway. This will serve as a guide when excavating the ramp area and constructing the formwork.
Take your time during this step to ensure accurate measurements. It’s better to double-check and make adjustments now than to encounter issues later in the construction process.
Now that you have determined the necessary dimensions for your driveway ramp, let’s move on to the next step: measuring and marking the ramp area.
Step 2: Measure and Mark the Ramp Area
After determining the required height and length of the ramp, it’s time to measure and mark the ramp area on your driveway. This will ensure precision and accuracy during the construction process.
Start by using a tape measure to measure the length and width of the ramp area. The width should be slightly wider than the width of your vehicle to allow for easy entry and exit.
Once you have the measurements, use chalk or marking paint to mark the boundaries of the ramp area on your driveway. You can use a straight edge or a string to ensure that the lines are straight and aligned properly.
If your driveway has any bends or curves, take those into account when marking the ramp area. You may need to adjust the shape of the ramp to accommodate these curves while still providing a gradual incline.
Additionally, consider the space needed for maneuvering your vehicle onto and off of the ramp. Allow for enough space on either side of the ramp to comfortably drive in and out without any obstacles or obstructions.
Double-check your measurements and markings to ensure accuracy before proceeding to the next step. It’s crucial to have a well-defined ramp area to guide you during the excavation and construction phases.
Now that you have measured and marked the ramp area, we can move on to the next step: digging the ramp area.
Step 3: Digging the Ramp Area
Now that you have measured and marked the ramp area, it’s time to start digging. This step involves excavating the ramp area to create space for the concrete foundation of the driveway ramp.
Before you begin digging, it’s essential to check with your local utility companies to ensure that there are no underground pipes or cables in the area. This will prevent any accidental damage or disruptions during the excavation process.
Grab your shovel and start removing the soil within the marked ramp area. Begin by digging along the perimeter, creating a clear boundary for the driveway ramp. Then, gradually move towards the center of the ramp area while maintaining a gradual slope on all sides.
As you dig, periodically check the depth to ensure that you are excavating to the required height for the ramp. Use a level or measuring tools to confirm that the ramp area is even and meets the desired specifications.
Keep in mind that the depth of the ramp will vary depending on the height determined in Step 1. It’s important to maintain a consistent slope to ensure a smooth transition for your lowered car.
Once you have successfully excavated the ramp area, remove any rocks, debris, or excess soil. Smooth out the surface to create a level base for the next steps.
With the ramp area dug, you are now ready to move on to constructing the formwork in Step 4.
Read more: How To Back A Car Out Of The Driveway
Step 4: Building the Formwork
After excavating the ramp area, the next step is to build the formwork. The formwork serves as a mold for the concrete, ensuring that it takes the desired shape and structure.
Start by measuring and cutting plywood or boards to match the dimensions and slope of your ramp. These will serve as the sides of the formwork. Use a saw or jigsaw to make clean and precise cuts.
Place the boards along the edges of the ramp area, securing them with nails or screws. Ensure that the boards are level and aligned with the ramp markings you made earlier. This will ensure a smooth and even surface for the ramp.
If your ramp has any bends or curves, use smaller sections of boards to create the necessary shape. Secure them in place and connect them to the main formwork for stability.
Use a level to check the formwork’s alignment and adjust as needed. This step is crucial to ensure that the final ramp has a consistent slope and meets the required specifications.
For added stability, you can also drive stakes into the ground on the outer edges of the formwork and secure them with screws or nails.
Once the formwork is in place, give it a final check to ensure it is sturdy and properly aligned. You are now ready to move on to the next step: installing the reinforcement.
Note: It’s important to follow local building codes or regulations when constructing the formwork. Ensure that the ramp design and dimensions comply with any applicable guidelines.
Step 5: Installing the Reinforcement
With the formwork completed, it’s time to reinforce the ramp with steel bars or rebar. This reinforcement will add strength to the concrete and help prevent cracking or shifting over time.
Start by measuring and cutting the rebar to match the length and width of the ramp. The rebar should be placed in a grid-like pattern, ensuring sufficient coverage throughout the ramp area.
Using wire or tie-downs, secure the rebar pieces together at their intersections. This will help keep them in place during the concrete pouring process.
Place the rebar grid inside the formwork, ensuring that it sits in the center and is slightly raised from the ground. This will allow the concrete to surround and encase the rebar, providing maximum reinforcement.
Make sure the rebar is evenly distributed and does not touch the formwork. This will ensure a uniform distribution of load throughout the ramp.
Double-check the alignment and positioning of the rebar before proceeding to the next step. A properly installed reinforcement will contribute to the ramp’s durability and longevity.
Now that the reinforcement is in place, you are ready to move on to the next step: mixing and pouring the concrete.
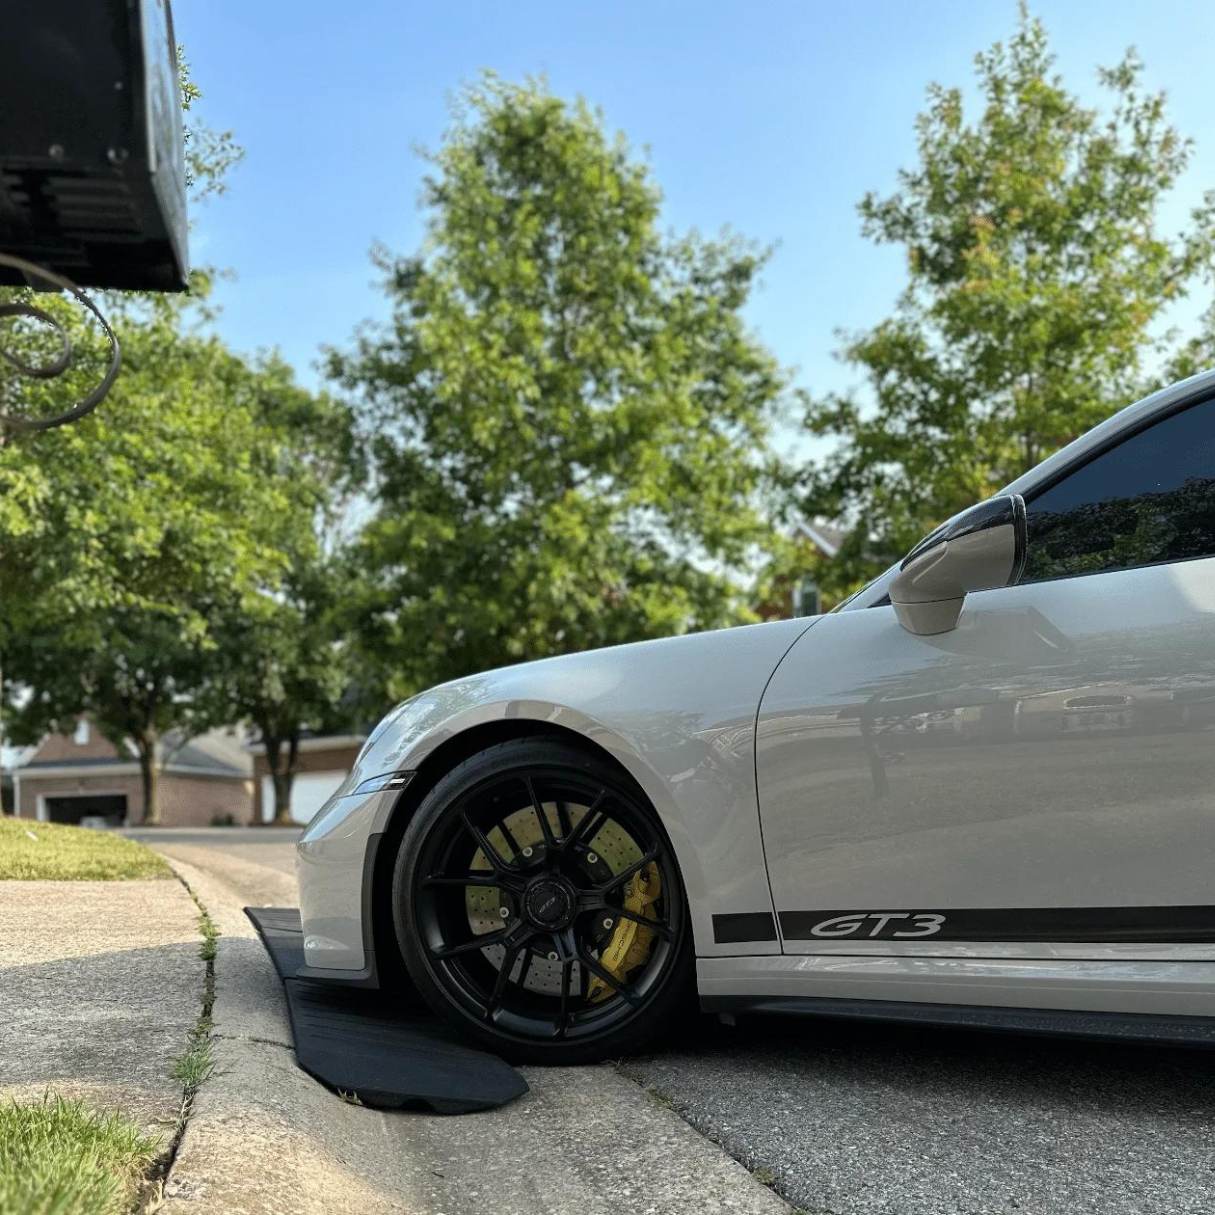
When making a driveway ramp for lowered cars, ensure a gradual slope to prevent scraping. Use durable materials like concrete or asphalt for a smooth transition.
Step 6: Mixing and Pouring the Concrete
With the reinforcement in place, it’s time to mix and pour the concrete for your driveway ramp. This step requires careful preparation and attention to detail to ensure a solid and smooth ramp surface.
Start by preparing the concrete mix according to the manufacturer’s instructions. Use a mixing container or a concrete mixer to combine the necessary amounts of water and concrete mix. Follow the recommended ratios to achieve the desired consistency.
Thoroughly mix the concrete until it reaches a uniform texture and there are no lumps or dry pockets. This can be done using a shovel, a mixing tool, or a concrete mixer.
Once the concrete is well-mixed, start pouring it into the formwork. Start from one end and work your way across, ensuring that the entire ramp area is filled evenly.
Use a trowel or a float to level the surface of the concrete as you pour. Smooth out any bumps or uneven areas to achieve a uniform finish. Be sure to push the concrete into the corners and edges of the formwork to ensure complete coverage.
Continuously check the level of the concrete surface with a straight edge or a level tool. Adjust as needed to maintain a consistent slope and ensure that the ramp is even.
Avoid over-pouring the concrete, as it may lead to excessive thickness and potential cracking. Moderation is key to achieve a strong and durable ramp.
Once the concrete is poured, use a trowel to remove any excess and create a smooth surface. Pay special attention to the edges and corners, ensuring that they are well-formed and free from any imperfections.
Now that the concrete is poured, it’s time to move on to the next step: smoothing and finishing the ramp surface.
Step 7: Smoothing and Finishing the Ramp Surface
After pouring the concrete, it’s important to smooth and finish the surface of your driveway ramp. This step will create a clean and polished look while also enhancing the ramp’s functionality and durability.
Start by using a float or a trowel to smooth out the surface of the concrete. Work systematically from one end to the other, ensuring that the entire ramp is evenly covered.
Use long, sweeping motions to level the concrete and create a uniform surface. Pay extra attention to any low spots or uneven areas, using the float to fill them in and create a seamless finish.
As you smooth the concrete, periodically check the slope and alignment of the ramp using a level tool. This will help ensure that the ramp maintains the desired angle and provides a smooth transition for vehicles.
After smoothing the surface, give the concrete some time to set slightly. This will allow you to create a non-slip finish by using a broom to create texture. Lightly drag the broom over the ramp, creating small ridges or grooves that will improve traction.
Be mindful not to press too hard with the broom, as this can disrupt the surface of the concrete. The goal is to create a textured finish without affecting the overall smoothness of the ramp.
Once you are satisfied with the texture, use the trowel to clean up the edges of the ramp. Smooth out any rough or jagged areas, ensuring a clean and professional finish.
Now that the surface has been smoothed and finished, it’s time to move on to the next step: curing and drying the concrete.
Read more: How Wide Is A Two Car Driveway
Step 8: Curing and Drying
After completing the construction and finishing of your driveway ramp, the next step is to allow the concrete to properly cure and dry. Curing is a crucial process that helps optimize the strength and durability of the ramp.
Start by covering the ramp with plastic sheeting or a curing compound. This will help retain moisture and prevent rapid drying, which can lead to cracking. Ensure that the plastic or curing compound completely covers the ramp’s surface.
Leave the plastic sheeting or curing compound in place for at least three to seven days, depending on the manufacturer’s instructions. During this time, it’s important to keep the ramp moist by lightly spraying it with water twice a day.
Moisture is essential for proper curing, as it allows the concrete to fully hydrate and develop its strength. The continuous hydration process will enhance the ramp’s durability and resistance to wear and tear.
During the curing period, avoid walking or driving on the ramp to prevent any damage or disruptions to the curing process. Place signs or barriers to notify others that the ramp is still under construction and should not be used.
After the curing period has elapsed, carefully remove the plastic sheeting or curing compound from the ramp. The concrete should have hardened and gained sufficient strength by this point.
Allow the ramp to air dry for an additional two to three days before using it. This will ensure that any residual moisture within the concrete fully evaporates and the ramp becomes fully ready for regular use.
Now that the concrete has cured and dried, it’s time to move on to the next step: removing the formwork.
Step 9: Removing the Formwork
After the concrete has cured and dried, it’s time to remove the formwork. This step will reveal the final shape and structure of your driveway ramp.
Carefully inspect the concrete to ensure it is sufficiently hardened and strong before proceeding with the removal process. If the concrete is still soft or shows signs of weakness, allow more time for curing before removing the formwork.
Start by removing any screws, nails, or stakes that were used to secure the formwork. Use a pry bar or a hammer to gently loosen and remove the fasteners, taking care not to damage the concrete surface.
Next, slowly and gradually dismantle the formwork, starting from one end and working your way across. Use a pry bar or a hammer to gently pry the formwork away from the concrete, allowing it to separate without causing any damage.
As you remove the formwork, inspect the edges and corners of the ramp. Smooth out any rough or uneven areas using a trowel, ensuring a clean and polished finish.
Dispose of the formwork components responsibly, keeping in mind any local regulations regarding waste disposal. Recycle or reuse the materials if possible to reduce environmental impact.
With the formwork removed, take a moment to admire your newly constructed driveway ramp. The concrete surface should be smooth, level, and ready for use.
Now that the formwork is removed, it’s time to move on to the optional final step: adding a non-slip surface to enhance the safety and functionality of the ramp.
Step 10: Adding a Non-Slip Surface (Optional)
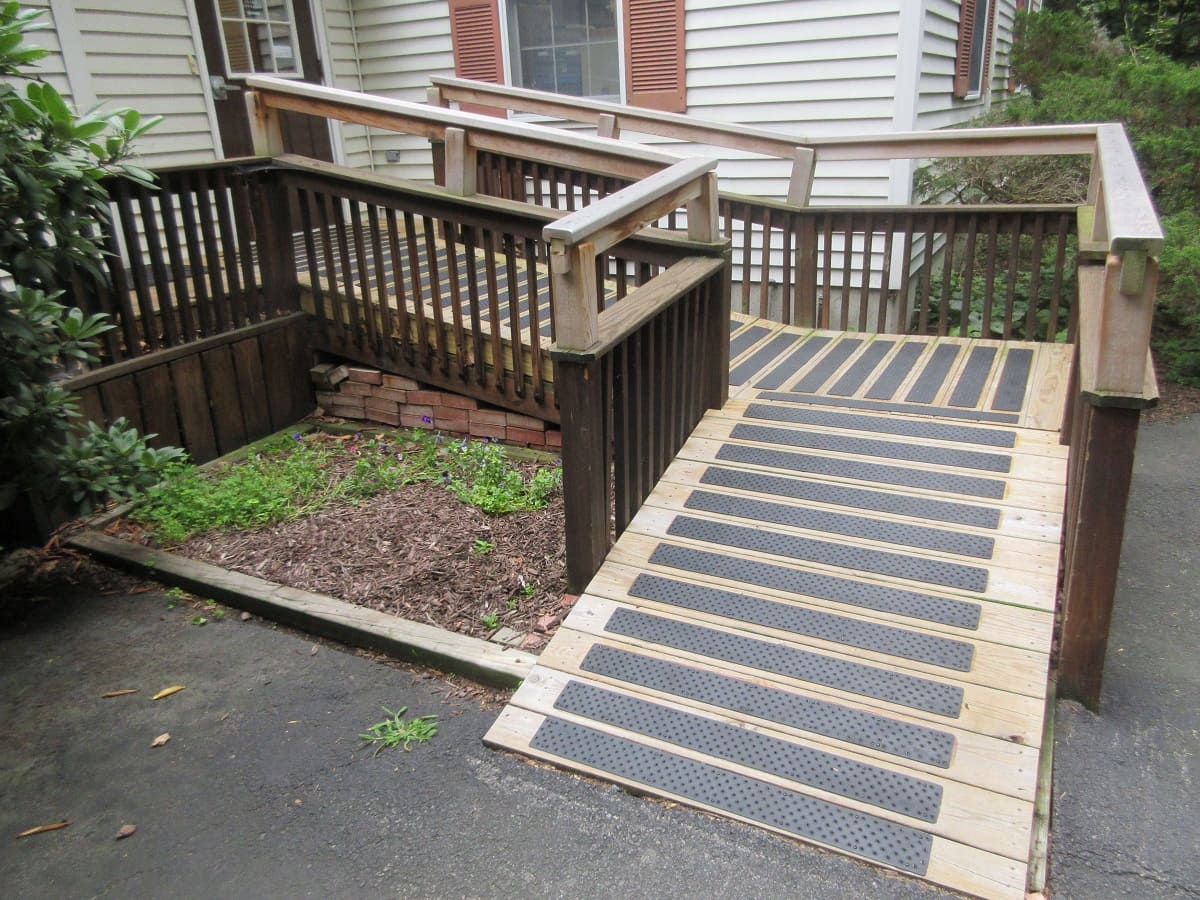
Adding a non-slip surface to your driveway ramp is an optional step but highly recommended to enhance safety, especially during wet or icy conditions. A non-slip surface provides additional traction, reducing the risk of slips and vehicle slippage when driving onto or off the ramp.
There are several options available for creating a non-slip surface on your driveway ramp:
- Anti-slip paint or coating: Apply an anti-slip paint or coating specifically designed for concrete surfaces. These coatings contain additives that provide grip and friction, improving traction on the ramp.
- Rubber mats or strips: Install rubber mats or strips onto the ramp surface. These mats have textured surfaces that enhance grip, making it easier for vehicles to navigate the ramp safely.
- Aggregate or grit: Mix an aggregate material, such as sand or small stones, into a topcoat sealer or paint. This creates a textured surface that increases traction on the ramp.
- Traction tape: Apply adhesive traction tape onto the ramp surface. This tape has a rough, textured surface that provides excellent grip, even in wet conditions.
Choose the option that best suits your preferences and budget. Prioritize materials that are durable and weather-resistant, ensuring that the non-slip surface will remain effective over time.
Follow the manufacturer’s instructions when applying or installing the non-slip surface. Clean the ramp thoroughly before application to ensure proper adhesion.
Once the non-slip surface is applied, allow sufficient drying time before using the ramp. Test the effectiveness of the non-slip surface by walking on it or driving a vehicle onto the ramp.
Regularly inspect and maintain the non-slip surface to ensure its continued effectiveness. Clean the surface as needed to remove debris or dirt that may reduce traction.
Adding a non-slip surface to your driveway ramp is a simple yet essential step to enhance safety and provide peace of mind for both drivers and pedestrians.
Congratulations! You have successfully completed all the steps to create a driveway ramp for lowered cars. Enjoy the convenience and ease of maneuvering your vehicle over elevated surfaces.
If you have any further questions or require additional assistance, don’t hesitate to reach out. Happy driving!
Conclusion
Building a driveway ramp for lowered cars is a rewarding DIY project that can significantly improve the accessibility and functionality of your driveway. With proper planning and execution, you can create a smooth and safe transition for your lowered vehicle.
In this comprehensive guide, we have covered the step-by-step process involved in constructing a driveway ramp. From determining the required height and length of the ramp to adding a non-slip surface, each step is crucial in creating a durable and functional ramp.
Remember to prioritize safety throughout the construction process. Take the time to properly measure, mark, and dig the ramp area. Ensure the reinforcement is installed correctly and the concrete is mixed and poured with care. The finishing touches, such as smoothing and adding a non-slip surface, will further enhance the ramp’s safety and usability.
Always adhere to local regulations and building codes when constructing the driveway ramp. If in doubt, consult with professionals or seek guidance from local authorities to ensure compliance and safety.
By following this guide, you will be able to create a driveway ramp that offers a smooth and seamless entry and exit for your lowered car. Remember to regularly inspect and maintain the ramp to keep it in optimal condition.
Now it’s time to enjoy the convenience and ease of navigating your lowered car over elevated surfaces. Say goodbye to concerns about scraping or damaging your vehicle and embrace a smoother and more comfortable driving experience.
If you have any further questions or require assistance along the way, don’t hesitate to seek professional help or reach out to fellow car enthusiasts who have experience with driveway ramp construction.
Happy driving!
Frequently Asked Questions about How To Make A Driveway Ramp For Lowered Cars
Was this page helpful?
At Storables.com, we guarantee accurate and reliable information. Our content, validated by Expert Board Contributors, is crafted following stringent Editorial Policies. We're committed to providing you with well-researched, expert-backed insights for all your informational needs.


0 thoughts on “How To Make A Driveway Ramp For Lowered Cars”