
Articles
How To Lower A Ceiling
Modified: October 28, 2024
Learn effective strategies and techniques in our informative articles on how to lower a ceiling. Discover step-by-step instructions and helpful tips to create a more spacious and visually appealing living space.
(Many of the links in this article redirect to a specific reviewed product. Your purchase of these products through affiliate links helps to generate commission for Storables.com, at no extra cost. Learn more)
Introduction
Have you ever walked into a room and felt like the ceiling was just too high? Maybe you’ve been searching for ways to make your space feel cozier and more intimate. Lowering a ceiling can be a great solution to these common design dilemmas. By bringing the ceiling height down, you can create a more intimate atmosphere and improve the overall aesthetic of the room.
In this article, we will guide you through the process of lowering a ceiling. We will cover everything from assessing the ceiling height to choosing the right method, and from preparing the room to installing the new ceiling material. Whether you are looking to update your home or are a DIY enthusiast looking for a new project, this guide will help you achieve the desired results.
Before we dive into the details, it’s important to note that lowering a ceiling is a significant undertaking. It requires careful planning, proper tools, and knowledge of construction techniques. If you don’t feel comfortable tackling this project on your own, consider hiring a professional contractor.
Now, let’s get started on your journey to a lower ceiling and a more inviting space!
Key Takeaways:
- Lowering a ceiling can create a more intimate and visually appealing space, but it’s a significant undertaking that requires careful planning, proper tools, and knowledge of construction techniques. Consider consulting a professional if you’re unsure.
- From assessing the ceiling height to installing the new ceiling material, each step is crucial in ensuring a successful project. Prioritize safety, accuracy, and proper preparation to achieve a satisfying end result.
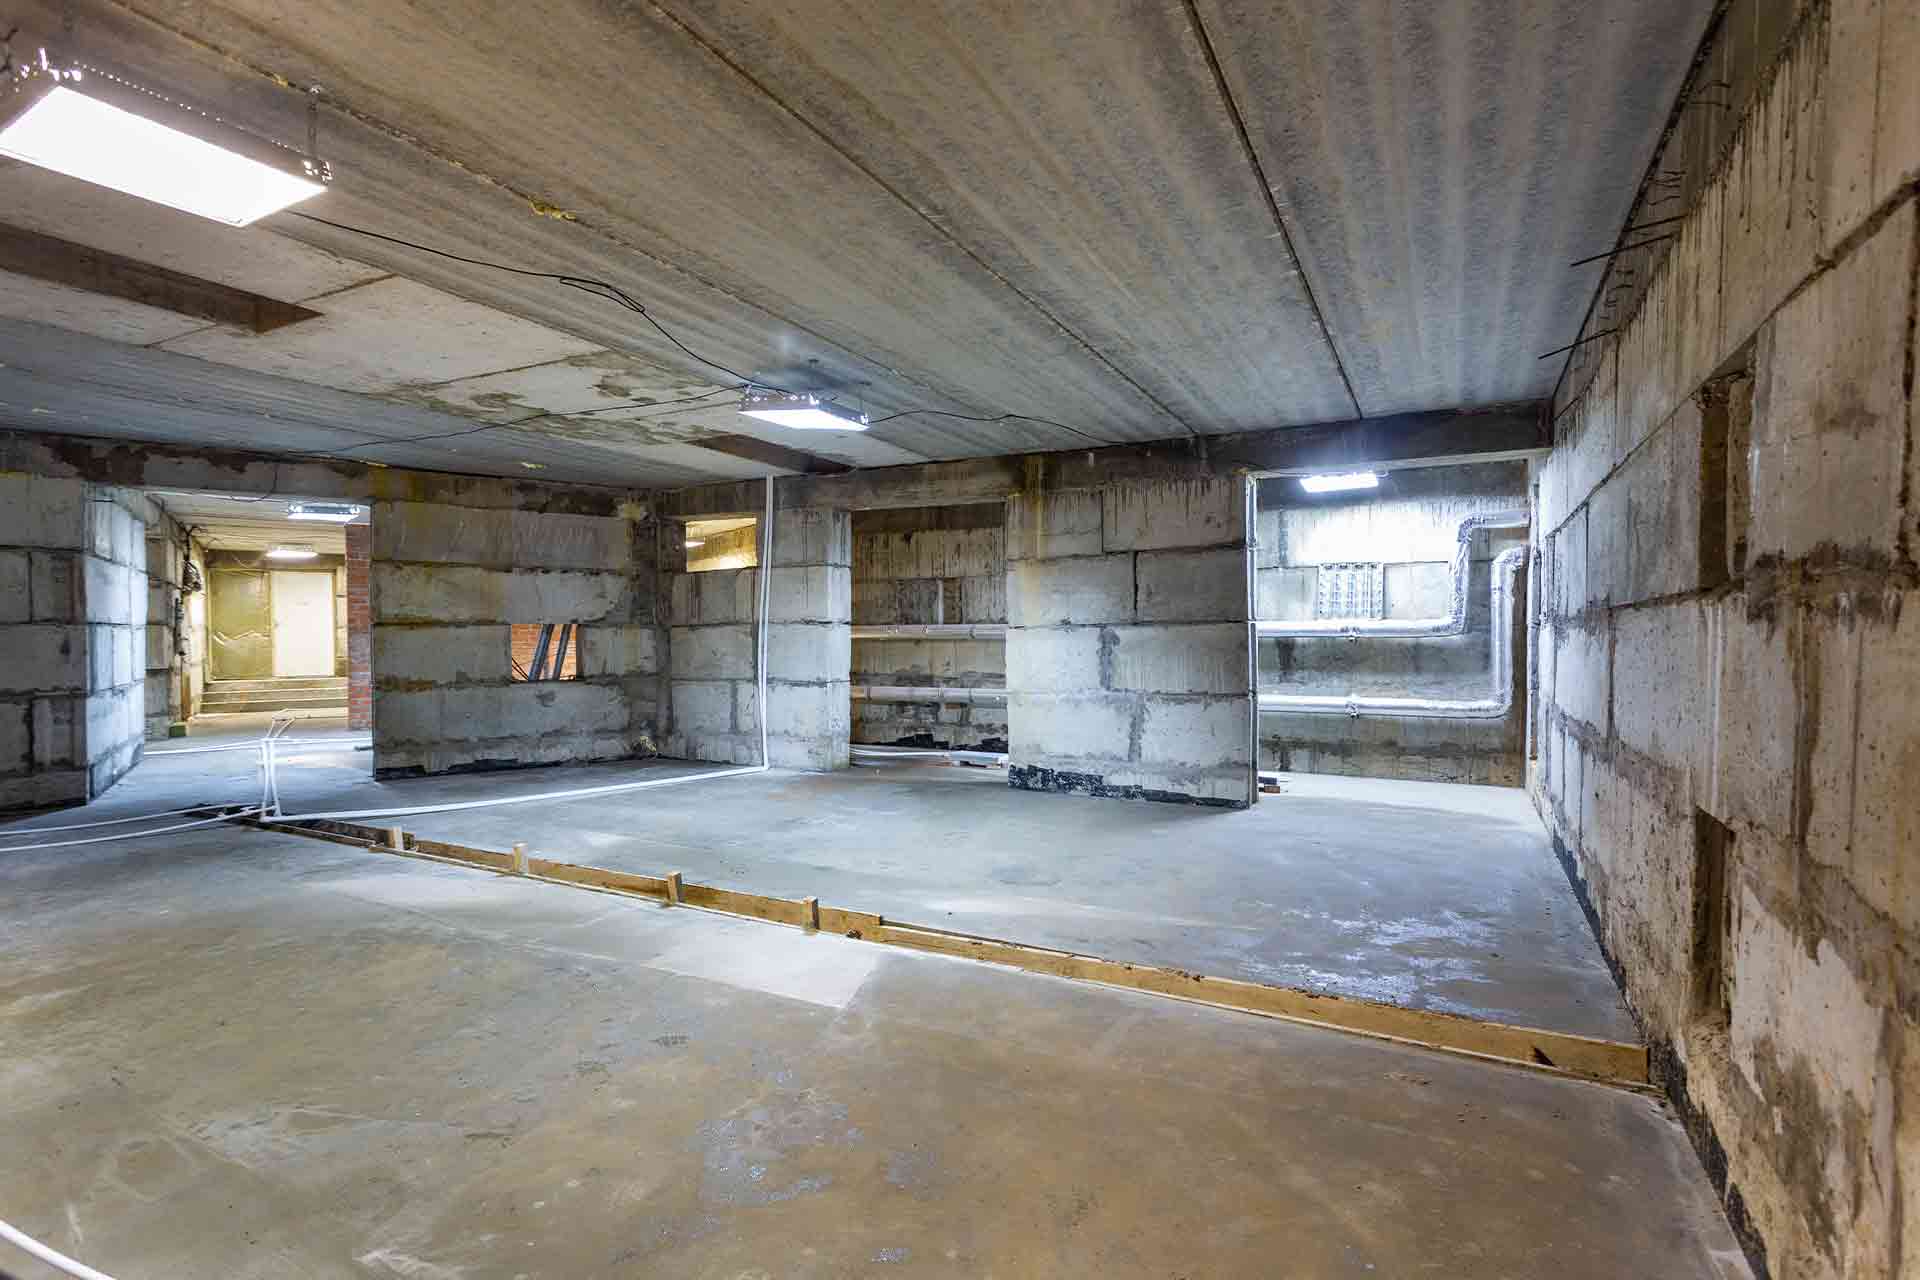
Assessing the Ceiling Height
Before you begin the process of lowering a ceiling, it’s crucial to assess the existing ceiling height and determine how much you want to lower it. This will help you plan the project and ensure that you achieve your desired results. Here are the steps to assess the ceiling height:
- Measure the current ceiling height: Use a tape measure to measure from the floor to the highest point of the existing ceiling. Write down this measurement for reference.
- Determine the desired ceiling height: Consider the purpose of the room and the visual effect you want to achieve. Generally, a standard ceiling height is around 8 to 9 feet. However, you may choose to lower the ceiling even further for a cozier atmosphere.
- Consider the practical implications: Keep in mind that lowering the ceiling too much can affect the functionality of the room. Ensure that the new ceiling height allows for comfortable movement and proper lighting.
- Take structural elements into account: Examine the current state of the ceiling, including the presence of structural elements such as beams or HVAC systems. If these components may impede the lowering process, it’s important to plan accordingly.
Once you have assessed the ceiling height and determined your desired new height, you will have a clear idea of how much you need to lower the ceiling. This information will guide you through the subsequent steps of the process, ensuring that you achieve the desired outcome for your space.
Choosing the Right Method
Lowering a ceiling can be achieved through several methods depending on your specific needs and the structure of your space. It’s essential to choose the right method to ensure a successful and safe project. Here are some common methods to consider:
- Soffit Construction: This method involves constructing a soffit, which is a dropped ceiling section, around the perimeter of the room. It allows you to lower the central portion of the ceiling while maintaining the height around the edges. Soffit construction is a popular option as it offers flexibility in design and doesn’t require extensive structural modifications.
- Joist Modification: If the existing ceiling joists are at the desired level, you can modify them to create a lower ceiling. This involves cutting the joists and adding additional support beams to maintain the structural integrity. Joist modification is a more involved process and may require professional assistance to ensure proper support and safety.
- Drywall Installation: Another method is to install new drywall directly over the existing ceiling. This allows you to create a lower ceiling without making structural changes. However, it’s important to note that this method will reduce the overall ceiling height, so it’s crucial to consider the impact on the room’s functionality.
- Suspended Ceiling System: A suspended ceiling, also known as a drop ceiling, is a popular option for lowering a ceiling. It involves installing a grid system and attaching ceiling tiles or panels to create a new ceiling below the existing one. Suspended ceilings offer ease of installation and accessibility for future maintenance.
When choosing the right method for lowering your ceiling, consider factors such as your budget, the desired aesthetics, the structural implications, and the level of complexity you’re comfortable with. It’s recommended to consult with a professional contractor or an experienced DIYer to ensure you make an informed decision and execute the method effectively.
Materials and Tools Needed
Once you have decided on the method for lowering your ceiling, it’s time to gather the materials and tools necessary for the project. Here is a list of common items you may need:
Materials:
- Drywall sheets or ceiling tiles
- Lumber or metal framing for soffit construction or joist modification
- Fasteners such as screws or nails
- Drywall compound for finishing
- Primer and paint for the new ceiling
- Insulation, if necessary
- Electrical wiring and fixtures, if affected by the lowering process
Read more: How To Lower A Dorm Bed
Tools:
- Tape measure
- Pencil or marker for marking measurements
- Level for ensuring accuracy
- Power drill or screwdriver
- Drywall saw or utility knife
- Drywall taping tools, including a trowel and sandpaper
- Paint brushes or rollers
- Safety equipment, such as goggles and dust masks
It’s important to ensure that you have all the necessary materials and tools before starting the project. This will prevent unnecessary delays and ensure a smoother construction process. Keep in mind that the specific requirements may vary based on the method you choose and the unique characteristics of your space. Take the time to plan and gather the appropriate materials to set yourself up for a successful ceiling-lowering project.
Preparing the Room
Before you begin the process of lowering a ceiling, it’s crucial to prepare the room properly to ensure a smooth and efficient construction process. Here are the steps to follow when preparing the room:
- Clearing the space: Remove all furniture, decorations, and any other items from the room. This will provide you with a clean and unobstructed work area.
- Protecting the floor: Cover the floor with drop cloths or plastic sheets to protect it from dust, debris, and potential damage during the construction process.
- Turning off utilities: Locate the main electrical breaker and turn off the power supply to the room. This will prevent any accidents or electrical hazards during the construction process.
- Creating a workspace: Set up a designated workspace in the room or in a nearby area where you can store and access your materials and tools easily. This will ensure that everything is organized and within reach.
- Setting up proper lighting: Since you will be working in a lower ceiling space, it’s important to have sufficient lighting. Set up temporary lighting fixtures or use portable work lights to ensure proper visibility.
- Installing temporary ventilation: Lowering a ceiling can generate a significant amount of dust and debris. Consider installing temporary ventilation, such as a fan or an open window, to improve air circulation and minimize the buildup of dust.
- Securing protective coverings: Cover any permanent fixtures, outlets, switches, and vents with plastic sheets or tape to protect them from dust and damage during the construction process.
- Taking safety precautions: Wear appropriate safety gear, including goggles and dust masks, to protect yourself from potential hazards, such as dust particles and debris.
By properly preparing the room, you ensure that the construction process goes smoothly and that you minimize the potential for accidents or damage. Take the time to complete these steps before moving on to the next phase of lowering the ceiling.
Measuring and Marking the New Ceiling Height
Once the room is prepared, it’s time to measure and mark the new ceiling height. This step is crucial as it will guide you in the process of lowering the ceiling and ensure accurate results. Here’s how to measure and mark the new ceiling height:
- Refer to your previous assessment: Take out the measurement you recorded during the assessment of the existing ceiling height. This will serve as a reference point for determining the amount you need to lower the ceiling.
- Select a level reference point: Choose a level reference point on the wall or another fixed structure in the room. This can be a door frame, a window sill, or a molding. Ensure that the reference point is level and will provide a reliable measurement.
- Measure and mark the new height: Use a tape measure and starting from the level reference point, measure and mark the new desired height on the wall at various points around the room. Make sure to measure and mark consistently to maintain accuracy.
- Create a straight guideline: Connect the marked points on the wall using a straight edge or a chalk line. This will create a guideline that will serve as a reference for the new ceiling height.
- Double-check the measurements: Before proceeding to the next steps of the process, double-check the measurements to ensure accuracy. Use the level to ensure that the guideline is straight and level throughout the room.
By carefully measuring and marking the new ceiling height, you establish a clear guideline for the construction process. This will ensure that the lowered ceiling remains consistent and visually appealing. Take the time to measure accurately and make any necessary adjustments before moving on to the next steps in the process.
Removing Existing Fixtures
Before you can proceed with lowering the ceiling, it’s important to remove any existing fixtures that may interfere with the construction process. This includes lighting fixtures, fans, and any other attachments to the current ceiling. Here’s how to remove existing fixtures:
- Turn off the power: Locate the circuit breaker that supplies power to the room and turn it off to ensure your safety during the removal process. If you’re unsure which breaker controls the room, it’s best to turn off the main power supply.
- Remove lighting fixtures: Start by removing any lighting fixtures attached to the ceiling. Use a ladder or step stool to reach the fixtures safely. Unscrew or unclip the fixtures from the ceiling, being careful not to damage any wiring in the process.
- Disconnect electrical wires: After removing the fixtures, you may need to disconnect the electrical wires. First, make sure the power is off. Next, remove the wire connectors or electrical tape to separate the wires. Keep in mind that electrical work can be hazardous, so if you’re unsure about handling the wires, consult a licensed electrician.
- Detach other fixtures and attachments: If there are any other fixtures or attachments, such as ceiling fans or decorative elements, carefully remove them using the appropriate tools. Follow the manufacturer’s instructions or consult a professional if necessary.
- Cap and label wires: If you have disconnected any electrical wires, it’s essential to cap them with wire connectors and label them for future reference. This will make it easier to reconnect the fixtures once the new ceiling is installed.
When removing existing fixtures, it’s crucial to work carefully and methodically to avoid damaging the ceiling or any wiring. If you’re unsure about any step of the process or if you’re dealing with complex electrical work, it’s always best to seek professional help to ensure your safety and the integrity of the electrical system.
Consider using a drop ceiling or suspended ceiling to lower the height of a room. This can be a cost-effective and efficient way to create a cozier atmosphere.
Read more: How To Properly Lower Curtains
Securing the Ceiling Joists
Before you can proceed with installing the new ceiling material, it’s important to ensure that the ceiling joists are properly secured. This will provide the necessary support for the lowered ceiling and maintain the structural integrity of the room. Here’s how to secure the ceiling joists:
- Inspect the existing joists: Start by inspecting the condition of the ceiling joists. Look for any signs of damage, such as cracking, splitting, or sagging. If you notice any issues, consult a professional to assess the situation and determine the necessary repairs.
- Add support if needed: If the existing joists are not at the desired height or if additional support is required, you may need to add new support beams or sister joists. Consult a professional to ensure that the added supports are installed correctly and are capable of supporting the new ceiling.
- Install blocking or bridging: Consider installing blocking or bridging between the joists to enhance stability and prevent twisting or shifting. This involves placing perpendicular pieces of lumber or metal between the joists to create a solid connection.
- Secure the joists: Use appropriate fasteners, such as screws or nails, to secure the joists in place. Make sure the fasteners are long enough to penetrate the joists and provide a strong connection. Follow the manufacturer’s guidelines for the specific type of joist fastening required.
- Check for levelness: Use a level to ensure that the joists are straight and level. This is important to maintain a uniform height for the new ceiling. Make any necessary adjustments by shimming or repositioning the joists.
Securing the ceiling joists is a critical step in the process of lowering a ceiling. Proper support will ensure that the new ceiling material is installed securely and will help prevent future issues such as sagging or cracking. If you’re unsure about any aspect of securing the joists or if you encounter any structural concerns, it’s best to consult a professional to ensure the safety and stability of your space.
Installing the New Ceiling Material
Now that the ceiling joists are properly secured, it’s time to install the new ceiling material. Whether you choose drywall panels, ceiling tiles, or another type of material, proper installation is crucial for a polished and professional finish. Here’s how to install the new ceiling material:
- Measure and cut the material: Begin by measuring the dimensions of the area where the new ceiling material will be installed. Use a straight edge and a utility knife or a specialized cutting tool to cut the material to the appropriate size. Take precise measurements and double-check before making any cuts.
- Apply adhesive or fasten the material: Depending on the chosen material, you may need to apply adhesive or use fasteners to attach it to the ceiling joists or the existing ceiling. Follow the manufacturer’s instructions for the specific material being used and ensure a secure and even application.
- Ensure a level installation: Use a level throughout the installation process to ensure that the new ceiling material is installed evenly and level. This will help prevent any visible inconsistencies or uneven surfaces.
- Secure the material: For drywall panels, use screws or nails to secure the panels to the ceiling joists. Be mindful of the recommended spacing and ensure that the material is securely attached. If you’re using ceiling tiles, follow the manufacturer’s instructions for the proper installation method.
- Seal joints and edges: If you’re using drywall panels, apply joint compound or drywall tape to fill in the seams between panels. Smooth out the compound and allow it to dry before sanding and applying a second coat, if necessary. For other types of materials, ensure that the edges are properly aligned and finished for a seamless appearance.
- Finish the ceiling: Once the new ceiling material is installed and any necessary sealing and finishing are complete, you can proceed with priming and painting or applying any other desired finishing touches. Follow the appropriate painting or finishing techniques for the chosen material.
Proper installation of the new ceiling material is essential for achieving a professional look. Take your time with each step, follow the manufacturer’s instructions, and ensure that the material is securely and evenly installed. This will ensure a visually appealing finished product for your lowered ceiling.
Finishing Touches
With the new ceiling material installed, it’s time to add the finishing touches that will complete the transformation of your space. These final touches will enhance the aesthetics and functionality of the lowered ceiling. Here are some key finishing touches to consider:
- Trim and molding: Install crown molding or other decorative trim around the perimeter of the room, where the new ceiling material meets the walls. This will not only create a clean and polished look but also hide any gaps or imperfections.
- Lighting fixtures: Reinstall or replace any lighting fixtures that were removed during the ceiling lowering process. Choose fixtures that complement the new ceiling height and design, and ensure they are properly wired and securely attached.
- Paint or wallpaper: Apply a fresh coat of paint or wallpaper to the walls to complement the new lowered ceiling. Select colors and patterns that enhance the overall aesthetic of the space and create a cohesive look.
- Decorative elements: Consider adding decorative elements such as ceiling medallions, recessed lighting, or hanging pendants to enhance the visual appeal of the lowered ceiling. These additions can provide a focal point and create a unique atmosphere in the room.
- Insulation and soundproofing: Depending on your specific needs and preferences, consider adding insulation or soundproofing materials to the new ceiling. This can help improve energy efficiency and reduce noise transmission between floors.
- Final inspections: Once all the finishing touches are complete, take the time to inspect the lowered ceiling and the room as a whole. Check for any remaining gaps, cracks, or imperfections. Touch up paint or make any necessary repairs to ensure a polished end result.
By carefully considering these finishing touches, you can truly transform the space and create a visually appealing and functional environment with your new lowered ceiling. Take the time to choose the right elements that suit your style and preferences, and ensure that everything is properly installed and finished for a satisfying end result.
Conclusion
Lowering a ceiling can dramatically transform a room, creating a more intimate and visually appealing space. By following the steps outlined in this guide, you can successfully lower a ceiling and achieve your desired results. From assessing the ceiling height to choosing the right method, and from preparing the room to installing the new ceiling material, each step is important in ensuring a smooth and successful project.
Throughout the process, it is essential to prioritize safety and accuracy. If you are unfamiliar or uncomfortable with any aspect of the project, consider consulting a professional contractor who can provide guidance and assistance. Ensure that you gather all the necessary materials and tools, and take the time to properly prepare the room before starting the construction. This will help you maintain a clean and organized work environment.
Remember to measure and mark the new ceiling height accurately, as this will serve as a guide for the rest of the project. Secure the ceiling joists properly, as they provide vital support for the new ceiling material. Take care during the installation of the new ceiling material, following the manufacturer’s instructions and ensuring a level and secure installation.
Once the new ceiling material is installed, focus on the finishing touches that will complete the transformation. Consider adding trim and molding, reinstalling or replacing lighting fixtures, and applying paint or wallpaper to the walls. These final touches will enhance the overall aesthetics of the room and create a cohesive look.
Lastly, take the time to step back and appreciate the results of your hard work. The lowered ceiling will provide a new atmosphere, making the room feel cozier and more inviting. Whether you are updating your home or working on a DIY project, lowering a ceiling can be a rewarding endeavor that transforms your space into a place you truly love.
Interested in other ceiling solutions? If you're curious about versatile ceiling options, our article on "What Is A Drop Ceiling" sheds light on a popular choice that might suit your space perfectly. This guide offers insight into the aesthetics and functionality of drop ceilings, helping you decide if this method aligns with your home improvement goals. Dive into the details to see how a drop ceiling could transform your room's look and feel.
Frequently Asked Questions about How To Lower A Ceiling
Was this page helpful?
At Storables.com, we guarantee accurate and reliable information. Our content, validated by Expert Board Contributors, is crafted following stringent Editorial Policies. We're committed to providing you with well-researched, expert-backed insights for all your informational needs.


0 thoughts on “How To Lower A Ceiling”