Articles
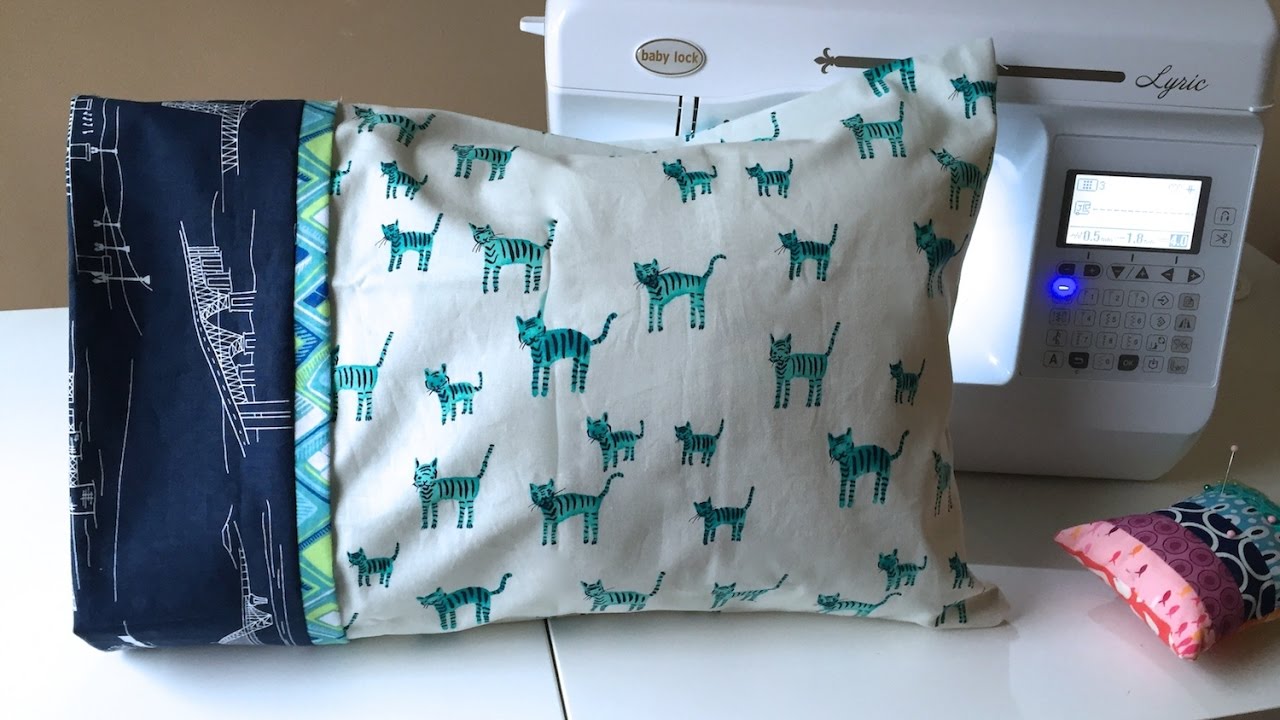
How To Make A Child’s Pillowcase
Modified: August 20, 2024
Learn how to make a child's pillowcase with step-by-step instructions. Find helpful articles and tips on creating cute and comfortable pillowcases for kids.
(Many of the links in this article redirect to a specific reviewed product. Your purchase of these products through affiliate links helps to generate commission for Storables.com, at no extra cost. Learn more)
Introduction
Creating a child’s pillowcase is not only a fun and rewarding project but also a practical way to add a personal touch to a child’s bedroom decor. Whether you are a beginner or an experienced sewing enthusiast, making a pillowcase can be a delightful and enjoyable activity. In this article, we will walk you through the step-by-step process of making a child’s pillowcase that is both comfortable and stylish.
Before we dive into the project, let’s gather all the materials needed. You will need:
- Fabric of your choice (cotton is recommended for its softness and durability)
- Measuring tape
- Pins
- Sewing machine (or a needle and thread if you prefer hand-sewing)
- Scissors
- Hemming ribbon
- Iron
Once you have gathered all the necessary materials, you are ready to begin the pillowcase-making process. Let’s get started!
Key Takeaways:
- Create a personalized and charming addition to your child’s bedroom decor by following the step-by-step instructions to make a child’s pillowcase, adding a touch of creativity and sentimental value to the project.
- Enjoy the process of making a child’s pillowcase, embrace your sewing skills, and revel in the joy of seeing your child’s face light up when they lay their head on a pillowcase made with love, adding a special touch to their bedroom decor.
Read more: How To Make A Tool Belt For A Child
Materials Needed
Before you start making a child’s pillowcase, it’s essential to gather all the necessary materials to ensure a smooth and successful sewing process. Here is a list of the materials you will need:
- Fabric of your choice: Look for a soft and durable fabric such as cotton. Consider the child’s preferences and the overall theme of their bedroom when selecting the fabric.
- Measuring tape: This will help you accurately measure the dimensions of the pillowcase.
- Pins: Use pins to secure the fabric in place during the sewing process.
- Sewing machine: If you have a sewing machine, it will greatly speed up the process. However, you can still hand-sew the pillowcase if you prefer.
- Scissors: Sharp fabric scissors are necessary for cutting the fabric to the desired size.
- Hemming ribbon: This decorative ribbon will give your pillowcase a finished look. Choose a color and design that complements your fabric.
- Iron: A hot iron will be used to press and smooth the fabric during the sewing process.
By gathering these materials ahead of time, you’ll have everything you need to create a beautiful and comfortable pillowcase for your child.
Step 1: Measure and Cut the Fabric
The first step in making a child’s pillowcase is to measure and cut the fabric to the desired size. This will ensure that the pillowcase perfectly fits the child’s pillow and provides a snug and comfortable fit. Here’s how to do it:
- Measure the pillow: Start by measuring the dimensions of the child’s pillow. Typically, a standard children’s pillow measures 14 by 20 inches. However, be sure to measure the pillow you plan to use to ensure accuracy.
- Add seam allowance: Once you have the pillow measurements, add an extra half an inch to each side to account for seam allowance. For example, if the pillow measures 14 by 20 inches, you will cut the fabric to be 15 by 21 inches.
- Lay out and cut the fabric: Lay out the fabric on a flat surface, ensuring it is smooth and free of any wrinkles. Use the measurements you calculated in the previous step to mark and cut the fabric to the desired size. Use fabric scissors to ensure clean and straight cuts.
Remember to double-check your measurements before cutting the fabric to ensure accuracy. It’s better to measure twice to avoid any mistakes that may result in an ill-fitting pillowcase.
Once you have successfully measured and cut the fabric, you are ready to move on to the next step.
Step 2: Prepare the Hem
After measuring and cutting the fabric for the child’s pillowcase, the next step is to prepare the hem. Hemming the fabric will not only give the pillowcase a neat and finished look but also prevent fraying. Follow these steps to prepare the hem:
- Iron the fabric: Start by ironing the fabric to remove any wrinkles and ensure a smooth surface. Set your iron to the appropriate temperature for the fabric you are using.
- Fold the fabric: Take one of the shorter edges of the fabric and fold it towards the wrong side by half an inch. Press the fold with the iron to create a crease.
- Fold again: Fold the fabric once more along the same edge, this time by one inch. Press the fold with the iron to create another crease.
- Secure the hem: Use pins to secure the folded hem in place. Place the pins about an inch apart to keep the fabric in place during the sewing process.
By preparing the hem before sewing, you will ensure that the edges of the pillowcase are clean and professional-looking. It also makes it easier to sew the hem accurately.
Once you have completed these steps, your fabric will be ready for the next stage of sewing the child’s pillowcase.
Step 3: Sew the Side Seams
Now that you have prepared the hem, it’s time to sew the side seams of the child’s pillowcase. This step will join the fabric together, creating a tube-like shape that will eventually become the pillowcase. Follow these steps to sew the side seams:
- Remove the pins: Start by carefully removing the pins that are securing the folded hem. You want to ensure that the fabric is smooth and ready for sewing.
- Align the fabric edges: Place the fabric with the wrong side facing up. Match the raw edges of the fabric along the longer sides. Make sure the folded hem is on the same side.
- Pin the sides: Use pins to secure the fabric edges together. Place the pins about 1-2 inches apart. This will help keep the fabric in place as you sew the side seams.
- Sew the side seams: Using a sewing machine or a needle and thread, start sewing from the top edge of the fabric down to the bottom edge. Use a straight stitch and sew along the pinned edge, about a quarter-inch from the fabric edge. Backstitch at the beginning and end of the seam to secure the thread. Repeat this step on the other side of the fabric.
Remember to remove the pins as you sew along to avoid damaging your sewing machine or needle. Take your time and sew slowly to ensure accurate and straight seams.
Once you have sewn the side seams, you have successfully created the basic structure of the child’s pillowcase. Now, let’s move on to the next step to add a decorative touch.
Read more: How To Make An Envelope Pillowcase
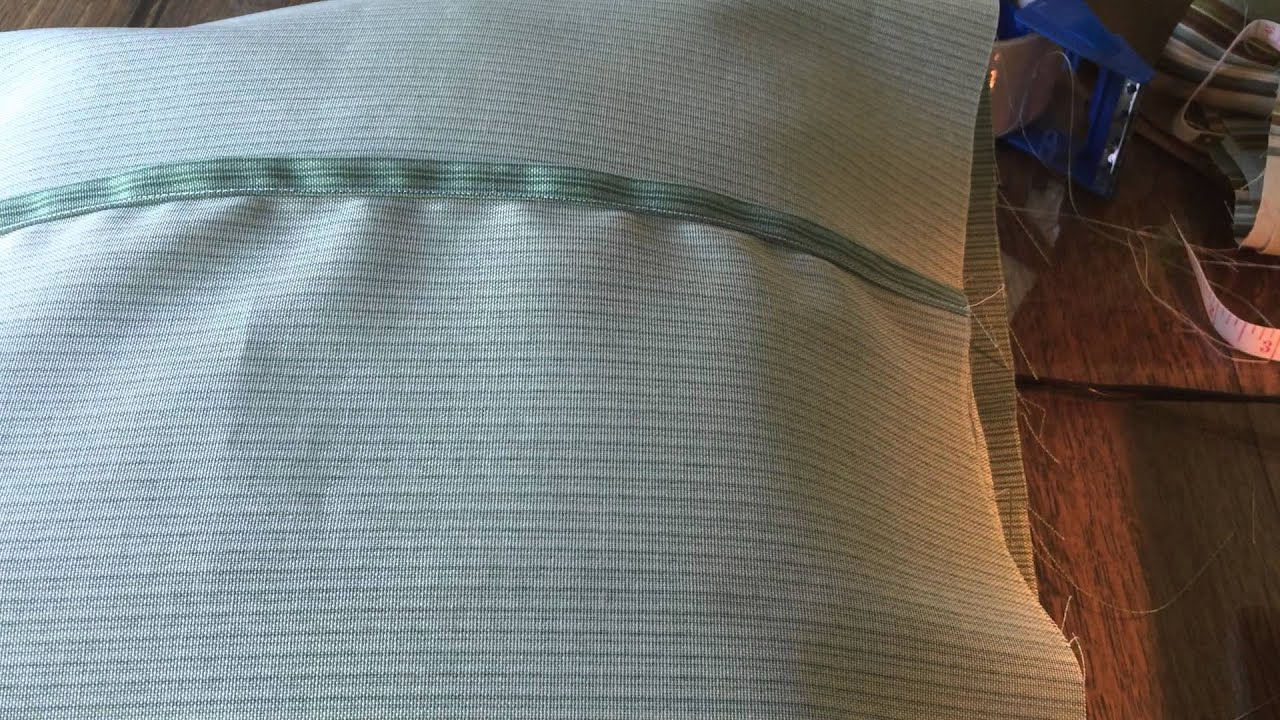
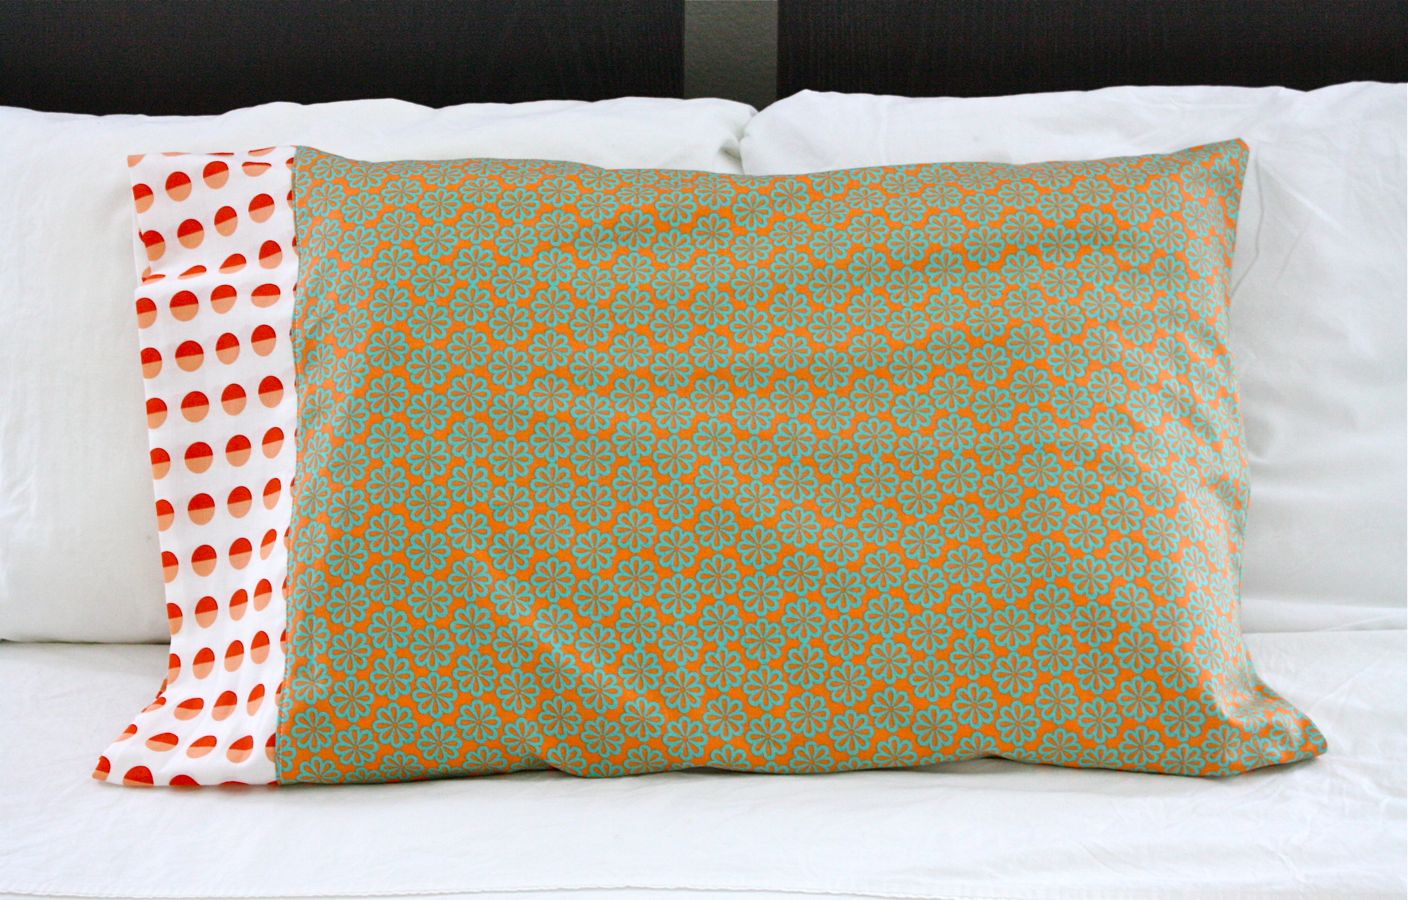
Step 4: Attach the Hemming Ribbon
Adding a hemming ribbon is a delightful way to enhance the look of the child’s pillowcase. This decorative ribbon adds a pop of color and a touch of charm. Follow these steps to attach the hemming ribbon:
- Select the hemming ribbon: Choose a hemming ribbon that complements the fabric and matches the desired aesthetic. Satin or grosgrain ribbon works well for this purpose.
- Measure the ribbon: Start by measuring the length needed to go around the perimeter of the pillowcase. Add a couple of extra inches to ensure you have enough ribbon to work with.
- Pin the ribbon: Place the ribbon along the raw edge of the folded hem, making sure it aligns with the fabric edge. Use pins to secure the ribbon in place, ensuring it lays flat and straight along the hem.
- Sew the ribbon: Using a sewing machine or a needle and thread, stitch along the edges of the ribbon to attach it to the fabric. Use a straight stitch and sew close to the edges of the ribbon. Backstitch at the beginning and end of the ribbon to secure the thread.
Be careful not to pull the ribbon too tight or stretch the fabric as you sew. Take your time and sew slowly to ensure even and neat stitching.
By attaching the hemming ribbon, you add an extra touch of style and personality to your child’s pillowcase. It’s a small detail that can make a big difference in the overall look and feel of the pillowcase.
Once you have successfully attached the hemming ribbon, your child’s pillowcase is now ready for the next step.
When making a child’s pillowcase, be sure to prewash the fabric to prevent shrinkage after sewing. This will ensure that the pillowcase maintains its shape and size after washing.
Step 5: Create the Pillow Pocket
Creating a pillow pocket is a crucial step in making a child’s pillowcase as it ensures that the pillow stays securely in place while providing a polished and finished look. Follow these steps to create the pillow pocket:
- Measure the width of the pillowcase: Take the width of the fabric (the measurement from one side seam to the other) and divide it in half. This will give you the measurement for the width of the pillow pocket.
- Mark the pillow pocket: On the wrong side of the fabric, measure and mark the width of the pillow pocket starting from the top edge of the fabric. Use fabric chalk or a washable fabric marker to make the markings.
- Sew the pillow pocket: Starting from one side seam, sew a straight seam along the marked line, stopping just before reaching the other side seam. This will create a pocket-like opening in the fabric.
- Backstitch for reinforcement: To reinforce the stitches and prevent them from unraveling, backstitch at the beginning and end of the seam. This will ensure that the pillow pocket is secure and durable.
Remember to sew straight and evenly along the marked line for a clean and professional look. Take your time and sew slowly to maintain accuracy.
By creating the pillow pocket, you provide a functional feature that keeps the pillow securely in place. It also adds a touch of elegance to the child’s pillowcase.
Once you have completed this step, your child’s pillowcase is almost complete. Let’s move on to the next step to finish it off.
Step 6: Sew the Remaining Seams
Now that you have created the pillow pocket, it’s time to sew the remaining seams of the child’s pillowcase to fully enclose the fabric. Follow these steps to complete the sewing process:
- Turn the fabric inside out: Start by flipping the fabric inside out so that the wrong side is facing you. This will expose the seams and the pillow pocket you created in the previous steps.
- Align the edges: Align the raw edges of the fabric along the top and bottom edges, making sure the side seams are matched up. Use pins to secure the edges together, ensuring they stay in place during sewing.
- Sew the top and bottom seams: Using a sewing machine or a needle and thread, sew a straight seam along the top and bottom edges of the fabric. Start from one side seam and sew all the way to the other, making sure to backstitch at the beginning and end of each seam.
- Trim any excess fabric: After sewing the top and bottom seams, trim any excess fabric from the corners to reduce bulkiness. Be careful not to cut into the seams and leave a small seam allowance for durability.
Take your time and sew slowly, ensuring that the edges are aligned and the stitches are straight. This will result in a polished and professionally finished pillowcase.
Once you have sewn the remaining seams and trimmed the excess fabric, your child’s pillowcase is almost complete. It’s time to move on to the next step to add the final touches and make it ready for use.
Step 7: Trim the Excess Threads
As you near the completion of the child’s pillowcase, it’s essential to take a moment to trim any excess threads that may be visible. Trimming these threads will give the pillowcase a clean and polished appearance. Follow these steps to tidy up the sewing project:
- Inspect the pillowcase: Carefully examine the pillowcase, paying attention to the seams and any visible loose threads. Take note of any areas where excess threads need to be trimmed.
- Trim the excess threads: Using a pair of sharp scissors, carefully trim the excess threads flush with the fabric. Be careful not to cut into the fabric or the stitches, focusing only on the visible threads.
- Check for missed threads: Once you have trimmed the visible threads, give the pillowcase a final inspection to ensure no additional threads have been missed. Trim any remaining loose threads that may be discovered.
Trimming the excess threads is a simple but important step in completing your child’s pillowcase. By taking the time to tidy up the project, you ensure a finished and professional look.
With the excess threads trimmed, your child’s pillowcase is now almost ready for use. Let’s move on to the next step to make the final preparations.
Read more: How To Make A Sling Out Of A Pillowcase
Step 8: Turn the Pillowcase Right Side Out
Now that you have finished sewing and trimming the excess threads, it’s time to turn the child’s pillowcase right side out. This step will reveal the beautiful fabric and showcase the finished seams. Follow these steps to complete the process:
- Locate the opening: Look for the opening where you created the pillow pocket. This is where you will turn the pillowcase right side out.
- Start turning the fabric: Begin by gently pushing the fabric through the opening. Use your fingers or a blunt object, like a pencil or chopstick, to help guide the fabric and smooth out any corners or edges as you go.
- Continue turning: Slowly and carefully continue turning the fabric until the entire pillowcase is right side out. Take your time to ensure that the seams are fully turned out and the fabric lies flat and smooth.
Turning the pillowcase right side out will reveal the beautifully sewn seams and showcase the chosen fabric. It’s a satisfying step that marks the near-completion of your child’s pillowcase.
Once you have successfully turned the pillowcase right side out, it’s time to move on to the final step to add the finishing touches.
Step 9: Press and Finish
The final step in making a child’s pillowcase is to press and finish the fabric, ensuring a crisp and professional look. By pressing the pillowcase, you will remove any remaining wrinkles and create a smooth finish. Follow these steps to complete the process:
- Prepare your iron: Set your iron to the appropriate temperature for the fabric you used. Consult the fabric care instructions if needed.
- Press the pillowcase: Lay the pillowcase flat on your ironing board, with the seams facing upwards. Start at one end and gently press the iron on the fabric, moving from the center towards the edges. Be careful not to drag or slide the iron, as this may distort the fabric or affect the sewn seams. Repeat this process on both sides of the pillowcase, ensuring all creases and wrinkles are removed.
- Pay attention to the corners and edges: Use the tip of the iron to press the corners and edges of the pillowcase. This will create sharp, defined edges and give the pillowcase a polished finish.
- Inspect the pillowcase: Once you have pressed the entire pillowcase, take a moment to inspect it for any remaining wrinkles or imperfections. If needed, go back and touch up any areas that require additional pressing.
- Finish and display: Finally, fold the pillowcase neatly and prepare it for use or display in your child’s bedroom. The crisp, pressed fabric will showcase your sewing skills and create a professional and appealing look.
By taking the time to press and finish the fabric, you are adding the final touches to your child’s pillowcase. The end result will be a beautifully crafted and presentable pillowcase that your child will love.
Congratulations! You have successfully completed all the steps to make a child’s pillowcase. Enjoy the satisfaction of having created a unique and personalized item for your child’s bedroom.
Remember, as with any sewing project, practice makes perfect. So don’t be afraid to experiment with different fabrics, colors, and patterns to create even more delightful pillowcases for your child or as gifts for others.
Conclusion
Congratulations on completing the process of making a child’s pillowcase! By following the step-by-step instructions and utilizing your sewing skills, you have successfully created a personalized and charming addition to your child’s bedroom decor. Not only is a handmade pillowcase a practical item, but it also carries sentimental value, making it a special keepsake for years to come.
Throughout this article, we covered the necessary materials needed, detailed each step of the sewing process, and provided helpful tips to ensure success. From measuring and cutting the fabric to pressing and finishing the final product, every step has been carefully outlined to guide you through the project.
Remember, while this article provided a comprehensive guide, sewing is a creative endeavor, and it is encouraged to personalize the pillowcase according to your child’s preferences. Consider using different fabric patterns, adding embroidery or appliques, or even incorporating their favorite characters or themes to make the pillowcase truly unique.
Making a child’s pillowcase is not only a practical and enjoyable sewing project but also an opportunity to express your creativity and create a functional piece of art that your child will cherish. So gather your materials, fire up your sewing machine, and let your imagination run wild as you embark on this delightful project.
Enjoy the process, embrace your sewing skills, and revel in the joy of seeing your child’s face light up when they lay their head on a pillowcase made with love!
Frequently Asked Questions about How To Make A Child's Pillowcase
Was this page helpful?
At Storables.com, we guarantee accurate and reliable information. Our content, validated by Expert Board Contributors, is crafted following stringent Editorial Policies. We're committed to providing you with well-researched, expert-backed insights for all your informational needs.


0 thoughts on “How To Make A Child’s Pillowcase”