Articles
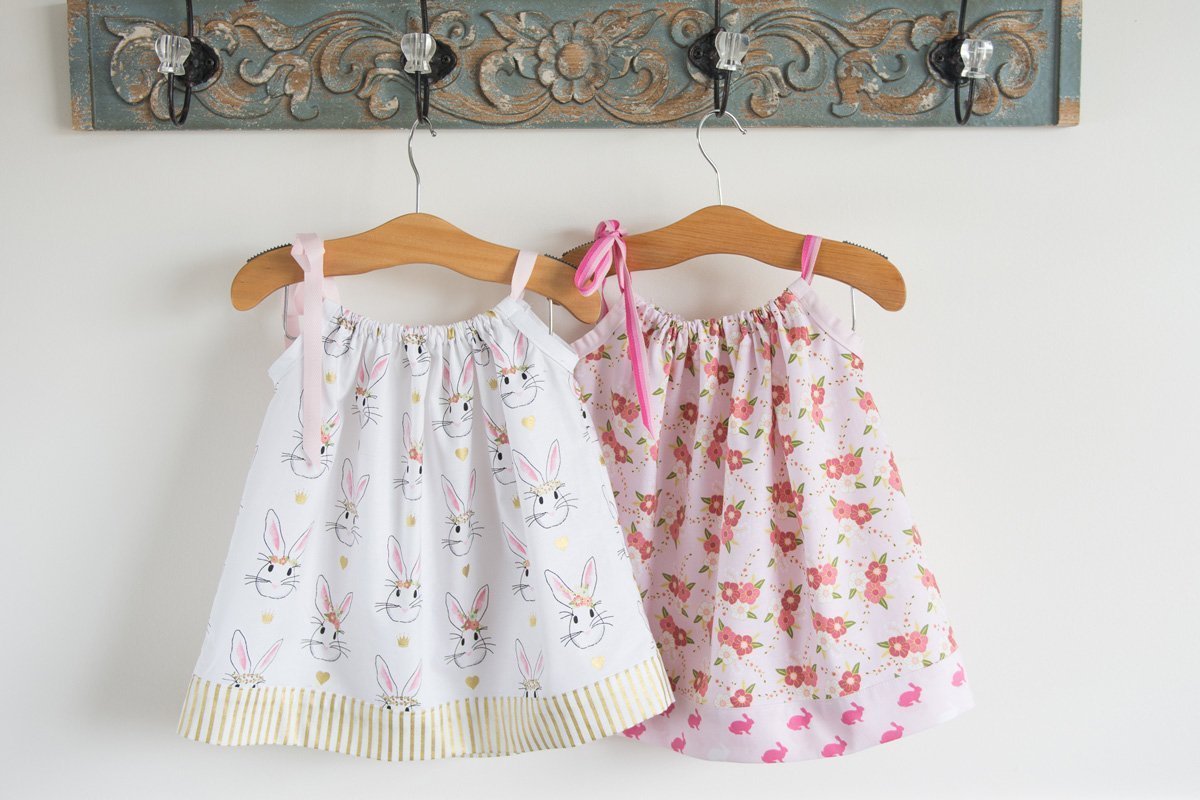
How To Make A Pillowcase Dress From Fabric
Modified: August 20, 2024
Learn how to make a beautiful pillowcase dress using fabric with our informative articles. Step-by-step instructions and tips for creating your own unique design.
(Many of the links in this article redirect to a specific reviewed product. Your purchase of these products through affiliate links helps to generate commission for Storables.com, at no extra cost. Learn more)
Introduction
Welcome to this step-by-step guide on how to make a beautiful pillowcase dress from fabric. Pillowcase dresses are a popular choice for warm weather, as they are light, comfortable, and versatile. Whether you’re a beginner or an experienced sewer, this project is achievable and rewarding.
With just a few materials and some basic sewing skills, you can create a lovely dress for yourself, your child, or as a thoughtful gift. The best part is that you can customize the dress to your liking, choosing from a wide range of fabrics, patterns, and embellishments.
In this tutorial, we will walk you through the process of making a pillowcase dress from start to finish. We will provide detailed instructions and tips to help you every step of the way. So grab your fabric, thread, and sewing machine, and let’s get started on your new favorite dress!
Key Takeaways:
- Create a personalized and stylish pillowcase dress from fabric with just a few materials and basic sewing skills. Customize the dress to your liking and enjoy the rewarding process of making a beautiful garment.
- Master the art of sewing a pillowcase dress by following step-by-step instructions. From measuring and cutting the fabric to adding decorative embellishments, enjoy the creative journey of crafting a unique and comfortable garment.
Read more: How Much Fabric Is Needed For A Pillowcase
Materials Needed
Before you start making your pillowcase dress, make sure you have the following materials:
- Fabric: Choose a lightweight and breathable fabric such as cotton or linen. The amount of fabric needed will depend on the size of the dress you are making.
- Thread: Select a thread color that matches or complements your fabric.
- Elastic: You will need elastic for the neckline and waistband of the dress. The width of the elastic will vary depending on your preference.
- Pins: Use pins to hold your fabric in place while sewing.
- Scissors: Sharp scissors are essential for cutting fabric and trimming excess threads.
- Ruler or Measuring Tape: A ruler or measuring tape will help you accurately measure and cut your fabric.
- Sewing Machine: While you can sew the dress by hand, a sewing machine will make the process faster and more efficient.
- Iron: An iron will be necessary for pressing your fabric and creating crisp seams.
Optional materials:
- Ribbon or Bias Tape: Adding ribbon or bias tape to the hem or straps of the dress can provide a decorative touch.
- Bow or Flower Embellishments: If desired, you can add bows, flowers, or other embellishments to enhance the aesthetic appeal of the dress.
- Lace or Trim: Incorporating lace or trim along the hemline or straps can add a touch of elegance to your dress.
Having these materials ready will ensure a smoother and more enjoyable sewing process. Once you have gathered all the necessary materials, it’s time to move on to the next step: measuring and cutting the fabric.
Step 1: Measure and Cut the Fabric
The first step in making a pillowcase dress is to measure and cut the fabric. Follow these steps:
- Measure your desired dress length: Decide how long you want your dress to be and subtract the seam allowances. Measure from the shoulder down to your desired length.
- Measure the width: Measure around the fullest part of your chest or your child’s chest. This will determine the width of the dress.
- Prepare your fabric: Lay your chosen fabric on a flat surface and smooth out any wrinkles. Ensure that the fabric is folded in half widthwise so that you have a double layer of fabric.
- Mark your measurements: Use a fabric marker or pins to mark the length and width measurements on the fabric. Make sure the marks are visible and accurately aligned.
- Cut the fabric: Use sharp scissors to cut along the marked lines. Cut through both layers of fabric to create the front and back pieces of the dress.
It’s important to note that the measurements and cuts may vary depending on the size and style of the dress you want to make. If you’re making the dress for a child, consider using a loose and comfortable fit to allow for growth and movement.
Once you have cut the fabric, proceed to the next step to finish the edges of the dress.
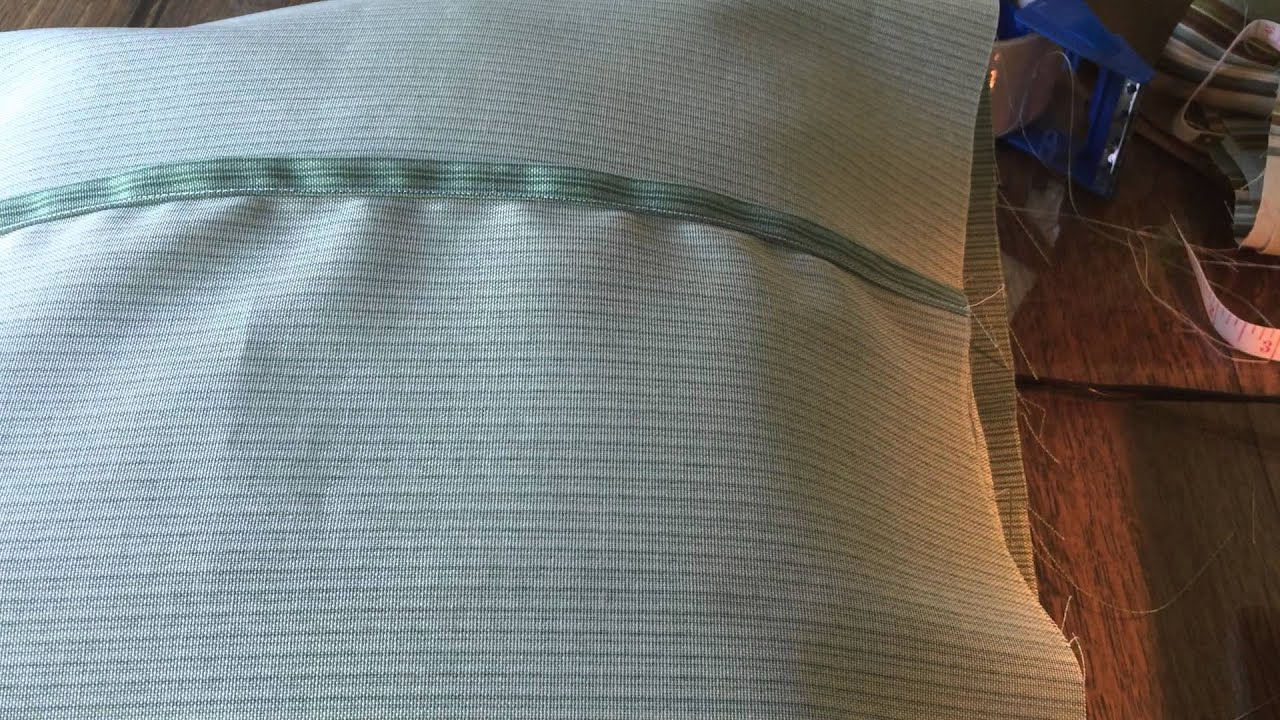
Step 2: Finish the Edges
After cutting the fabric for your pillowcase dress, it’s time to finish the edges to prevent fraying and create a clean and polished look. Follow these steps to finish the edges:
- Set up your sewing machine: Thread your sewing machine with a matching thread and set it up for a straight stitch.
- Start with the armhole edges: Fold the fabric of the armholes towards the wrong side by about ¼ inch and press with an iron to create a crease. Then fold it again by another ¼ inch and press. Pin the folded edges in place.
- Secure the edges with a straight stitch: Starting from one end of the armhole, stitch close to the folded edge using a straight stitch. Stitch all the way to the other end of the armhole, removing the pins as you go. Repeat this process for the other armhole.
- Move on to the neckline and hem edges: Repeat the same process for the neckline and the bottom hem of the dress. Fold the fabric towards the wrong side, press, pin, and stitch close to the folded edge using a straight stitch.
- Trim any excess threads: After finishing the edges, trim any excess threads with scissors to give the dress a clean and neat appearance.
Finishing the edges not only prevents fraying but also adds durability to the dress. It’s essential to take your time and sew with precision to ensure the edges are neatly finished and well secured.
Once you have finished the edges, you can move on to creating the armholes in the next step.
Step 3: Create the Armholes
Creating the armholes is an important step in making a pillowcase dress. Follow these steps to create the armholes:
- Measure and mark the armhole placement: Fold the dress in half lengthwise, aligning the side seams. Measure down from the top folded edge and mark the armhole placement. The standard measurement for armholes is around 1-2 inches from the top edge, but you can adjust it based on your preference.
- Draw the armhole curve: Using a curved ruler or a round object like a plate, draw the curve for the armhole. Start at the mark and draw a gentle curve that extends towards the side seam, then back up towards the shoulder seam. Repeat this process for both the front and back of the dress.
- Cut along the armhole curve: Carefully cut along the drawn curve, ensuring to cut through both layers of fabric. Take your time and use sharp scissors to achieve clean and smooth edges.
Once you have created the armholes, it’s time to move on to sewing the side seams in the next step.
Remember, precision is key when creating the armholes. Take your time to ensure the curves are even and symmetrical on both sides of the dress. This will contribute to the overall appearance and comfort of the finished garment.
When making a pillowcase dress from fabric, be sure to measure the child’s chest and desired dress length accurately before cutting the fabric. This will ensure a proper fit and avoid any unnecessary adjustments later on.
Step 4: Sew the Side Seams
Now that the armholes are created, it’s time to sew the side seams of the dress. Follow these steps:
- Align the fabric: Open up the dress so that the front and back pieces are laying flat, right sides together. Align the side seams and pin them in place.
- Sew the side seams: Using a straight stitch, sew along the pinned side seams, starting from the armhole and going all the way down to the hem of the dress. Remove the pins as you sew and backstitch at the beginning and end of the seam to secure it.
- Finish the seam allowances: To prevent fraying, finish the seam allowances by either using a serger or zigzag stitch along the edges. Alternatively, you can trim the seam allowances with pinking shears to reduce bulk and prevent fraying.
- Press the side seams: Once the side seams are sewn and finished, press them open with an iron to create a crisp and professional finish.
When sewing the side seams, it’s essential to maintain an even seam allowance and sew with accuracy. This will ensure that the dress fits well and hangs properly when worn.
With the side seams sewn, you’re nearing the completion of your pillowcase dress. The next step will focus on adding ties or straps to the dress for a comfortable and adjustable fit.
Step 5: Add Ties or Straps
Adding ties or straps to your pillowcase dress will not only provide a secure fit but also add a touch of style to the garment. Follow these steps to add ties or straps:
- Measure and cut the ties or straps: Determine the desired length of the ties or straps. Cut two pieces of fabric, each measuring approximately 1-2 inches wide and long enough to create the desired length.
- Fold and press the ties or straps: Fold the fabric pieces in half lengthwise, with the right sides facing each other. Press them with an iron to create a crease.
- Sew the ties or straps: Sew along the long raw edge of each fabric piece, leaving the short ends open. Use a 1/4 inch seam allowance or adjust the width to your preference. Backstitch at the beginning and end of each seam to secure them.
- Turn the ties or straps right side out: Carefully turn the sewn fabric pieces right side out. You can use a safety pin or a loop turner to help you push the fabric through and achieve a clean finish.
- Attach the ties or straps to the dress: Position the ties or straps on the dress, aligning them with the top corners or sides. Pin them in place, ensuring they are symmetrical and evenly spaced. Sew them securely, either by hand or with a sewing machine, making multiple passes or a box stitch for added strength.
Adding ties or straps not only provides functionality but also allows for adjustability and personalization. You can tie them in a bow, leave them hanging, or even cross them in the back for a unique look.
With the ties or straps added, your pillowcase dress is nearly complete. The next step will focus on hemming the bottom of the dress for a polished finish.
Step 6: Hem the Bottom
To give your pillowcase dress a clean and finished look, it’s important to hem the bottom. Follow these steps to hem the bottom of the dress:
- Measure and mark the desired length: Decide how long you want your dress to be and mark the length using pins or fabric marker. Remember to account for the seam allowance.
- Press the hem: Fold the fabric towards the wrong side along the marked line and press it with an iron. The folded edge should be about ¼ to ½ inch wide.
- Pin the hem in place: Use pins to secure the folded edge of the hem in place, making sure it is even and smooth all the way around the dress.
- Sew the hem: Starting from one end, sew the hem using a straight stitch. Stitch close to the folded edge, removing the pins as you go. Backstitch at the beginning and end of the seam to secure it.
- Press the hem: Once the hem is sewn, press it again with an iron to create a crisp and polished finish.
Hemming the bottom of the dress not only adds a professional touch but also helps prevent fraying and ensures durability. Take your time to sew the hem accurately and maintain an even seam allowance throughout the process.
With the hem completed, your pillowcase dress is nearly finished. The final step will focus on adding any decorative embellishments to enhance the aesthetic appeal of the dress.
Step 7: Add any Decorative Embellishments
In this final step, you have the opportunity to personalize and enhance the aesthetic appeal of your pillowcase dress by adding decorative embellishments. Follow these steps to add your desired embellishments:
- Choose your embellishments: Decide on the type of decorative elements you’d like to add to your dress. This can include bows, flowers, appliques, lace trim, or any other decorative accents.
- Plan the placement: Visualize where you want to place the embellishments on the dress. Consider the overall design and balance of the garment.
- Secure the embellishments: Use hand-sewing techniques or a sewing machine to attach the embellishments onto the dress. Make sure they are securely fastened and will withstand normal wear and laundering.
- Experiment and get creative: Feel free to experiment with different combinations of decorative elements and placement positions to achieve the desired look. Add as many or as few embellishments as you like, making the dress uniquely yours.
Adding decorative embellishments allows you to showcase your creativity and give your pillowcase dress a personal touch. It’s important to consider the durability of the embellishments and choose appropriate sewing techniques to ensure they remain securely attached.
Once you’re satisfied with the placement and attachment of the decorative elements, take a moment to admire your completed pillowcase dress. You have successfully transformed a piece of fabric into a beautiful and functional garment!
Congratulations! You have now mastered the art of making a pillowcase dress from fabric. Whether you made it for yourself or as a gift, your dress is sure to be a stylish and comfortable addition to any wardrobe.
Remember that practice makes perfect, so continue to refine your sewing skills and explore new designs and techniques. Enjoy wearing or gifting your handmade pillowcase dress with pride!
Conclusion
Creating a pillowcase dress from fabric is a fulfilling and enjoyable sewing project that allows you to showcase your creativity while producing a stylish and comfortable garment. By following the step-by-step guide outlined in this article, you have learned how to measure and cut the fabric, finish the edges, create armholes, sew the side seams, add ties or straps, hem the bottom, and add decorative embellishments.
Throughout the process, attention to detail, precision, and creativity are essential. Taking the time to measure accurately, sew with care, and customize the dress to your preference will result in a beautifully crafted garment that fits well and brings joy to the wearer.
Remember, sewing is a skill that improves with practice. Don’t be discouraged if your first attempt isn’t perfect. Take note of what you’ve learned, make adjustments, and keep experimenting to refine your techniques.
Furthermore, feel free to explore and adapt the instructions provided to suit your individual style and preferences. You can choose different fabrics, vary the design, or add your own unique touches to make each dress truly one-of-a-kind.
So, gather your materials, set up your sewing machine, and embark on the journey of creating beautiful pillowcase dresses. Whether you make them for yourself, your children, or as thoughtful gifts, these dresses will surely be cherished for their handmade charm and versatility.
Enjoy the process of sewing and the satisfaction that comes with creating something with your own hands. Sew on!
Frequently Asked Questions about How To Make A Pillowcase Dress From Fabric
Was this page helpful?
At Storables.com, we guarantee accurate and reliable information. Our content, validated by Expert Board Contributors, is crafted following stringent Editorial Policies. We're committed to providing you with well-researched, expert-backed insights for all your informational needs.


0 thoughts on “How To Make A Pillowcase Dress From Fabric”